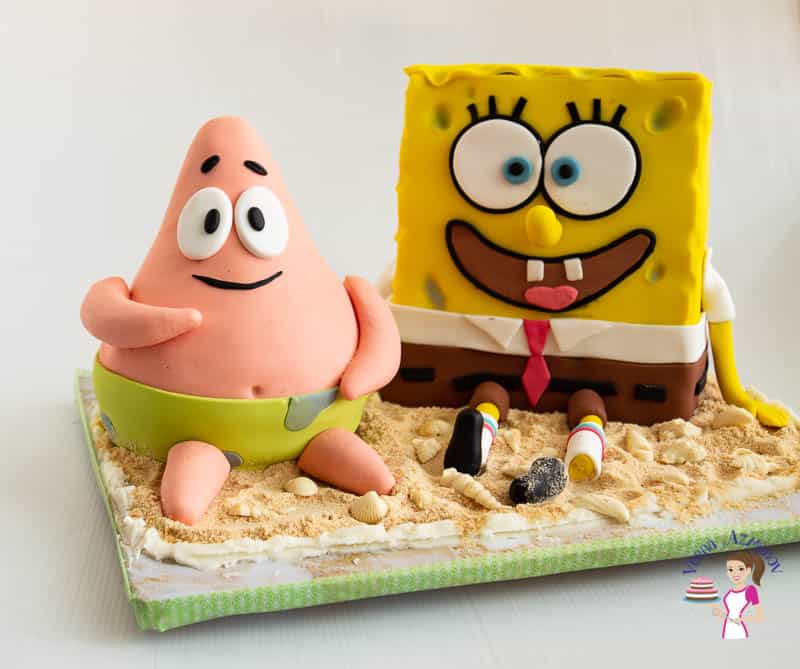
SpongeBob Cake

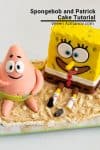
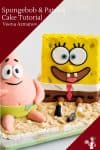
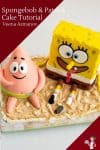
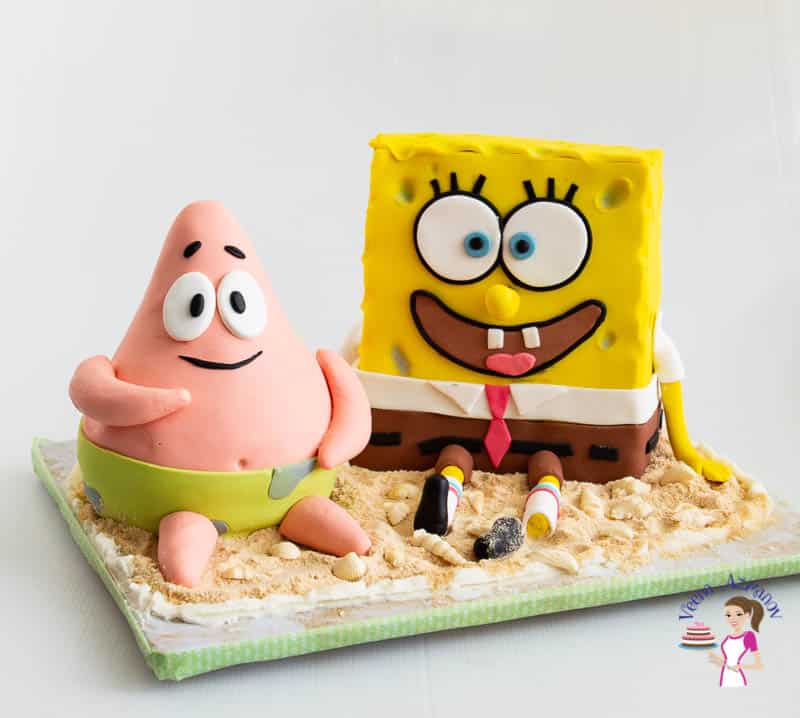
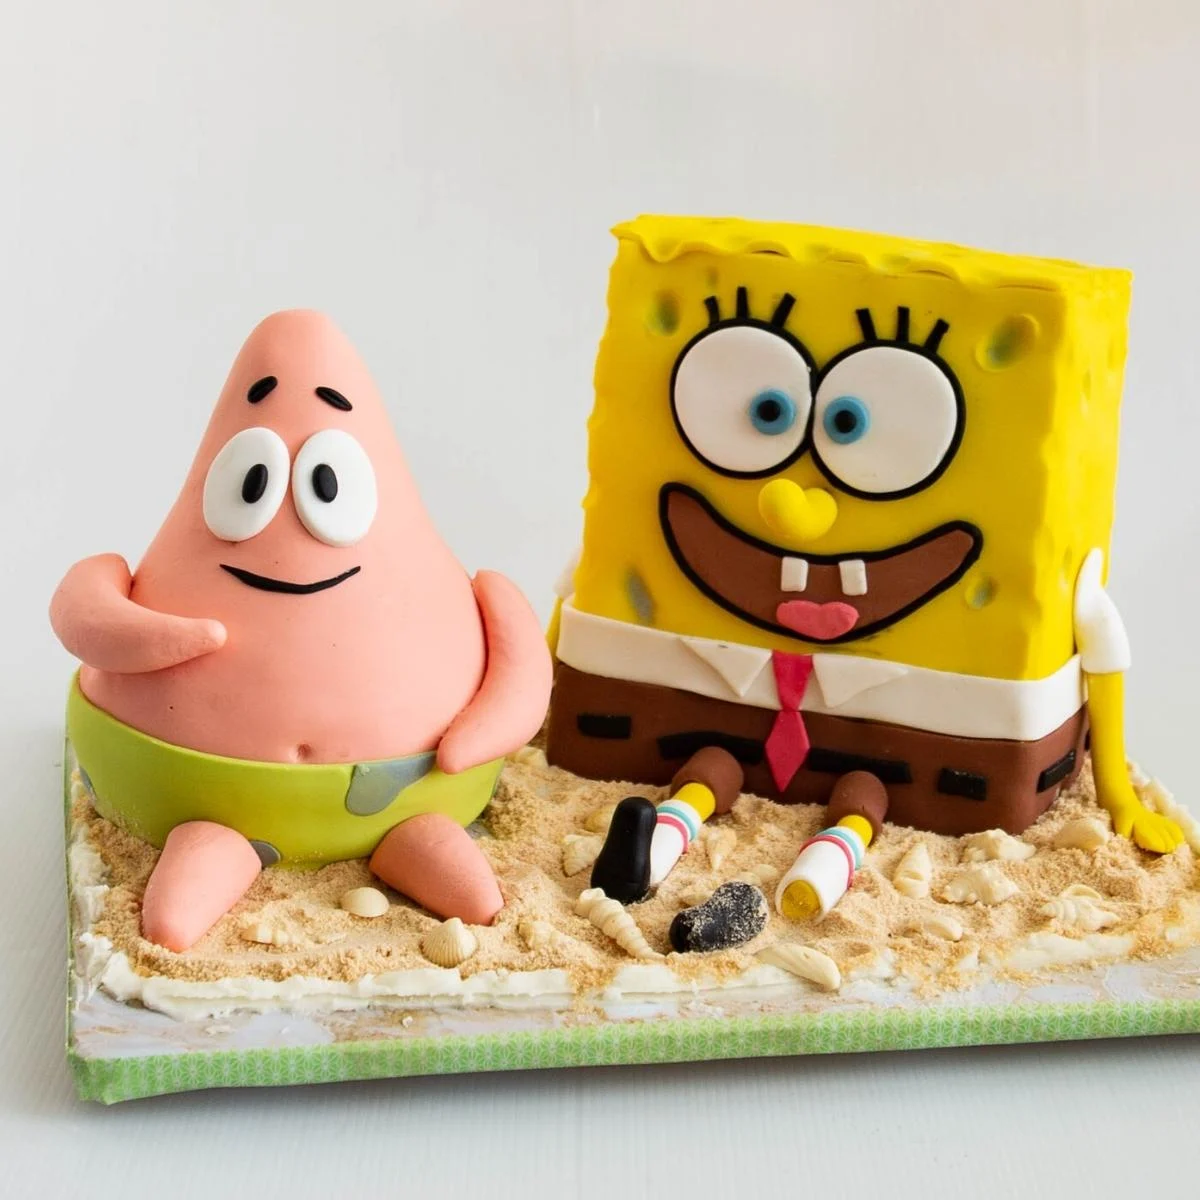
This SpongeBob cake is the perfect birthday cake for kids. Today, I show you how I made both SpongeBob Square Pants and his friend Patrick Star sitting in fondant on the sand.
Who lives in a pineapple under the sea?
My daughter is fond about SpongeBob characters – SpongeBob SquarePants, Patrick Star, Squidward, and Mr. Crab. She watches him every single day. So, of course, no surprise that she wanted a SpongeBob birthday cake. In fact, we even made SpongeBob’s Pineapple house on another birthday, and I’ll be sharing that tutorial with you very soon.
The cake is fairly simple and easy to make. The little details do take time, so make sure you keep ample time and space for the small jobs work so you are not overwhelmed with too much to do.
Materials
Cake
- For SpongeBob, I am using my chocolate vanilla sheet cake (recipe below).
- And, for Patrick, I am using my sphere cake recipe.
Fondant
- This is my marshmallow fondant. And yet, you can also use my homemade fondant recipe or vegetarian fondant recipe.
- I’ve used Magic Colors yellow for SpongeBob.
- Patrick is skin tone with a little pink food gel color added.
- The rest are small amounts of red, blue, black, and white fondant.
SpongeBob cake recipe & tutorial
Cake recipe for SpongeBob
- Preheat the oven to 350°F / 177°C / Gas Mark 4
- Prepare a sheet cake pan (or rectangle cake pan) for baking – grease and line with parchment paper. In a bowl, combine flour, baking powder, baking soda, and salt – set aside.
- In the mixing bowl of a stand mixer, cream butter and sugar until light and fluffy. Add eggs one at a time until well combined. Use a spatula and scrape the sides of the bowl when necessary.
- Next, add the flour and milk mixture in three batches. Followed by the vanilla extract.
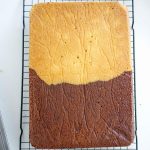
- Vanilla batter – Lift one side of the sheet cake pan by placing a small plate or spoon under one side of the pan. Pour half the cake batter. It will rest on one side.
- Chocolate batter – Add the cocoa and milk mixture to the other half, remove the bowl/spoon from under the pan, and pour the second cake batter.
- Bake in the preheated oven on the middle rack for about 30 to 40 minutes, or until the toothpick inserted into the center comes out clean. Cool in the pan for 10 minutes, then invert on a cooling rack and cool completely before you
Pro tip – Putting the cake in the freezer for an hour makes it easier to carve with fewer crumbs.

Step-by-step: SpongeBob cake
- Print a picture of the character (SpongeBob SquarePants) for inspiration
- Level – cut any dome off the cake with a serrated bread knife. Brush the cake with sugar syrup
Pro tip – For sugar syrup, boil water and sugar in a small saucepan over medium heat. Brush this sugar mixture all over the cake. - Cut the cake in half, then in half again. This will give you 4 – 3 x 9-inch pieces. Cut each piece to about 6 inches. Stack two pieces with buttercream (see video)
- Add three dowels (I use straws), a cake circle/board, and 2.5 x 5-inch pieces. Add the next two layers with frosting in between.
- Then, crumb coat with ganache. Chill 15 minutes, then coat with more ganache. Chill another 15 minutes
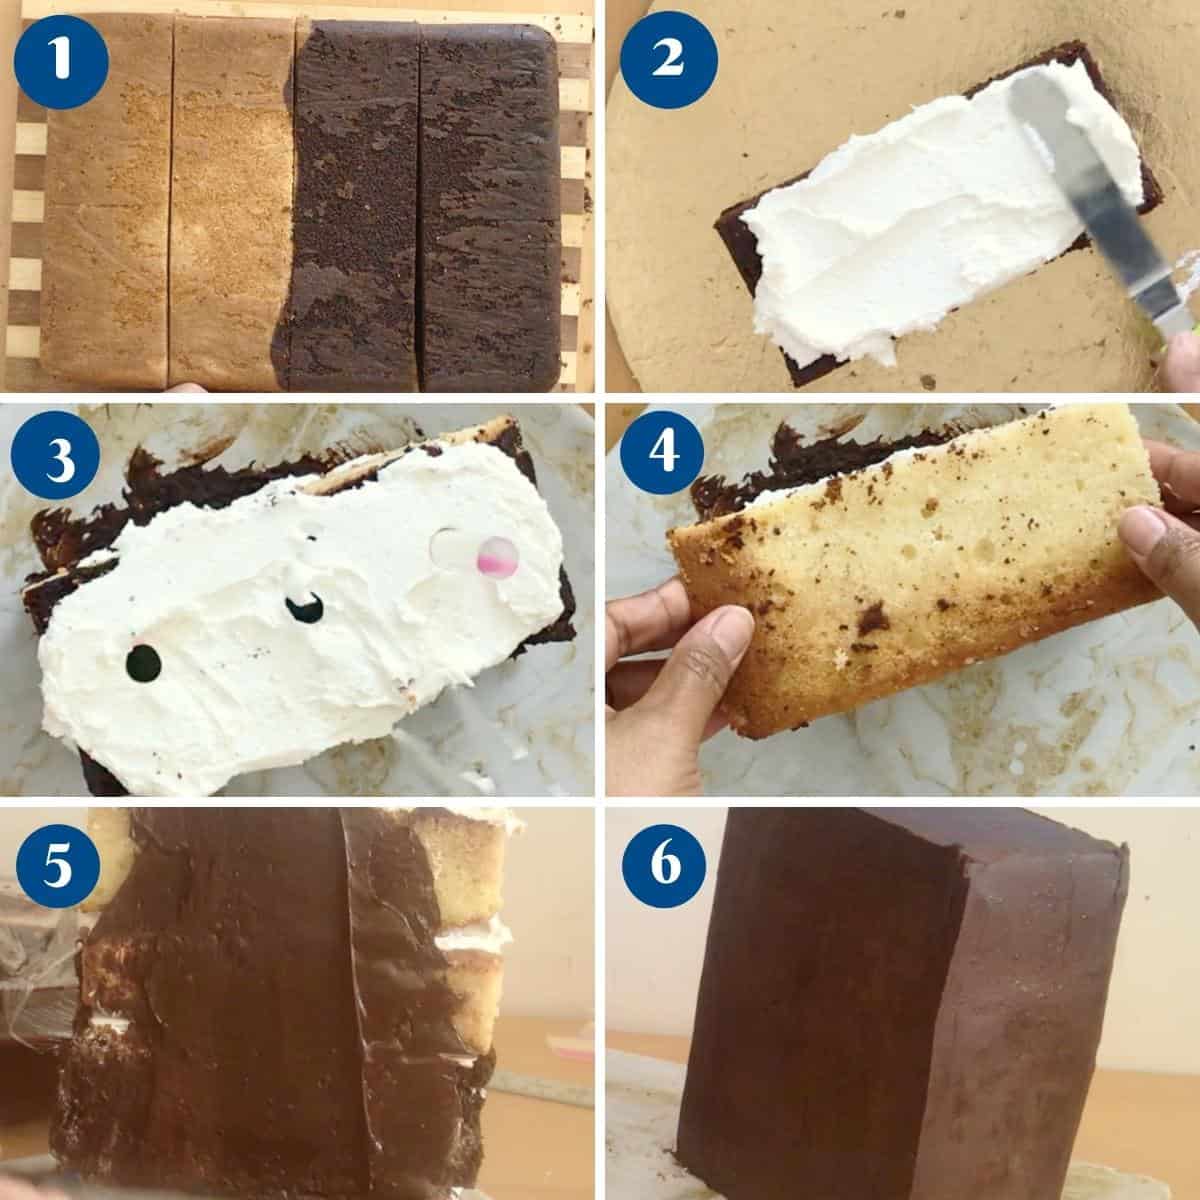
- Meanwhile, roll out yellow fondant. Cut strips about 8 x 9 inches for the front and back and 4 x 7 inches for the sides. (don’t make them too large to prevent waste)
- Lay the fondant on a baking tray lined with parchment paper. Chill the fondant pieces in the fridge for 10 minutes. Then, brush the cake with water and panel the cold fondant pieces to SpongeBob. Use a cake smoother to cut off the excess as shown in the video
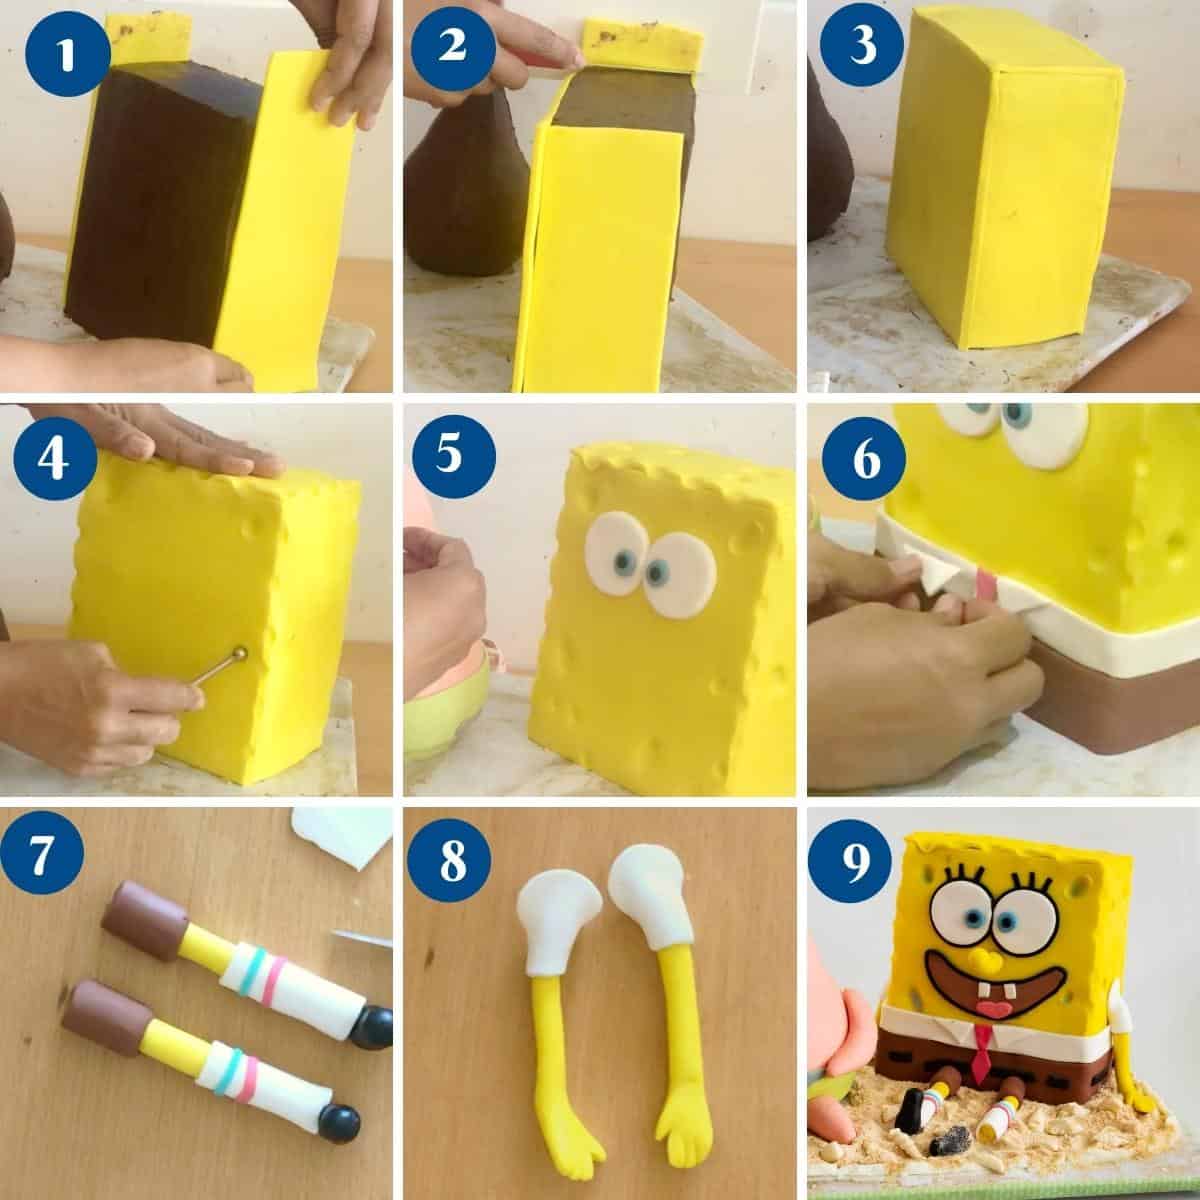
Pro tip – Chilling the fondant will help make it firm so you can work with it easily. Once on the cake, it will thaw again and become soft. - Once the cake is paneled and the excess cut off. You can now make holes using a ball tool (if you don’t have a ball tool, dip your knuckles in flour and gently press in)
- After this, it is time to make and glue the remaining details for decoration, as shown in the video.
- SpongeBob’s eyes – White fondant with blue and black for the pupils.
- Brown pants – With a rolling pin, roll a long strip of fondant about 11/2-inches thick. Roll on the work surface like a jelly roll, then unroll it onto the cake as shown in the video. You will also need a thin strip of black for his belt as well.
- Shirt – A strip of white above the belt. Don’t forget to make his tie and collar
- Hands and Legs – Roll the same yellow fondant into a thin cylinder. Cut and shape as shown in the video.
- Shoes – Small balls of black rolled into a ball, then shaped into a shoe as shown in the video
- Nose – You will need a small piece of yellow fondant rolled into a cylinder about 5 inches long – Use a cocktail stick to attach it to the cake.
- Small details – Mouth, teeth, tongue, outline for the eyes, eyebrows, etc.
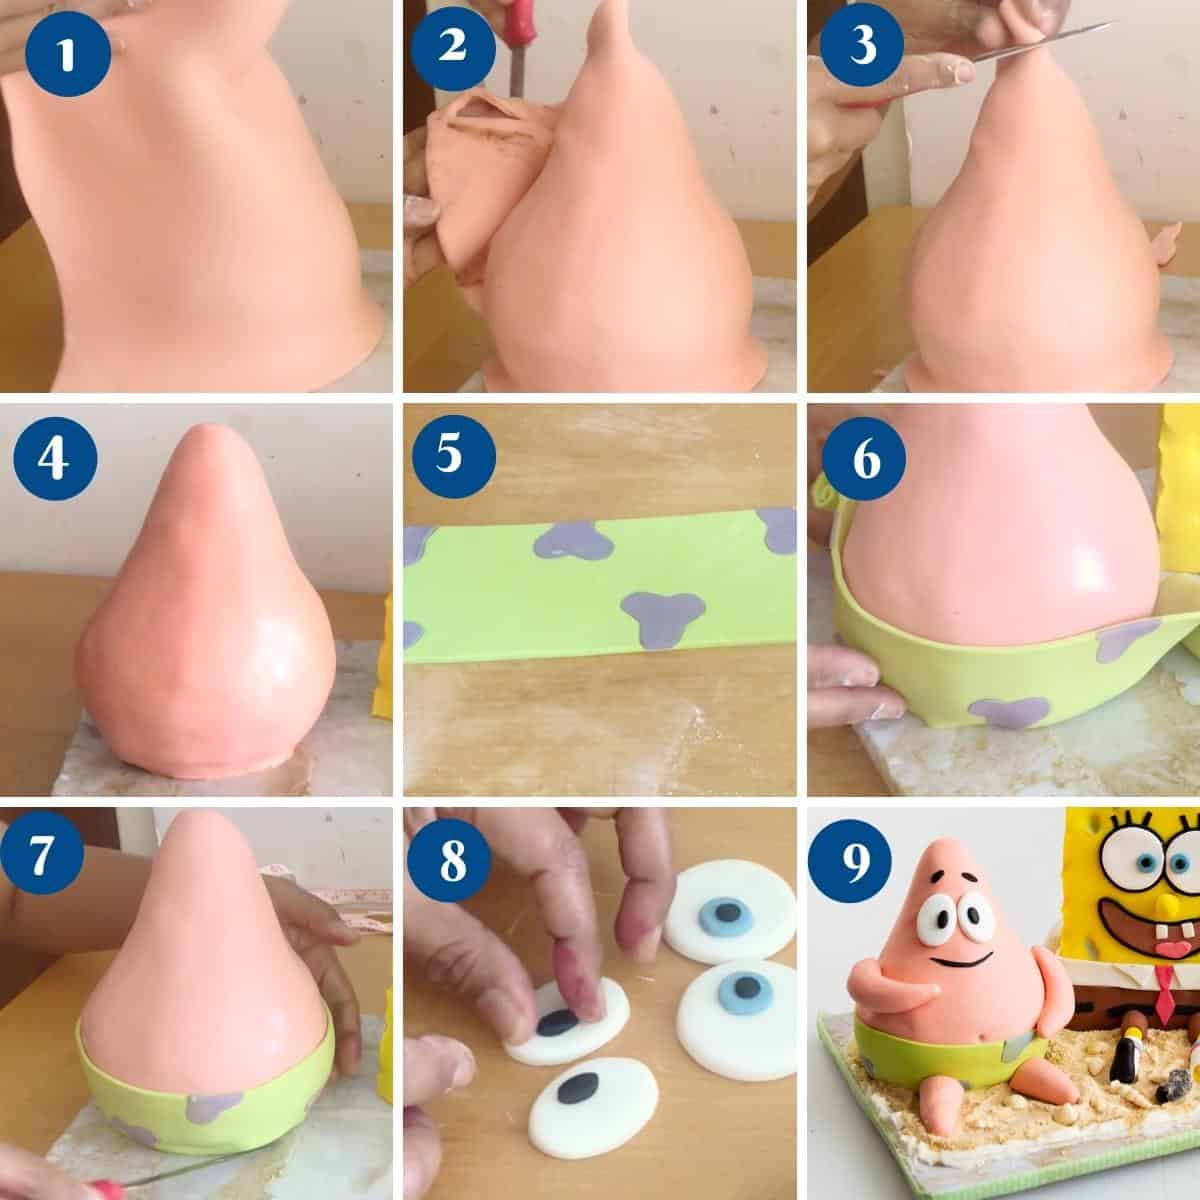
Step-by-step: Patrick Cake tutorial
- Print the picture of the character to use as a reference.
- Bake two dome/ sphere cakes using a ball pan. Cool completely
- Join the two halves with frosting to make a ball. Chill so the frosting holds them together.
- Place them on the cake board – cut off a little on the bottom to create a flat base.
- Use cake trimmings mixed with frosting (cake pop mixture) to create Patrick’s tall head (see video)
- Frost the cake with ganache, and smooth with a spatula, then a plastic scraper.
- Chill the cake for at least 30 minutes
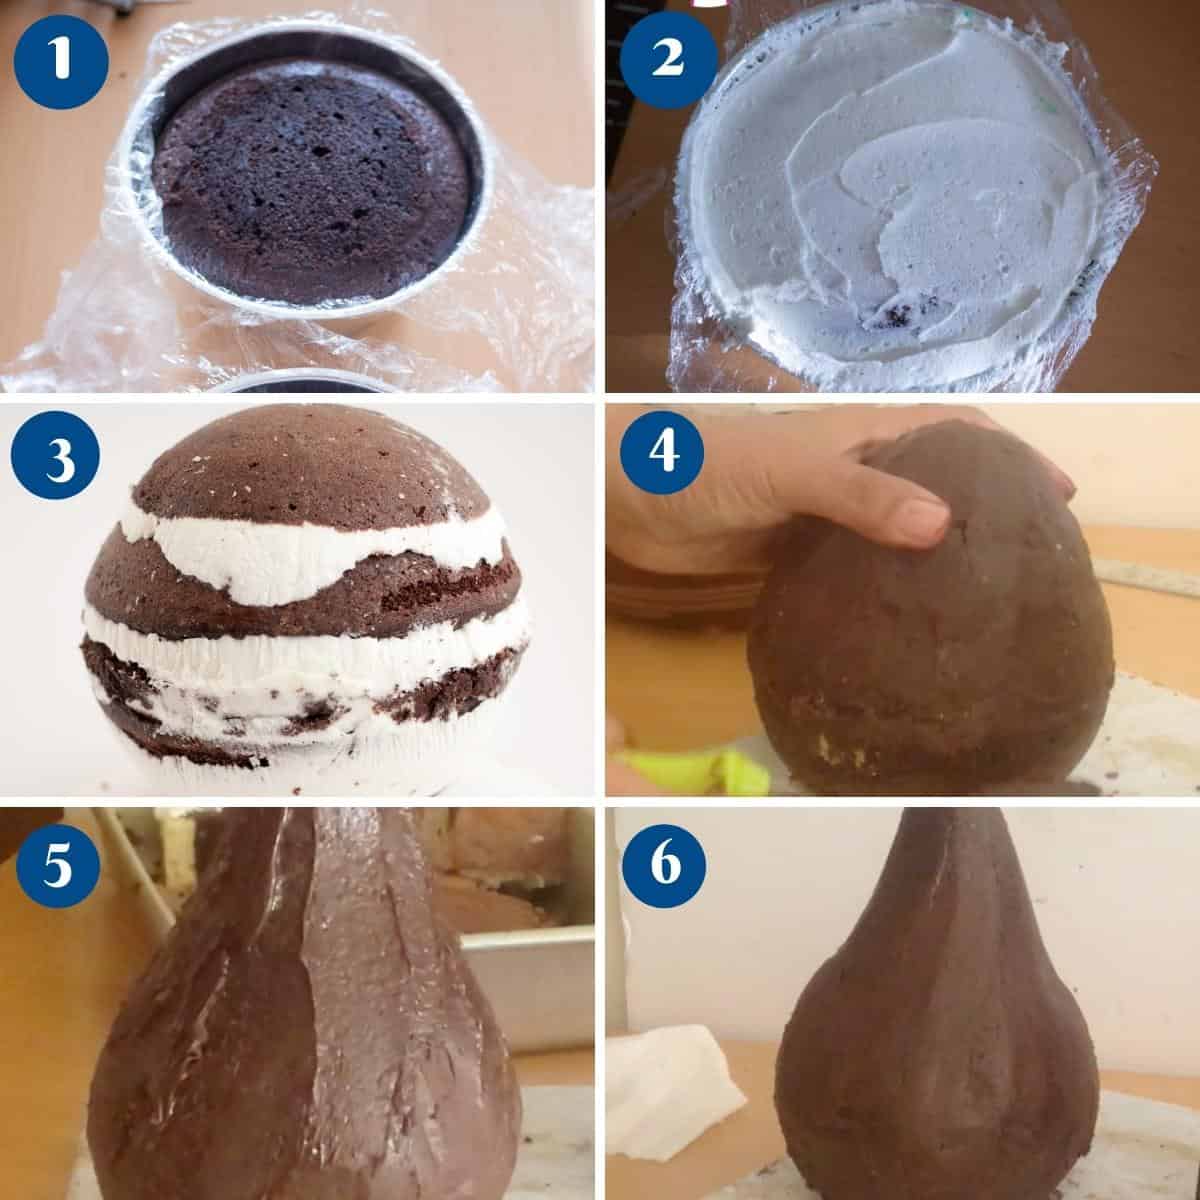
- Roll the fondant and cover the cake as shown in the video. Cut off excess, then use your hands to rub gently and seam the edges
- Now make the rest of the fondant details and glue them on the character as shown in the video
- Patrick’s Pants – Lime green fondant with purple flowers. As shown in the video, roll the two sides in and then unroll onto the cake.
- Patrick’s eyes – white fondant in oval shapes with black circles.
- Hand and legs – Patrick’s hands are the same color as his body, rolled into a cylinder and tapered towards the end.
- Mouth – A black strip for the mouth.
Base of the cake
- Sand – I used cookie crumbs and brown sugar, pulsed in the food processor for the sand.
- Shells – The shells are melted white chocolate in shell molds.
Tips for success
- I like to bake the cake at least a day ahead and make sure to cool it completely, otherwise the frosting will melt
- In fact, the best way to make fewer crumbs during carving is to freeze the cake for at least an hour.
- Roll the fondant about 1/4 inch thick so it’s easier to handle.
- Chilling the fondant stiffens the sugar in the fondant, making it surprisingly easier to handle.
- Dust the edges of the cutters with flour to make clean edges.

more tutorials you may like
- Burger Cake Tutorial, Pancake Cake Tutorial
- Log Cake Tutorial, Wine Bottle and Crate Cake Tutorial
- Fault Line Cake Tutorial
- Easy Rainbow Cake – Seven Layers


SpongeBob Cake
This SpongeBob cake tutorial is the perfect celebration cake for kids. Today, I show you how I made both SpongeBob SquarePants and Patrick in fondant.
Video
Ingredients
- 3¾ cup (470 g) All-purpose flour
- 2 cups (400 g) Sugar
- 12 oz (340 g) Unsalted butter
- 5 Eggs
- 3½ tsp Baking powder
- ½ tsp Baking soda
- ½ tsp Salt
- 1 cup (240 ml) Milk
- 2 tsp Vanilla extract
- 4 tbsp (20 g) Cocoa powder (with 4 tbsp hot milk)
- 2 lbs (1 kg) Marshmallow fondant for Spongebob
- 1 lb (500 g) Marshmallow fondant for Patrick
- 1 lb (500 g) Frosting
- 2 lb (1 kg) Chocolate ganache
- 1 Cup (240 ml) Simple syrup
- 1 Chocolate Vanilla Sheet Cake
- 1 Sphere Cake Recipe
Method
- Preheat the oven to 350°F / 177°C / Gas Mark 4
- Prepare a sheet cake pan for baking – grease and line with parchment paper.In a bowl, combine flour, baking powder, baking soda, and salt – set aside.
- In the mixing bowl of a stand mixer, cream butter and sugar until light and fluffy. Add eggs one at a time until well combined. Use a spatula and scrape the sides of the bowl when necessary.
- Next, add the flour and milk mixture in three batches. Followed by the vanilla extract.
- Vanilla batter – Lift one side of the sheet cake pan by placing a small plate or spoon under one side of the pan. Pour half the batter. It will rest on one side.
- Chocolate batter – Add the cocoa and milk mixture to the other half, remove the bowl/spoon from under the pan, and pour the second batter.
- Bake in the preheated oven on the middle rack for about 30 to 40 minutes, or until the skewer inserted into the center comes out clean. Cool in the pan for 10 minutes, then invert on a cooling rack and cool completely before you frost it.
- Print a picture of the character (SpongeBob SquarePants) for reference.
- Level – cut any dome off the cake with a serrated bread knife. Brush the cake with sugar syrup.
- Cut the cake in half, then in half again. This will give you 4 – 3 x 9-inch pieces. Cut each piece to about 6 inches. Stack two pieces with buttercream (see video.
- Add three dowels (I use straws), a cake circle/board, and 2.5 x 5-inch pieces. Add the next two layers with frosting in between.
- Then, crumb coat with ganache. Chill 15 minutes, then coat with more ganache. Chill for another 15 minutes.
- Meanwhile, roll out yellow fondant. Cut strips about 8 x 9 inches for the front and back and 4 x 7 inches for the sides. (don't make them too large to prevent waste).
- Lay the fondant on a baking tray lined with parchment paper. Chill the fondant pieces in the fridge for 10 minutes. Then, brush the cake with water and press the cold fondant pieces to SpongeBob. Use a cake smoother to cut off the excess as shown in the video.
- Once the cake is paneled and the excess cut off. You can now make holes using a ball tool (if you don't have a ball tool, dip your knuckles in flour and gently press in).
- After this, it is time to make the remaining details as shown in the video.
- SpongeBob's eyes – White fondant with blue and black.
- Brown pants – with a rolling pin, roll a long strip of fondant about 11/2-inches thick. Roll the dough on the work surface like a jelly roll, then unroll it onto the cake as shown in the video. You will also need a thin strip of black for his belt as well.
- Shirt – A strip of white above the belt. Don't forget to make his tie and collar.
- Hands and Legs – Roll the same yellow fondant into a thin cylinder. Cut and shape as shown in the video.
- Shoes – Small balls of black rolled into a ball, then shaped into a shoe as shown in the video
- Nose – You will need a small piece of yellow fondant rolled into a cylinder about 5 inches long – Use a cocktail stick to attach it to the cake.
- Small details – Mouth, teeth, tongue, outline for the eyes, eyebrows, etc.
- Print the picture of the character to use as a reference.
- Bake two dome/ sphere cakes using a ball pan. Cool completely.
- Join the two halves with frosting to make a ball. Chill so the frosting holds them together.
- Place them on the cake board – cut off a little on the bottom to create a flat base.
- Use cake trimmings mixed with frosting (cake pop mixture) to create Patrick's tall head (see video).
- Frost the cake with ganache, and smooth with a spatula, then a plastic scraper.
- Chill the cake for at least 30 minutes.
- Roll the fondant and cover the cake as shown in the video. Cut off excess, then use your hands to rub gently and seam the edges.
- Now, make the rest of the details as shown in the video.
- Pants – Lime green fondant with purple flowers. As shown in the video, roll the two sides in and then unroll onto the cake.
- Eyes – White fondant in oval shapes with black circles.
- Hand and legs – Patrick's hands are the same color as his body, rolled into a cylinder and then tapered towards the end.
- Mouth – A black strip for the mouth.
- Sand – I used cookie crumbs and brown sugar, pulsed in the food processor for the sand.
- Shells – The shells are melted white chocolate in shell molds.
Notes
- I like to bake the cake at least a day ahead and make sure to cool it completely, otherwise the frosting will melt.
- In fact, the best way to make fewer crumbs during carving is to freeze the cake for at least an hour.
- Roll the fondant about 1/4 inch thick so it’s easier to handle.
- Chilling the fondant stiffens the sugar in the fondant, making it surprisingly easier to handle.
- Dust the edges of the cutters with flour to make clean edges.
Equipment you will need


Nutrition
Tried this recipe?
Mention @veenaazmanov_kitchen or tag #veenaazmanovkitchen!more cake tutorials
- Letter Cakes Recipe Tutorial
- Sharp Edges on Ganache Cakes
- Sharp Edges Buttercream Cakes
- Cake Decorating Recipes
- Cake Decorating Tutorials


Don’t lose this recipe! Save it for Later!
📌 Save this Recipe for later on Pinterest so you can easily find it again.
⭐ Add Veena Azmanov Kitchen to your Google Preferred Sources.
It helps Google show you more of our recipes.
📧 Subscribe for new recipes delivered to your inbox.
🎥 Follow us for more recipes


This is so cute! I love the touch of “sand”. Pass me a slice of this cake!
Thank you, Bre
Thanks for sharing this dear. Very useful post for me with so many tips. Bookmarked!!
Thank you, Kushi
What a fun design. Thanks for sharing!
You are welcome, Angela
If you only knew how big Sponge Bob is in our house!! This cake is adorable and perfect.
Thank you, Toni
My 9 year old loves Spongebob so this cake tutorial is perfect! I Can’t wait to make this for him! It’ll feel so special
He would feel special for sure.