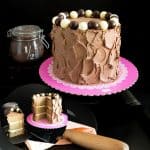
Pancake Cake Tutorial

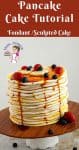
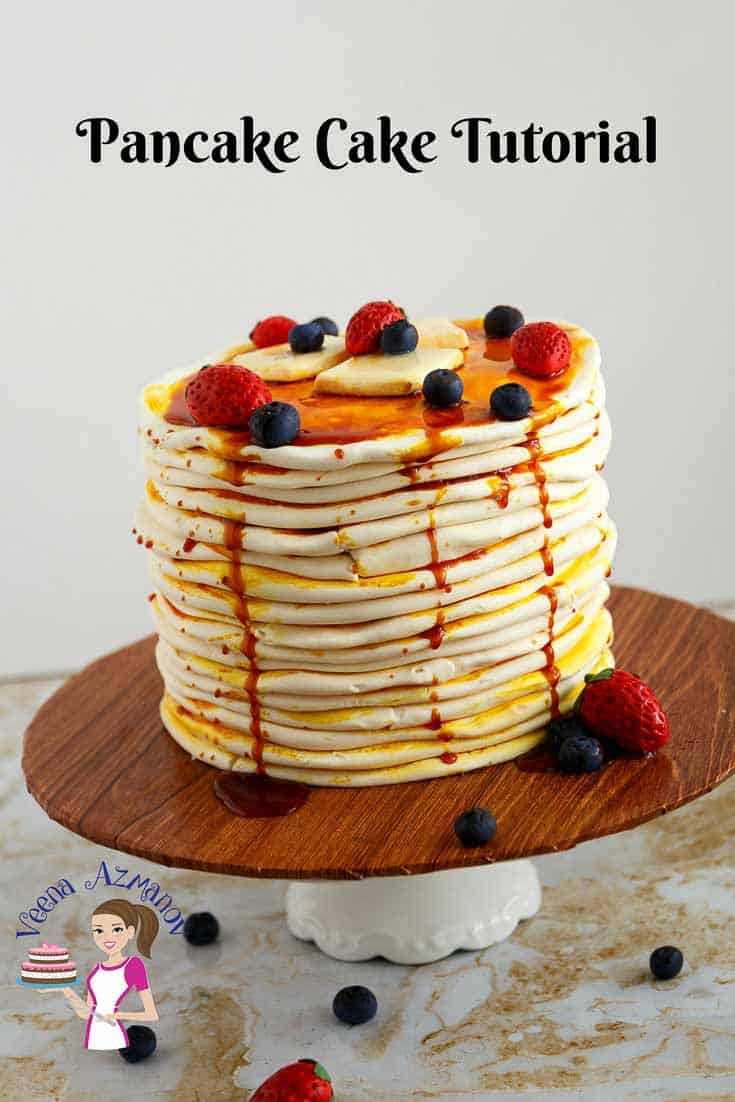
Create a stunning Stacked Pancake Cake that looks like a delicious tower of breakfast pancakes! This tutorial will guide you through baking, frosting, and decorating a 4-layer, 6-inch round cake, using American buttercream, marshmallow fondant, and gumpaste berries for realistic details.
As a cake decorator, my specialty has always been wedding cakes, but I absolutely love the occasional novelty cake orders that allow me to step outside the traditional and dive into something playful. While I enjoy crafting all kinds of cakes, there’s something extra special about fun, creative designs that challenge my artistic skills.
Food illusion cakes, like this Stacked Pancake Cake, have a unique thrill—seeing the transformation from cake to a hyper-realistic edible masterpiece is incredibly rewarding! The process of shaping fondant, layering textures, and painting realistic details brings out my creativity in a way that’s both exciting and satisfying. And when the final cake looks so real it tricks the eye, that’s the ultimate joy of cake decorating!
Materials & Tools
Cake & Frosting
- Cake: Four 6-inch round cakes (any flavor). I used my red velvet cake but I have many other recipes that would work just as well.
- Filling & Frosting: I used my Velvet American Buttercream recipe today, but Swiss meringue buttercream, Italian meringue buttercream, or French buttercream would work just as well.
- Fondant: I used my marshmallow fondant recipe today – about 1.1 kg. (ivory-colored)
- For the pancake layers, I tinted my fondant with Magic Colors Ivory gel (you can also use cream). Use very little—you just need to remove the white, not really make it cream.
- Butter – I used a dab of golden yellow. Again, use just a dab to make it creamy, not yellow.
- Strawberry—Magic Color red and Olive Green. You can use red and add a dab of brown to deepen the color of the strawberries. You can also use green with a dab of black to deepen the green!
- Blueberries—Navy blue and black—I started with navy blue and added a bit of black. I also dusted the blueberries with black petal dust.
- Syrup—I used corn syrup with a little golden yellow and a touch of brown. I’d say 1/4 cup corn syrup with 1 tsp golden yellow and 1/4 tsp brown. Then, add more color if necessary, or add more corn syrup to dilute the color. You can also use piping gel instead of corn syrup to make the syrup.
Decorations & Edible Paint
- Gum Paste Fruits: Strawberries and blueberries
- Edible Gel Colors: Ivory, brown, and a touch of yellow
- Edible Gold or Brown Petal Dust (Optional for shading)
Tools
- Offset spatula
- Fondant rolling pin
- Fondant smoother
- Sharp knife or pizza cutter
- Food-safe paintbrush
- Small ball tool (for gum paste fruit details)
- Cornstarch or powdered sugar (for rolling fondant)

Step-by-step: Pancake cake tutorial
Step 1: Bake and Prepare the Cake
- Bake 4 layers of 6-inch round cake and let them cool completely.
- Trim the tops if needed for an even stack.
Step 2: Frost the Cake
- Place the first cake layer on a cake board.
- Apply a thin layer of buttercream and stack the second layer.
- Repeat the process with all four layers.
- Crumb coat the cake with a thin layer of buttercream and refrigerate for 20 minutes.
- Apply a final smooth coat of buttercream and chill while preparing the fondant.
Step 3: Make the Pancake Layers (Fondant Strips)
- Color your marshmallow fondant in an ivory shade (use gel colors).
- Roll out long strips about ½ inch wide and ¼ inch thick.
- Flatten the strips slightly using your rolling pin to resemble pancake edges. I like to flatten them with my hand to give it a natural, uneven look.
- Start at the bottom and wrap the strips around the cake, slightly overlapping them.
- Continue stacking the strips upwards, ensuring each row mimics pancake layers.
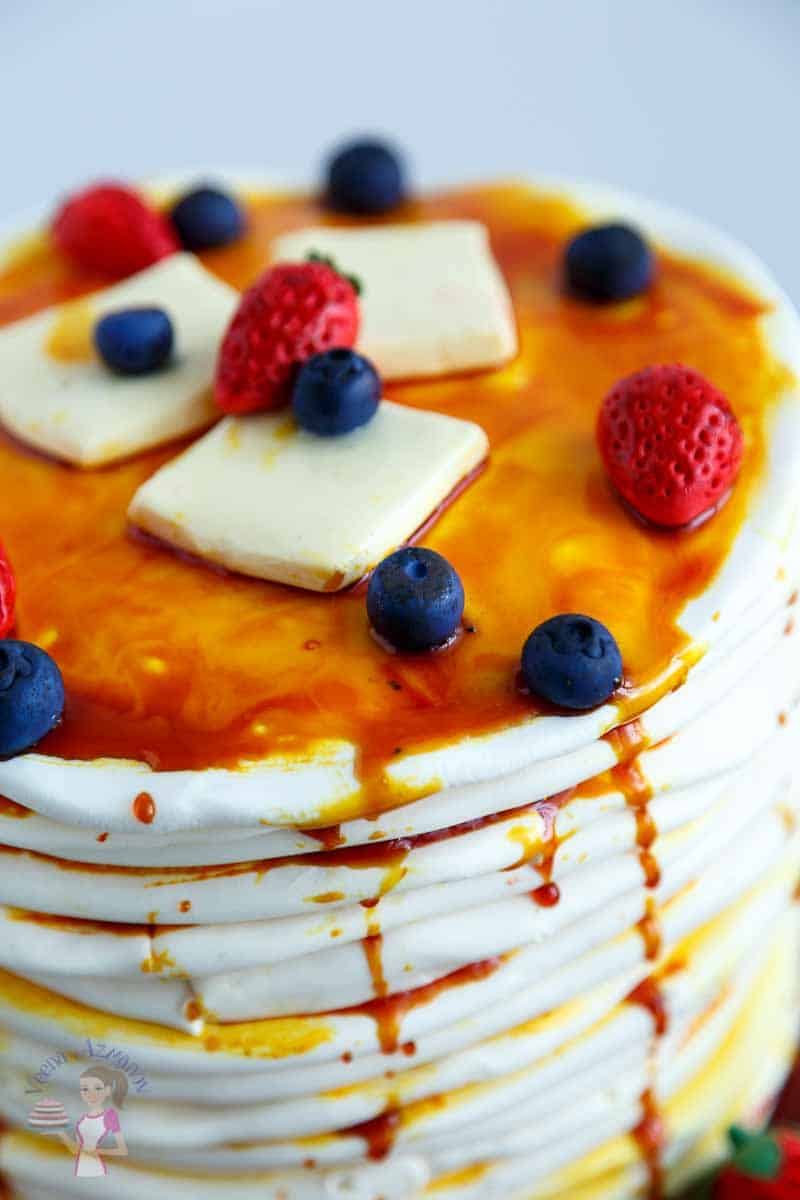
Step 4: Create the Cooked/Burnt Pancake Look
- Mix ivory and brown gel colors with a small amount of clear alcohol (like vodka) or lemon extract to create a thin paint.
- Use a food-safe brush to paint the edges of each pancake layer, adding burnt or cooked marks for realism.
- Lightly dust the edges with gold or brown petal dust to create dimension.
- Blend the colors for a natural toasted effect.
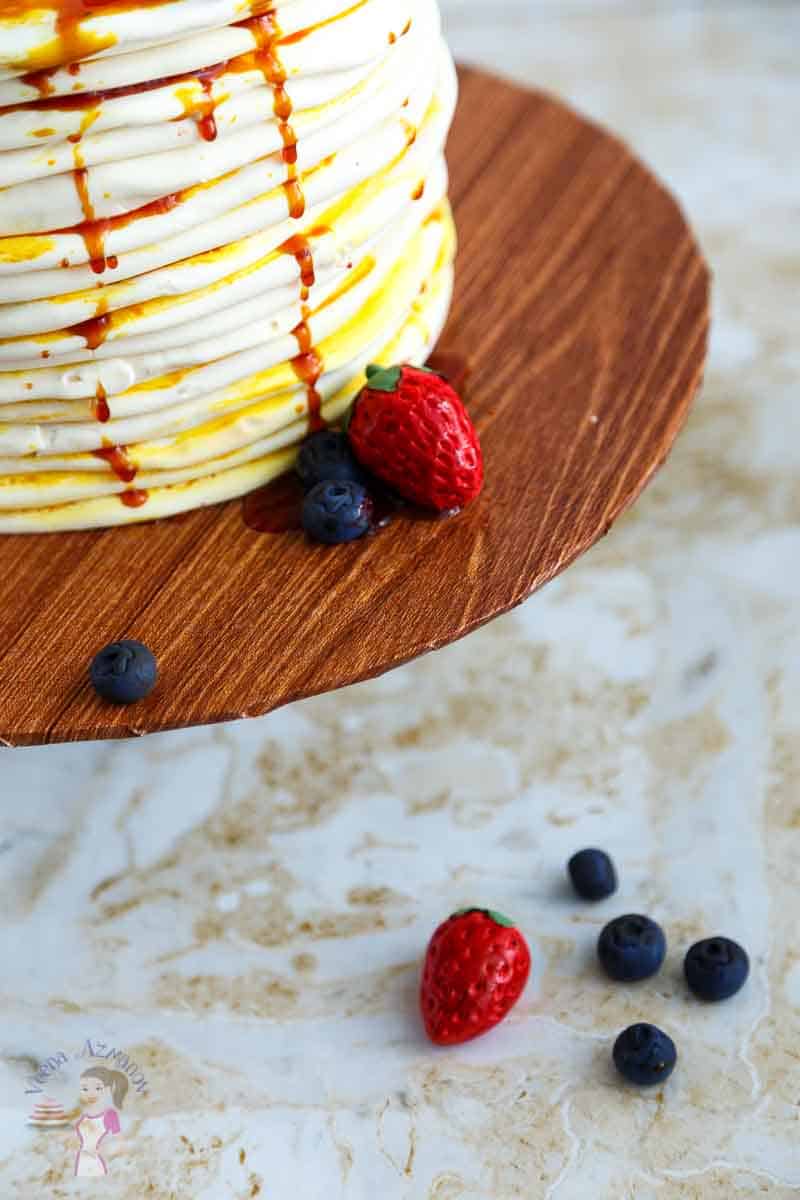
Step 5: Make Gum Paste Fruits (Strawberries & Blueberries)
Strawberries
- Roll small red gum paste balls and shape them into strawberry forms.
- Use a ball tool to create small dimples to mimic seeds.
- Roll out green gum paste and cut tiny leaves for the strawberry tops.
- Attach the leaves and let the strawberries dry.
Blueberries
- Roll small balls of dark blue gum paste.
- Use a ball tool to indent the tops.
- Lightly dust with blue and purple petal dust for a natural look.
Step 6: Assemble the Final Cake
- Arrange the gum paste strawberries and blueberries on top of the cake.
- Optionally, drizzle edible syrup (caramel or honey-colored piping gel) for a realistic syrup effect.
- Serve and impress with your Stacked Pancake Cake!

Tips for Success
- Preparing the Cake Base
- Use a sturdy cake like vanilla, butter, or pound cake to support the fondant. Avoid very soft cakes that may collapse under the weight of the fondant strips.
- Level each cake layer before stacking to ensure stability and a uniform height.
- Chill the cake before decorating to make applying fondant easier and prevent sagging.
- Creating Realistic Pancake Layers with Fondant
- Use the right fondant shade: Mix ivory fondant with a touch of warm brown or yellow to mimic the golden-brown pancake color.
- Roll long strips evenly to ensure they look uniform when stacked around the cake.
- Flatten the edges slightly for a more natural pancake appearance—real pancakes aren’t perfectly even!
- Overlap the fondant strips slightly when wrapping around the cake to create depth and layers, just like real pancakes.
- Achieving a Realistic Cooked Look
- Paint the edges with a mixture of ivory, brown, and a bit of yellow gel color mixed with vodka or lemon extract to create a natural “cooked” look.
- Use a dry brush technique to blend the colors for soft, gradual shading—this makes it look more authentic.
- Add slight imperfections like uneven marks and darker spots to mimic the uneven browning of real pancakes.
- Adding Syrup for Extra Realism
- Use piping gel mixed with brown or gold food coloring to create a realistic syrup effect.
- Gently drizzle the syrup down the sides of the cake using a spoon or piping bag for a natural flow.
- Keep it semi-transparent by not overmixing color into the piping gel—it should resemble real syrup!
- Perfecting the Gum Paste Fruits
- Strawberries: Add tiny indentations using a toothpick or ball tool to resemble seeds before drying.
- Blueberries: Dust with a mix of blue and purple petal dust for a natural, slightly frosted look.
- Let the gum paste fruits dry completely before placing them on the cake to prevent them from losing shape.
- Assembly & Final Details
- Use an offset spatula to carefully place the fondant strips without tearing them.
- Work from bottom to top when placing fondant layers to ensure an authentic stack effect.
- Keep hands dusted with cornstarch to prevent sticking while working with fondant.
- Brush the entire cake lightly with a soft dry brush to remove excess cornstarch or powdered sugar for a clean, finished look.
- Serving & Storage
- Avoid refrigerating the finished cake for too long, as condensation may cause colors to smudge.
- Store in a cool, dry place and serve at room temperature for the best texture and flavor.
- If transporting, box the cake carefully to prevent fondant strips from shifting.
more cake tutorials
- Castle Cake Tutorial
- Mermaid Cake Recipe
- SpongeBob Cake
- Pancake Cake Tutorial
- Wine Bottle and Crate Cake Tutorial


Frequently asked questions
A dense, sturdy cake like vanilla, butter, pound, or even a light chocolate cake works best. Avoid overly soft cakes like chiffon or sponge, as they may not hold the weight of the fondant well.
Fondant is recommended for the most realistic pancake stack effect, but you can try buttercream piping techniques to create textured layers. However, the clean edges and shading are much easier to achieve with fondant strips.
Cake layers: Bake up to 2 days in advance and wrap them well in plastic wrap.
Fondant details: Prepare the fondant strips a few hours before assembling, but don’t let them dry out too much.
Gum paste fruits: Make these several days in advance to allow them to dry properly.
Fully assembled cake: Can be stored at room temperature for up to 24 hours, but avoid refrigeration to prevent condensation on the fondant.
Work with small batches of fondant at a time and keep the rest covered in plastic wrap.
If fondant starts drying, knead in a tiny bit of shortening to restore elasticity.
Apply the strips immediately after rolling them out to prevent stiffness.
Piping gel mixed with brown or golden food coloring gives the best realistic syrup look.
Thinned caramel sauce can work but may soak into the fondant.
Edible glaze or clear corn syrup can be mixed with color for a glossy finish.
Place the cake in a sturdy box with minimal extra space to prevent shifting.
If traveling long distances, chill the cake for 15-30 minutes before transport to firm up the buttercream.
Avoid direct sunlight and high humidity to keep the fondant in good condition.
Pancake Cake Tutorial
Create a stunning Stacked Pancake Cake that looks like a delicious tower of breakfast pancakes! This tutorial will guide you through baking, frosting, and decorating a 4-layer, 6-inch round cake, using American buttercream, marshmallow fondant, and gumpaste berries for realistic details.
Video
Ingredients
- 4 6-inch Round cakes (any flavor)
- 6 cups American Buttercream
- 2 lbs Marshmallow fondant Ivory, red, blue
- Gum Paste Fruits: Strawberries and blueberries
- Edible Gel Colors: Ivory brown, and a touch of yellow
- Edible Gold or Brown Petal Dust (Optional for shading)
Method
- Bake 4 layers of 6-inch round cake and let them cool completely. Trim the tops if needed for an even stack.4 6-inch Round cakes
- Place the first cake layer on a cake board. Apply a thin layer of buttercream and stack the second layer. Repeat the process with all four layers.6 cups American Buttercream
- Crumb coat the cake with a thin layer of buttercream and refrigerate for 20 minutes. Apply a final smooth coat of buttercream and chill while preparing the fondant.
- Color your marshmallow fondant in an ivory shade (use gel colors). Roll out long strips about ½ inch wide and ¼ inch thick. Flatten the strips slightly using your rolling pin to resemble pancake edges.2 lbs Marshmallow fondant
- Start at the bottom and wrap the strips around the cake, slightly overlapping them. Continue stacking the strips upwards, ensuring each row mimics pancake layers.
- Mix ivory and brown gel colors with a small amount of clear alcohol (like vodka) or lemon extract to create a thin paint. Use a food-safe brush to paint the edges of each pancake layer, adding burnt or cooked marks for realism.
- Lightly dust the edges with gold or brown petal dust to create dimension. Blend the colors for a natural toasted effect.
- Strawberries: Roll small red gumpaste balls and shape them into strawberry forms. Use a ball tool to create small dimples to mimic seeds. Roll out green gumpaste and cut tiny leaves for the strawberry tops. Attach the leaves and let the strawberries dry.Gum Paste Fruits: Strawberries and blueberries
- Blueberries: Roll small balls of dark blue gum paste. Use a ball tool to indent the tops. Lightly dust with blue and purple petal dust for a natural look.
- Arrange the gumpaste strawberries and blueberries on top of the cake. Optionally, drizzle edible syrup (caramel or honey-colored piping gel) for a realistic syrup effect. Serve and impress with your Stacked Pancake Cake!
Equipment you will need


Nutrition
Tried this recipe?
Mention @veenaazmanov_kitchen or tag #veenaazmanovkitchen!more cake tutorials
- How to Make a Fire Truck Cake
- Fondant Cheese and Mice Cake Tutorial
- Barcelona Soccer Ball Cake
- Car Cake Tutorial
- Pillow Cake


Don’t lose this recipe! Save it for Later!
📌 Save this Recipe for later on Pinterest so you can easily find it again.
⭐ Add Veena Azmanov Kitchen to your Google Preferred Sources.
It helps Google show you more of our recipes.
📧 Subscribe for new recipes delivered to your inbox.
🎥 Follow us for more recipes

Best pancake tutorial ever. Just made one last week. I was dreading it would take forever but with you roll, press and cut in the middle. Such a breeze. I can’t believe how easy it was. Thank you! Love your blog.
Thank you, Mattias. So happy you found this tutorial useful. Thanks for coming back to write this feedback. Have a great day.
Thank you so much for this tutorial. Have been looking for an easier way to do this. I have a big one to make soon.
You are very welcome Elly.
Thanks for the Pancake cake tutorial, Veena!
I’m planning to make a wedding cake version of this cake for a couple who is having breakfast food at the reception (expecting around 200 guests).
I originally thought I would do a typical 3 tiered wedding cake set-up, but decided this might take away from the effect of a uniform pancake stack. I was thinking about stacking 4 12 inch (two layered) cakes on top of each other for a gigantic double barrel cake (using boards and dowels). I’ve never stacked so many uniform layers on top of each other. Do you think it’s advisable? Or do you have alternative advice?
With appreciation,
Elizabeth
Hey Elizabeth.
Take into account that 2 x 12-inch layers will look really huge. Once you add the fondant edges for the pancake look it will be a 14-inch cake. So that’s a 14-inch double barrel cake.
Do you have any layers on top?
Honestly, I would go with a traditional three-tier pancake cake. It will be a long time to make the three-layer but the effect will be much better than one large 14-inch double barrel cake. Alternatively, you can make a large double barrel cake with fewer servings – I would not go bigger than a 7 inch if it’s a single layer cake. Aesthetically a small but tall stack of pancakes are more pleasing to the eye. Hope this makes sense.
Your cake is fantastic! Thank you so much for sharing!
Thank you, Angela
Thanks very much Erin!