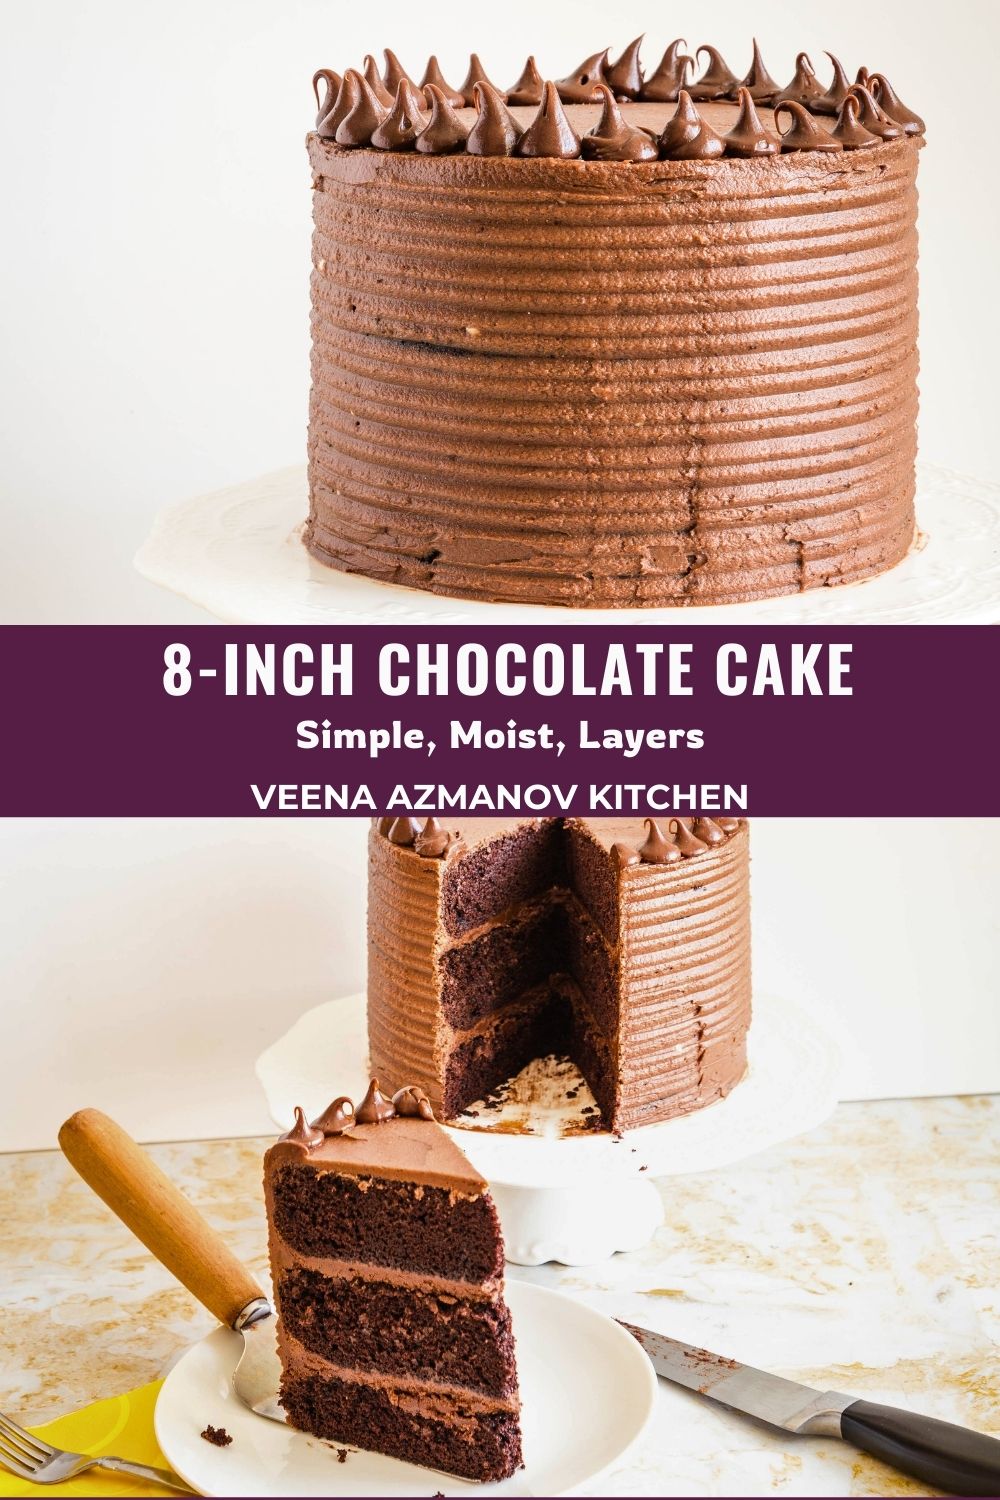
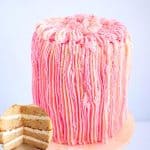
Best 8-inch Chocolate Cake Recipe
 Prep Time 20 minutes Cook Time 35 minutes Total Time 1 hour 55 minutes
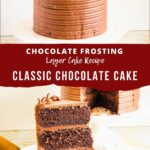

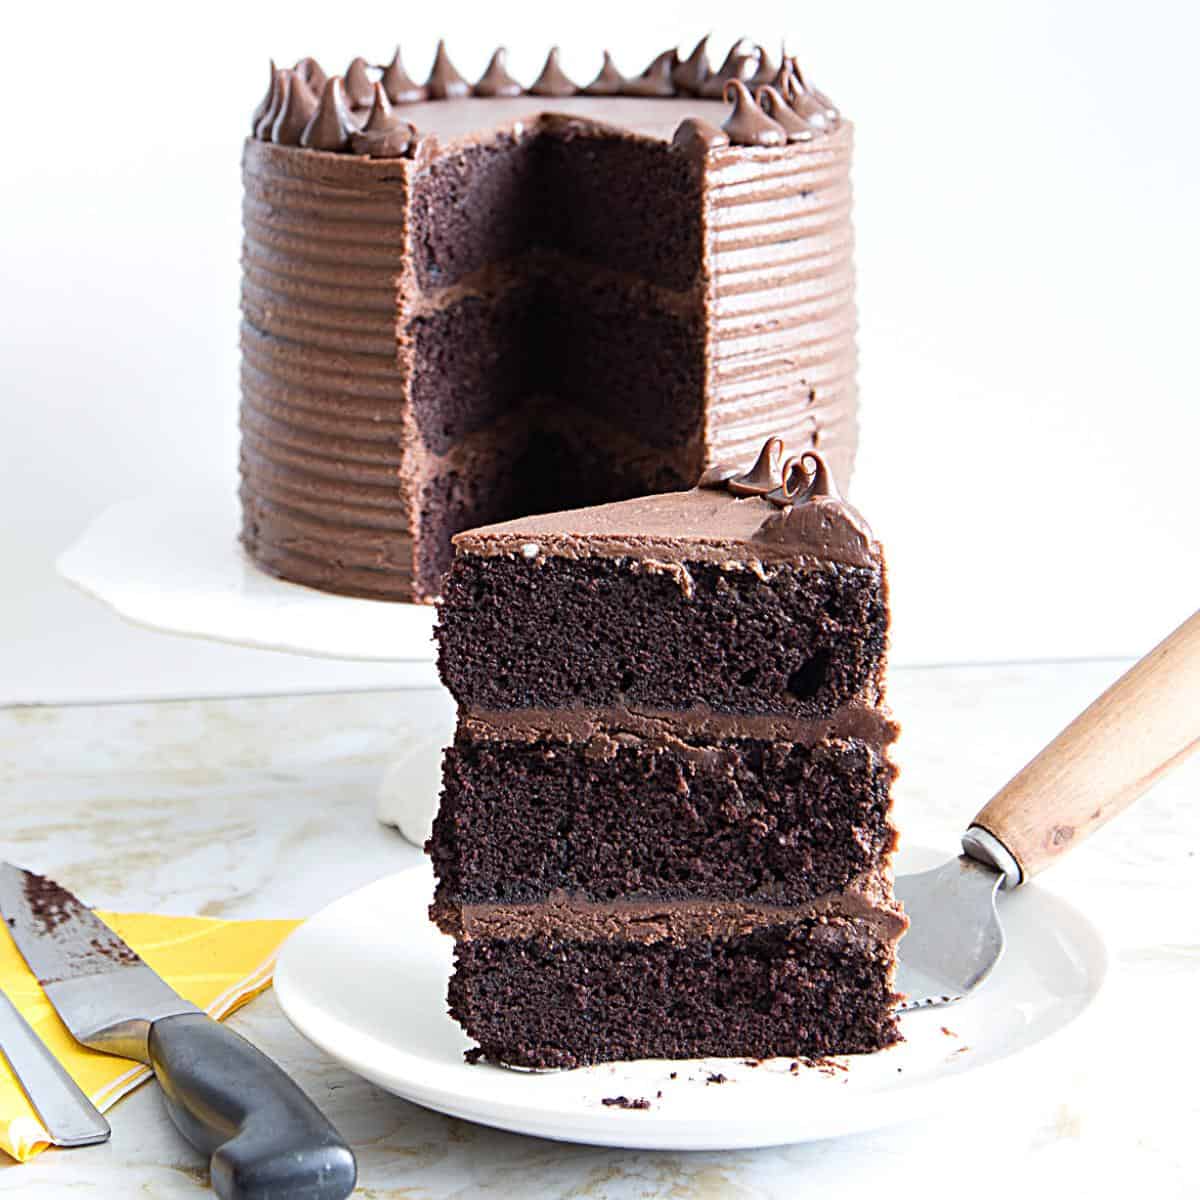
This classic chocolate cake is soft, rich, and perfectly sized for three 8-inch round cake layers. Made with Greek yogurt and simple pantry ingredients, it delivers a moist crumb with deep chocolate flavor — without needing melted chocolate or complicated steps. Frosted with silky chocolate Swiss meringue buttercream, this is the kind of chocolate cake you’ll bake again and again.
In the U.S., 9-inch cakes are often the standard, but in Israel, 8-inch cakes are just as popular. When I ran my cake business, I baked both sizes regularly depending on what customers needed. That’s why you’ll find dedicated 8-inch and 9-inch cake recipes on my blog — each written specifically for that pan size.
This 8-inch chocolate cake was one of my most requested layer cakes. It’s reliable, moist, and perfectly balanced — the kind of classic chocolate cake that works for birthdays, celebrations, or simply when you want a proper homemade dessert without scaling a larger recipe.
Why you’ll love this classic 8-inch cake?
- Perfect 8-inch layers – Designed specifically for three 8-inch pans, so no guessing or adjusting.
- Moist but sturdy – Greek yogurt keeps the crumb soft while giving the cake structure for stacking.
- Simple ingredients – No melted chocolate, no complicated steps, just pantry staples.
- Everyday classic – Rich chocolate flavor without being overly heavy or overly sweet.

Ingredients for this 8-inch cake
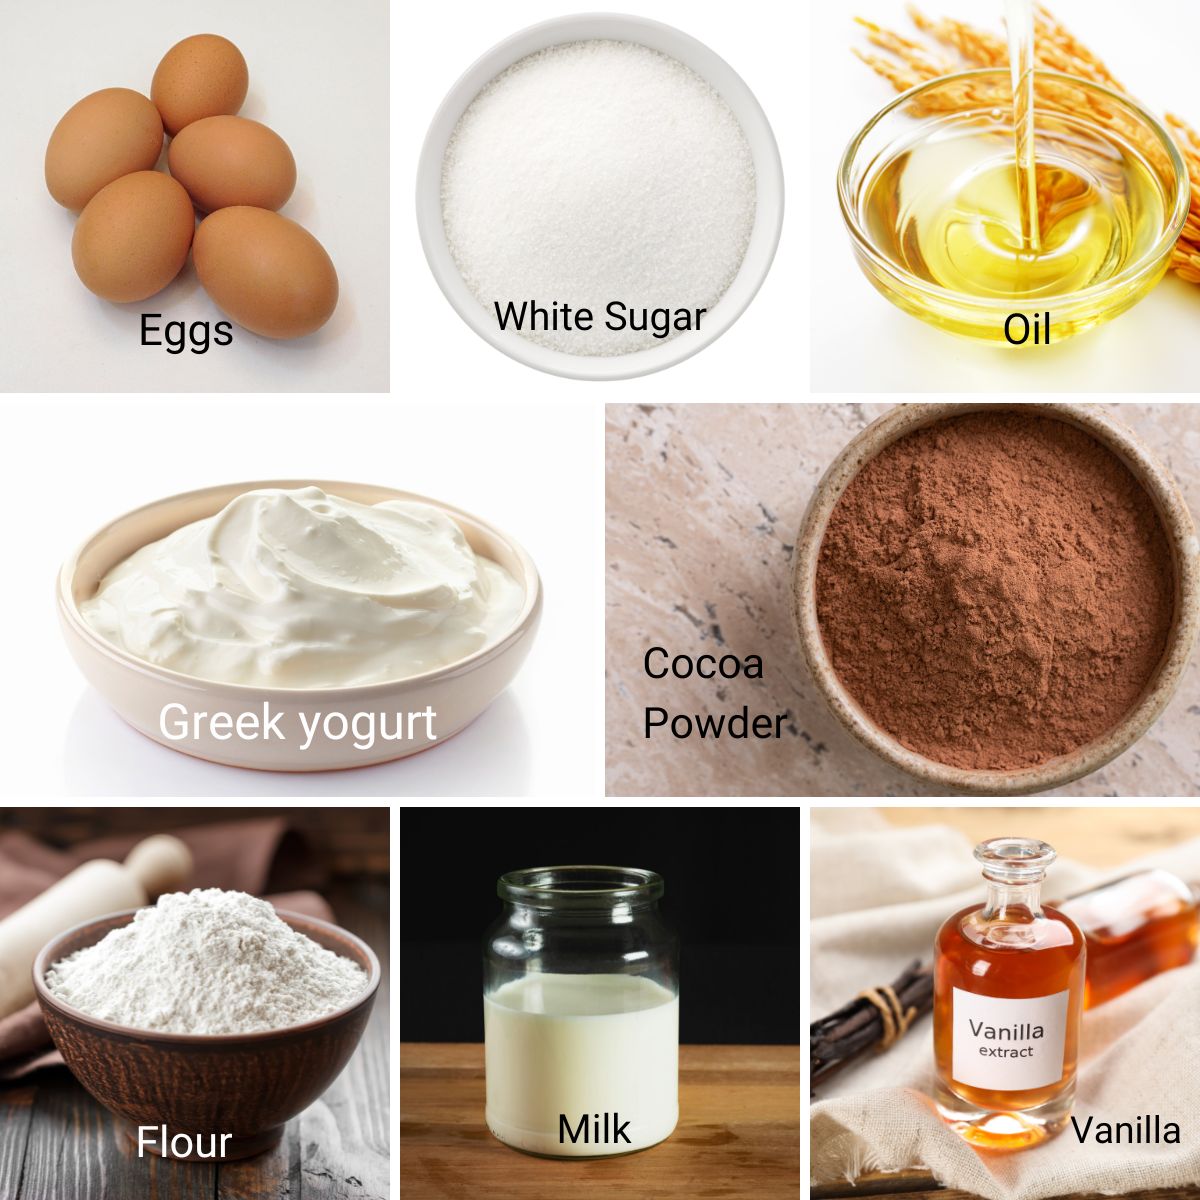
- All-purpose flour – Gives the cake structure while keeping it tender.
- Cocoa powder – Use unsweetened Dutch-processed cocoa for a deep chocolate flavor and darker color.
- White sugar – This recipe uses only white sugar for a clean chocolate flavor and balanced sweetness.
- Greek yogurt – Adds moisture, richness, and structure. It also helps create a soft crumb without making the cake heavy.
- Oil – Keeps the cake moist for days.
- Milk – Loosens the batter and works with the yogurt for tenderness.
- Hot water – Added at the end to bloom the cocoa and create a smooth, pourable batter.
Step-by-step: Best Chocolate Cake (8-inch Round with Greek Yogurt)
Classic Chocolate Cake Batter
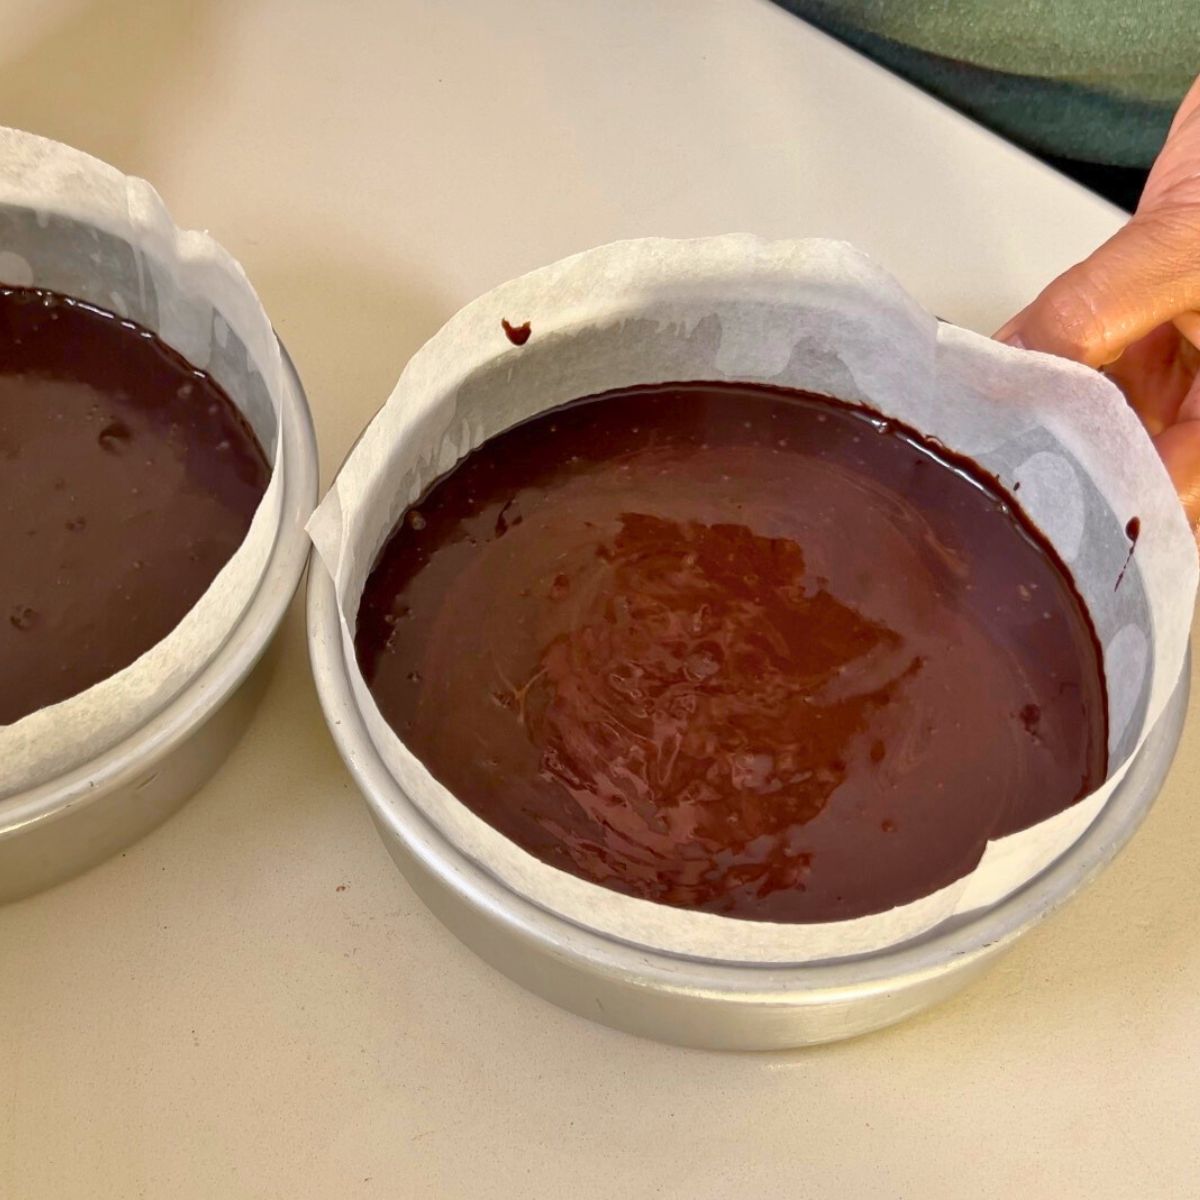
- Preheat the oven to 325°F / 165°C. Grease and line three 8-inch round cake pans or 2 x 9-inch round cake pans with parchment paper.
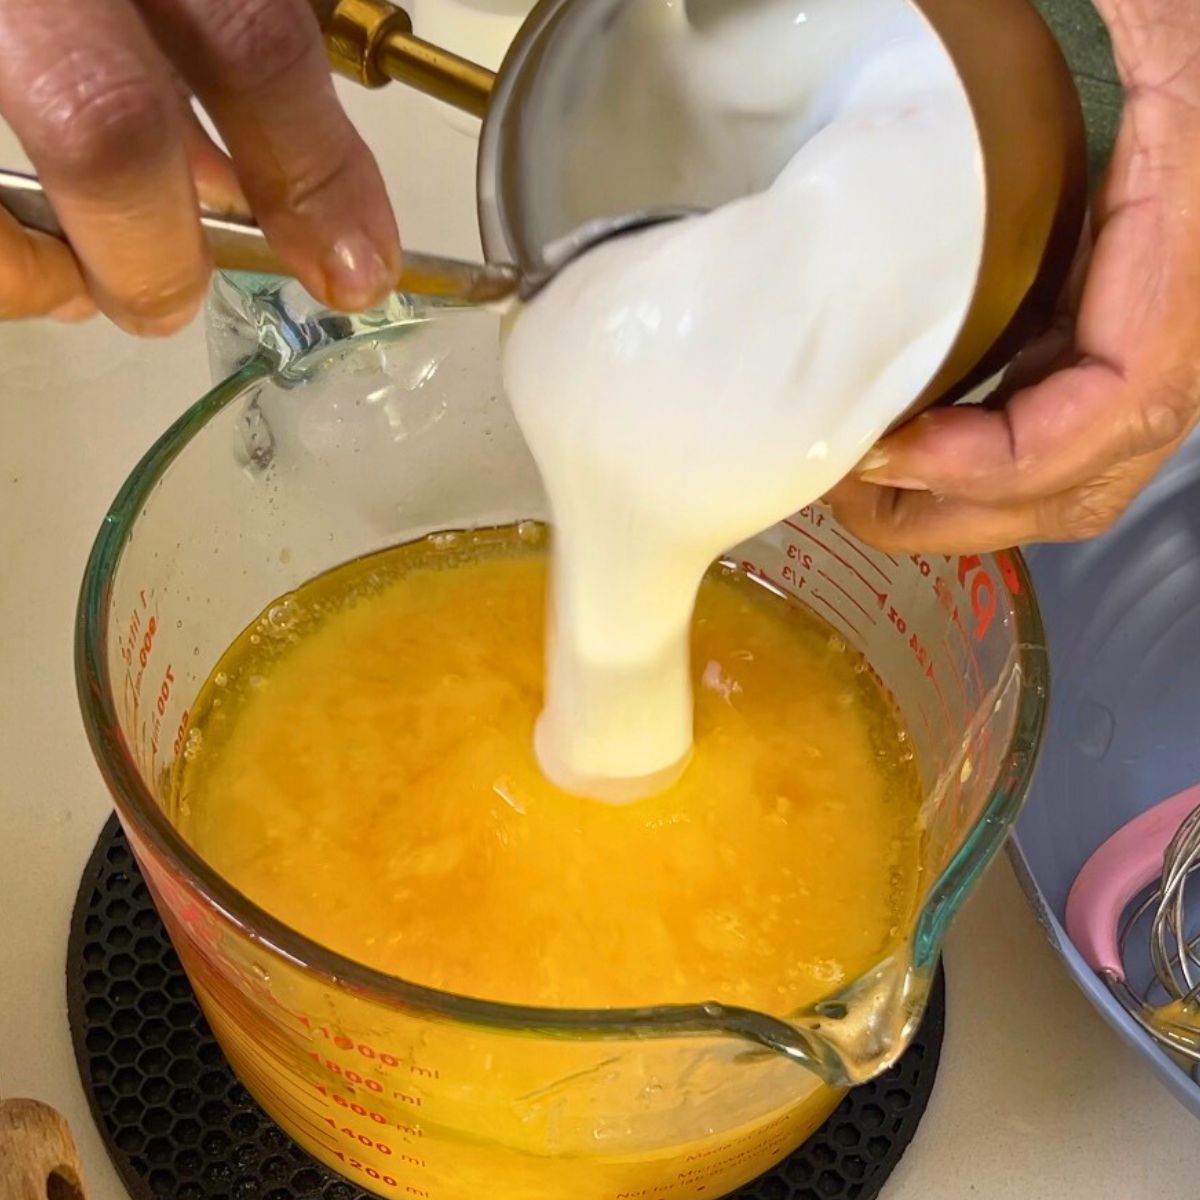
- In a mixing bowl, whisk together the eggs, oil, vanilla extract, Greek yogurt, and milk until smooth and fully combined.
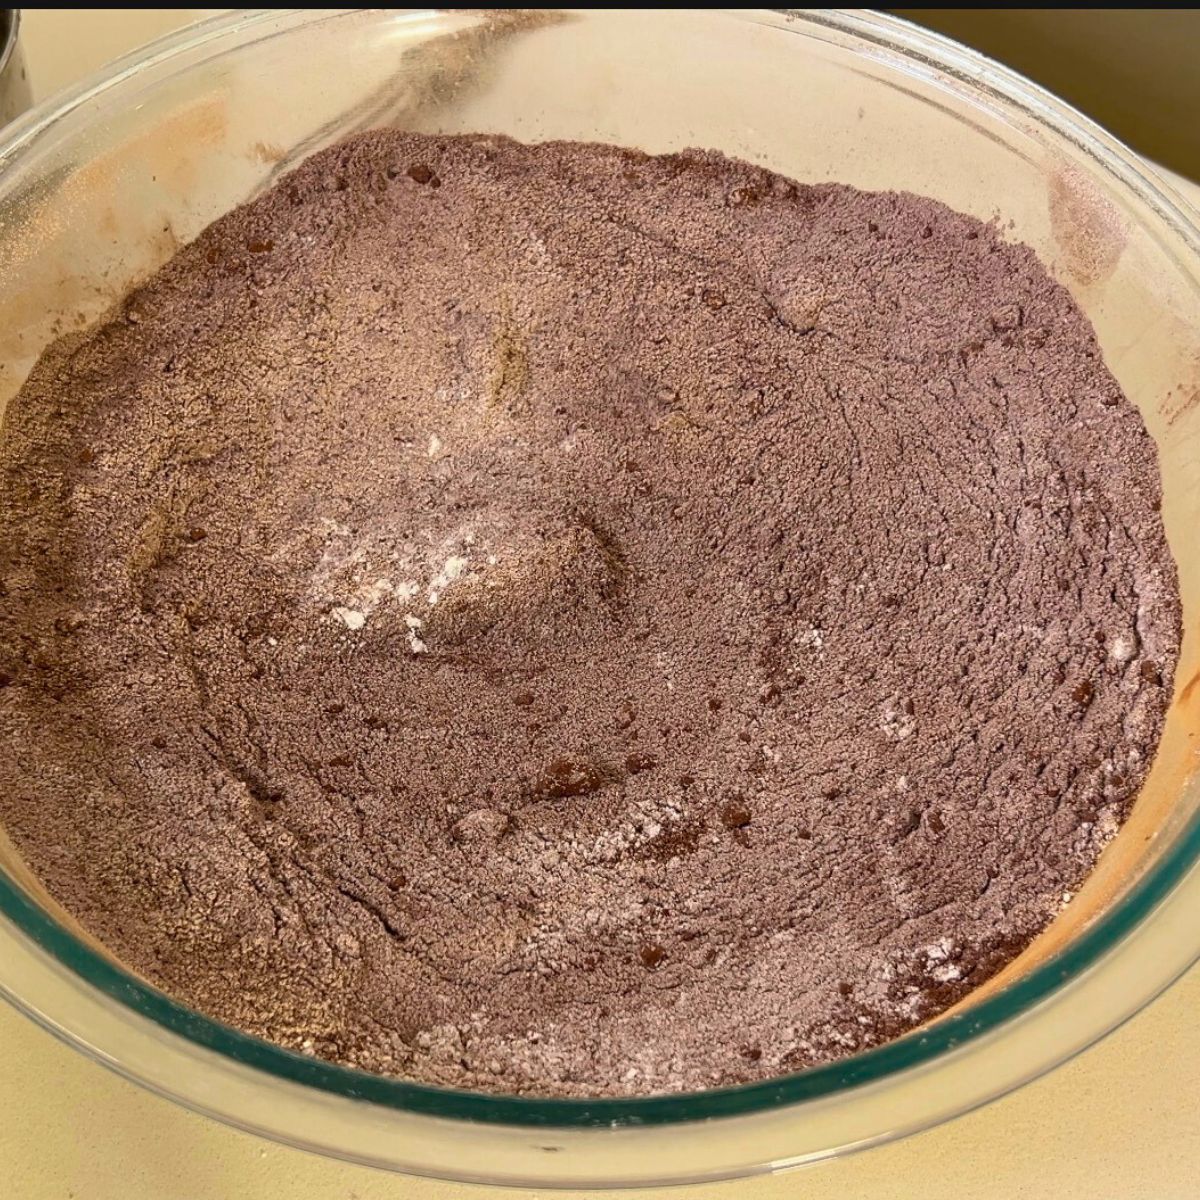
- In a separate bowl, combine the flour, cocoa powder, white sugar, baking powder, baking soda, and salt. Whisk to remove any lumps.

- Pour the wet ingredients into the dry ingredients and mix until just combined. Do not overmix.
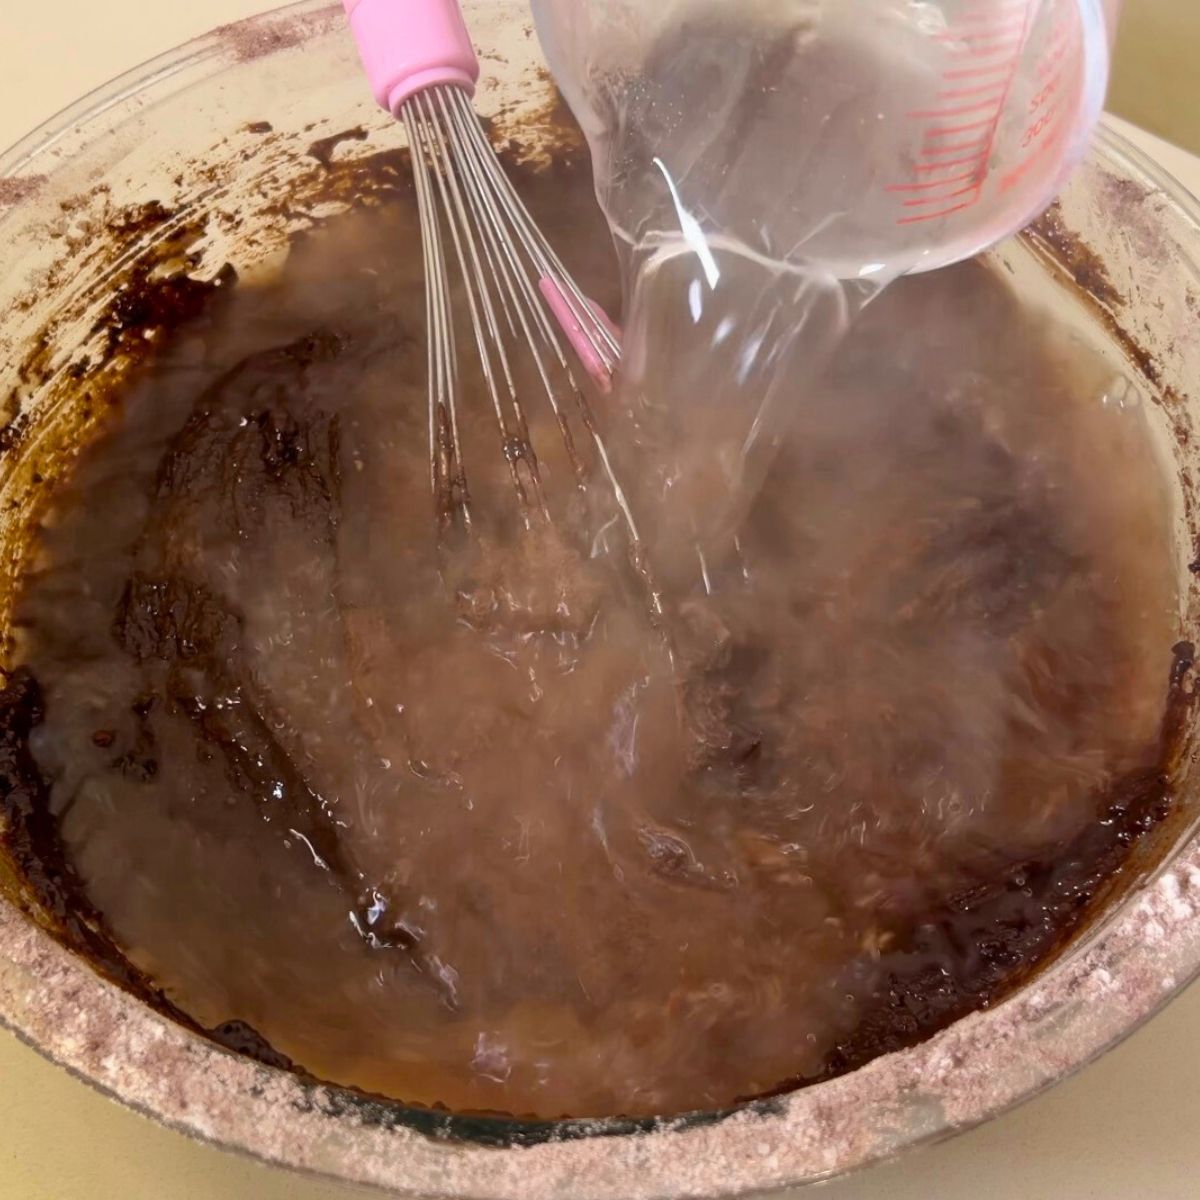
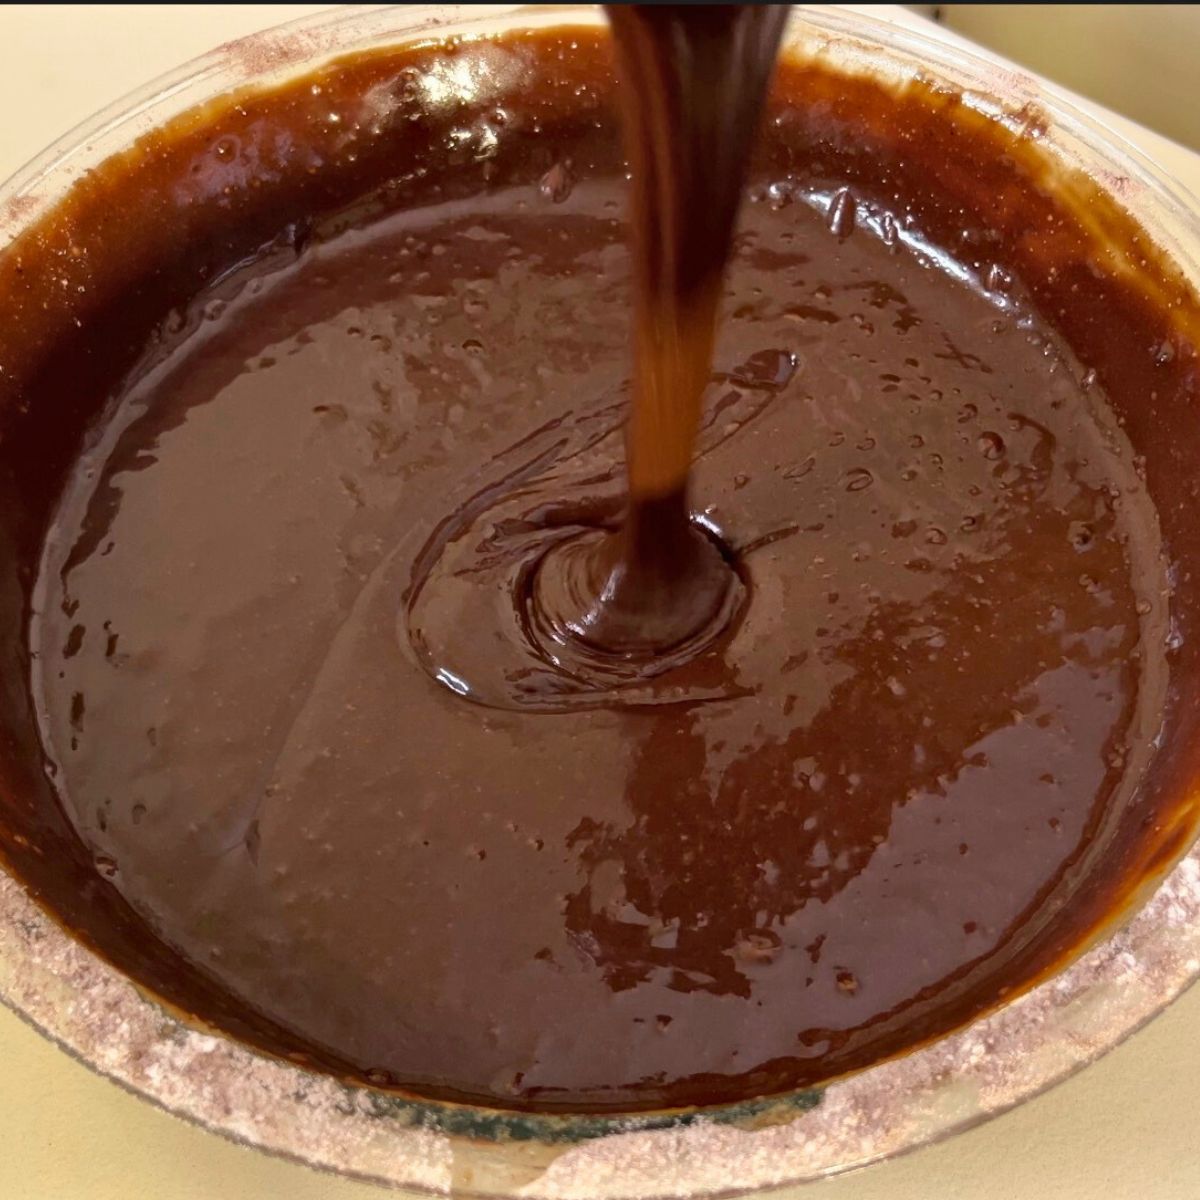
- Slowly add the hot water and whisk until the batter is smooth and slightly thin. This step enhances the chocolate flavor and creates a tender crumb.
- Divide the batter evenly between the prepared pans and bake for 28–32 minutes, or until a toothpick inserted in the center comes out with a few moist crumbs.
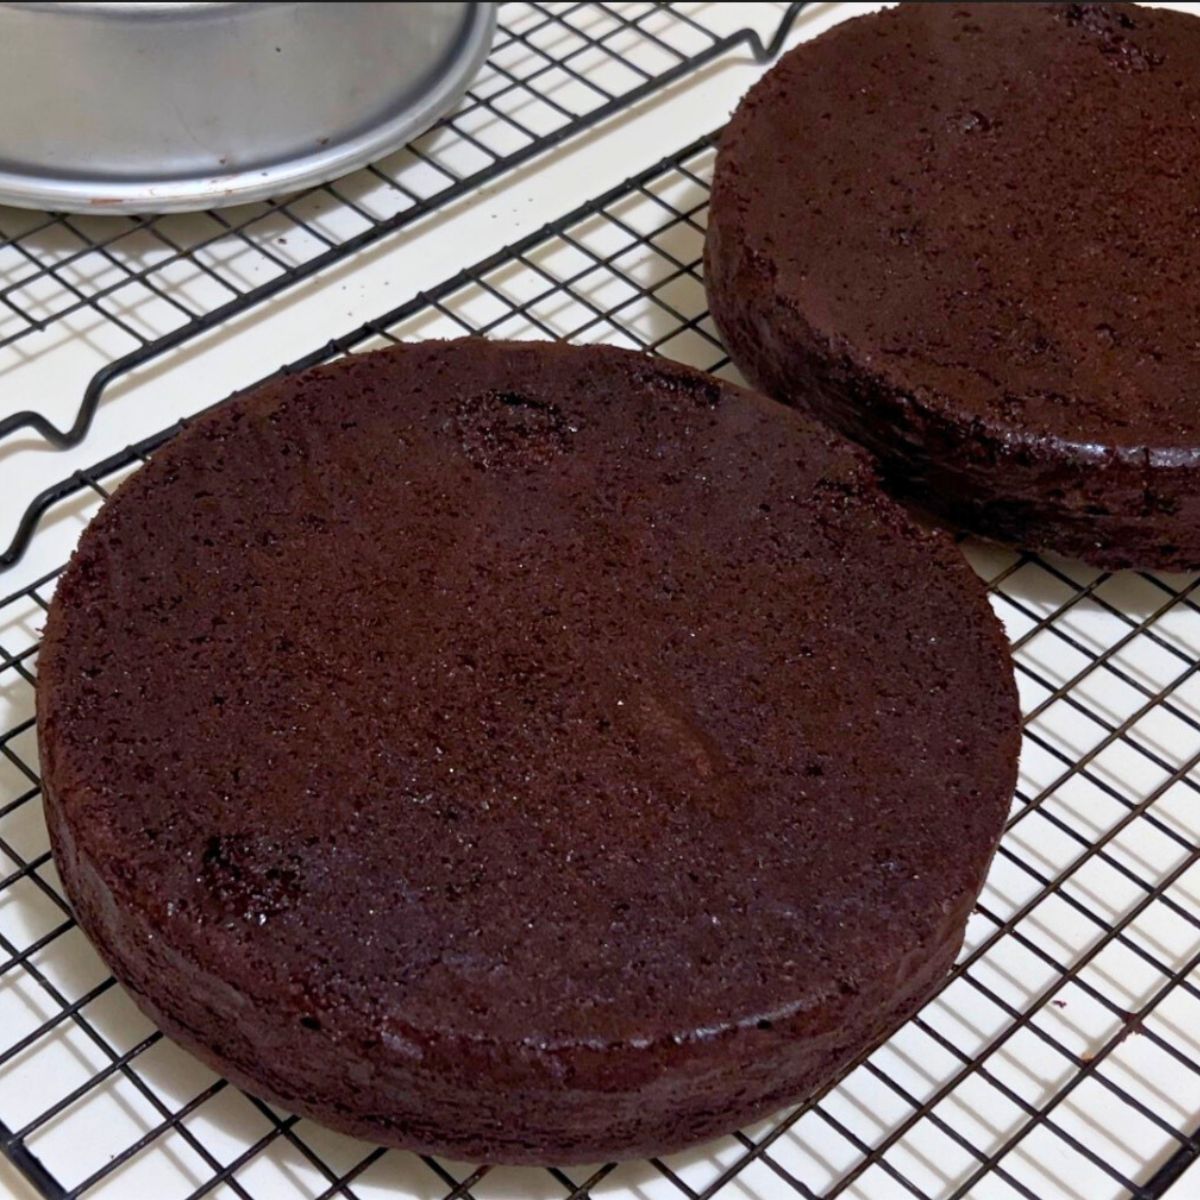
- Cool the cakes in the pans for 10 minutes before transferring them to a wire rack to cool completely before frosting.
Chocolate Swiss meringue buttercream
- See the video – how I make Swiss meringue buttercream.
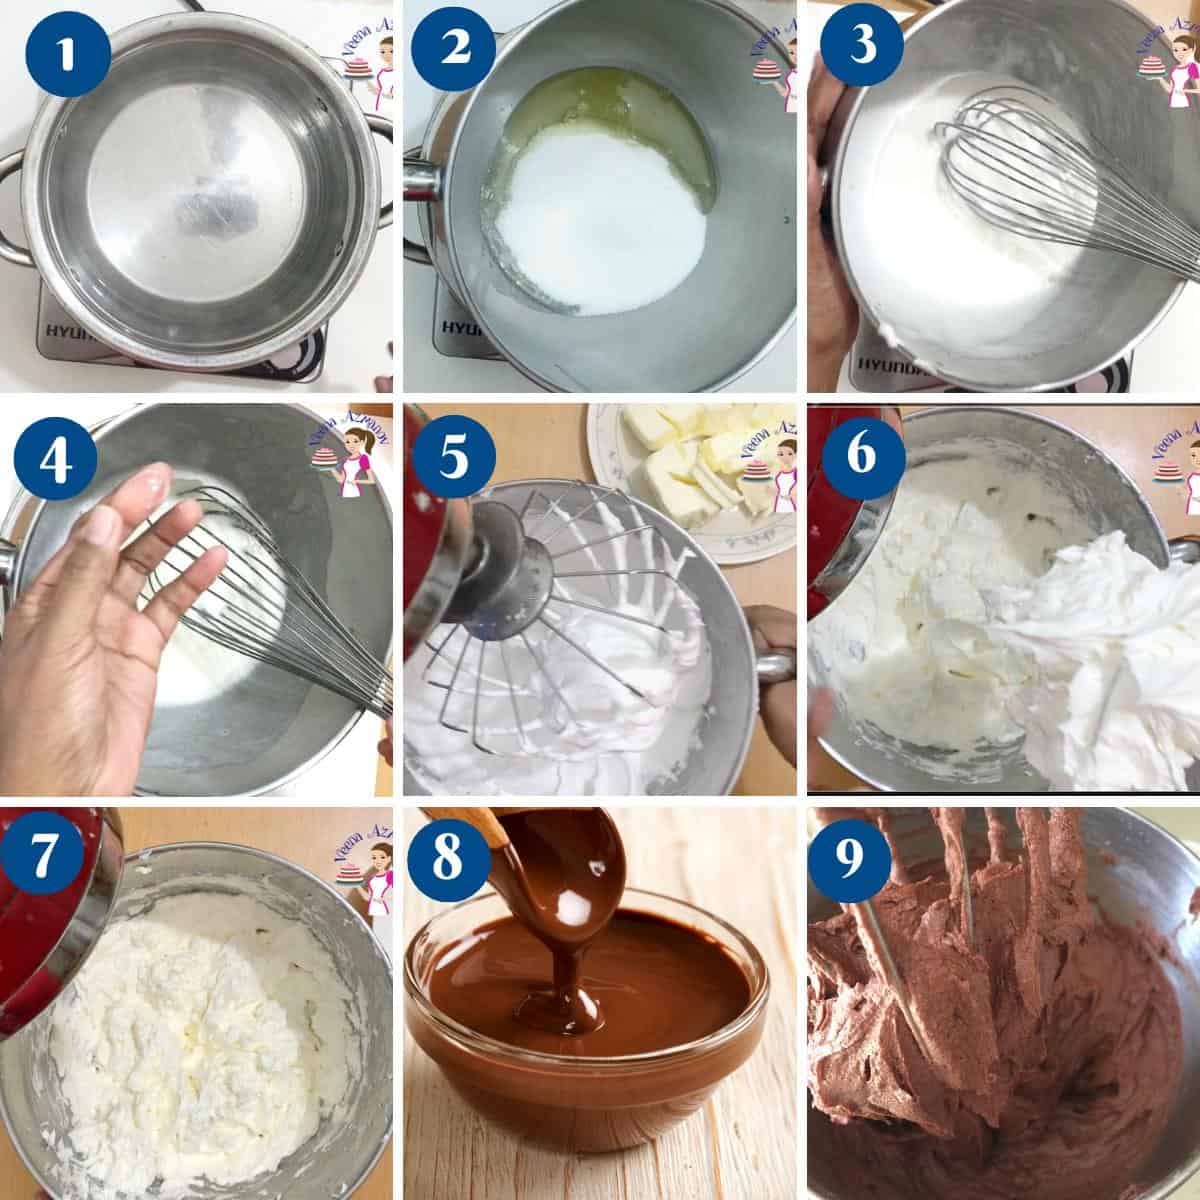
- Chocolate – Melt the chocolate in a microwave-safe bowl or double boiler.
- Temper – In the bowl of a stand mixer, place the egg whites and sugar and place it over a pot of simmering water. Using the whisk whip until all the sugar has dissolved and the egg whites are barely warm (about 160 F)
- Whip – Take the bowl off the heat and place it on the stand mixer. Whip the egg whites until you have a thick meringue with stiff peaks. Let the mixer continue to whip on low until the mixer bowl feels cool to the touch.
- Butter – Gradually add the butter one cube at a time with the mixer on medium speed. Once all the butter has been added turn the mixer up to medium-high and whip for 2 minutes. Add the vanilla extract.
- Chocolate – Fold in the melted cooled chocolate until you have a smooth uniform color.
Assemble (stack the layers)
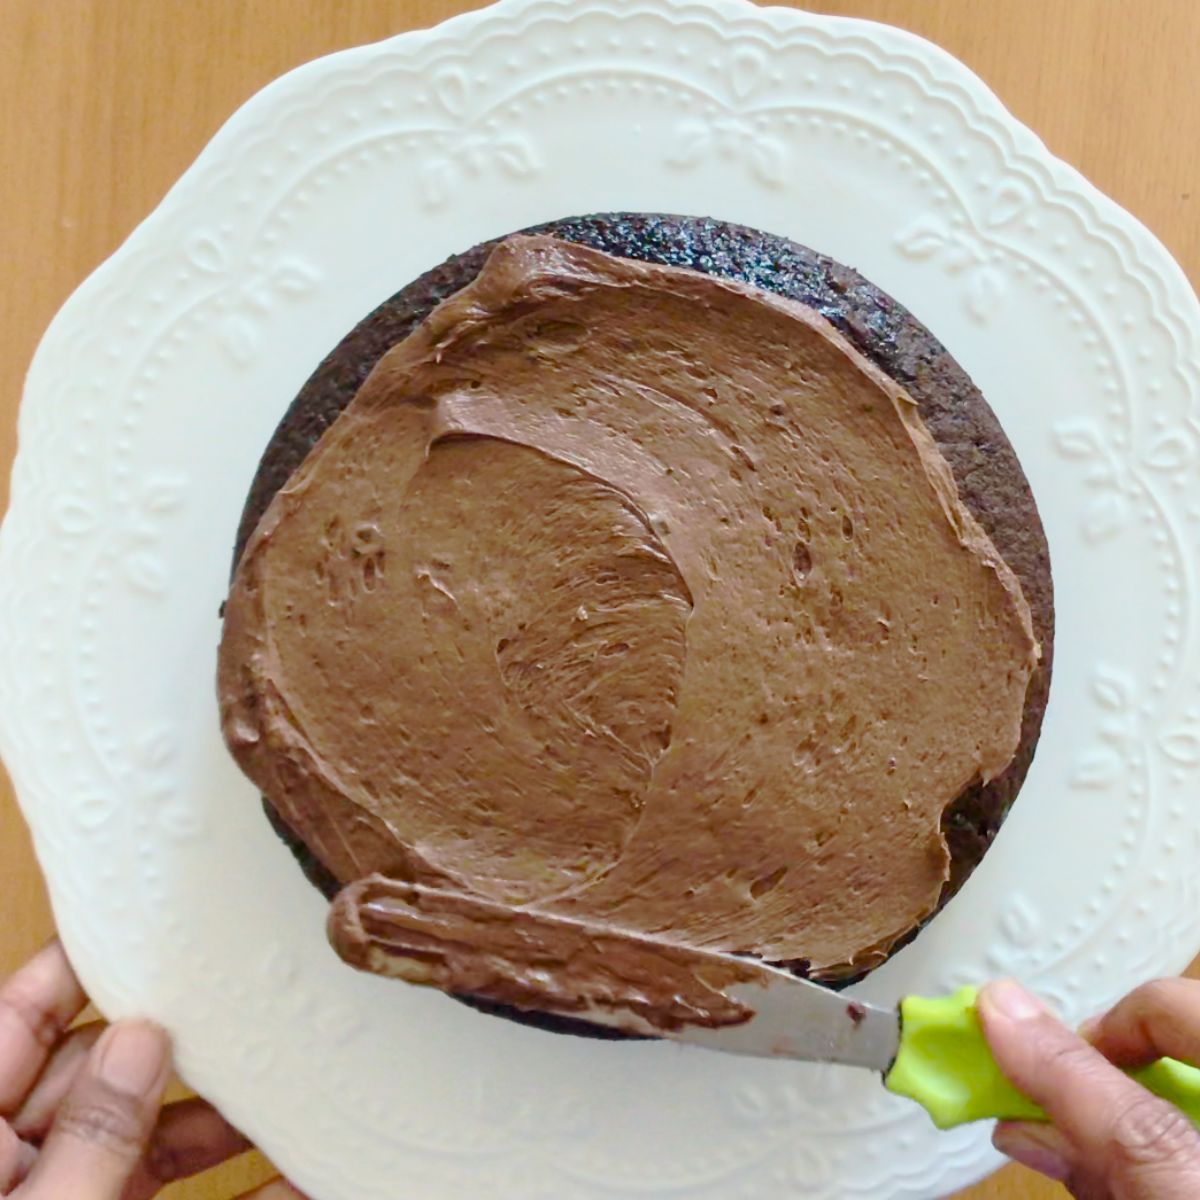
- Level – Using a bread knife or cake leveler cut the domes off the cake layers. Brush each layer with the cooled simple syrup
- Stack – Place a cake layer on the cake board or cake stand. Top with a big dollop of buttercream – spread evenly using a straight-edge spatula. Place the next layer followed by more buttercream, then the final layer. Chill the cake for 15 minutes.
Pro tip – Chilling the cake at this point will ensure the layers don’t move when you frost the outside.
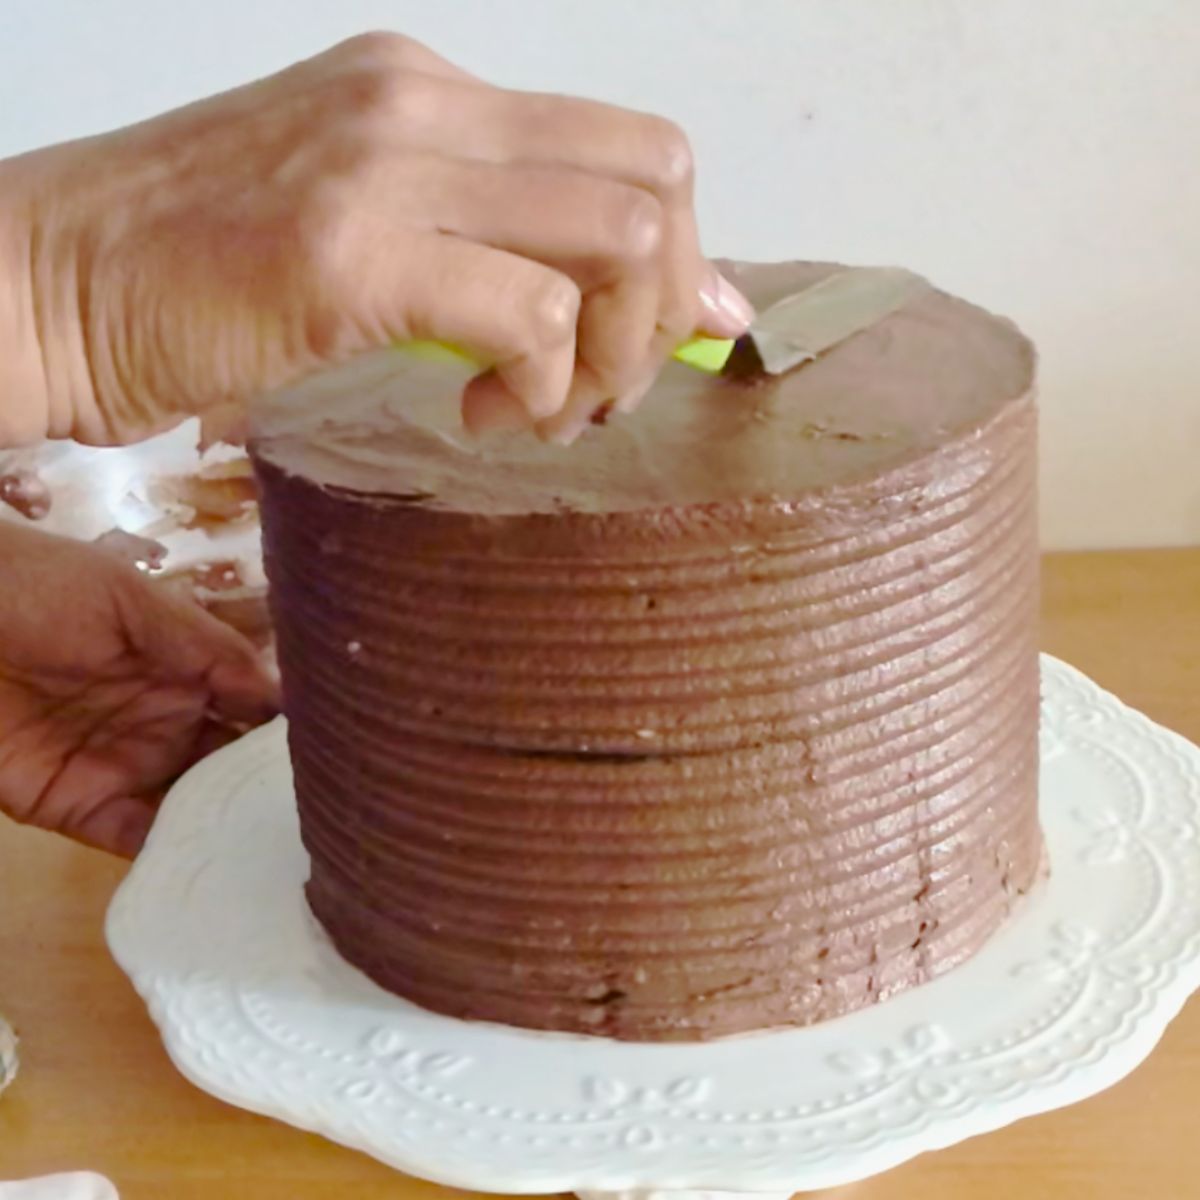
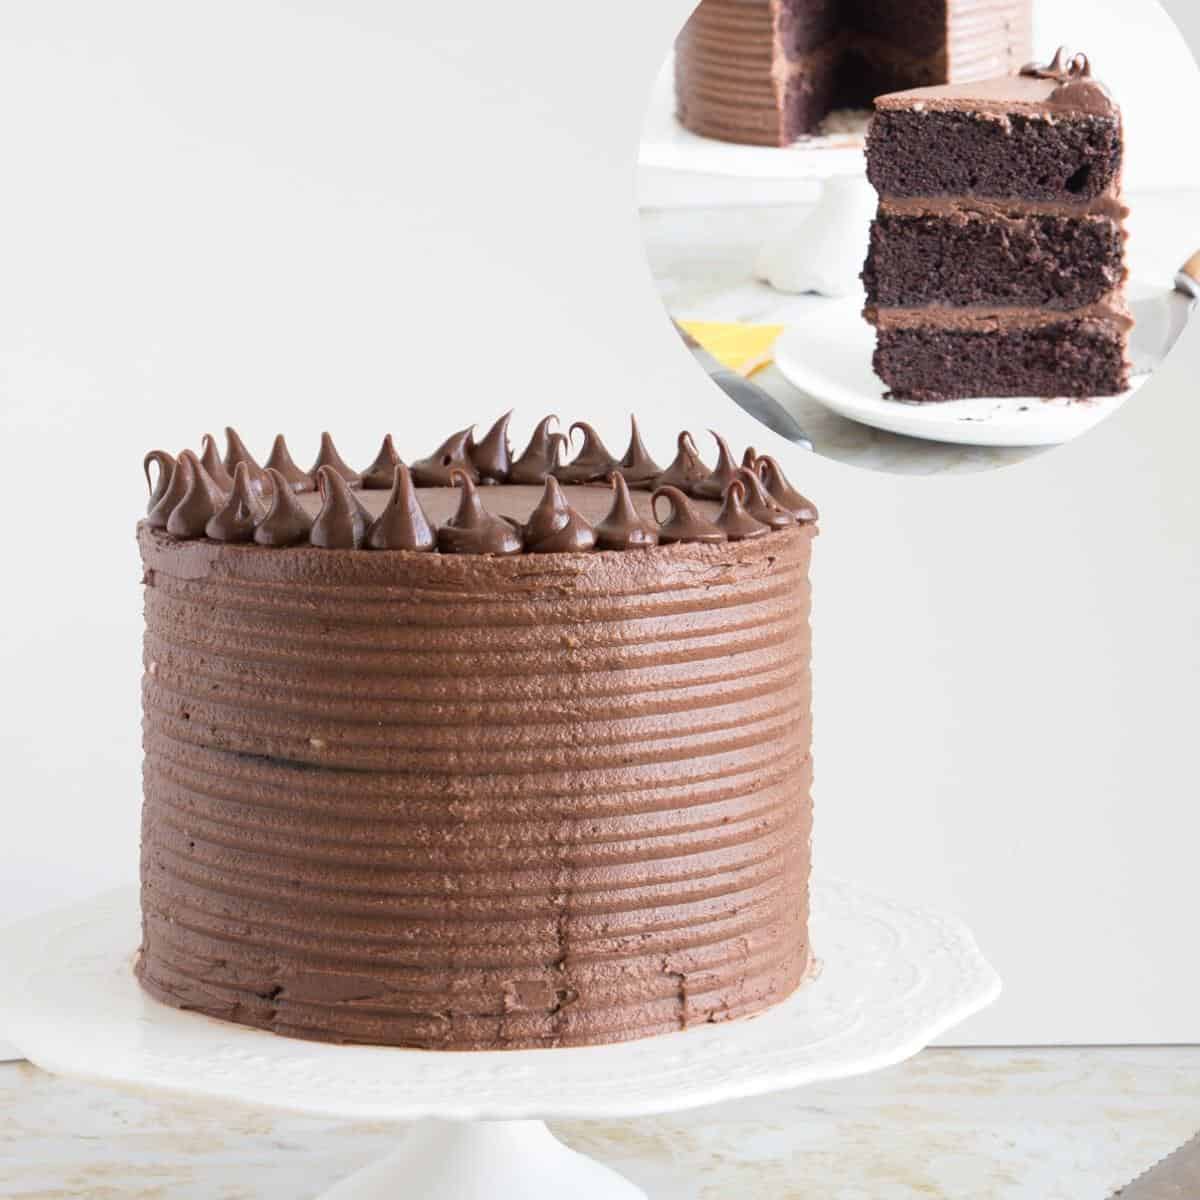
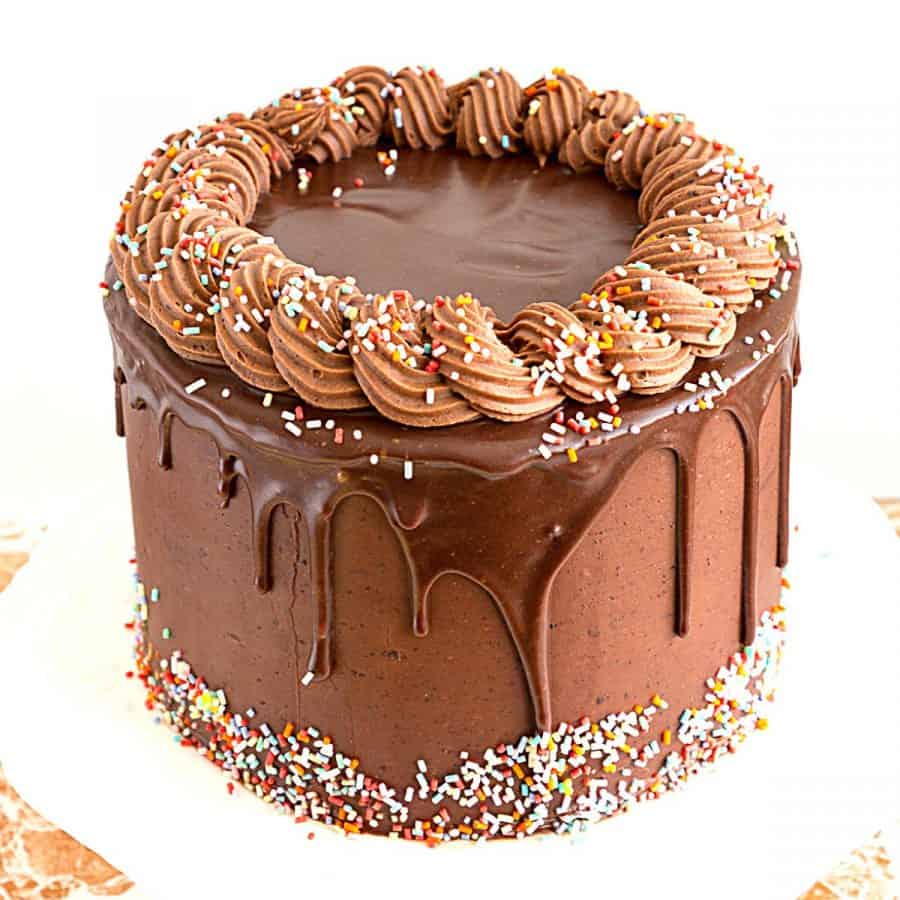
- Frost – Spread the remaining buttercream around and on the top of the cake.
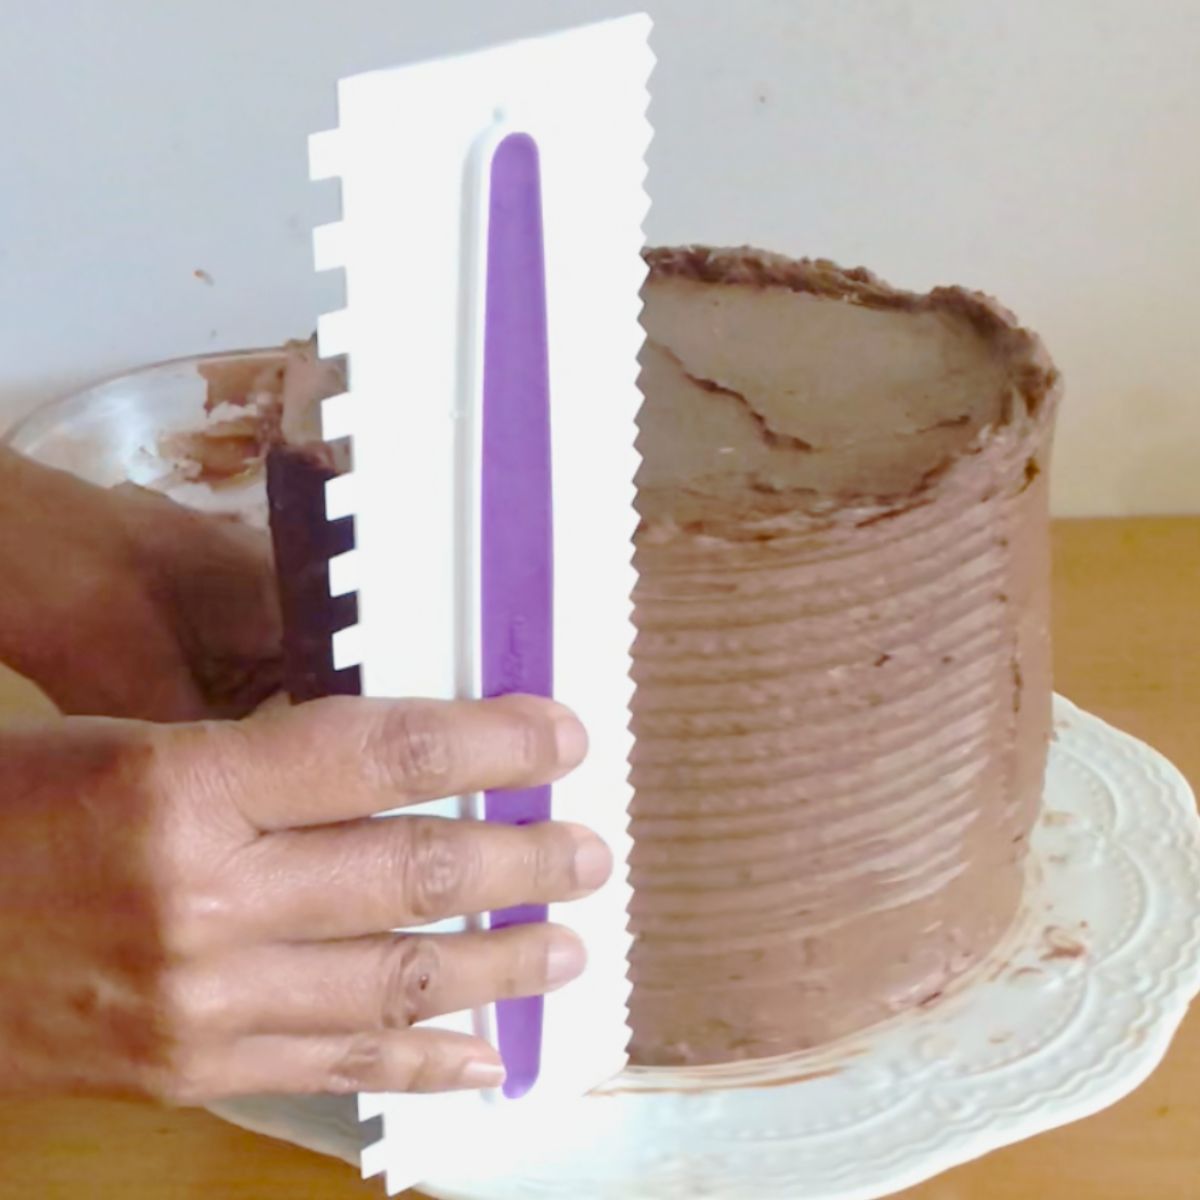
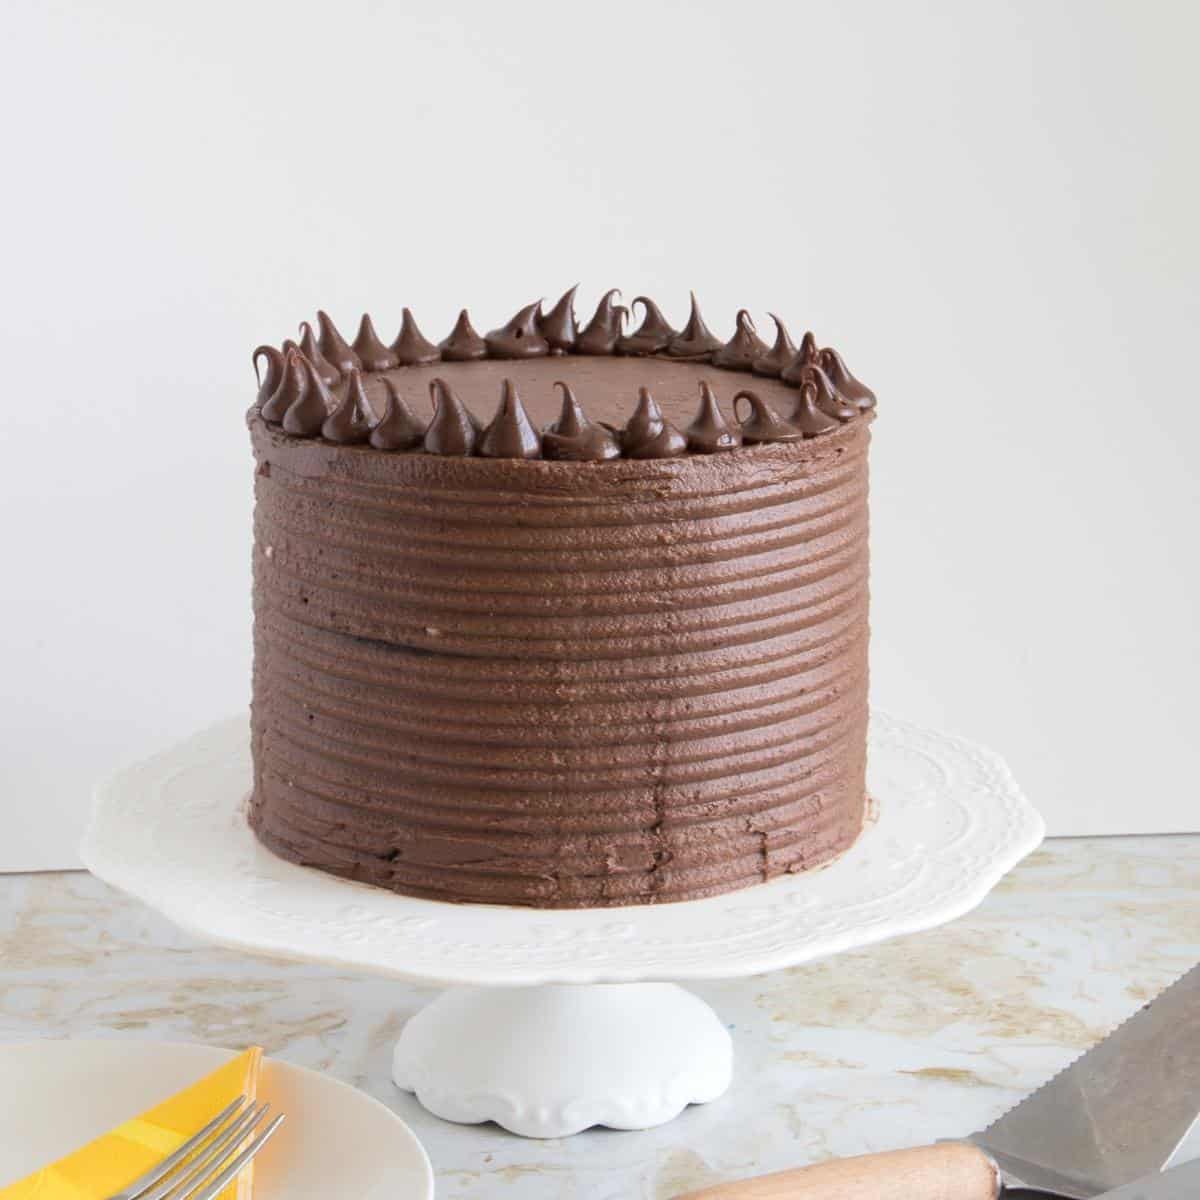
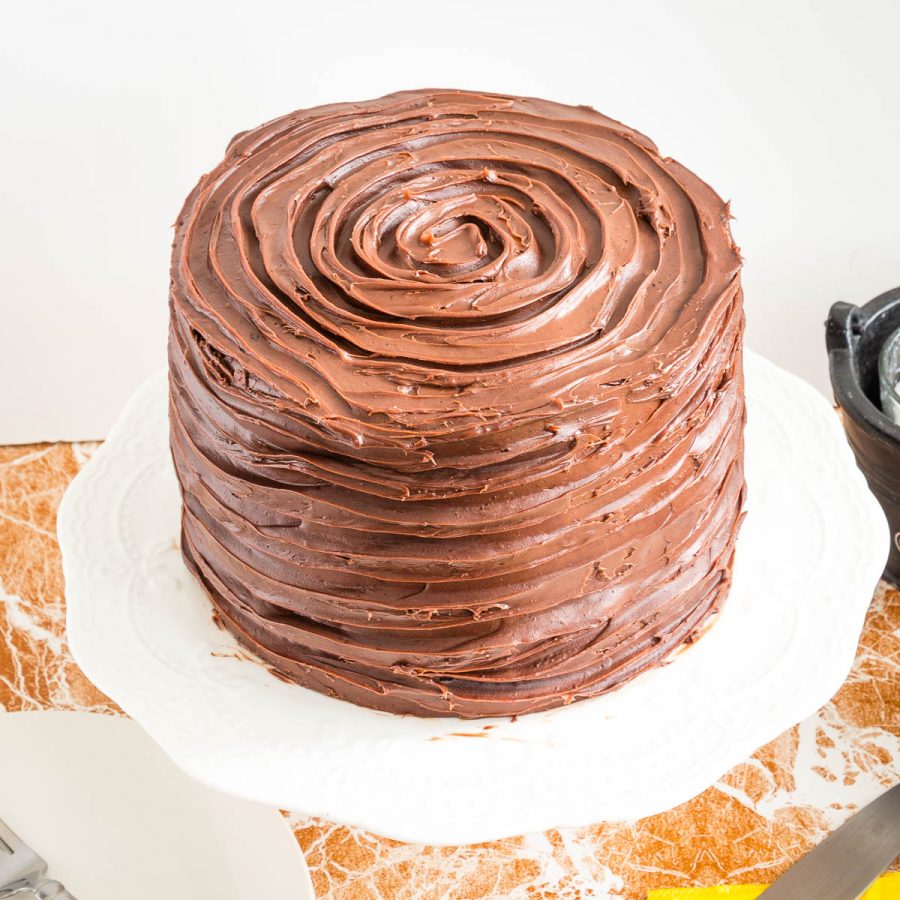
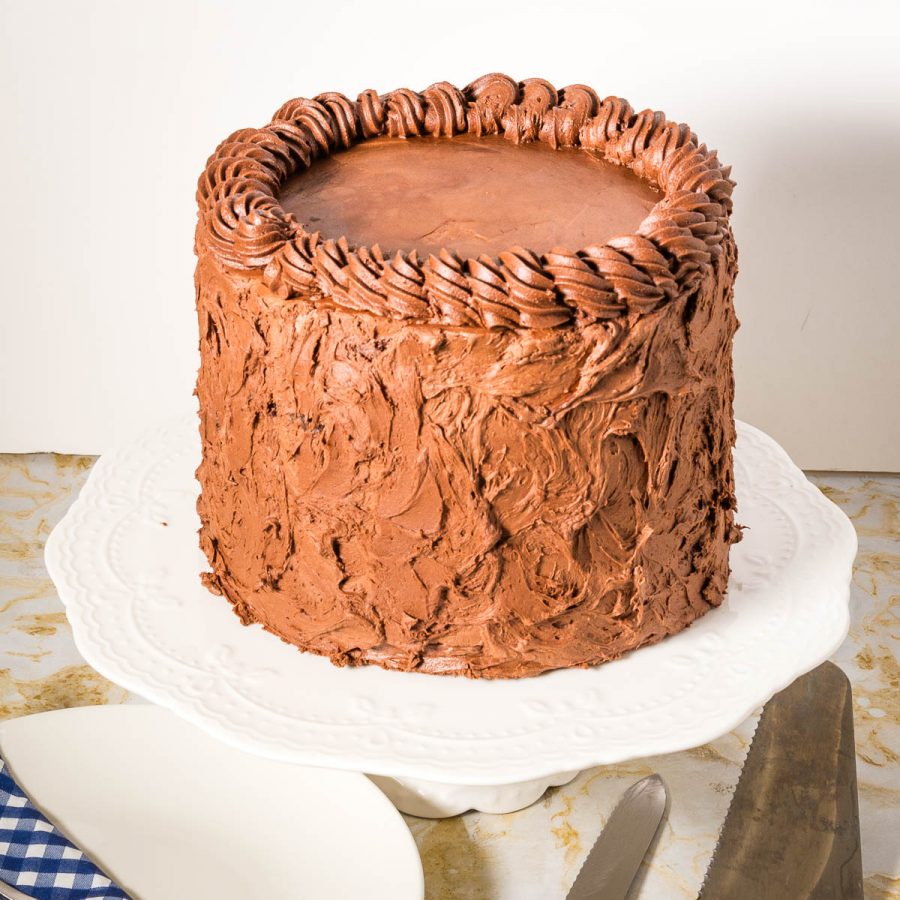
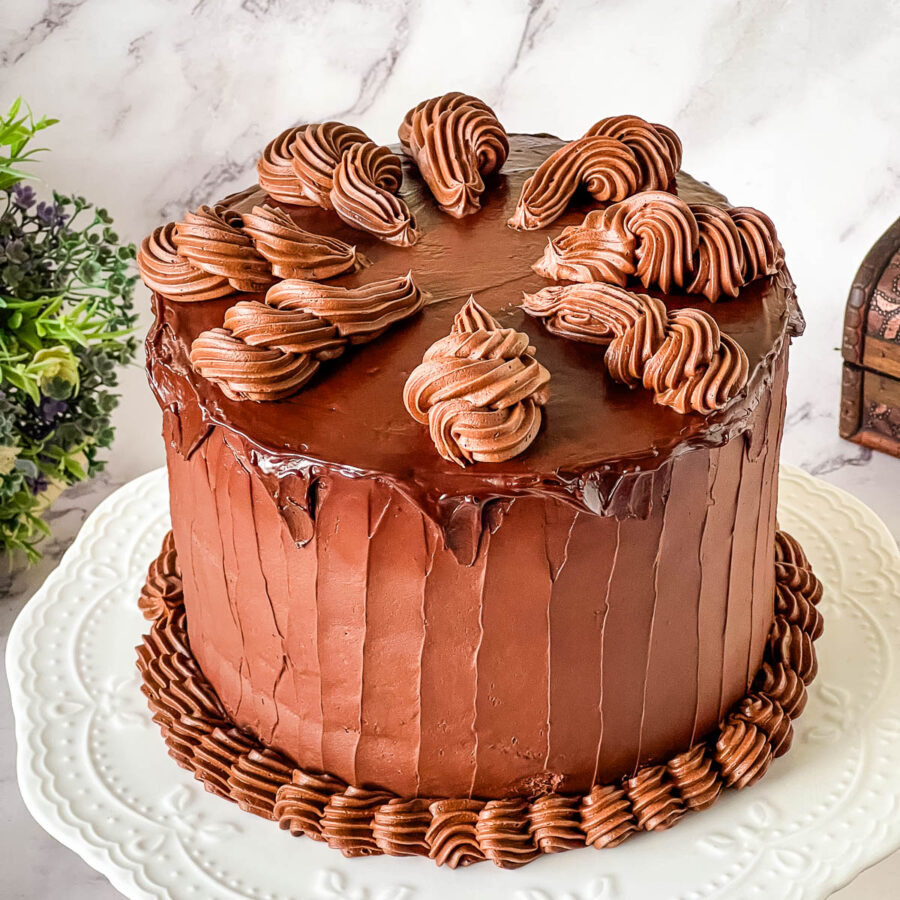
- Texture – I’ve used an icing comb to create a pattern on the outside but you can choose to create a smooth effect with a bench scraper or a rustic finish with a spatula.
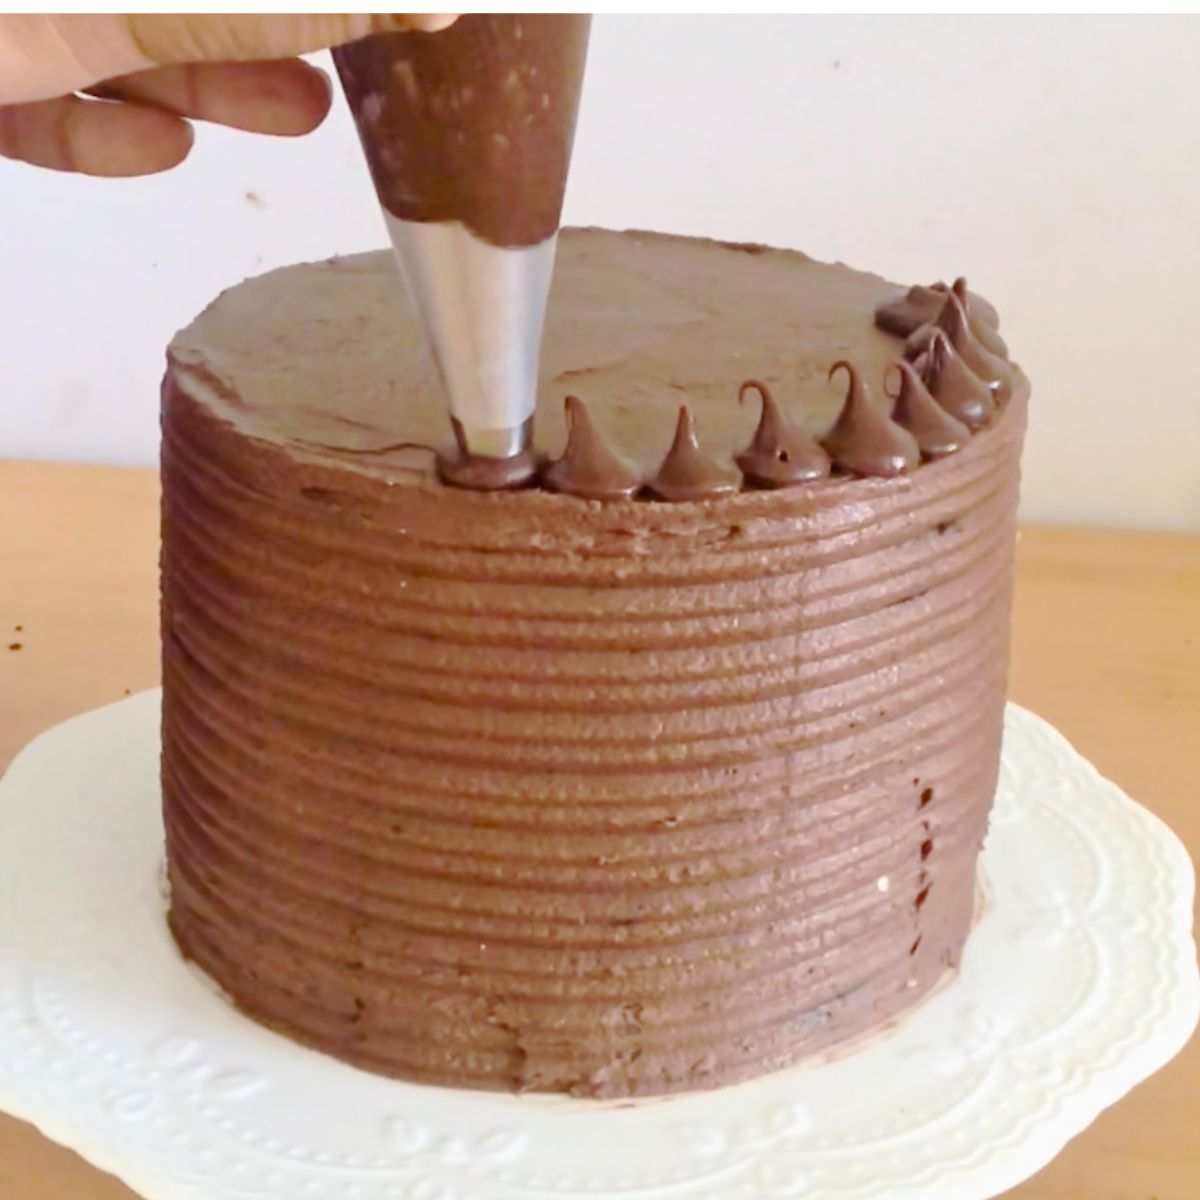
- Pipe – Place any remaining frosting in a piping bag and with a round tip and pipe small kisses as I have done.
Storage
- The baked cake layers will stay fresh for up to two days at cool room temperature, longer if kept in the fridge. It can be frozen for a month or more.
- Once frosted the cake needs to be kept in the fridge because Swiss meringue contains egg whites which is a perishable ingredient.
How is This Cake Different from My Other Chocolate Cakes
This classic chocolate cake is lighter than my chocolate mud cake and simpler than my Death by Chocolate cake. It uses cocoa powder instead of melted chocolate and Greek yogurt instead of buttermilk, making it perfect for everyday baking while still delivering rich chocolate flavor.
What is the best frosting for this cake?
I frosted it with chocolate buttercream, but try vanilla, mocha, or ganache. There are so many other frosting options. Such as:
Swiss or Italian Meringue Buttercream, French or German Buttercream Frosting, Chocolate Buttercream Frosting.
See all 30 plus frosting recipes here on the blog.
Tips for the Best Chocolate Cake
- Use full-fat Greek yogurt for the best texture. Low-fat versions can make the cake slightly drier.
- The batter will be thinner after adding hot water — this is normal and gives the cake a soft crumb.
- Do not overmix once the flour is added. Mix just until smooth to keep the cake light.
- Weigh your cake pans if possible so all three 8-inch layers bake evenly.
- Let the layers cool completely before frosting with Swiss meringue buttercream.
Troubleshooting
| Problem | Possible Cause | Solution |
|---|---|---|
| Cake is dense | Overmixed after adding flour | Mix just until combined |
| Cake sinks in the center | Oven opened too early or underbaked | Bake fully and avoid opening oven first 20 minutes |
| Cake is dry | Overbaked or used low-fat yogurt | Use full-fat yogurt and check at minimum bake time |
| Layers are sticky on top | Very moist crumb from yogurt | Chill layers before frosting |
| Cake domed too much | Oven too hot | Use oven thermometer and bake at correct temperature |
| Frosting sliding | Cake not fully cooled | Chill layers before applying buttercream |
- 8 inch chocolate fudge cake, Simple Moist Chocolate Cake
- Devil’s Food Chocolate Cake with Chocolate Ganache
- Death By Chocolate Cake,
- Moist Chocolate Pound Cake
- Coffee Chocolate Cake, Espresso Cake with Espresso Ganache
Frequently asked questions
The baked cake layers will stay fresh for up to two days at cool room temperature, longer if kept in the fridge. It can be frozen for a month or more. Once frosted, the cake must be kept in the fridge because Swiss meringue contains egg whites, a perishable ingredient.
If you don’t want to make a layer cake like this,
You can pour this batter into a 9 x 13 pan to make a classic chocolate sheet cake.
Pour the batter into a well-greased and dusted 12 cup bundt pan for a classic chocolate bundt cake’.
This recipe can also be baked into 36 beautiful chocolate cupcakes
Yes, you can make the chocolate cake ahead of time and freeze it for later use. It’s best to wrap the completely cooled cake layers tightly in plastic wrap and then place them in an airtight container or freezer bag. Properly stored, the cake can be frozen for up to 2 to 3 months. When you’re ready to use the cake, thaw it in the refrigerator overnight and bring it to room temperature before frosting or serving.
Absolutely! While chocolate cake is often paired with chocolate frosting, you can certainly use different types of frosting based on your preference. Popular alternatives include cream cheese frosting, vanilla buttercream, or even a fruit-based frosting like raspberry or strawberry. Consider the flavor combinations and textures that you enjoy, and choose a frosting that complements the chocolate cake well.
8-inch Best Chocolate Cake (with Greek yogurt)
This is my best chocolate cake ever! it is an oil-based cake made with cocoa powder and whipped eggs for that light and airy texture. Frosted with a smooth, velvety, and rich chocolate Swiss meringue buttercream this is a surprisingly simple and easy layer cake to make.
Video
Ingredients
- 3 large Eggs
- 180 ml (¾ cup) Cooking oil
- 2 tsp Vanilla extract
- 60 ml (¼ cup) Whole milk
- 240 ml (1 cup) Greek yogurt
- 345 g (2¾ cups) All-purpose flour
- 400 g (2 cups) White sugar
- 100 g (1¼ cups) Cocoa powder
- 2½ tsp Baking Powder
- 1½ tsp Baking Soda
- ½ tsp Kosher salt
- 240 ml (1 cup) Hot water or Coffee
- 4 large Egg whites
- 200 g (1 cup) White sugar
- ¼ tsp Cream of tartar optional
- 340 g (1½ cups) Unsalted butter
- 2 tsp Vanilla Extract
- ½ tsp Kosher salt
- 200 g (7 oz) Chocolate melted and cooled
- ¼ cup Simple syrup
Method
- Oven – Preheat the oven to 325°F/ 165°C/ Gas Mark 3. Pan – Grease and line (2 or)3 x 8-inch round cake pans or 2 x 9-inch round baking pans
- Dry ingredients – In a mixing bowl, combine flour, baking powder, baking soda, sugar, cocoa powder, and salt. Set aside345 g All-purpose flour, 100 g Cocoa powder, 400 g White sugar, 2½ tsp Baking Powder, 1½ tsp Baking Soda, ½ tsp Kosher salt
- Wet ingredients – In another mixing bowl, combine the eggs, oil, Greek yogurt, milk, and vanilla extract.3 large Eggs, 180 ml Cooking oil, 2 tsp Vanilla extract, 240 ml Greek yogurt , 60 ml Whole milk
- Wet to dry – Add the wet ingredients to the dry ingredients and combine well. Then add the hot water or coffee and combine well.240 ml Hot water or Coffee
- Bake – Divide the batter equally between the prepared baking pans. Bake for 30 to 35 minutes or until a toothpick inserted in the center comes clean.
- Cool – When baked, cool in the baking pan for 5 minutes. Then, invert onto a wire rack and cool completely before frosting.
- Chocolate – Melt the chocolate in a microwave-safe bowl or double boiler. Set aside to cool.
- Temper – In the bowl of a stand mixer, place the egg whites and sugar and place it over a pot of simmering water. Using the whisk whip until all the sugar has dissolved and the egg whites are barely warm (about 160 F)4 large Egg whites, 200 g White sugar, ½ tsp Kosher salt
- Whip – Take the bowl off the heat and place it on the stand mixer. Whip the egg whites with Cream of tartar until you have a thick meringue with stiff peaks. Let the mixer continue to whip on low until the mixer bowl feels cool to the touch.¼ tsp Cream of tartar
- Butter – Gradually add the butter one cube at a time with the mixer on medium speed. Once all the butter has been added turn the mixer up to medium-high and whip for 2 minutes. Add the vanilla extract.340 g Unsalted butter, 2 tsp Vanilla Extract
- Chocolate – Fold in the melted cooled chocolate until you have a smooth uniform color.200 g Chocolate
- Level – Using a bread knife or cake leveler, cut the domes off the cake layers. Brush each layer with the cooled simple syrup. Note – Simple syrup is just sugar water that has been boiled and cooled. Used to keep cake layers moist.¼ cup Simple syrup
- Stack – Place a cake layer on the cake board or cake stand. Top with a big dollop of buttercream – spread evenly using a straight-edge spatula. Place the next layer followed by more buttercream, then the final layer. Chill the cake for 15 minutes.
- Frost – Spread the remaining buttercream around and on the top of the cake. A straight-edge spatula for the top, an offset spatula, and a bench scraper for the sides work better.
- Texture – I’ve used an icing comb to create a pattern on the outside but you can choose to create a smooth effect with a bench scraper or a rustic finish with a spatula.
- Pipe – Place any remaining frosting in a piping bag and with a round tip and pipe small kisses as I have done.
Notes
- This recipe is written specifically for three 8-inch round cake pans. No scaling is required.
- Use full-fat Greek yogurt for the best texture and moisture.
- The batter will be thin after adding the hot water. This is normal and helps create a soft, tender crumb.
- Do not overmix once the flour is added. Mix just until smooth to avoid a dense cake.
- Check for doneness at the minimum baking time. The cake is ready when a toothpick comes out with a few moist crumbs.
- Let the cake layers cool completely before frosting with Swiss meringue buttercream.
- Cake layers can be baked a day ahead and stored tightly wrapped at room temperature.
- Unfrosted layers freeze well for up to 1 month. Thaw overnight in the refrigerator before decorating.
Equipment you will need


Nutrition
Tried this recipe?
Mention @veenaazmanov_kitchen or tag #veenaazmanovkitchen!- Eggless Chocolate Cake,
- Moist chocolate sheet cake
- 8 inch Chocolate Pecan cake
- See all chocolate cake recipes here


Don’t lose this recipe! Save it for Later!
📌 Save this Recipe for later on Pinterest so you can easily find it again.
⭐ Add Veena Azmanov Kitchen to your Google Preferred Sources.
It helps Google show you more of our recipes.
📧 Subscribe for new recipes delivered to your inbox.
🎥 Follow us for more recipes

Hello, may I ask if this recipe was updated?
I’ve made this particular cake several times and I feel I remember a portion where you go fairly in-depth into how to whip the eggs until they create ribbon like strips when you let it drip from the mixer attachment. now it’s simply combine all ingredients and the explanation of that process is gone as well as the pictures. You have the statement “whipped eggs to create a light and airy texture” still in the description of the recipe but that is not reflected in the process at all now. I am unsure if the texture will change without the whipping process, but I’ve been very happy with the cake as it was in the past. And I simply don’t remember brown sugar being part of the recipe either.
Anyways, please note any updates to the recipe if that is indeed the case. The last update is noted for 2021 and I’ve made this cake for birthdays in 2022 and 2023 with what I feel is a different process to what is listed now.
Thank you.
Hey TF, this cake has not been changed. I updated the post, but the recipe, video, and images are the same. Are you sure this cake recipe is the one you remember?
I do have two other cakes that have whipped egg whites – the Black forest cake and the Chocolate Chiffon cake.
I do have the chocolate chiffon cake with chocolate frosting there too.
Just made this cake for my daugters birthday – it got rave reviews and was so easy to make. I gave your blog link to all my friends too.
Aww thank you so much Eileen. Happy Birthday to your daughter.
Hi! Making your chocolate cake right now! So excited!!
Hey Megan. Let me know how it was.
Can you double this recipe and mix in a standard Kitchenaid mixer bowl and have enough room in the bowl?
Yes, you can double the recipe, Tiffany. I think there should be no issue with space in the bowl as long as you have a large mixer. My 5 qt had no problem.
Hi Veena,
I will need to make double the amount so 24 yields. I have 2 8inch tin cakes. Will it work?
Would you advise to purchase another tin cake?
Any advice would be very much appreciated.
Saya, A standard 8-inch cake gives 8 to 10 party servings. But, in our home, an 8-inch cake will serve 14 people because we do not eat large pieces of cake.
So really it depends on how much cake you serve and also if you are serving more than one dessert.
Hi Veena, which cake recipe of chocolate & vanilla cake will be good for under fondant ?
This cake can be used for fondant too.
Hi, I’m not a baker but would like to try and make this for my wife and daughter, however I can not find all purpose flour in the supermarkets. Do I use Plain flour ?
Yes, Alan you can use plain flour. Thanks
Is there any difference between the step-by-step in the article and then again in the recipe card?
No, Alan! The recipe is the same, but the article has step-by-step with progress pictures and pro tips which are not included in the recipe card below. This helps many bakers especially novices when they see the detailed step by step.
But when you print the recipe card, it’s a one-page recipe, not a long article with images.