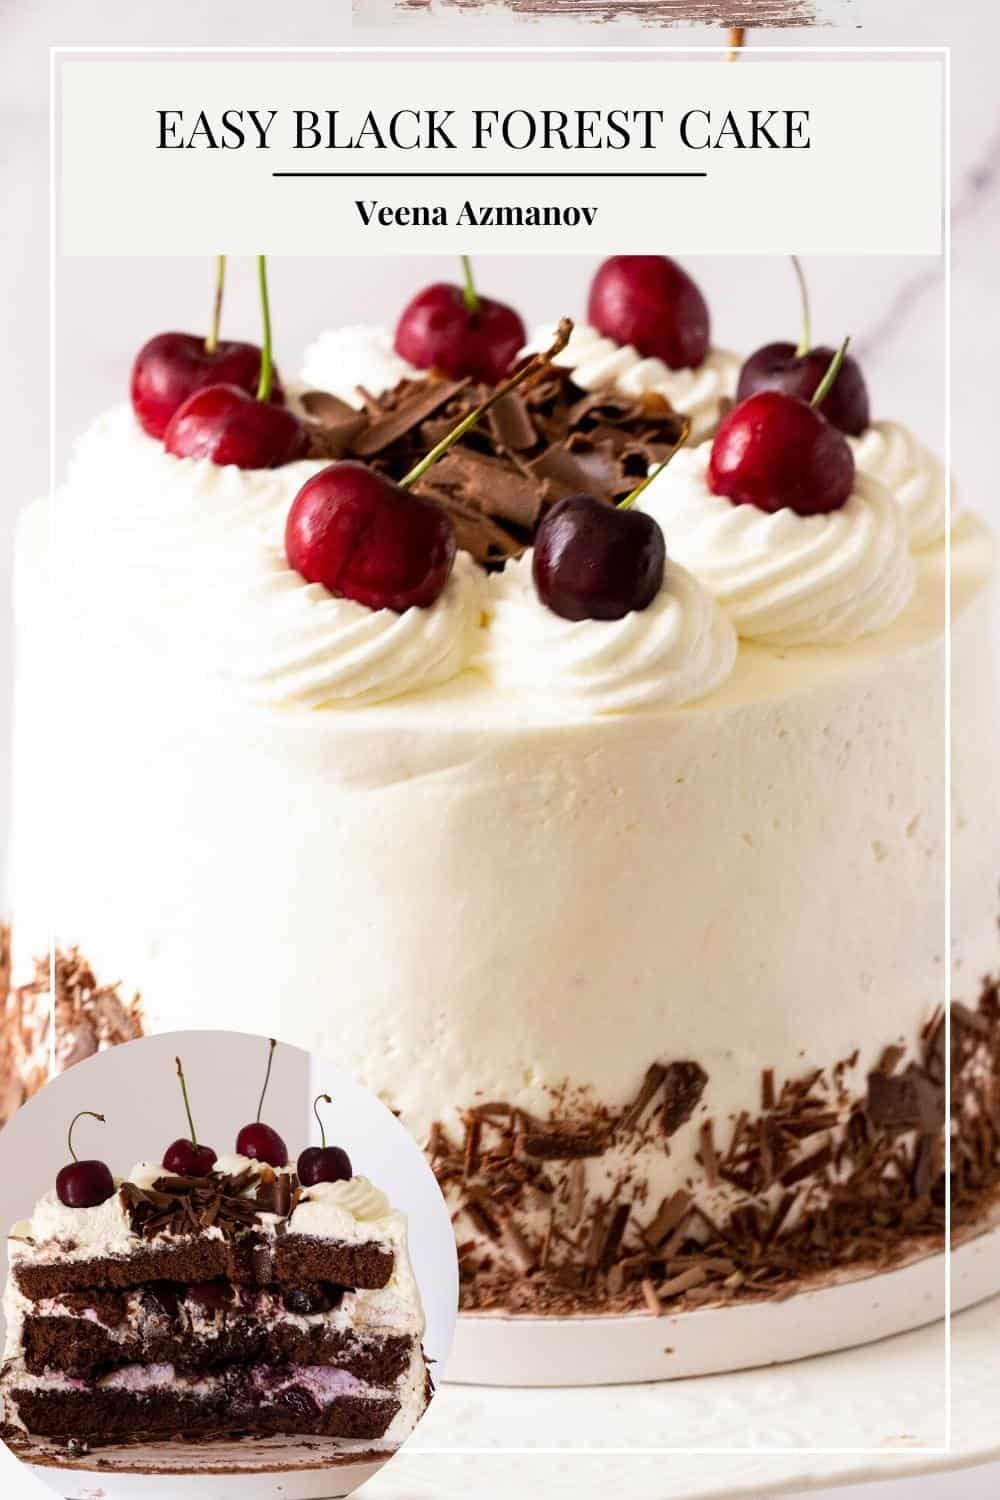
Black Forest Cake
 Prep Time 1 hour 30 minutes Cook Time 45 minutes Total Time 6 hours 15 minutes
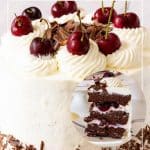
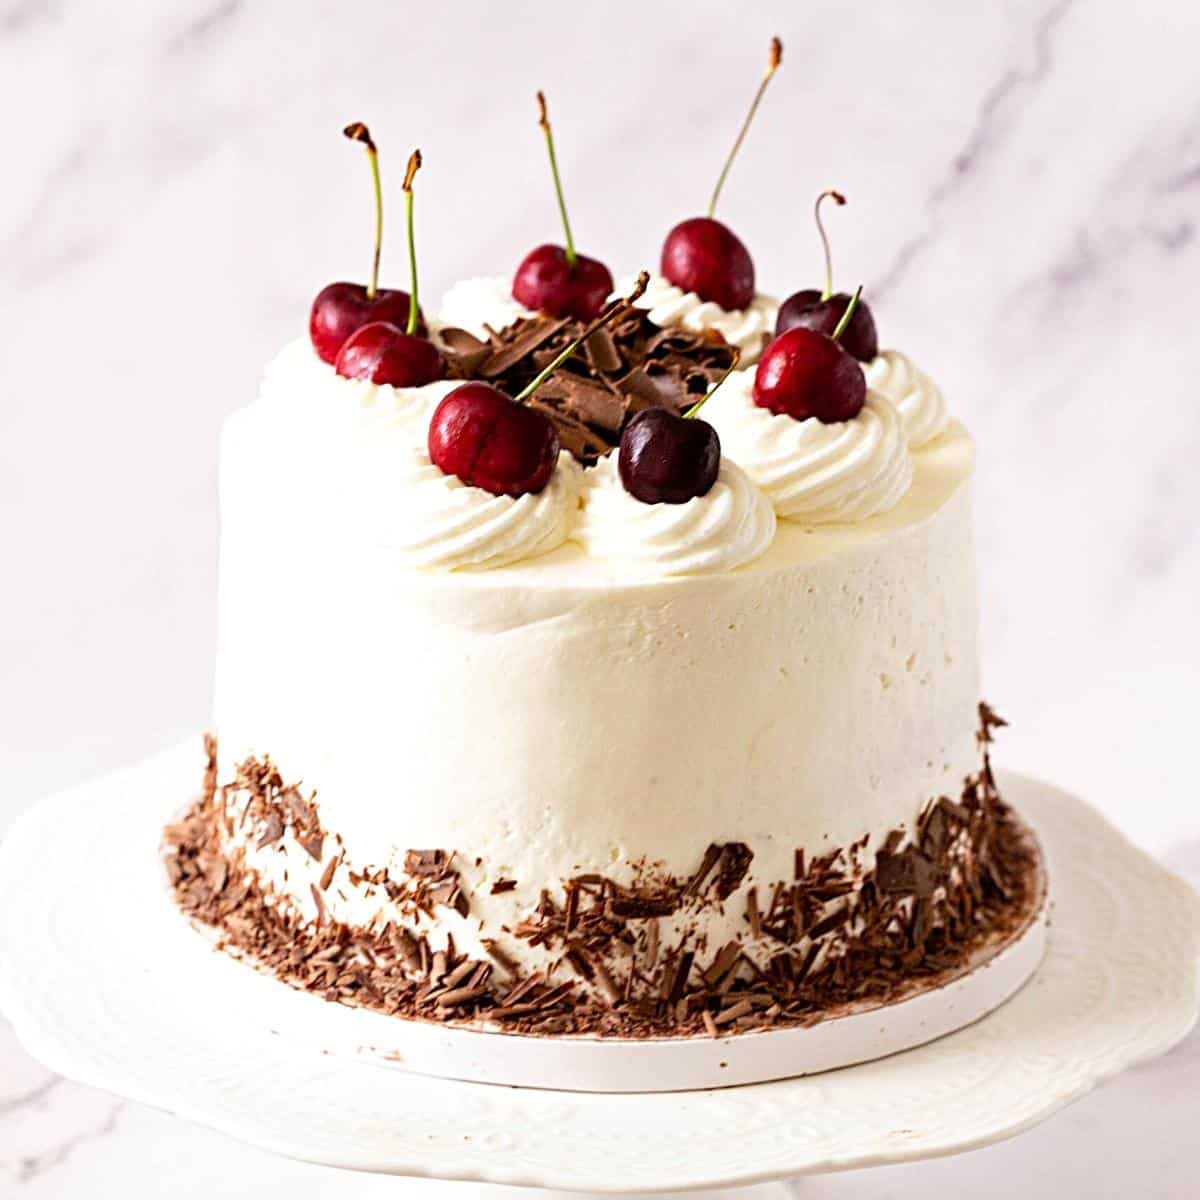
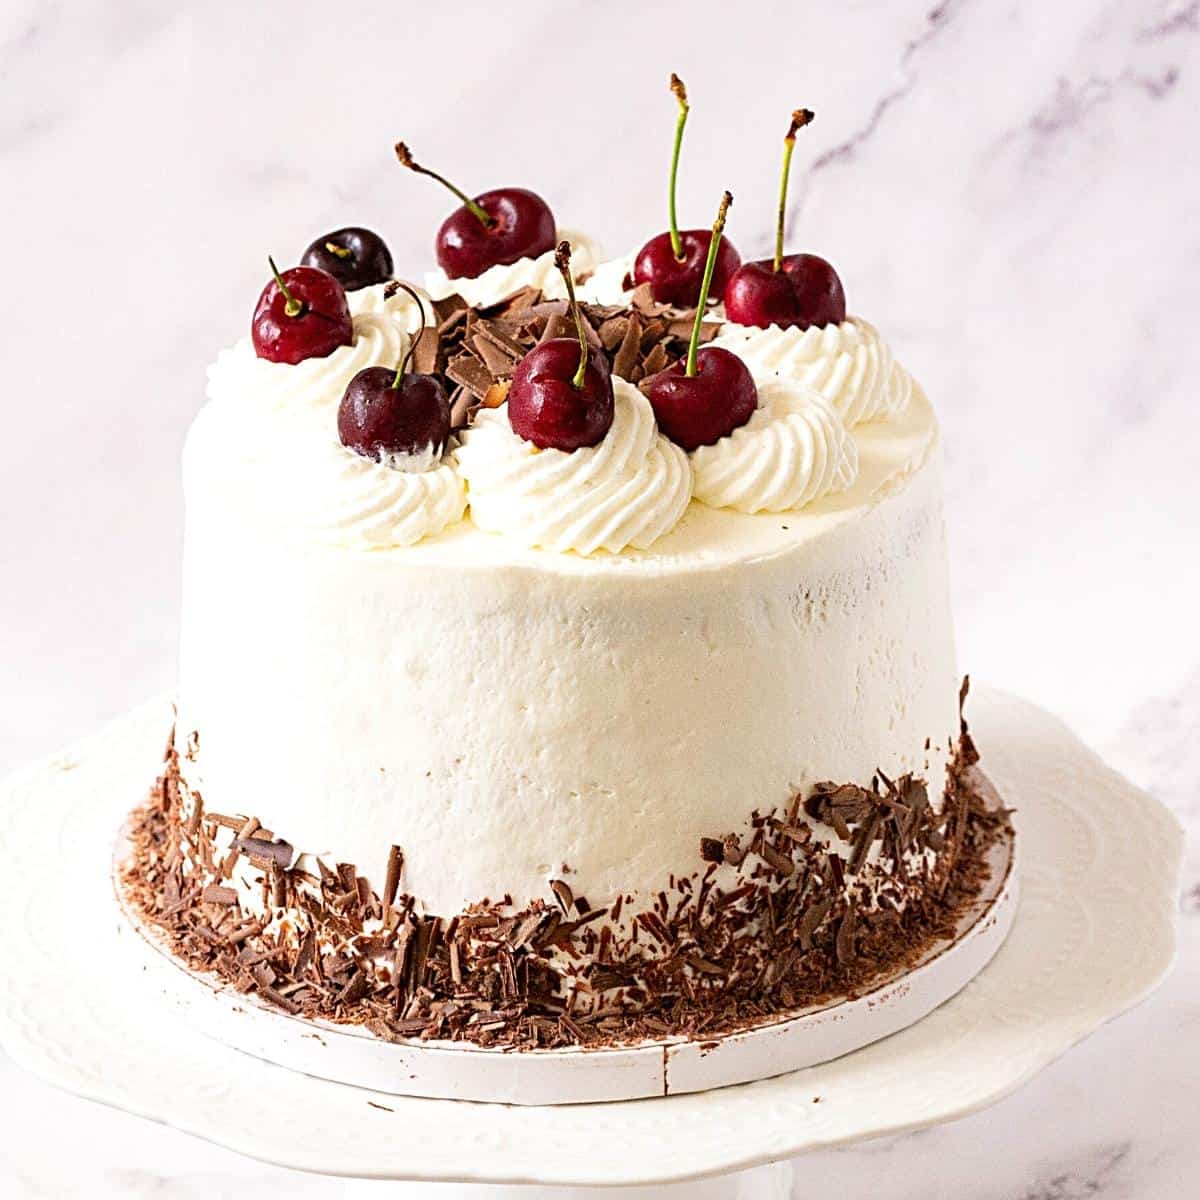
Black Forest cake (Schwarzwälder Kirschtorte) is a very popular German dessert. It is a sweet chocolate cake soaked in cherry liqueur, layered with a cherry filling and whipped cream frosting. This recipe is so easy to make that you can whip up this cake on any given weekend with just a couple of simple ingredients.
Black Forest Cake has always been my absolute favorite dessert. Growing up, it was a tradition—every time we went out for dinner, everyone knew Veena’s dessert would be a slice of Black Forest Cake.
Over the years, I’ve tried countless recipes, and let me tell you, not all of them were successful! I’ve had my fair share of failed attempts, but this one? It’s the ultimate recipe that finally checks all the boxes. When I made it, it was an instant hit, so much so that everyone begged me for the recipe. And now, I’m thrilled to share it with you… My all-time favorite Black Forest Cake!
Why make this cake recipe?
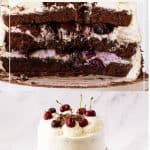
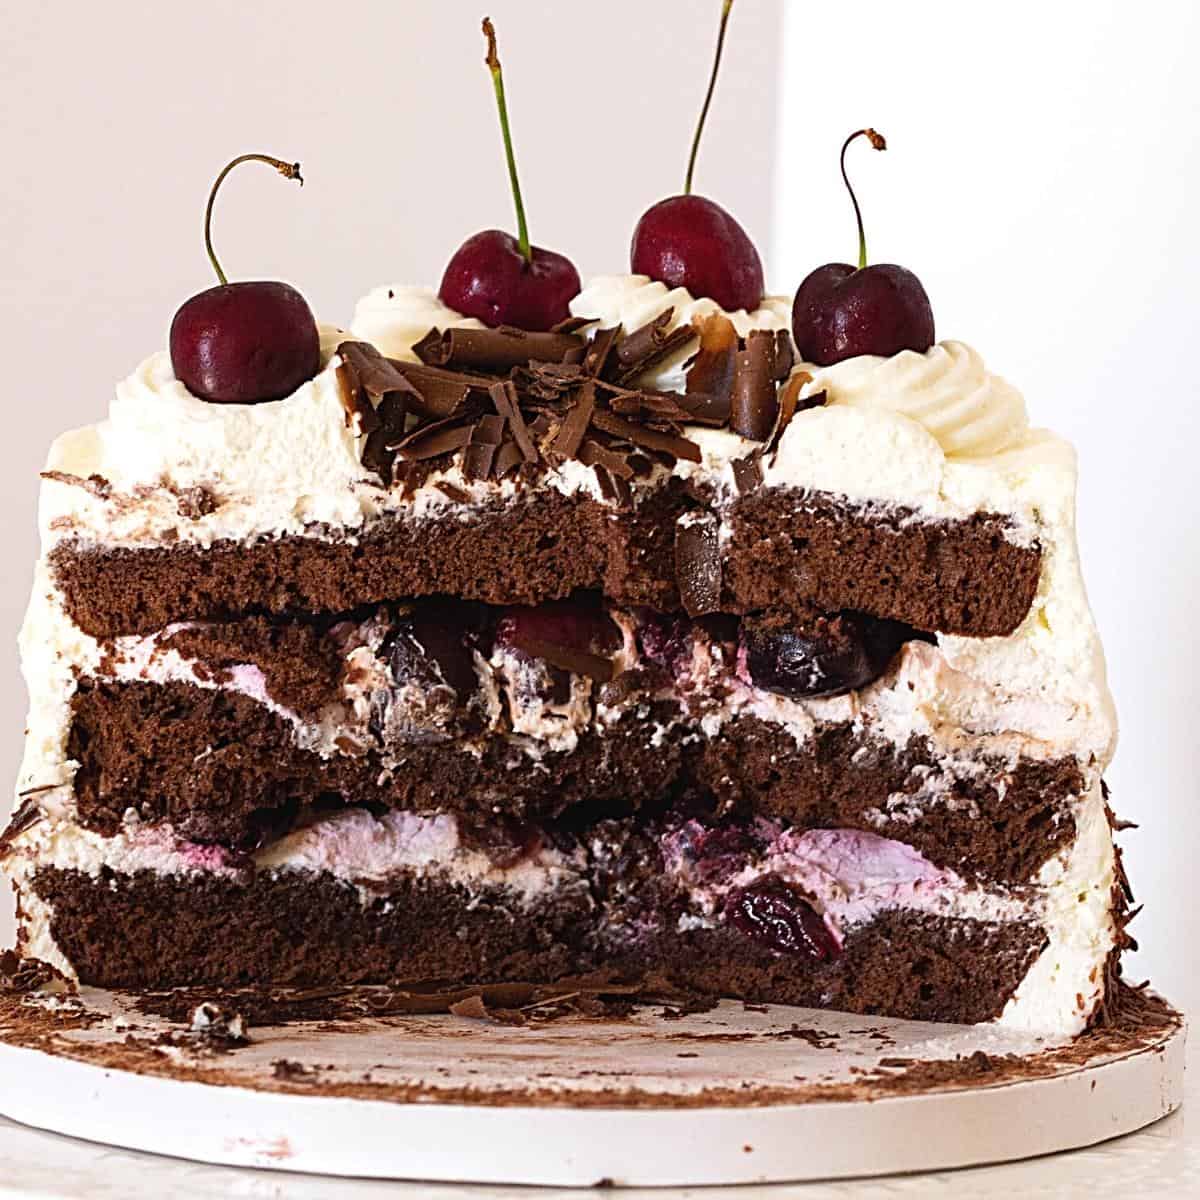
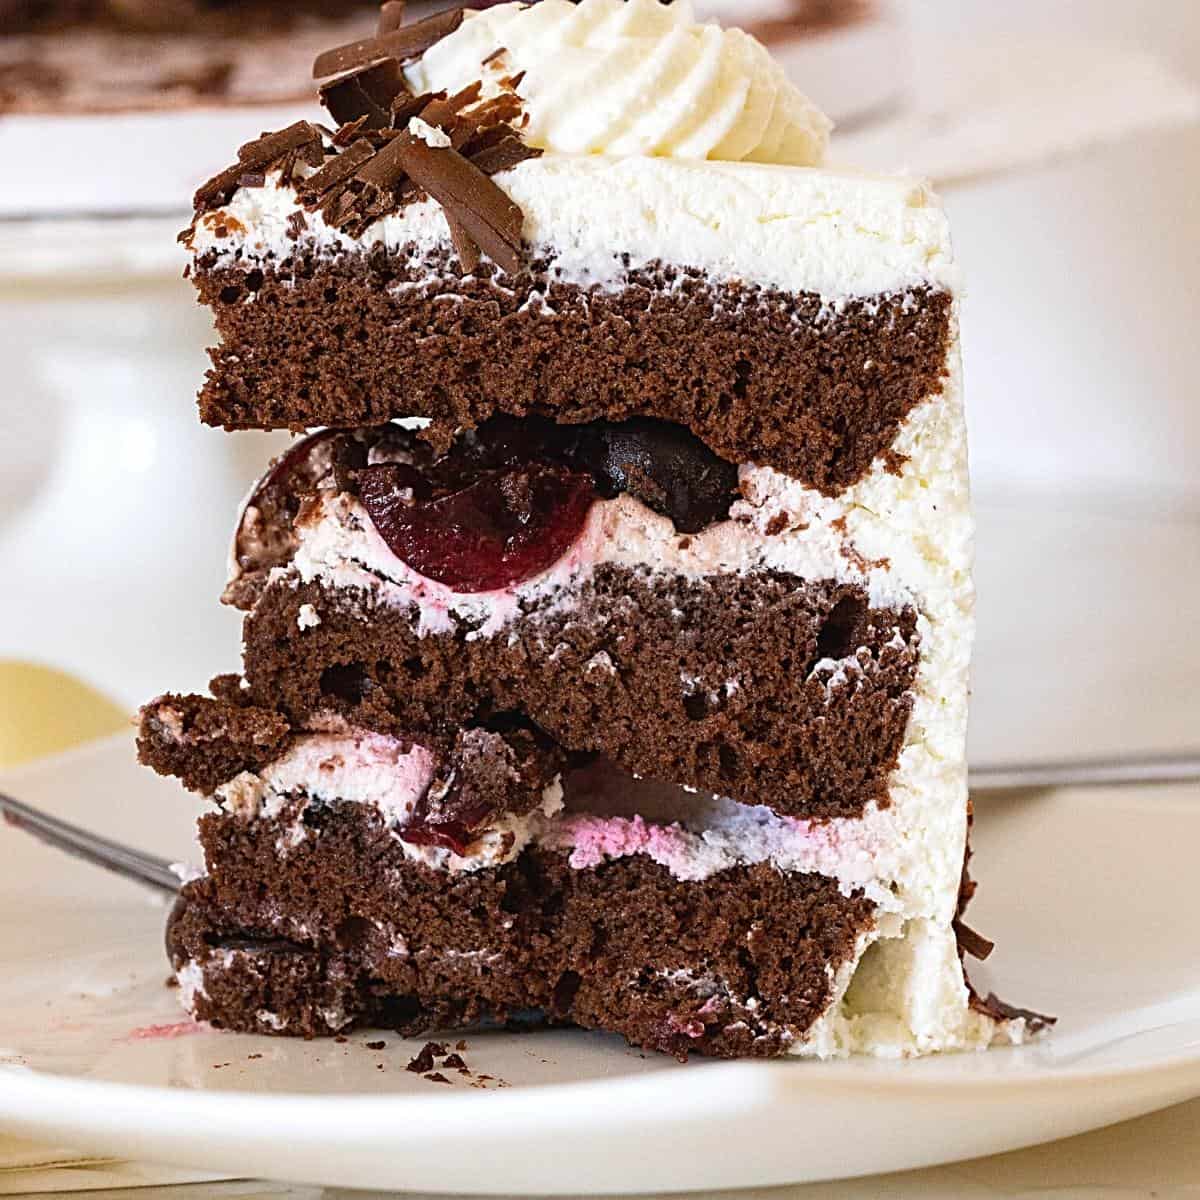
- Authentic Flavor Layers: Made with moist chocolate cake, real whipped cream, and tart cherries, this cake embodies the traditional Black Forest experience with a perfect balance of sweetness and tanginess.
- Moist and Rich Texture: The chocolate cake layers are perfectly moist and decadent, thanks to a balance of butter and oil in the batter, ensuring every bite melts in your mouth.
- Cherries Done Right: Uses authentic cherry compote or kirsch-soaked cherries for that signature burst of fruity flavor, avoiding overly sweetened canned fillings.
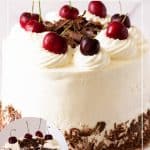
- Elegant Presentation: With its whipped cream frosting, chocolate shavings, and cherry garnish, this cake is visually stunning, making it perfect for any celebration or special occasion.
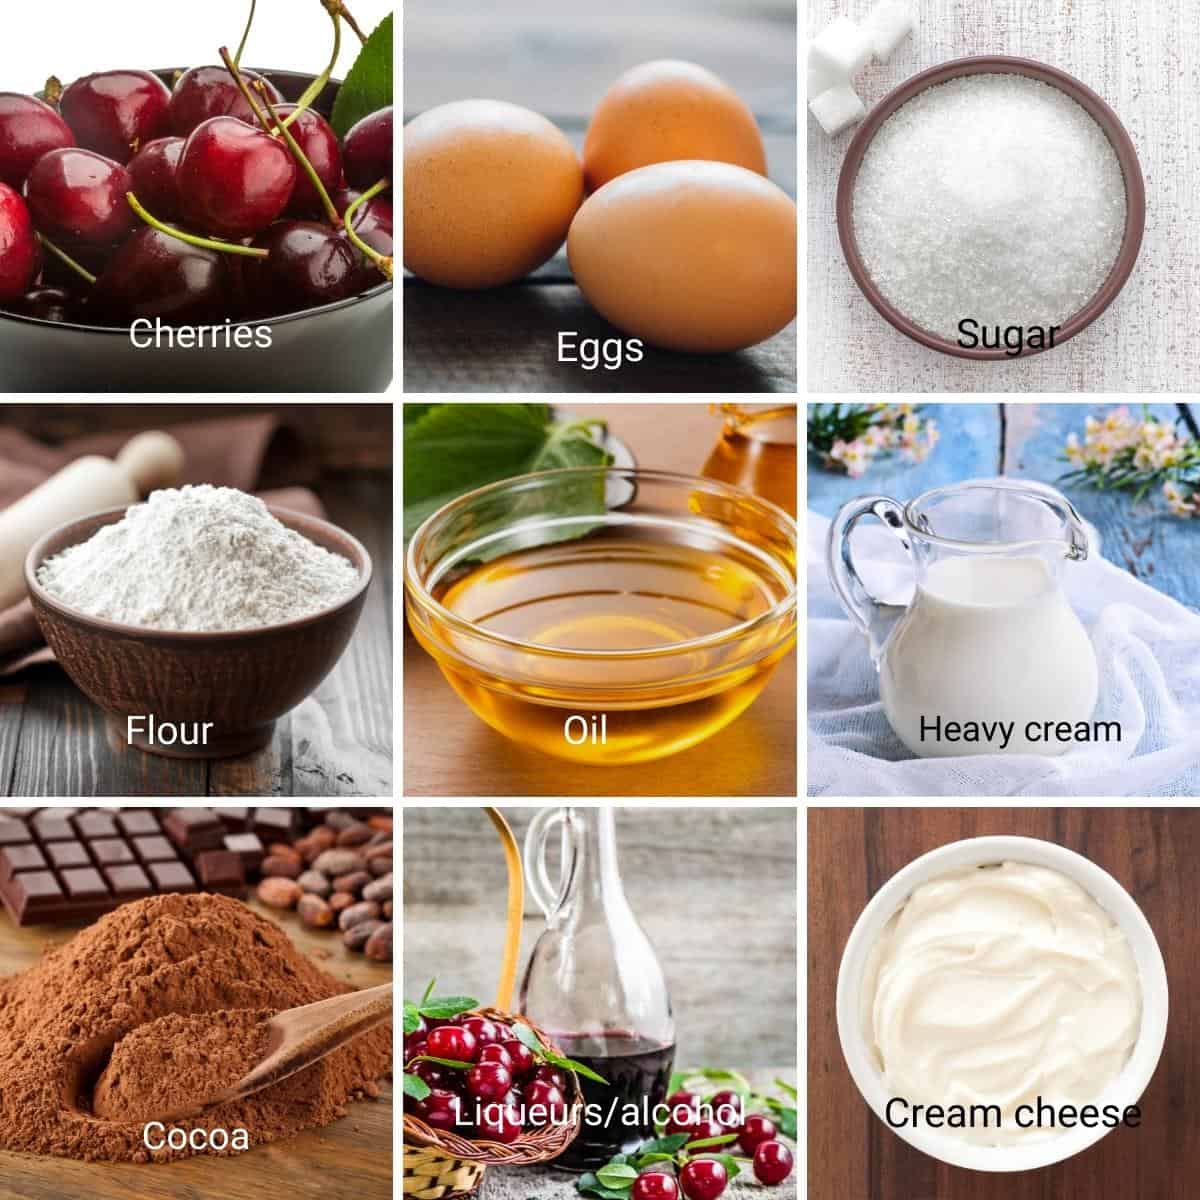
Ingredients and substitutes
- Flour – When it comes to chocolate cake, I prefer using all-purpose flour over cake flour. Brings more stability when combined with the cocoa powder.
- Cocoa powder – We use Dutch-processed cocoa powder.
- Eggs – Use large eggs and separate them carefully. The whipped meringue is what gives the cake its light and airy texture. There is no leavening, such as baking powder or baking soda, in this cake because its rise comes from the whipped eggs.
- Cherries – The black forest is made with sour cherries. I use fresh cherries when in season and a jar soaked in syrup during other times. You can use canned cherries for the filling if fresh cherries are unavailable. Drain them well and adjust the amount of sugar used accordingly, as canned cherries are often sweetened.
- Heavy cream – It’s very important to use full-fat, heavy whipping cream with a fat content of at least 38%. Otherwise, the frosting will be too soft to stay within the cake layers.
- Cream cheese – This is optional, but it helps stabilize the whipped cream. It gives the frosting body to hold it between the layers.
- Liqueurs/alcohol – A classic Black Forest is made with kirsch. I make a lovely cherry rum every time cherries are in season, but cherry brandy is wonderful, too.
Step-by-step: Black Forest cake recipe
Cake layers
- Oven/Pan – Preheat the oven to 340°F/170 °C/Gas Mark 4. Grease and line with parchment paper 3 x 8-inch round cake pans.
Pro tip – These cakes are light and airy, so lining the pans with parchment is necessary. - Dry ingredients – In a medium bowl, sift the all-purpose flour, cocoa powder, and half the salt.
Pro tip – Sift the dry ingredients at least twice for a light and airy cake.
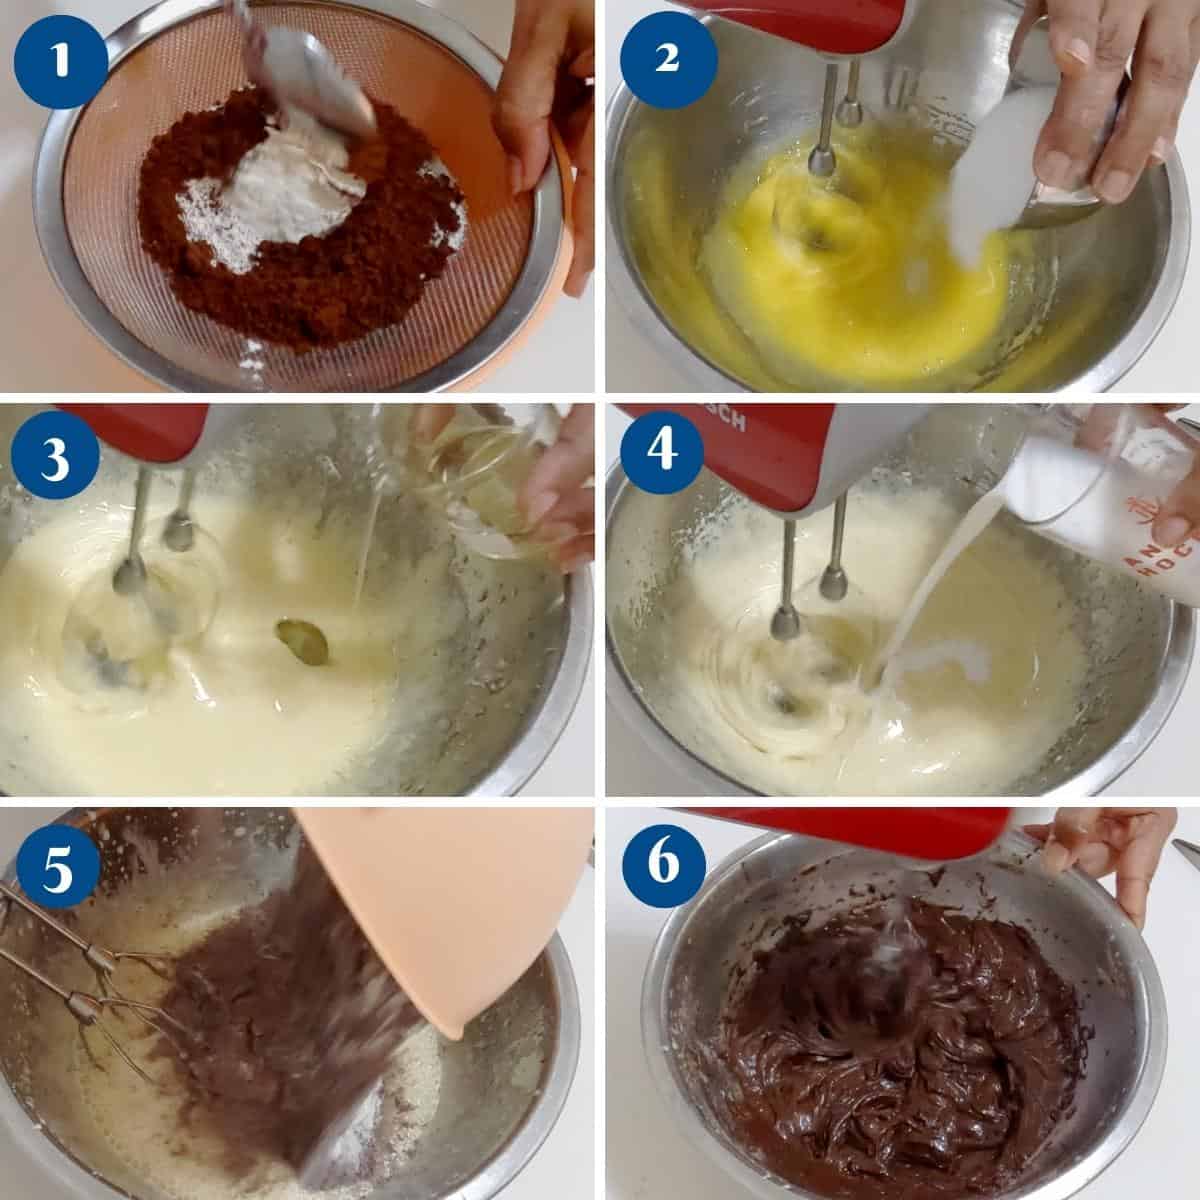
- Egg yolk mixture – In a large bowl of a stand mixer, using the whisk attachment, whip the egg yolks with half the sugar on medium-high speed until light and foamy. While whipping simultaneously, gradually add the oil and milk. Then, add the flour mixture and combine well.
Pro tip – Do not overmix when you add the oil, milk, and flour mixture, as it can deflate the volume created in the egg yolks. - Meringue – In a clean bowl of a stand mixer with the whisk attachment, whip the egg whites with cream of tartar and salt. Gradually add the remaining sugar and continue to whip until stiff peaks form.
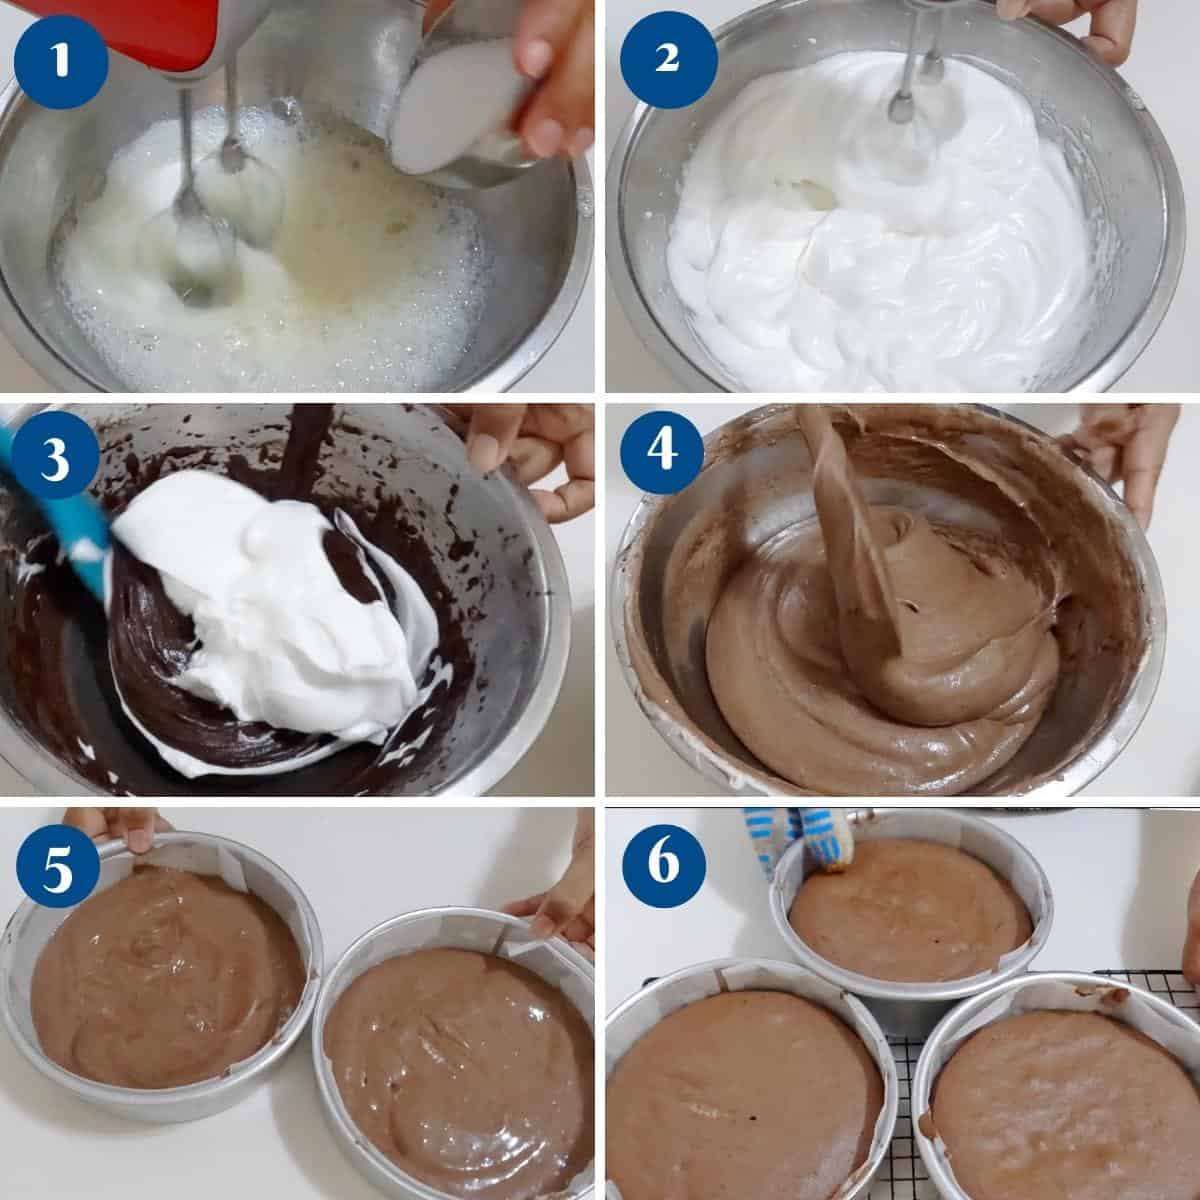
- Combine – Fold the whipped meringue into the egg yolk mixture until no white streaks are seen.
- Bake – Divide the batter between the prepared cake pans and bake in the preheated oven for 25 to 30 minutes, or until a toothpick inserted in the center comes out clean.
Pro tip – These layers are very light and airy, so they do not take long to bake. - Cool – As soon as the cakes are out of the oven, invert them onto a cooling rack and let them cool completely. These cake layers can be kept wrapped in plastic wrap in the fridge for a few days.
Pro tip – Inverting them while they’re still hot will help prevent them from sinking during cooling.
Cherry cake filling
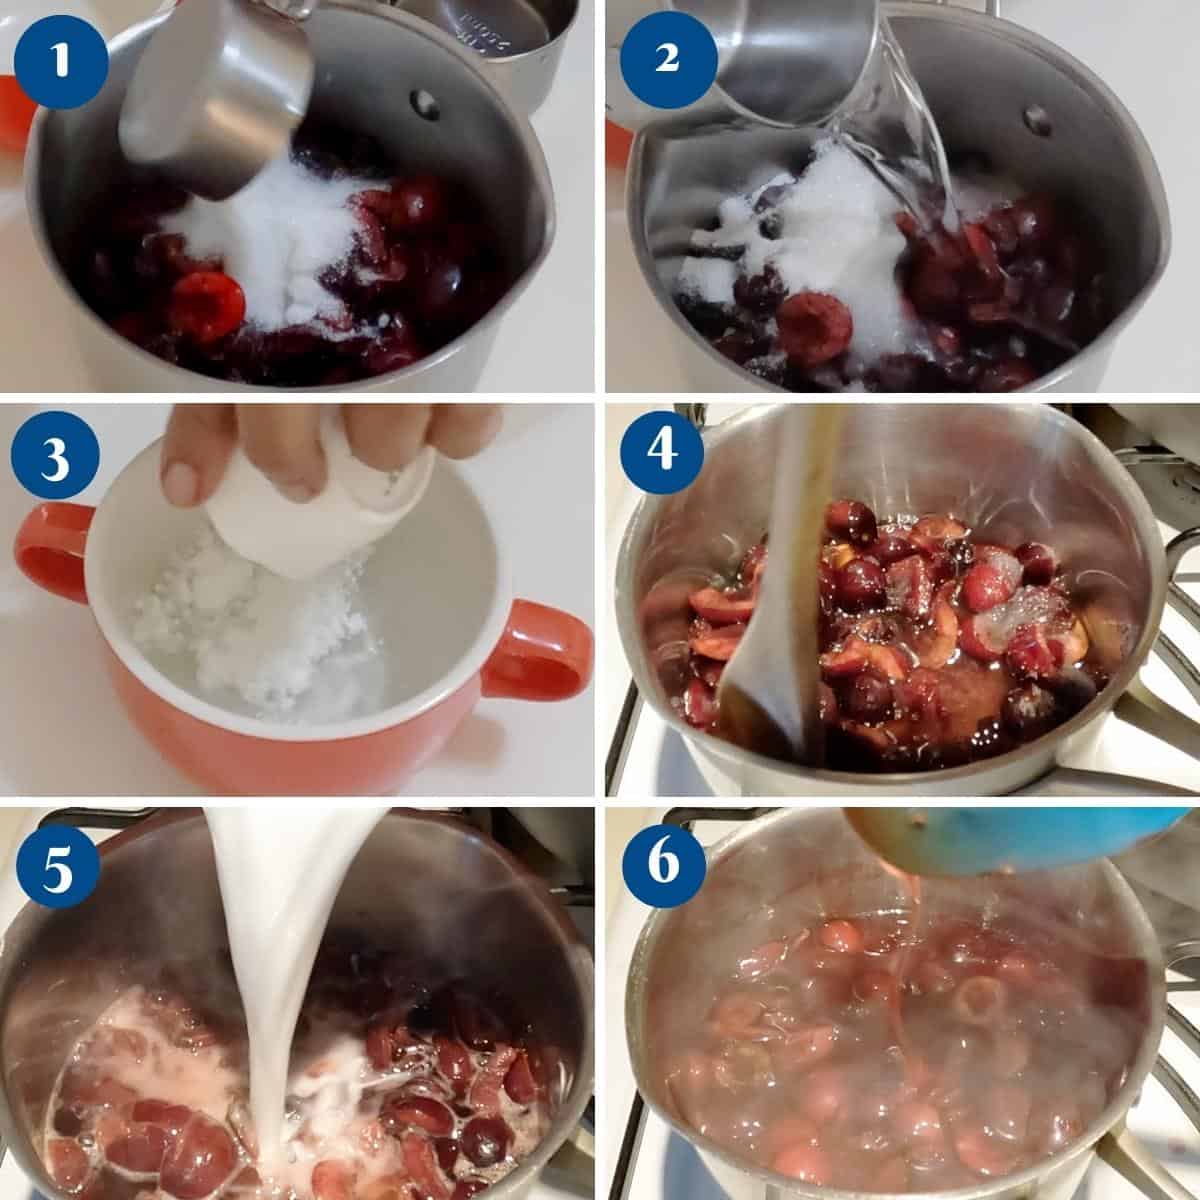
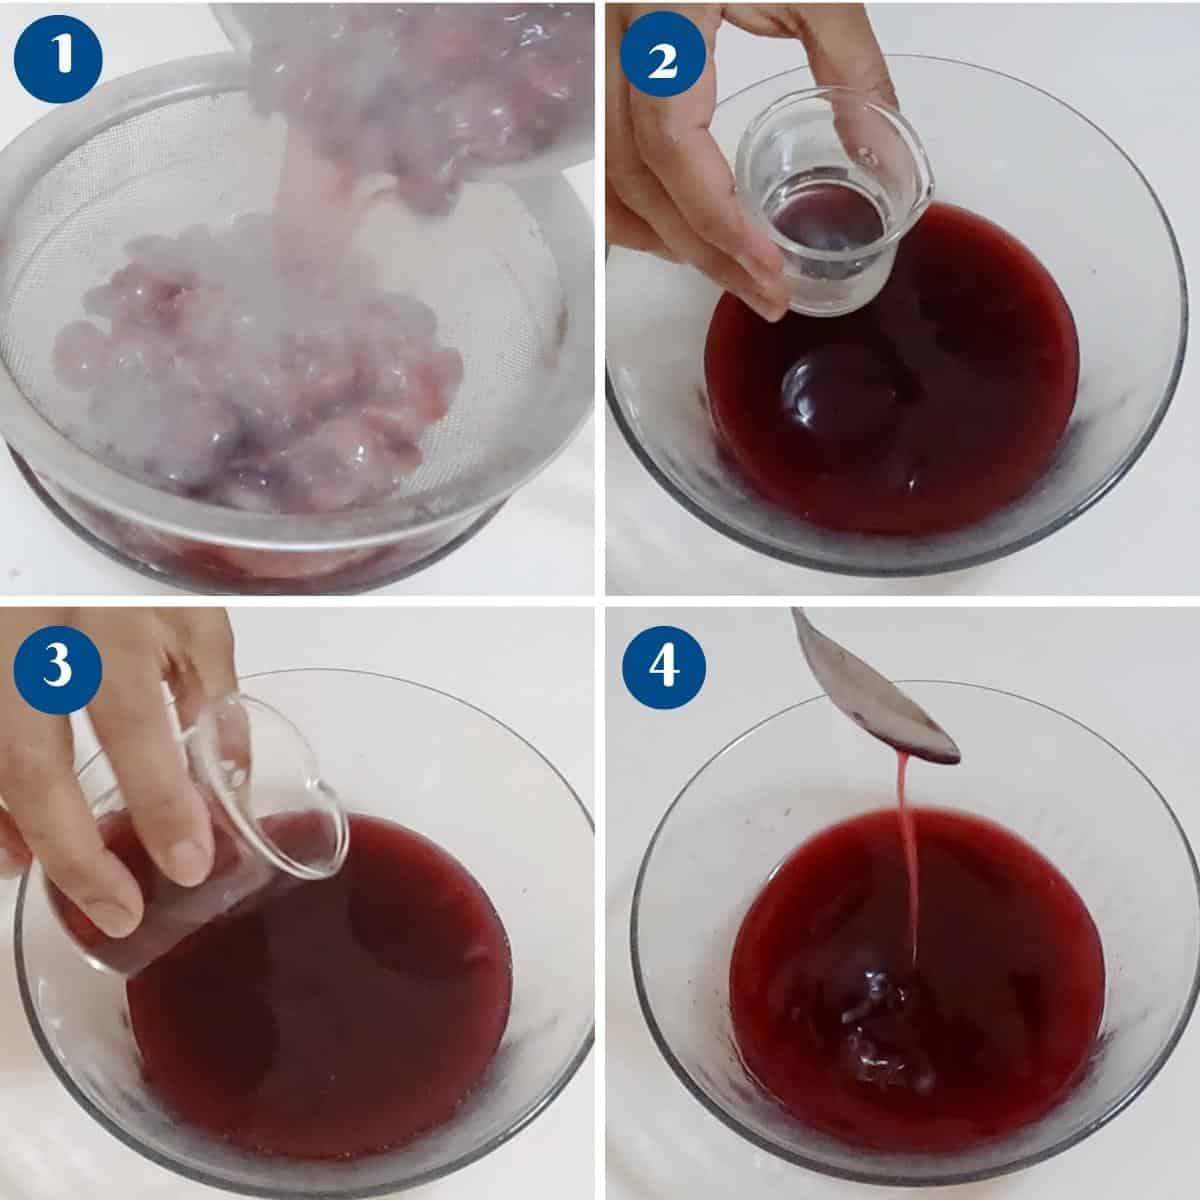
- Combine – In a small saucepan, combine the chopped cherries, sugar, half the water, and salt.
- Slurry – In a small bowl, combine the remaining water and cornstarch.
Pro tip – Cornstarch tends to settle down, so make sure to stir it again before adding it to the filling. - Simmer – Place the saucepan over medium heat. Simmer until all the sugar has melted. Then, add the cornstarch slurry and continue simmering on medium-low heat until the liquid thickens to a syrupy consistency.
Pro tip – At first, the mixture will be very opaque and milky, but as the cornstarch cooks, it will become shiny and translucent. - Drain – Pass the filling through a sieve to drain the cherry syrup from the cherries. Use the drained cherries between the cake layers.
Pro tip – Drain the cherries well so there is no excess liquid in the cake filling. Otherwise, it becomes messy when frosting. - Cherry syrup – Cool the drained cherry syrup, then add the kirsch and cherry rum. Use this to moisten the cake layers during frosting.
Whipped cream frosting
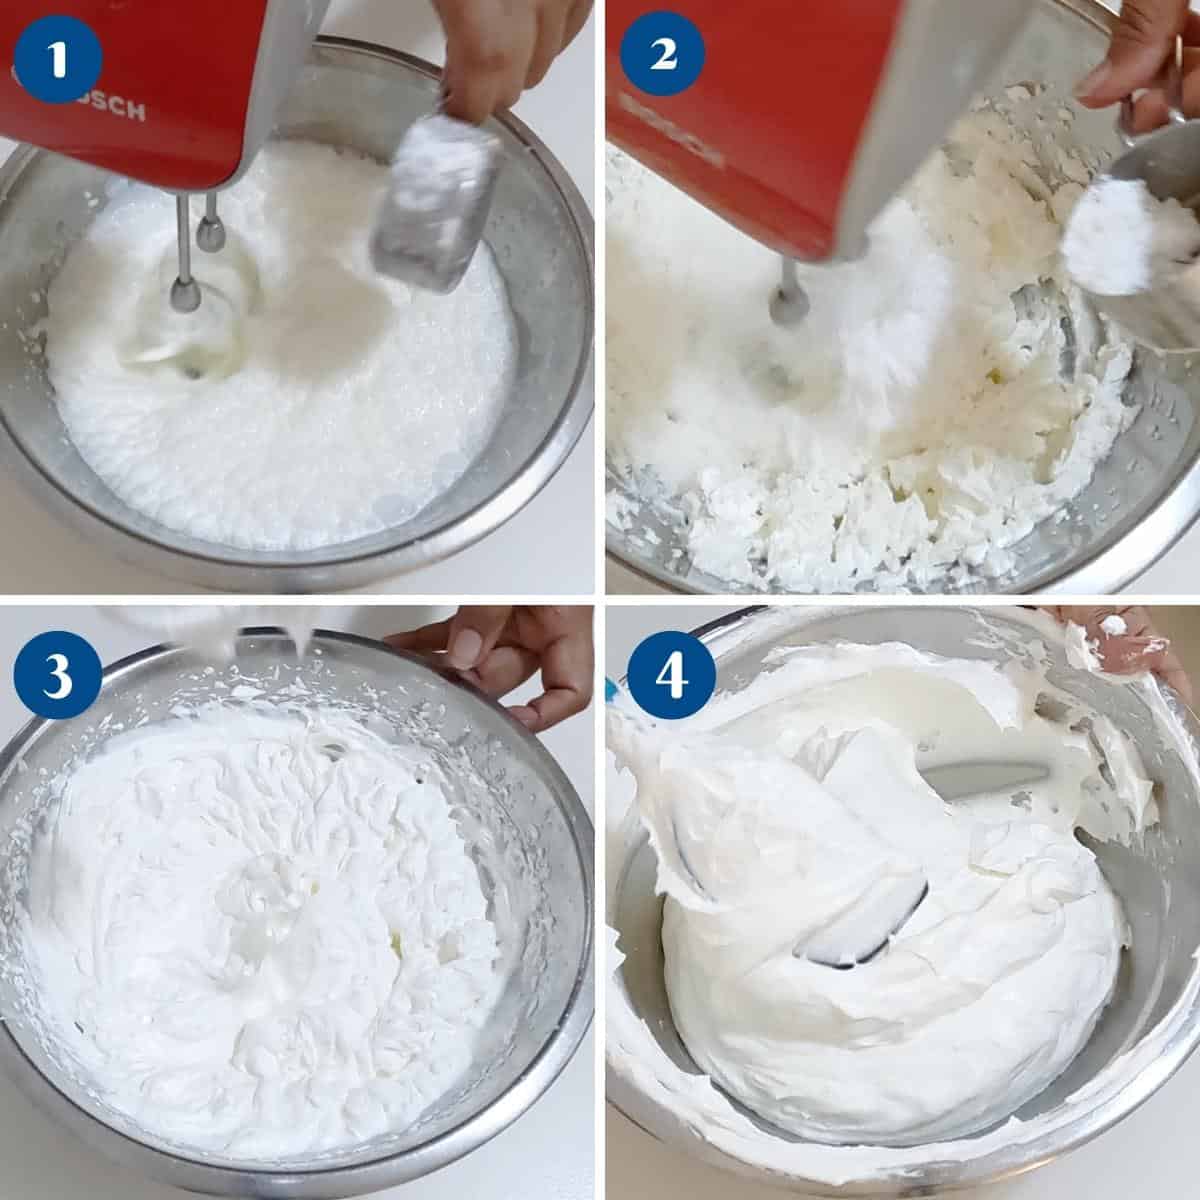
- Heavy cream – In the bowl of the stand mixer with the whisk attachment, whip the heavy cream with half the powdered sugar until stiff peaks form. Set aside.
- Cream cheese – In the bowl of a stand mixer with the whisk attachment, whip the cream cheese with the remaining powdered sugar until creamy.
Pro tip – Make sure the cream cheese is at room temperature, and do not over-cream, as it can become grainy. - Combine – Gently fold the whipped cream into the cream cheese mixture until well combined.
Pro tip – Whipping the heavy cream and cream cheese separately prevents them from separating.
Assemble
- Moisten layers – Generously moisten the three cake layers with cherry syrup.
Pro tip – These cake layers are very light and airy, so be generous with the cherry syrup. - Stack – Place one cake layer on a cake drum or cake stand. Top with a big dollop of whipped cream frosting, followed by a generous amount of drained cherries. Continue to stack the remaining two cake layers with more frosting and cherry filling.
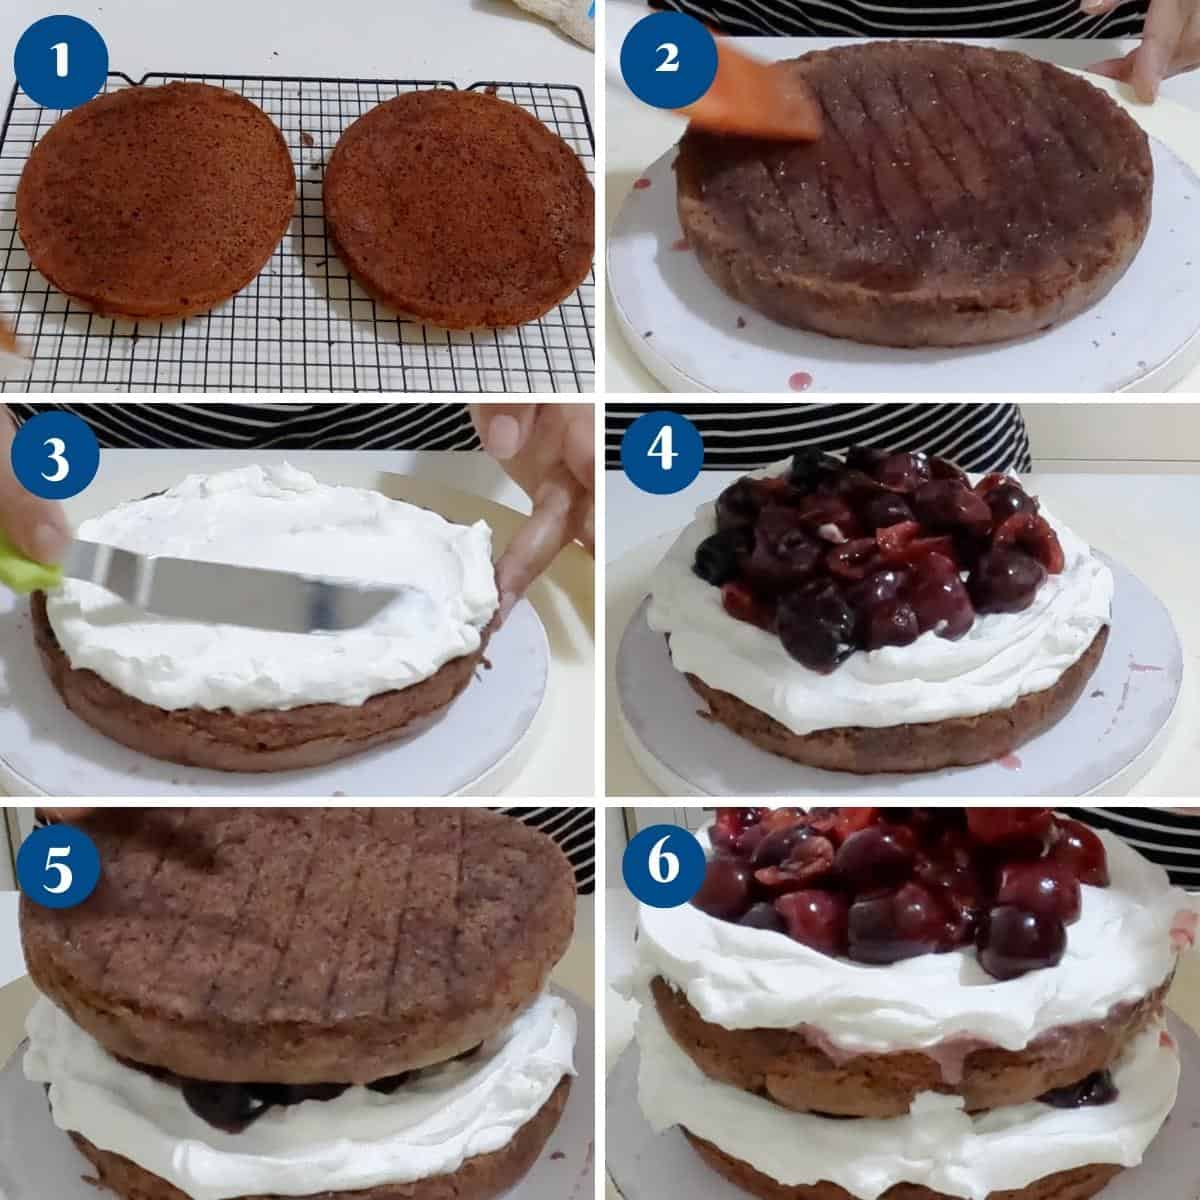
- Frost – Using a straight-edged spatula, frost the top and outside of the cake with more frosting. Use a bench scraper to smooth the side and an offset spatula to level the top.
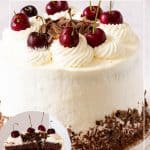
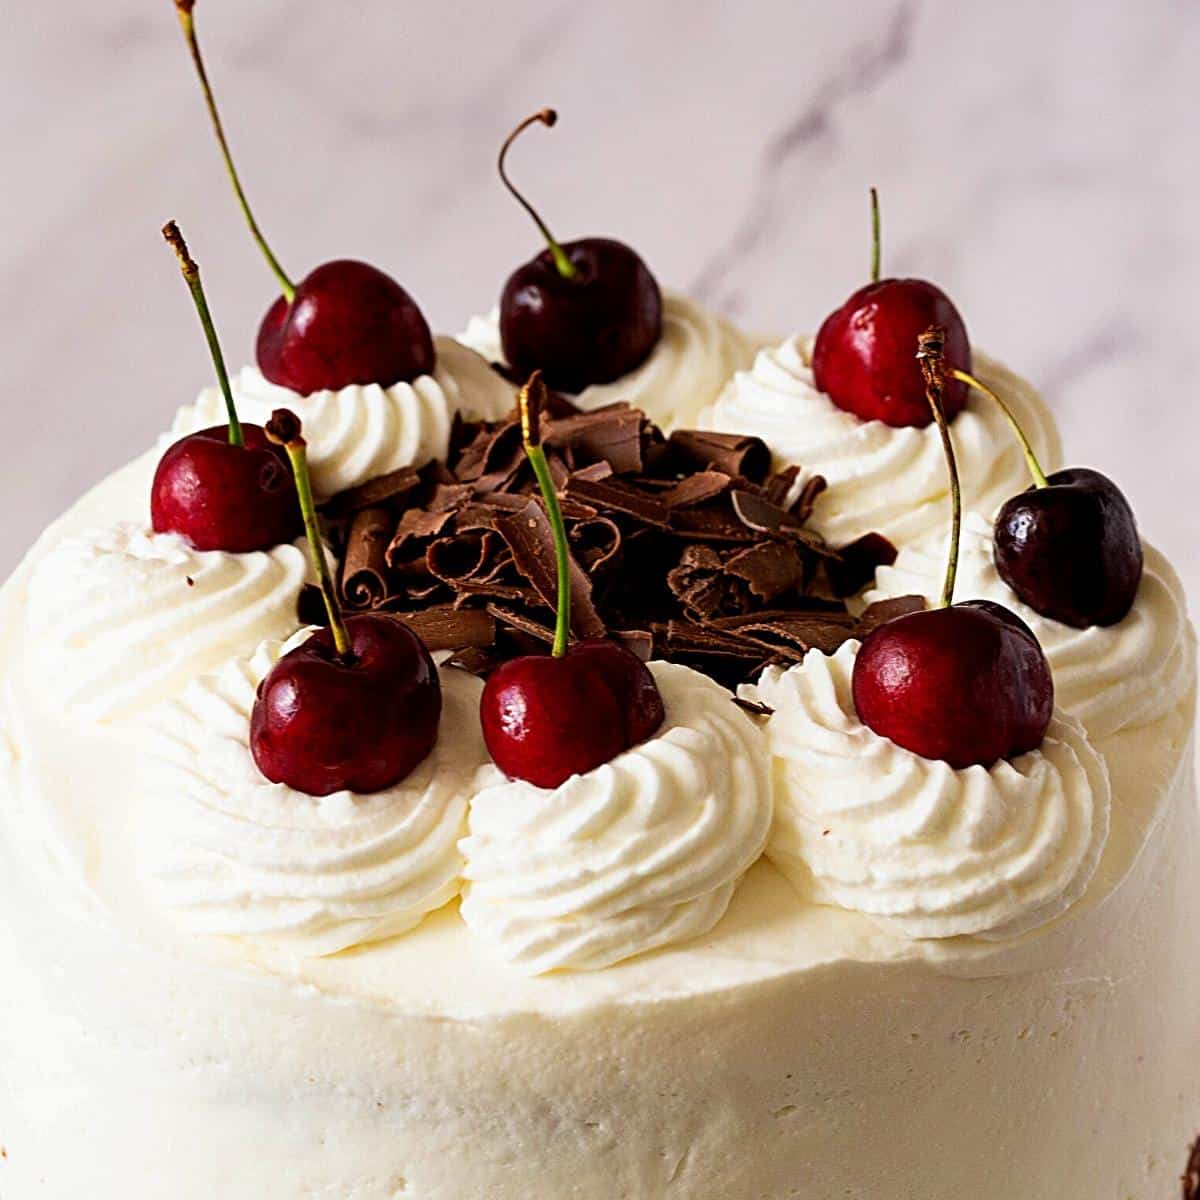
- Pipe – Transfer the remaining frosting into a piping bag with a star piping tip. Pipe large swirls all around the top of the cake.
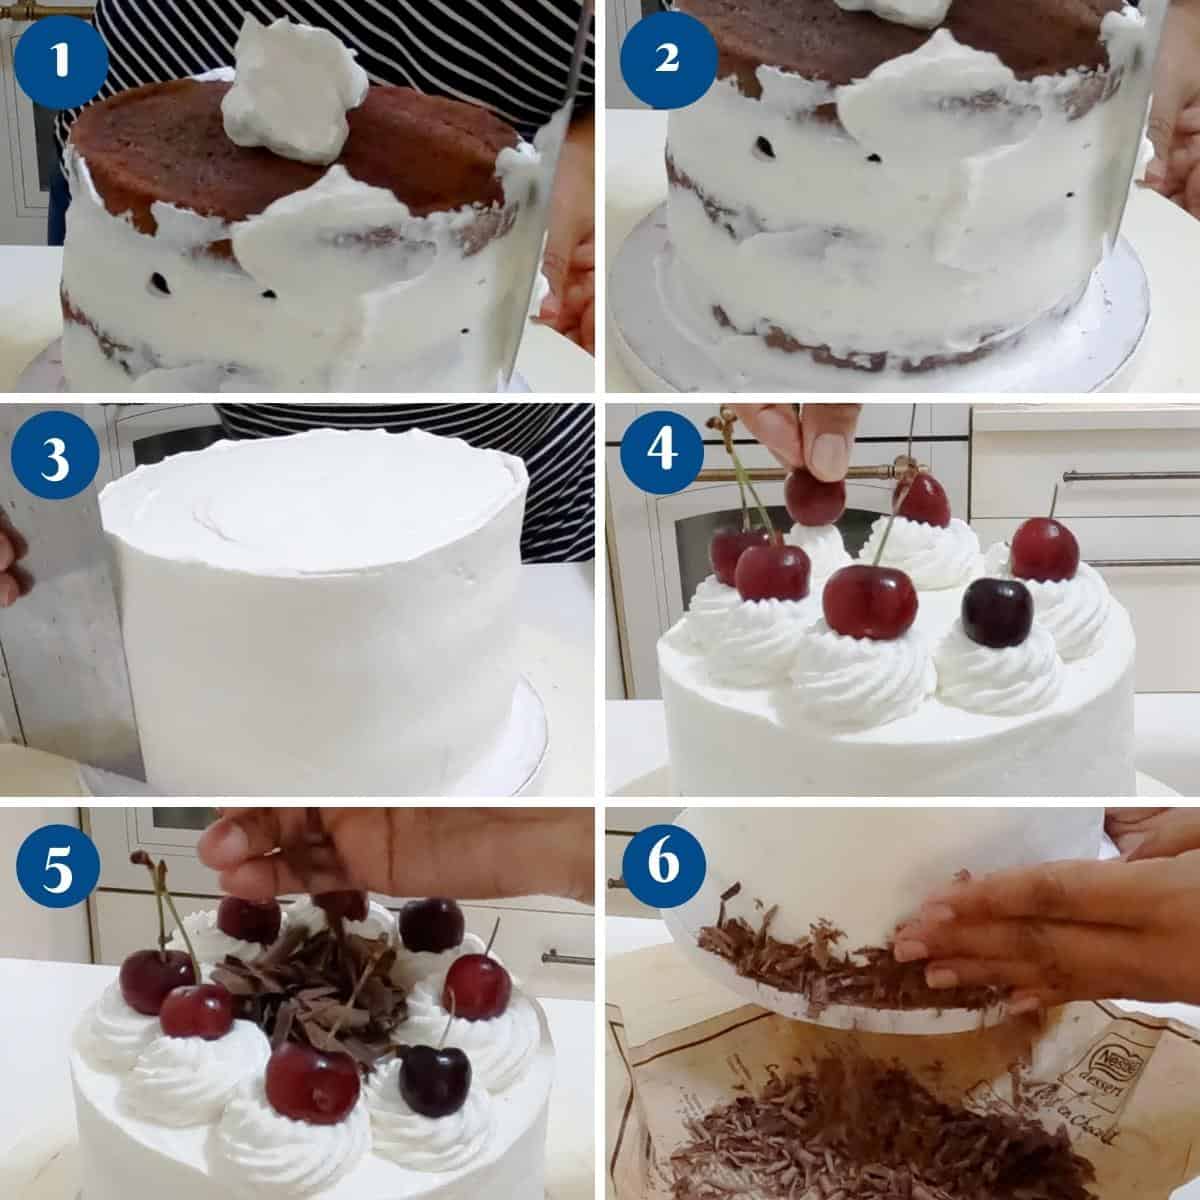
- Chocolate – Pour a handful of chocolate curls or shavings into the center of the cake, between the frosting swirls. And add more chocolate shavings or curls around the base of the cake.
- Chill – Keep the cake chilling in the fridge for at least 4 hours before slicing and cutting.
Note – Whipped cream and cream cheese are perishable ingredients, so this cake must be kept in the refrigerator at all times.
Troubleshooting
- Dry cake layers – Ensure you don’t overbake the cake. Follow the recommended baking time and check for doneness by inserting a toothpick into the center. The cake is ready if it comes out clean or with a few crumbs. Also, ensure that the ingredients are measured correctly and that the batter is not overmixed, as this can lead to a dry texture.
- Soggy cake layers – Ensure the cake layers have completely cooled before assembling the cake. Warm or hot cake layers can cause the whipped cream to melt and make the cake soggy. Additionally, make sure the cherry filling is manageable. If necessary, thicken the filling with a cornstarch slurry to avoid excessive moisture.
- Whipped cream not holding its shape – Ensure the cream and all utensils (bowl, beaters) are cold. You could place the bowl and beaters in the refrigerator for a few minutes before whipping the cream. Over-whipping the cream can also cause it to become grainy or turn into butter. Whip the cream until it reaches stiff peaks, and immediately refrigerate it until ready to use.
- Cherry filling too runny – If your cherry filling is too runny, it may need additional thickening. Mix a teaspoon of cornstarch with a little water to create a slurry, then add it to the simmering cherry mixture. Cook for a few more minutes until the filling thickens to your desired consistency. Remember to cool the filling before using it in the cake.
- Difficulty slicing the cake neatly – To achieve clean and neat slices, ensure the assembled cake has been chilled in the refrigerator for a few hours or overnight. Chilling helps the layers set and makes slicing easier. Use a sharp, thin-bladed knife and dip it in warm water before each cut to achieve clean edges.
- Difficulty with chocolate shavings – If you’re having trouble creating chocolate shavings, try using a vegetable peeler or a grater with large holes. Ensure the chocolate is firm but not too cold, as it can become brittle. Hold the chocolate bar firmly and carefully scrape the peeler or grater across the surface to create shavings. If the chocolate becomes too soft, refrigerate it for a few minutes to firm it up.
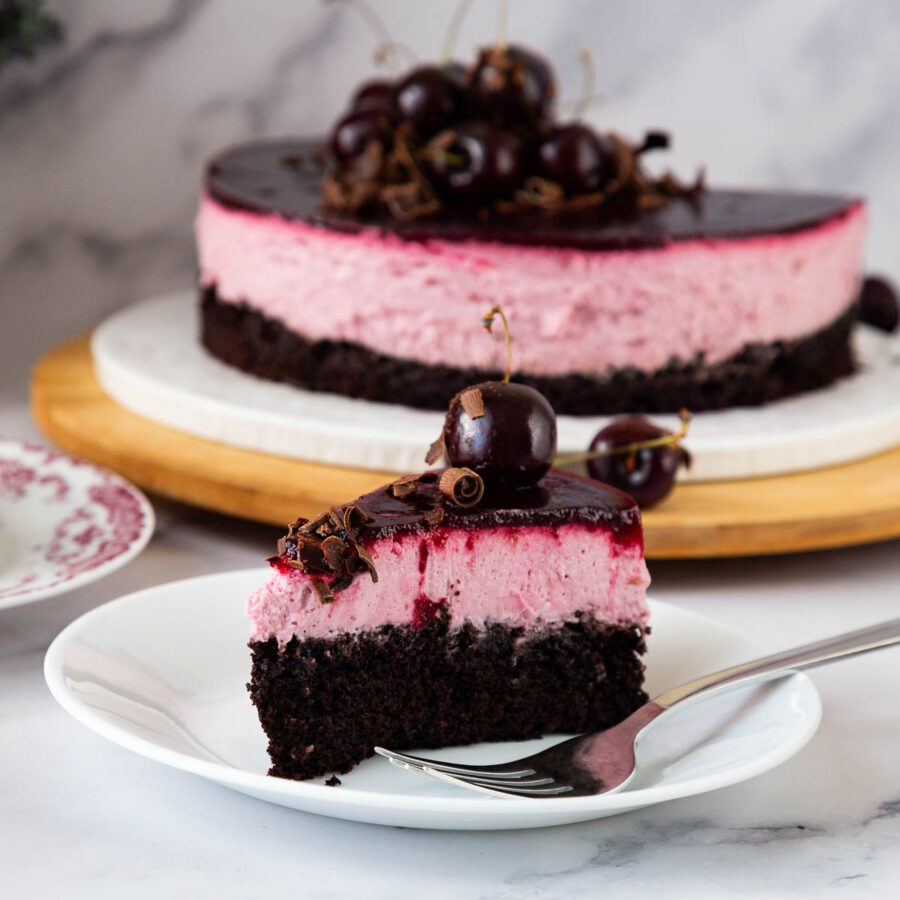
- Cherry Cheesecake – Baked, or Chocolate Cherry Cheesecake
- Best Cherry Bars, Best Cherry Pie Recipe
- Chocolate Cherry Cupcakes, Vanilla Cherry Cupcakes
- and Cherry Pound Cake (Bundt Cake),


Frequently asked questions
This cake will keep in the fridge for two days before serving. Leftovers will keep for another 2 days. Black Forest cake should be stored in the refrigerator due to its whipped cream filling and frosting. Cover the cake with plastic wrap or store it in an airtight container to prevent it from drying out. It is best consumed within a few days.
Black Forest Cake is a popular dessert in Europe. It’s a chocolate sponge cake layered with whipped cream and sour cherry filling. As its name suggests, it’s a German dessert that was first made in 1820 in the Black Forest region of Germany. It was created in honor of King Ludwig, also known as the “Mad King” of Bavaria. King Ludwig had a reputation for extremely lavish spending and debauchery. The Black Forest region in Germany may have been named after the dark wooded area in the south, but the real name comes from the region’s dense forests.
Yes, you can make a non-alcoholic version of Black Forest cake by substituting the cherry liqueur or brandy typically used in the cherry filling with cherry juice or water. It will still have the delicious cherry flavor without the alcohol content.
While the traditional Black Forest cake uses chocolate cake, you can experiment with different cake flavors if desired. Some variations use vanilla or almond-flavored cake as the base.
Black Forest Cake
Black Forest cake (Schwarzwälder Kirschtorte) is a very popular German dessert. It's a sweet chocolate cake soaked in cherry liqueur, layered with a cherry filling, and topped with whipped cream frosting. This recipe is so easy to make that you can whip up this cake on any given weekend with just a couple of simple ingredients.
Video
Ingredients
- ¾ cup (95 g) All-purpose flour
- ½ tsp Kosher salt divided
- ⅔ cup (60 g) Cocoa powder dutch-processed
- 5 large Eggs separated
- 1¼ cup (250 g) Sugar
- ½ cup (120 ml) Cooking oil
- ¼ cup (60 ml) Whole milk
- 1 tsp Vanilla extract
- ⅛ tsp Cream of tartar Optional
- 7 oz (200 g) Fresh cherries seeds remove and cut in half
- ⅓ cup (70 g) Sugar
- 1 tbsp Lemon juice
- 1 cup (240 ml) Water divided
- 4 tsp Cornstarch
- ¼ tsp Kosher salt
- 3 cups (710 ml) Heavy cream 38% fat
- 1 cup (240 ml) Cream cheese 32 – 38% fat
- ½ cup (60 g) Powdered sugar
- 4 tbsp (60 ml) Kirsch
- 4 tbsp (60 ml) Cherry rum (or cherry brandy or more kirsch)
- 6 – 8 medium Cherries Fresh or canned
- ½ cup (120 g) Chocolate curls or shavings (see notes)
Method
- Oven/Pan – Preheat the oven to 340°F (170°C) or Gas Mark 4. Grease and line with parchment paper 3 x 8-inch round cake pans.
- Dry ingredients – In a medium bowl, sift the all-purpose flour, cocoa powder, and half the salt.¾ cup All-purpose flour , ½ tsp Kosher salt, ⅔ cup Cocoa powder
- Egg yolk mixture – In a large bowl of a stand mixer, using the whisk attachment, on medium-high speed, whip the egg yolks with half the sugar until light and foamy. While whipping simultaneously, gradually add the oil and milk. Then, add the flour mixture and combine well.5 large Eggs, 1¼ cup Sugar, ½ cup Cooking oil , ¼ cup Whole milk , 1 tsp Vanilla extract
- Meringue – In a clean bowl of a stand mixer with the whisk attachment, whip the egg whites with cream of tartar and salt. Gradually add the remaining sugar and continue to whip until stiff peaks form.5 large Eggs, ⅛ tsp Cream of tartar
- Combine – Fold the whipped meringue into the egg yolk mixture until no white streaks are seen.
- Bake – Divide the batter between the prepared cake pans and bake in the preheated oven for 25 to 30 minutes, or until a toothpick inserted in the center comes out clean.
- Cool – As soon as the cakes are out of the oven, invert them onto a cooling rack and let them cool completely. These cake layers can be wrapped in plastic and kept in the fridge for a few days.
- Combine – In a small saucepan, combine the chopped cherries, sugar, half the water, and salt.7 oz Fresh cherries , ⅓ cup Sugar, 1 tbsp Lemon juice, ¼ tsp Kosher salt
- Slurry – In a small bowl, combine the remaining water and cornstarch.1 cup Water, 4 tsp Cornstarch
- Simmer – Place the saucepan over medium heat. Simmer until all the sugar has melted. Then, add the cornstarch slurry and continue simmering on medium-low heat until the liquid thickens to a syrupy consistency.
- Drain – Pass the filling through a sieve to drain the cherry syrup from the cherries. Use the drained cherries between the cake layers.
- Cherry syrup – Cool the drained cherry syrup, then add the kirsch and cherry rum. Use this to moisten the cake layers during frosting.4 tbsp Kirsch, 4 tbsp Cherry rum
- Heavy cream – In the bowl of the stand mixer with the whisk attachment, whip the heavy cream with half the powdered sugar until stiff peaks form. Set aside.3 cups Heavy cream, ½ cup Powdered sugar
- Cream cheese – In the bowl of a stand mixer with the whisk attachment, whip the cream cheese with the remaining powdered sugar until smooth and creamy.1 cup Cream cheese
- Combine – Gently fold the whipped cream into the cream cheese mixture until well combined.
- Moisten layers – Generously moisten the three cake layers with cherry syrup.
- Stack – Place one cake layer on a cake drum or cake stand. Top with a big dollop of whipped cream frosting, followed by a generous amount of drained cherries. Continue to stack the remaining two cake layers with more frosting and cherry filling.
- Frost – Using a straight-edged spatula, frost the top and outside of the cake with more frosting. Use a bench scraper to smooth the side and an offset spatula to level the top.
- Pipe – Transfer the remaining frosting into a piping bag with a star piping tip. Pipe large swirls all around the top of the cake.
- Chocolate – Pour a handful of chocolate curls or shavings into the center of the cake, between the frosting swirls. And add more chocolate shavings or curls around the base of the cake.½ cup Chocolate curls or shavings, 6 – 8 medium Cherries
- Chill – Keep the cake chilling in the fridge for at least 4 hours before slicing and cutting. Note – Whipped cream and cream cheese are perishable ingredients, so this cake must be kept in the refrigerator at all times.
Notes
- Choose high-quality ingredients: Since the flavors in a Black Forest cake are rich and pronounced, using high-quality ingredients is essential. Opt for fresh and ripe cherries, good-quality dark chocolate, and real whipped cream for the best results.
- Bake the chocolate cake layers: Start by baking moist and flavorful chocolate cake layers. Use a reliable recipe or follow the instructions correctly. You’ll typically need two or three layers, depending on your preference. Today, I’m using light chocolate layers for my cake base, but you can also use my easier, simpler, and moister cake layers instead.
- Prepare the cherry filling: Traditionally, a Black Forest cake features a cherry filling made with cherries, sugar, and a hint of Kirsch (cherry brandy). You can substitute the Kirsch with cherry juice or water if you prefer a non-alcoholic version. Simmer the cherries with sugar until they release their juices and become tender. For a jam-like consistency, we thicken the filling with a cornstarch slurry.
- Assemble the cake layers: Once the cake layers have cooled, place the first layer on a cake stand or serving plate. Spoon a generous amount of cherry filling over the cake layer, and spread it evenly. Repeat with the remaining layers, making sure to save some cherries for decorating the top of the cake.
- Whip the cream: Whip fresh heavy cream until it reaches stiff peaks. Sweeten it with a bit of powdered sugar or vanilla extract to taste. Ensure the cream is cold, and whip it in a chilled bowl to achieve the best results. Be careful not to over-whip the cream, as it can turn grainy.
- Frost the cake: Apply a thin layer of whipped cream around the sides and top of the cake. This acts as a crumb coat to seal in any loose crumbs. Then, cover the entire cake with a thick layer of whipped cream, creating swirls or patterns with a spatula for an attractive finish. Smooth the cream on the sides as much as possible.
- Decorate the cake: The classic Black Forest cake is adorned with chocolate shavings and cherries. Use a vegetable peeler to create chocolate curls or grate a bar of dark chocolate. Gently press the chocolate shavings onto the sides of the cake. Decorate the top with additional cherries and a dusting of powdered sugar.
- Chill before serving: Refrigerate the Black Forest cake for a few hours or overnight to allow the flavors to meld and the cream to set. This also makes the cake easier to slice and serve.
Nutrition
Tried this recipe?
Mention @veenaazmanov_kitchen or tag #veenaazmanovkitchen!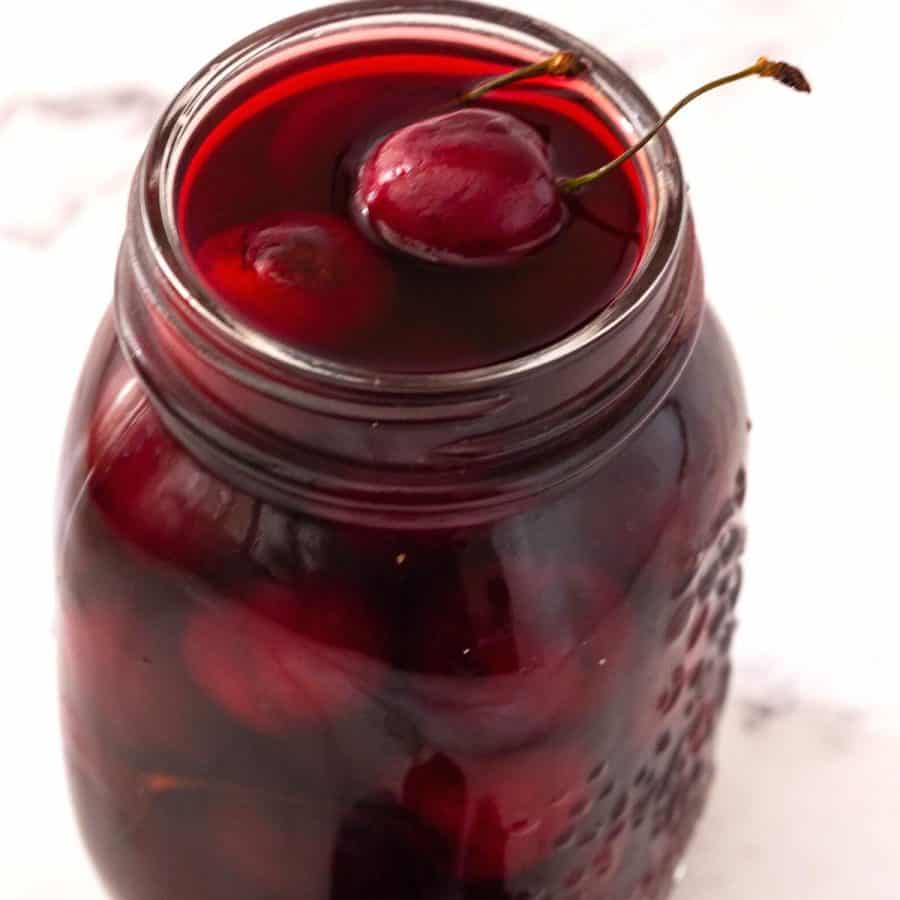

Don’t lose this recipe! Save it for Later!
📌 Save this Recipe for later on Pinterest so you can easily find it again.
⭐ Add Veena Azmanov Kitchen to your Google Preferred Sources.
It helps Google show you more of our recipes.
📧 Subscribe for new recipes delivered to your inbox.
🎥 Follow us for more recipes


I was nervous about making such a classic cake, but your recipe made it so simple. The flavors were perfectly balanced, and the cake looked as good as it tasted!
Thank you so much for the lovely feedback, Michael.
This is hands-down the best Black Forest Cake recipe I’ve tried. The instructions were easy to follow, and the results were stunning and delicious. A new favorite!
Thank you so much for the lovely feedback, Charlotte
I made this for a dinner party, and it was a hit! The whipped cream frosting was light and airy, and the chocolate shavings on top were the perfect finishing touch.
Thank you so much for the lovely feedback, Ethan
This Black Forest Cake took me back to my childhood! The moist chocolate layers and the cherries were a match made in heaven. Thank you for such a nostalgic recipe!
Thank you for the recipe. I really appreciate the step by step and all the pro tips. The whipped cream with cream cheese was delicious.
great