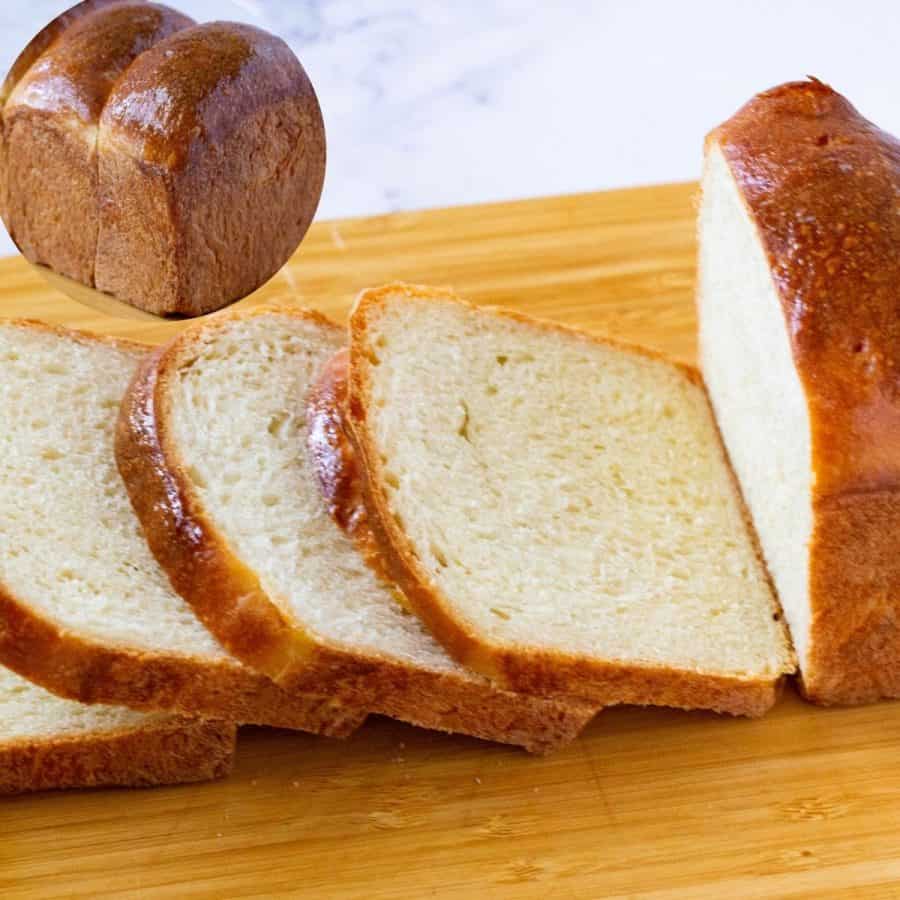
Pullman Sandwich Bread – Pain De Mie
 Prep Time 15 minutes Cook Time 30 minutes Total Time 2 hours 45 minutes
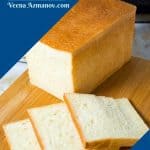

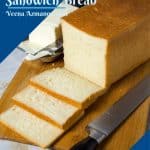
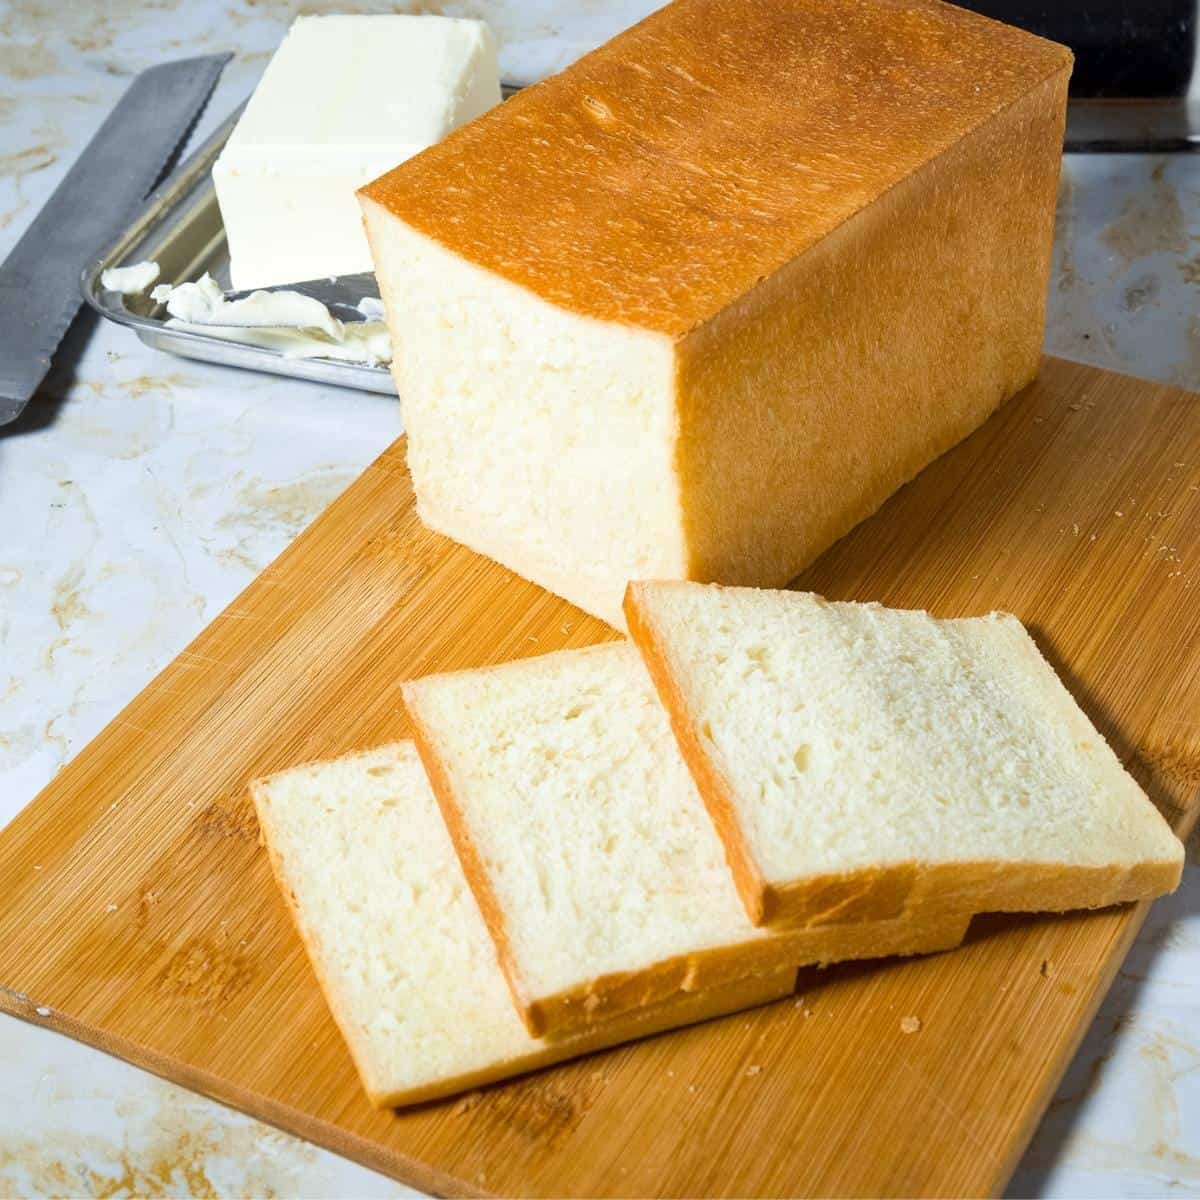
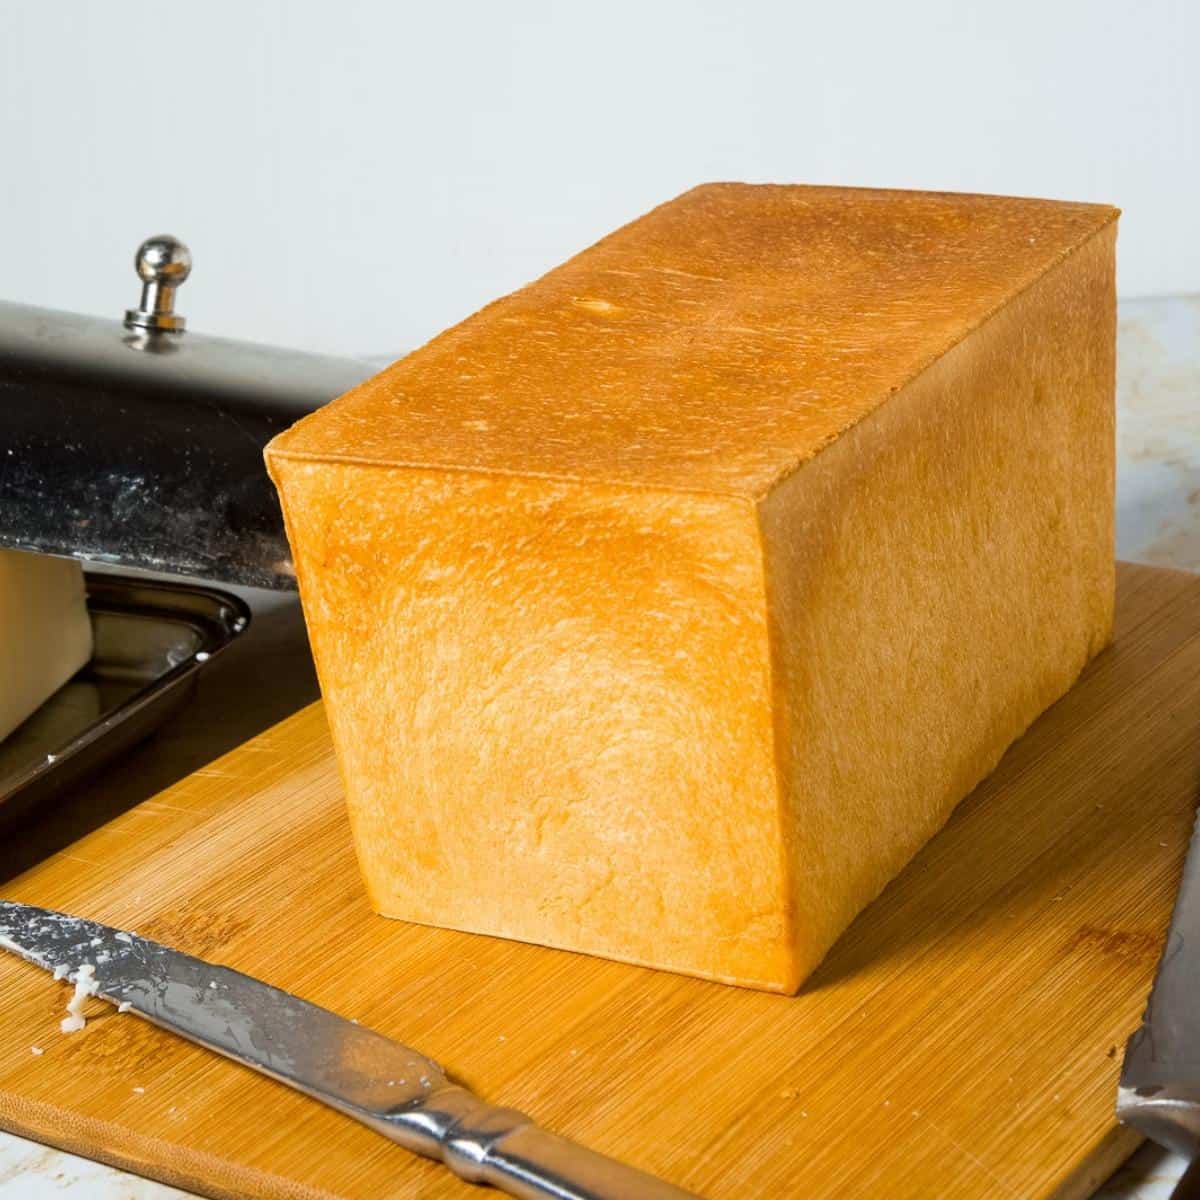
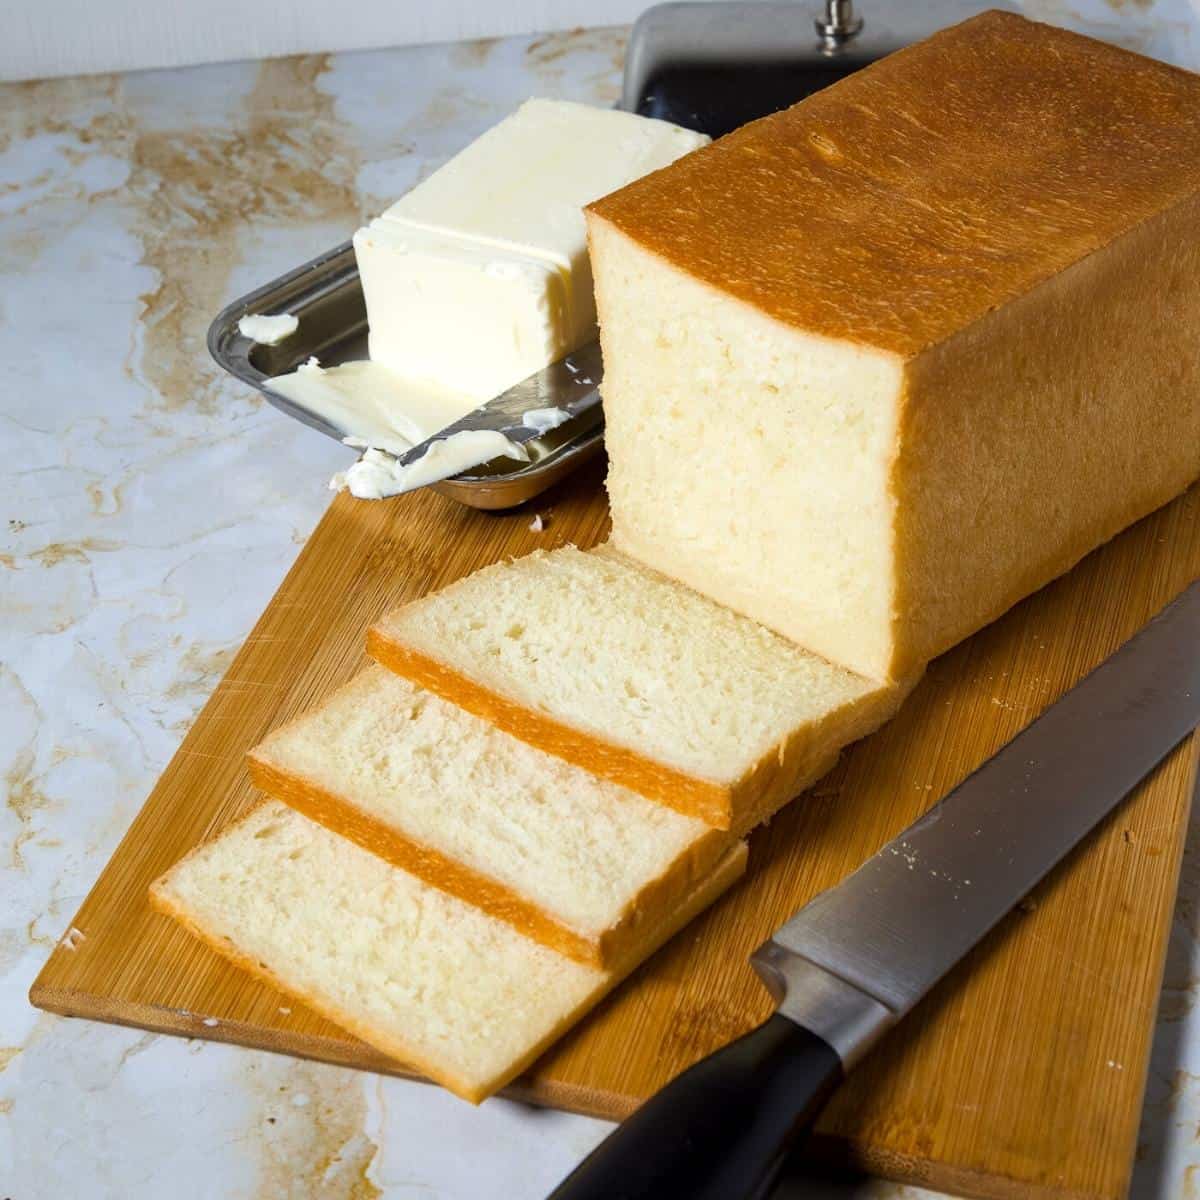
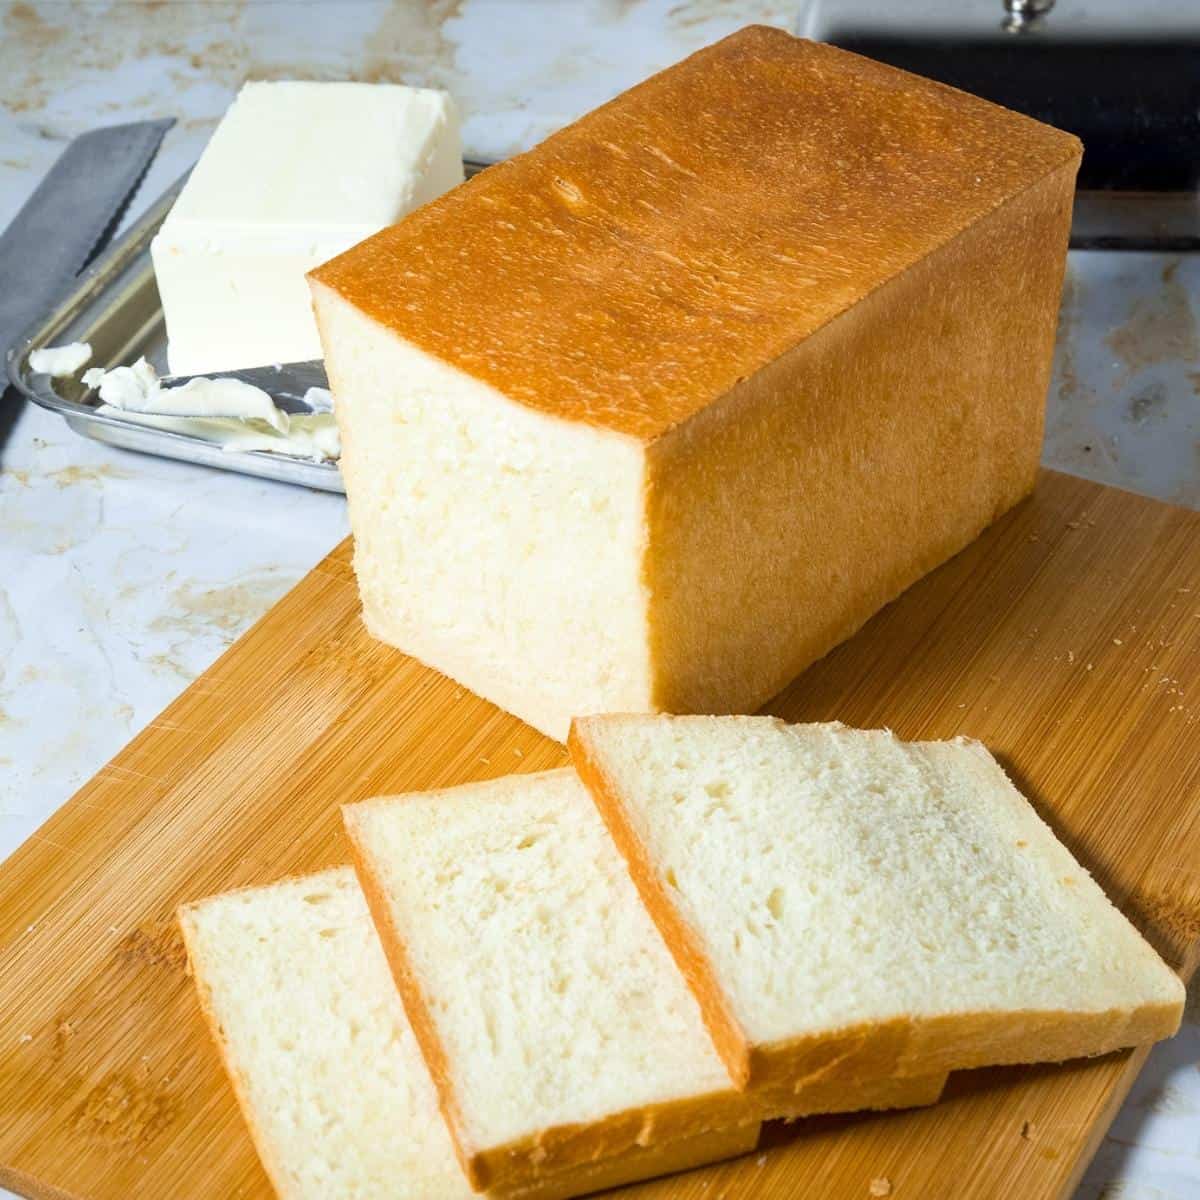
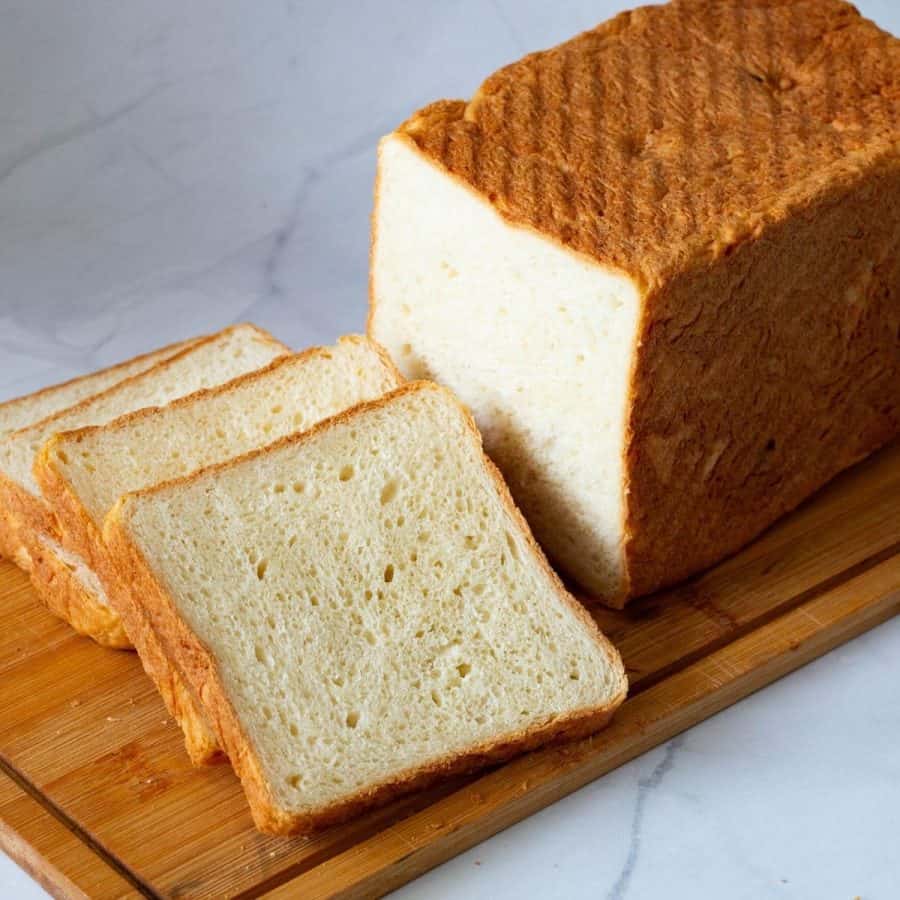
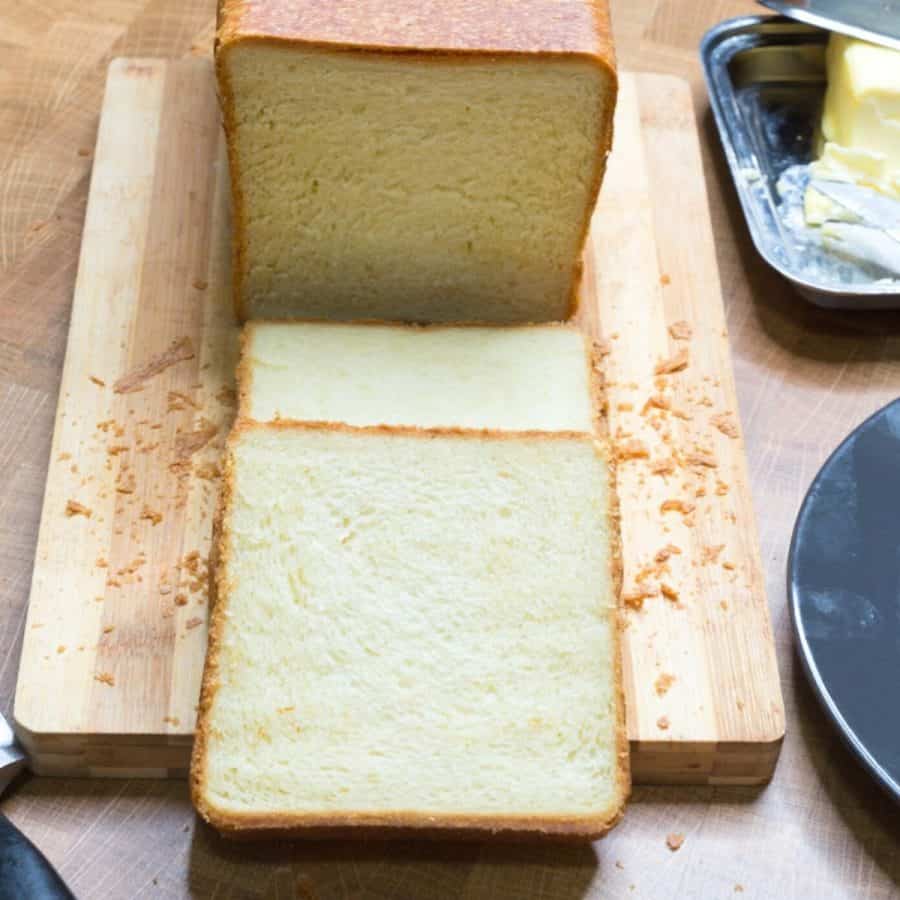
Pain de mie is a French sandwich bread with four square corners baked in a Pullman loaf pan. This simple and easy recipe for Pullman sandwich bread makes a light and fluffy loaf of bread with perfect four square corners. And, it has a delicate soft texture, soft crumb, and delicious flavor.
One of my fondest childhood memories revolves around the perfectly square sandwiches my mom used to pack for my school lunches.
What made these sandwiches extra special was the bread—my mom’s homemade bread. It was soft, fluffy, and perfectly square. I remember how it would squish gently when I took a bite, the crust revealing a pillowy interior that practically melted in my mouth. It was the only bread we used for butter sandwiches or jam sandwiches. I don’t ever remember eating a dinner roll or any other bread with butter, jam, or peanut butter
Now, as a parent myself, I find myself recreating this cherished tradition for my own kids. I take just as much care in making their sandwiches as my mom did for me. Watching my kids dig into their sandwiches brings me immeasurable joy. It’s a simple pleasure, to be sure, but one that connects us across generations and brings back cherished memories of childhood.
In a world that often moves too fast, there’s something comforting about slowing down and savoring the simple things in life – like a perfectly square sandwich made with love and shared with those we hold dear.
What is Pullman bread?
All bread made in a loaf pan can be used to make sandwiches, and yet to be characterized as a Pullman sandwich bread, you must have four square corners. Yup!! That’s the defining characteristic of this bread. That shape comes from using a specific loaf pan that has a nifty sliding lid. You actually bake the bread with the lid on. So when the bread rises as it bakes, it fills the corners of the pan on all sides, giving it those perfect square corners.
I’m not really sure how true this is, but I read somewhere that the Pullman Railway Company invented this bread back in the old days to make storage and transport easier. With this shape, they could stack the bread one on top of the other, using space more efficiently.
The texture of the Pullman sandwich bread is supposed to be soft, light, and fluffy. So, you must have a good recipe that’s just right for the pan you have, so it will give you a perfect bread, not too dense nor too limp.
Why make this bread?
- This bread recipe tastes great and is quick and simple to prepare.
- Most of the ingredients are simple and easy to find or pantry staples.
- The dough is made with commercial yeast, so the rise and proofing time is 60 to 90 minutes, unlike the many hours needed to make sourdough bread with a sourdough starter.
- It’s really not that complicated. In fact, it is one of the simplest breads you can make in the kitchen. Follow the directions below and eat it fresh, or French toast it for breakfast.
- Because of its square sides, this classic pain de mie is the best bread to use for sandwiches. It has a light and airy yet soft, tight crumb with a chewy texture.
- I am using a stand mixer with the dough hook, but you can also use a bread machine. Pour all ingredients into the pan. Set to dough or manual. Start and let the dough run its cycle for about 9 to 10 minutes – continue with the recipe as shown above.
Ingredients and substitutes
- Flour – Often, bread flour is recommended for making homemade bread, but this one works perfectly with all-purpose flour.
- Instant dry yeast – I like to use instant dry because I’ve always had great success with it. If you have to use active dry yeast, you will need 2 1/4 tsp or one packet. And if you use fresh yeast, you will need about 21 grams.
- Sugar – Not much, so it won’t make the dough sweet, but it will help feed the yeast and help it ferment quicker. If you prefer, you can also substitute sugar with 2 tbsp of honey.
- Butter – Will add richness and feed the yeast, helping it ferment quicker. You can also substitute the butter for 2 tbsp of oil in this recipe.
- Eggs – You can also omit the egg to make an eggless Pullman bread and replace it with 1/2 cup warm milk.
- Milk – Enhances the flavor and tenderizes the dough, giving it a soft texture.

Step-by-step: Best Pullman sandwich bread recipe
Dough
- Liquid ingredients – Ensure milk is warm, not hot (about 110°F). In a small bowl, add the yeast, sugar, and egg. Stir and set aside to foam for 5 mins.
- Dry ingredients – In the large bowl of a stand mixer, with the dough hook attachment, combine the flour and salt. Then, add the yeast mixture. Combine with a wooden spoon or rubber spatula.
Pro tip – If you do not like kneading, I highly recommend using a stand mixer with the hook attachment. - Combine – Add the yeast mixture to the flour mixture and combine on medium-high speed for about 3 minutes, scraping the sides of the bowl as necessary.
Pro tip – Avoid the temptation to add more flour. We want soft, light, and fluffy bread, and this is only possible when the dough is soft, elastic, yet slightly sticky.

- Knead – Once all the flour is incorporated, knead the dough for 8 to 10 minutes on medium speed until smooth. The dough will be soft and sticky.
Pro tip – A soft and sticky dough is a light and airy bread, so don’t add more flour. - Butter – Next, add the soft room-temperature butter a little at a time. Knead again for another 10 to 12 minutes until smooth and elastic.
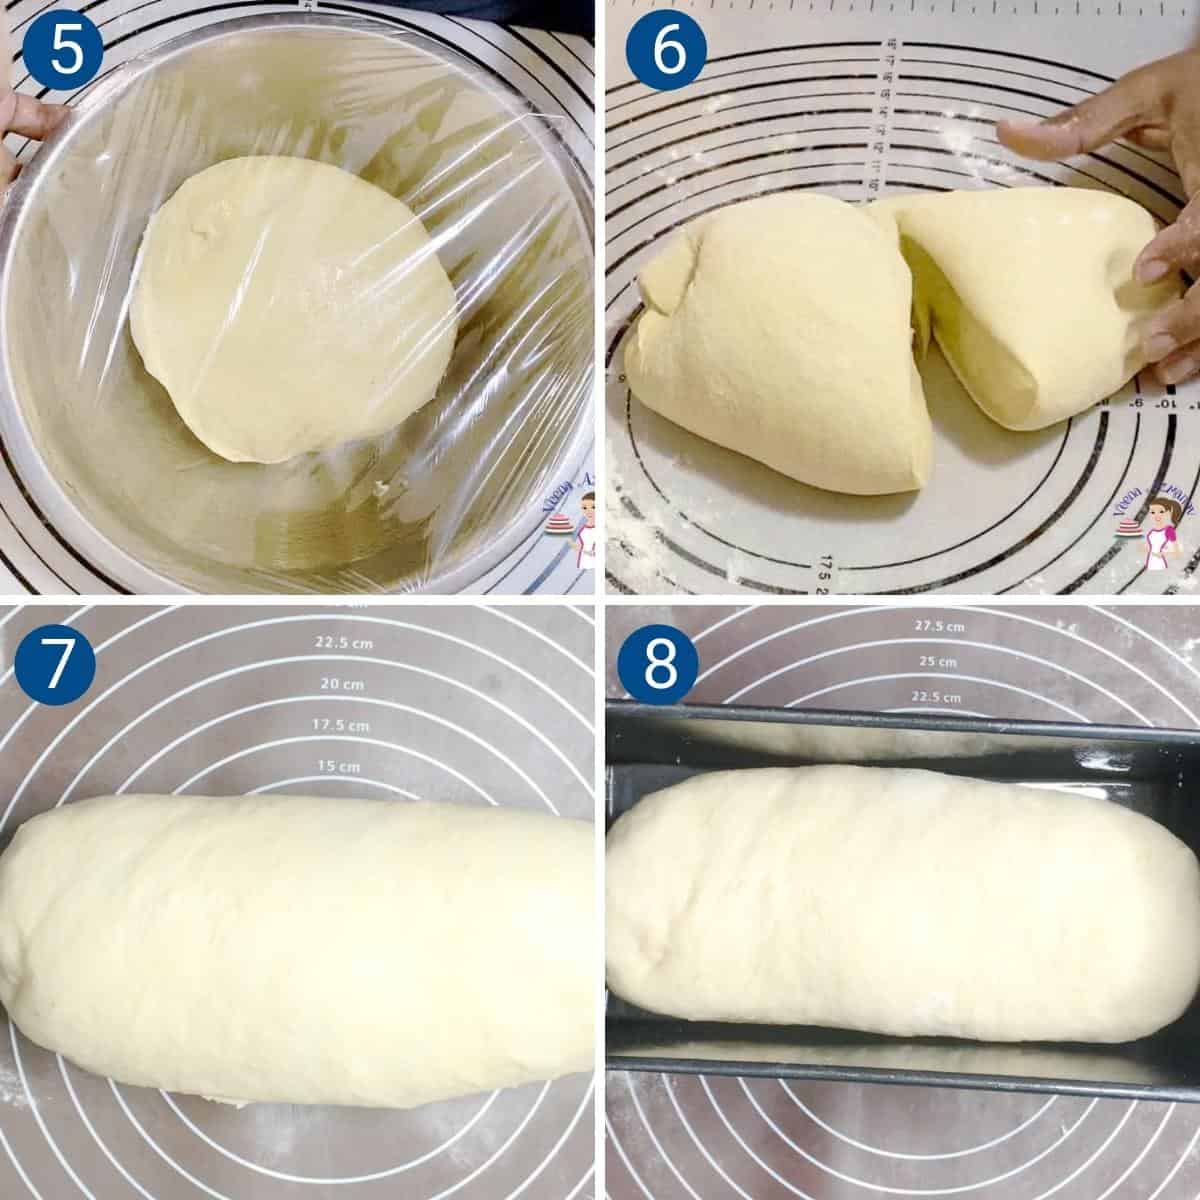
Pro tip – When you add the butter, it will seem like the dough is falling apart. Trust the process and keep kneading. It will become smooth and shiny. - Bowl – Remove the dough from the mixer bowl onto a lightly floured surface. Shape it into a ball. Then, place in an oiled bowl.
Pro tip – Using a flexible bread scraper does a good job of removing the sticky dough from the bowl.
Rise, Shape, Proof
- Rise – Cover with plastic wrap or a clean kitchen cloth. Leave to rise in a warm place for about an hour until doubled in volume.
Pro tip – In winter, you may need 90 minutes or more. But in summer, the dough may double in 45 minutes. If you can’t attend to it at that moment, de-gas, reshape, and let doubles in volume again. - Shape – When the dough has doubled in volume, invert it onto a lightly floured surface. Next, start to roll like a jelly roll. Fold from the top to the center, then again once more towards the end. Pinch the seams together.
Pro tip – The idea is to fold the dough into a nice, tight package. Folding helps strengthen the gluten strands and prevents loose, floppy bread. - Proof – Place into a buttered Pullman loaf pan seam side down. Then, cover the loaf pan with plastic wrap or a clean kitchen cloth. Let rise in a warm place for about 45 minutes until almost 2 inches from the top rim of the loaf pan.
- Cover – Once you see your dough is almost halfway up the sides, spray the cover of the Pullman pan lid and place it on.
Pro tip – You want to place the lid on before it rises to the top, so you don’t ruin the rise.

Bake
- Oven – Once you see your dough is almost halfway up the sides, preheat the oven to 380°F / 190°C / Gas Mark 5 for at least 20 minutes.
- Bake – Place the loaf pans on a baking sheet and into the oven.
- Bake the 13-inch loaf for about 45 to 50 minutes,
- Bake the 9-inch loaf for about 25 to 30 minutes,
- and the 7-inch loaf for about 20 to 25 minutes.
Pro tip – The bread is done when you tap the bottom of your loaf, and you will hear a hollow sound (or the internal temperature registers between 160° and 180°F on an instant-read thermometer.
- Cool – Partially open the lid and let it cool for 10 minutes – before you invert it onto a cooling rack. Then, cover it with a clean kitchen towel for 5 minutes to keep it soft.
Pro tip – Wrapping the bread in a kitchen cloth will let the steam cool in the bread, keeping it soft. - Note – Always let bread rest for at least an hour before you cut it – this is the hardest part!! But it will prevent the steam from escaping and making the bread dry.
- Enjoy!
Pullman Sandwich Bread aka Pain de Mie
Video
Ingredients
- 276 ml (1¼ cups) Warm milk or water (110℉)
- 100 g (2 large) Egg
- 50 g (4 tbsp) Sugar or honey
- 9 g (3 tsp) Instant dry yeast
- 562 g (4.5 cups) Bread flour or all-purpose flour
- 12 g (2 tsp) Salt
- 60 g (4 tbsp) unsalted Butter room temperature (or ¼ cup oil)
- 180 ml (¾ cup) Warm milk or water (110℉)
- 60 g (1 large) Egg
- 40 g (2½ tbsp) Sugar or honey
- 7 g (2¼ tsp) Instant dry yeast
- 400 g (3¼ cups) Bread flour or all-purpose flour
- 9 g (1½ tsp) Salt
- 42 g (3 tbsp) unsalted Butter room temperature (or 2½ tbsp oil)
- 160 g (⅔ cup) Warm milk or water (110℉)
- 50 g (1 large) Egg
- 25 g (1½ tbsp) Sugar or honey
- 5 g (1½ tsp) Instant dry yeast
- 370 g (3 cups) Bread flour + 2 tbsp more for consistency
- 7 g (1¼ tsp) Salt
- 35 g (2½ tbsp) unsalted Butter room temperature (or 2 tbsp oil)
Method
- Liquid ingredients – Ensure milk is warm, not hot (about 110 F). In a small bowl add the milk, yeast, sugar, and egg. Stir and set aside to foam for 5 mins.276 ml Warm milk or water (110℉), 100 g Egg, 50 g Sugar, 9 g Instant dry yeast
- Dry ingredients – In the large bowl of a stand mixer, with the dough hook attachment combine the flour and salt. Then, add the yeast mixture. Combine with a wooden spoon or rubber spatula562 g Bread flour , 12 g Salt
- Combine– Add the yeast mixture to the flour mixture and combine on medium-high speed for about 3 minutes scraping the sides of the bowl as necessary.
- Knead – Once all the flour is incorporated, knead the dough for 8 to 10 minutes on medium speed until smooth. The dough will be soft and sticky.
- Butter – Next, add the soft room-temperature butter a little at a time. knead again for another 10 to 12 minutes until smooth and elastic.60 g unsalted Butter
- Bowl – Remove the dough from the mixer bowl onto a lightly floured surface. Shape it into a ball. Place in an oiled bowl.
- Proof – Cover with plastic wrap or clean kitchen cloth. Leave to rise in a warm place for about an hour until doubled in volume.
- Shape – When the dough is doubled in volume invert the risen dough onto a lightly floured surface. Start to roll like a jelly roll. Fold from the top to the center then again once more towards the end. Pinch the seams together.
- Proof – Place into a buttered Pullman loaf pan seam side down. Cover the loaf pan with plastic wrap or a clean kitchen cloth. Let rise in a warm place for about 45 minutes until almost 2 inches from the top rim of the loaf pan.
- Cover – Once you see your dough is almost halfway up the sides – spray the cover of the Pullman pan lid and place it on.Pro tip – you want to place the lid on before it rises to the top so you don't ruin the rise.
- Oven – Once you see your dough is almost halfway up the sides preheat the oven to 380°F / 190°C / Gas Mark 5 for at least 20 minutes.
- Bake – Place the loaf pans on a baking sheet and into the oven. Bake – the 13-inch loaf for about 45 to 50 minutes, – the 9-inch loaf for about 25 to 30 minutes, – and the 7-inch loaf for about 20 to 25 minutes. Pro tip – The bread is done – when you tap the bottom of your loaf and you will hear a hollow sound (or the internal temperature registers between 160° to 180°F on an instant-read thermometer.
- Cool – Partially open the lid and let it cool for 10 minutes – before you invert it onto a cooling rack. Cover it with a clean kitchen towel for 5 minutes to keep soft.
- Note – Always let bread rest for at least an hour before you cut it – this is the hardest part!! But, it will prevent the steam from escaping and making the bread dry.
Notes
-
Knead until smooth and elastic.
A well-developed dough rises higher and gives you that soft, even Pullman crumb. -
Keep the dough slightly firm.
A tighter dough holds its shape, fills the corners of the pan, and bakes into a square, even loaf. -
Chill the dough for 10–15 minutes before shaping.
A short rest firms it up just enough to roll tightly, which prevents gaps and tunnels. -
Fill the Pullman pan just under halfway.
This gives the dough room to rise without popping the lid or overflowing.
Equipment you will need

Nutrition
Tried this recipe?
Mention @veenaazmanov_kitchen or tag #veenaazmanovkitchen!Tips for Success
- Knead until smooth and elastic – A well-developed dough rises higher and gives you that soft, even Pullman crumb.
- Keep the dough slightly firm -A tighter dough holds its shape, fills the corners of the pan, and bakes into a square, even loaf.
- Chill the dough for 10–15 minutes before shaping – A short rest firms it up just enough to roll tightly, which prevents gaps and tunnels.
- Fill the Pullman pan just under halfway – This gives the dough room to rise without popping the lid or overflowing.
more pullman bread variations
- If you like Brioche bread try my Brioche Pullman Bread
- And if you have sourdough make my Sourdough Pullman Loaf (Pain de Mie)
Troubleshooting Pullman Sandwich Bread
| Issue | What Went Wrong | How to Fix It |
|---|---|---|
| The loaf is dense, or didn’t rise enough | The dough was under-kneaded or proofed in a cool environment | Knead until windowpane; proof at 26–28°C; extend rise if needed |
| Lid popped open, or loaf ballooned | Overproofed or too much dough placed in the Pullman pan | Shorten final proof; weigh dough correctly for your pan size |
| Sides pulled in or shrank while cooling | The loaf was underbaked, so the structure didn’t set | Bake 5–8 minutes longer; aim for internal temp 93–95°C (200–205°F) |
| Crumb has tunnels or large gaps | Shaping was loose, or air pockets weren’t expelled | Roll tightly, pinch seams well, and tap the pan before proofing |
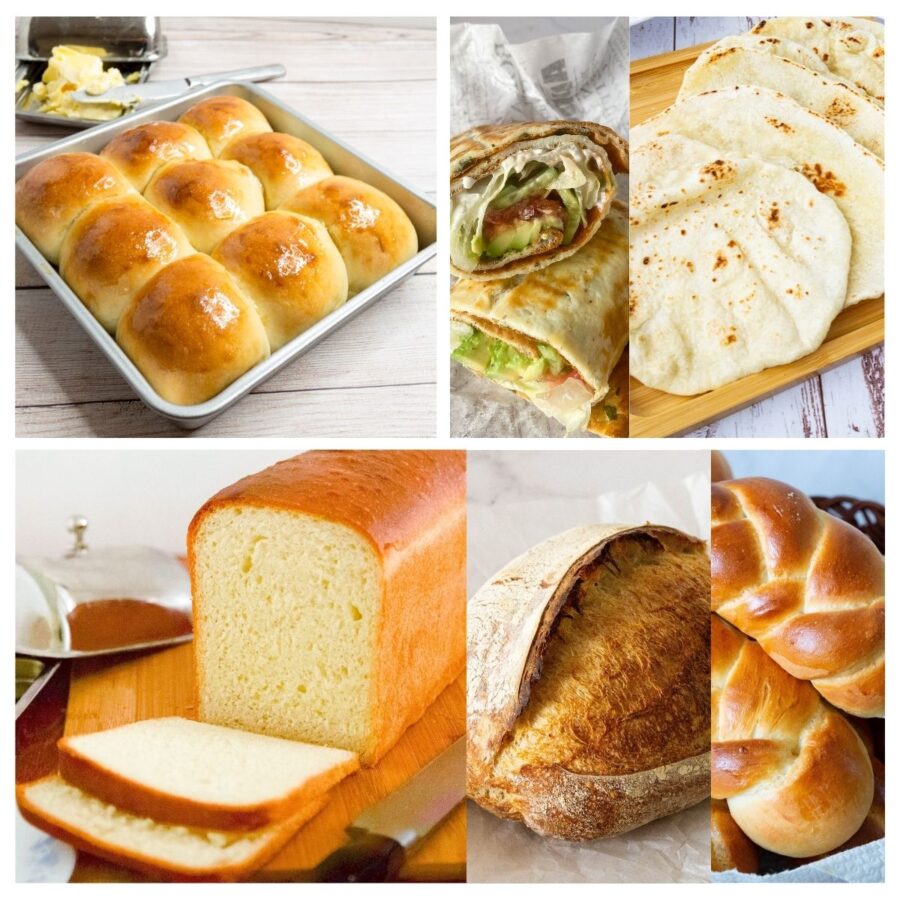
more sandwich bread recipes
- White sandwich bread recipe
- Brioche sandwich bread or Brioche Pullman Loaf
- No-knead sandwich bread
- Whole wheat sandwich bread
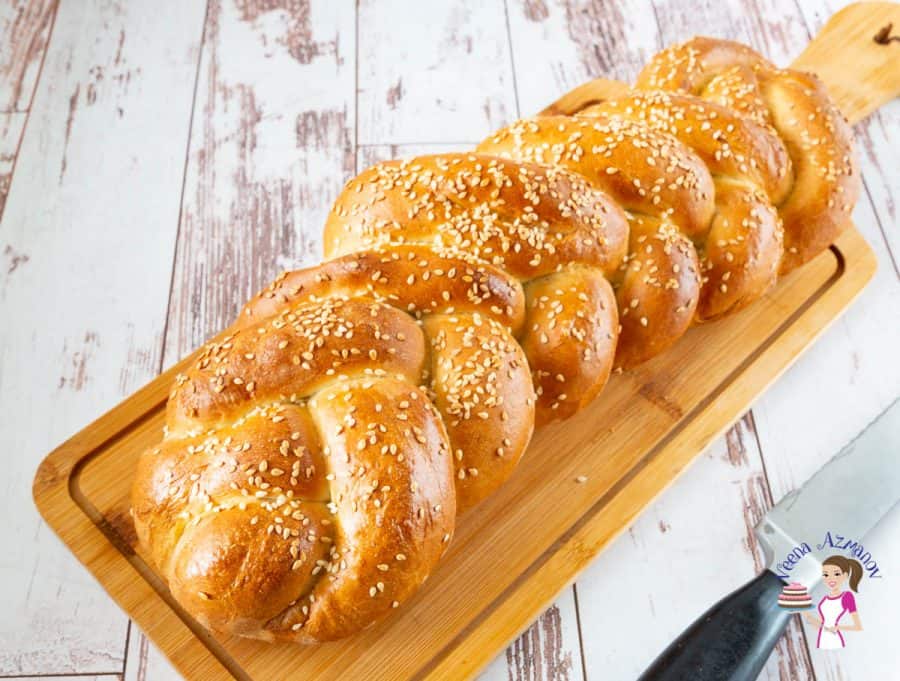
- Challah Sandwich Bread
- Challah Recipe – 3 strands, 4 strands, 5 strands, 6 strands
- See all Sandwich Bread recipes

Frequently asked questions
If stored properly, this white bread will stay for 4 to 5 days at room temperature. It can also be frozen for a month or more, too. However, never store bread in the fridge as it dries out.
Pain de mie is a soft, white or brown sliced bread in French. ‘Pain’ means bread, and ‘(de) la mie’ refers to the soft part of the bread. In English, pain de mie is similar to a Pullman loaf or regular sandwich bread.
Yes, the only difference is that a Pullman is baked in a square pan, and you need to use the right amount of dough in the pan. Too little and it won’t reach the corners for a square shape, too much may cause the bread to explode in the pan during baking.
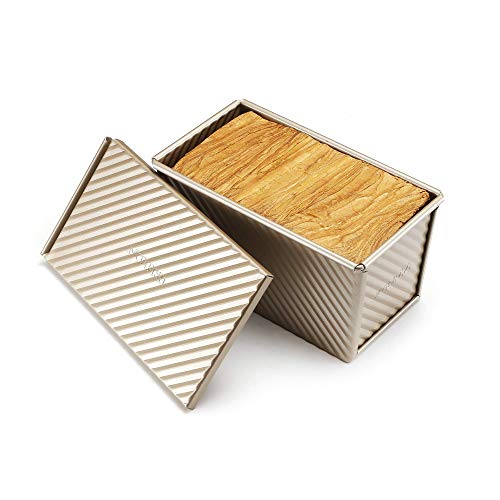
The smart choice? If you must buy one loaf pan, buy the Pullman sandwich loaf pan, so that you can make regular bread without the lid or Pullman sandwich bread with the lid. It is very important that you buy a good-quality pan. Nothing is worse than spending time on bread and having it stuck in the pan, or the lid does not work after one or two bakes. (often an issue with low-quality metal)
A good quality pan will last you for years and will be a pleasure to use over and over again. Here are three pans that I own and love very much: a 13 x 4 x 4 Pullman pan, a 9 x 4 x 4 Pullman pan, and this 8 x 4 x 4 Pullman pan can be used for this recipe.
Each Pullman pan will have its own guide for total dough weight.
16x4x4 about 1300 – 1400 grams
13x4x4 about 1100 – 1200 grams
9x4x4 about 750 – 850 grams
7x4x4 about 550 – 650 grams
you may also like
- 10 Best Gifts for Bread Bakers
- 15+ Beginner Bread Recipes for Everyday Baking
- Learn Bread Baking at Home • Step by Step 😄
- Homemade Ciabatta Recipe
- Mini Sausage Rolls
- Homemade Ciabatta Recipe

Don’t lose this recipe! Save it for Later!
📌 Save this Recipe for later on Pinterest so you can easily find it again.
⭐ Add Veena Azmanov Kitchen to your Google Preferred Sources.
It helps Google show you more of our recipes.
📧 Subscribe for new recipes delivered to your inbox.
🎥 Follow us for more recipes


The first time I tried to make this, the dough didn’t come together. It was crumbly. So I threw it out and started again and weighed everything instead. My dough was not as thin and stretchy as yours in your video. And I have unsightly seams all over it. I don’t have that rolling technique down at all! I hope it tastes better than it looks. I also used the 7 inch recipe for an 8 inch Pullman pan with lid so it didn’t quite become a beautiful square. Next time I’ll make the 9 inch recipe instead. Looking forward to using this for chicken salad sandwiches and French toast. It is just me so I appreciate the smaller loaf size!
I have a question … if using a smaller pullman pan, what would you do with the extra dough? I’m also assuming you would need to weigh the dough, so at what point would you do that?
Hi Rhonda, great question! I usually weigh the dough right after mixing and then divide it based on the size of the pan I’m using. If I have extra dough, I’ll either make a few dinner rolls, hamburger buns, or bake it in a small loaf pan.
💐💯🙌🏼👏🏼🙏🏼!!!! I just made the smallest of the three Pullman sizes and for the first time after many years and much wasted flour, I finally have a delicious worthy loaf of sandwich bread!!!! I’m sure it’s not perfect but it’s perfect to me. It’s soft and flavorful and the crumb is nice and the ultimate compliment is – it reminds me of the homemade breads I ate growing up. This will be my go too sandwich bread recipe for a long long time. 🙏🏼💐🙏🏼💐🙏🏼
Thank you so much Maria. I am so happy to hear you enjoyed this recipe.
Excellent, clearly written recipe with very knowledgeable tips. I used my new 13” lidded Pullman pan. It worked great. I also have a 9” and can make the smaller version if I want. I had to knead by hand as my stand mixer wasn’t going to be able to handle the amount of kneading required. I only use Diamond Kosher salt and generally reduce the amount to lower the sodium. I used 2 t and the full 4 T sugar. Next time I will do 3 T of sugar, it has a very good crumb, texture and flavor, but it is a tiny bit too sweet, probably due to not properly compensating for the substitution of kosher salt. Thank you, Veena for this excellent recipe.
Thank you, Kathy, for the lovely feedback. I am so happy you enjoyed making this recipe.
Made the 13 inch Pullman with bread flour and fresh milled flour 50% hard red 50% hard white, they both turned out tender, flavorful and delicious, if using fresh milled increase milk to 310 grahams.
Thank you Veena for sharing this perfect sandwich bread recipe.
Thank you so much Ann for the lovely feedback. I am so happy you enjoyed making this sandwich bread.
Hi Veena, made your 13 x 4 Paul and loaf and I’m making it again today. I’m curious and confused because your recipe calls for instant dry yeast, which reacts faster than dry yeast but in step one of the directions it says to let the yeast foam for 5 minutes. As far as I know you don’t need to activate instant yeast so I’m confused about this step
Hey Chenoa, yes, you can actually use the yeast directly in the flour and it works perfectly. I have the habit of doing it like this to ensure my yeast is good and active. It’s a personal habit and what I have done in the video, hence the instructions do the same. But, yes, you can add the yeast directly to the flour. Thanks
I used this recipe for the 13” Pullman for the first time today. It turned out very well. I do think it is a bit too sweet, but my daughter loved it. I measured by weight, and all ingredients were well thought out. I really appreciate the trial and error you have done on this recipe. I will be making the 9” and 7” tomorrow.
Thank you Tricia, for the lovely feedback. I’m so happy your daughter enjoyed this bread. You can reduce the sugar a bit – I know some have, and it has not affected the recipe. Thanks
Thank you so much for your quick response. We had toast with the bread this morning and it was fabulous. I ended up making the 13” again. I used 3 tbsp of the honey instead of 4 tbsp sugar. It is much better. Even my grands like the bread. I will see how long the 2 loaves last.
Thank you for the feedback, Tircia. I am so happy your family is enjoying this bread.
The recipe is perfect. I made this while waiting for my sourdough starter. The bread is amazing, very soft. My only issue was the suggested baking time. 45 -50 minutes for a 4 x13 pullman was way too long. It should have only been 30 – 35 minutes. I took it out after 40, smelling over done bread. Needless to say the bottom was way too brown, but the after you cut it off, the bread is very nice.
If I make this again is will keep a better eye on it and not just wait for the timer.
Hi Susan. Thanks for the feedback. Next time I bake this bread, I will recheck the time again and update if necessary. But in my oven (with the oven thermometer), most 13-inch loaves usually take me 45 to 50 minutes.
Your ingredients show 9 grams instant dry yeast – this is 1 tablespoon but you show the conversion of 2 1/4. Could you let me know which is correct for the 13” pan?
Hi Rick. 9 grams of yeast would be right for 13 inch pullman bread. Thanks
How do you slice your loaves for thin even slices?
Hey Tasha, I just use a bread knife, not special tools just my years of experience – I like thin slices so I do cut them thin. But my neighbor has this [eafl id="277218" name="Bread Slicer" text="Bread Slicer"], and she loves it. You can use it for both loaf pans and sourdough loaves.