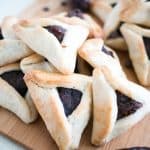
Challah Sandwich Bread
 Prep Time 20 minutes Cook Time 30 minutes Total Time 2 hours 50 minutes
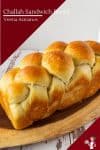
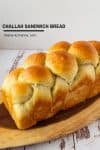
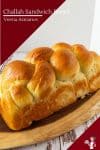
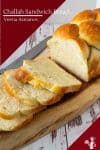
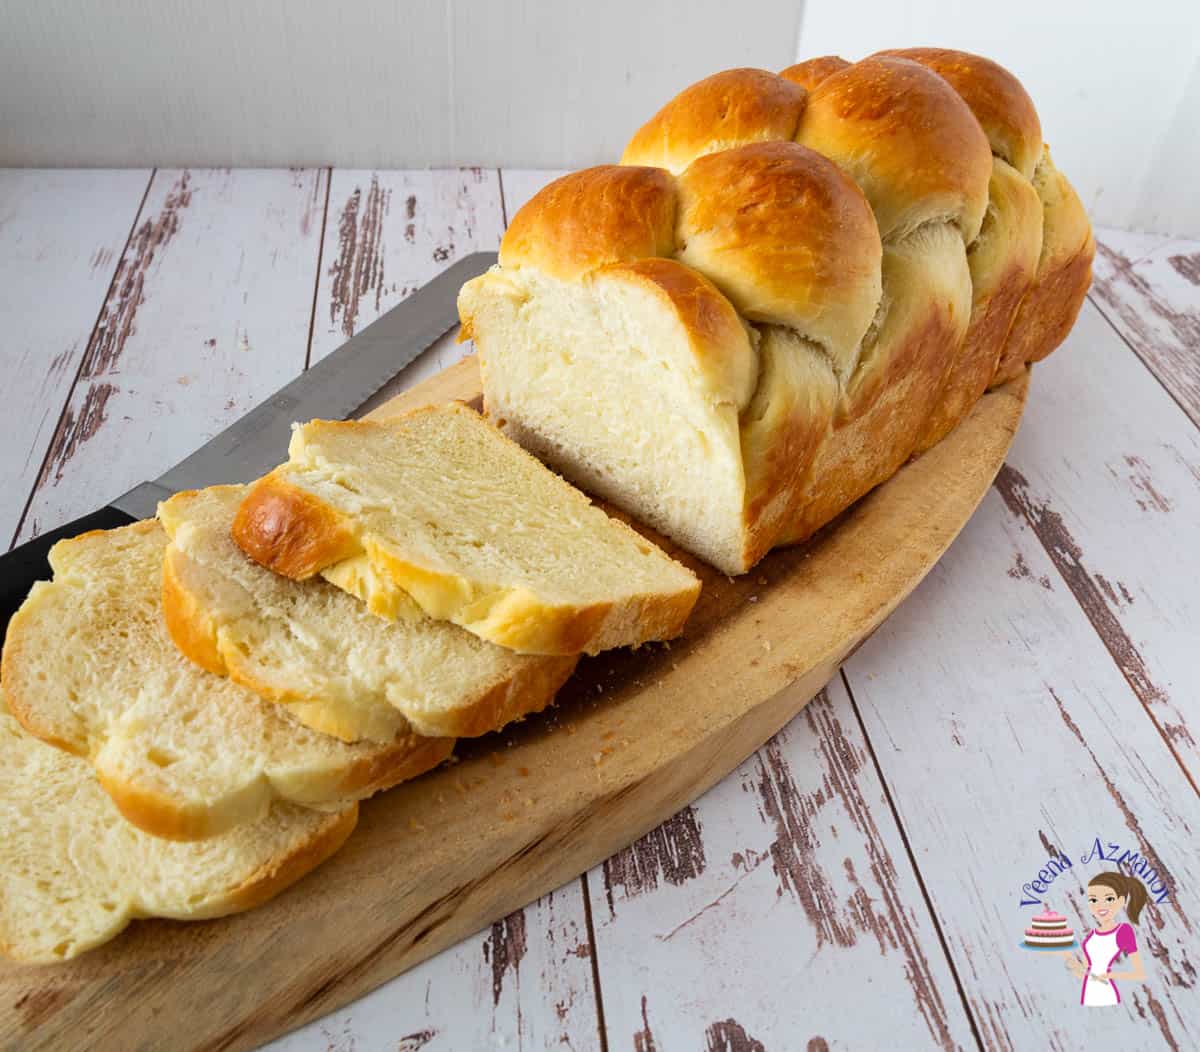
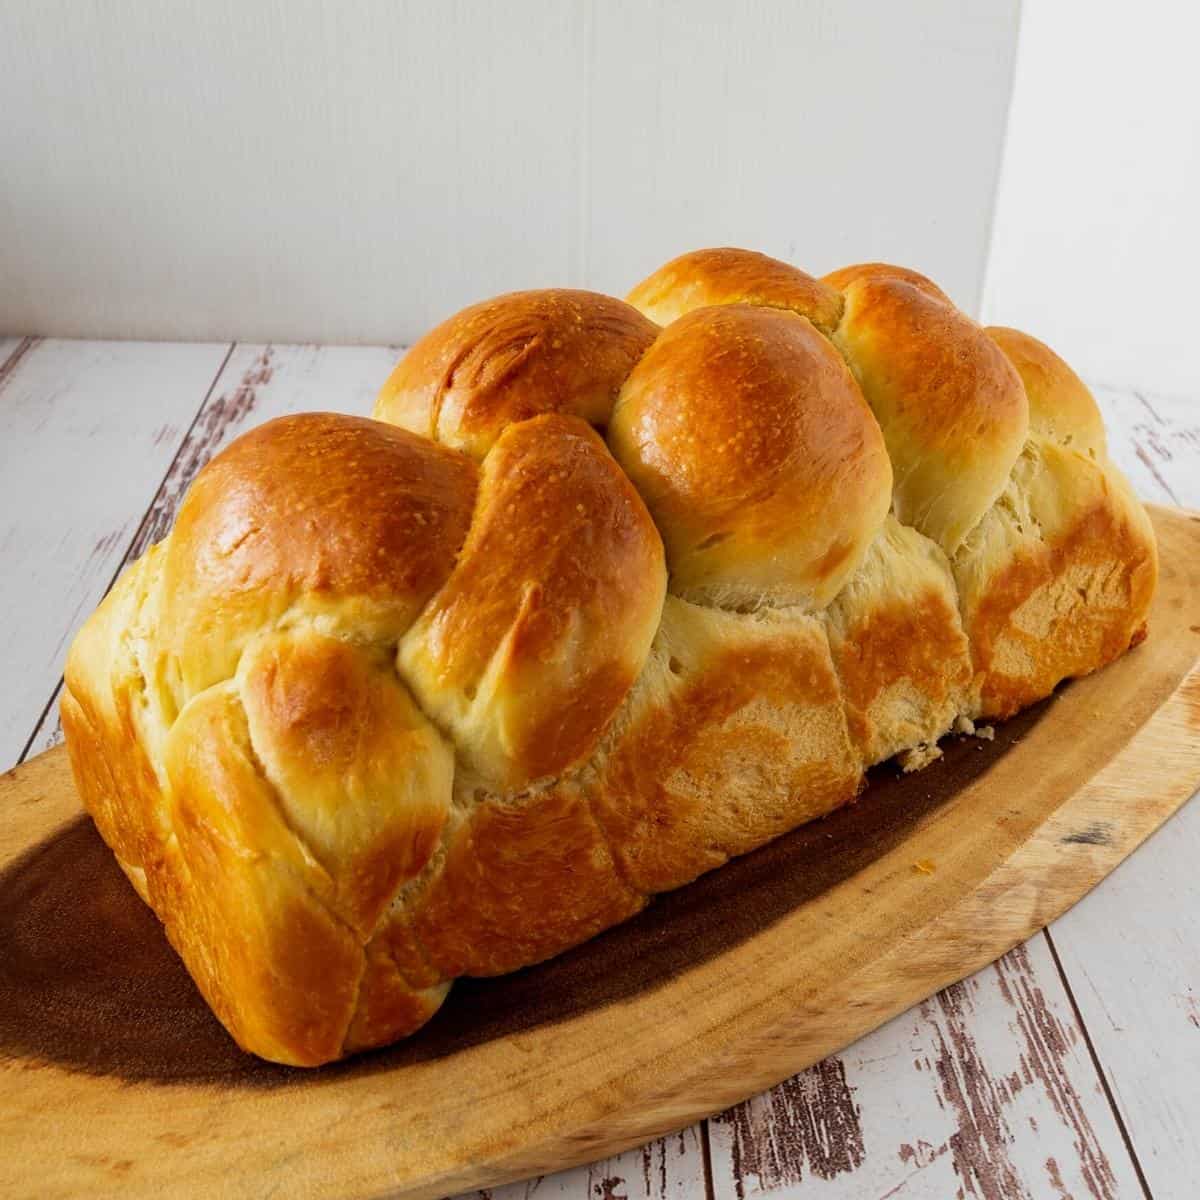
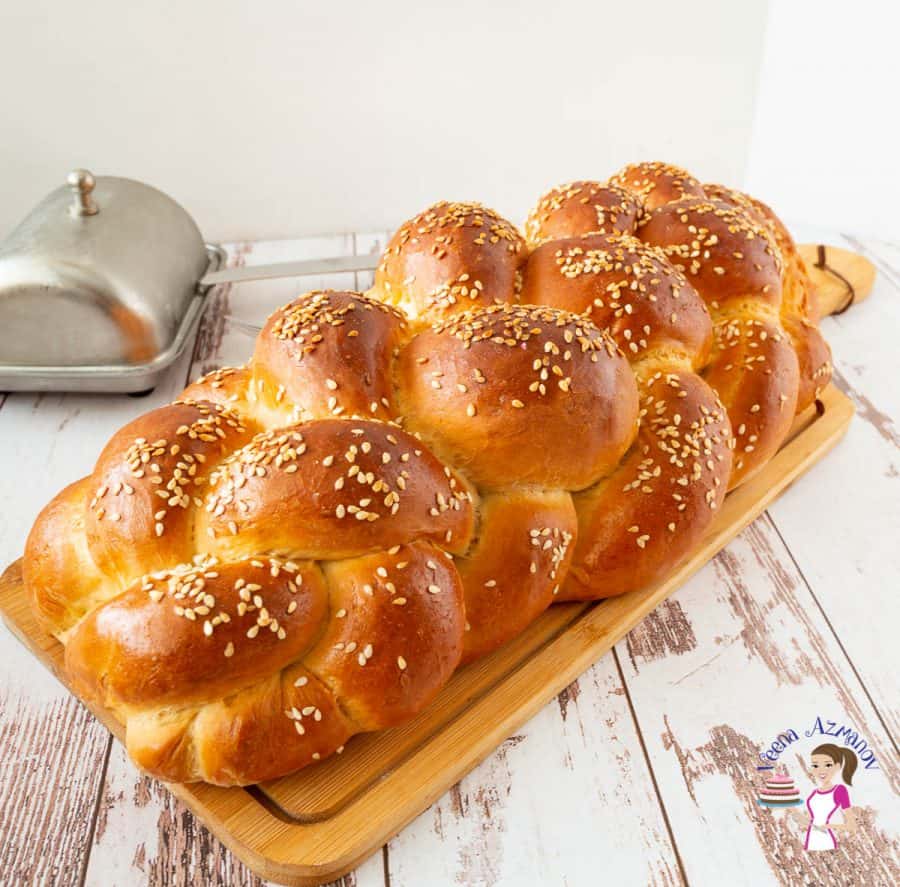
Give your next sandwich bread a braiding with this challah sandwich bread. An egg-based dough baked in a loaf pan makes perfect and impressive slices for your sandwiches.
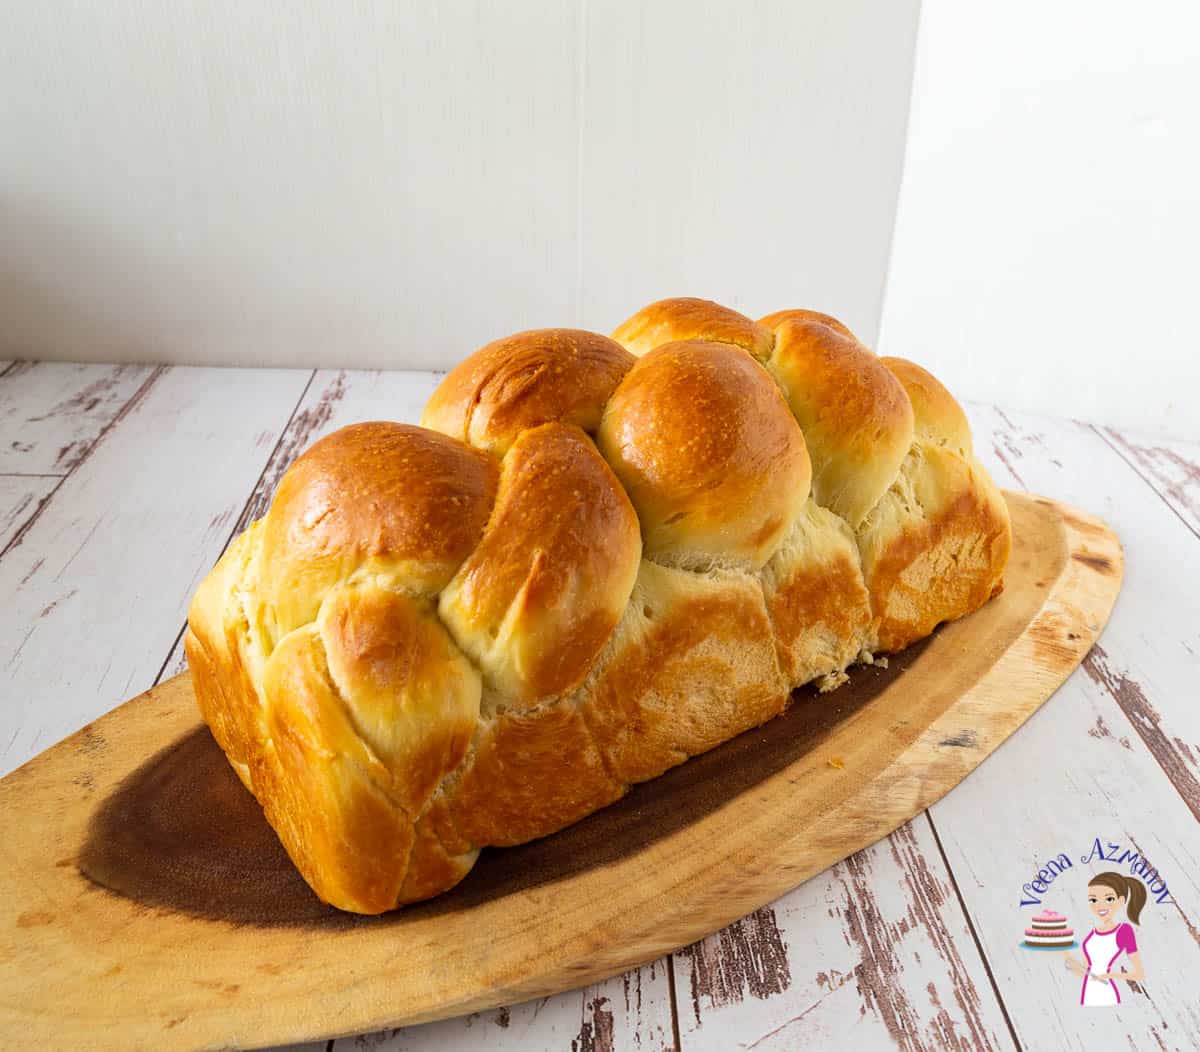
Challah is a beautiful egg-based bread made every Friday for the Jewish Shabbat and for most Jewish holidays. We eat it for dinner every Friday. In addition, the leftovers make the most delicious sandwiches and challah French toast. My kids love this bread so much that I often bake it in a loaf pan just so it makes perfect sandwich slices.
Why make this challah sandwich bread
- Making challah is easier than you think. As you can see in my video and step-by-step progress pictures, the ingredients are simple and easy.
- Also, the process is like any other bread, except that it’s braided.
- Braiding challah – The real magic about challah is braiding. This is what makes this braided loaf different from all other breads. They start from one braid right up to 10 braids. Below, I have used the six braids because they are imposing, but you can choose any of the other braided challah recipes as well.
Ingredients and substitutes
- Flour – I like using bread flour for this challah. It gives a soft chew bread with a tender crust. And yet, for years, I have made this with all-purpose flour, and it also works wonderfully. So, use either bread or all-purpose flour.
- Instant dry yeast – Today, I am using fresh baker’s yeast, but you can also use 2 1/4 tsp or one envelope of instant dry yeast or active dry yeast.
- Sweetener – This is not necessarily a very sweet dough. Traditionally, honey is used, but you can also use sugar.
- Fat – Traditionally, oil is used in challah. I love to use butter for the rich flavor it provides.
- Egg – Adds a lot of flavor to the bread, gives a tender crumb, and strengthens the texture. The egg is also a leavening agent that helps the bread rise.

Step-by-step: Challah sandwich bread recipe
Dough
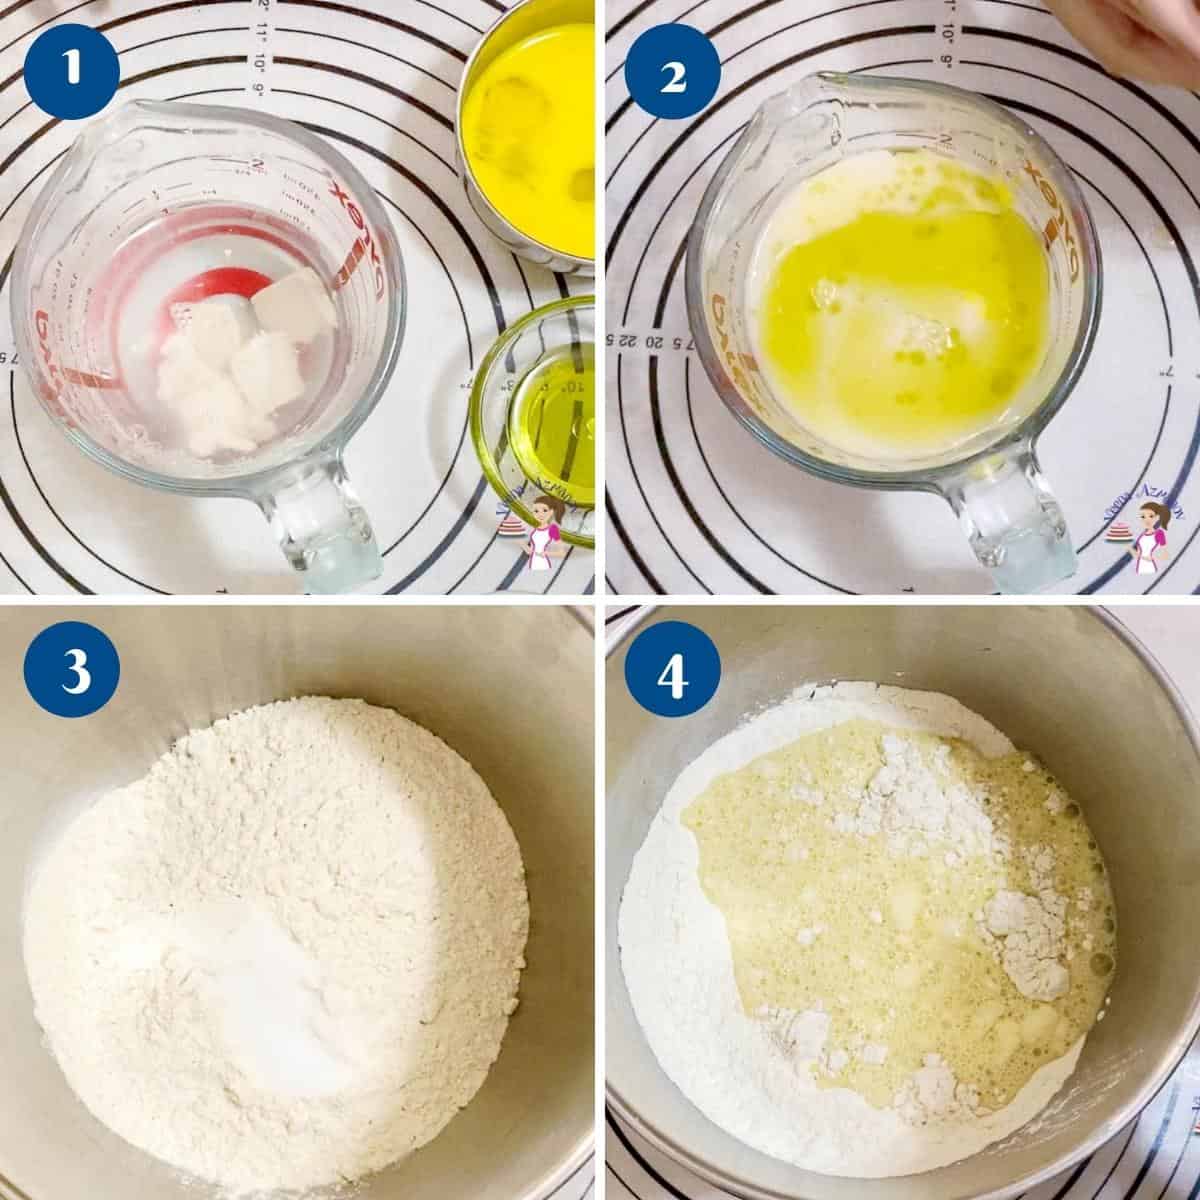
- In a small bowl or measuring cup, combine lukewarm water (110°F), yeast, honey, oil, and eggs. Whisk and set aside to foam for 3 minutes.
- Measure the flour and salt (you can also use kosher salt) in a large bowl or the bowl of a stand mixer with the dough hook. Add the yeast mixture and combine well with a spatula or a wooden spoon.
- Knead – Transfer to a well-dusted worktop and knead for 5 to 6 minutes or in the stand mixer for 4 to 5 minutes.
- First rise – When the dough is soft and shiny but still slightly sticky, shape it into a ball. Place the dough in an oiled bowl, seam side down. Coat the surface with oil to prevent drying. Cover with a clean kitchen towel or plastic wrap. Leave in a warm place. Let it rise for 60 to 90 minutes until it doubles in volume.
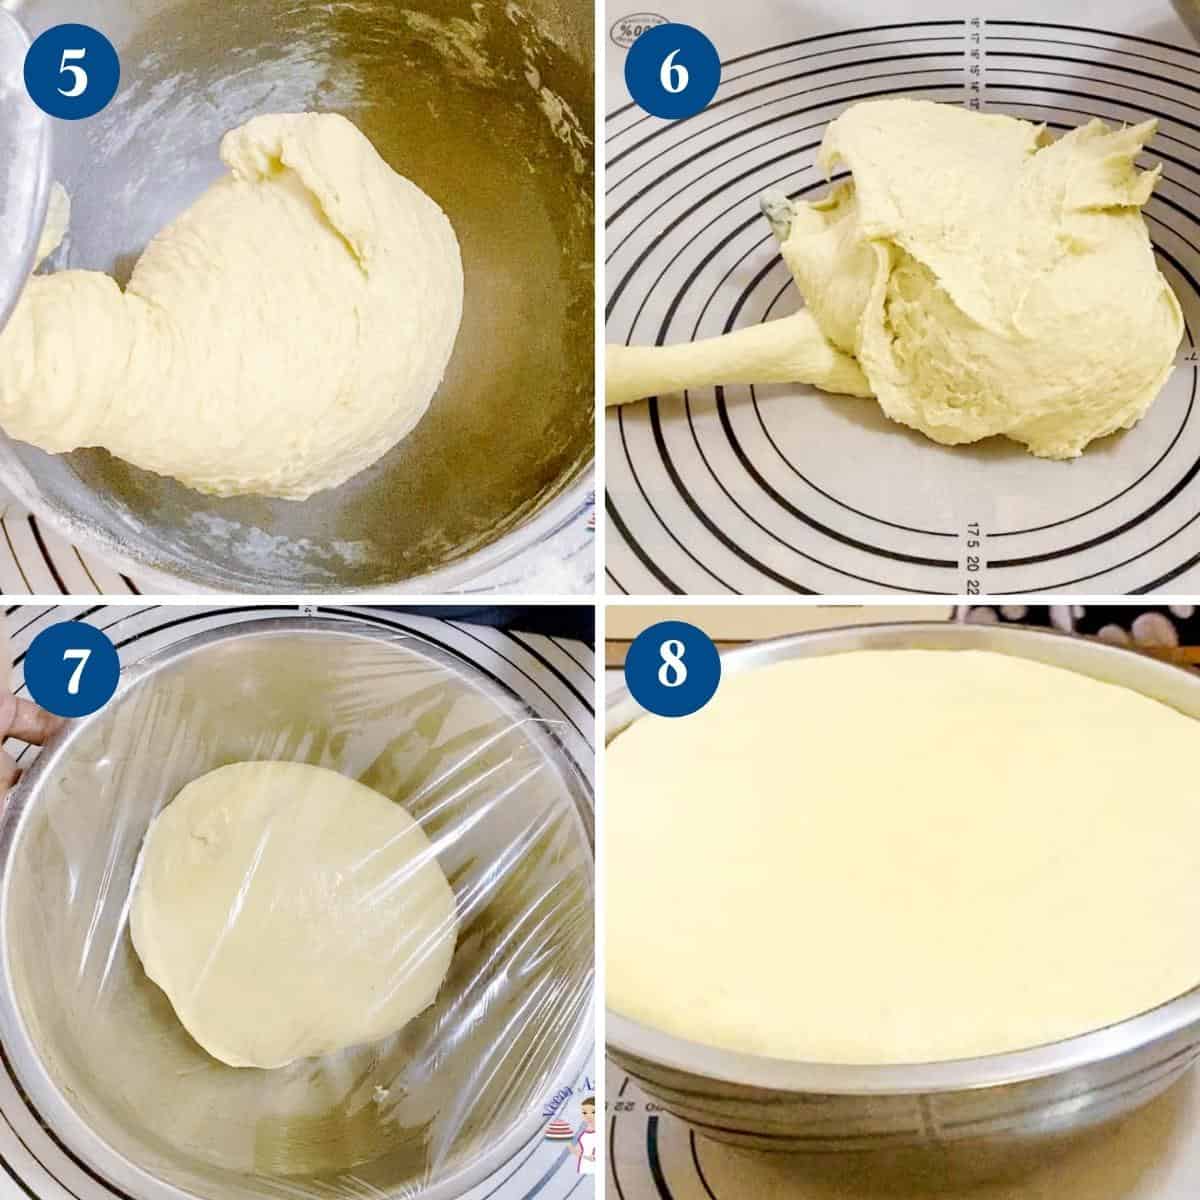
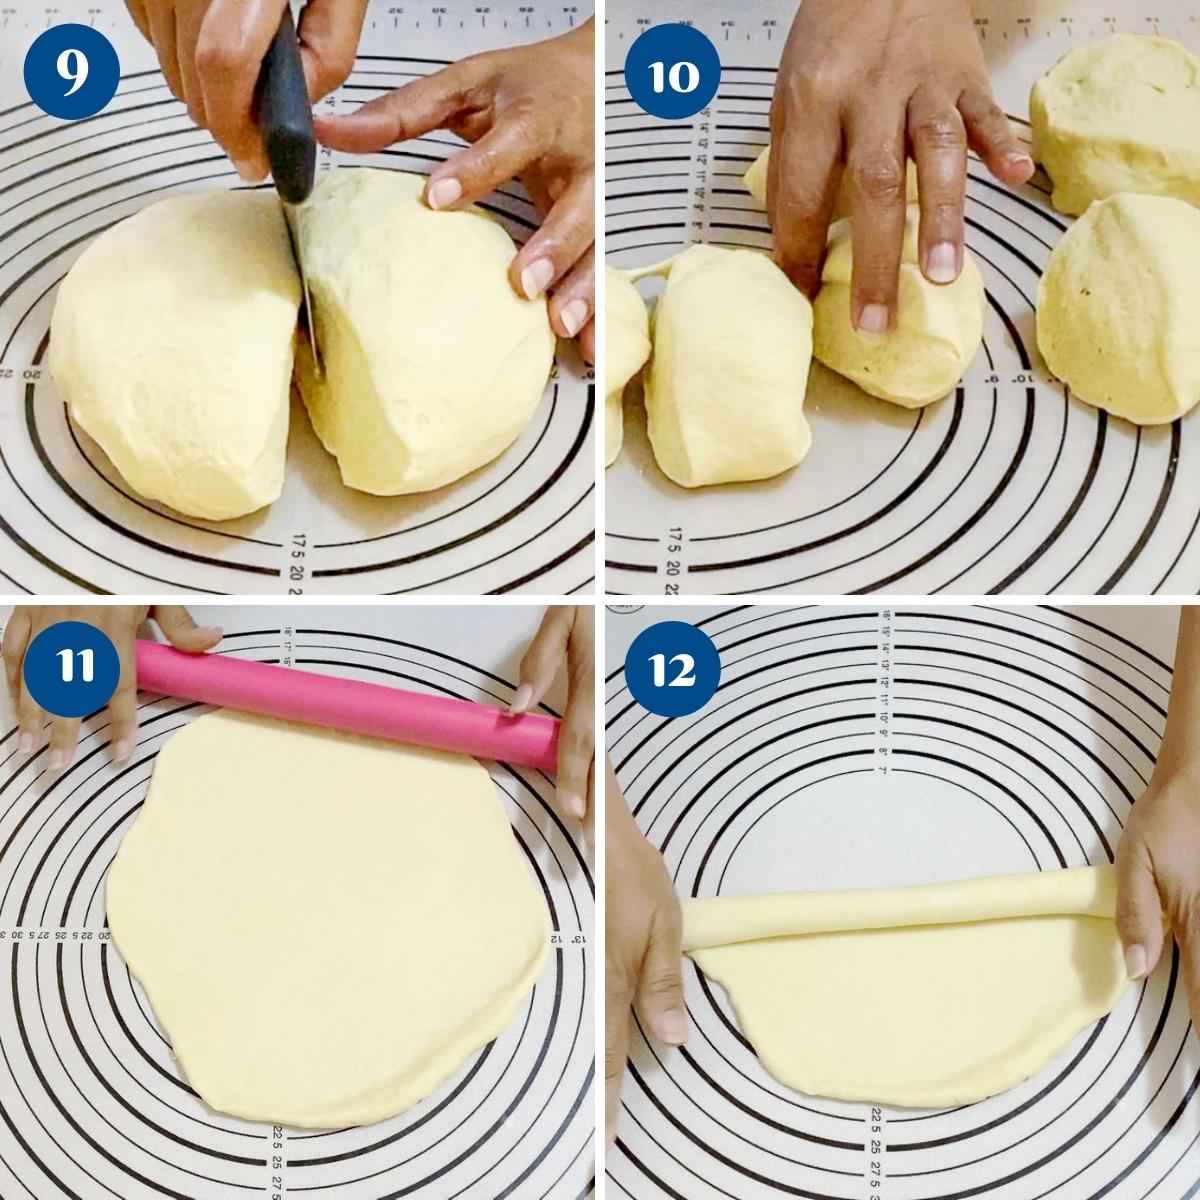
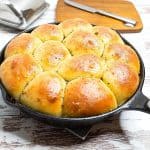
- Divide – When the dough is doubled in volume, transfer to a well-dusted floured surface. De-gas and reshape into a ball. Then, roll into a small log. Then, divide the dough into 6 portions using a bench scraper or knife. They need to be approximately the same weight. I use a kitchen scale to measure the dough. Shape each into a ball.
- Rope – Roll each ball with a rolling pin on an unfloured work surface (see video). Then, roll like a jelly roll into a rope about 18 inches long
Braid
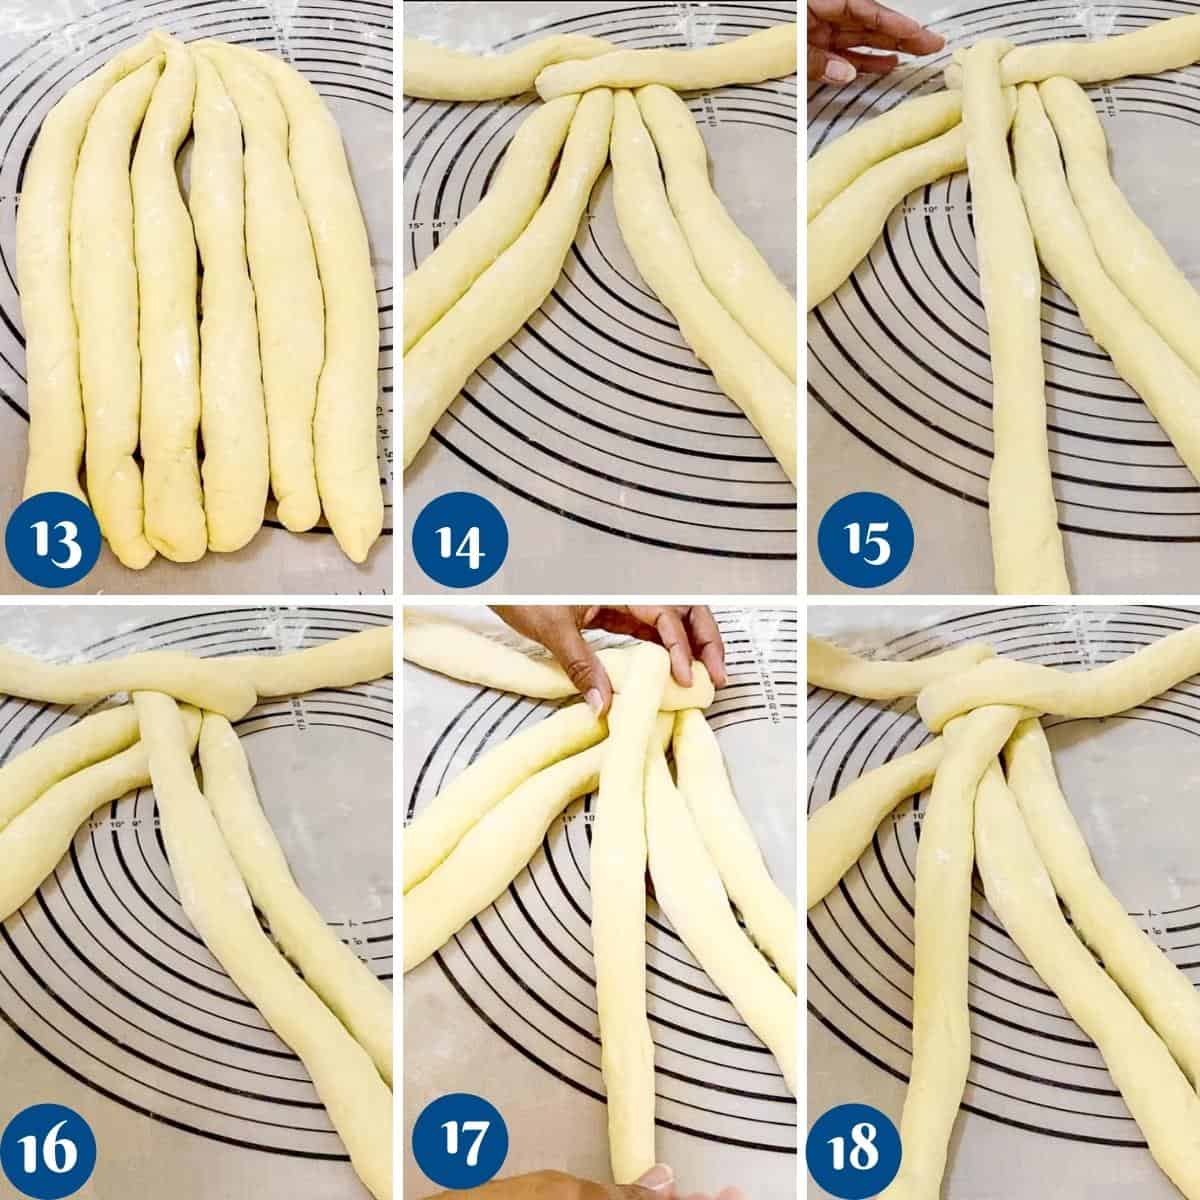
- Braiding the challah – Place all six ropes so they intersect at the top. Ensure the six strands are secured at the top. From left to right, you now have 1, 2, 3, 4, 5, and 6 strands in front of you. It’s harder when only reading my instructions, so please watch the video.–
- Continue with the process until you have reached the bottom. Tuck the seams at the top and bottom under.
- Strand 1 goes over 6 and 6 goes over 1 –
simple criss-cross (like two arms on either side). - Then, 1 comes down between 2, 3, and 4, 5.
- And 3 goes over in place of 6.
- Then, 1 comes down between 2, 3, and 4, 5.
- And 4 goes over in place of 1.
- Rise – Transfer to a sprayed 9 x 4-inch loaf pan. Cover with a clean kitchen cloth and leave to proof for 30 to 45 minutes.

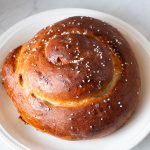
- Oven/Eggwash – 20 minutes before baking, preheat the oven to 350°F / 177°C / Gas Mark 4. Brush the bread with a beaten egg. Sprinkle a pinch of sesame seeds (or poppy seeds).
- Bake – If you make two challah breads with this dough, bake each for 20 to 25 minutes until you have a nice golden brown. If you make one large challah, (as I have here) bake for about 45 to 50 minutes until you have a nice golden brown color.
Pro tip – When baked, the internal temperature of the bread should be about 195°F. The bread will have a hollow sound on the bottom when tapped. - Cool – Remove and let cool on a wire rack for 5 minutes. Then, cover with a clean kitchen cloth to keep it soft.


Frequently asked questions
The challah will keep at room temperature for 2 to 3 days. Once cut, make sure to wrap the cut side of the bread well to prevent drying out. Also, leftovers can be used to make French toast and bread pudding.
Absolutely, I do it every week. I cut the bread into slices. Place it into a reusable silicone storage bag in the freezer. When I need I just thaw slices in the microwave for 15 to 30 seconds.
Yes, raisins, dried cranberries, and almonds are very common in challah and taste delicious.
Of course, I have made challah bread for years with all-purpose flour before I had the luxury of bread flour, and it works equally well. Bread flour does give a softer, chewier bread with a tender crumb.
Challah Sandwich Bread
Give your next sandwich bread a braiding with this challah sandwich bread. An egg-based dough baked in a loaf pan makes perfect and impressive slices for your sandwiches.
Video
Ingredients
- 240 grams (1 cup) Warm water 110F
- 9 grams (2¼ tsp) Instant dry yeast
- 30 grams (2 tbsp) Honey or sugar
- 30 grams (2 tbsp) Olive oil
- 100 grams (2 large) Eggs
- 550 grams (4 cups) All-purpose flour
- 9 grams (1¼ tsp) Salt
Method
- Yeast mixture – In a mixing bowl or measuring cup, combine warm water (110°F), yeast, honey, oil, and eggs. Stir and set aside to foam for 3 minutes.240 grams Warm water, 9 grams Instant dry yeast, 30 grams Honey, 30 grams Olive oil, 100 grams Eggs
- Dry ingredients – Measure the flour and salt in a mixing bowl or stand mixer with the dough hook. Add the yeast mixture and combine well.550 grams All-purpose flour, 9 grams Salt
- Knead – transfer to a well-dusted worktop and knead for 5 to 6 minutes or in the stand mixer for 4 to 5 minutes.
- First rise – When the dough is soft and shiny but still slightly sticky, shape it into a ball. Place the dough in an oiled bowl, seam side down. Coat the surface with oil to prevent drying. Cover with a clean kitchen cloth or plastic wrap. Leave in a warm place. Let rise for 60 to 90 minutes until it doubles in volume.
- Divide – When the dough is doubled in volume, transfer to a well-dusted floured surface. De-gas and reshape into a ball. Then roll into a small log. Then, divide the dough into six portions. They need to be approximately the same weight. I use a kitchen scale to measure the dough.
- Ropes – Shape each into a ball. If necessary, let rest for 5 to 10 minutes. Roll each ball with a rolling pin on an unfloured work surface. Then, roll like a jelly roll into a rope about 18 inches long (see video)
- Braiding the challah – Ensure the six strands are secured at the top. From left to right, you now have 1, 2, 3, 4, 5, and 6 strands in front of you. – Strand 1 goes over 6 and 6 goes over 1 – simple criss-cross (like two arms on either side).– Then, 1 comes down between 2, 3, and 4, 5.– And 3 goes over in place of 6.– Then, 1 comes down between 2, 3, and 4, 5.– And 4 goes over in place of 1.Continue with the process until you have reached the bottom. Tuck the seams at the top and bottom under.
- Second rise – Transfer to a sprayed 9-inch loaf pan. Cover with a clean kitchen cloth and leave to proof for 30 to 45 minutes.
- Oven/Egg wash – About 20 minutes before baking, preheat the oven to 350°F /177°C / Gas Mark 4. Brush the bread with a beaten egg.
- Bake – If you make two challah breads with this dough, bake each for 20 to 25 minutes until they are nice and golden brown. If you make one large challah (as I have here), bake for about 45 to 50 minutes until they are nice and golden brown.
- Cool – Remove and let cool on a wire rack for 5 minutes. Then, cover it with a clean kitchen cloth to keep it soft.
Notes
- Use Fresh Ingredients: Make sure your yeast is fresh and active. Check the expiration date and proof the yeast before using it to ensure it’s working. Use good-quality all-purpose flour for consistent results.
- Measure Accurately: For accuracy, use a kitchen scale to measure your ingredients, especially the flour. Too much or too little flour can affect the dough’s consistency.
- Activate Yeast Properly: Dissolve the yeast in warm water (about 110°F/45°C) with a bit of sugar to activate it. Let it sit for 5-10 minutes until it becomes frothy.
- Knead Thoroughly: Knead the dough until it is smooth, elastic, and slightly tacky but not sticky. This usually takes about 10 minutes by hand or 5-7 minutes with a stand mixer.
- Allow Proper Rising Time: Let the dough rise in a warm, draft-free area until it has doubled in size. This can take 1 to 1.5 hours for the first rise. The second rise, after shaping, should be about 30-45 minutes until puffy.
- Maintain Consistent Braiding: Divide the dough into equal pieces and roll them into uniform ropes. Follow a consistent braiding pattern, starting with the outermost ropes and bringing them to the center alternately.
- Monitor Oven Temperature: Preheat your oven to 350°F (175°C) and use an oven thermometer to ensure the temperature is accurate. Bake in the center of the oven for even heat distribution.
- Egg Wash for a Glossy Finish: Apply an egg wash made from a beaten egg yolk mixed with a tablespoon of water. This will give the challah a beautiful, glossy finish. If desired, sprinkle sesame or poppy seeds on top for added texture and flavor.
- Check for Doneness: The challah is done when it is golden brown and sounds hollow when tapped on the bottom. If the top browns too quickly, tent it with aluminum foil during the last 10-15 minutes of baking.
- Cool Properly: Allow the challah to cool on a wire rack to prevent the bottom from becoming soggy. Let it cool completely before slicing to maintain its structure.
- Practice and Patience: Braiding takes practice. Don’t be discouraged if your first few attempts aren’t perfect. The more you practice, the better your braids will become.
- Experiment with Flavors: Once comfortable with the basic recipe, experiment by adding flavors like cinnamon, raisins, or other dried fruits to the dough for variety.
Equipment you will need


Nutrition
Tried this recipe?
Mention @veenaazmanov_kitchen or tag #veenaazmanovkitchen!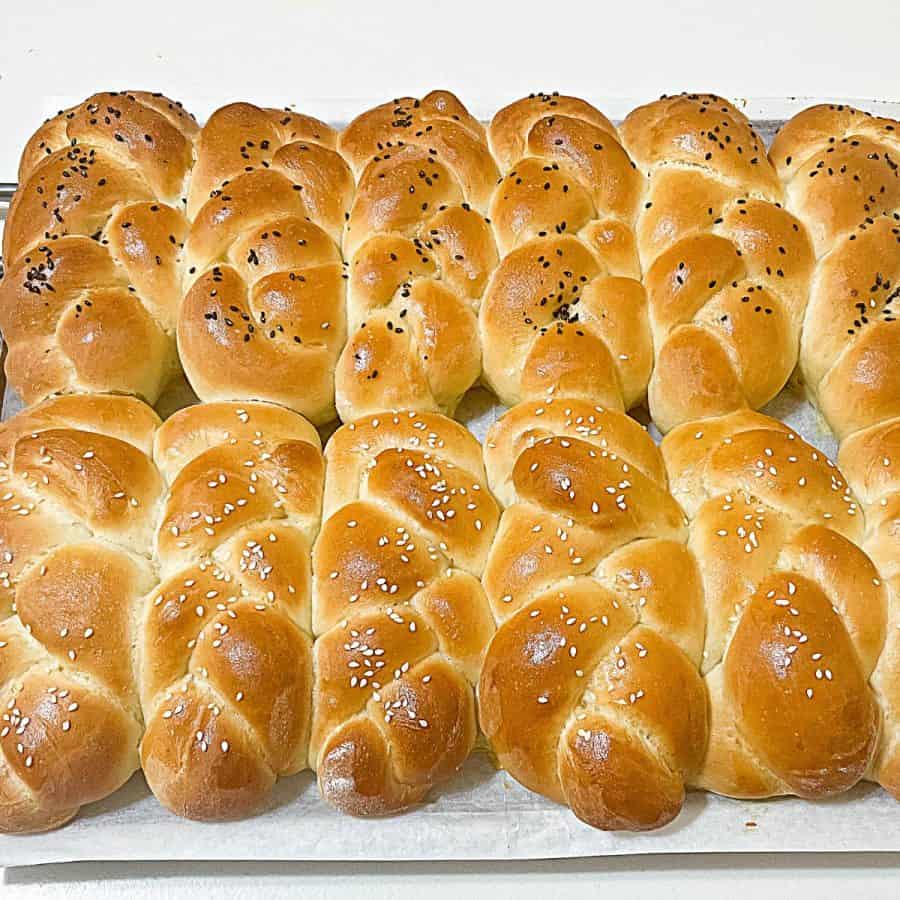


Don’t lose this recipe! Save it for Later!
📌 Save this Recipe for later on Pinterest so you can easily find it again.
⭐ Add Veena Azmanov Kitchen to your Google Preferred Sources.
It helps Google show you more of our recipes.
📧 Subscribe for new recipes delivered to your inbox.
🎥 Follow us for more recipes

Can this bread be made without braiding?
Yes! you can – just shape it into a log and place it in the loaf pan. Challah dough has more structure than regular sandwich bread because it needs to hold its shape without a mold, whereas sandwich bread can be made much lighter because it is intentionally baked in a pan. Check out my other sandwich bread recipes, including challah sandwich bread.
I have a question, not a comment. Can I bake my challah in a glass loaf pan? Or is a non stick metal loaf pan best? And if a glass pan is ok, should I line it with parchment paper?
Valerie, you can use any loaf pan, glass, or metal. You only need to spray the pan well before placing the bread in it.
Bread will not stick in a well-greased pan. If I use the loaf pan for cake then yes, parchment works best.
Thanks
Could you use a babka filling? I was thinking of adding a bit of vanilla and doing a challah dough babka so it will be parve using the olive oil instead of the milk and butter but not sure ifit would work or be too dry
Yes, you can use babka filling for sure. I often use leftover challah dough for Nutella or chocolate bread for the kids over the weekend.
Hi, Veena! I wanted to make the challah sandwich bread but something in the ingredients puzzles me. You wrote 180 gr. or 240 ml water. From all I know from chemistry class (and my mom’s a chemistry teacher so I knew it well) 180 gr. water is actually 180 ml water and 240 ml water will be 240 gr. water. So how much water do I need 180 gr./ml or 240 gr./ml ?
Petina. Sorry about that confusion. It should read 1 cup water – 240 ml. Thanks for bringing it to my attentiong. I must have had a type error when writing the conversions
Love this recipe!! Tried both the regular and slow rise versions. I even added apple filling for Rosh Hashanah.
could you rise and freeze once braided then thaw and let rise when ready to bake? Also could you use canola oil or add a dash of vanilla if you want it a bit more dessert like.
Yes, I made an apple pie filled challah this year as well. I have not tried freezing the dough after braiding so not sure how that will work.
You can definitely use canola oil and also add vanilla extract to the dough for flavor.
Thank you. The challah worked out great! I made one with apple cinnamon filking and it was a big hit. so much do my grandparents thought they were bought fresh at a kosher bakery despite the fact I froze them! The recipe is so easy Im able to make it at least once a week!
Thank you so much for the lovely feedback Carly.
I like the option of using pans to make sandwich challah. Could you please tell me if I should grease the pan before placing the dough in it. Thanks very much.
Yes, please, Oriel. I like to use a spray but you can also butter it for a nice golden finish.
I’m confused – you mention milk and honey in the instructions but these aren’t in the list of ingredients.
Hey Karissa. Sorry for the confusion. This bread is made with water and honey but you can use milk instead of water too. If you prefer to use milk and honey try this milk and honey challah dough recipe and bake in the sandwich pan
Came out great – thank you!
Thank you, Karissa.