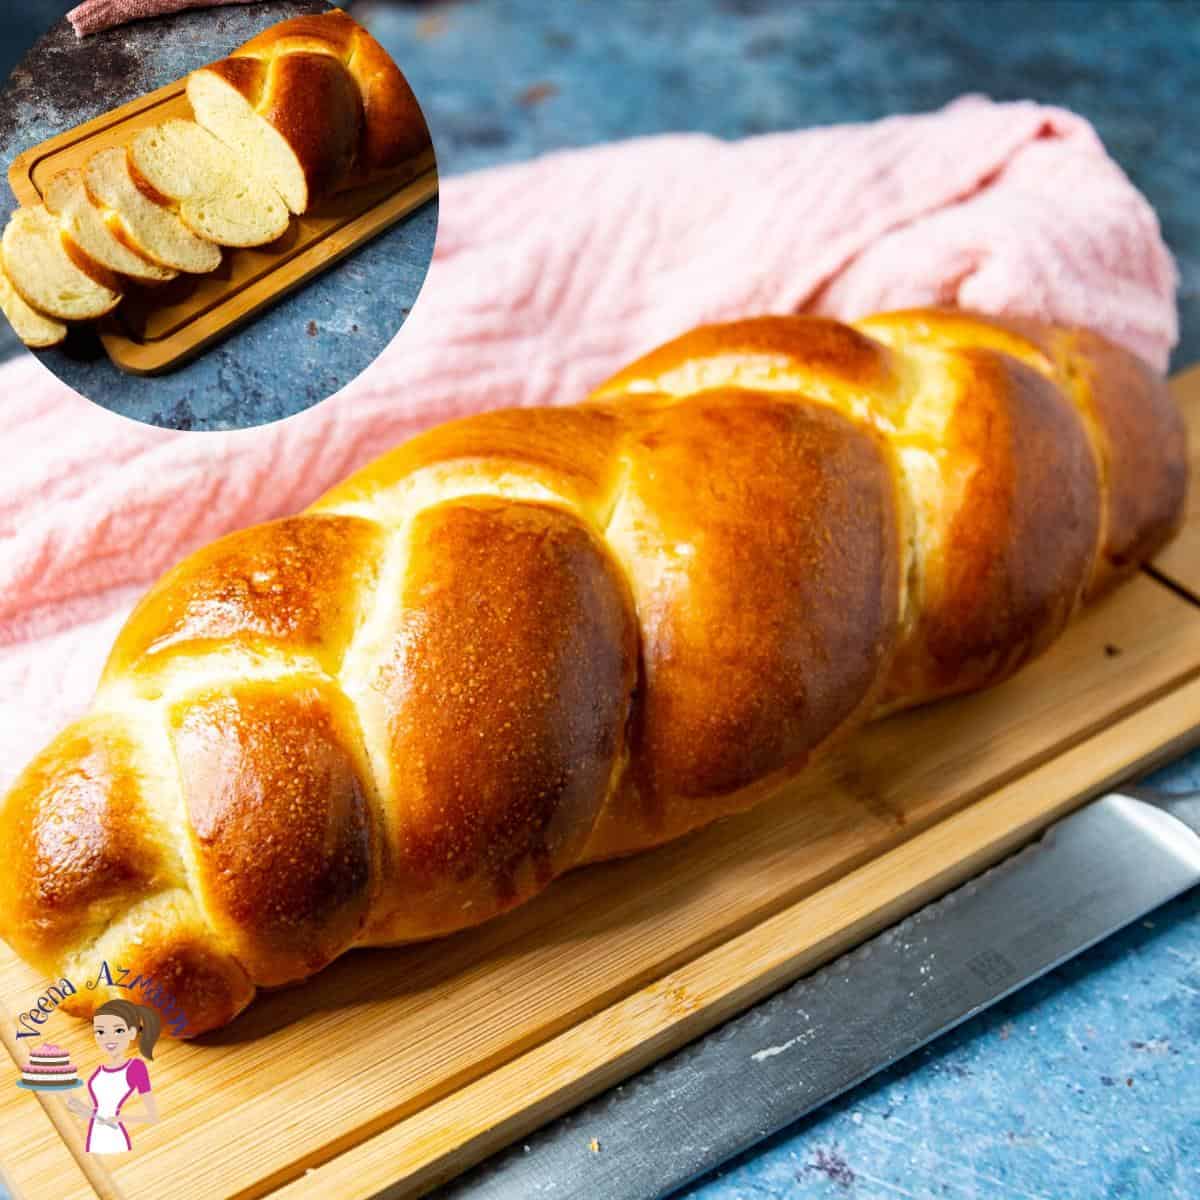
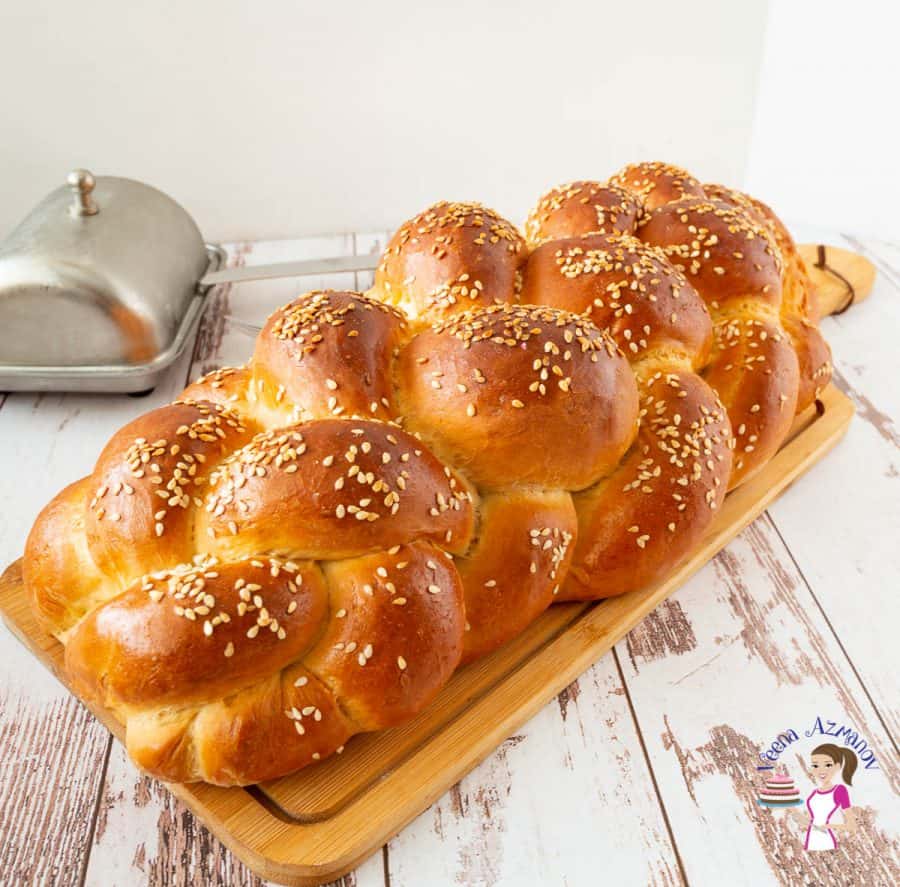
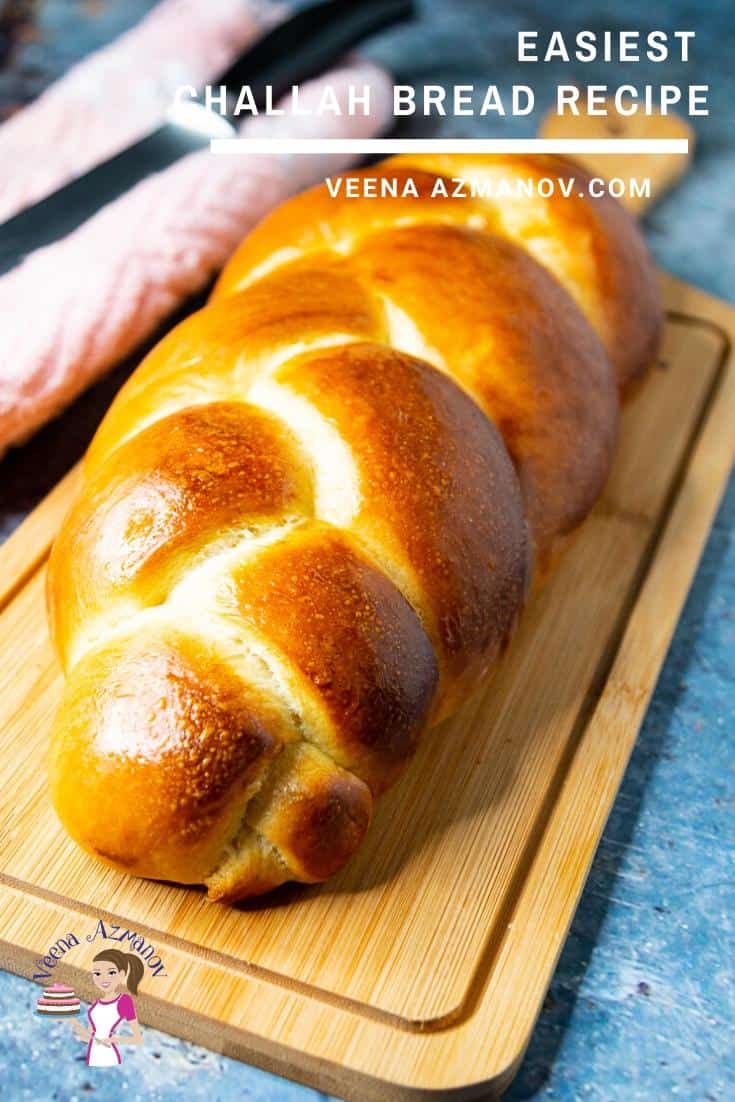
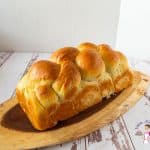
Easiest 3 Braid Challah Bread Recipe
 Prep Time 30 minutes Cook Time 25 minutes Total Time 2 hours 40 minutes
Have you been intimidated by the pretty challah? Not anymore. Today, I share with you the easiest three-braid challah bread recipe you will ever make. This recipe uses just six ingredients, which are regular pantry staples, and the process is surprisingly simple and easy.
Living in Israel means challah is part of every Friday. You can pick up a fresh loaf at almost any bakery, but there’s something special about making it yourself. The smell alone fills the whole house, and everyone somehow finds their way into the kitchen asking if it’s ready yet.
I’ve noticed something funny over the years. A store-bought challah can sit on the counter all weekend without much trouble, but my homemade one rarely survives Friday dinner. Between everyone tearing off “just one more piece” while it’s still warm, there’s usually very little left by the end of the evening. That’s exactly why I often bake extra dinner rolls for the rest of the weekend.
What is Challah?
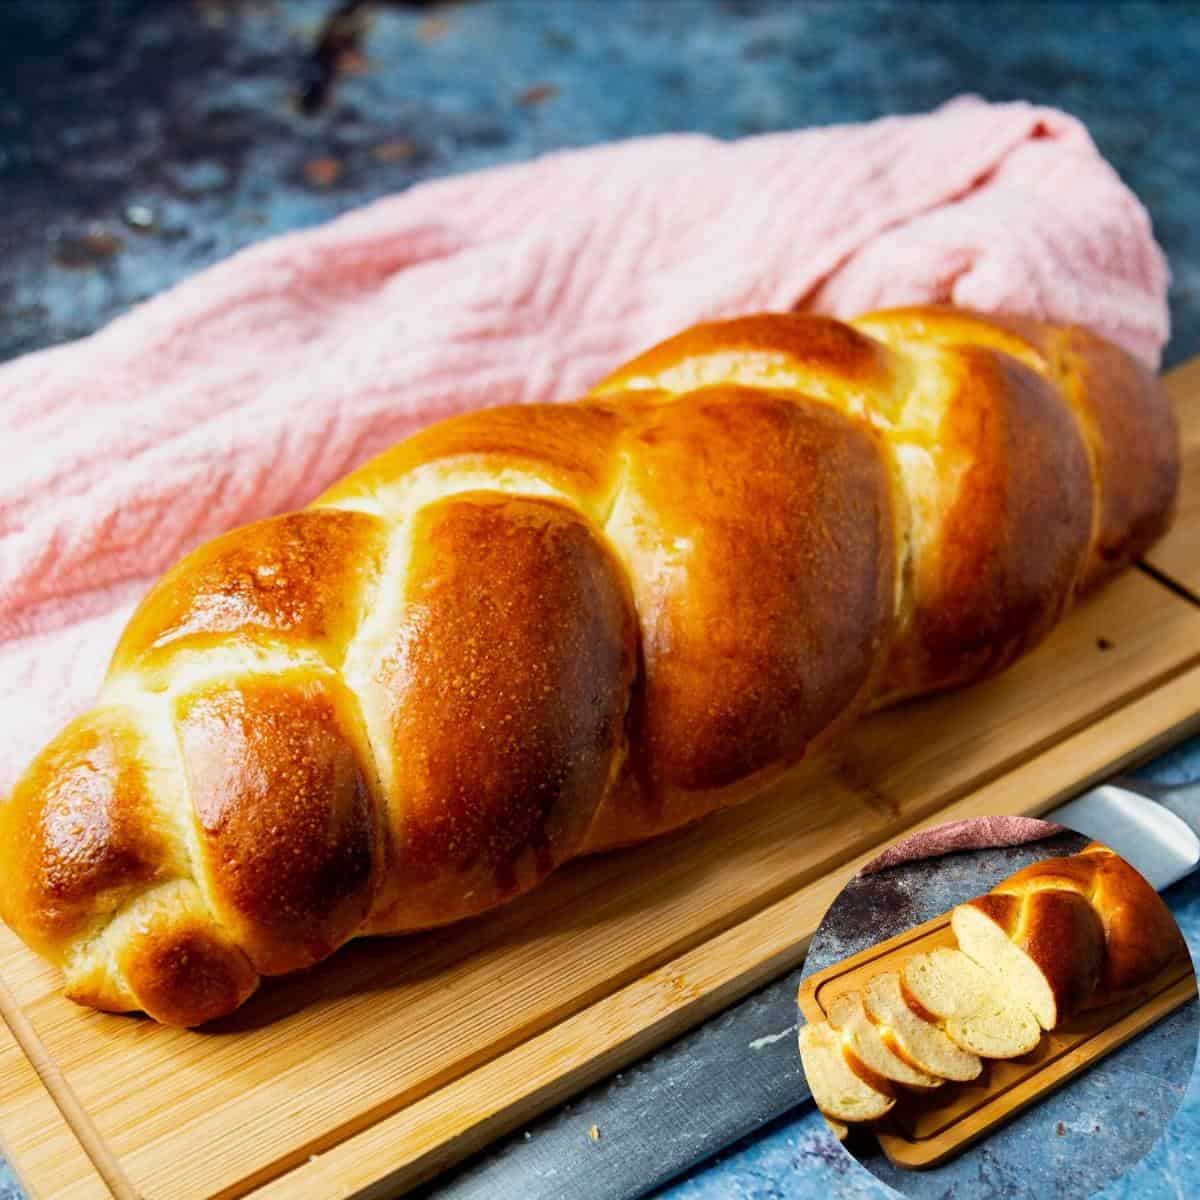
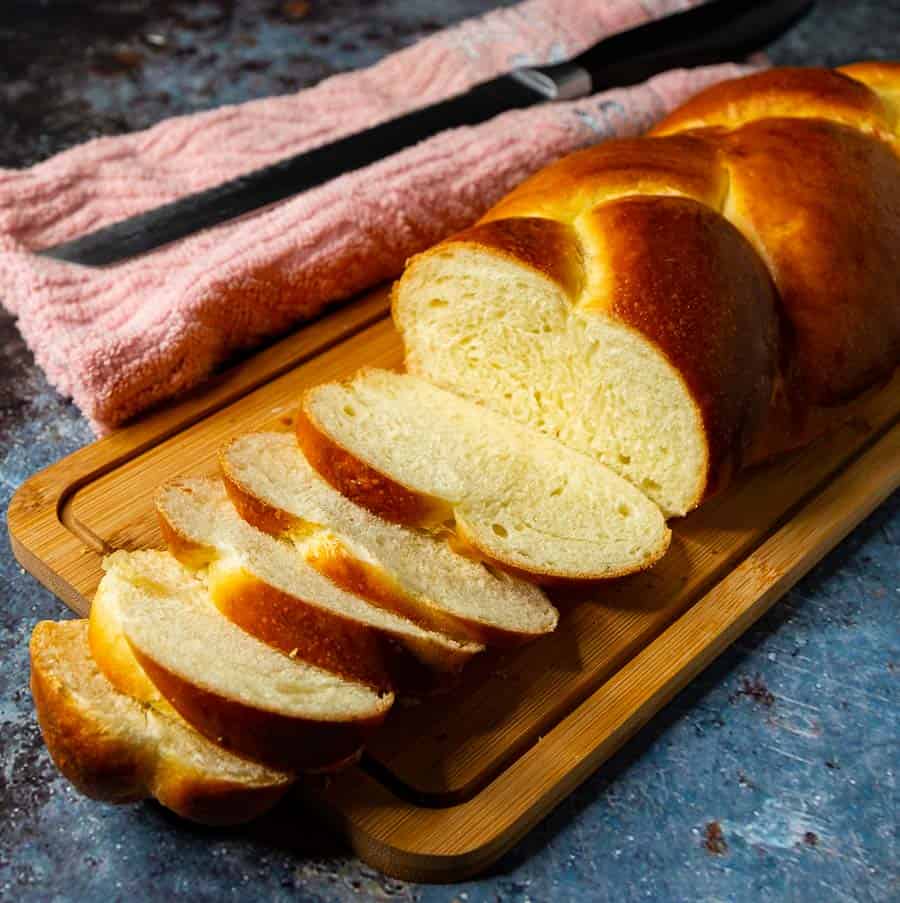
Challah is a traditional Jewish braided bread that’s often served on Shabbat (Friday evening) and Jewish holidays. It’s known for its soft, fluffy crumb, rich golden crust, and beautiful braided shape.
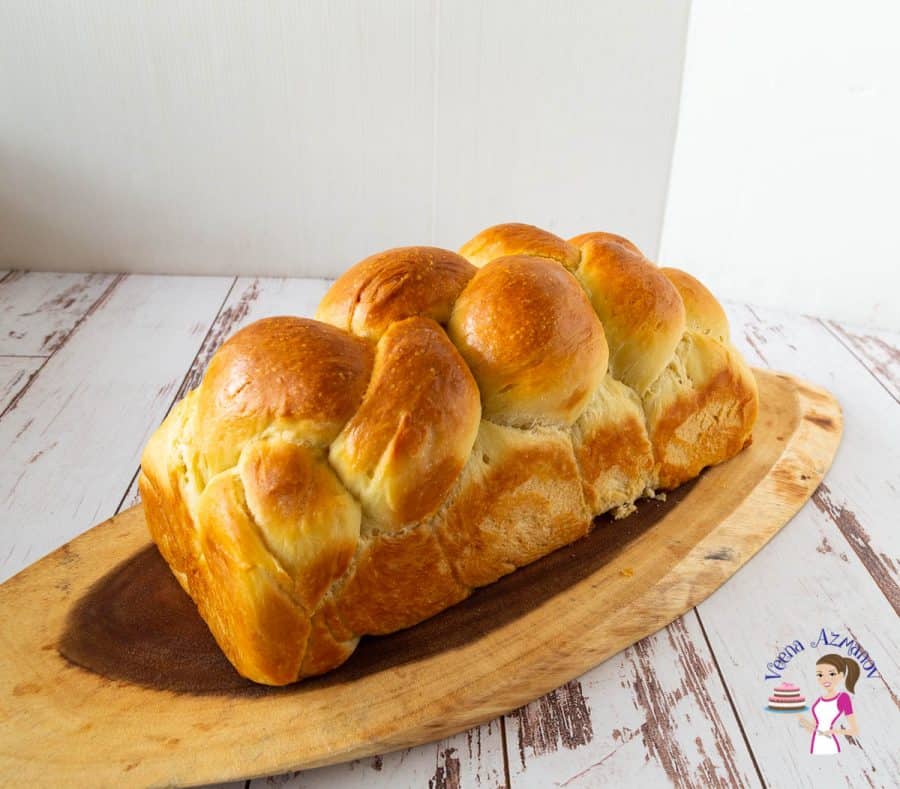
While traditional challah is usually made without dairy so it can be served with meat meals according to kosher dietary laws, many home bakers also enjoy richer variations made with milk, butter, or honey. Whether you choose a classic three-strand braid or a more decorative five- or six-strand loaf, the dough is wonderfully soft and perfect for sharing.
Why make this challah recipe?
- Rich Flavor: The combination of sugar, eggs, and a touch of vanilla (if used) creates a subtly sweet and rich flavor profile that complements both savory and sweet toppings.
- Perfect Texture: The dough is carefully kneaded to achieve a smooth and elastic texture, resulting in a challah that is light, fluffy, and tender on the inside, with a perfectly crisp crust on the outside.
- Visually Stunning: The six-braid technique not only makes the challah look impressive and beautiful but also ensures an even bake, making it a centerpiece for any table.
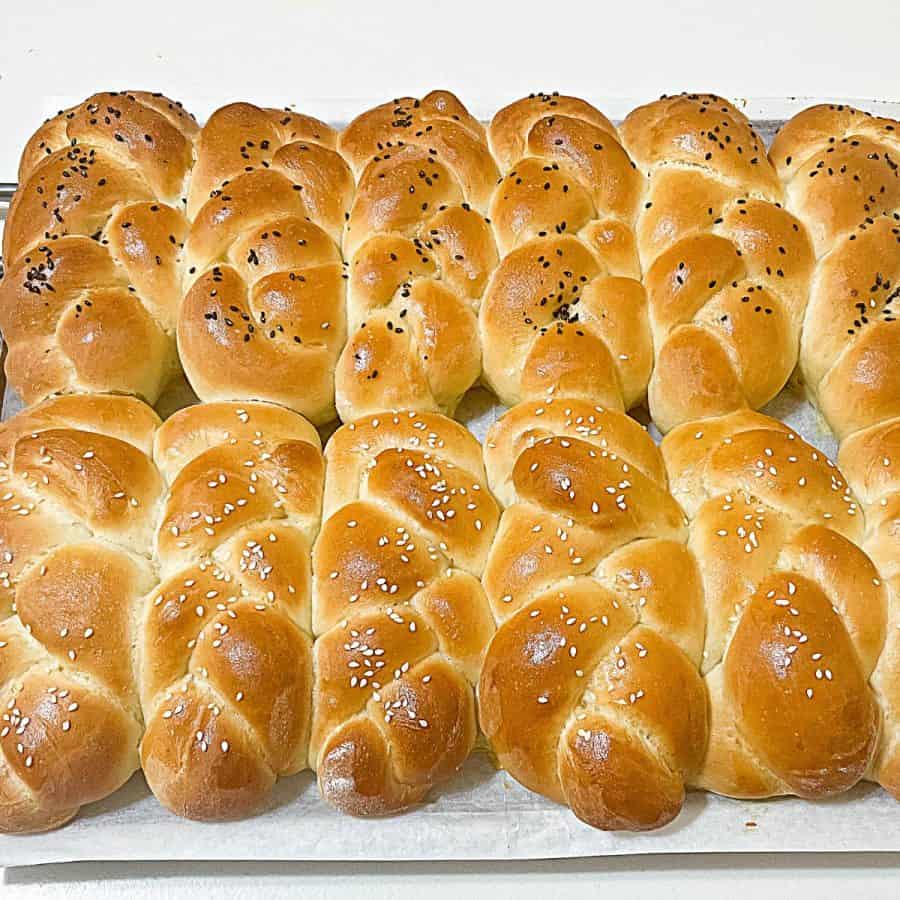
- Versatile: This challah is incredibly versatile. It can be enjoyed plain, used for sandwiches, turned into French toast, or served with a variety of spreads and toppings. The addition of sesame or poppy seeds provides extra flavor and texture.
Ingredients and substitutes
- Flour – I like using bread flour for this challah. It gives a soft, chewy bread with a tender crust. But, for years, I have made this with all-purpose flour, and it works wonderfully too. So, use either bread or all-purpose flour.
- Water – As I said above, traditionally, challah is made with warm water, but the same amount of milk works just as well.
- Instant dry yeast – I like to use instant dry because I’ve always had great success with it. If you need to use active yeast, you will require 2 1/4 teaspoons or one packet. And if you use fresh yeast, you will need about 21 grams. Also, activating the yeast is unnecessary, but I like to take the guesswork out and make sure my dough will rise.
- Sugar – This is not necessarily very sweet because I will be serving it with the main course for dinner. However, you can increase the sweetness a bit more to make the challah sweeter. If you prefer, you can also substitute sugar with honey.
- Oil – Vegetable oil adds flavor, but butter-flavored margarine works just as well. Of course, I often like to use butter.
- Egg – Adds a lot of flavor to the bread, gives a tender crumb, and strengthens the texture. The egg also serves as a leavening agent, helping the bread rise.

Step-by-step: Easy Challah – 3 Braid Bread
Challah Dough
- Yeast mixture – In a mixing bowl or measuring cup, combine warm water (110°F), yeast, honey, oil, and eggs. Stir and set aside to foam for 3 minutes.
- Dry mixture – Measure the flour and salt in a mixing bowl or stand mixer with the dough hook.
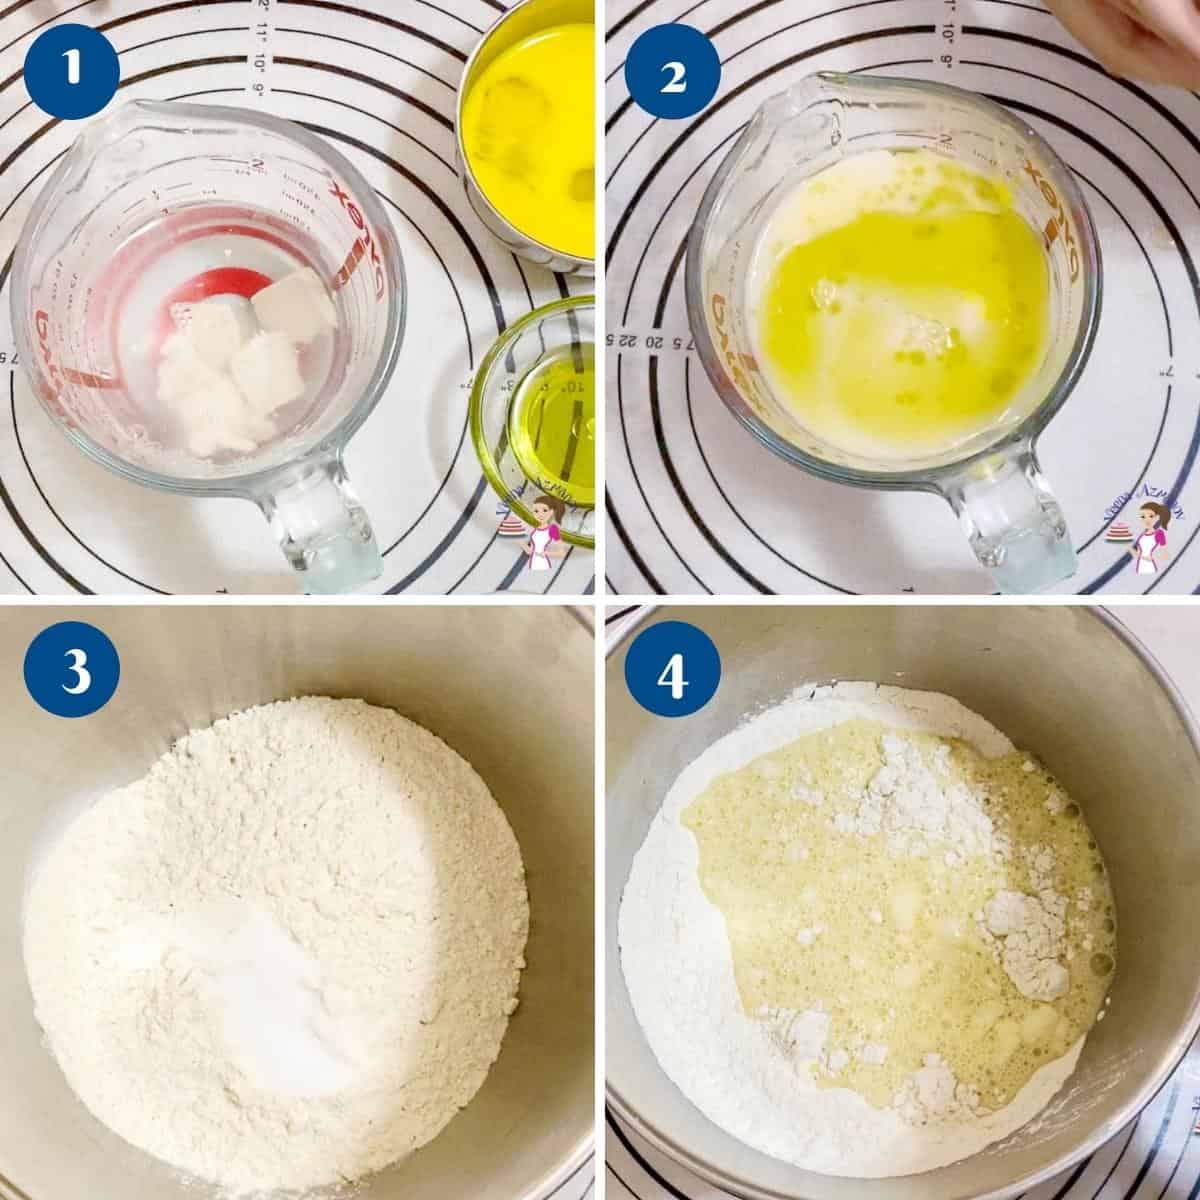
- Knead – Add the yeast mixture to the flour mixture and combine well on medium-low speed. Knead until smooth and elastic. This should take about 6 to 8 minutes on medium-low in the stand mixer or about 10 to 15 minutes by hand on a lightly dusted work surface.

Rise and Shape
- Bowl – When the dough is smooth, soft, and elastic. Shape it into a ball. Place the dough in an oiled bowl, seam side down. Coat the surface with oil to prevent drying. Cover with a clean kitchen cloth or plastic wrap.
- Rise – Leave in a warm place. Let it rise for 60 to 90 minutes until it doubles in volume.
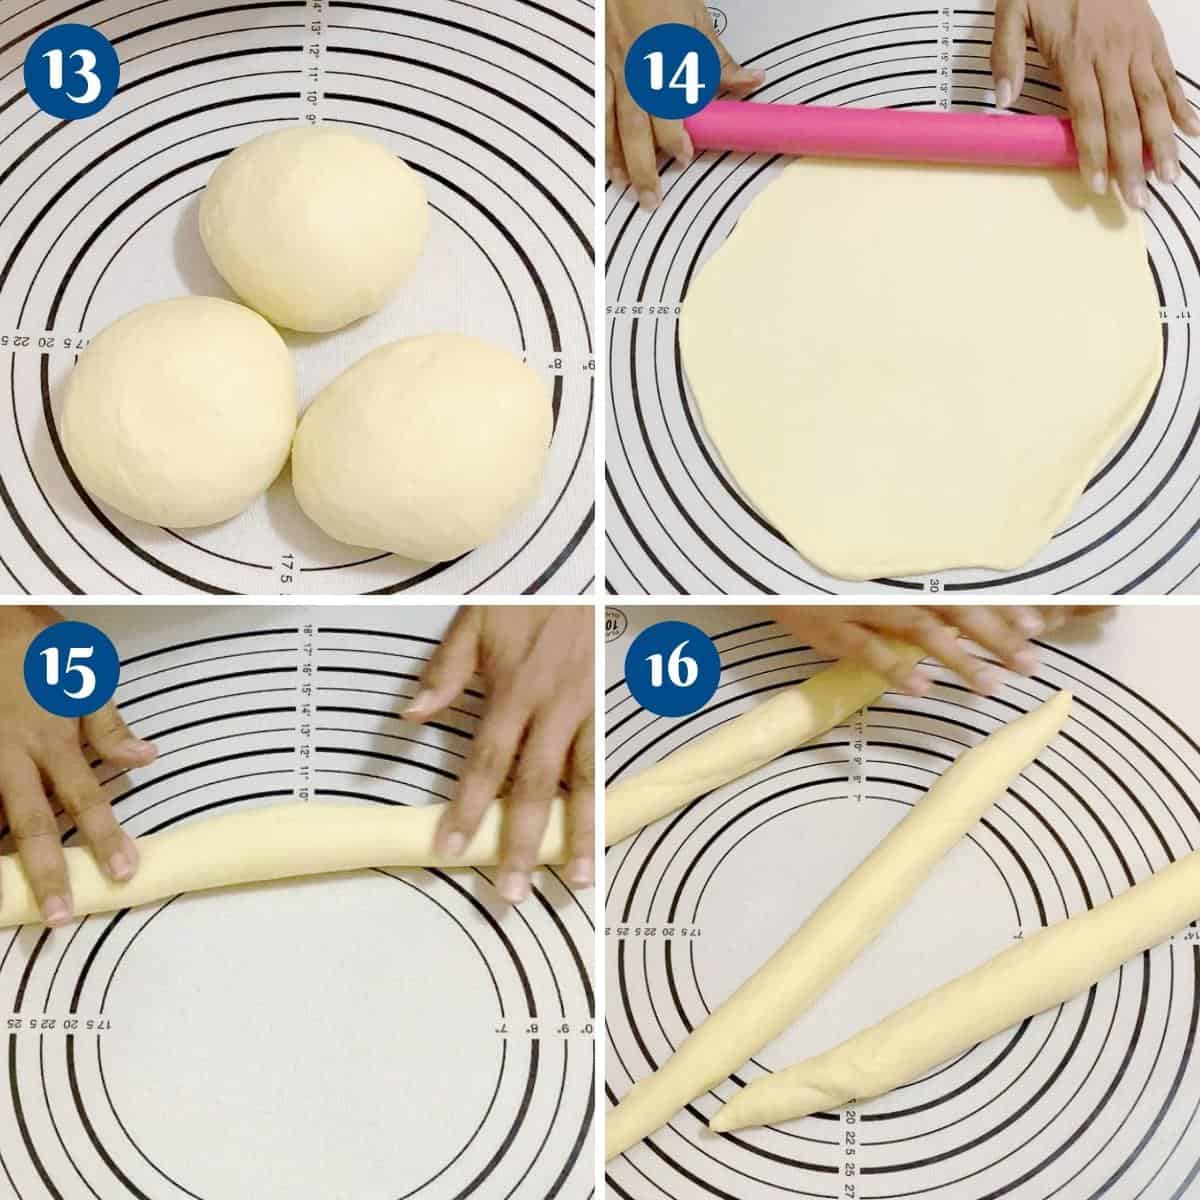
- Divide – Transfer to a well-dusted work surface. Press down and shape it into a log. You can divide the dough into two small loaves. Then, divide the dough into 3 portions.
- Ropes – Shape each into a ball. If necessary, let it rest for 5 to 10 minutes. Roll each ball with arolling pin on an unfloured work surface. Then, roll like a jelly roll into a rope about 18 inches long (see video).
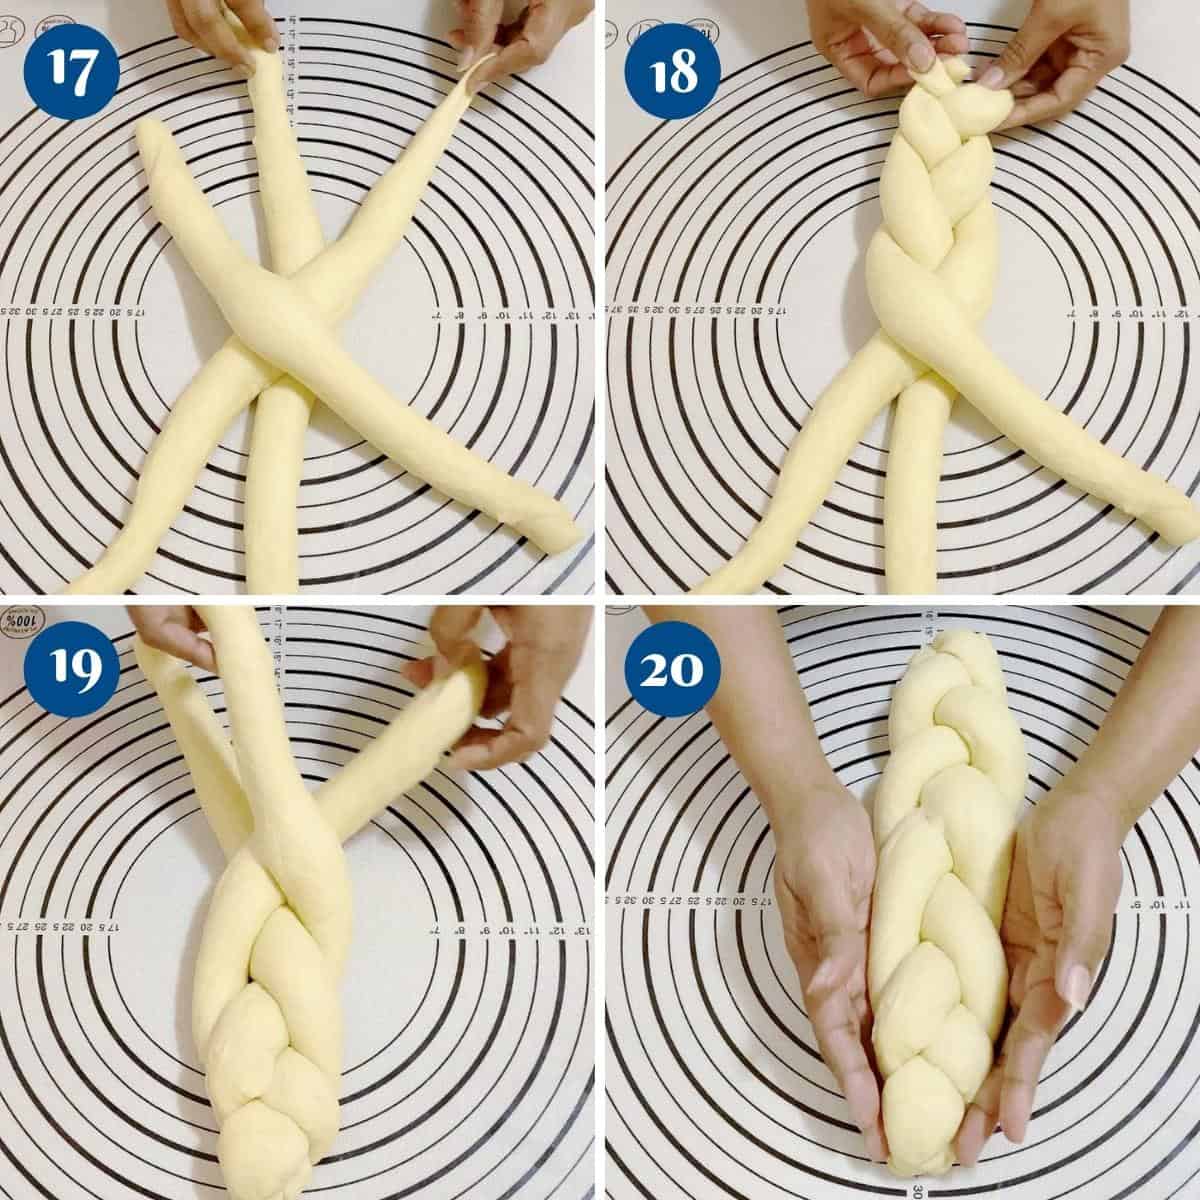
- 3 braid challah – Place all three long strands so they intersect in the middle. Then braid from the center to the bottom. Flip the dough and braid from the center to the bottom on the other side, too.
Proof and Bake
- Proof – Place the loaves on a baking sheet lined with parchment paper. Cover with a plastic wrap or clean kitchen cloth and let proof for 45 to 60 minutes.
- Oven – About 20 minutes before baking, preheat the oven to 350°F /177°C / Gas Mark 4
- Bake – Brush the bread with a beaten egg. Then bake each loaf on the center rack of the oven for 35 to 40 minutes.
- Cool – Remove from the oven and let cool on a wire rack for 5 minutes. Then, cover with a clean kitchen cloth to keep it soft.

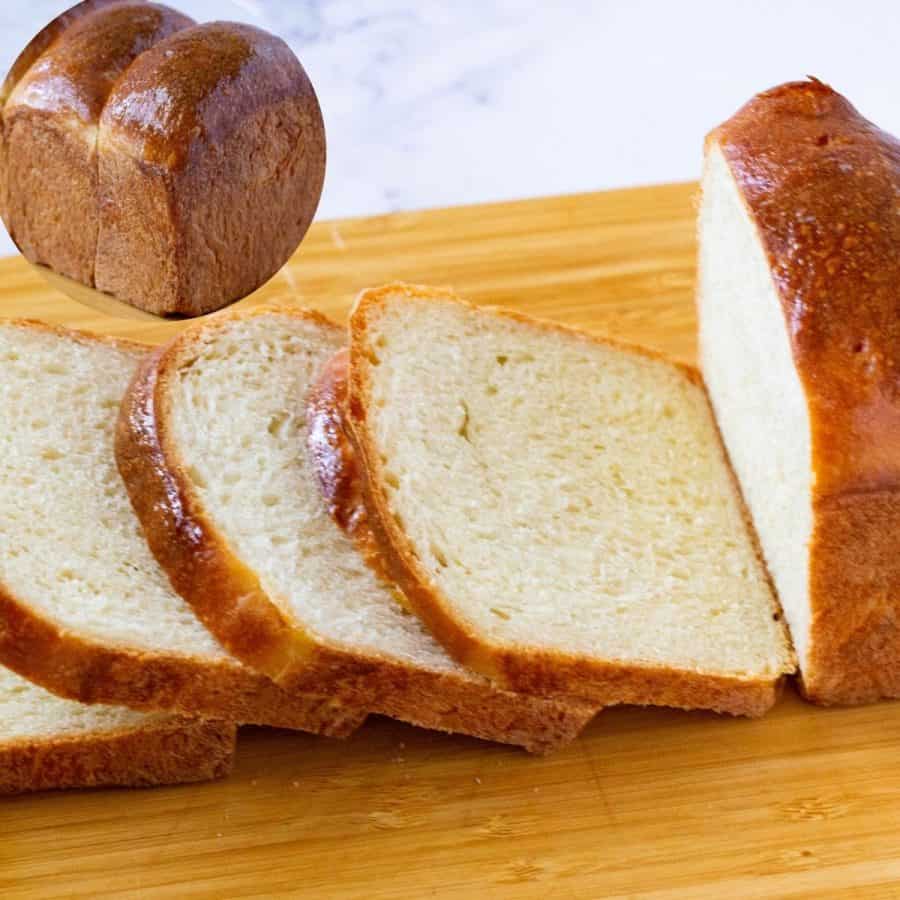
Two key factors contribute to the quality of challah bread.
- The density of the dough when making this bread. Unlike our pizza or focaccia bread, where we add more water, this dough has less water. Unlike our dinner rolls, where we make light and airy bread, this one is denser. That’s because we want the dough to hold its shape. When kneading this dough, take note of its density. It must be soft but still have a good body, not as squishy as pizza dough.
- When shaping the loaf, don’t just roll it into a long rope. Take that moment to roll it out, then into a jelly roll as I have in the video. This gives you a well-formed and shaped loaf. The final bread will hold better, as I like to call it good-looking bread.

Challah Bread Recipe – 3 Braids
Have you been intimidated by the pretty challah? Not anymore. Today, I share with you the easiest three-braid challah bread recipe you will ever make. This recipe uses just six ingredients, which are regular pantry staples, and the process is surprisingly simple and easy.
Video
Ingredients
- 250 ml (1 cups) Water warm 110F
- 7 g (2¼ tsp) Instant dry yeast
- 40 g (2 tbsp) Honey
- 40 g (2 tbsp) Oil cooking or olive
- 100 g (2 large) Eggs
- 500 g (4 cups) Bread flour or 50% bread and 50% all-purpose flour
- 9 g (1 tsp) Kosher salt
Method
- Yeast mixture – In a mixing bowl or measuring cup, combine warm water (110°F), yeast, honey, oil, and eggs. Stir and set aside to foam for 3 minutes.250 ml Water, 7 g Instant dry yeast, 40 g Honey, 40 g Oil, 100 g Eggs
- Dry mixture – Measure the flour and salt in a mixing bowl or stand mixer with the dough hook.500 g Bread flour, 9 g Kosher salt
- Knead – Add the yeast mixture to the flour mixture and combine well on medium-low speed. Knead until smooth and elastic. This should take about 6 to 8 minutes on medium-low in the stand mixer or about 10 to 15 minutes by hand on a lightly dusted work surface.
- Bowl – When the dough is smooth, soft, and elastic. Shape it into a ball. Place the dough in an oiled bowl, seam side down. Coat the surface with oil to prevent drying. Cover with a clean kitchen cloth or plastic wrap.
- Rise – Leave in a warm place. Let rise for 60 to 90 minutes until it doubles in volume.
- Divide – Transfer to a well-dusted work surface. Press down and shape it into a log. You can divide the dough into two small loaves. Then, divide the dough into three portions.
- Ropes – Shape each into a ball. If necessary, let rest for 5 to 10 minutes. Roll each ball with a rolling pin on an unfloured work surface. Then, roll like a jelly roll into a rope about 18 inches long (see video).
- 3 braid challah – Place all three long strands so they intersect in the middle. Then braid from the center to the bottom. Flip the dough and braid from the center to the bottom on the other side, too.
- Proof – Place the loaves on a baking sheet lined with parchment paper. Cover with a plastic wrap or clean kitchen cloth and let proof for 45 to 60 minutes. Alternatively, you can also place the dough in an 8-inch round baking pan.
- Oven – About 20 minutes before baking, preheat the oven to 350°F /177°C / Gas Mark 4
- Bake – Brush the bread with a beaten egg. Then bake each loaf on the center rack of the oven for 35 to 40 minutes.
- Cool – Remove from the oven and let cool on a wire rack for 5 minutes. Then, cover with a clean kitchen cloth to keep it soft.
Notes
- If using instant yeast, you can mix it directly with the dry ingredients without proofing.
- Rising times are only a guide. Dough rises faster in a warm kitchen and slower in cooler weather.
- Every brand of flour absorbs moisture differently. Add a little extra flour or water only if needed to achieve a soft, slightly tacky dough.
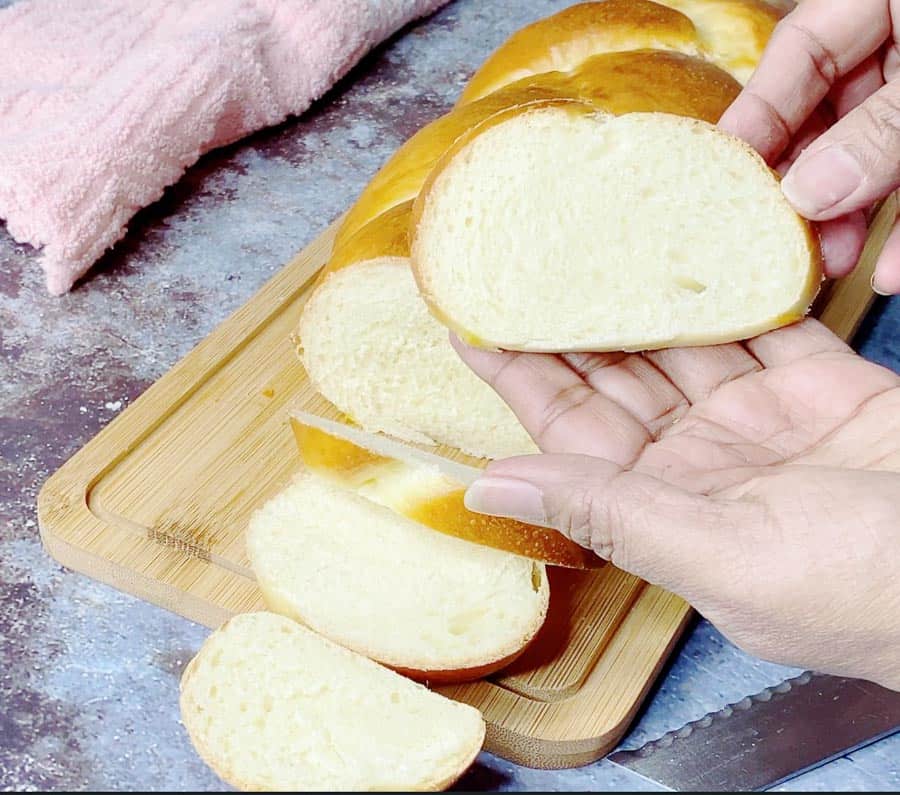
- Let the loaf cool completely on a wire rack before slicing for the best texture.
- Once you’re comfortable with the basic recipe, try adding raisins, cinnamon, or other dried fruit to the dough.
Equipment you will need


Nutrition
Tried this recipe?
Mention @veenaazmanov_kitchen or tag #veenaazmanovkitchen!Tips for Success
- Use fresh yeast. If using active dry yeast, proof it first to make sure it’s bubbly and active before mixing the dough.
- Measure flour accurately. Too much flour makes challah heavy and dry. A kitchen scale gives the best results.
- Knead until smooth and elastic. The dough should feel soft and slightly tacky but shouldn’t stick to your hands.
- Don’t rush the rise. Let the dough double in size for the first rise, then become noticeably puffy after braiding before baking.
- Roll equal-sized ropes. Even ropes create a neater braid and help the loaf bake evenly.
- Brush generously with egg wash. This gives the loaf its signature shiny golden crust. Add sesame or poppy seeds if you like.
- Bake until deeply golden. The loaf should sound hollow when tapped on the bottom. If it browns too quickly, loosely tent with foil.
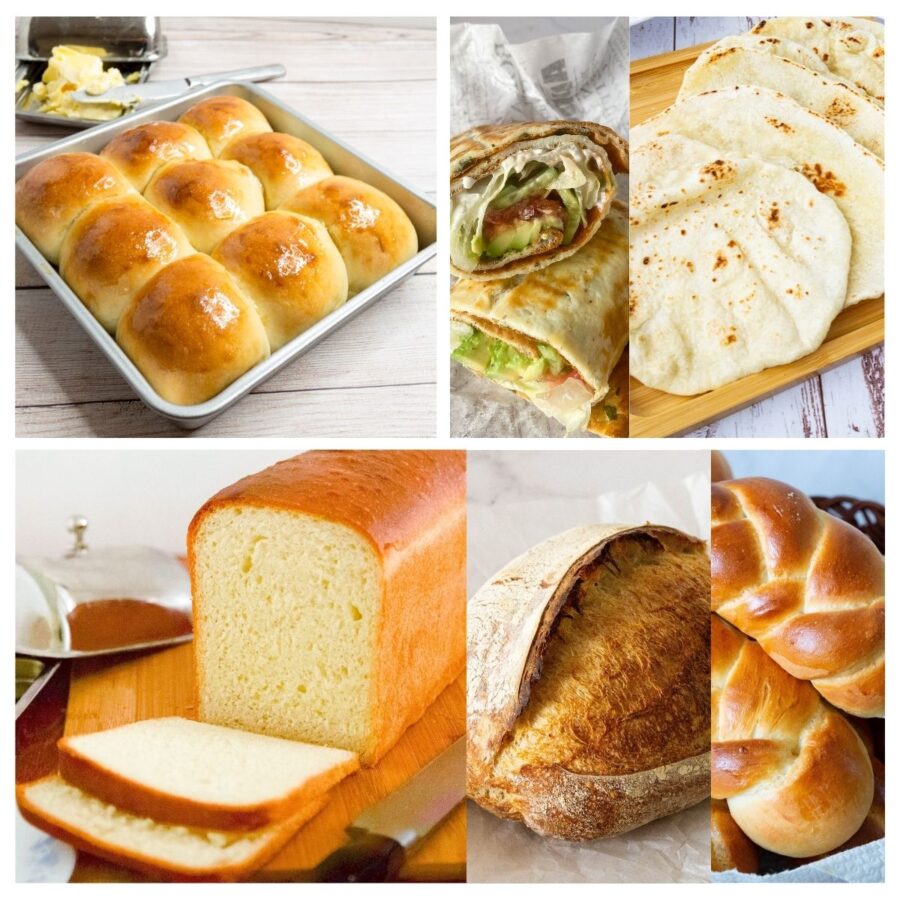
more challah bread recipes


Troubleshooting
| Problem | Possible Cause | Solution |
|---|---|---|
| Dough didn’t rise | Inactive yeast or a cold room | Use fresh yeast and let the dough rise in a warm place until doubled. |
| Challah is dense | Too much flour, not enough kneading, or under-proofed | Knead until elastic, measure flour accurately, and allow the dough to fully rise. |
| Loaf spread instead of rising | Dough was too soft or over-proofed | Add only enough flour to make a soft, workable dough and don’t let the second rise go too long. |
| Top browned too quickly | Oven too hot or loaf too close to the top element | Bake on the center rack and tent loosely with foil if needed. |
| Bread is dry | Too much flour or overbaking | Measure flour carefully and bake only until the loaf is golden and cooked through. |
| Braid looks uneven | Ropes were different sizes | Roll each rope to the same length and thickness before braiding. |
| Crust is too hard | Overbaked | Remove the loaf as soon as it’s done and let it cool on a wire rack. |
Frequently asked questions
The challah will keep at room temperature for 2 to 3 days. Once cut, be sure to wrap the cut side of the bread well to prevent it from drying out. Also, leftovers can be used to make French toast and bread pudding.
Absolutely, I do it every week. I cut the bread into slices. Place it into a reusable silicone storage bag in the freezer. When I need I just thaw slices in the microwave for 15 to 30 seconds.
Yes, raisins, dried cranberries, and almonds are very common in challah and taste delicious.
Of course, I have made challah bread for years with all-purpose flour before I had the luxury of bread flour, and it works equally well. Bread flour does give a softer, chewier bread with a tender crumb.
sourdough and festive challah
- Sourdough Challah Bread
- Sourdough Mini Challah • Dinner Rolls
- Delicious Mini Challah Rolls • Single Braid
- Round Challah Recipe
- Round Apple Honey Challah
- Braided Chocolate Challah

Don’t lose this recipe! Save it for Later!
📌 Save this Recipe for later on Pinterest so you can easily find it again.
⭐ Add Veena Azmanov Kitchen to your Google Preferred Sources.
It helps Google show you more of our recipes.
📧 Subscribe for new recipes delivered to your inbox.
🎥 Follow us for more recipes
you may also like
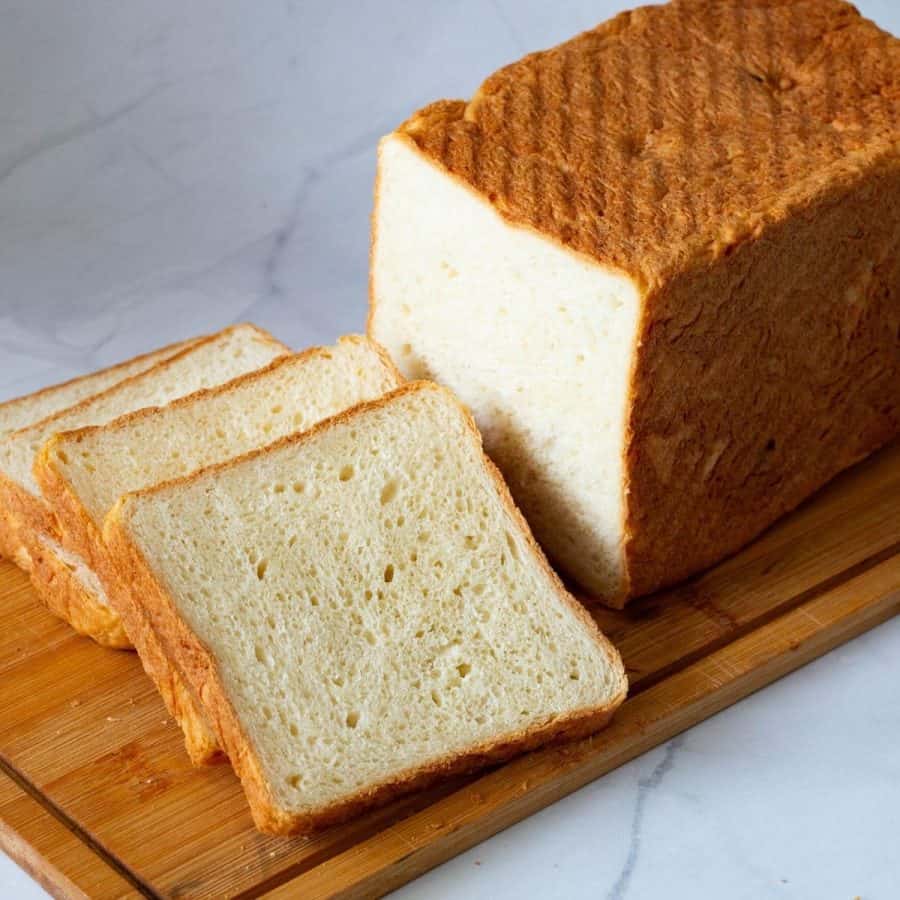
- 10 Best Gifts for Bread Bakers
- 15+ Beginner Bread Recipes for Everyday Baking
- Learn Bread Baking at Home • Step by Step 😄
- Homemade Ciabatta Recipe
- Mini Sausage Rolls


done day 5
We Love this bread and I have been making it since I saw your blog. I want to send the last I made.
I don’t see how you can add it here.
You can share the pictures with me in my Facebook group or tag me @veenaazmanov on any social media channel when you share. Thanks
Day 5 done
Day 5 is done. Love it!
Day 5 Done