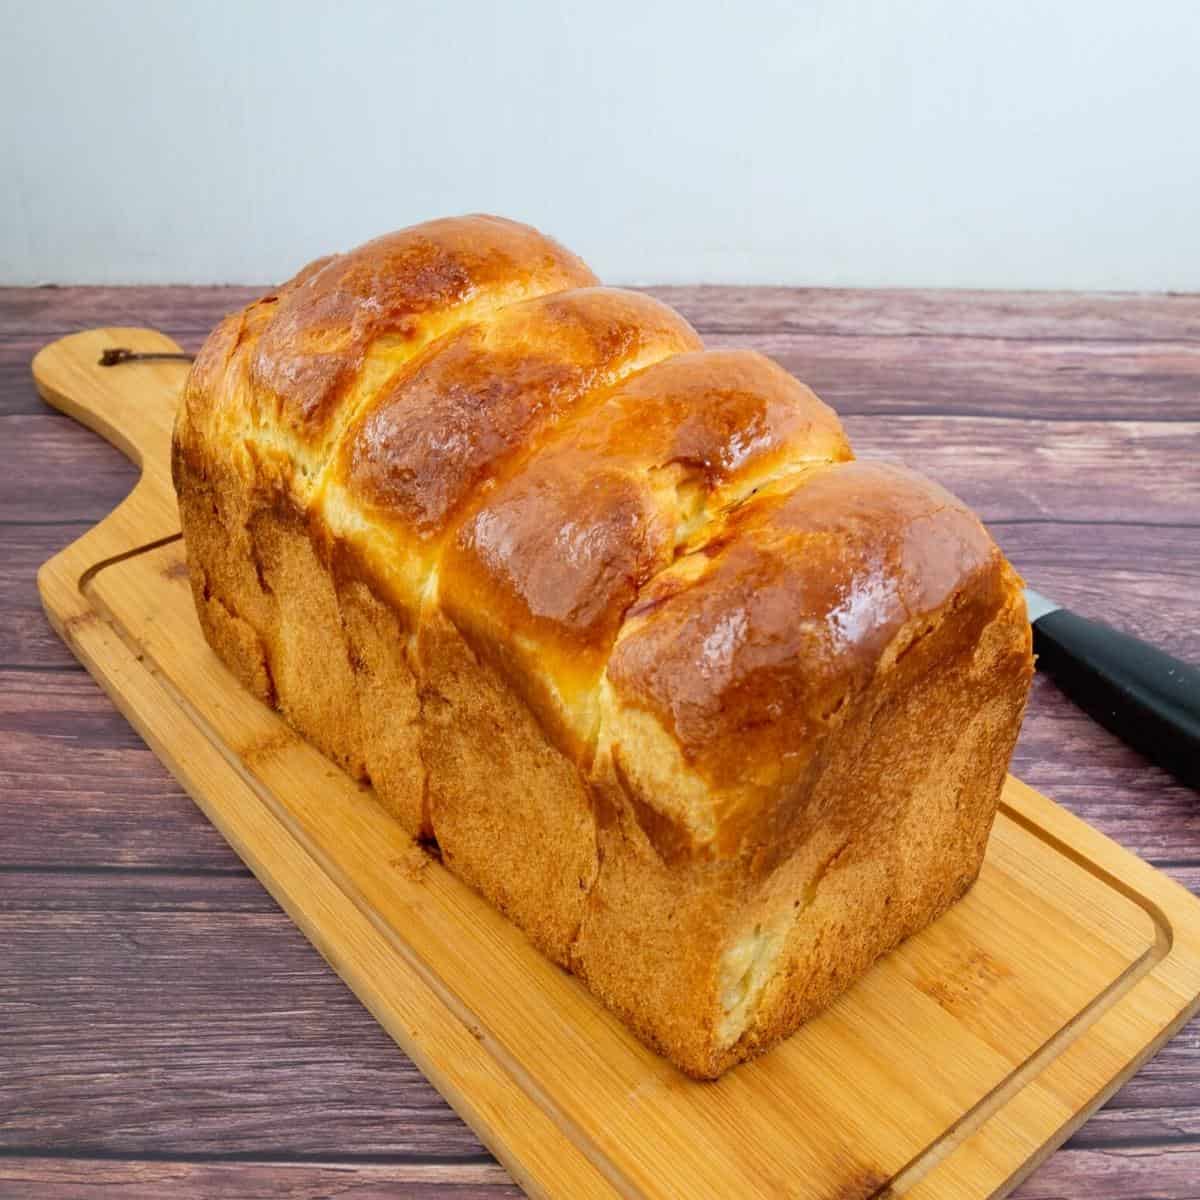
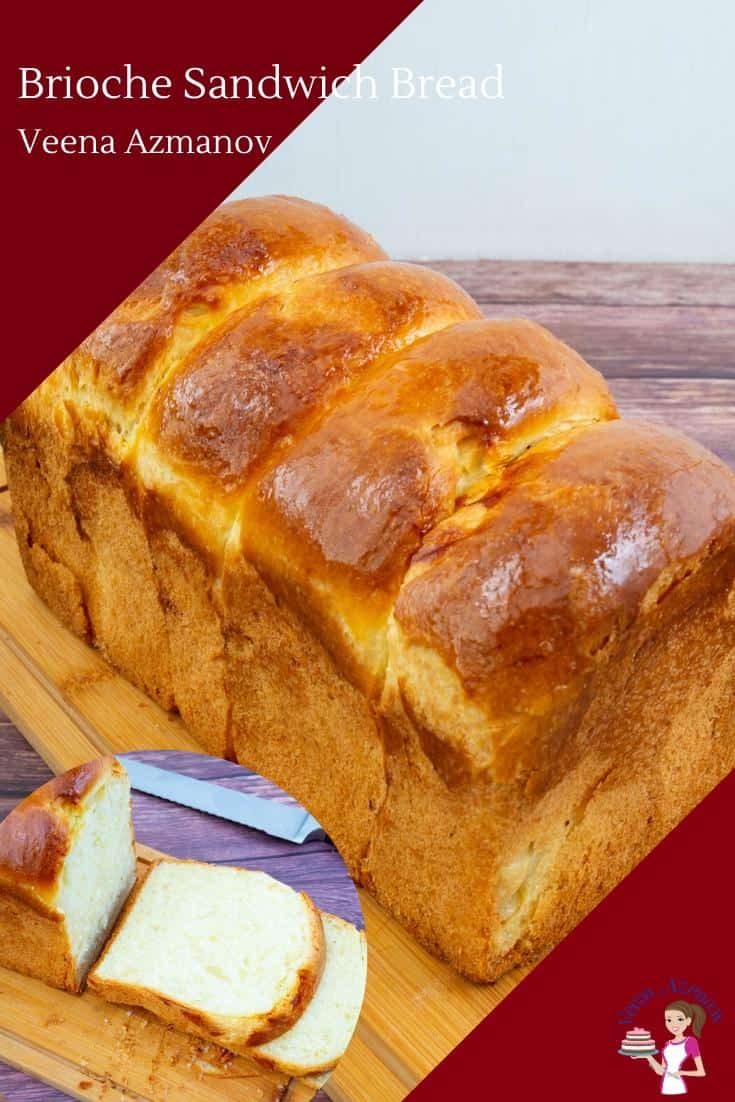
Sandwich Brioche Bread Recipe
 Prep Time 10 minutes Cook Time 30 minutes Total Time 6 hours 40 minutes


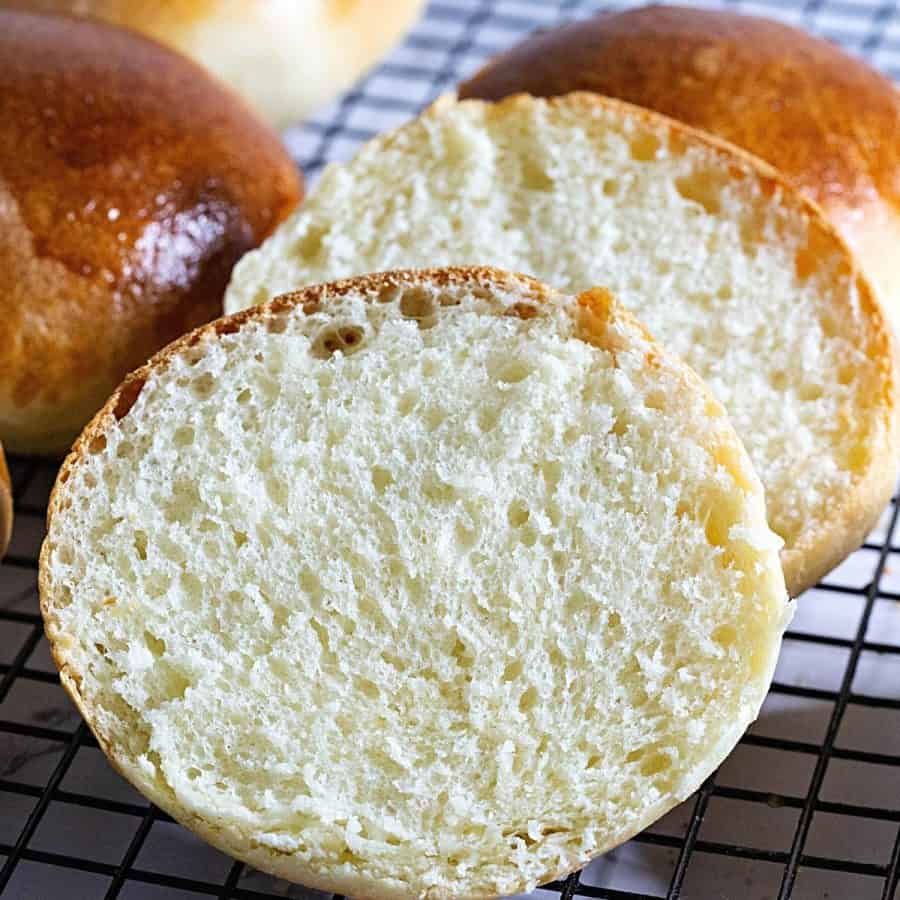
This French brioche bread is a rich, buttery, light, and fluffy sandwich bread. Made with milk, eggs, sugar, and lots of butter. A soft consistency dough that takes only 10 minutes to prepare, but a few hours to rise in the fridge overnight.
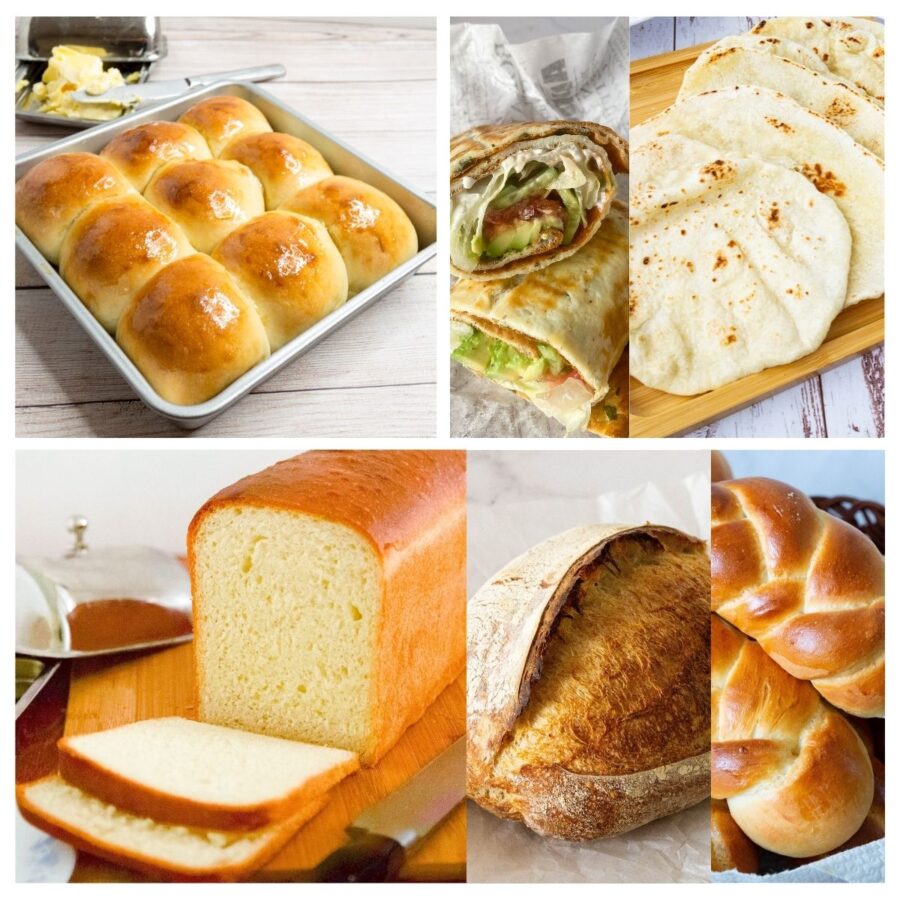
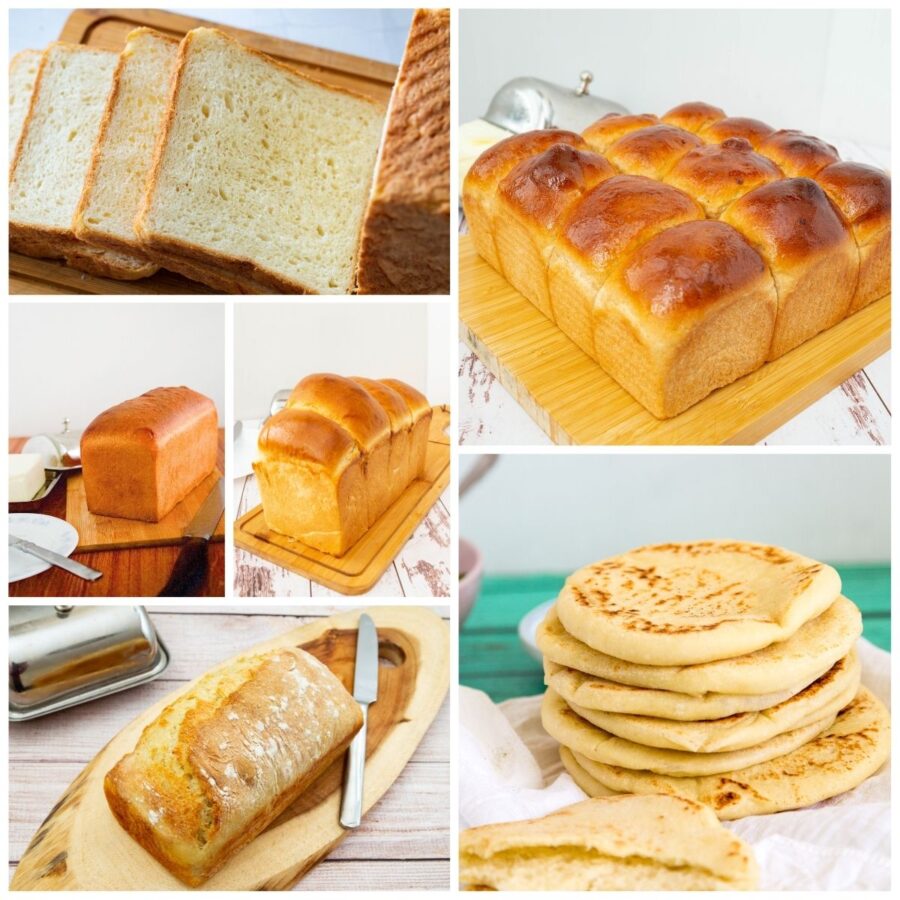
Brioche is one of the richest, softest, and most delicious breads to make and enjoy. One recipe can be made into many different shapes. I’ve already shared with you a few of these, such as the classic brioche a tete, brioche buns, and brioche loaf bread.
Today, I want to share this classic brioche sandwich bread recipe. It makes the best brioche bread; I think you will love it.
Why make this bread?
- Unlike the classic sandwich bread, this brioche bread is buttery and rich, with a crisp golden crumb.
- The dough is made with easy-to-find or simple pantry staples like milk, eggs, sugar, yeast, and lots of butter. It has a very soft, sticky texture because of all that butter.
- Also, unlike regular bread, this one takes longer to proof because we start with chilled dough. So, make sure to give this bread ample time.
- This is a great bread to have in the freezer because it warms up as freshly baked again. Make sure to slice it before you freeze it so you can thaw a few slices at a time.

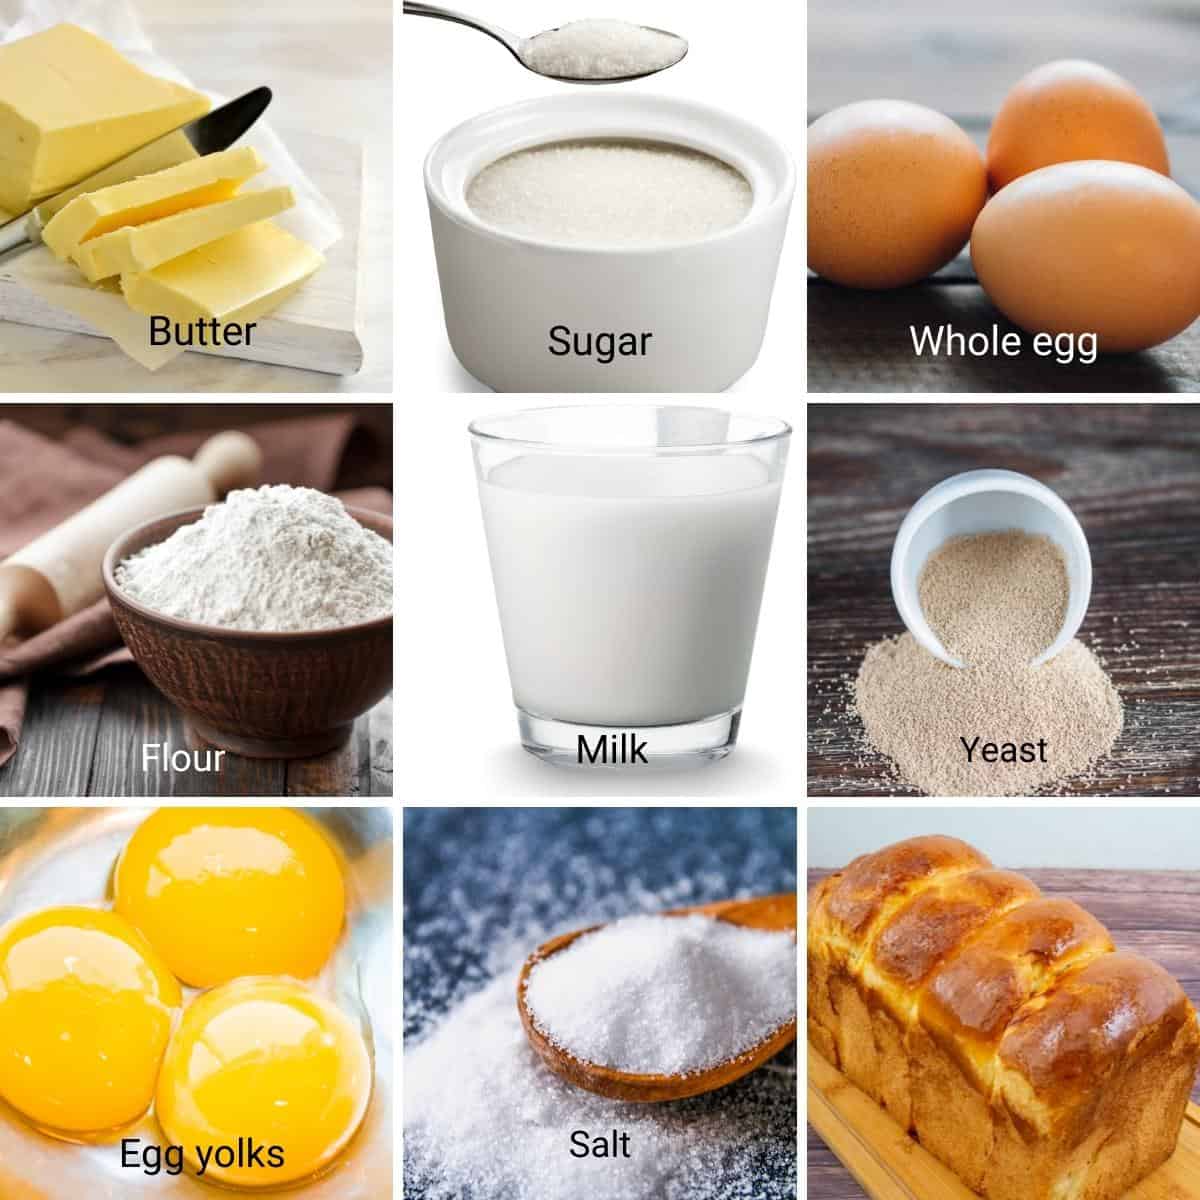
Ingredients and substitutes
- Flour – Often, bread flour is recommended for making homemade bread. And yet, I have been making bread for over 10 years now, and I always use all-purpose flour for my brioche.
- Instant dry yeast – Today, I am using baker’s fresh yeast. But you can also use instant dry yeast or active dry yeast, as I have done in my other brioche recipes.
- Sugar – Brioche is a sweet bread, but you can certainly reduce the sugar by half.
- Butter – Is the star of the show in the French brioche recipe. So, use good-quality butter with high-fat content.
- Eggs – Add a lot of flavor to the bread, give a tender crumb, and strengthen the texture.
- Milk – Enhances the flavor and tenderizes the dough, giving it a soft texture. The temperature of the liquid water/milk is an important factor in bread making. It has to be warm, not hot, usually about 110°F. And yet, you don’t really need a thermometer. The temperature is around the same as when you give milk to a baby.
Step-by-step: Homemade brioche bread
- Wet ingredients – In the measuring cup or bowl of a stand mixer with the dough hook attachment, combine warm milk, yeast, sugar, and eggs with a whisk.
- Dry ingredients – Add flour and salt to the stand mixer. Combine with a spatula.
- Knead for 8 to 10 minutes on medium speed, scraping the sides of the bowl.
Pro tip – The dough will be soft and sticky – that’s ok.
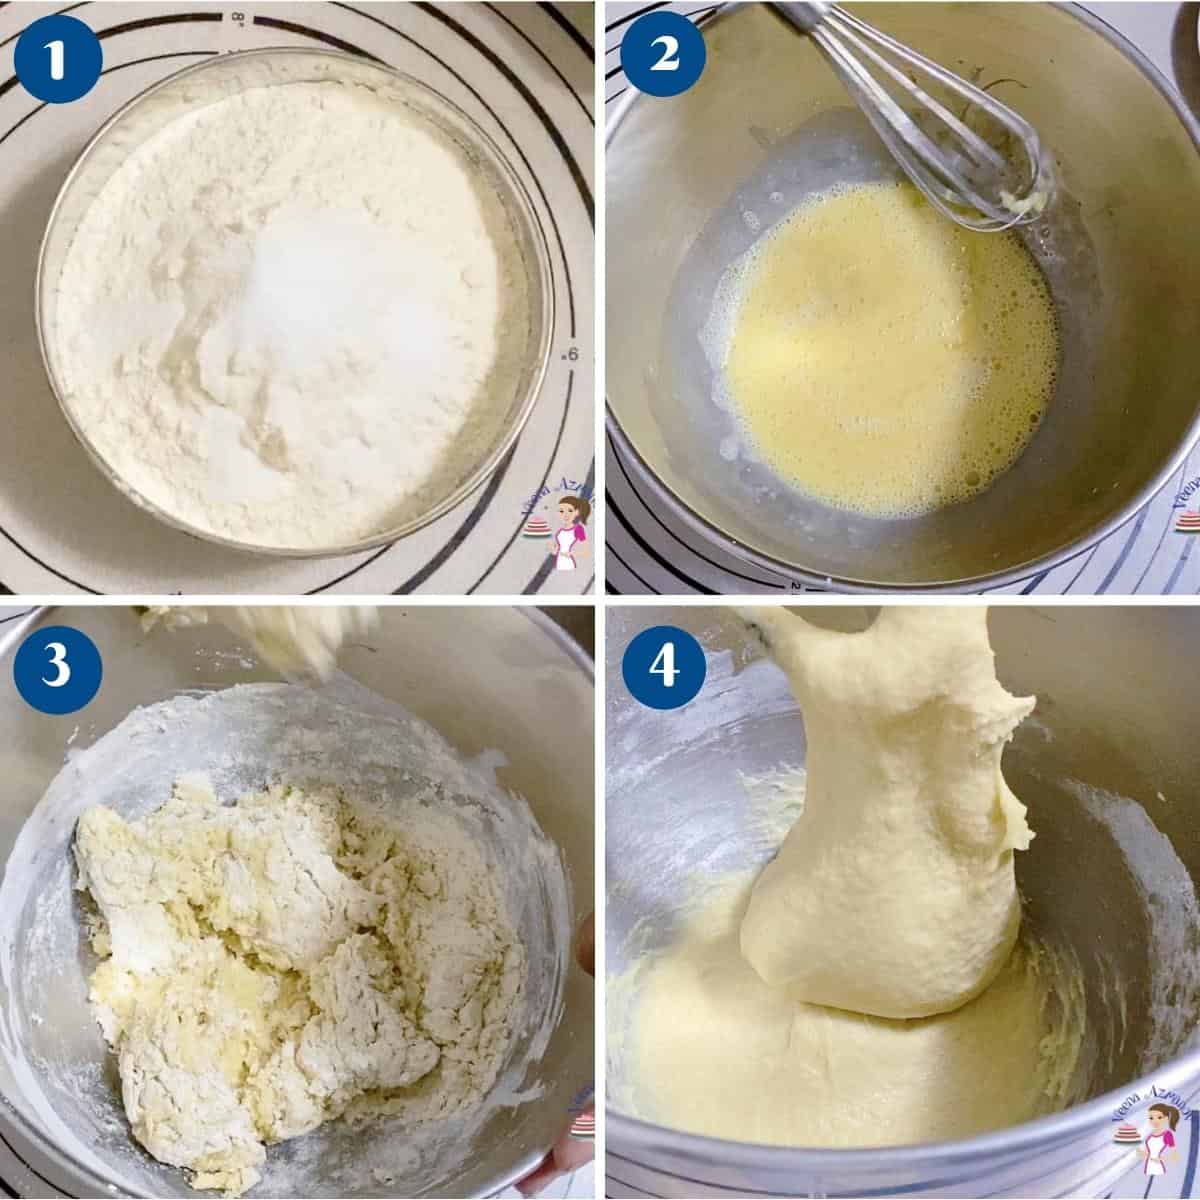
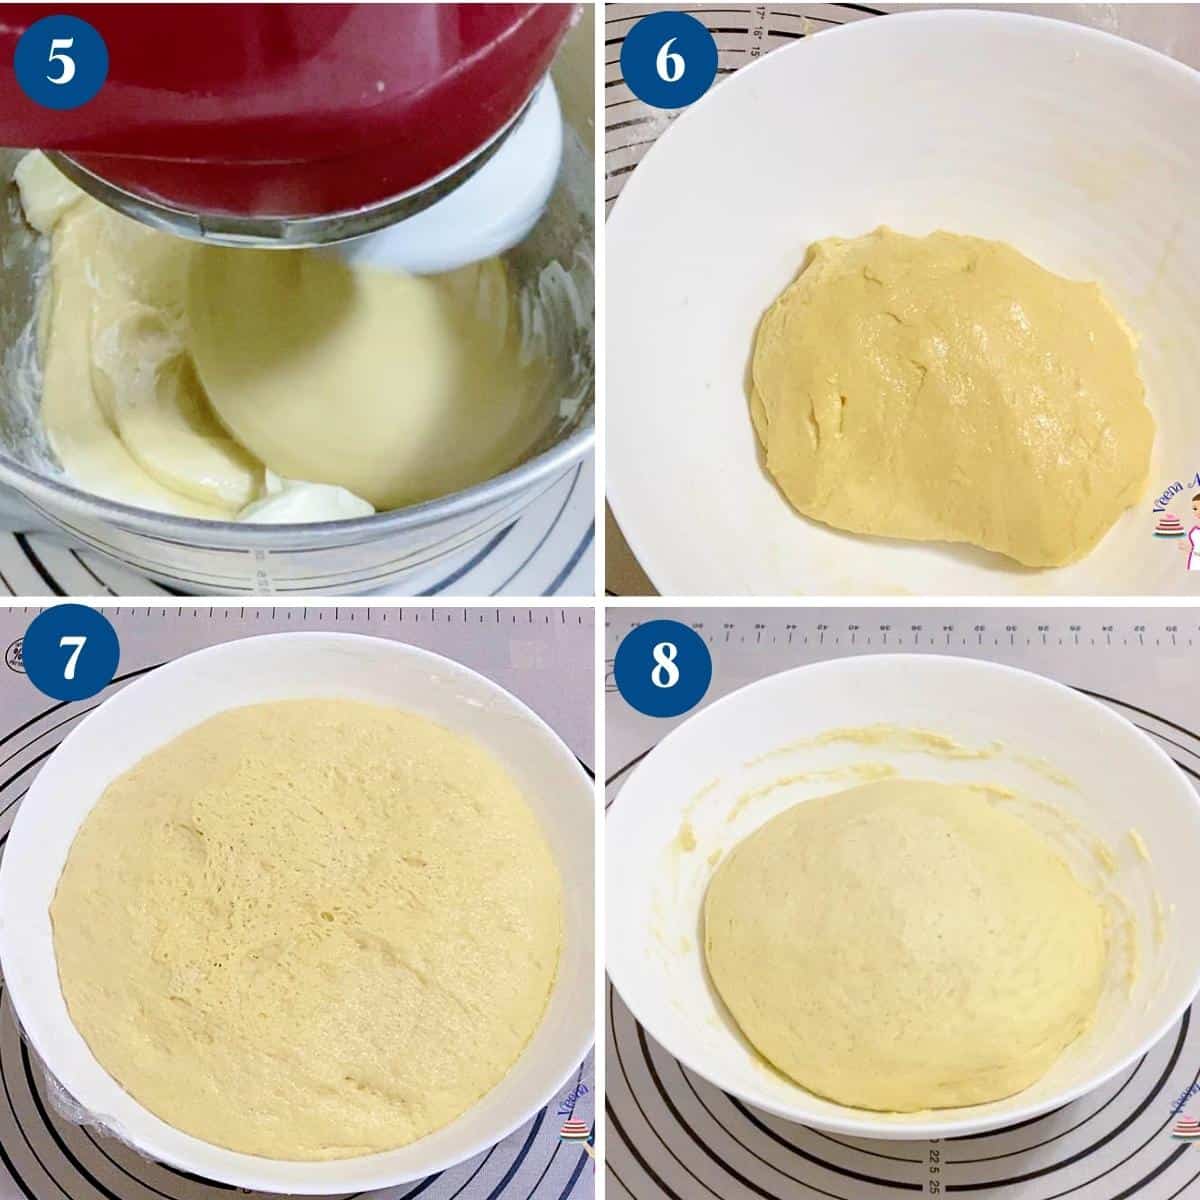
- Butter – Next, gradually add the soft room-temperature butter, one cube at a time. Once all the butter is in, knead again for 10 minutes more until smooth, elastic, and soft.
- Rise—Transfer the dough to an oil-boiled bowl. Cover with a clean kitchen cloth or plastic wrap and leave it to rise in a warm place for 60 to 90 minutes or until doubled in volume.
- Chill – Then, punch the dough down and shape it into a ball. Cover again and let rise in the fridge for 6 hours up to 12 hours.
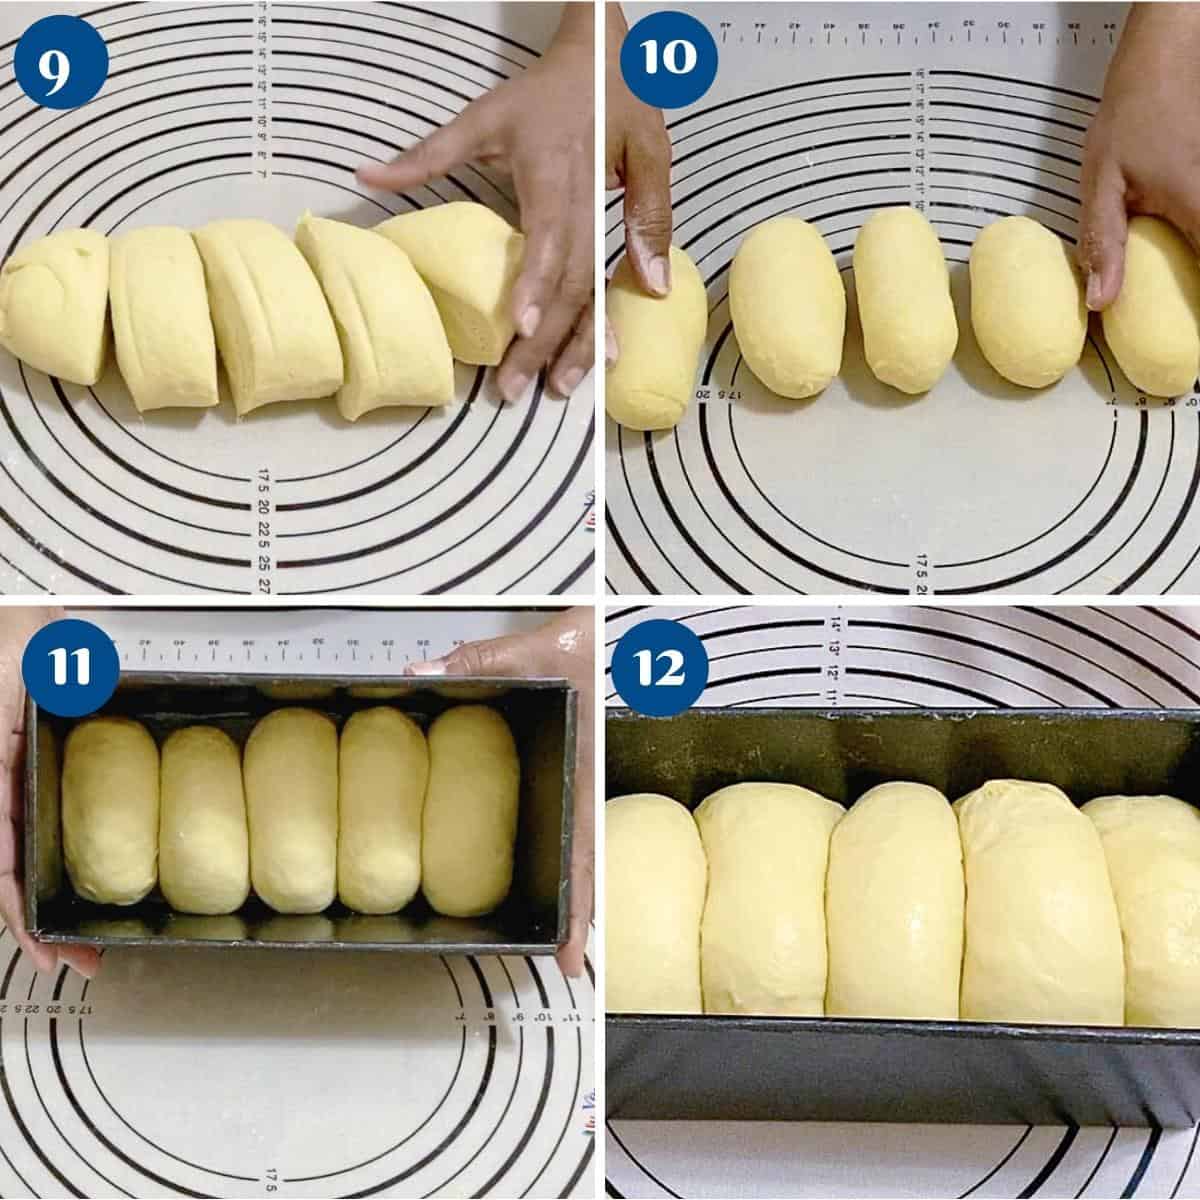
- Shape – Transfer the dough to a lightly floured work surface. Divide it into five equal pieces (equal portions). Shape each portion into a tight ball, tucking the seams under. Then, roll each ball into a sausage. Place these sausages into a sprayed loaf pan.
- Proof – Cover the loaf pan with plastic wrap or a clean kitchen towel. Let rise in a warm place. This can take about 90 minutes up to 2 hours (because we started with chilled dough).
Pro tip – You can also leave the dough to proof in the refrigerator for up to 12 hours. Thaw an hour before baking.
- Oven – Once you see that your dough is almost halfway up the sides. Preheat the oven to 350°F/177 °C/Gas Mark 4 for at least 20 minutes.
- Egg wash – Brush the loaf with beaten egg (use only egg yolk/water mixture for a darker color).

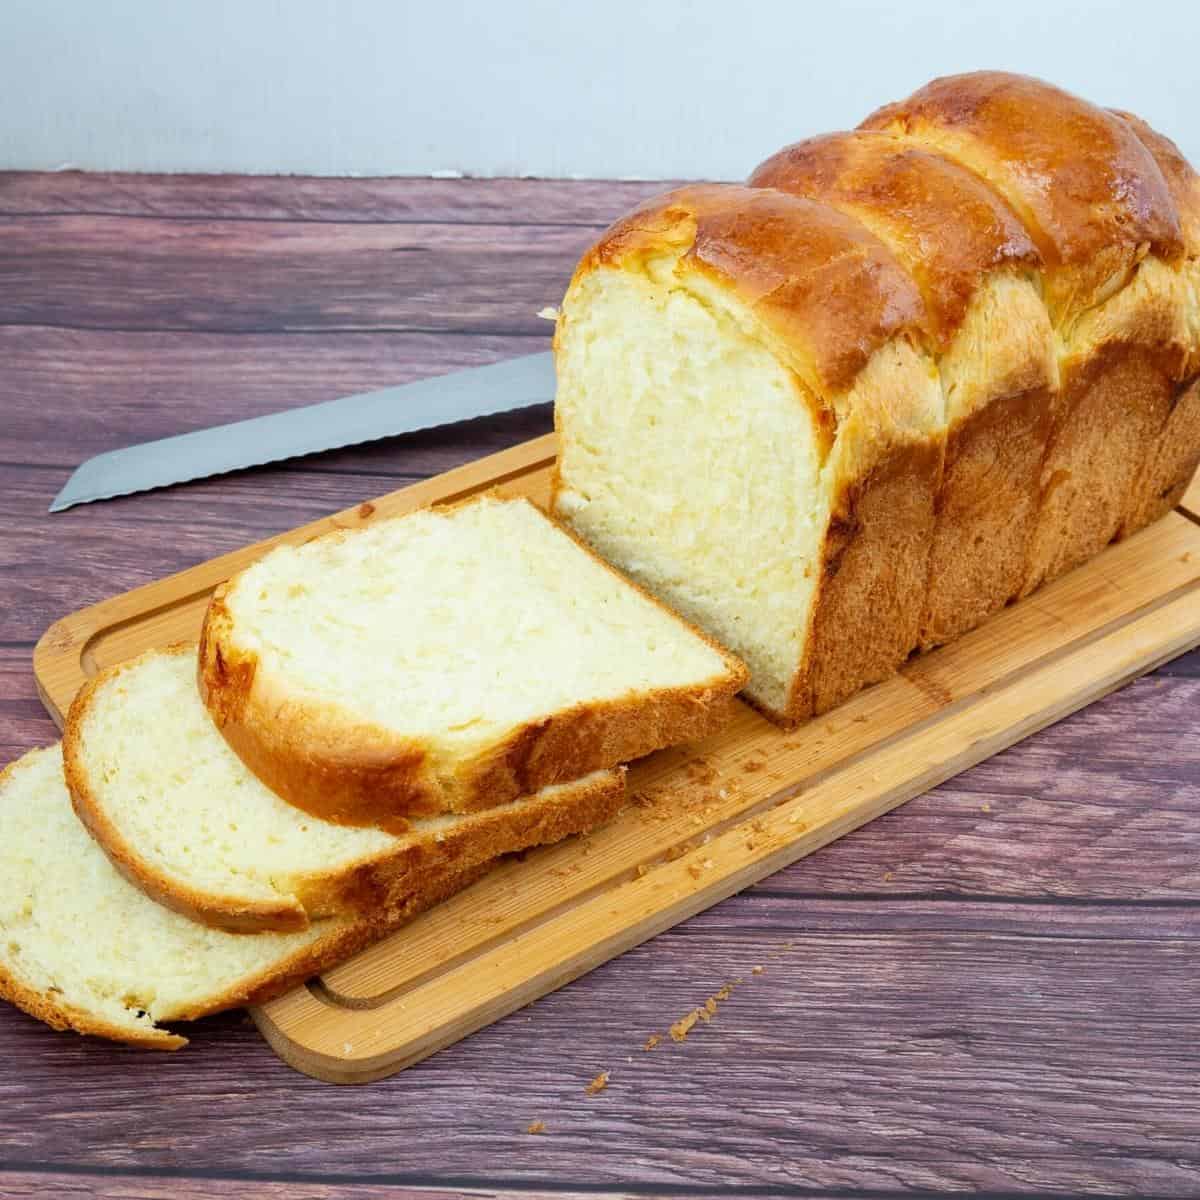
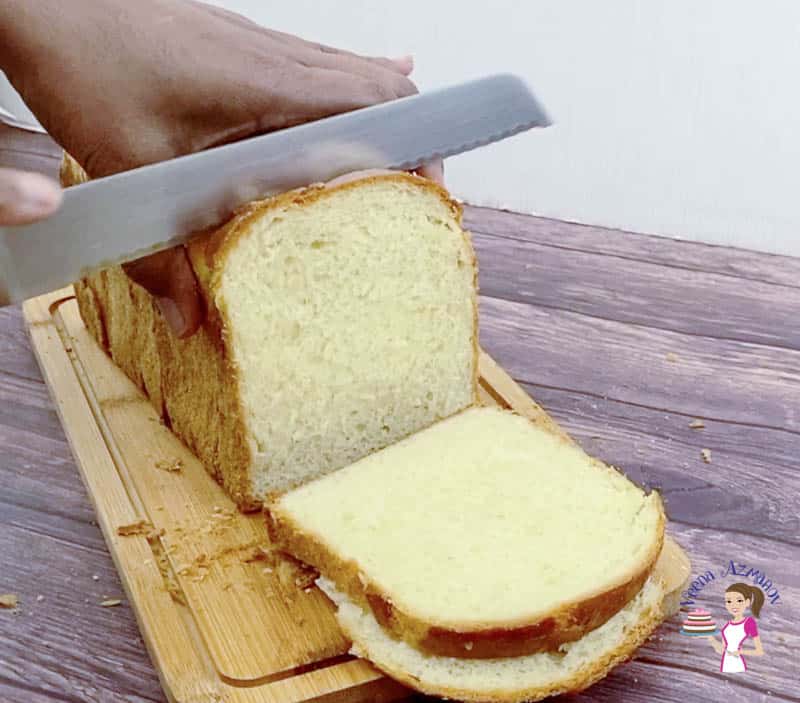
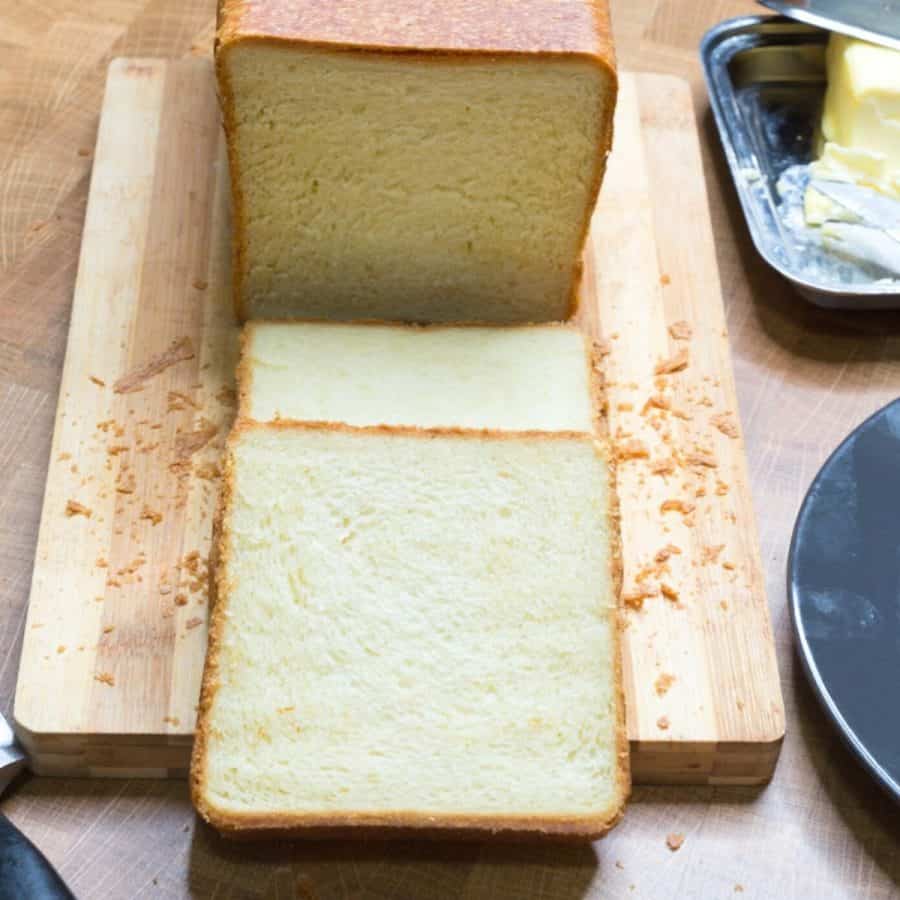
- Bake – Place the loaf pan on the center rack in the hot oven. Bake the loaf for about 50 to 55 minutes, until golden brown on top. Cool in the pan for 10 minutes, then invert on a cooling rack and cool completely.
Pro tip – The bread is done when you tap the bottom of your loaf and you will hear a hollow sound. This bread, when baked, should read 180°F – 190°F on an instant-read thermometer. - Cool – Always let the bread rest for at least an hour before you cut it. I know it’s hard, but it will keep the bread moist.
- Enjoy!

Troubleshooting
- Dense or Heavy Texture: If your brioche bread turns out dense or heavy instead of light and fluffy, there might be a few causes:
- Insufficient proofing time: Brioche requires a longer proofing time due to its high fat content. Ensure that you let the dough rise until it has doubled in size before baking.
- Overmixing: Overmixing the dough can develop too much gluten, resulting in a dense texture. Mix the ingredients just until they are combined and avoid excessive kneading.
- Incorrect yeast: Make sure your yeast is fresh and active. Expired or inactive yeast can lead to poor rising.
- Dry or Crumbly Texture: If your brioche bread is dry or crumbly, consider the following:
- Insufficient moisture: Brioche dough should be soft and slightly sticky. If the dough feels dry, try adding a bit more liquid, such as milk or water, during the mixing process.
- Too little butter: Brioche relies on a generous amount of butter for its richness. Ensure that you are adding the correct proportion of butter to the dough.
- Overbaking: Overbaking can result in a dry texture. Keep a close eye on your bread during baking and remove it from the oven as soon as it turns golden brown and sounds hollow when tapped on the bottom.
- Lack of Flavor: If your brioche lacks the desired flavor:
- Increase the amount of sugar: Brioche traditionally has a slightly sweet taste. Adjust the amount of sugar in the recipe to suit your preferences.
- Use high-quality ingredients: The quality of ingredients, such as eggs, butter, and vanilla extract, can significantly impact the flavor of your brioche. Opt for fresh, high-quality ingredients whenever possible.


Frequently asked questions
If stored properly, this brioche bread will stay for 4 to 5 days at room temperature. It can be frozen for a month or more, too. Never store bread in the fridge as it dries out.
Brioche is a highly enriched dough, so overnight proofing helps enhance its flavor and strengthen and relax the gluten. Overnight proofing is highly recommended. However, you can leave it to rise on the counter for longer, but you will still need to chill the dough before you shape, proof, and bake it.
You want to keep bread covered in an airtight container or ziplock bag to prevent air from drying it out. I like to use my reusable silicone bags to keep bread fresh.
Yes, brioche dough is versatile and can be used for various recipes. It can be shaped into rolls and buns, or even used as a base for pastries like pain au chocolat or brioche doughnuts. Its rich and buttery flavor pairs well with both sweet and savory fillings.
It might work. But, perhaps, it’s best to use my tried and tested soft burger buns recipes or brioche buns.
Brioche Sandwich Bread Recipe
This French brioche bread is a rich, buttery, yet light and fluffy sandwich bread. Made with milk, eggs, sugar, and lots of butter. A soft consistency dough that takes only 10 minutes to prepare, but a few hours to rise in the fridge overnight.
Video
Ingredients
- 180 g (¾ cups) Whole Milk 3% warm (110F)
- 9 g (1 tbsp) Instant dry yeast
- 150 g (3 large) Eggs
- 45 g (3 tbsp) Sugar
- 500 g (4 cups) Bread flour or 50% bread and 50% All-purpose
- 9 g (1 tsp) Kosher salt
- 130 g (½ cups) Butter unsalted room temperature
Method
- Wet ingredients – In the bowl of a stand mixer with the hook attachment, combine warm milk, yeast, sugar, and eggs. Add flour and salt. Combine with a spatula.180 g Whole Milk 3%, 9 g Instant dry yeast , 150 g Eggs, 45 g Sugar
- Dry ingredients – Add flour and salt to the stand mixer. Combine with a spatula.500 g Bread flour , 9 g Kosher salt
- Knead for 8 to 10 minutes on medium speed, scraping the sides of the bowl.
- Butter – Next, gradually add the soft room-temperature butter, one cube at a time. Once all the butter is in, knead again for 10 minutes more until smooth, elastic, and soft.130 g Butter unsalted
- Rise – Transfer the dough to an oiled bowl. Cover with a clean kitchen cloth or plastic wrap and leave it to rise in a warm place for 60 to 90 minutes or until doubled in volume.
- Chill – Then, punch the dough down and shape it into a ball. Cover again and let rise in the fridge for 6 to 12 hours.
- Shape – Transfer the dough to a lightly floured surface. Divide into five portions. Shape each portion into a tight ball, tucking the seams under. Then, roll each ball into a sausage. Place these sausages into a sprayed loaf pan.
- Proof – Cover the loaf pan with plastic wrap or a clean kitchen cloth. Let it rise in a warm place. This can take about 90 minutes up to 2 hours (because we started with chilled dough).
- Oven – Once you see that your dough is almost halfway up the sides. Preheat the oven to 350°F/ 177°C/ Gas Mark 4 for at least 20 minutes.
- Egg wash – Brush the loaf with beaten egg ( use only egg yolk/water mixture for a darker color).
- Bake – Place the loaf pan on the center rack in the hot oven. Bake the loaf for about 50 to 55 minutes. Cool in the pan for 10 minutes, then invert on a cooling rack and cool completely.
- Cool – Always let the bread rest for at least an hour before you cut it. I know it's hard, but it will keep the bread moist.
- Enjoy!
Notes
- Measure all ingredients beforehand so you don’t forget anything at the last minute.
- For accuracy, use a weight measure for the ingredients because every cup of flour can weigh differently depending on how you fill it.
- The milk must be warm (not hot), about 110°F. If the milk is too hot, it will kill the yeast; similarly, if the milk is too cold, it will not activate the yeast.
- Though instant dry yeast has a long shelf life, it can get ruined. Always check the expiry on the yeast. If unsure, combine the yeast with water/milk, sugar/honey, and oil/butter from the recipe and let stand 5 minutes. If it gets foamy, the yeast is good to go; if not, best to buy fresh yeast or check the temperature of the milk.
- Keep salt away from yeast as it can kill the yeast. I like to combine it with the flour, then add it to the yeast mixture.
- A soft, loose, well-hydrated dough is not necessarily bad; it often will give you soft, fluffy bread, so don’t be tempted to add more flour than mentioned in the recipe.
- Kneading is key to making good bread. While kneading by hand can be therapeutic, using a stand mixer is easier and quicker.
- Leave the dough at room temperature to rise until doubled in volume. While not recommended when in haste, you can place it in a warm (not hot) oven, which will expedite the rise.
- Bread does not have to be time-consuming. You can leave the dough in the fridge to rise for a few hours (even overnight) while you go about your chores. A slow rise will give more flavor to the bread.
- Always preheat the oven for at least 10 minutes before you place bread in, or the low temperature will spread the dough too much.
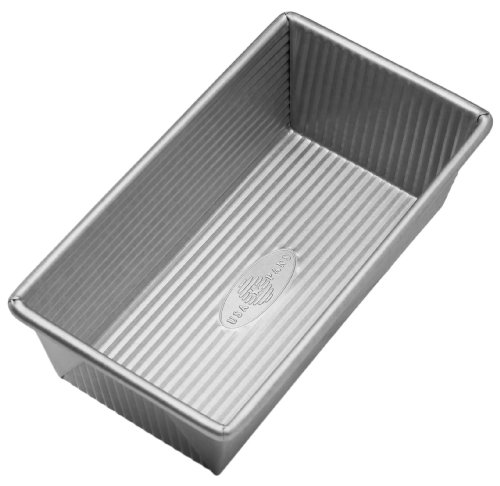
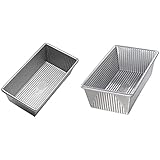
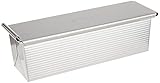
Equipment you will need


Nutrition
Tried this recipe?
Mention @veenaazmanov_kitchen or tag #veenaazmanovkitchen!Sandwich loaf pans
- It is very important that you buy a good-quality pan. Nothing is worse than spending time on bread and having it get stuck in the pan. A good quality pan will last you for years and will be a pleasure to use over and over again. Since I bake almost every week, I have quite a few baking pans, and yet I keep using these three pans over and over again. I love loaf pans with high sides.
- I have this large Pullman sandwich loaf pan and this small Pullman sandwich loaf pan, which work great not just for the Pullman bread but also for this type of classic loaf bread, even challah bread. So, basically, you can use that one pan for both types of loaves. Make sure to buy the lids if you plan to make the Pullman bread as well.
- These are classic sandwich loaf pans that I love very much and often use them for my plain loaves as well as babkas and stuffed bread roll recipes.


Don’t lose this recipe! Save it for Later!
📌 Save this Recipe for later on Pinterest so you can easily find it again.
⭐ Add Veena Azmanov Kitchen to your Google Preferred Sources.
It helps Google show you more of our recipes.
📧 Subscribe for new recipes delivered to your inbox.
🎥 Follow us for more recipes


making this now but using a 7x4x4 pullman pan…i made the recipe as written…made the 5 sausages and only put 4 into my pan…did not want to overcrowd it! i usually like your recipes because you normally have directions for different size pans but this recipe doesn’t…what measurements would you recommend for the 7 inch pullman and how long to cook? someone asked above and i have read and reread this whole blog and no where does it say different times for different pan sizes!
Hey, Jessica, I make bread often, so I test and measure out different size pans. That is why I can give you different sizes. Unfortunately, I have not tested the 7-inch pan for this recipe yet.
However, it should take about 35 to 40 minutes. Also, fill the dough only a little more than half, so the 4 rolls should be just fine in the pan. You can use the remaining dough to make flatbread or bake mini dinner rolls or garlic rolls.
Leave to rise until 2/3 full, then bake as suggested above.
Thanks
I’ve been trying to bake bread and I thank you for sharing with all your heart. God bless you
Thank you
You say to bake the smaller loafs for 30 to 35 minutes, but what about the larger loafs (13×4)? How long do you bake them with lids on?
Donna the recipe clearly states – Bake for about 25 to 30 minutes for the small loaves and about 45 to 50 minutes for the big loaf.
Thanks
Usually, your bread recipes are my “go-to’s”. This brioche I tried for the 1st time today. I questioned the amount of milk but put it all in my bread machine anyway. (Postpartum surgery recovery laziness) I examined as it kneaded and my doubts were shown true! The dough was way to dry. Is there a mistake in the amount you’ve listed? I measured the flour by scooping spoonfuls into a measuring cup, so that isn’t the problem. Anyway, I thought it might be worthy to point out. Love your recipes no matter!!!
Hey Holly, Sorry to hear that. No. This recipe should not be dry at all. Infact, the butter makes it a very soft dough. Not sure what happened. Many have tried this recipe successfully so I know the measurements are accurate
It was dry when I was to mix with the spatula it took the butter to smooth it out. I used my electric mixer which the dough hook
Diane. Sounds like the eggs you are using were very small. You can also add a few tablespoons of milk if necessary.
?Another successful bake! Thank you Veena. I did take a calculated risk and used a incorrect pan size but the taste was so good. Thank you for the detailed instructions.?
You are very welcome Lucy. Thank you for always coming back to leave feedback. Makes my day
This was a huge hit at my house!! It was so good!
Thank you so much for the feedback. Thank you Toni
I just love all the awesome tips you give! This is such a great recipe 🙂
Thank you so much, Danielle
I’ve been baking a lot of bread recently, but I’ve never made brioche. For some reason I thought it would be difficult, so I am really pleased to read your recipe and tips. Going to share this one now too!
Thank you, Jacqueline. Yes, Brioche is easier than most people think
One of my favorite bread and I love the process of making it. So delicious
That is true, Kushi. Thank you
Lovely recipe! This is the perfect time to craft my bread making skills, I keep this recipe bookmarked!
Thank you, Jack.