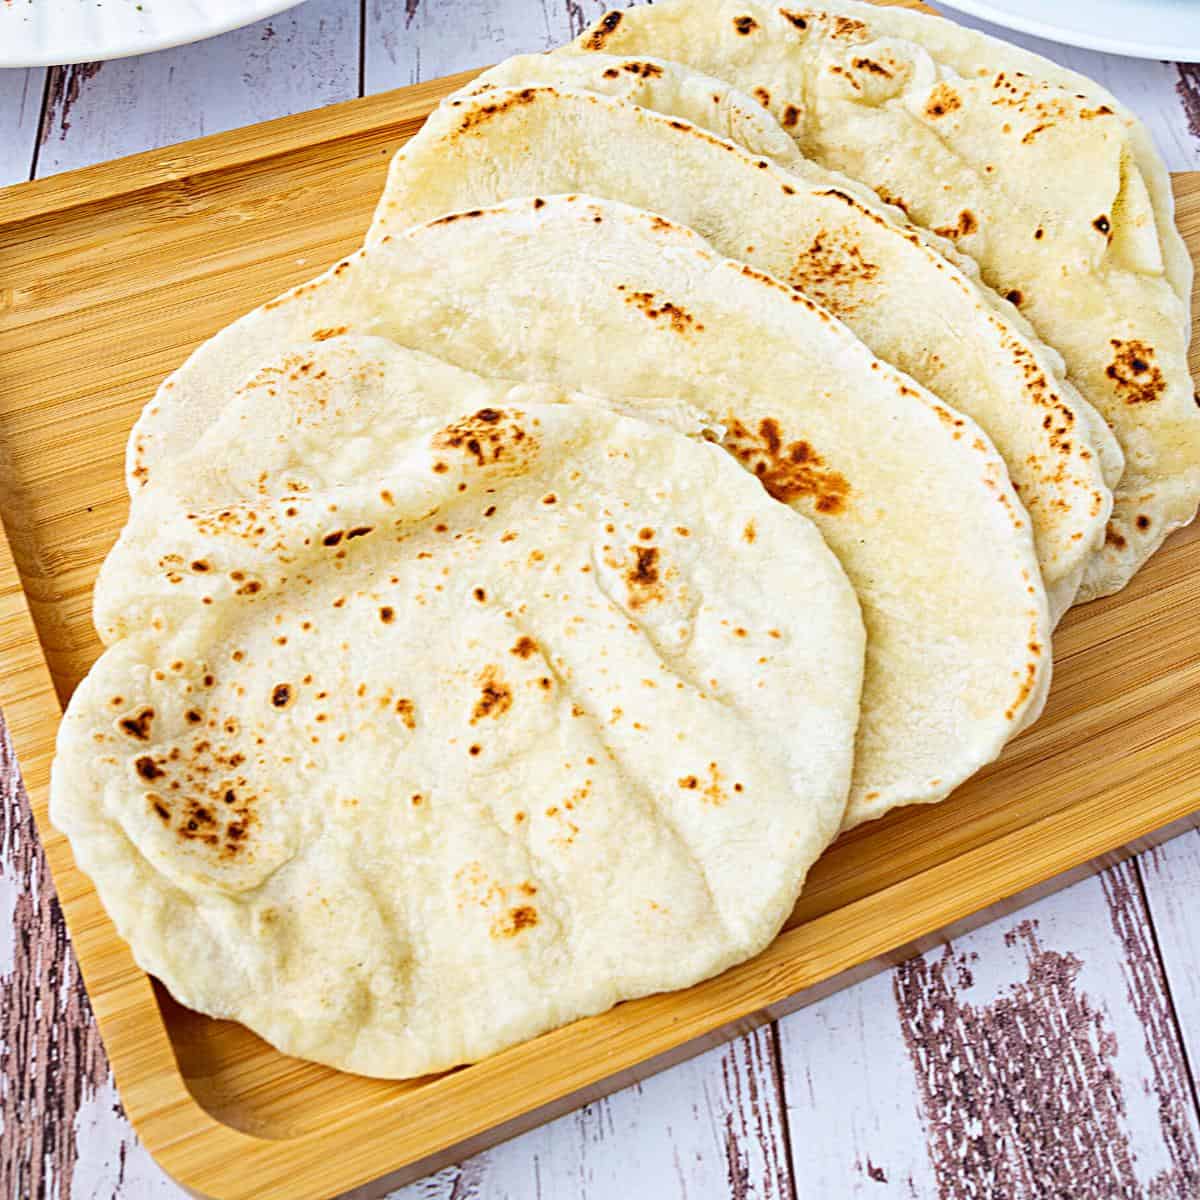
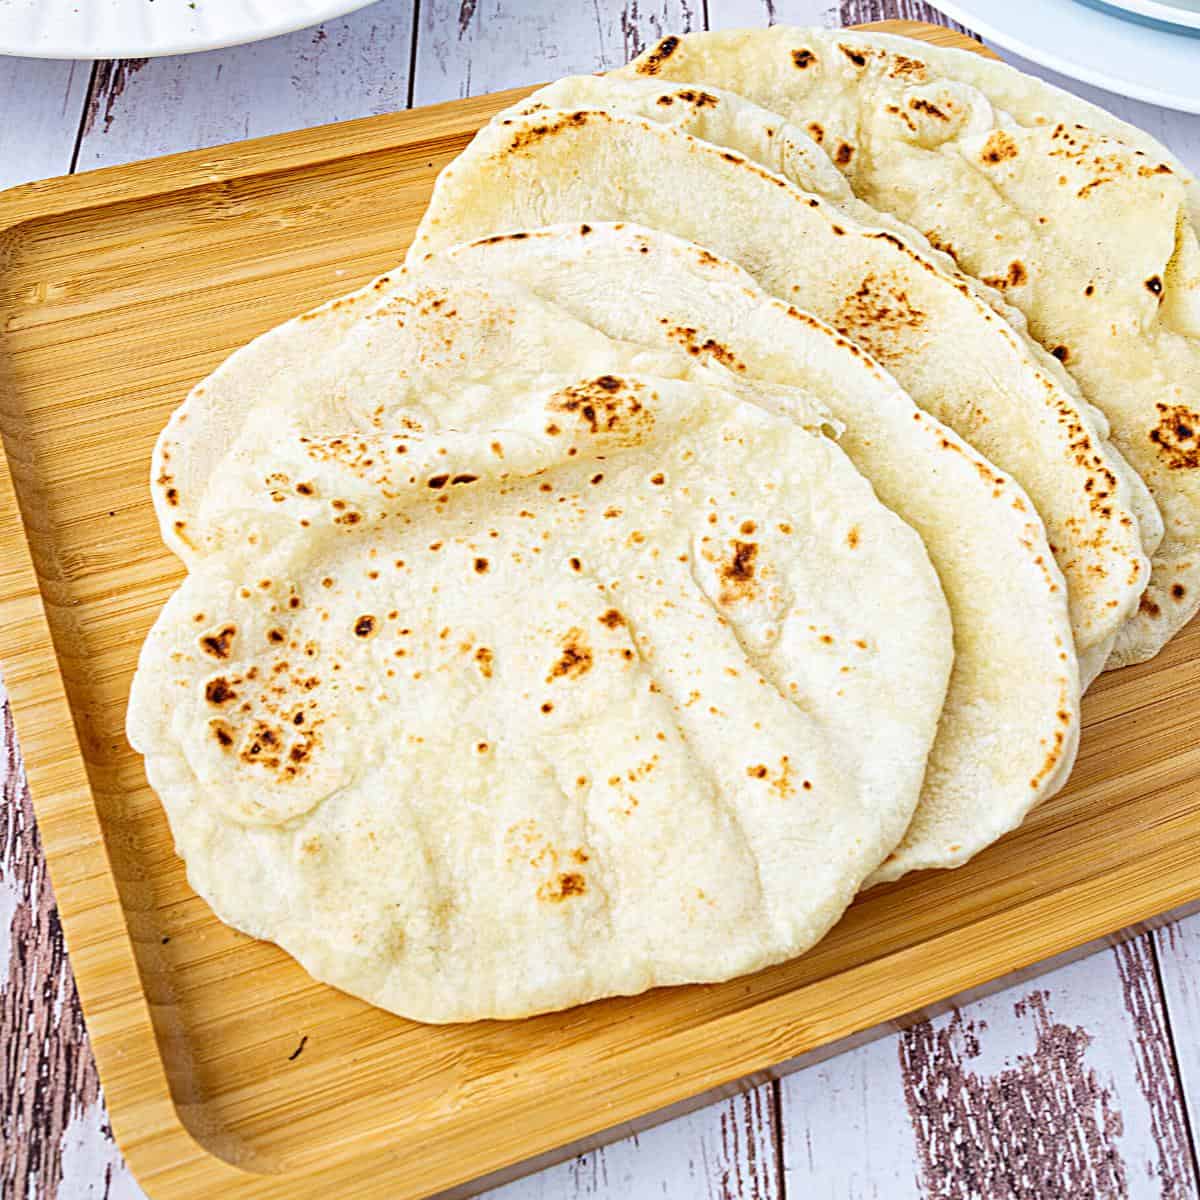
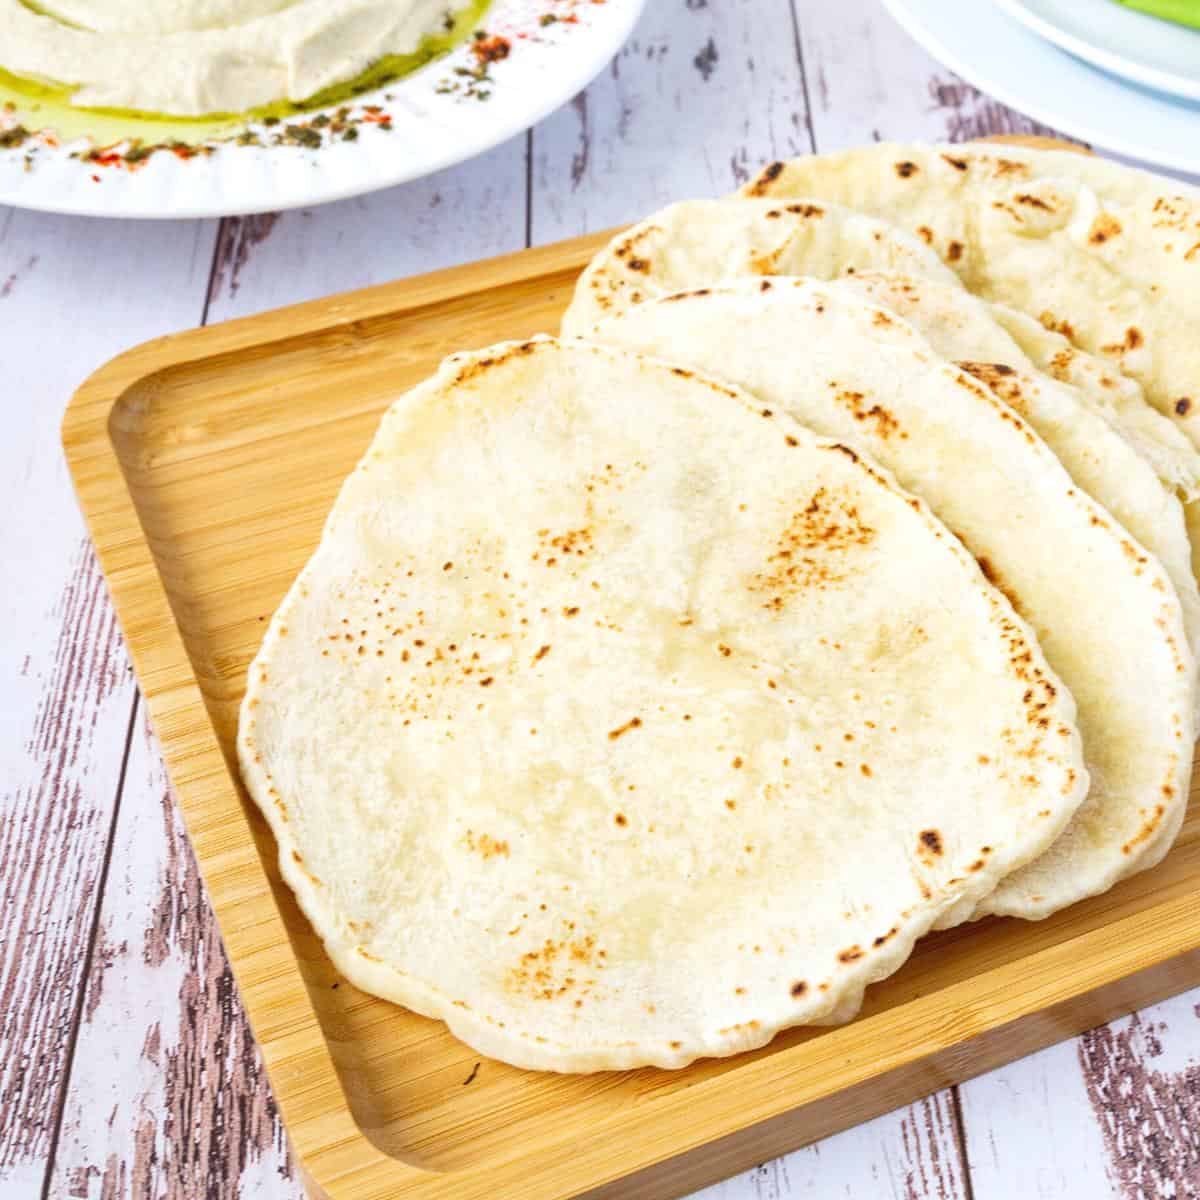
No-Knead flatbread recipe
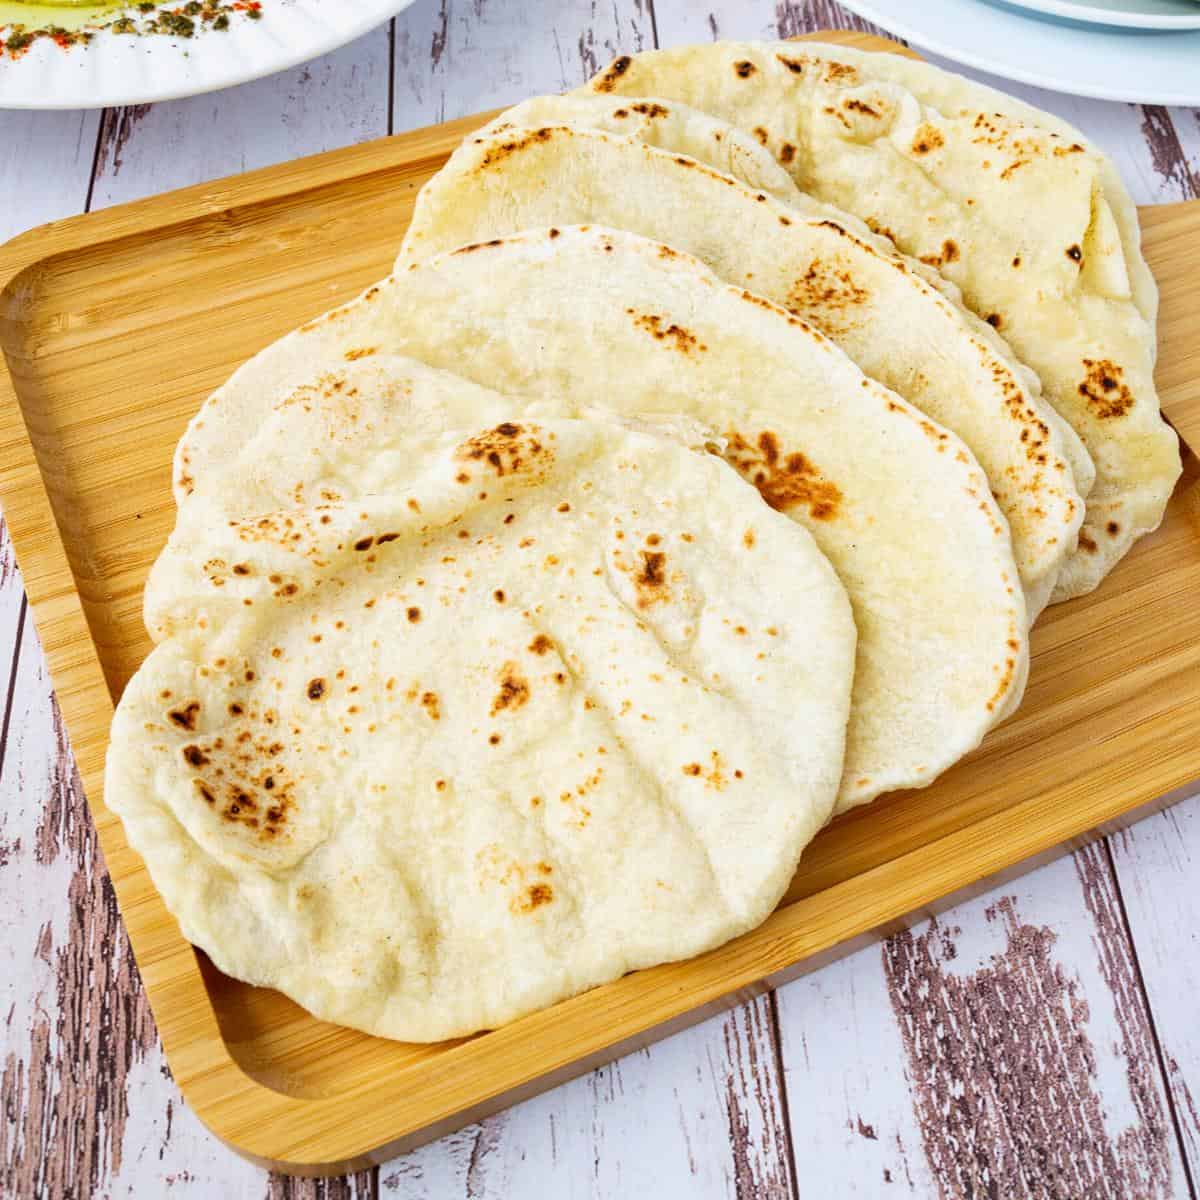
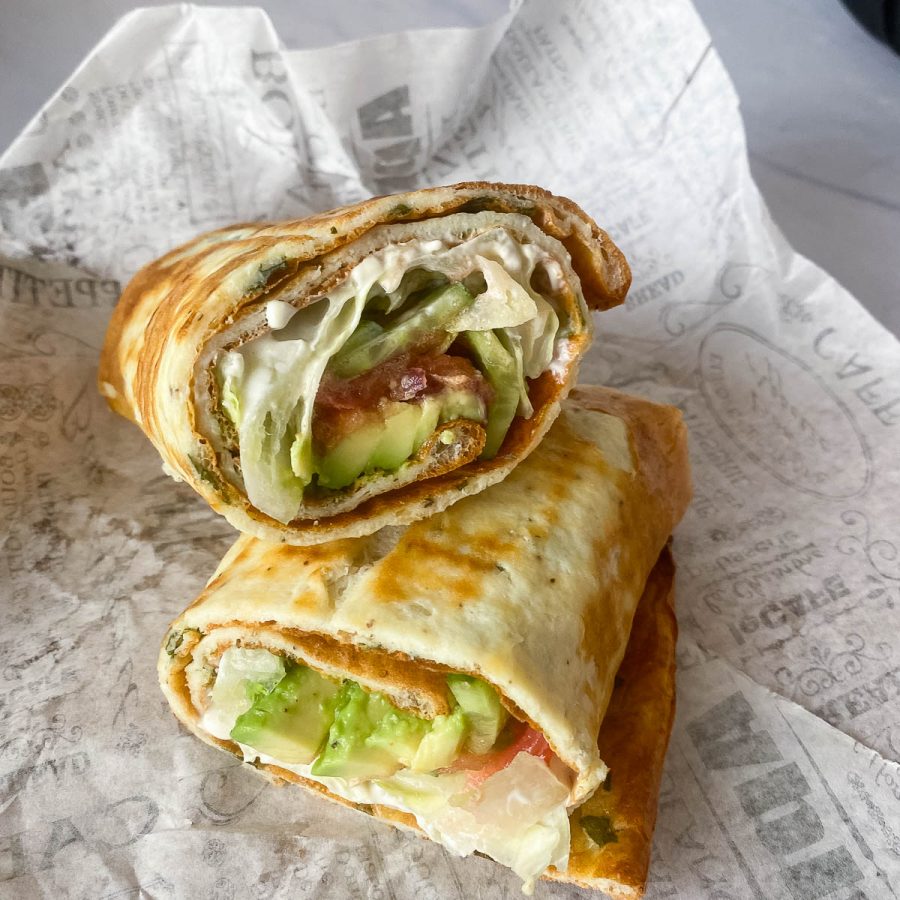
This flatbread recipe uses six ingredients, including yeast, and needs only 30 minutes to rise. You don’t need to knead it, and yet it produces a soft, tender flatbread that’s perfect for wraps and spreads as well as with BBQs and grills, such as shawarma or hummus.
This is a bread I make when I want a quick flatbread recipe. In fact, I make it often on Thursdays because we usually have hummus or falafel with tahini sauce on that day. Sometimes, I make pita bread, but when I’m short on time, this quick flatbread comes to my rescue.
If you give my husband this flatbread with a smear of oil, he’s in heaven. He loves this flatbread so much. Often, I will sprinkle it with zaatar, which is a Middle Eastern herb. Sometimes I will sprinkle some goat cheese along with zaatar.
Why make this flatbread
- This is one of the easiest and most delicious flatbread recipes I’ve made.
- The best part is you don’t need to knead it, yet it gives you a soft, tender flatbread that can be eaten on its own.
- Most of the ingredients are simple pantry staples, so you can make them at any time.
- It is a very versatile dough! You can roll this thick to serve like a pita or thin as a wrap!
- Best of all, these are made with yeast dough, so they are softer and have a longer shelf life than most other flatbread recipes.
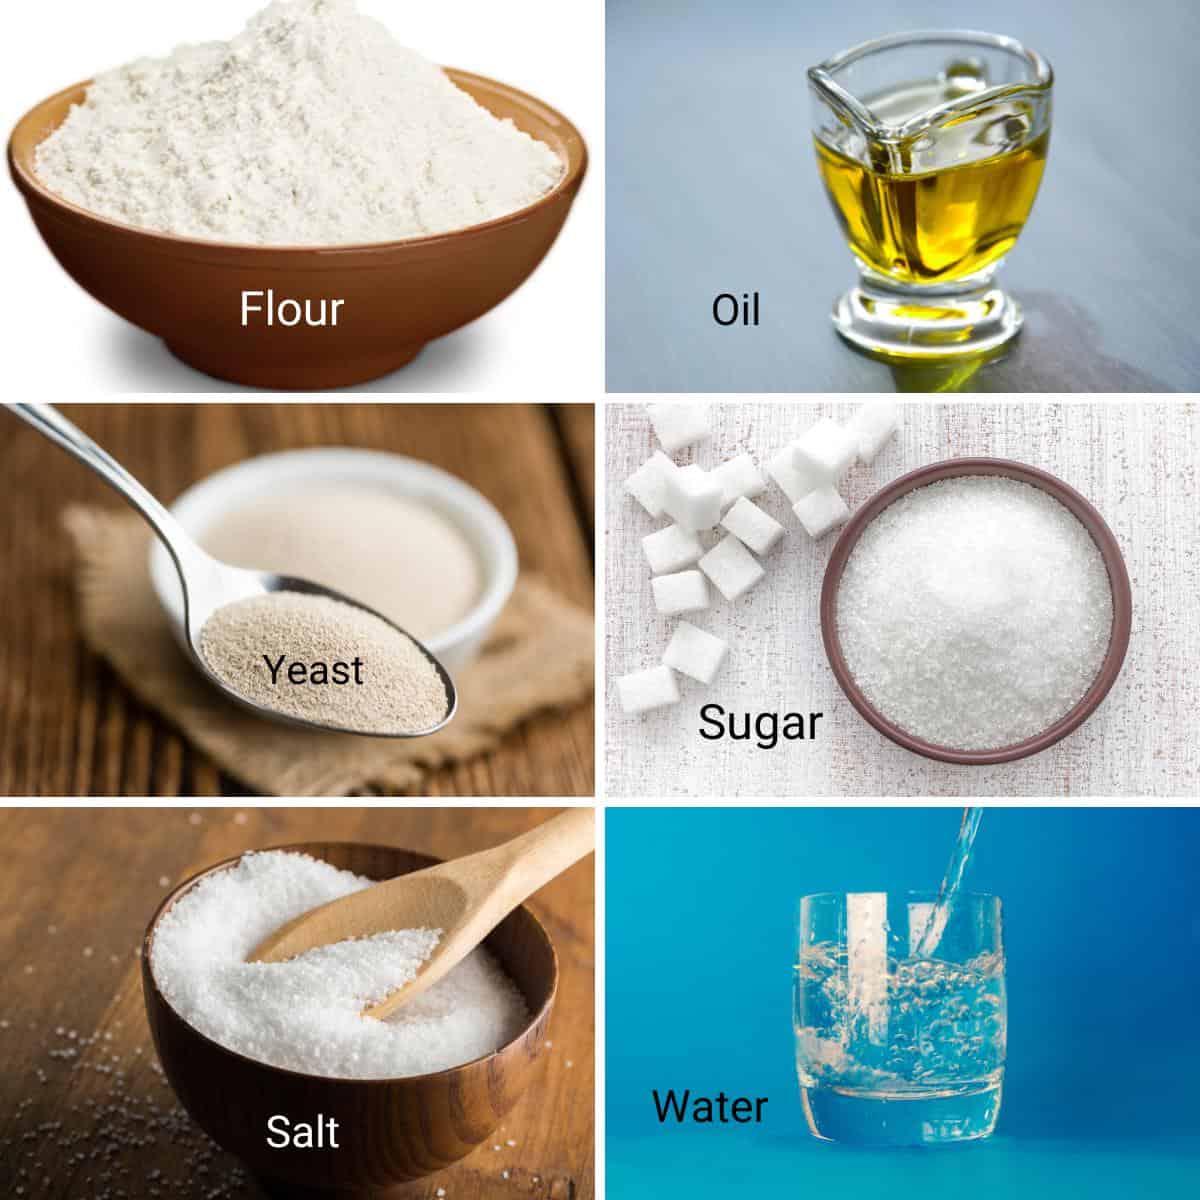
Ingredients and substitutes
- Flour – I have always used all-purpose flour for this bread.
- Water – It is very important to use warm water, not cold or hot water. Cold water will not revive the yeast, and hot water will kill it.
- Instant dry yeast – I prefer using instant dry yeast because I’ve consistently had great success with it. If you need to use active dry yeast, you will require 2 1/4 teaspoons or one packet. And if you use fresh yeast, you will need about 21 grams.
- Sugar – The sugar here is not really to add sweetness. So no, the one tablespoon won’t make your homemade dinner rolls sweet.
- Olive oil – A good source of food for the yeast and adds a nice flavor as well.
Step-by-step: No-knead flatbread recipe
- Yeast mixture – In a measuring cup or medium bowl, combine the warm water, olive oil, sugar, and yeast.
- Dry ingredients – In another large bowl, combine the flour and salt.
- Wet to dry ingredients – Add the yeast mixture to the flour mixture in the bowl. Use a wooden spoon or spatula to combine it well, ensuring no dry flour is left on the bottom.

- Proof – Cover the bowl with a clean kitchen cloth or plastic wrap. Let it rest in a warm place for 30 minutes to an hour, until it has almost doubled in size.
Pro tip – If you leave it in the warm oven, it will double in 20 minutes! - Divide – Transfer the dough to a well-floured work surface. Use a bench scraper or knife and divide the dough into two portions. Then divide each portion into 6 to make 12 flatbreads
- Roll – Dust each portion with flour and make a ball. Roll each ball on a well-dusted work surface with a rolling pin to about 6 inches, then dust off the excess flour.
Pro tip – This is a soft dough, so you need flour to prevent it from sticking.

- Skillet – Heat a skillet on medium-high heat. Once hot, reduce the heat to medium.
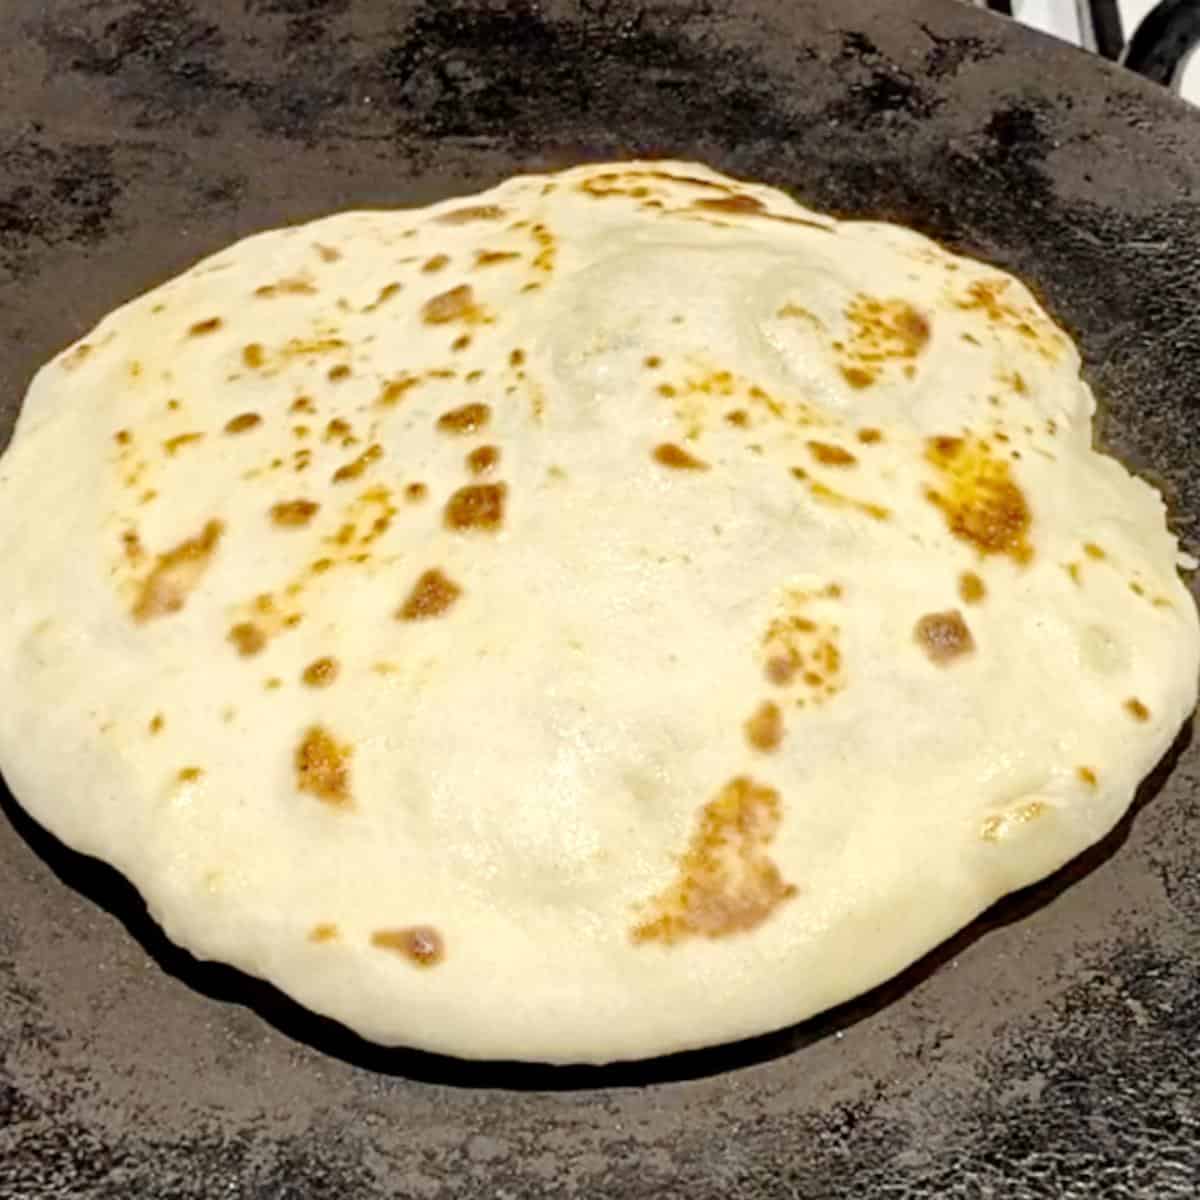
Pro tip – It is important that the skillet is hot. Less heat will make the bread stick to the skillet, and too hot will give black spots. - Cook – Place one flatbread on the skillet. Wait 30 seconds until you see bubbles form on the top. Flip it over and wait an additional 30 seconds. Then use the back of your flat spatula to press down and help cook evenly.
Pro tip – You can roll all the flatbread first or start cooking them simultaneously. Press gently on all sides so the flatbread will puff up. - Optional – You can brush the flatbread with oil or butter, or just leave it plain.
Pro tip – Oil and butter will help keep the flatbread soft. - Store – Once cooked, keep them wrapped between sheets of clean kitchen cloth or cheesecloth to stay soft.
No-Knead Flatbread Recipe
This flatbread recipe uses six ingredients including yeast and needs only 30 minutes to rise. You don't need to knead it and yet it produces a soft, tender flatbread that's perfect for wraps and spreads as well as with BBQs and grills such as shawarma or hummus.
Video
Ingredients
- 500 g (4 cups) All-purpose flour
- 7 g (1½ tsp) Instant dry yeast (1 packet)
- 360 ml (1½ cup) Warm water (110 F)
- 15 g (1 tbsp) Olive oil
- 15 g (1 tbsp) Sugar
- 9 g (1 tsp) Salt
- ½ cup All-purpose flour for working
Method
- Yeast mixture – In a measuring cup or medium bowl, combine the warm water, olive oil, sugar, and yeast.360 ml Warm water, 15 g Olive oil, 15 g Sugar, 7 g Instant dry yeast
- Dry ingredients – In another large bowl, combine the flour and salt.500 g All-purpose flour, 9 g Salt
- Wet to dry ingredients – Add the yeast mixture to the flour mixture in the bowl. Use a wooden spoon or spatula to combine it well making sure that no dry flour is left on the bottom.
- Proof – Cover the bowl with a clean kitchen cloth or plastic wrap. Let it rest in a warm place for 30 minutes to an hour, until it has almost doubled in size.
- Divide– Transfer the dough to a well-floured work surface. Use a bench scraper or knife and divide the dough into two portions. Then divide each portion into 6 to make 12 flatbreads.½ cup All-purpose flour
- Roll – Dust each portion with flour and make a ball. Roll each ball on a well-dusted work surface with a rolling pin to about 6 inches, then dust off the excess flour.
- Skillet – Heat a skillet on medium-high heat. Once hot, reduce heat to medium.
- Cook – Place one flatbread on the skillet. Wait 30 seconds until you see bubbles form on the top. Flip it over and wait an additional 30 seconds. Then, use the back of your flat spatula to press down and help cook evenly.
- Optional – You can brush the flatbread with oil or butter, or just leave it plain.
- Store – Once cooked, keep them wrapped in clean kitchen cloth or cheesecloth to maintain their softness.
- Enjoy.
Notes
- Hydration Matters: For no-knead recipes, the water content in the dough should be slightly higher than regular dough to allow for better gluten development without kneading.
- Resting Time: Today, we used 30 minutes to an hour, but if possible, let the dough rest for a longer time (even up to 24 hours) to allow the gluten to develop and the flavor to mature.
- Use a Cast-Iron Skillet: A cast-iron skillet retains heat well and ensures even cooking.
- Preheat Your Pan: Before placing your dough in the skillet, ensure that it’s properly preheated. A medium-high heat is usually appropriate, but you might need to adjust based on your stovetop.
- Thickness: Roll or pat out your dough to the desired thickness. Remember, it will puff up slightly as it cooks.
- Watch for Bubbles: As you cook the bread, bubbles will start to form. When large bubbles appear, it’s usually a good time to flip the bread.
- Keep Warm: After cooking, wrap the flatbreads in a clean kitchen towel. This keeps them warm and soft as you cook the remaining pieces.
- Avoid Overcooking: Flatbread should be soft and pliable. If you overcook it, it may become crispy and hard. Keep an eye on it and adjust the cooking time accordingly.
- Adjust As Needed: The first bread is often a test. Adjust the heat or cooking time as needed, then proceed with the rest of the dough.
Equipment you will need


Nutrition
Tried this recipe?
Mention @veenaazmanov_kitchen or tag #veenaazmanovkitchen!Tips for making no-knead flat bread
- Hydration Matters: For no-knead recipes, the dough should have slightly higher water content than regular dough to allow better gluten development without kneading.
- Resting Time: Today we have used 30 minutes to an hour, but if possible, let the dough rest for a longer time (even up to 12 or 24 hours) to allow the gluten to develop and the flavor to mature.
- Use a Cast-Iron Skillet: A cast-iron skillet retains heat well and ensures even cooking.
- Preheat Your Pan: Before placing your dough in the skillet, ensure that it’s properly preheated. A medium-high heat is usually appropriate, but you might need to adjust based on your stovetop.
- Thickness: Roll or pat out your dough to the desired thickness. Remember, it will puff up slightly as it cooks.
- Watch for Bubbles: As you cook the bread, bubbles will start to form. When large bubbles appear, it’s usually a good time to flip the bread.
- Keep Warm: After cooking, wrap the flatbreads in a clean kitchen towel. This keeps them warm and soft as you cook the remaining pieces.
- Avoid Overcooking: Flatbread should be soft and pliable. If you overcook it, it may become crispy and hard. Keep an eye on it and adjust the cooking time accordingly.
- Adjust As Needed: The first bread is often a test. Adjust the heat or cooking time as needed, then proceed with the rest of the dough.
more no knead bread recipes
- No-Knead Olive Bread
- No-Knead Bread Without a Dutch Oven
- Crusty No-Knead Bread
- Soft Flatbread Without Yeast (no-knead)
- No-Knead Beer Bread
- No-Knead Knotted Rolls
- and No-Knead Sandwich Bread
- No-Knead flatbread recipe


Troubleshooting
- My dough did not rise. The water used must be warm, about 110°F (not hot or cold). Therefore, ensure you use the correct water temperature. Simply speaking, hot water will kill the yeast, while cold water will not revive it.
- Why is my dough too sticky? The dough needs to be soft but not too sticky. If necessary, add more flour, but only a little flour.
- My flatbread is too hard. There could be three reasons for this.
- Too much flour in the dough must be soft and slightly sticky. That’s why it produces a soft, tender, yeasted flatbread.
- Cooking on very high heat or overcooking it. You want to cook this flatbread recipe on medium heat until it’s cooked. Overcooking it will dry it out, making it too hard.
- Wrap the flatbread in a clean kitchen cloth. The steam in the flatbread settles in, keeping it soft.


Frequently asked questions
This no-knead flatbread recipe will keep at room temperature for 2 days if well wrapped.
No, use expensive bread flour for other bread. This one works best with plain old all-purpose flour. Having said that, if bread flour is all you have, use it.
Yes, you can use whole wheat flour, but it may need a little more time to rise, so take that into account. You may also need a little less flour, as whole wheat flour will absorb more water.
Yes, if you want to let the dough rise for a longer period. I highly recommend leaving it in the fridge rather than on the counter. This will let it rise slowly and help develop more flavor.
Yes, flatbread can be frozen, and it’s a great way to preserve its freshness if you’ve made a large batch. Here’s how to freeze and later thaw flatbread:
Cool Completely: Before freezing, ensure that the flatbreads are completely cool to room temperature to prevent condensation from forming inside the freezer bag, which can make the flatbread soggy.
Separate with Parchment: To prevent the flatbreads from sticking together, place a piece of parchment paper or wax paper between each flatbread.
Package Properly: Place the stack of flatbreads in a resealable plastic freezer bag. Press out as much air as possible before sealing the bag to reduce the risk of freezer burn.
Label and Date: Always label the freezer bag with the date and type of flatbread. This helps you track how long they’ve been in the freezer and identify them easily.
Store Flat: If possible, store the flatbreads flat in the freezer to maintain their shape.
Thawing and Reheating Flatbread:
Room Temperature Thawing: Remove the desired number of flatbreads from the freezer and let them thaw at room temperature for a few hours.
Microwave Thawing: If you’re in a hurry, you can use the defrost function on your microwave. However, use this method sparingly as it can make the flatbread a bit more chewy.
Reheat on the Stovetop: For the best results, after thawing, reheat the flatbreads on a skillet over medium heat for a minute or two on each side. This will help them regain their original texture and flavor.
Oven Method: You can also wrap the flatbreads in aluminum foil and heat them in the oven at a low temperature (around 300°F or 150°C) until they’re warmed through.
Flatbreads can be frozen for up to three months. While they might still be safe to eat after this time, their quality in terms of flavor and texture might diminish.
Yes, flatbread can be made gluten-free! The main challenge is finding the right combination of gluten-free flours and binders to replicate the texture and flexibility of traditional flatbread. You will need Gluten-free all-purpose flour blend, along with xanthan gum or guar gum, water, sugar, salt, yeast, and oil.
Don’t lose this recipe! Save it for Later!
📌 Save this Recipe for later on Pinterest so you can easily find it again.
⭐ Add Veena Azmanov Kitchen to your Google Preferred Sources.
It helps Google show you more of our recipes.
📧 Subscribe for new recipes delivered to your inbox.
🎥 Follow us for more recipes


Day 10 done
Thanks so much! I needed a quick recipe that was also authentic to what I use to eat back home in Detroit. These came out amazing. my children were eating up the pita bread before I could make the chicken shawarma haha.
This will be my new go to!
Thank you so much for the lovely feedback. Jessica
Easy and they turned out great! Thanks for sharing!
DAY 10 DONE
Day 10 Done
Day 10 done
Day 10 DONE
Day 10 Done
Day 10 done
Thanks!
Day 10 done