Easy No Yeast Bread

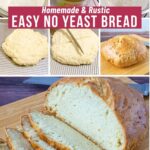
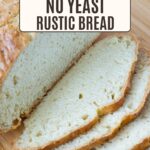
This easy no yeast bread is perfect when you want fresh homemade bread fast without waiting for dough to rise. Made with six simple pantry ingredients, this quick bread comes together in minutes and bakes into a rustic loaf with a golden crust and soft tender crumb. No stand mixer, bread machine, or yeast needed.

I’ve always made homemade bread a few times a week because I was one of those moms who liked my kids growing up eating homemade whenever possible. So bread in our house was almost always homemade.
But the first time I made this no yeast bread was actually for a friend who said she couldn’t eat yeast. Honestly, I didn’t expect much from a bread made with baking soda instead of yeast, but it turned out surprisingly soft, rustic, and delicious. Since then, it has become one of my go-to bread recipes whenever I want fresh homemade bread fast without waiting hours for dough to rise.
Why You’ll Love This Irish Soda Bread
- No yeast and no rising time needed
- Easy one-bowl bread recipe
- Made with simple pantry ingredients
- Soft tender crumb with rustic crust
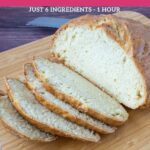
- Ready in under an hour
- Beginner-friendly homemade bread recipe
- No stand mixer required
- Perfect warm with butter, soup, or jam

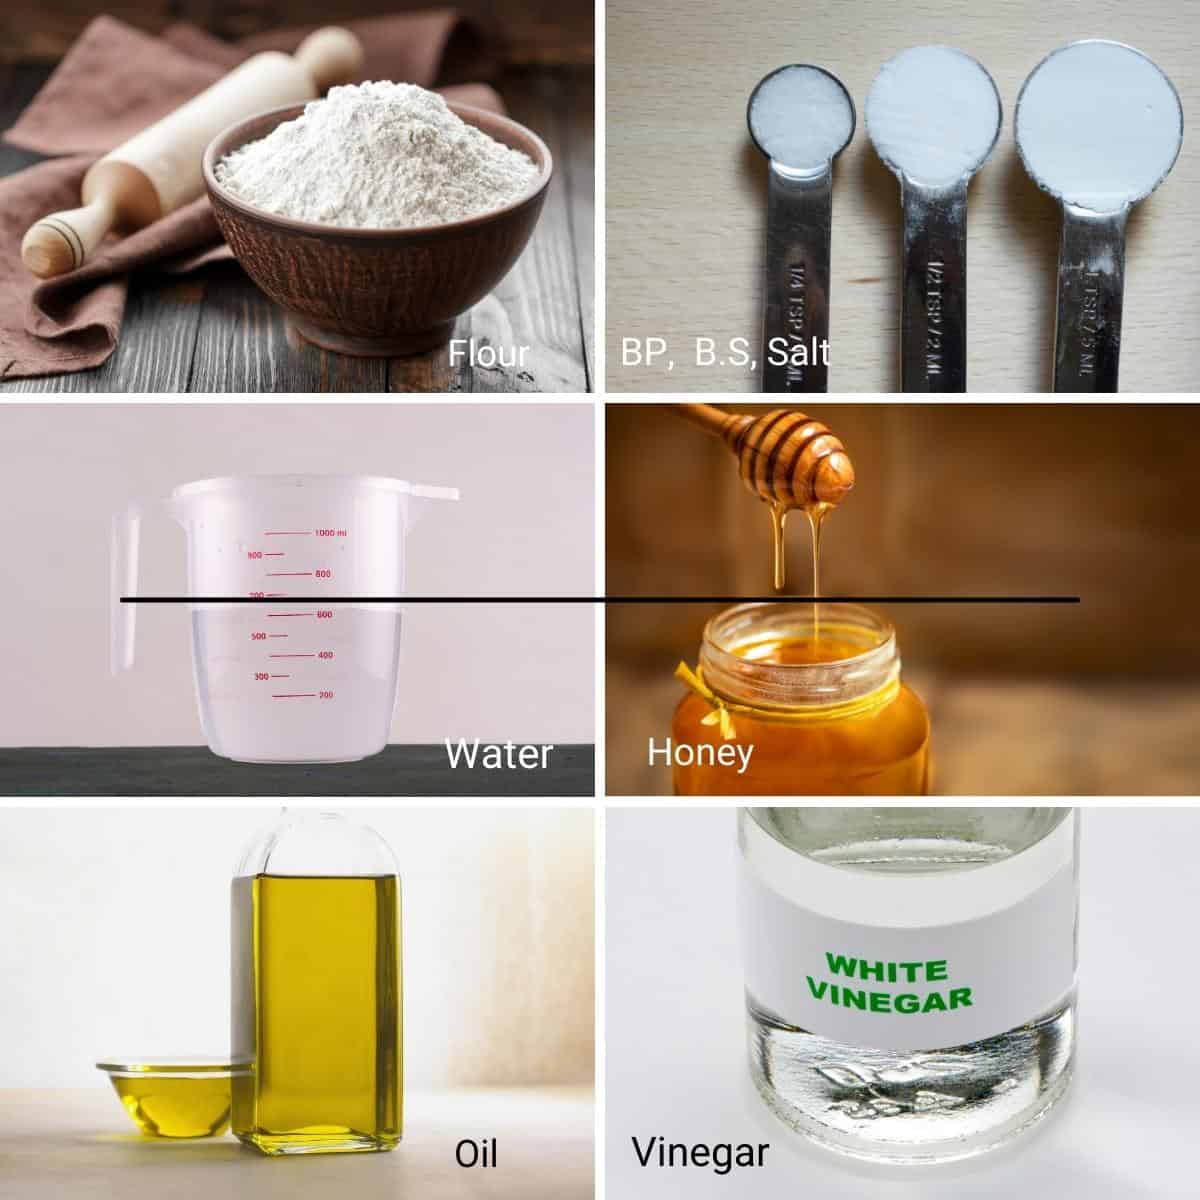
Just 6 Ingredients for this No Yeast Bread
- All-purpose flour – Gives the bread structure while keeping the crumb soft.
- Baking soda and baking powder – Help the bread rise without yeast.
- Warm water or milk – Milk gives a softer richer crumb.
- Honey – Adds slight sweetness and flavor.
- Vinegar – Reacts with the baking soda for lift.
- Oil or melted butter – Keeps the bread tender.
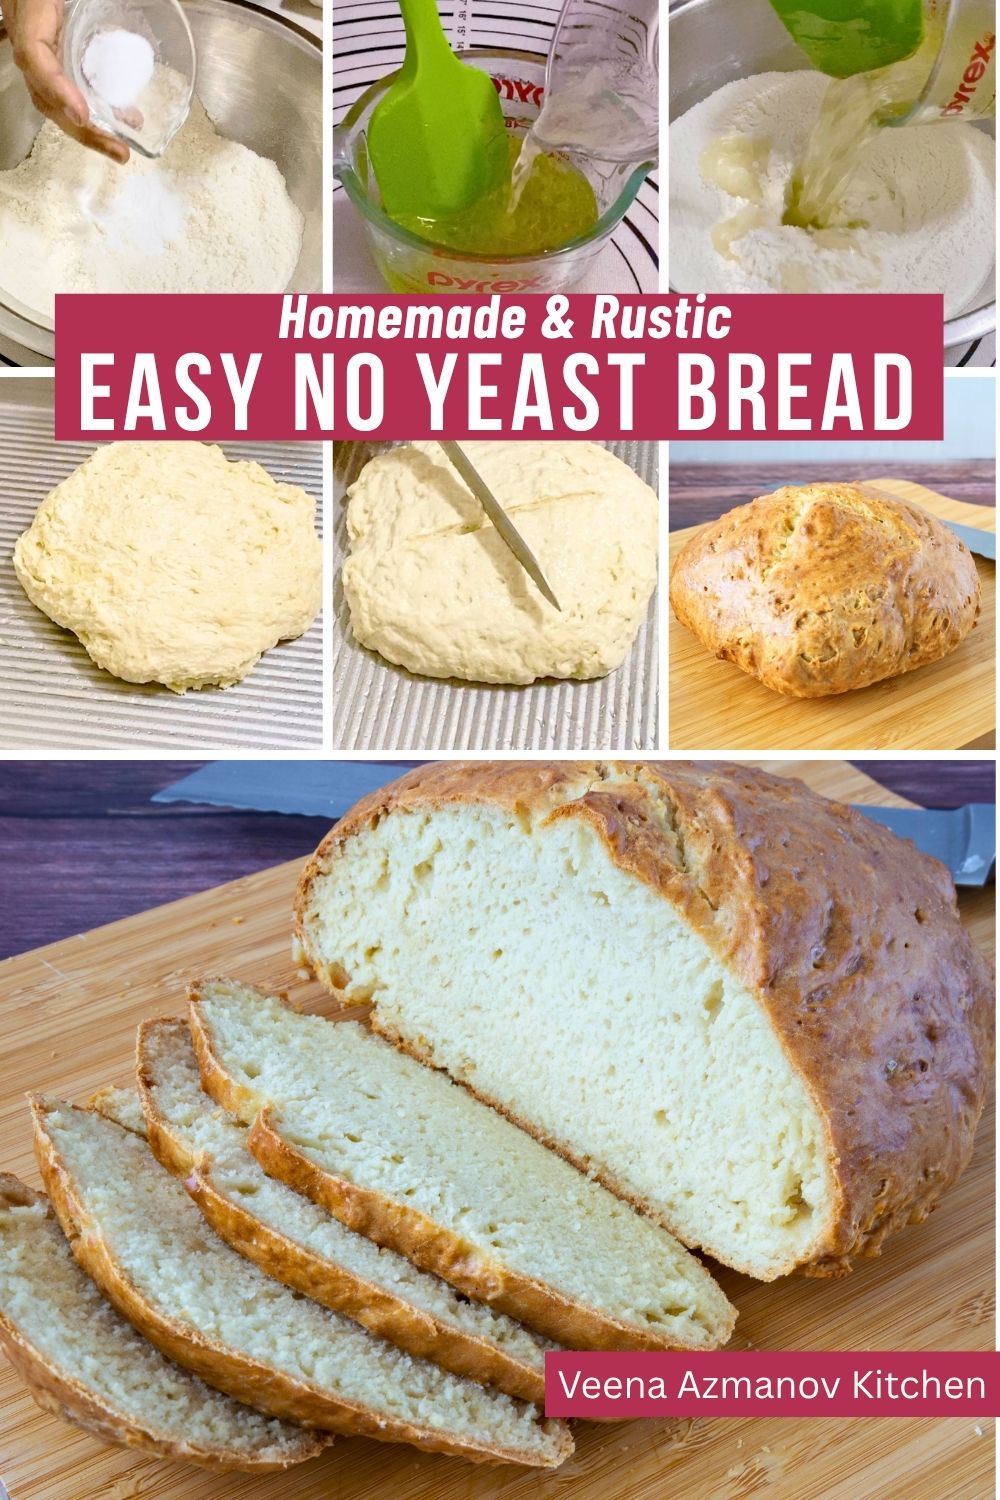
Step-by-Step: No Yeast Bread
- Preheat – Preheat the oven to 400°F / 200°C. Line a baking sheet with parchment paper.
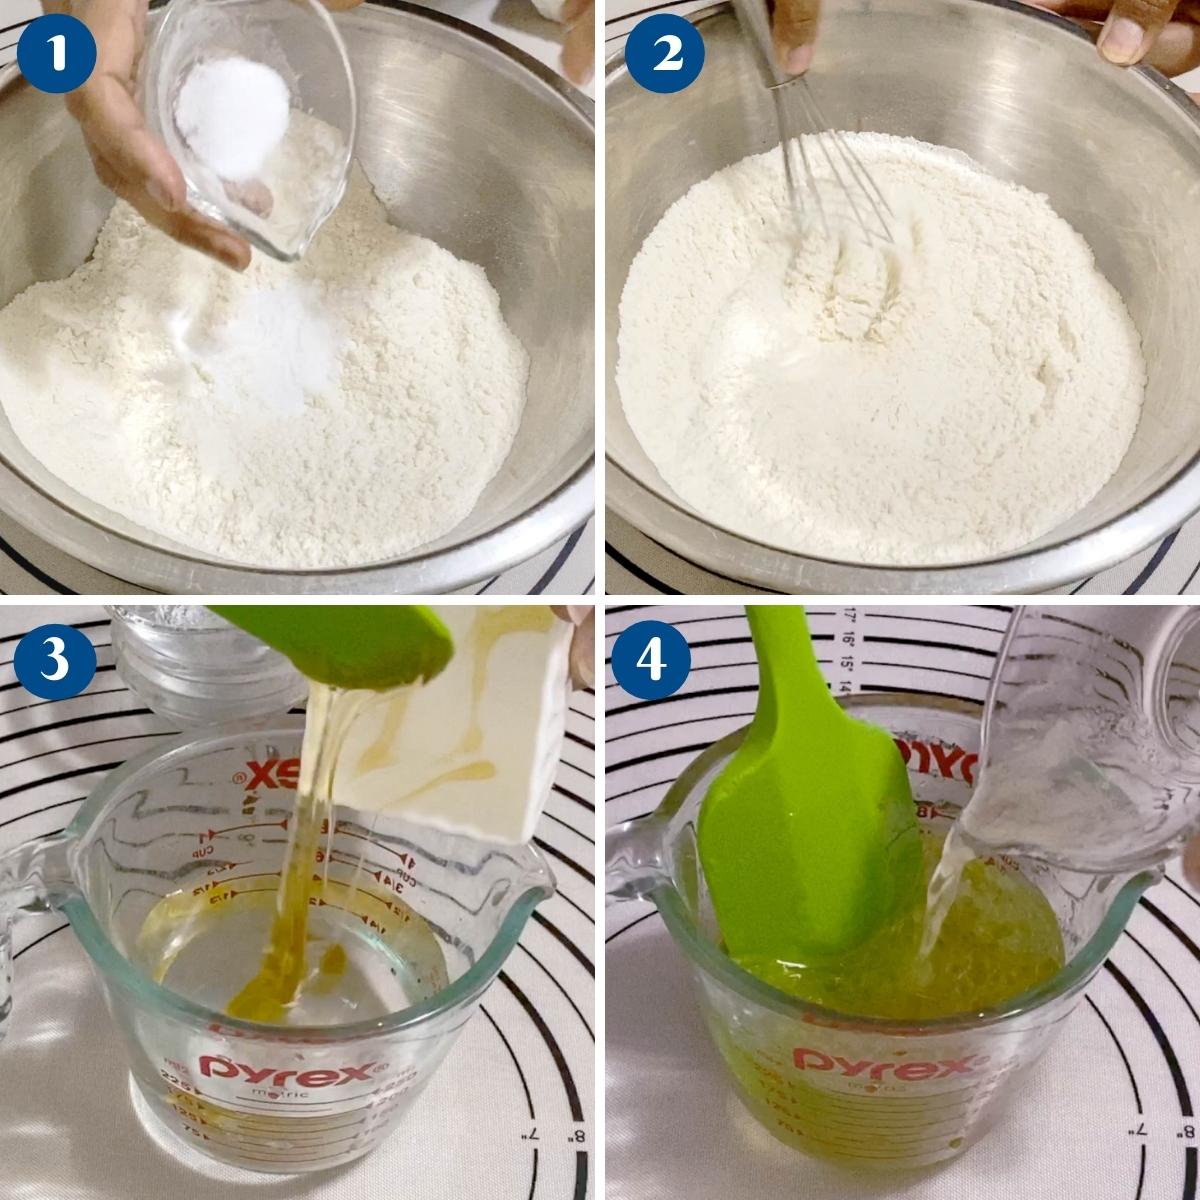
- Dry ingredients – In a large bowl, whisk together the flour, baking powder, baking soda, and salt.
- Wet ingredients – In a separate bowl, combine the warm water, oil, honey, and vinegar.

- Mix dough – Pour the wet ingredients into the dry ingredients and mix just until a shaggy dough forms.
- Shape loaf – Turn the dough onto a lightly floured surface and gently shape into a round loaf. Do not overmix or knead too much.
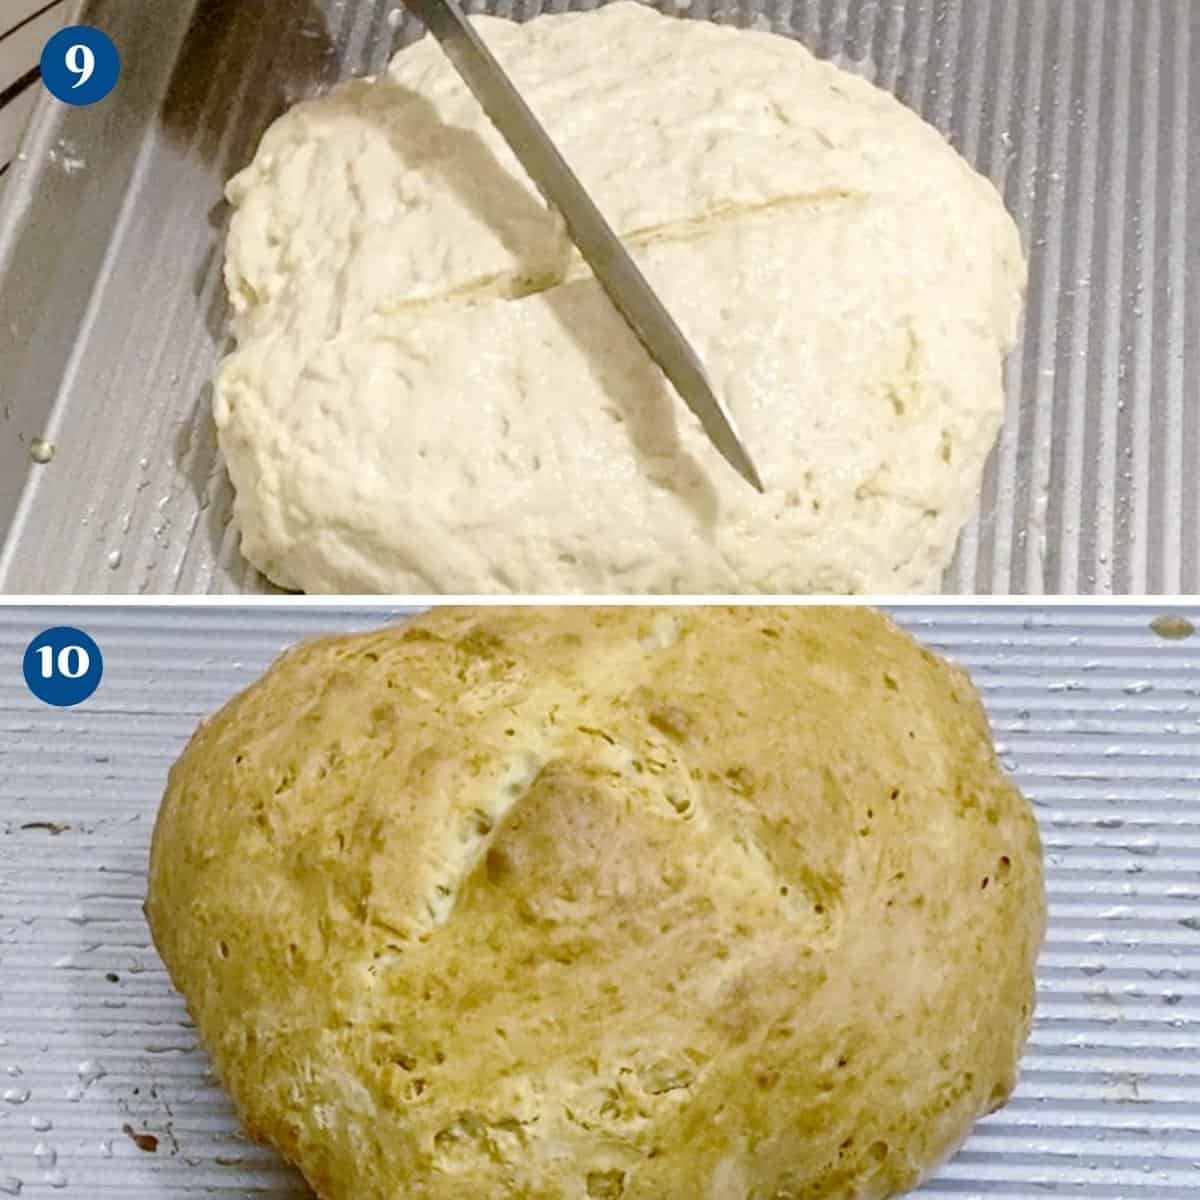
- Score – Place the loaf on the prepared baking sheet and cut a deep cross on top with a sharp knife.
- Bake – Bake for 35 to 40 minutes until golden brown and the bottom sounds hollow when tapped.
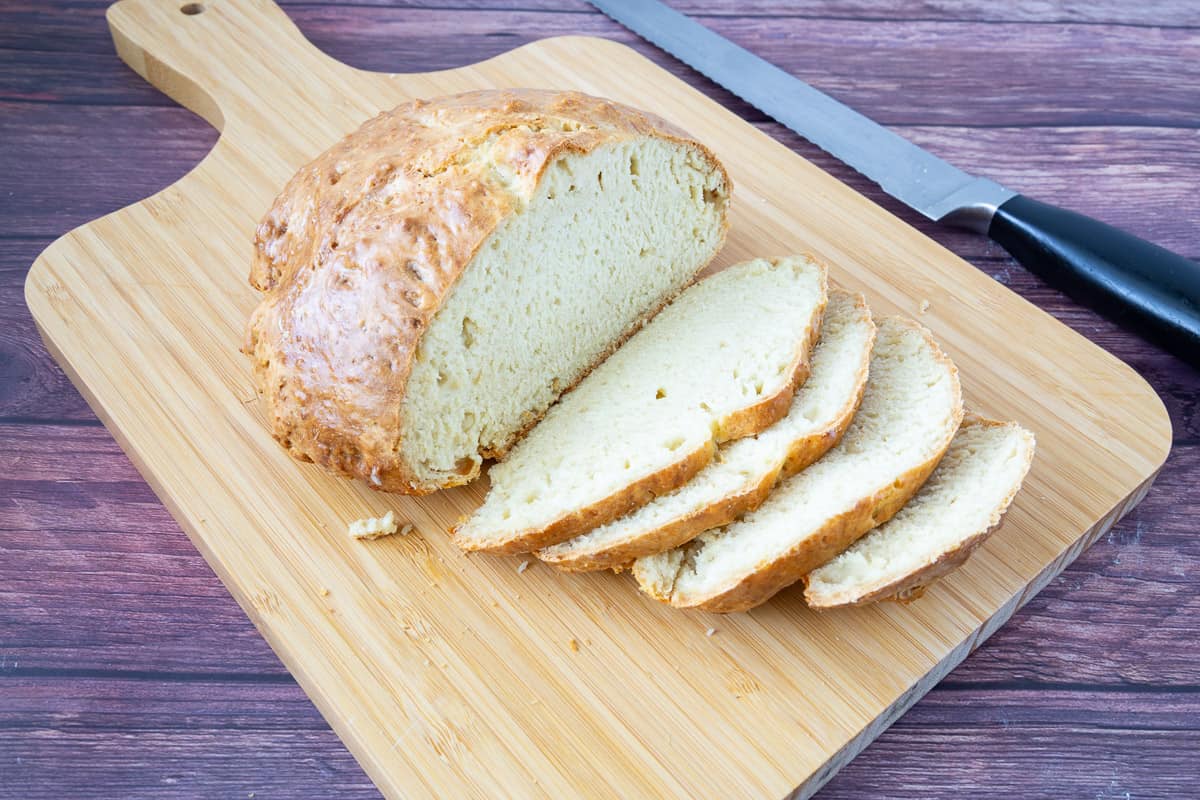
- Cool – Cool on a wire rack for at least 15 minutes before slicing.

Tips for Success
- Do not overmix the dough or the bread can become tough.
- The dough should look shaggy and slightly sticky.
- Use fresh baking soda and baking powder for the best rise.
- Score the loaf deeply so it bakes evenly.
- Let the bread cool slightly before slicing.
- This bread is best served warm the day it is baked.
Troubleshooting
| Problem | Possible Cause | Solution |
|---|---|---|
| Bread is dense | Dough was overmixed | Mix only until combined |
| Bread did not rise | Old baking soda or baking powder | Use fresh leavening agents |
| Bread is dry | Too much flour or overbaking | Measure flour correctly |
| Center is doughy | Underbaked loaf | Bake until bottom sounds hollow |
| Crust too dark | Oven too hot | Tent loosely with foil |

- Butterscotch Irish Cream
- Baileys Irish Cream
- Bailey’s Irish Cream Chocolate Mousse – Delicious Rich
- Baking Powder vs. Baking Soda
- Homemade Thanksgiving Recipes


Frequently asked questions
Irish Soda Bread is best eaten fresh, but can be stored in an airtight container at room temperature for 2-3 days. After that, it may start to dry out.
Yes. This recipe uses baking soda and baking powder instead of yeast, so there is no rising time needed.
It has a rustic flavor with a soft tender crumb and golden crust.
Yes. Cool completely, wrap well, and freeze for up to 2 months.
Dense bread is usually caused by overmixing or expired baking soda and baking powder.
Yes. Milk creates a slightly softer richer crumb.
Yes, you can put the dough in a 9 x 5-inch loaf pan and bake it as a loaf of sandwich bread.
No Yeast Bread Recipe – Soda bread
This amazing no-yeast bread makes a surprisingly light and airy loaf. Using just eight ingredients you probably have on hand, this recipe is simple, easy, and gets done in less than an hour.
Video
Ingredients
- 500 grams (4 cups) All-purpose flour
- 1½ tsp Baking powder
- 1½ tsp Baking soda
- 1¼ tsp Salt
- 380 grams (1⅔ cups) Warm water or milk (80 to 85 F)
- 2 tbsp Oil (optional for flavor)
- 2 tbsp Honey (optional for flavor)
- 1 tbsp Vinegar
Method
- Preheat – Preheat the oven to 400°F / 200°C. Line a baking sheet with parchment paper.
- Dry ingredients – In a large bowl, whisk together the flour, baking powder, baking soda, and salt.500 grams All-purpose flour , 1½ tsp Baking powder, 1½ tsp Baking soda, 1¼ tsp Salt
- Wet ingredients – In a separate bowl, combine the warm water, oil, honey, and vinegar.380 grams Warm water , 2 tbsp Oil, 2 tbsp Honey, 1 tbsp Vinegar
- Mix dough – Pour the wet ingredients into the dry ingredients and mix just until a shaggy dough forms.
- Shape loaf – Turn the dough onto a lightly floured surface and gently shape into a round loaf. Do not overmix or knead too much.
- Score – Place the loaf on the prepared baking sheet and cut a deep cross on top with a sharp knife.
- Bake – Bake for 35 to 40 minutes until golden brown and the bottom sounds hollow when tapped.
- Cool – Cool on a wire rack for at least 15 minutes before slicing.
Notes
- Do not overmix the dough or the bread can become tough.
- The dough should be shaggy and slightly sticky.
- Use fresh baking soda and baking powder for the best rise.
- This bread is best served warm the day it is baked.
- Leftovers toast beautifully the next day.
Equipment you will need


Nutrition
Tried this recipe?
Mention @veenaazmanov_kitchen or tag #veenaazmanovkitchen!Don’t lose this recipe! Save it for Later!
📌 Save this Recipe for later on Pinterest so you can easily find it again.
⭐ Add Veena Azmanov Kitchen to your Google Preferred Sources.
It helps Google show you more of our recipes.
📧 Subscribe for new recipes delivered to your inbox.
🎥 Follow us for more recipes


Hi Veena, I don’t have the baking soda, so for 100g of whole wheat flour, needs how many grams of baking powder? Thank you.
Yes — baking powder alone is enough 😊
For 100 g whole wheat flour, use about 3 g (¾ tsp) baking powder.
It already contains the acid it needs, so nothing else is required.
The bread may be slightly softer, but it will bake and rise properly.
I’ve made this a few times and love it!! I’m going to be using buttermilk this time around to make rolls and was wondering if you still have to score the bread?
Thank you, Ashlee.
If making this as a sandwich bread in a loaf pan, do i bake it at 200 degrees C? Also, will I need to lower the temperature later in baking like in the instructions?
Yes, please follow the recipe as instructed. This is how I bake this bread as well. Thanks
Can I put some raisins in?
Yes, you can add 1/2 to 3/4 cup raisins or cranberries to the dry flour. Then continue with the recipe.
What a lovely crumb this bread has! Quick, no-knead, perfect!
This looks insanely, incredibly good. Sooo yummy! I am so excited to make this for my family.
This bread came out perfect! The crust had the perfect crisp texture, and the inside was so airy and fluffy. Great bread recipe — thank you!
You are welcome, Amanda. Thank you, for the feedback.
What an easy to follow recipe that yields amazing bread! Love that it doesn’t require any yeast since that can be hard to find at times…
I am totally down for a no-yeast, easy bread recipe! This looks so amazingly delicious!!
When I want homemade bread at home but out of yeast, this is the recipe to turn to. Comes out perfect every time.
Thank you, Sharon. I am so happy to hear that.