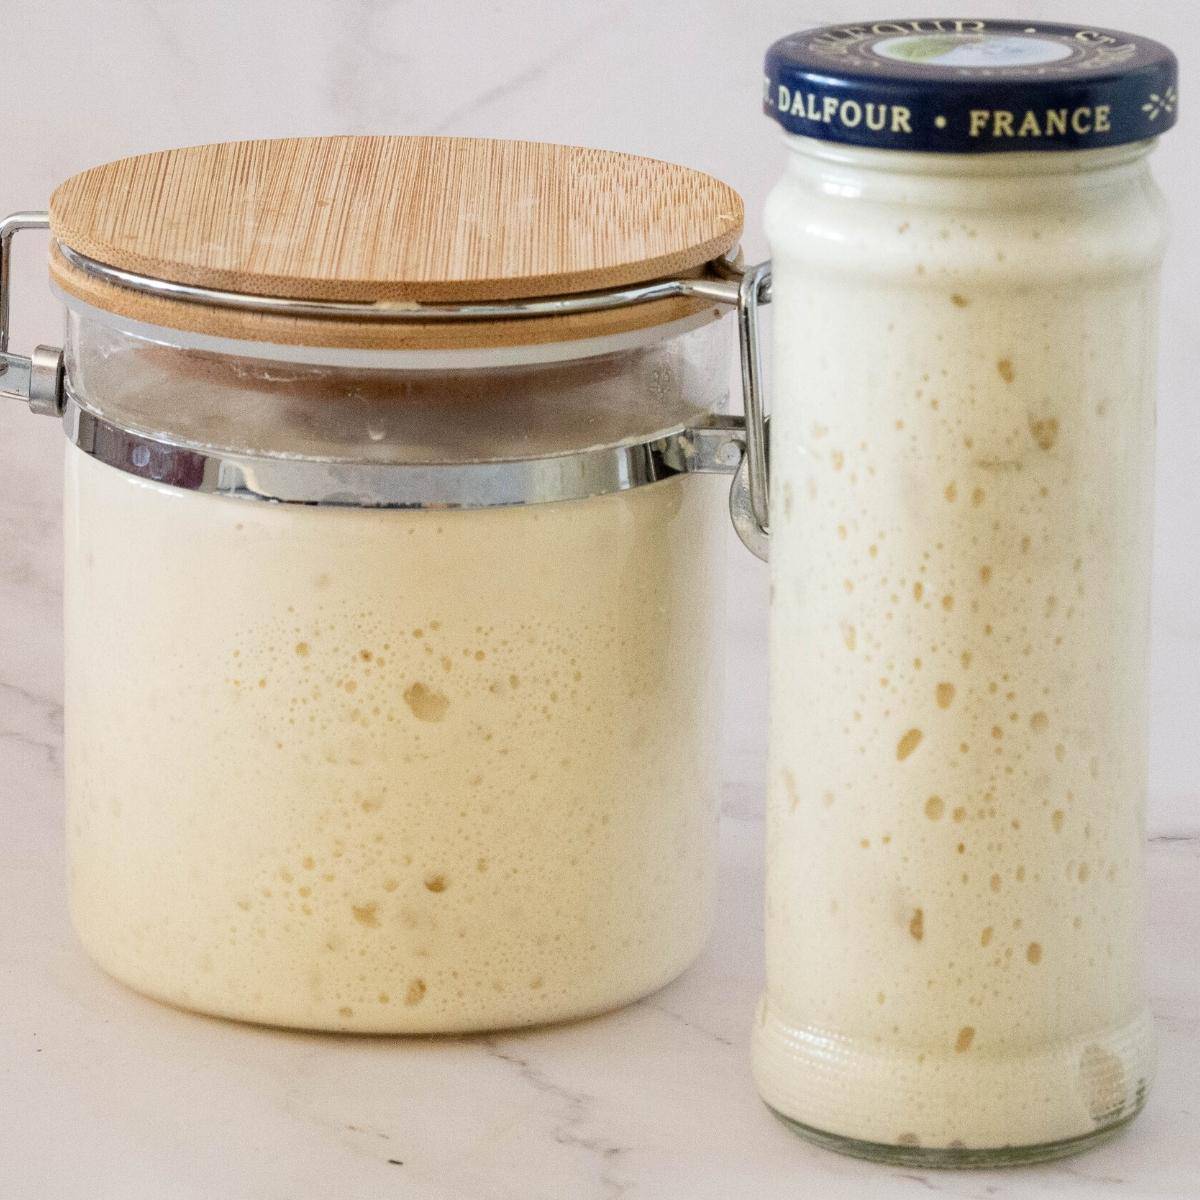
Sourdough Starter in 7 Days
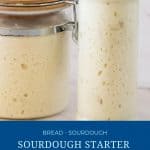
To make great sourdough bread, you need a strong sourdough starter — wild yeast made from just flour and water. In this post, I’ll show you how to make a sourdough starter in 7 days using the traditional discard method, the same reliable method bakers have used for generations.
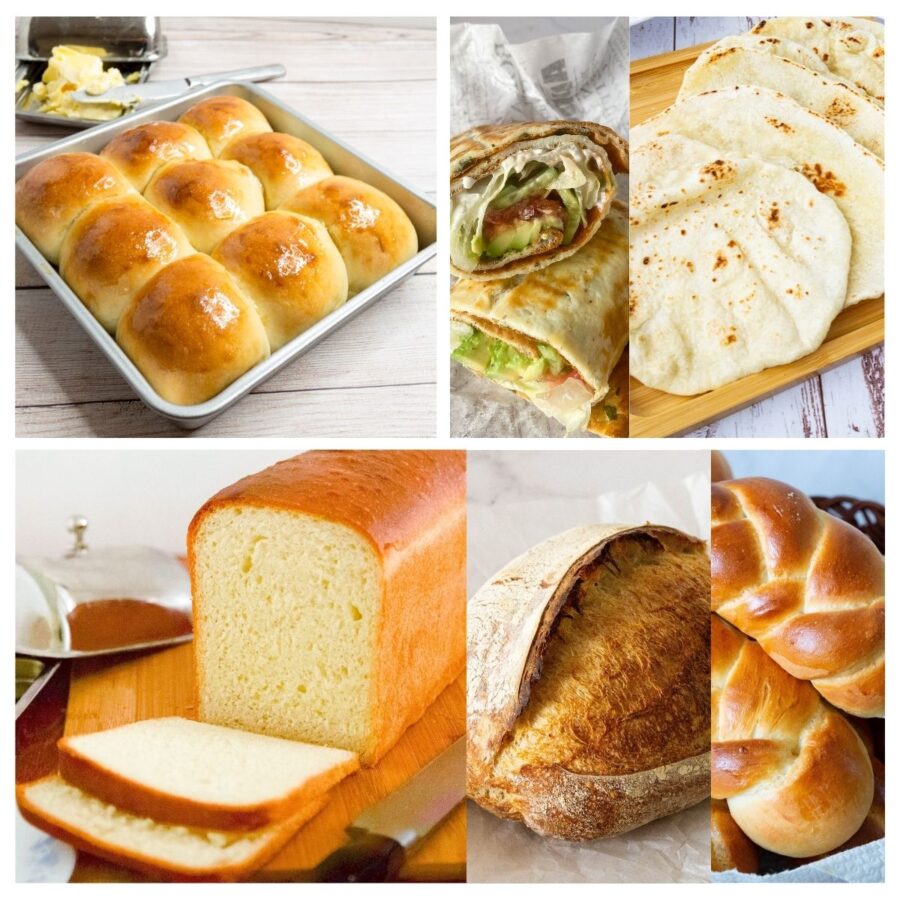
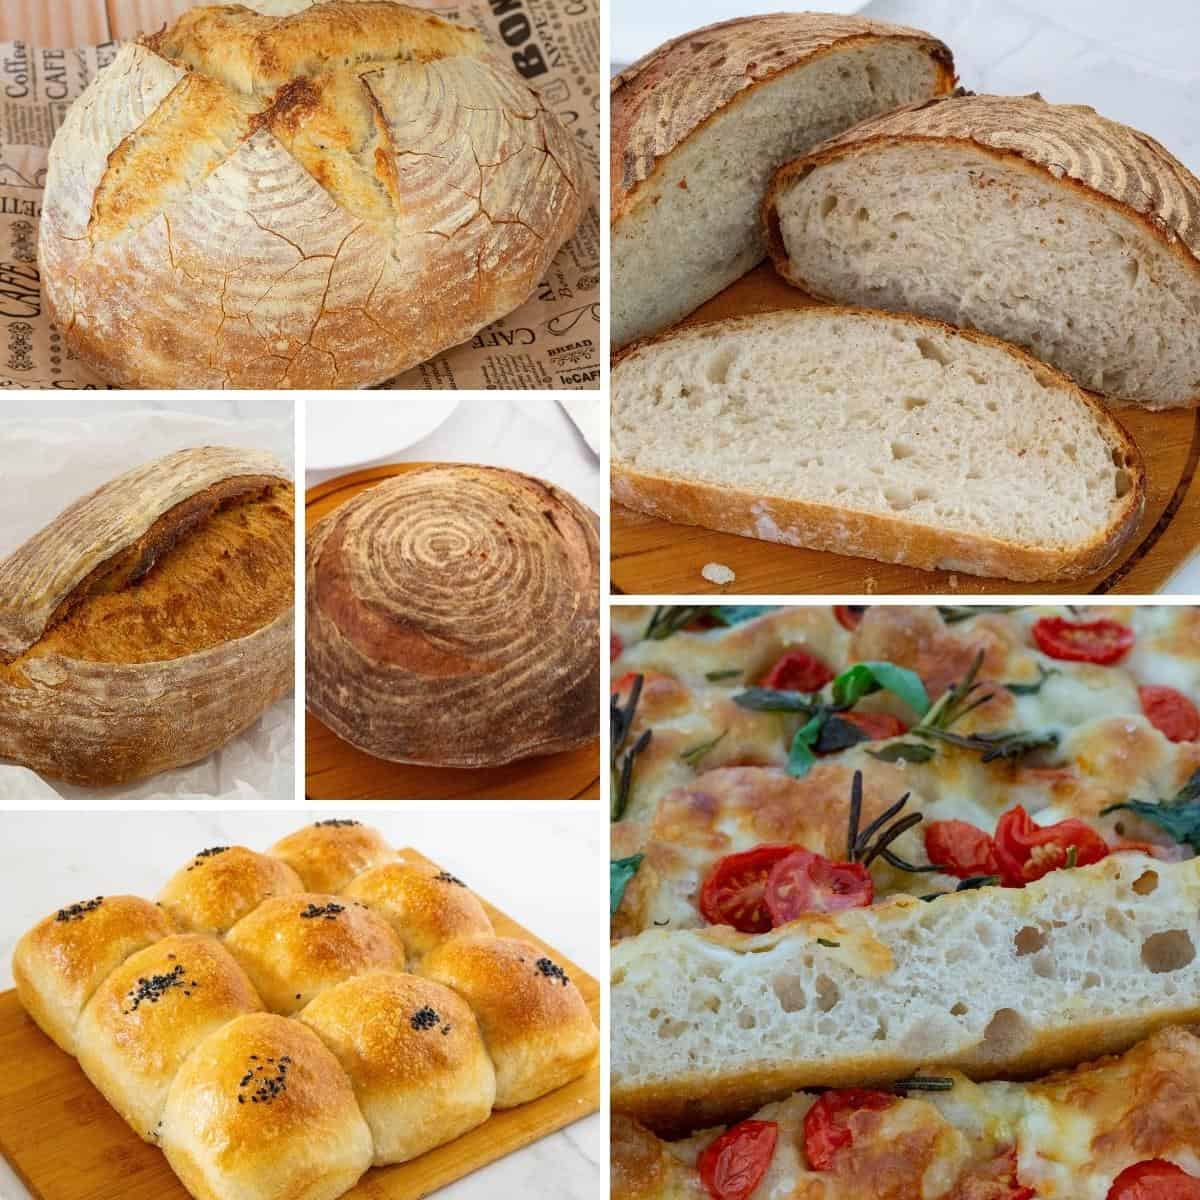
I’ve used this starter for years to bake everything from simple sourdough loaves to sandwich bread, rolls, focaccia, pizza dough, and more. It’s predictable, stable, and strong — not just bubbly in a jar, but powerful enough to raise real bread.
If you’ve seen newer “no-discard” methods online and wondered which one actually works, I’ll explain the difference below — and why I still teach the traditional method.
What is a sourdough starter?
A sourdough starter is wild yeast — a natural leavening agent created when flour and water ferment together over time. Wild yeast and beneficial bacteria feed on the flour’s natural sugars, producing gas (for rise) and acids (for flavor).
Despite the name, not all sourdough bread tastes sour. Flavor depends on fermentation time, temperature, and how the starter is maintained.
Sourdough is one of the oldest ways to make bread, long before commercial yeast existed — and when cared for properly, a starter can last for decades.
How old is the oldest sourdough starter?
Some sourdough starters are reported to be over 100 years old, passed down through generations. With proper care, a starter truly can last a lifetime — and beyond.


What is the Difference between Traditional vs No-Discard Sourdough Starter (Important)
If you’ve searched for how to make a sourdough starter, you’ve probably seen two very different approaches:
The Traditional Discard Method (This Recipe)
- Discard part of the starter regularly
- Feed with fresh flour and water
- Controls acidity
- Produces a strong, stable starter
- Ready to bake with in about 7 days
The No-Discard Method (Popular Online)
- No discard, only small daily additions
- Starter grows slowly in the same jar
- Often becomes overly acidic
- Can look bubbly but bake weak bread
- Frequently needs fixing later
My honest take:
The no-discard method can work, but it’s slower and far less reliable. Many starters made this way stall, smell harsh, or fail to rise bread properly. The traditional discard method creates a healthier balance of yeast and bacteria — which is exactly what you want if you plan to bake bread regularly.
That’s why this post focuses on the 7-day traditional sourdough starter.
Understanding the Science (Shortened & Practical)
Sourdough works because of a symbiotic relationship between:
- Wild yeast → creates carbon dioxide for rise
- Lactic acid bacteria → add flavor and strengthen dough
Discarding part of the starter during feeding:
- Removes excess acid
- Prevents yeast starvation
- Keeps the culture balanced and strong
This balance is the reason traditional starters perform better and are easier to maintain long-term.

Ingredients for a Sourdough Starter (and Why They Matter)
- Flour – You can make a starter with many flours, but some work faster and more reliably.
- Rye flour – My preferred flour to start. It contains more natural yeast and bacteria.
- Whole wheat flour – Also excellent for early fermentation.
- All-purpose flour – Works well once the starter is established but ferments more slowly at the beginning.
- Bread flour – Higher protein; great for baking but not necessary for starting.
Best approach: Start with rye or whole wheat for the first 1–2 days, then switch to all-purpose flour.
- Liquid
- Water – Room temperature (about 80–85°F / 27–29°C).
- Avoid heavily chlorinated tap water if possible (filtered or bottled is best).
- Optional boost: a tiny amount of molasses, honey, fruit juice, or raisin water on day one to jump-start fermentation.
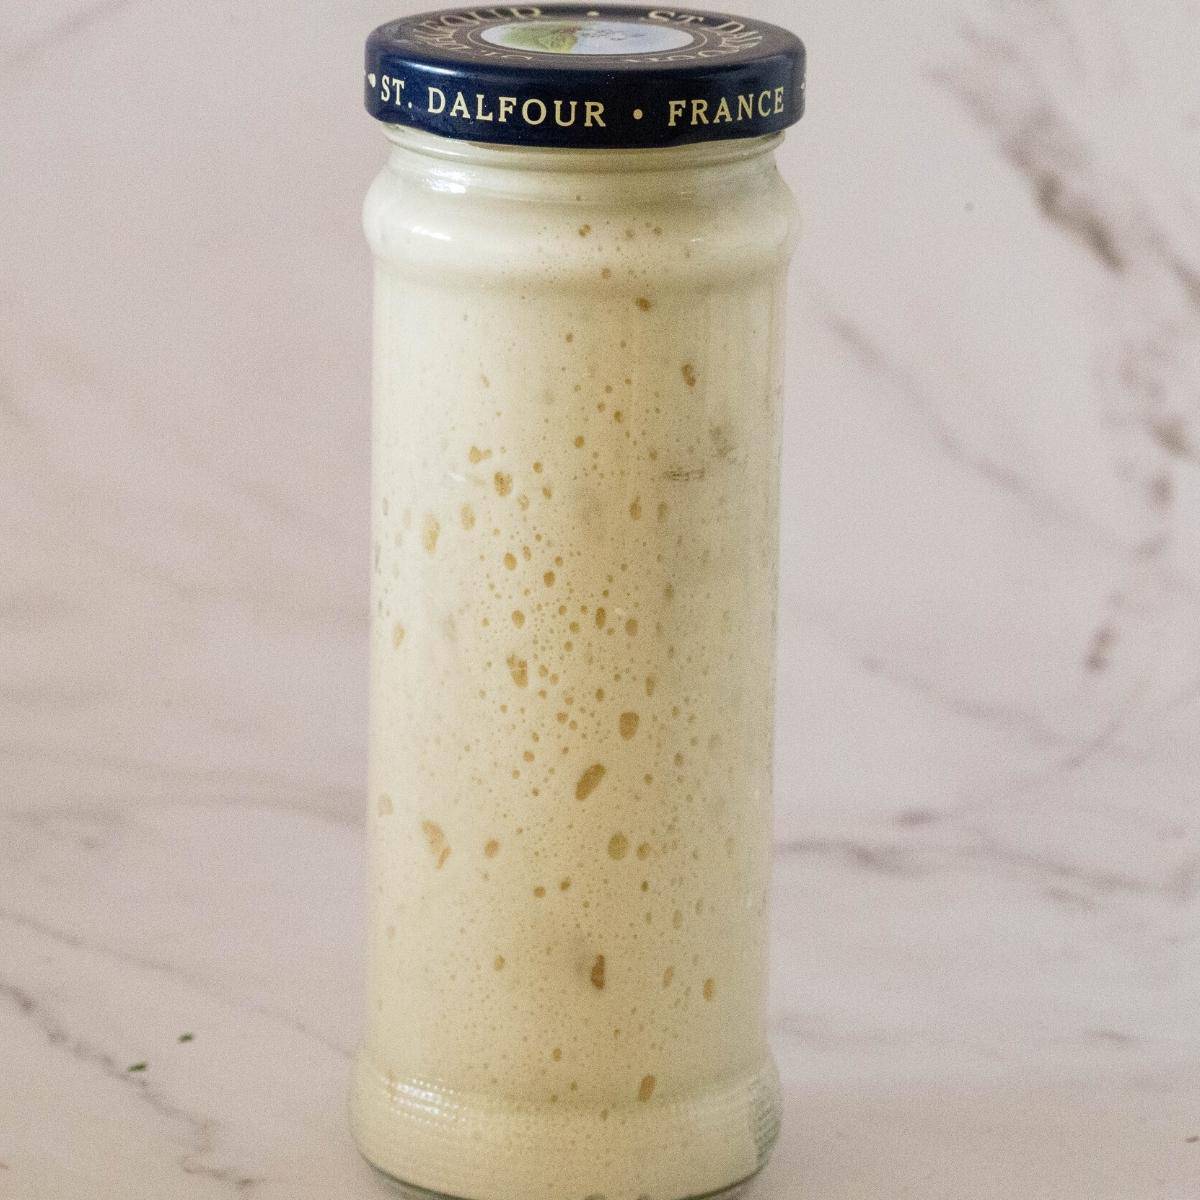
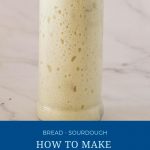
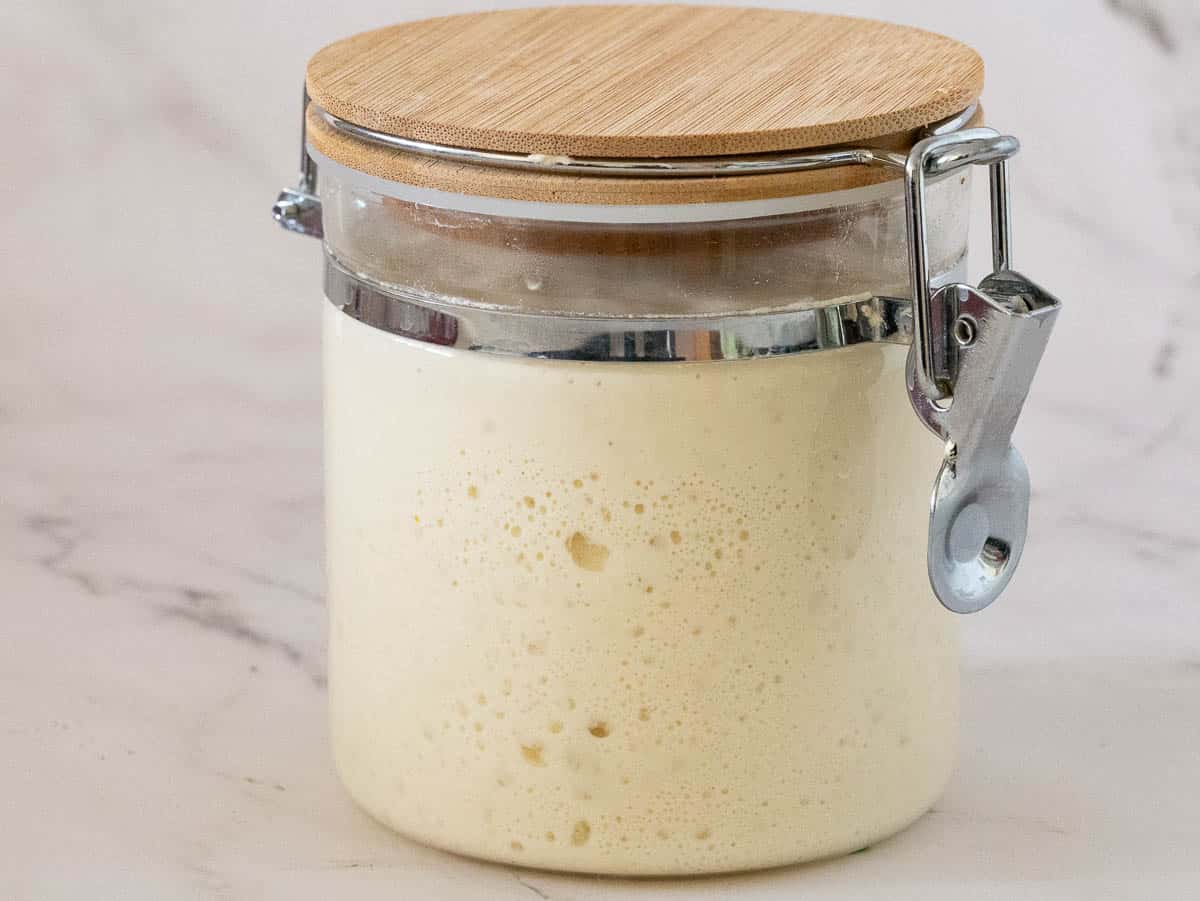
What is the best container for a sourdough starter?
A clear glass jar is ideal. It lets you see bubbles and rise clearly, doesn’t react with acids, and is easy to clean. Avoid metal containers for long-term storage.
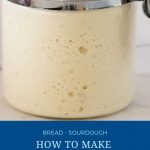
How to Make a Sourdough Starter in 7 Days (Day-by-Day)
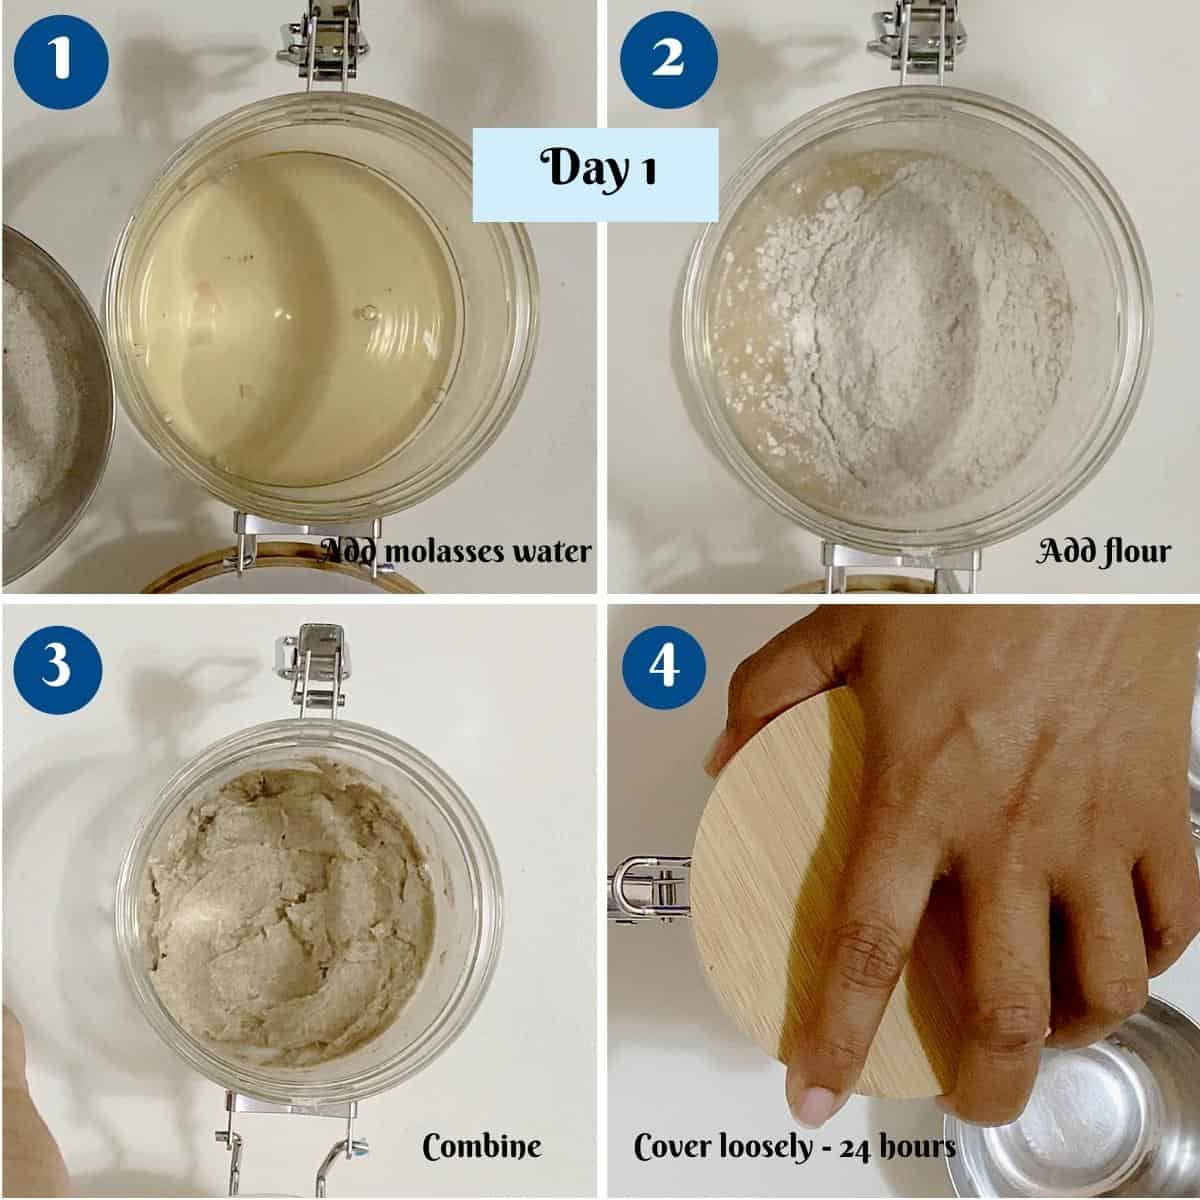
Day 1
In a clean glass jar (about 8 oz), add 30 g water and stir in ⅛ tsp molasses (optional). Add 30 g rye flour and mix until no dry flour remains. Cover loosely and leave in a warm place for 24 hours.
Pro tip: Warm spot = faster results. Don’t seal the lid tight.
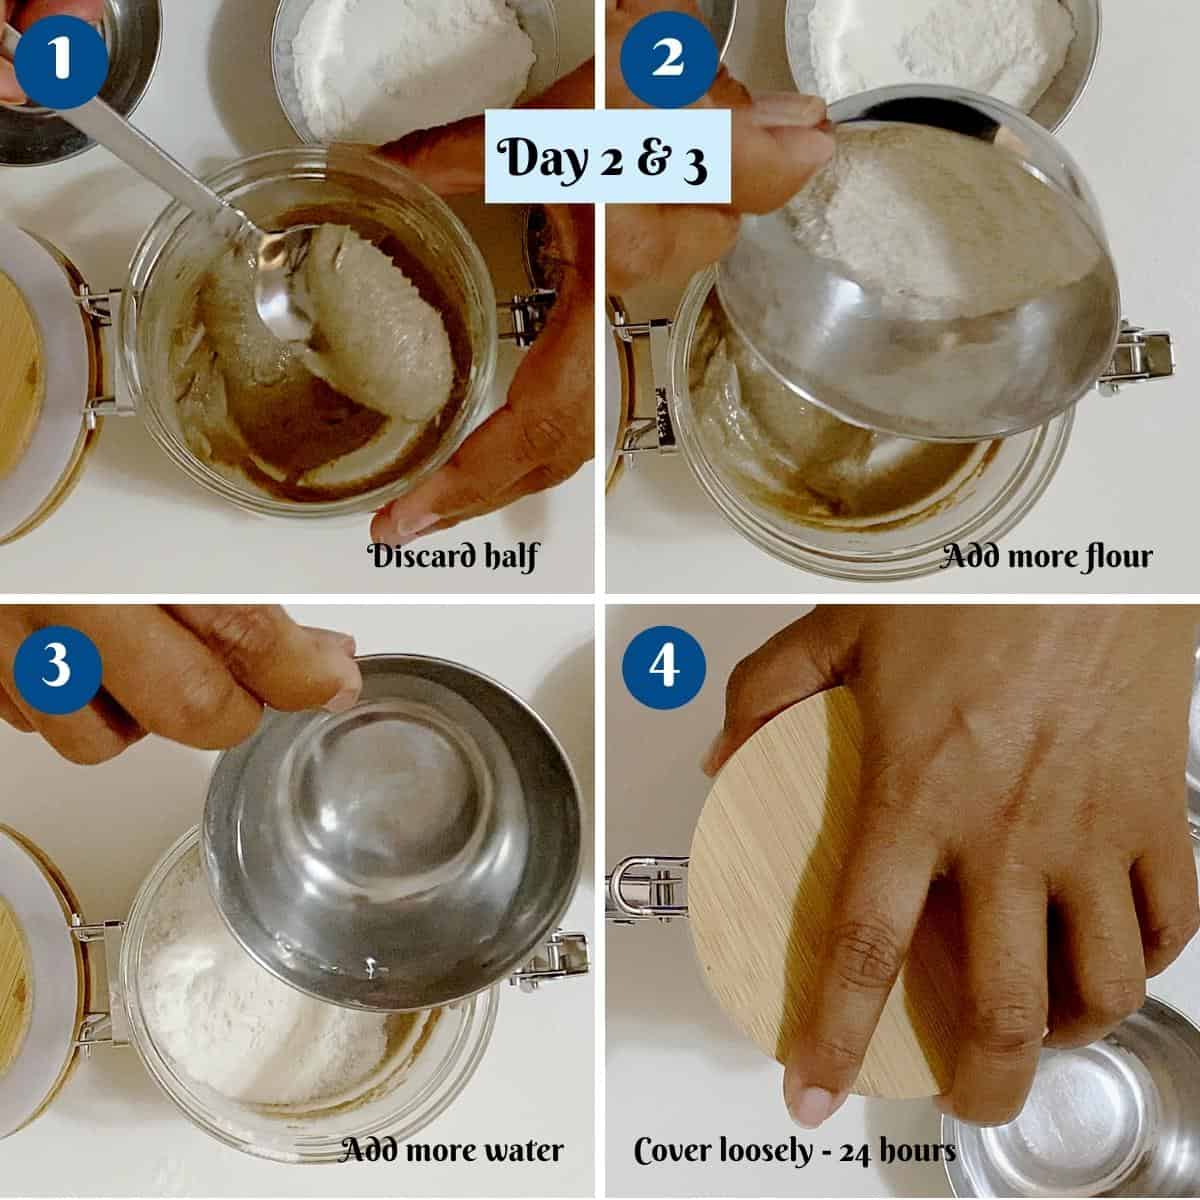
Day 2
Stir the starter. Discard half. Add 15 g whole wheat flour, 15 g all-purpose flour, and 30 g water. Mix well, scrape down the sides, cover loosely, and leave 24 hours.
Pro tip: It may look quiet today. That’s normal.
Day 3
Stir. Discard half. Add 30 g all-purpose flour and 30 g water. Mix well, cover loosely, leave 24 hours.
Pro tip: You may start seeing small bubbles and a tangy smell.
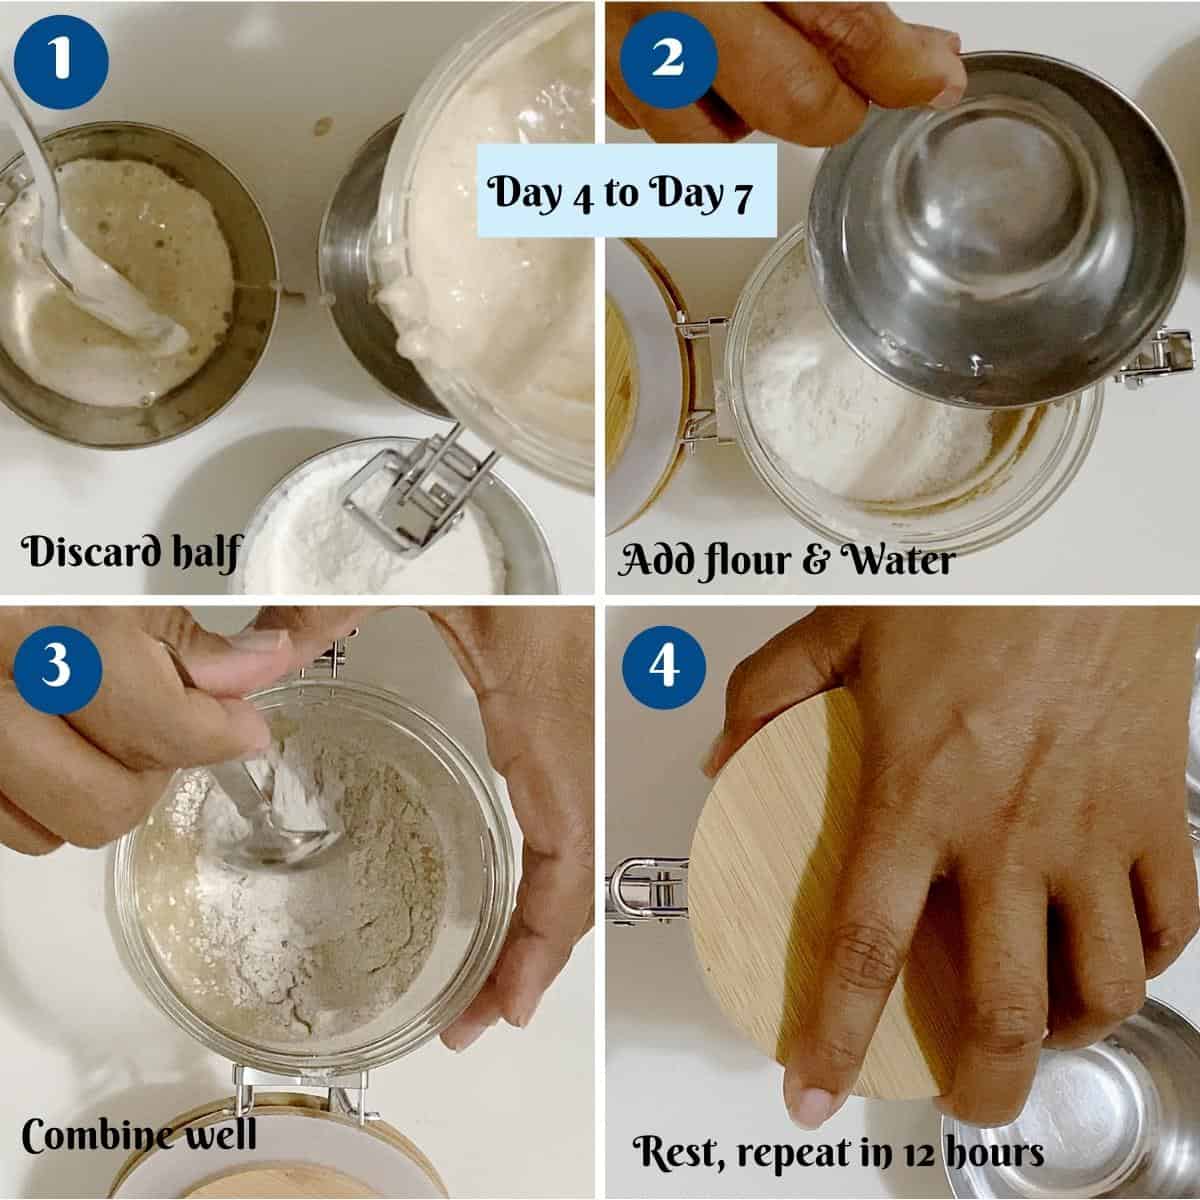
Day 4 (Feed twice)
Morning (1st feeding): Stir. Discard half. Add 30 g all-purpose flour + 30 g water. Mix and leave 12 hours.
Evening (2nd feeding): Repeat: discard half, add 30 g all-purpose flour + 30 g water, mix, leave 12 hours.
Day 5 (Feed twice)
Repeat the Day 4 schedule:
- Feed every 12 hours
- Each feed: discard half → add 30 g AP flour + 30 g water
Day 6 (Feed twice)
Repeat again:
- Feed every 12 hours
- Each feed: discard half → add 30 g AP flour + 30 g water
Pro tip: By now you should see a clear rise (often close to doubling). If it rises and then collapses before the next feed, that’s a good sign — it’s active.
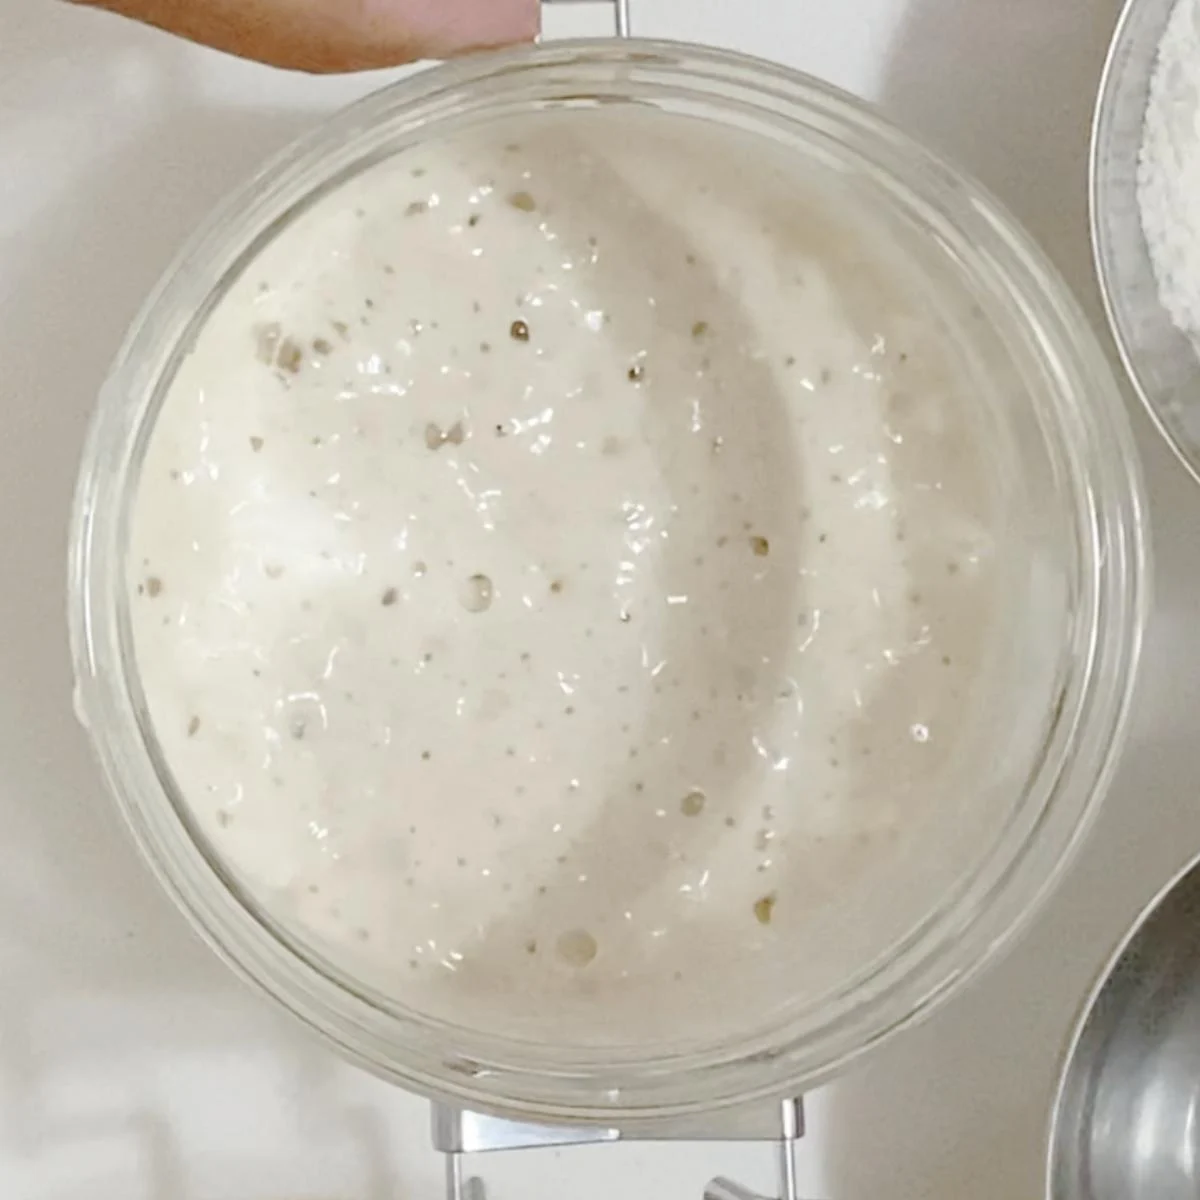
Day 7
Stir. Discard half. Add 30 g all-purpose flour + 30 g water. Mix well and leave in a warm place.
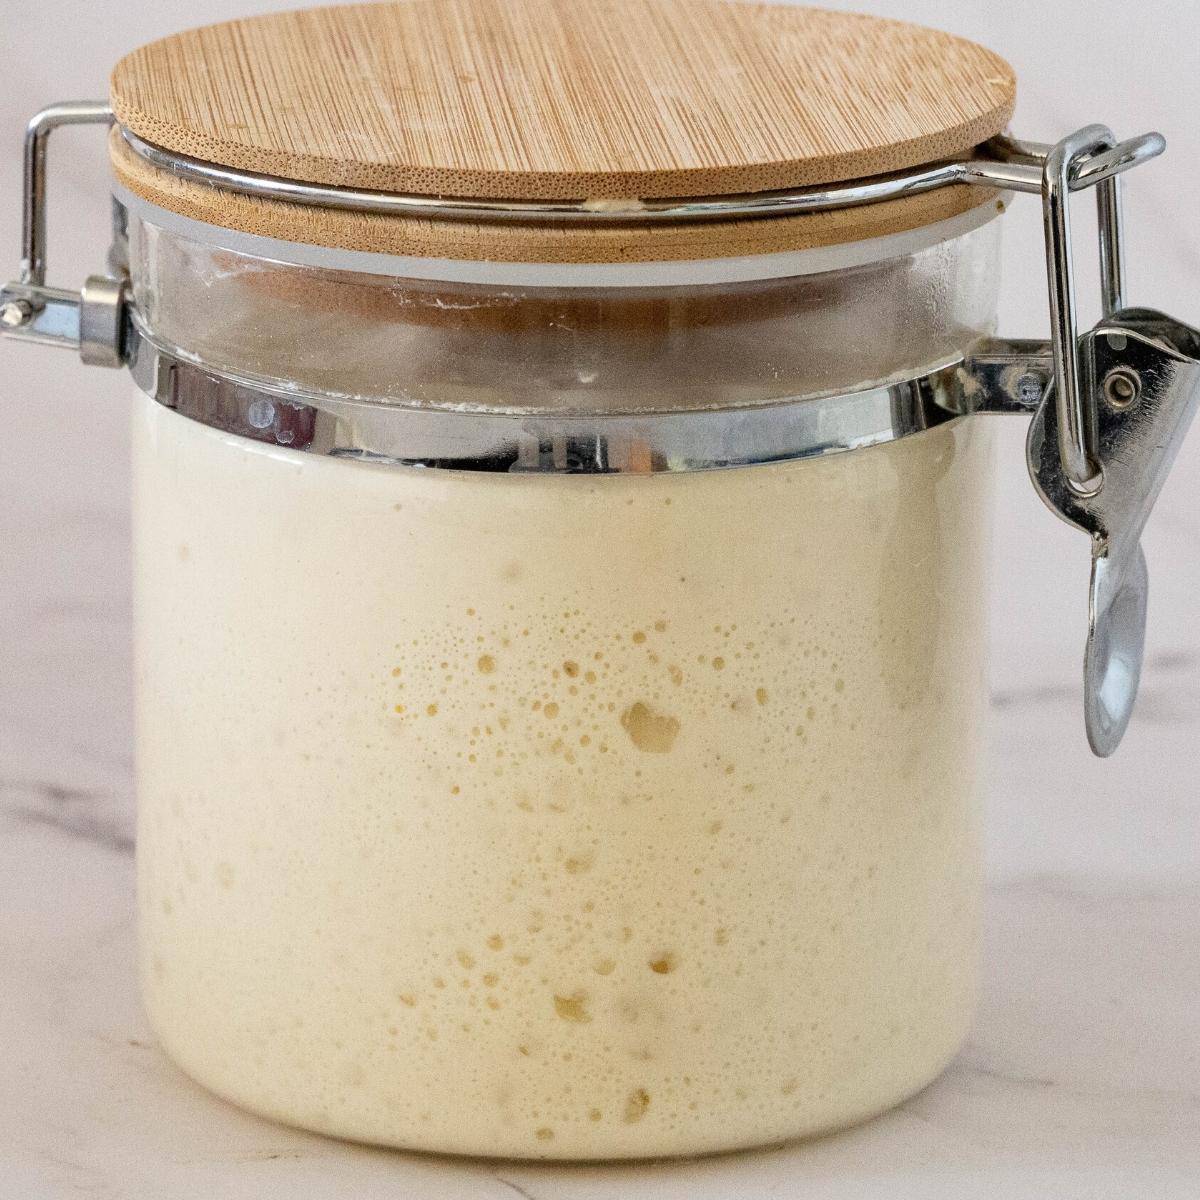
Ready check: If it consistently doubles within 4–6 hours after feeding and smells pleasantly yeasty, it’s ready to bake. If not, keep feeding every 12 hours for another day or two.
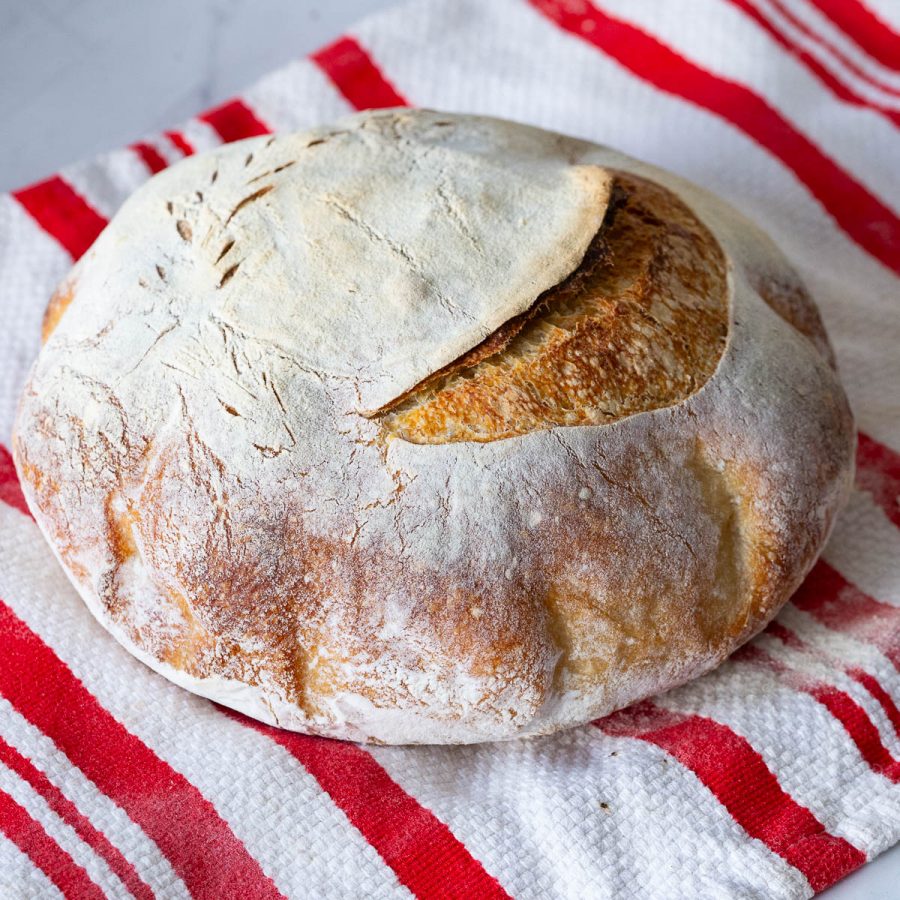
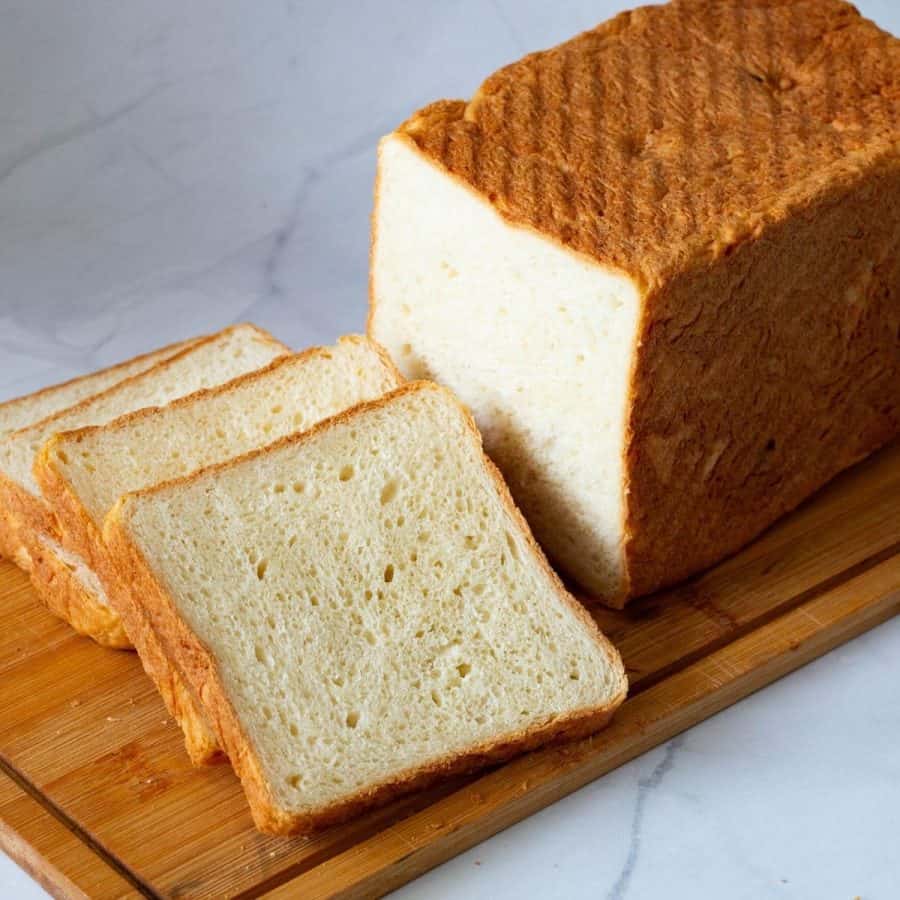
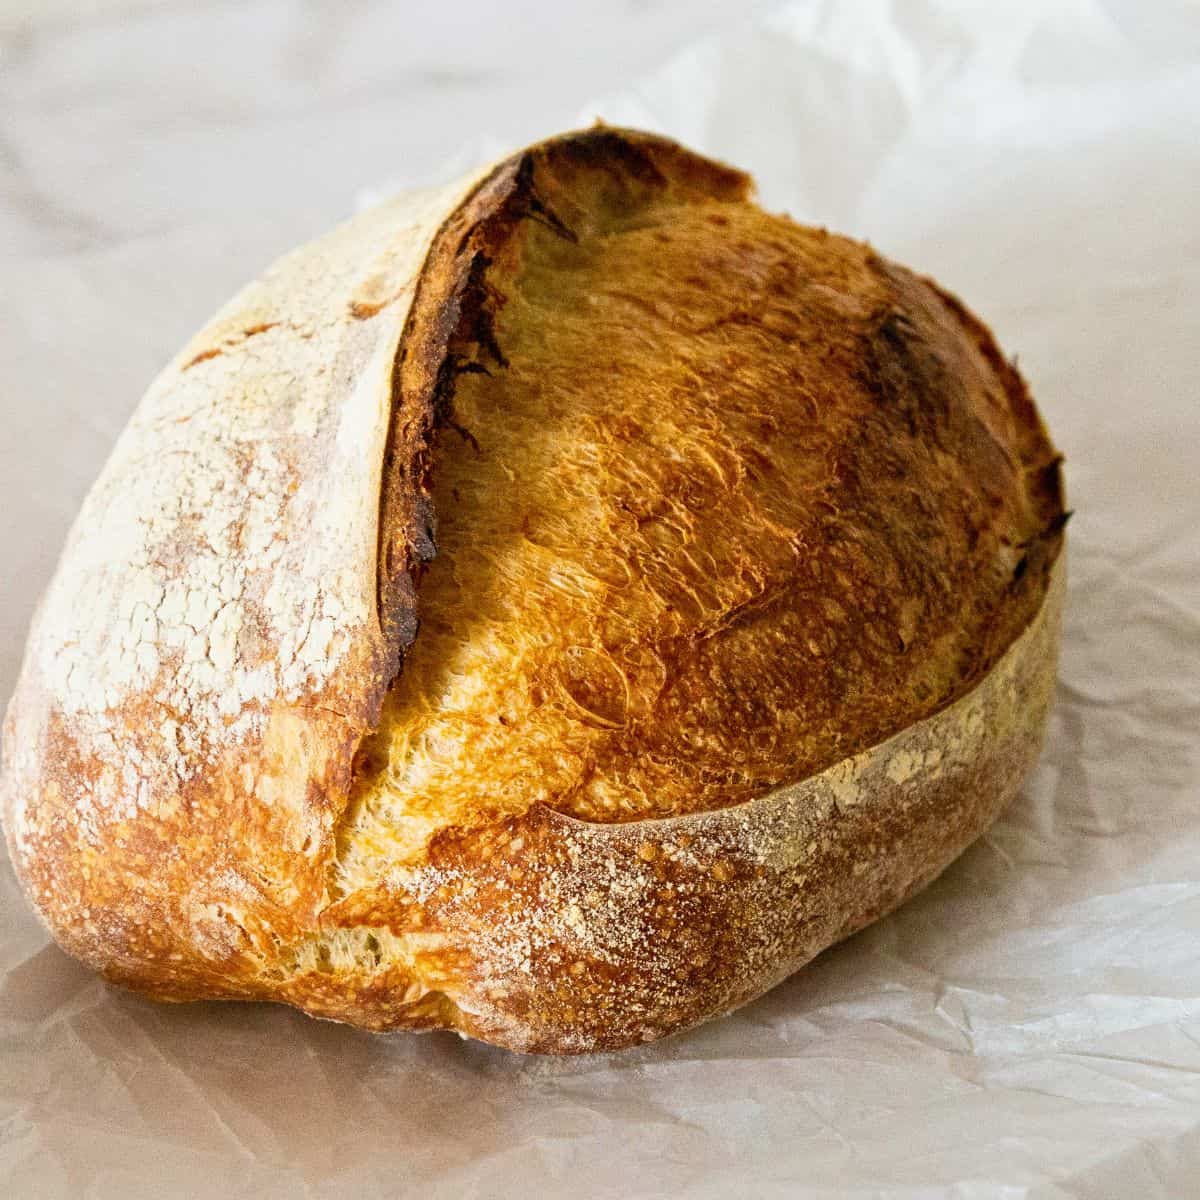
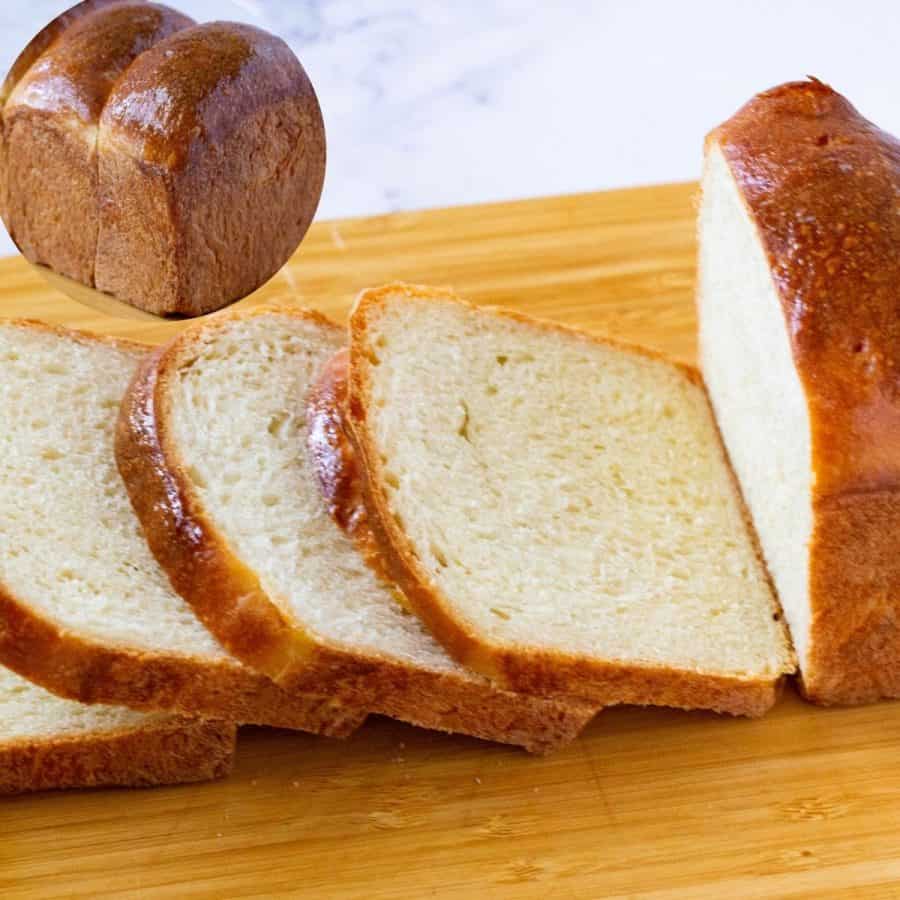
Sourdough Bread for Beginners
This is the simplest way to make sourdough bread at home with just four ingredients and minimal hands-on time. No complicated techniques—just mix, rest, shape, and bake!
How to Use Your Sourdough Starter (After Day 7)
By the end of Day 7, your sourdough starter should be active, bubbly, and rising predictably after feeding. At this point, beginners often ask: Do I use all of it? Do I feed it again? What is a levain? Here’s how it works — step by step.
Step 1: Save Your Starter (Always)
Your starter is your “mother” culture — you never use all of it.
- After feeding, always keep a small portion (about 2–4 tablespoons) in the jar.
- This is the starter you’ll continue to feed and maintain for future baking.
Think of it as your yeast supply.
Step 2: Build a Levain (What That Means)
A levain is simply a portion of your starter that you feed specifically for baking.
- It is:
- Not a different ingredient
- Not complicated
- Just starter + fresh flour + water
- You make a levain so you can:
- Use a larger amount for bread
- Keep your main starter small and manageable
Step 3: How to Make a Levain (Beginner Version)
- Take a small amount of active starter (for example, 1–2 tablespoons).
- Feed it with flour and water according to your bread recipe.
- Leave it at room temperature until it is bubbly and doubled.
- Use this levain in your bread dough.
👉 The remaining starter in the jar is fed and saved for next time.
Step 4: Using Starter Without a Separate Levain (Optional)
Some recipes use starter directly instead of a levain.
In that case:
- Feed your starter
- Let it peak (rise and just begin to fall)
- Measure out what the recipe needs
- Always save and feed the rest
Both methods are correct — the recipe will tell you which one to use.
Step 5: After Baking — What to Do with the Starter
Once you’ve taken what you need for baking:
- Feed the remaining starter
- Let it sit at room temperature for a short time
- Then:
- Store it in the refrigerator if you bake weekly
- Or keep feeding it at room temperature if you bake often
Is my sourdough starter ready?
- Your starter is ready when:
- It doubles in volume within 4–6 hours
- It smells pleasantly yeasty (not sharp or rotten)
- It looks bubbly and airy
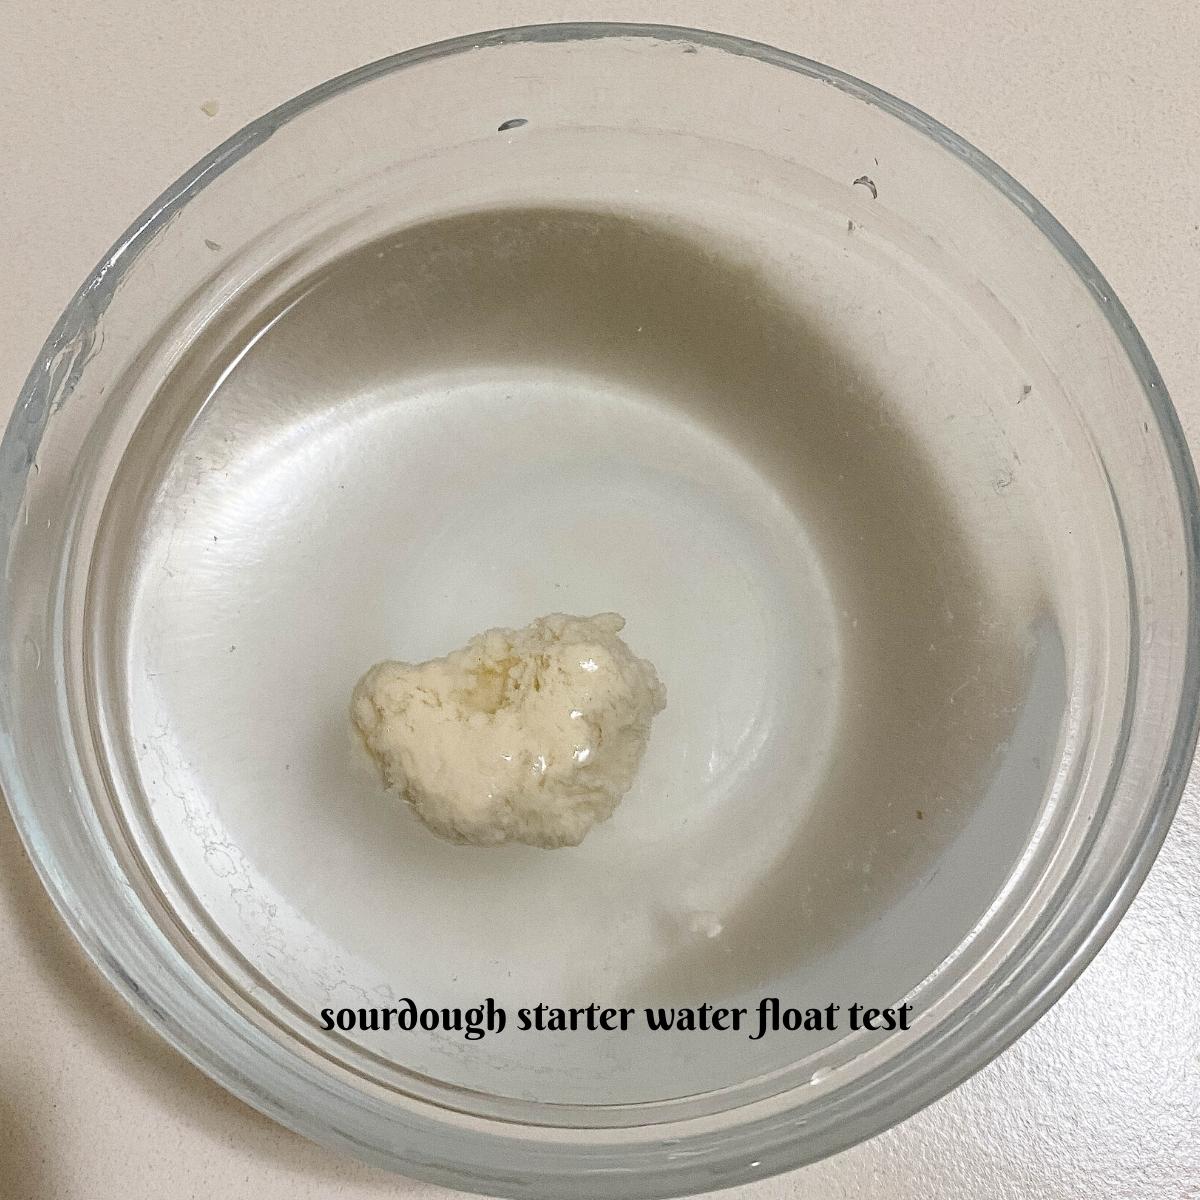
Float test (optional):
Drop a small spoonful of starter into room-temperature water. If it floats, it’s ready to bake.
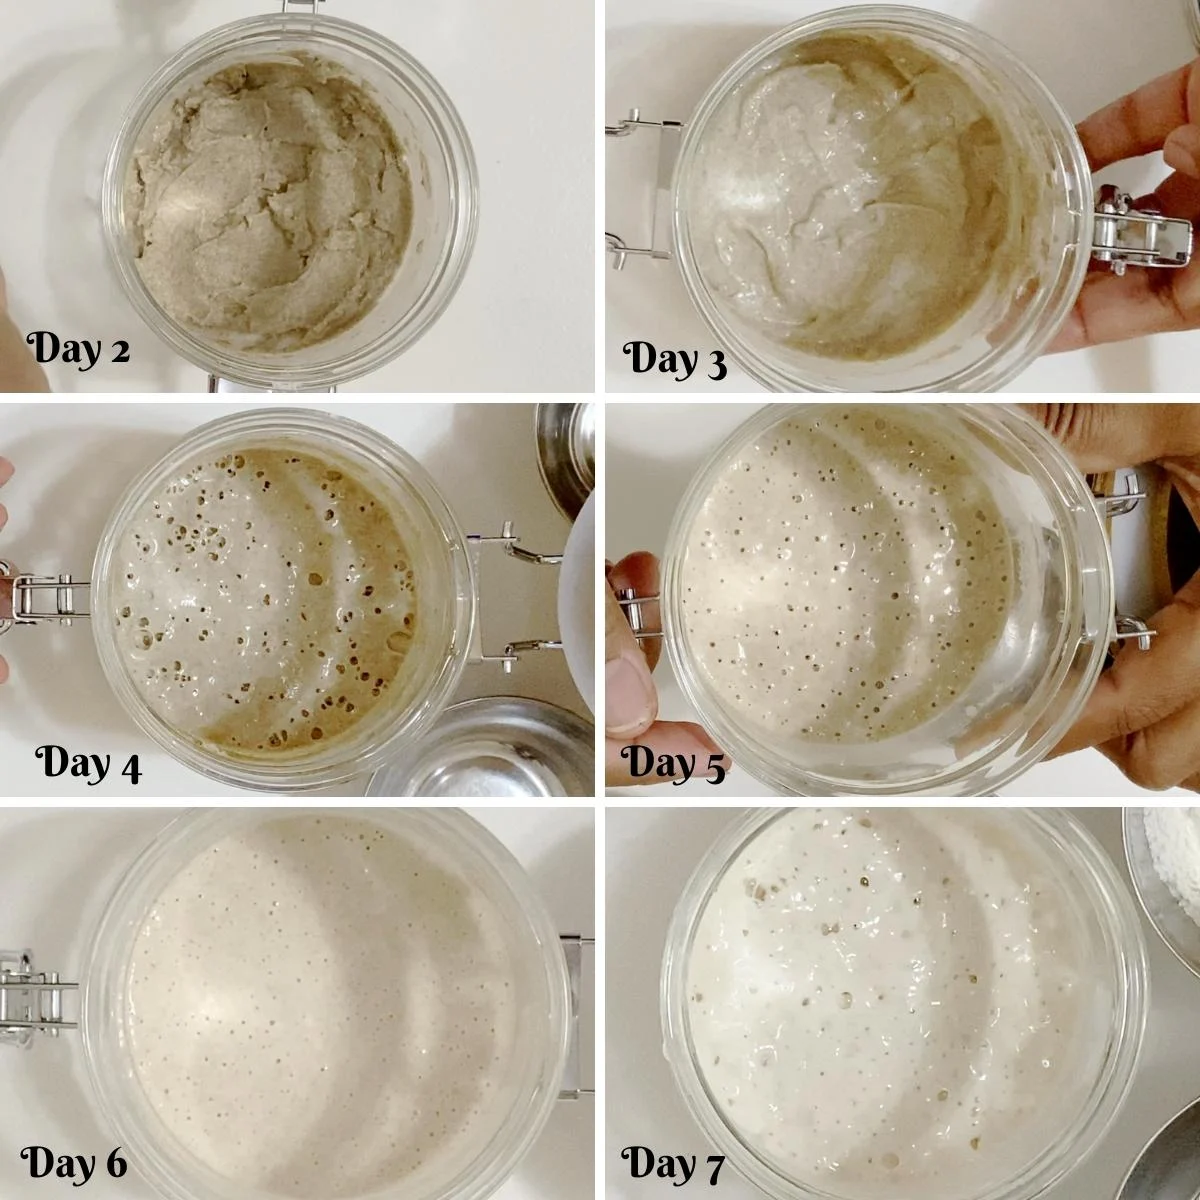
What to expect from day 1 to day 7 of making the starter?
- Day 1–2: No activity
- Day 3: Small bubbles
- Day 4: Tangy smell, light bubbling
- Day 5: Rise begins
- Day 6: Strong activity
- Day 7: Reliable rise and fall
Color will vary depending on flour used — darker with rye or whole wheat, lighter with all-purpose flour.
How to Use Your Sourdough Starter before baking.
- Remove from fridge
- Feed and let it peak at room temperature
- Use the required amount for your recipe
- Always save some starter to feed again
How much sourdough starter do I need for one loaf?
Most sourdough bread recipes use 80–150 grams (about ⅓–½ cup) of active starter for one loaf, depending on the recipe and fermentation time.
Feeding, maintaining, and storing the starter
- Feed at the same time each day if possible
- Always discard before feeding to control acidity
- Once active, store in the refrigerator if baking weekly
- Feed weekly when refrigerated
- If neglected, feed at room temperature for 2–3 days to revive
What is the biggest mistake you can make with your sourdough starter?
Letting it starve for too long without feeding. This weakens the yeast and increases acidity. Regular feeding — even when stored in the fridge — keeps the starter healthy and active.
Tips for Success (Read This Before You Start)
- Keep your starter warm. Temperature matters more than almost anything else. A cool kitchen will slow fermentation and delay activity. Aim for about 24–27°C / 75–80°F. A switched-off oven or a warm corner of the kitchen works well.
- Start with the right flour. Rye or whole wheat flour jump-start fermentation because they contain more natural yeast and bacteria. Once the starter shows activity, you can switch to all-purpose flour.
- Use filtered or bottled water if possible. Chlorine in tap water can slow down fermentation. If using tap water, let it sit uncovered overnight so the chlorine can evaporate.
- Stick to the feeding schedule. Feeding late or skipping feedings can weaken the starter or make it overly acidic. Try to feed at roughly the same time every day.
- Always discard before feeding. Discarding keeps acidity under control and ensures the yeast gets fresh food. Skipping this step often leads to a weak or smelly starter.
- Watch the starter, not the calendar. Seven days is a guideline, not a rule. Your starter is ready when it rises predictably and smells pleasantly yeasty.
- Use a clean jar and scrape the sides. Dried starter on the sides of the jar can encourage mold. Stir well and keep the jar tidy.
- Use your senses. Look for bubbles, watch the rise, and smell the starter. A healthy starter smells tangy and yeasty, never sharp or rotten.


Troubleshooting Sourdough Starter
| Problem | Likely cause | Solution |
|---|---|---|
| No bubbles after a few days | Kitchen too cold or weak flour | Move to a warmer spot and feed with rye or whole wheat flour for 1–2 days. |
| Starter smells very sour or like alcohol | Starter is hungry or overly acidic | Discard more than half and feed with fresh flour and water. Feed more frequently. |
| Brown liquid (hooch) on top | Starter hasn’t been fed in a while | Stir it in or pour it off, then feed immediately. |
| Starter rises then collapses quickly | Starter is active but needs regular feeding | Feed on schedule and use the starter closer to its peak. |
| Starter looks bubbly but won’t rise bread | Starter is immature or unbalanced | Continue regular feedings for a few more days before baking. |
| Green, black, or fuzzy spots | Mold contamination | Discard the starter and start again with a clean jar. |
| Starter takes longer than 7 days | Temperature, flour, or water issues | Keep feeding — many starters need 8–10 days to fully mature. |
| Very thick or very runny starter | Incorrect hydration or flour type | Adjust with small amounts of water or flour to reach a thick, spoonable consistency. |


Frequently asked questions
You can make a sourdough starter with just flour and water. Mix them together, then discard part of the mixture and feed it with fresh flour and water daily. In about 7 days, using the traditional discard method, you’ll have a strong, active sourdough starter ready to bake with.
Consistency. Keep your starter warm, feed it regularly, and always discard before feeding. Using good-quality flour (especially rye or whole wheat at the beginning) and controlling acidity are the real secrets to a strong starter.
With a float test (picture above). Take a small teaspoonful of starter and drop it in a bowl of room-temperature water. If it floats, it means your starter is ready. If not, continue to feed it.
The 1:1:1 rule means feeding your starter with equal parts starter, flour, and water by weight. For example, 30 g starter + 30 g flour + 30 g water. This keeps the starter balanced and easy to maintain.
No. A 3-day-old starter is usually too weak to raise bread. Early bubbles are often caused by bacteria, not stable yeast. It’s best to wait until the starter reliably doubles within a few hours — usually around day 7 or later.
A healthy starter:
Doubles in volume after feeding
Has lots of bubbles throughout
Smells pleasantly yeasty or slightly tangy
Rises and falls predictably
If it smells sharp, rotten, or shows mold, it’s not healthy.
Maintaining your starter is very important to keep it healthy and happy.
1 – Feed it – Once a week, take it out of the refrigerator, use half the starter and discard the remaining starter (or use it to make bread), then add more fresh flour and water.
2 – Clean it – Make sure to clean the glass container or jar at least once in a few weeks. I clean my container at least once in two weeks. This way, there is never a bad smell or discoloration in my starter.
A bad starter usually smells bad, like stronger than alcohol or pungent. It may also have discoloration on the surface or sides.
In the first three days, yes, you need to discard the remaining starter because it has no bubbles or activity. But, you can add it to other recipes to make sourdough pancakes, sourdough waffles, muffins, crepes, etc.
I saved the remaining discards from days 4 to 7 in the refrigerator and used them to make bread on day 7. Just like making your first sourdough bread.
A sourdough starter is fresh wild yeast, and if you use it soon after it has been fed and peaked, it will not be sour. To achieve a sour taste, you need to let the starter go without food for a while. Starve it until it gets a brown liquid called hooch on top. This increases the acidity in the starter, which gives the sour flavor to sourdough.
An overfed starter often looks very thin, weak, and barely rises. This happens when the starter is fed too often or with too much flour and water before it has time to ferment properly.
The biggest mistake is not discarding before feeding. Skipping discard leads to excess acidity, weak yeast, and a starter that looks active but won’t bake good bread.
Rye flour and whole wheat flour are the best for starting a sourdough starter because they contain more natural yeast and bacteria. Once established, all-purpose flour works well for maintenance.
With regular feeding, a sourdough starter can last indefinitely. Some starters have been maintained for decades. Even neglected starters can often be revived with a few days of regular feeding.
Sourdough bread is often easier to digest because long fermentation breaks down gluten and phytic acid. While it’s not “diet food,” many people find it gentler on digestion than commercially yeasted bread.
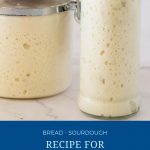
Sourdough Starter (7-Day Traditional Method)
To make excellent sourdough bread, you need a strong sourdough starter — wild yeast made from flour and water. This traditional 7-day sourdough starter recipe uses the discard method to create a stable, reliable starter you can maintain for years.
Video
Ingredients
- 30 grams (¼ cup) Rye flour – For Day 1 or whole wheat flour
- 15 grams Whole wheat flour – For Day 2 or more rye flour
- 255 grams All-purpose flour – For Day 3 to 7
- 300 grams (30 ml) Bottled water room temperature – avoid tap water
- ⅛ tsp Molasses – for Day 1 optional but highly recommended for day 1
Method
- Day 1 – In a clean glass jar (about 8 oz), add 30 g water and stir in ⅛ tsp molasses (optional). Add 30 g rye flour and mix until no dry flour remains. Cover loosely and leave in a warm place for 24 hours. Pro tip – Keep the lid loose (don’t seal tight). A warm spot helps fermentation start faster.
- Day 2 – Stir the starter. Discard half. Add 15 g whole wheat flour, 15 g all-purpose flour, and 30 g water. Mix well, scrape down the sides, cover loosely, and leave in a warm place for 24 hours. Pro tip – It may look quiet today. That’s normal. Discard half means remove about half from the jar (you don’t need to weigh it).
- Day 3 – Stir the starter. Discard half. Add 30 g all-purpose flour and 30 g water. Mix well, cover loosely, and leave in a warm place for 24 hours. Pro tip – You may start seeing small bubbles and a tangy smell today.
- Day 4 (feed twice)Morning (1st feeding): Stir. Discard half. Add 30 g all-purpose flour and 30 g water. Mix well, cover loosely, and leave 12 hours.Evening (2nd feeding): Stir. Discard half. Add 30 g all-purpose flour and 30 g water. Mix well, cover loosely, and leave 12 hours.Pro tip – By now you should see more bubbles and possibly a small rise. If it still looks slow, keep going.
- Day 5 (feed twice) – Repeat the Day 4 schedule.Morning: Stir. Discard half. Add 30 g all-purpose flour and 30 g water. Mix well, cover loosely, and leave 12 hours.Evening: Stir. Discard half. Add 30 g all-purpose flour and 30 g water. Mix well, cover loosely, and leave 12 hours.Pro tip – The starter may begin rising more noticeably and may smell more yeasty.
- Day 6 (feed twice) – Repeat the Day 4 schedule again.Morning: Stir. Discard half. Add 30 g all-purpose flour and 30 g water. Mix well, cover loosely, and leave 12 hours.Evening: Stir. Discard half. Add 30 g all-purpose flour and 30 g water. Mix well, cover loosely, and leave 12 hours.Pro tip – If your starter rises and then collapses before the next feeding, that’s a good sign it’s active and hungry.
- Day 7 – Stir the starter. Discard half. Add 30 g all-purpose flour and 30 g water. Mix well, cover loosely, and leave in a warm place.Pro tip – If it consistently doubles within 4–6 hours after feeding and smells pleasantly yeasty, it’s ready to bake. If not, keep feeding every 12 hours for another day or two.
- Step 1 – Save your starter. After feeding, always keep a small portion in the jar (about 2–4 tablespoons). This is the starter you will continue to feed and maintain for future baking. Pro tip – Never use all your starter. Always keep some back so you can keep it going.
- Step 2 – What levain means. A levain is simply a portion of your starter that you feed specifically for baking. It is not a different ingredient, just starter plus fresh flour and water. Pro tip – Think of levain as “the starter you build for today’s bake.”
- Step 3 – How to make a levain (beginner version). Take a small amount of active starter (about 1–2 tablespoons). Feed it with flour and water according to your bread recipe. Leave it at room temperature until it is bubbly and doubled, then use it in your bread dough. Pro tip – Use the levain when it has peaked (domed top and very bubbly) for best results.
- Step 4 – Using starter without a separate levain (optional). If your recipe uses starter directly, feed your starter and let it peak (rise and just begin to fall). Measure what the recipe needs, then save and feed the rest. Pro tip – Active starter works best when used at peak, not after it has completely collapsed.
- Step 5 – After baking, what to do with the starter. Once you’ve taken what you need for baking, feed the remaining starter. Let it sit at room temperature for a short time, then store it in the refrigerator if you bake weekly, or keep feeding at room temperature if you bake often. Pro tip – If the starter will be in the fridge, feeding it once a week is usually enough to keep it healthy.
Notes
- Keep your starter warm. Temperature matters more than almost anything else. A cool kitchen will slow fermentation and delay activity. Aim for about 24–27°C / 75–80°F. A switched-off oven or a warm corner of the kitchen works well.
- Start with the right flour. Rye or whole wheat flour jump-start fermentation because they contain more natural yeast and bacteria. Once the starter shows activity, you can switch to all-purpose flour.
- Use filtered or bottled water if possible. Chlorine in tap water can slow down fermentation. If using tap water, let it sit uncovered overnight so the chlorine can evaporate.
- Stick to the feeding schedule. Feeding late or skipping feedings can weaken the starter or make it overly acidic. Try to feed at roughly the same time every day.
- Always discard before feeding. Discarding keeps acidity under control and ensures the yeast gets fresh food. Skipping this step often leads to a weak or smelly starter.
- Watch the starter, not the calendar. Seven days is a guideline, not a rule. Your starter is ready when it rises predictably and smells pleasantly yeasty.
- Use a clean jar and scrape the sides. Dried starter on the sides of the jar can encourage mold. Stir well and keep the jar tidy.
- Use your senses. Look for bubbles, watch the rise, and smell the starter. A healthy starter smells tangy and yeasty, never sharp or rotten.
Equipment you will need


Nutrition
Tried this recipe?
Mention @veenaazmanov_kitchen or tag #veenaazmanovkitchen!Don’t lose this recipe! Save it for Later!
📌 Save this Recipe for later on Pinterest so you can easily find it again.
⭐ Add Veena Azmanov Kitchen to your Google Preferred Sources.
It helps Google show you more of our recipes.
📧 Subscribe for new recipes delivered to your inbox.
🎥 Follow us for more recipes


Thank you for the information on making the starter. I have tried to make a starter. After reading you directions, I was not removing the discard every time. I’ll try again. Can I use bread flour instead of AP flour? Or continue with rye or wheat flour?
Thanks again for your time,
Elaine
Hi Elaine,
You’re very welcome! Yes, removing the discard each time is an important part of keeping the starter balanced, so that should help a lot.
You can absolutely use bread flour for your starter. In fact, many bakers prefer it because the higher protein content can help create a strong and active starter. If your starter is already established, I would continue feeding it with whichever flour you plan to bake with most often.
Rye flour is excellent for getting a new starter going because it tends to ferment quickly and encourages activity. Once the starter is active and healthy, you can switch to bread flour, all-purpose flour, or continue with a combination of flours.
Good luck with your next attempt, and feel free to let me know how it progresses!
Happy baking,
Veena
Veena
Thank you for responding so quickly. I’m starting today. I’m going to use rye first then breadflour. I’ll let you know how I’m doing.
Blessings
Elaine
I’m always here if you have any questions. All the best, enjoy the process.
If a recipe calls for active dry yeast or fresh yeast, how do I convert to use a starter
Charleen, for every one cup of sourdough in the recipe you can use 1 envelope (2 1/4 tsp of instant active dry yeast)
My brother makes sourdough from scratch on a regular basis, but I’ve never tried it myself. This is helpful. Thanks!
I have always been intimidated to make a sourdough starter. However, after reading your recipe and clear day-by-day instructions, I feel much more confident. I can’t wait to give it a try!
I’ve been looking for a recipe like this! Thanks for sharing!
I am beyond excited to have come across these super thorough directions for sourdough starter. It has inspired me to give it another shot – I’ve tried twice in the past but with little direction. I think maybe just maybe (lol) it will be a success this time.
Your instructions are so easy to follow. I can’t wait to make sour dough bread now. I am going to bake this over the weekend and I can’t wait!