Sourdough Challah Bread


Are you ready to take your challah bread to new heights? A traditional loaf with a surprising twist with the tangy infusion of sourdough starter. This technique will elevate your baking game and revolutionize your flavor experience. Prepare to embark on a journey of taste and texture as we unveil the power of sourdough in transforming your challah.

Every Friday, we pick up a fresh challah for the weekend—it’s a tradition in our home. Let’s be honest, I don’t always have the time to bake challah from scratch every single week! But when I do, I always reach for my sourdough starter because it just tastes better. The naturally leavened dough gives it a deeper, more complex flavor, and the texture is so soft and light that it practically melts in your mouth.
What I love most is that I can prep the dough ahead of time and bake it fresh just before dinner, filling the house with that irresistible, warm, slightly tangy aroma. And let me tell you—every time I make it, it gets eaten up way faster than any store-bought challah! There’s just something about homemade bread that makes it feel extra special.
Have you ever tried making sourdough challah? If not, you need to—it’s a game changer!
Why is this sourdough recipe the best for challah?
- Superior Texture with Autolyze Method – Letting the flour, water, eggs, and starter rest first allows the gluten to develop naturally, resulting in a soft, airy, and perfectly structured challah with a tender crumb.
- Deep, Complex Flavor – The slow sourdough fermentation (without commercial yeast) gives the challah a rich, slightly tangy depth, enhancing both taste and digestibility.
- Perfect Balance of Fluffiness & Braiding Strength – The combination of bread flour for strength and all-purpose flour for softness ensures that the challah is light and fluffy yet holds its shape beautifully when braided.
- Naturally Enriched & Healthier – Unlike quick yeasted versions, this recipe uses all-natural fermentation, honey instead of sugar, and olive oil instead of butter, making it a healthier yet indulgent choice.

Ingredients and substitutes
- Bread Flour & All-Purpose Flour – Bread flour provides strength for braiding, while all-purpose flour keeps the crumb soft. If needed, you can use all bread flour for a chewier texture or all AP flour for a softer loaf. Whole wheat flour can replace up to 30% of the total flour for a heartier version.
- Active Sourdough Starter – The natural leavening for this bread. If your starter is sluggish, use a small pinch of instant yeast (¼ tsp) to help with fermentation.
- Eggs – Provide richness, structure, and softness. If avoiding eggs, substitute with ¼ cup unsweetened applesauce per egg or ¼ cup yogurt per egg for a vegan alternative.
- Warm Water – Hydrates the dough and activates fermentation. For extra richness, replace with warm milk or a mix of milk + water.
- Honey – Adds natural sweetness and moisture. Can be swapped with maple syrup, agave syrup, or granulated sugar (use the same amount).
- Salt – Enhances flavor and controls fermentation. Fine sea salt or kosher salt works best. If using table salt, reduce slightly.
- Oil – Adds tenderness and keeps the challah soft. Olive oil is a great choice, but vegetable oil, avocado oil, or melted butter can be used as well.

Step-by-step: Sourdough challah bread
- Autolyze – Stir the water, eggs, active sourdough starter, and flour in a stand mixer bowl. Cover the bowl and leave to rest for 60 minutes.
Pro tip – Autolyze will help strengthen the gluten formation on the dough.

- Knead – Next, add the oil, honey, and salt. Knead the dough with a dough hook attachment on medium speed for 10 to 12 minutes. It should become smoother and more elastic.
Pro tip – You can also knead by hand on a lightly floured surface for 12 to 15 minutes. If it tries to stick to your hands or the countertop, sprinkle just a smidge more flour. - Bulk ferment – Place your kneaded dough in a lightly oiled bowl, cover it with a damp cloth, and let it rest at room temperature for 4-8 hours. It should nearly double in size.
Pro tip – The dough can be slowly fermented in the fridge for up to 24 hours.

- Divide – After the rise, punch down the dough and divide it into four equal parts.
- Shape each piece into a ball. Then, flatten each piece and roll it into a tight sausage. Roll each sausage into an 18-inch-long rope.
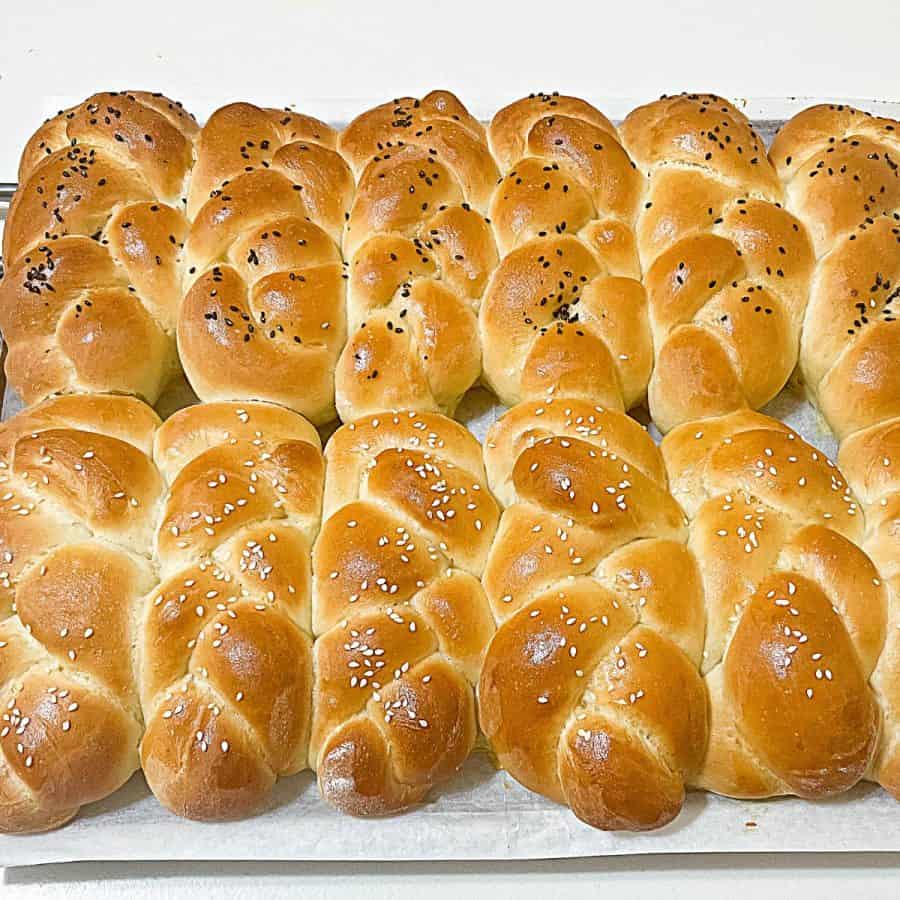
- With a bit of water on a plate, moisten two ropes with water and coat them with sesame seeds.
- This is optional, but it does give the braid a nice look.
Pro tip – Flatten and roll into a sausage before shaping it into a rope. This will create tension in the dough and prevent over-spreading.

- Braid – To braid the four ropes, place them on your work surface, pin them together at the top, then braid them as shown in the video.
- From left to right, you now have 1, 2, 3, and 4 strands.
- Strand 1 goes over 4 and 4 goes over 1– simple criss-cross.
- Then, 4 comes in between 2 and 3.
- And 3 goes over 1 (in place of 4).
- Then, 1 comes down between 2 and 4.
- And two goes over 4 (in place of 1).
- Proof – Place your lovely braid on a lined or lightly greased baking sheet. Cover with a damp cloth or greased plastic. Let it rest and rise again for 2 to 3 hours at room temperature or in the fridge for 4 to 6 hours.

- Oven – About 20 minutes before baking, preheat the oven to 350°F /177°C / Gas Mark 4.
- Bake – Brush the bread with a beaten egg. Then, bake the loaf on the center rack of the oven for 35 to 40 minutes. You’re looking for a beautiful golden brown top and a bottom that sounds hollow when tapped. If it starts browning too quickly, tent it with some aluminum foil.
- Cool – Remove from the oven and let cool on a wire rack for 5 minutes. Then, cover it with a clean kitchen cloth to keep it soft.
Pro tip – Do not leave the loaf on the tray for too long, as the steam will make the bread soggy on the bottom. Covering the bread with a cloth will help the bread retain moisture and prevent it from drying out.


- Milk and Honey Challah
- Easiest 3 Braid Challah Bread Recipe
- Challah Sandwich Bread
- Mini Single Braid Challah Rolls
- 5 Braid Challah Recipe – Braided Bread


Frequently asked questions
Using your senses is the best way to determine if your sourdough challah is ready. Look for a golden-brown crust and a slightly springy texture. When you tap the bottom of the loaf, it should sound hollow. Additionally, you can use a food thermometer to ensure the internal temperature reaches around 190°F (88°C).
Absolutely! Sourdough challah freezes well and can be stored for up to three months. To freeze, let the bread cool completely, then wrap it tightly in plastic wrap or aluminum foil. Place it in a freezer bag or an airtight container, then thaw it at room temperature when you’re ready to use it.
Like any other bread, sourdough challah is best enjoyed within a few days of baking. However, it can stay fresh for up to a week when stored correctly. Store it in a plastic bag or an airtight container at room temperature to extend its freshness. You can also reheat it in the oven or toaster to revive its crust and make it taste freshly baked.
Absolutely! Sourdough challah can be used as a substitute for regular challah in various recipes. However, remember that the sourdough flavor will add a tangy twist. It can be a delightful surprise, but if you’re unsure, you can always try a small test batch before committing to a larger recipe.
Sourdough Challah
Are you ready to embark on a journey into the delicious world of sourdough bread? Picture this: a perfectly golden loaf with a tender crust that surprises your palate and a crumb that is so light and airy that it practically melts in your mouth. If you've ever wondered how to achieve this pinnacle of bread perfection, you're in luck.
Ingredients
- 240 g (1 cups) Lukewarm water
- 100 g (2 large) Eggs
- 100 g (½ cups) Active sourdough starter (all bubbly and raring to go!)
- 250 g (2 cups) Bread flour
- 250 g (2 cups) All-purpose flour
- 30 g (2 tbsp) Honey or sugar
- 30 g (2 tbsp) Cooking oil vegetable or coconut
- 10 g (1¾ tsp) Kosher salt
- ½ cup (75 g) Sesame seeds for coating two ropes (optional)
Method
- Autolyze – Stir the water, eggs, and active sourdough starter with both flours in a stand mixer bowl. Cover the bowl and leave to rest for 60 minutes.240 g Lukewarm water , 100 g Eggs , 100 g Active sourdough starter , 250 g Bread flour, 250 g All-purpose flour
- Knead – Next, add the oil, honey, and salt. Knead the dough with a dough hook attachment on medium speed for 10 to 12 minutes. It should become smoother and more elastic.30 g Honey , 30 g Cooking oil , 10 g Kosher salt
- Bulk ferment – Place your kneaded dough in a lightly oiled bowl, cover it with a damp cloth, and let it rest at room temperature for 4-8 hours. It should nearly double in size.
- Divide – After the rise, punch down the dough and divide it into four equal parts. Shape each piece into a ball. Then, flatten each piece and roll it into a tight sausage. Roll each sausage into an 18-inch-long rope. With a bit of water on a plate, moisten two ropes with water and coat them with sesame seeds. This is optional, but it does give the braid a nice look.½ cup Sesame seeds
- Braid – To braid the four ropes, place them on your work surface, pin them together at the top, then braid them as shown in the video. You now have 1, 2, 3, and 4 strands from left to right.– Strand 1 goes over 4, and 4 goes over 1– Simple criss-cross.– Then, four comes in between 2 and 3.– And three goes over 1 (in place of 4).– Then, one comes down between 2 and 4.– And two goes over 4 (in place of 1).
- Proof – Place your lovely braid on a lined or lightly greased baking sheet. Cover with a damp cloth or greased plastic. Let it rest and rise again for 2 to 3 hours at room temperature or in the fridge for 4 to 6 hours.
- Oven – About 20 minutes before baking, preheat the oven to 350°F /177°C / Gas Mark 4.
- Bake – Brush the bread with a beaten egg. Then, bake the loaf on the center rack of the oven for 35 to 40 minutes. You're looking for a beautiful golden brown top and a bottom that sounds hollow when tapped. If it starts browning too quickly, tent it with some aluminum foil.
- Cool – Remove from the oven and let cool on a wire rack for 5 minutes. Then, cover it with a clean kitchen cloth to keep it soft.
Notes
- Use a Strong, Active Sourdough Starter – Your starter should be bubbly, doubled in size, and at peak activity before mixing. A sluggish starter will lead to dense, underproofed bread.
- Autolyze for Better Gluten Development – Letting the flour, water, eggs, and starter rest before adding salt and honey allows the gluten to develop naturally, making the dough easier to knead and giving the challah a softer texture.
- Adjust Hydration if Needed – Dough hydration can vary based on flour type and climate. If the dough feels too stiff, add 1-2 tbsp extra water. If too sticky, let it rest longer before kneading.
- Knead Until Smooth & Elastic – After kneading, the dough should feel soft, slightly tacky, and elastic. If it’s too sticky, resist adding too much flour—it will firm up during bulk fermentation.
- Don’t Rush Fermentation – Depending on room temperature, the bulk rise should take 4-8 hours. Let the dough double in size naturally—sourdough takes longer than yeasted challah.
- Poke Test for Perfect Proofing – Before baking, press the dough gently with your finger. If it springs back slowly and leaves a slight dent, it’s ready. If it springs back too quickly, it needs more time.
- Double Egg Wash for the Best Shine – Brush the first layer of egg wash before proofing and another right before baking for an ultra-glossy crust.
- Bake Until Deep Golden Brown – The challah is done when it has a rich golden color, feels light, and the internal temperature reaches 190°F (88°C).
- Let It Cool Completely – Resist the urge to slice it hot! Let the challah cool on a wire rack to prevent steam from making it gummy inside.
Nutrition
Tried this recipe?
Mention @veenaazmanov_kitchen or tag #veenaazmanovkitchen!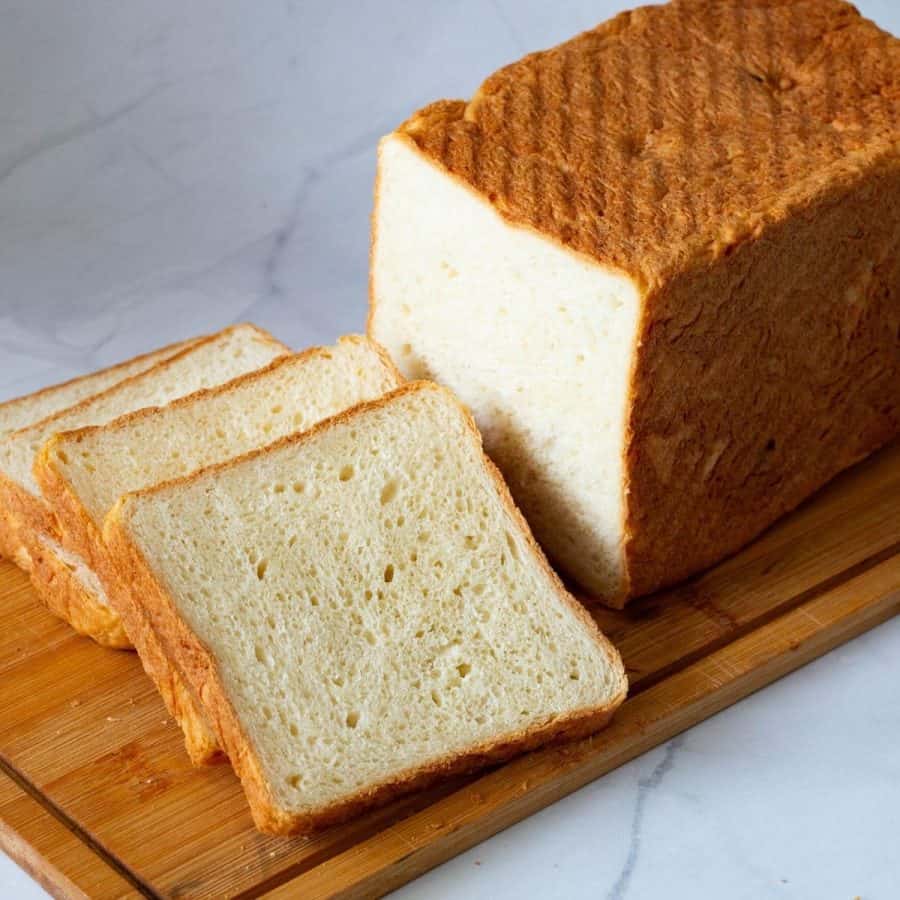


Don’t lose this recipe! Save it for Later!
📌 Save this Recipe for later on Pinterest so you can easily find it again.
⭐ Add Veena Azmanov Kitchen to your Google Preferred Sources.
It helps Google show you more of our recipes.
📧 Subscribe for new recipes delivered to your inbox.
🎥 Follow us for more recipes


Hi Veena
I tried the sourdough challah but my dough turned out to be a bit stiff and not soft and light. also after baking it turned out slightly tacky.
what did I do.wrong? please advise..thank you
Thank you for trying my sourdough challah!
1. If the dough felt stiff, it may have needed more hydration. Sourdough flours absorb liquid differently, so next time, try adding a little more water or milk (a tablespoon at a time) until the dough feels soft and pliable.
2. If it turned out tacky after baking, it might have been slightly underbaked or overproofed. If it was overproofed, it could collapse and become tacky. The best way to check is with the poke test—if the dough slowly springs back but leaves a slight indentation, it’s ready.
3. Also, let it cool completely on a wire rack to prevent excess moisture buildup.
Hope this helps, and I’d love to hear how it goes next time!
Hello, I have a couple questions. During the bulk ferment the pro tip says you can put in the fridge to ferment up to 24 hours… is this in place of the 4-8 hours at room temp or after the room temp rise? Also, this dough was very stiff to mix in my Kitchenaid it was very hard on my machine, is this normal?
Hey Amanda, You can do both. First on the counter and then in the fridge!
You can also do bulk fermentation only in the fridge without any counter time for the first rise. This gives the dough time to slowly ferment without becoming too sour and yeasty.
But, most importantly, the dough should not be hard during kneading. Quite the contrary. It must be soft and pliable. So if necessary, add up to 1/4 cup water during kneading.