Sourdough Starter (7-Day Traditional Method)
Calories: 38
Adjust Servings Here: 1 starter
Description
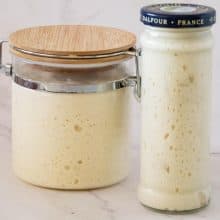
To make excellent sourdough bread, you need a strong sourdough starter — wild yeast made from flour and water. This traditional 7-day sourdough starter recipe uses the discard method to create a stable, reliable starter you can maintain for years.
Ingredients
- 30 grams (¼ cup) Rye flour - For Day 1 or whole wheat flour
- 15 grams Whole wheat flour - For Day 2 or more rye flour
- 255 grams All-purpose flour - For Day 3 to 7
- 300 grams (30 ml) Bottled water room temperature - avoid tap water
- ⅛ tsp Molasses - for Day 1 optional but highly recommended for day 1
Instructions
Sourdough Starter ( Day 1 to Day 7)
- Day 1 – In a clean glass jar (about 8 oz), add 30 g water and stir in ⅛ tsp molasses (optional). Add 30 g rye flour and mix until no dry flour remains. Cover loosely and leave in a warm place for 24 hours. Pro tip – Keep the lid loose (don’t seal tight). A warm spot helps fermentation start faster.
- Day 2 – Stir the starter. Discard half. Add 15 g whole wheat flour, 15 g all-purpose flour, and 30 g water. Mix well, scrape down the sides, cover loosely, and leave in a warm place for 24 hours. Pro tip – It may look quiet today. That’s normal. Discard half means remove about half from the jar (you don’t need to weigh it).
- Day 3 – Stir the starter. Discard half. Add 30 g all-purpose flour and 30 g water. Mix well, cover loosely, and leave in a warm place for 24 hours. Pro tip – You may start seeing small bubbles and a tangy smell today.
- Day 4 (feed twice)Morning (1st feeding): Stir. Discard half. Add 30 g all-purpose flour and 30 g water. Mix well, cover loosely, and leave 12 hours.Evening (2nd feeding): Stir. Discard half. Add 30 g all-purpose flour and 30 g water. Mix well, cover loosely, and leave 12 hours.Pro tip – By now you should see more bubbles and possibly a small rise. If it still looks slow, keep going.
- Day 5 (feed twice) – Repeat the Day 4 schedule.Morning: Stir. Discard half. Add 30 g all-purpose flour and 30 g water. Mix well, cover loosely, and leave 12 hours.Evening: Stir. Discard half. Add 30 g all-purpose flour and 30 g water. Mix well, cover loosely, and leave 12 hours.Pro tip – The starter may begin rising more noticeably and may smell more yeasty.
- Day 6 (feed twice) – Repeat the Day 4 schedule again.Morning: Stir. Discard half. Add 30 g all-purpose flour and 30 g water. Mix well, cover loosely, and leave 12 hours.Evening: Stir. Discard half. Add 30 g all-purpose flour and 30 g water. Mix well, cover loosely, and leave 12 hours.Pro tip – If your starter rises and then collapses before the next feeding, that’s a good sign it’s active and hungry.
- Day 7 – Stir the starter. Discard half. Add 30 g all-purpose flour and 30 g water. Mix well, cover loosely, and leave in a warm place.Pro tip – If it consistently doubles within 4–6 hours after feeding and smells pleasantly yeasty, it’s ready to bake. If not, keep feeding every 12 hours for another day or two.
How to Use Your Sourdough Starter (After Day 7)
- Step 1 – Save your starter. After feeding, always keep a small portion in the jar (about 2–4 tablespoons). This is the starter you will continue to feed and maintain for future baking. Pro tip – Never use all your starter. Always keep some back so you can keep it going.
- Step 2 – What levain means. A levain is simply a portion of your starter that you feed specifically for baking. It is not a different ingredient, just starter plus fresh flour and water. Pro tip – Think of levain as “the starter you build for today’s bake.”
- Step 3 – How to make a levain (beginner version). Take a small amount of active starter (about 1–2 tablespoons). Feed it with flour and water according to your bread recipe. Leave it at room temperature until it is bubbly and doubled, then use it in your bread dough. Pro tip – Use the levain when it has peaked (domed top and very bubbly) for best results.
- Step 4 – Using starter without a separate levain (optional). If your recipe uses starter directly, feed your starter and let it peak (rise and just begin to fall). Measure what the recipe needs, then save and feed the rest. Pro tip – Active starter works best when used at peak, not after it has completely collapsed.
- Step 5 – After baking, what to do with the starter. Once you’ve taken what you need for baking, feed the remaining starter. Let it sit at room temperature for a short time, then store it in the refrigerator if you bake weekly, or keep feeding at room temperature if you bake often. Pro tip – If the starter will be in the fridge, feeding it once a week is usually enough to keep it healthy.
The nutrition information and metric conversion are calculated automatically. I cannot guarantee its accuracy. If this data is important to you please verify with your trusted nutrition calculator. Thank you
Did you make this recipe? Share it with me.Tag @veenaazmanov_kitchen on instagram or #hashtag it #veenaazmanovkitchen