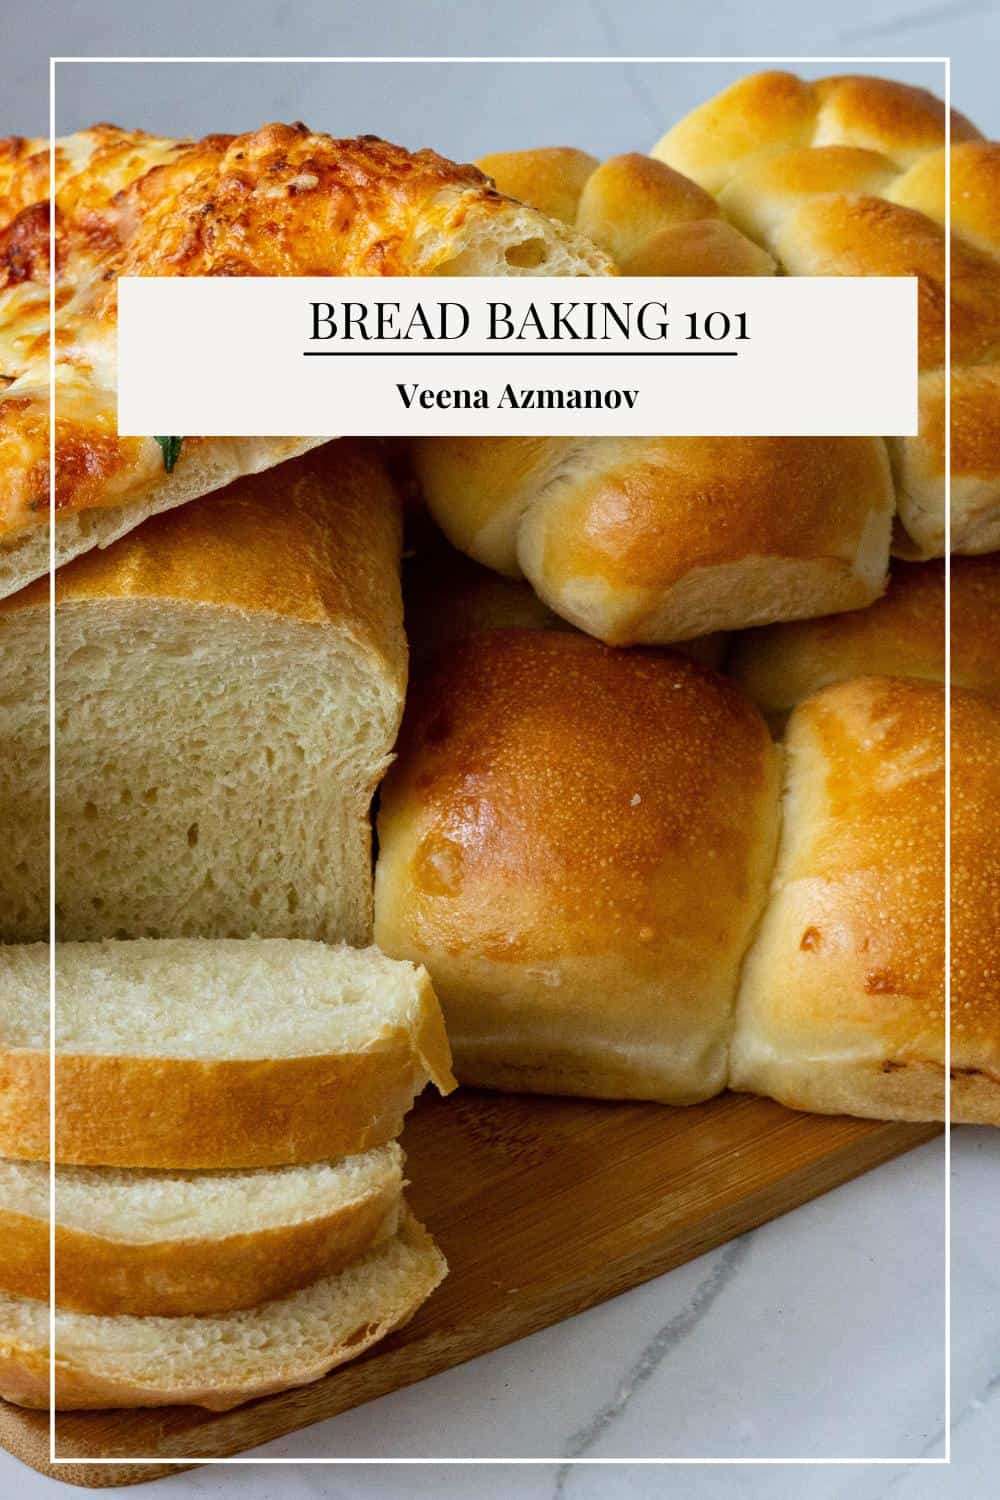
Baking bread 101 – Beginners Guide
 Prep Time 10 minutes Cook Time 25 minutes Total Time 2 hours 5 minutes

Are you looking to become a master bread baker? Learning to bake delicious bread can be one of the most rewarding and challenging experiences in the kitchen. But don’t worry – you don’t have to be a Michelin-Star chef to learn the basics of baking bread!
Bread is a staple food made from a dough of flour, water, and other ingredients that is typically baked. It is also one of the oldest prepared foods and has been consumed by humans for thousands of years. Also, bread is usually leavened. This means it rises during the baking process due to the action of leavening agents like yeast, baking powder, baking soda, etc. And the fermentation of these ingredients produces carbon dioxide gas, causing the bread to become light and airy.
Bread can come in various shapes, sizes, and textures, depending on the specific recipe and baking techniques used. It can have a soft or crusty exterior and a dense or fluffy interior. Also, different types of flour, such as wheat, rye, or cornmeal, can be used to make bread. As a result, it comes in different flavors and textures.
The science of baking bread
Baking bread is a fascinating process that involves a simple yet intricate science. Understanding these scientific principles can help bakers make informed decisions regarding ingredients, techniques, and troubleshooting. So, here are the fundamental scientific principles behind bread baking that I think you should know.
- Yeast Fermentation: Yeast is a crucial ingredient in bread baking. It is a microorganism that feeds on sugars in the dough and produces carbon dioxide gas through fermentation. This process causes the dough to rise and creates air pockets, giving the bread a light and airy texture.
- Gluten Formation: Gluten is a complex protein formed when wheat flour comes into contact with water and is subjected to mechanical manipulation during kneading. In addition, gluten provides structure and elasticity to the dough. This allows the dough to trap carbon dioxide gas released by yeast and create the desired texture in the final bread.
- Enzymatic Activity: Enzymes, naturally present in the flour, break down starches into sugars during the dough fermentation process. And these sugars serve as food for the yeast, promoting fermentation and gas production.
- Heat and Oven Spring: When bread dough is placed in a hot oven, the heat causes the carbon dioxide gas trapped in the dough to expand rapidly. This creates what is known as “oven spring,” where the bread rises and expands further. As a result, the proteins in the dough coagulate, giving the bread its final structure.
- Maillard Reaction: The Maillard reaction is a chemical reaction that occurs between amino acids and sugars in the dough during baking. It leads to the browning of the crust, creating desirable flavors and aromas in the bread.
- Starch Gelatinization: As the bread bakes, the starches in the dough absorb water and undergo gelatinization. This process helps to set the structure of the bread and contributes to its moist and tender crumb.
- Cooling and Moisture Redistribution: Once the bread is removed from the oven, it cools. During this time, moisture redistributes within the bread, allowing it to stabilize and develop its final texture.

What does hydration in bread baking mean
In bread baking, hydration refers to the dough’s ratio of water to flour. It indicates the amount of water relative to the flour used in a recipe. Hydration is typically expressed as a percentage.
Understanding hydration in bread baking allows bakers to manipulate the dough’s characteristics and tailor the bread’s texture and crumb to their liking. In fact, adjusting hydration can be an advanced technique. However, experimenting with different hydration levels can help bakers achieve the desired results in their bread recipes.
- Hydration is crucial in bread baking as it affects the texture, crumb structure, and overall moisture content. And different hydration levels can result in varying characteristics in the final baked bread.
- A higher hydration level means more water to flour in the dough. This results in a more hydrated and sticky dough. Also, high hydration doughs are typically more challenging to handle and shape, but they can yield bread with an open and holey crumb, a tender texture, and a crisp crust.
- Conversely, a lower hydration level means less water to flour in the dough. This leads to a stiffer and less sticky dough. As a result, lower hydration doughs are easier to handle and shape and tend to produce bread with a denser crumb and a chewier texture.
- Hydration levels can vary depending on the type of bread and the desired outcome. For example, artisan-style bread like ciabatta or sourdough often has higher hydration levels, while bread like bagels or sandwich loaves may have lower hydration levels.
- Also, the hydration level is influenced by factors such as the absorption properties of the flour, the environment, and the desired dough consistency. It’s common for bakers to adjust the hydration level during the bread-making process based on these factors and personal preferences.
What is gluten in bread baking?
You often hear bakers use this term in bread baking, so it is essential to understand what it means.
- Gluten is a complex mixture of proteins found in wheat flour, specifically in the proteins glutenin and gliadin. When wheat flour comes into contact with water and is subjected to mechanical manipulation, such as kneading, gluten formation occurs.
- Also, gluten provides structure and elasticity to the dough, allowing it to trap and hold carbon dioxide gas produced by yeast during fermentation. And this trapped gas causes the dough to rise and results in the characteristic airy texture of bread.
- The gluten proteins have unique properties that contribute to the structure and texture of the bread. Glutenin provides strength and elasticity to the dough, while gliadin contributes to extensibility, allowing the dough to stretch without tearing.
- In addition, the gluten proteins align and form a network of interconnected strands during the kneading process. This network traps the gas produced by yeast and provides support to the dough as it rises. And as the bread bakes, the gluten proteins coagulate and set, creating the final structure of the bread.
So, why is gluten important?
Gluten development is essential for proper bread baking. It allows the dough to hold its shape, rise effectively, and develop a desirable crumb texture. Different types of wheat and flour have varying gluten content, which affects the characteristics of the bread. In fact, bread flour, with its higher protein content, is often preferred for bread baking as it promotes better gluten development and results in a more chewy and structured loaf.
Some individuals may have gluten sensitivity or celiac disease, an autoimmune disorder triggered by gluten consumption. In such cases, alternative flours or gluten-free baking techniques can achieve similar results without using gluten-containing ingredients.
What does rise and proof in bread baking mean?
Bakers often say “rise” and “proof” during baking. Do you know that they are both different, and yet we use both terms to describe the fermentation and expansion of the dough as it undergoes the process of yeast activity? Here’s what each term means:
- Rise: The rise refers to the initial fermentation stage when the dough increases in volume. During this phase, the yeast consumes the sugars in the dough and produces carbon dioxide gas as a byproduct. Then, the gluten network traps the gas, causing the dough to expand and rise. This rise typically occurs after the dough has been mixed and kneaded.
- Proof: Proofing is the term we use to describe the final fermentation stage of the dough, which occurs after shaping. Once we shape the dough into the desired form, it undergoes a second rise or proof. During this phase, the dough continues to ferment and rise further, allowing the flavors to develop and the structure of the bread to stabilize. This stage is crucial for achieving the final baked bread’s desired texture, flavor, and volume.

The importance of rise and proof?
- Time – The rise and proof stages require appropriate time and environmental conditions to allow the yeast to ferment and produce carbon dioxide gas. Also, the duration of the rise and proof can vary depending on the recipe, room temperature, and yeast activity. As a general guideline, the dough should double in size during the initial rise. And during the second proof, it should increase by about one and a half times.
- Monitor – It’s essential to closely monitor the rise and proof to prevent under- or over-proofing. Underproofing can result in a dense texture, and overproofing can lead to a collapsed or excessively airy loaf.
The rise and proof stages are critical steps in bread baking. Since they allow the dough to develop flavor, texture, and volume before we bake it. Proper timing and observation during these stages contribute to the overall quality and characteristics of the final baked bread.
What are the tools necessary for baking bread?
To bake bread, you will need a few essential tools to help you with the various stages of the bread-making process. But remember, while these tools can enhance your bread-making experience, it is not critical that you have them all. In fact, for years, bakers have baked bread successfully with nothing but their hands and basic equipment.
You can start with the basics and gradually acquire additional tools as you gain more experience and confidence in baking bread.
Here are some common tools necessary for baking bread:
- Mixing Bowl: Use a large mixing bowl to combine and mix the ingredients for the dough.
- Measuring Cups and Spoons: Accurate measurements are crucial in baking. Use measuring cups and spoons to precisely measure flour, water, yeast, salt, and other ingredients.
- Kitchen Scale: A kitchen scale is helpful for measuring ingredients by weight, which can provide more accurate and consistent results, especially when working with bread recipes that use weight measurements.
- Dough Scraper/Bench Scraper: A dough scraper or bench scraper handles sticky dough, divides dough portions, and cleans your work surface.
- Wooden Spoon or Dough Whisk: Use a wooden spoon or dough whisk to mix the dough and combine the ingredients before kneading.
- Stand Mixer with Dough Hook (optional): While not essential, a stand mixer with a dough hook attachment can make kneading easier and less labor-intensive, especially for larger batches of dough.
- Pastry Brush: A pastry brush is helpful for applying egg wash or butter to the bread’s surface to enhance browning and add flavor.
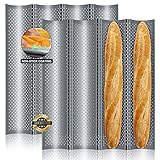
- Banneton or Proofing Basket: A banneton or proofing basket is made of cane or other natural materials that help shape and support the dough during the final proofing stage. It adds texture to the crust and helps the bread retain its shape.
- Baking Sheet or Loaf Pans: Baking sheets or loaf pans hold and shape the dough during the final rise and baking.
- Oven Thermometer: An oven thermometer ensures that your oven is at the correct temperature, as oven thermostats can be inconsistent. This helps achieve the desired baking results.
- Cooling Rack: After baking, a cooling rack allows air to circulate around the bread, preventing moisture buildup and keeping the crust crisp.
Additional tools that can be handy but are not essential include a bread knife or sharp knife for scoring the bread, a spray bottle for creating steam in the oven, and a pizza stone or baking stone for even heat distribution.


Ingredients for baking bread
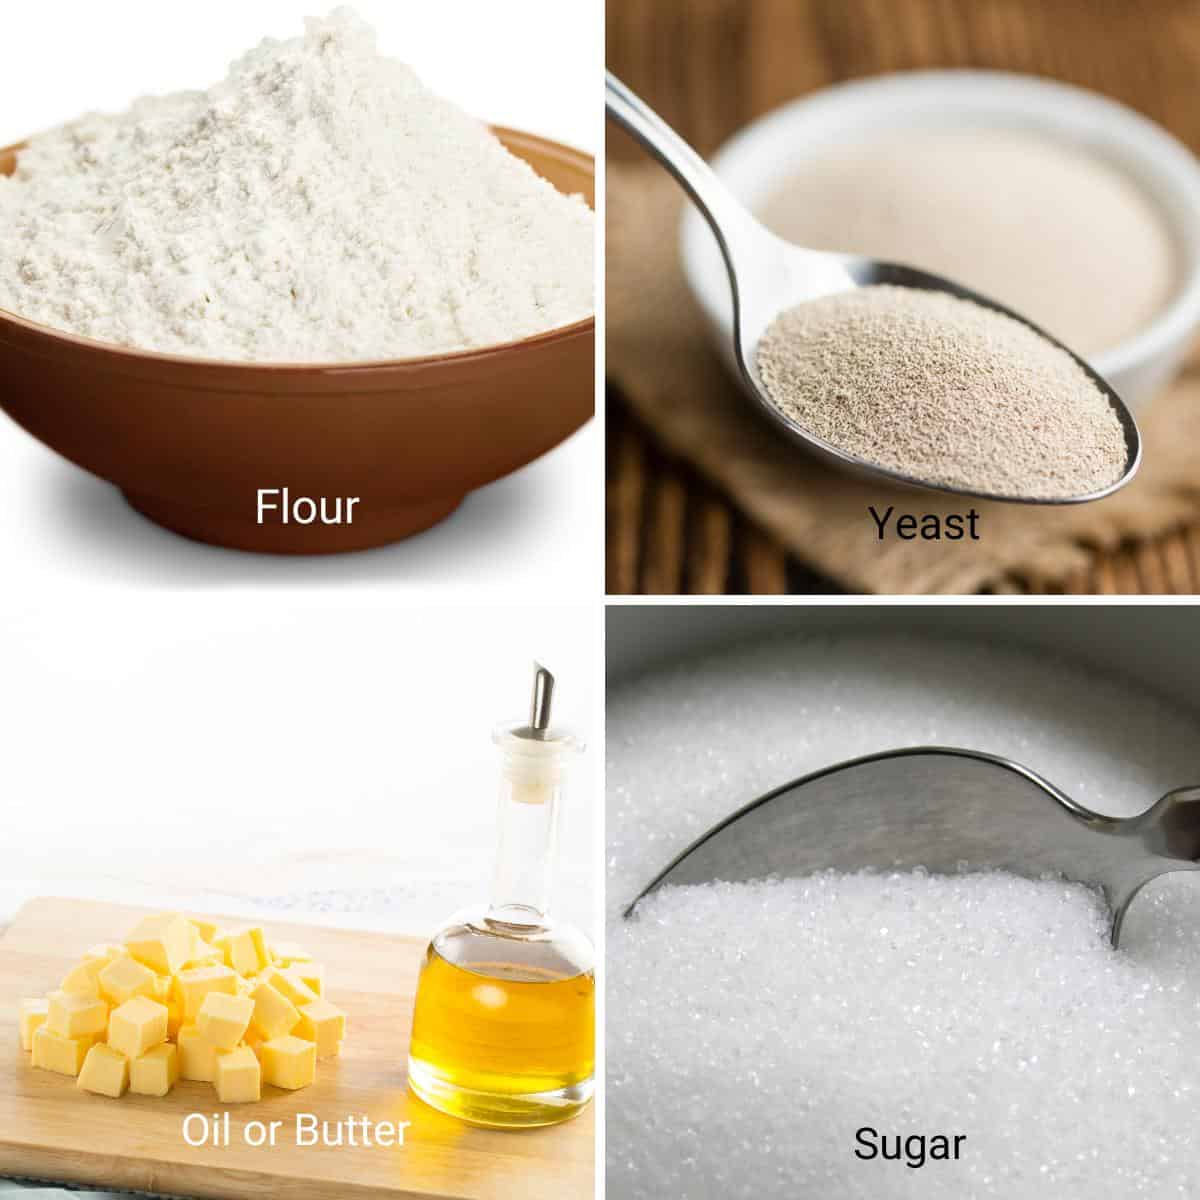
As you can see in the recipe given below, there are just four main ingredients in bread baking, and all these are pantry staples.
- Flour: Flour is the primary ingredient in bread baking and provides the structure and bulk of the bread. Common types of flour used in bread making include all-purpose flour, bread flour, whole wheat flour, and rye flour. And each type of flour has different protein content, which affects the gluten development and texture of the bread.
- Water: Water is essential for hydrating the flour and activating the yeast. It helps form gluten strands and allows the dough to rise properly during fermentation.
- Yeast: Yeast is a microorganism that causes the dough to rise by fermenting the sugars in the flour, producing carbon dioxide gas. It is available in both dry (active dry yeast or instant yeast) and fresh forms. Yeast provides the bread with a light and airy texture.
- Salt: We add salt to enhance the flavor of the bread. It also helps control yeast activity and gluten development. Additionally, salt plays a role in regulating fermentation and improving the shelf life of the bread.
Additional ingredients
The following ingredients are often used in enriched bread recipes to affect flavor, texture, and shelf life.
- Sugar: Sugar serves as food for the yeast and helps speed up the fermentation process. It also contributes to browning and crust formation. Also, you can use different types of sugars, such as granulated sugar, honey, or molasses, to add sweetness and flavor to the bread.
- Fats: You can add fats, such as butter, oil, or shortening, to the dough to enhance its texture, tenderness, and flavor. Also, fats help extend the shelf life of the bread by slowing down staling.
- Eggs: We sometimes use eggs in bread baking to enrich the dough, providing added moisture, structure, and richness to the bread.
- Milk or Dairy Products: You can add milk or dairy products, such as milk, buttermilk, or yogurt, to the dough to add tenderness and flavor to the bread.
These ingredients, combined with proper mixing, kneading, fermentation, and baking techniques, contribute to the creation of delicious and well-textured bread.
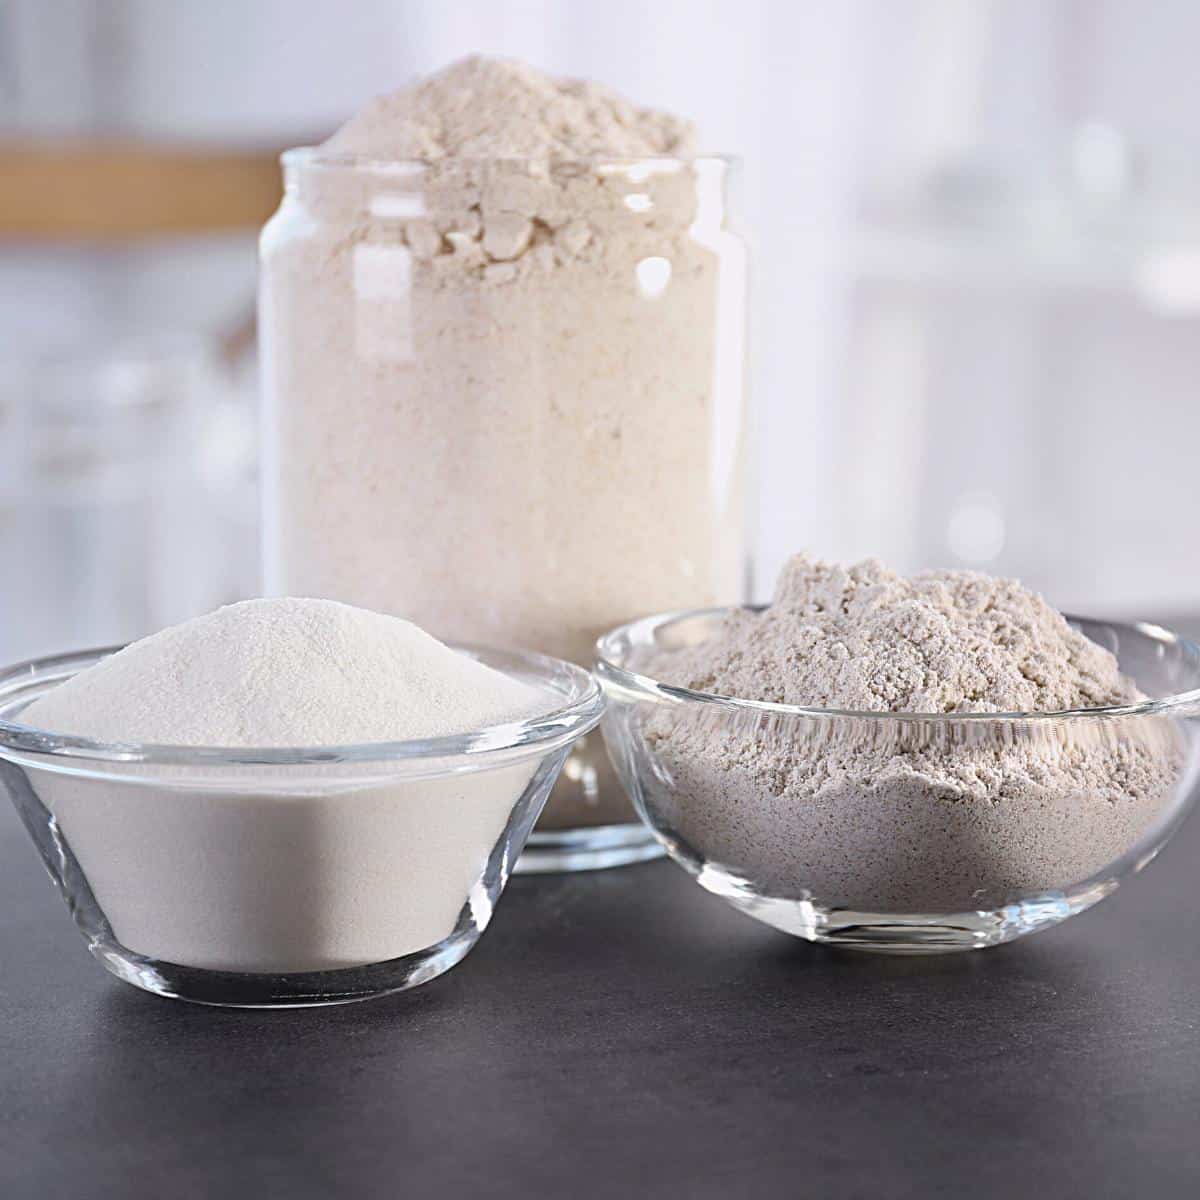
Types of flour used for baking bread
Several types of flour are commonly used for baking bread, each with its own characteristics and properties. It’s worth noting that flour characteristics can vary among different brands and regions. So it’s essential to consider the protein content and specific properties of the flour you use when following a bread recipe.
Experimenting with different types of flour can yield unique flavors and textures in your homemade bread. Here are some of the most commonly used types of flour for bread baking:
- All-Purpose Flour: All-purpose flour is versatile. And you can use it for various baking purposes, including bread. It is a blend of hard and soft wheat with moderate protein content, typically around 10-12%. All-purpose flour suits most bread recipes and produces a balanced texture and crumb.
- Bread Flour: Bread flour is a high-protein flour designed for baking bread. It has a higher protein content, typically around 12-14%, which promotes gluten development and creates a chewier texture in the bread. Bread flour is ideal for yeast-raised bread, providing structure and strength to support the rising process.
- Whole Wheat Flour: Whole wheat flour is made by grinding the wheat kernel, including the bran, germ, and endosperm. It has a higher fiber and nutrient content compared to refined flour. Also, whole wheat flour adds a nutty flavor and a denser texture to the bread. And due to its higher fiber content, it may require more water and longer kneading times.
- Rye Flour: Rye flour is made from ground rye grains and has a distinct flavor and darker color than wheat flour. It is commonly used in rye bread and can be mixed with wheat flour for a hybrid loaf. Rye flour has less gluten than wheat flour, producing denser and less elastic bread. It may require the addition of wheat flour or gluten to improve the bread’s structure.
- Spelt Flour: Spelt flour is an ancient grain flour that has recently gained popularity. It has a nutty flavor and a slightly sweet taste. Spelt flour contains gluten, but its gluten structure is more fragile than wheat flour, resulting in a lighter texture. You can use spelt flour as a partial replacement for wheat flour in bread recipes.
- Gluten-Free Flour Blends: We use gluten-free flour blends for individuals with gluten sensitivities or celiac disease. These blends typically combine gluten-free flour such as rice flour, tapioca flour, and potato starch. However, gluten-free bread baking requires additional ingredients and techniques to achieve a similar texture and structure to wheat-based bread.
The stages of baking bread?
The process of bread baking typically involves several stages. These stages vary slightly depending on the specific recipe and bread type. It’s essential to follow the instructions provided in the recipe to achieve the best results. Here are the key stages of bread baking:
- Mixing: The initial stage involves combining the flour, water, yeast, salt, and other ingredients in a mixing bowl. Then, we mix the ingredients together until a cohesive dough forms.
- Kneading: Kneading is a crucial step that develops the gluten in the dough, giving it structure and elasticity. The dough is stretched, folded, and pushed using the hands or a stand mixer with a dough hook. Kneading continues until the dough becomes smooth and supple and springs back when gently pressed.
- Fermentation (First Rise): After kneading, we allow the dough to rest and ferment. During this stage, the yeast converts the sugars in the dough into carbon dioxide and alcohol through fermentation. We cover the dough and leave it in a warm place for a specific period, typically until it has doubled. This first rise allows the dough to develop flavor and texture.
- Shaping: Once the dough has completed its first rise, it is shaped into the desired form. The dough is gently deflated, shaped into a loaf, rolls, or other desired shapes, and placed on a baking sheet or in a loaf pan. Proper shaping helps create a well-structured final product.
- Proofing (Second Rise): After shaping, the dough undergoes a second rise called proofing. This stage allows the dough to rise again, typically until it has increased in size by about one and a half times. During proofing, the yeast ferments, producing more carbon dioxide and creating air pockets in the dough. This rise contributes to the final baked bread’s lighter and fluffier texture.
- Baking: The proofed dough is transferred to the oven for baking. The oven is preheated to the appropriate temperature, typically around 375°F to 450°F (190°C to 230°C). The high heat causes the yeast to produce a final burst of gas, expanding the dough further. Baking also sets the structure of the dough, creates a golden crust, and imparts flavor through caramelization and Maillard reactions.
- Cooling: After baking, we remove the bread from the oven and allow it to cool on a wire rack. Cooling is essential for the bread to set and finish its cooking process. And it also helps prevent moisture buildup, resulting in a crisp crust.
Tips for kneading bread
- Use the correct technique: Start by pushing the dough away from you with the heel of your hand, then fold it over itself and rotate it a quarter turn. Repeat this process, pushing, folding, and rotating, for about 8-10 minutes or until the dough becomes smooth, elastic, and springs back when lightly pressed.
- You can gently swap the work surface: Use a light dusting of flour on the work surface to prevent sticking, but be careful not to add too much flour. Adding excessive flour can make the dough too dry, resulting in a dense loaf. As you knead, the dough should become less sticky and more manageable.
- Apply consistent pressure: Apply even pressure when kneading the dough, using the heel of your hand. Push the dough away from you and fold it back over itself, using your body weight to aid in the process. Avoid tearing or ripping the dough.
- Be patient: Kneading takes time, and patience is essential. Take your time with the process. Take breaks if needed, but aim for the desired texture and elasticity in the dough. Remember, gluten development takes time to achieve the proper structure.
- Test for gluten development: Perform the windowpane test to check the gluten development. Take a small piece of dough and gently stretch it between your fingers. If the dough stretches without tearing and becomes thin enough to see the light through it (like a windowpane), it indicates that gluten has developed sufficiently.
- Adjust hydration if needed: If the dough feels too dry and difficult to knead, you can add a little water, a teaspoon at a time, to help moisten the dough and facilitate gluten development. Conversely, if the dough feels overly wet and sticky, you can add a small amount of flour, again, gradually, to achieve the right consistency.
- Consider using a stand mixer: If kneading by hand is challenging or time-consuming, you can use a stand mixer with a dough hook attachment. Mix the ingredients initially until combined, then switch to the dough hook for kneading. Keep an eye on the dough’s consistency and adjust as needed.
Remember, practice makes perfect when it comes to kneading bread. With time and experience, you’ll develop a feel for the dough and be able to adjust techniques and timing to achieve the desired results.
Tips for shaping bread
- Prepare a clean, lightly floured surface: Start by lightly flouring your work surface to prevent the dough from sticking. However, use flour sparingly to avoid incorporating too much into the dough, which can make it dry and dense.
- Pre-shape the dough: Before the final shaping, pre-shape the dough into a round or rectangular shape, depending on the desired bread type. This helps create tension and structure in the dough, making it easier to shape the final loaf.
- Use gentle handling: Handle the dough gently to avoid deflating it too much. You want to preserve the air bubbles and the developed structure from fermentation. Please don’t overwork the dough, which can result in a dense final product.
- Create tension: Tension is crucial for a well-shaped loaf. To create tension, start with the pre-shaped dough and pull the edges towards the center, forming a tight surface. Roll or fold the dough, seam-side down, while applying gentle pressure to seal the edges.
- Shape according to the bread type: Different types require specific shaping techniques. For example, for a classic round loaf, tuck the edges of the dough underneath, rotating it as you go, until you form a smooth ball. For baguettes, elongate the dough gently, folding and rolling it into a thin cylinder shape. Could you research specific shaping techniques for the type of bread you are making?
- Use a bench scraper or your hands: A bench scraper can be a helpful tool for shaping bread, especially for handling sticky dough. It assists in lifting and folding the dough, creating tension. However, using your hands can also work, allowing you to feel the dough’s texture and shape it accordingly.
- Final proofing: After shaping the bread, it undergoes the final proofing stage. Place the shaped dough on a prepared surface, such as a baking sheet or a proofing basket (banneton), for the final rise. Cover the dough with a clean kitchen towel or plastic wrap to prevent it from drying out.
Remember, shaping bread takes practice, and it may require a few attempts to achieve the desired results. But with experience and experimentation, you’ll develop your own techniques and find what works best for you.

What is the best temperature for baking bread, and how long?
The best temperature for baking bread can vary depending on the recipe and the bread you’re baking. However, a typical range for bread baking is between 375°F and 450°F (190°C and 230°C). The specific temperature within this range will depend on factors such as the desired crust color and loaf size.
The baking time also varies based on the recipe, loaf size, and oven temperature. On average, a standard loaf of bread may take around 25 to 45 minutes to bake. However, larger loaves or specialty bread like sourdough may require longer baking times, while smaller rolls or baguettes may bake in a shorter time.
It’s always best to follow the specific instructions provided in your chosen recipe. Typically, the recipe gives you the recommended oven temperature and baking time. This ensures that you bake the bread correctly and safely.
And to ensure that you bake the bread thoroughly, you can also check for doneness by tapping the bottom of the loaf or inserting an instant-read thermometer into the center. The internal temperature should ideally reach around 190°F to 200°F (88°C to 93°C) for most bread types.
Remember that baking times and temperatures can vary, so monitoring the bread closely, especially during the last few minutes of baking, is crucial to avoid under- or over-baking. Adjustments may be necessary based on your specific oven’s performance and your desired crust and texture preferences.
Troubleshooting
- Dense or Heavy Loaf:
- Possible causes: Insufficient gluten development, too much flour, not enough yeast, under proofing, or improper shaping.
- Troubleshooting tips: Ensure proper kneading for sufficient gluten development, measure ingredients accurately, follow the recipe’s yeast-to-flour ratio, allow adequate time for proofing, and shape the loaf properly to create tension.
- Bread Doesn’t Rise:
- Possible causes: Inactive or expired yeast, water temperature too hot or too cold, insufficient proofing time, or a drafty environment.
- Troubleshooting tips: Check the expiration date of the yeast, use water at the recommended temperature for yeast activation, allow sufficient time for proofing, and provide a warm and draft-free environment for the dough to rise.
- Bread Collapses or Sinks:
- Possible causes: Overproofing, too much yeast, insufficient gluten development, or excess moisture.
- Troubleshooting tips: Pay attention to proofing times and avoid overproofing, use the recommended amount of yeast, ensure proper kneading for gluten development, and be cautious with adding excessive moisture.
- Tough or Chewy Crust:
- Possible causes: Insufficient steam in the oven, baking at too high a temperature, or inadequate fermentation.
- Troubleshooting tips: Use steam during the initial stages of baking by placing a tray of hot water in the oven or spraying water onto the oven walls. Adjust the baking temperature if needed, and allow sufficient time for fermentation to develop flavor and texture.
- Bread Doesn’t Brown:
- Possible causes: Insufficient sugar content, oven temperature too low, or inadequate baking time.
- Troubleshooting tips: Ensure the recipe includes an appropriate amount of sugar for browning, preheat the oven to the recommended temperature, and bake the bread for the full recommended time until it reaches the desired color.
- Gummy or Undercooked Interior:
- Possible causes: Insufficient baking time, too much moisture in the dough, or oven temperature too low.
- Troubleshooting tips: Bake the bread for the recommended time, adjust the dough’s hydration if it’s too wet, and verify that the oven temperature is accurate using an oven thermometer.
Remember that bread baking involves various factors, and troubleshooting may require some trial and error. Keep track of your process, make adjustments, and learn from each baking experience to improve your bread-making skills.
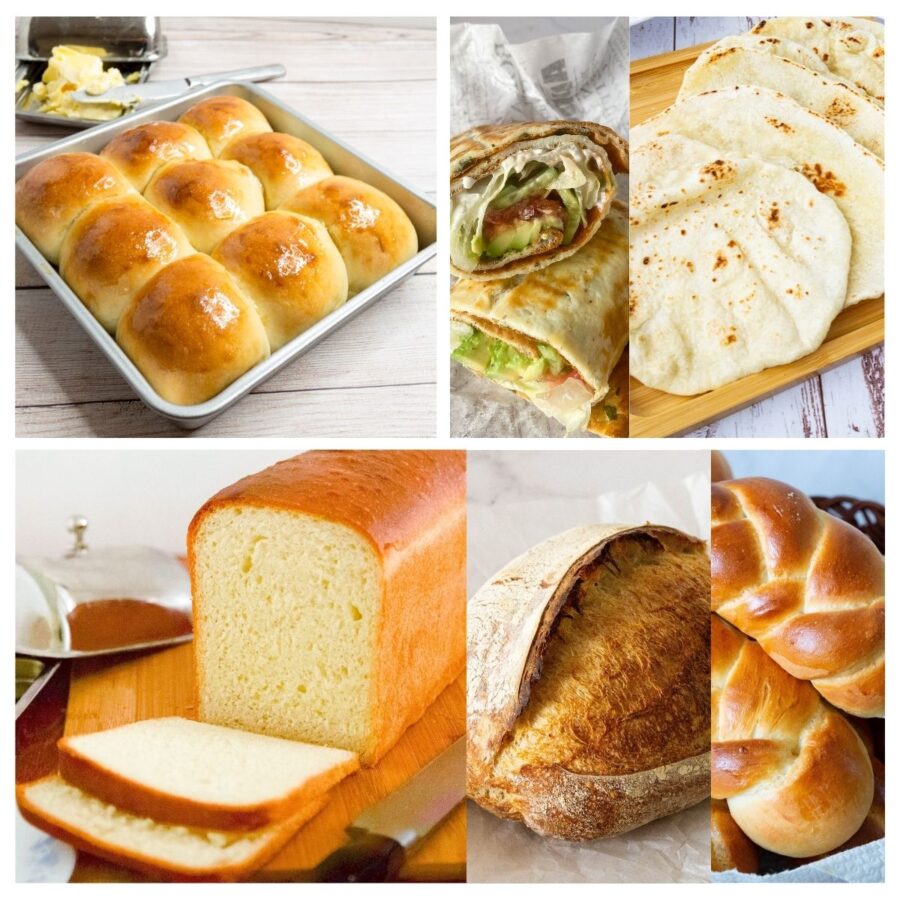
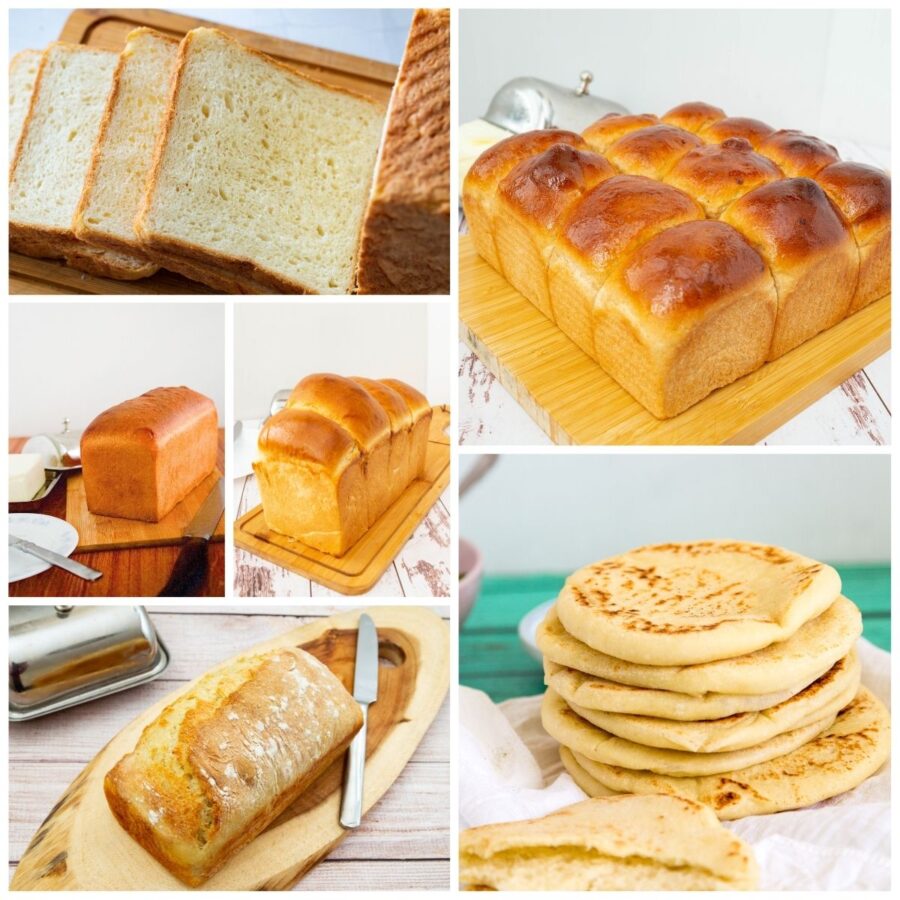
Types of bread
Bread comes in many different types, each with its own unique characteristics and flavors. Here are some popular types of bread from around the world:
- Baguette: A long, narrow French bread with a crisp crust and a soft interior. You can use it to make sandwiches or serve it with soups and stews.
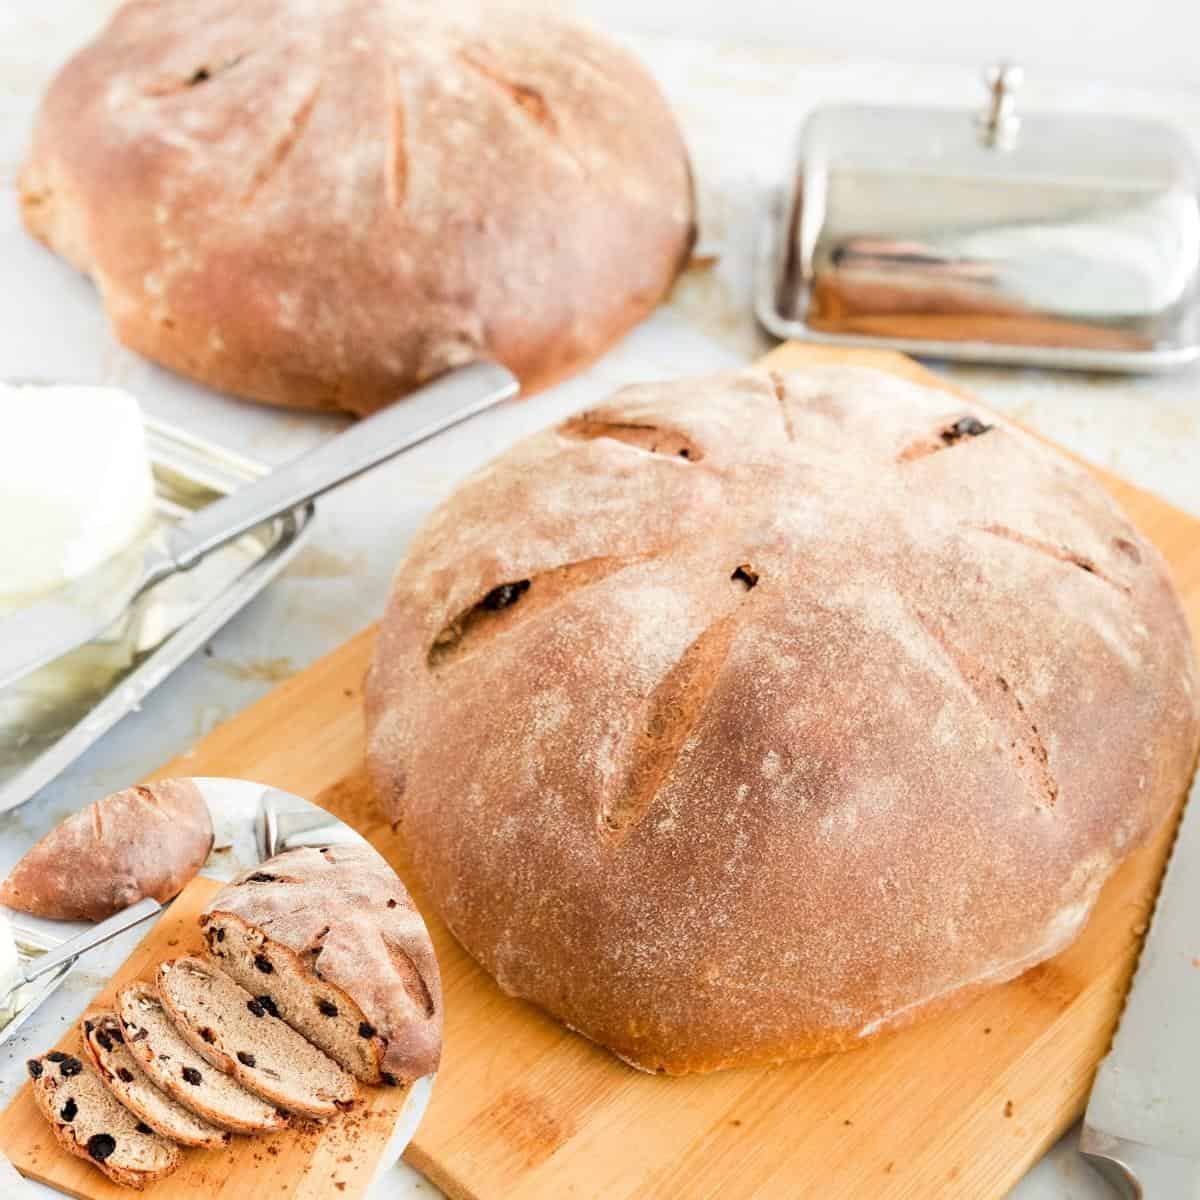
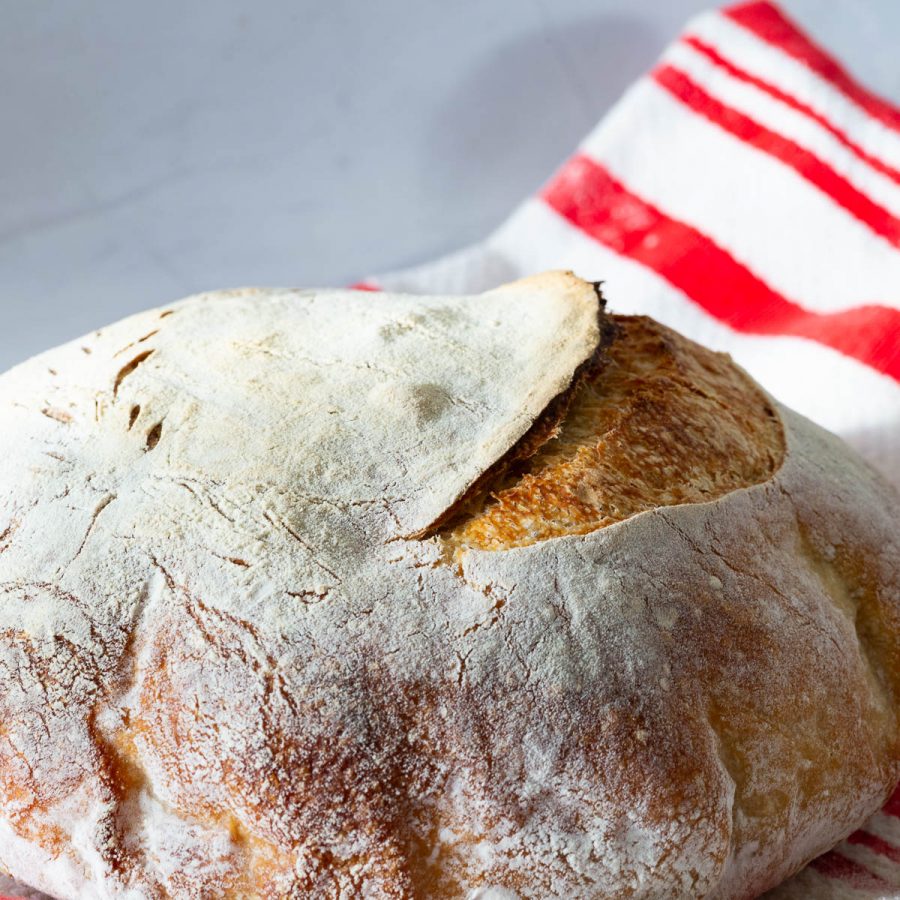
- Sourdough: A bread made from a fermented dough using naturally occurring lactobacilli and yeast. It has a tangy flavor and a chewy texture.
- Whole Wheat: Bread made from flour that includes the wheat grain provides more fiber and nutrients than white bread. It has a dense texture and a nutty flavor.
- Rye: A bread made primarily from rye flour, which gives it a distinct flavor. It can be light or dark in color, and New York City delis use it to make some of their famous sandwiches.
- Ciabatta: An Italian bread with a crispy crust and a soft, airy interior. It is often used for making sandwiches or served alongside pasta dishes.
- Pita: A round, flatbread from the Middle East. It is characterized by its hollow interior, which can be filled with various ingredients to make sandwiches or used as a dipper.
- Focaccia: An Italian bread similar to pizza dough, typically topped with olive oil, herbs, and sometimes vegetables or cheese. It has a light and fluffy texture.
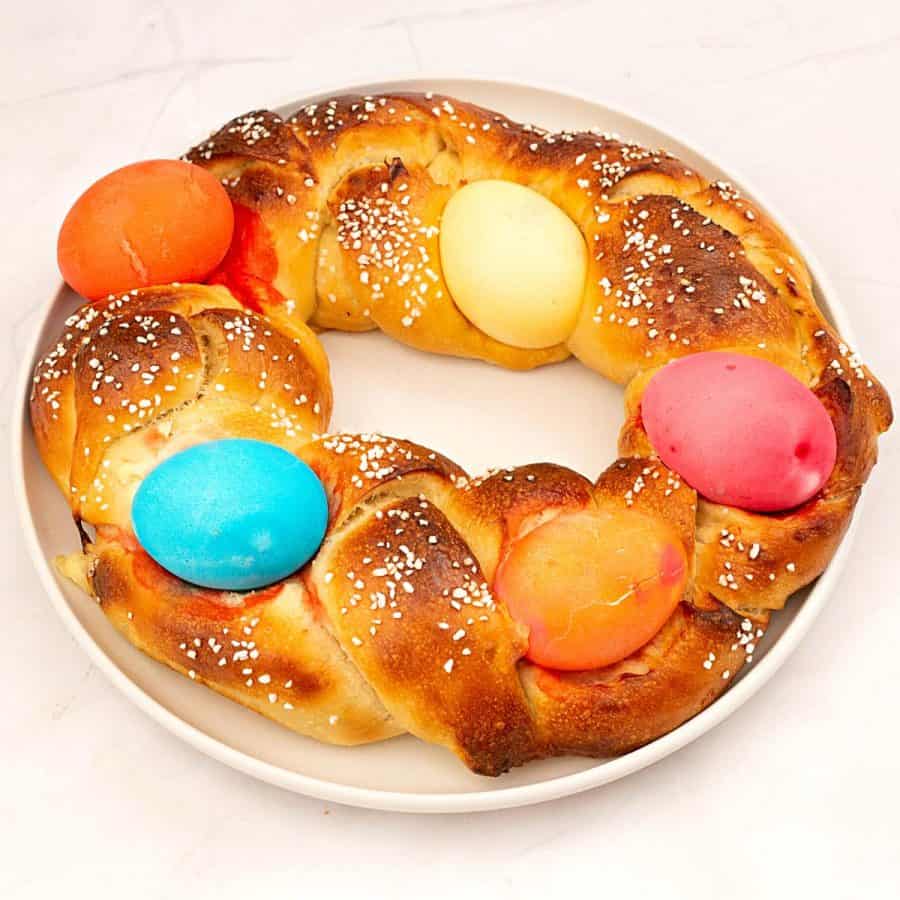
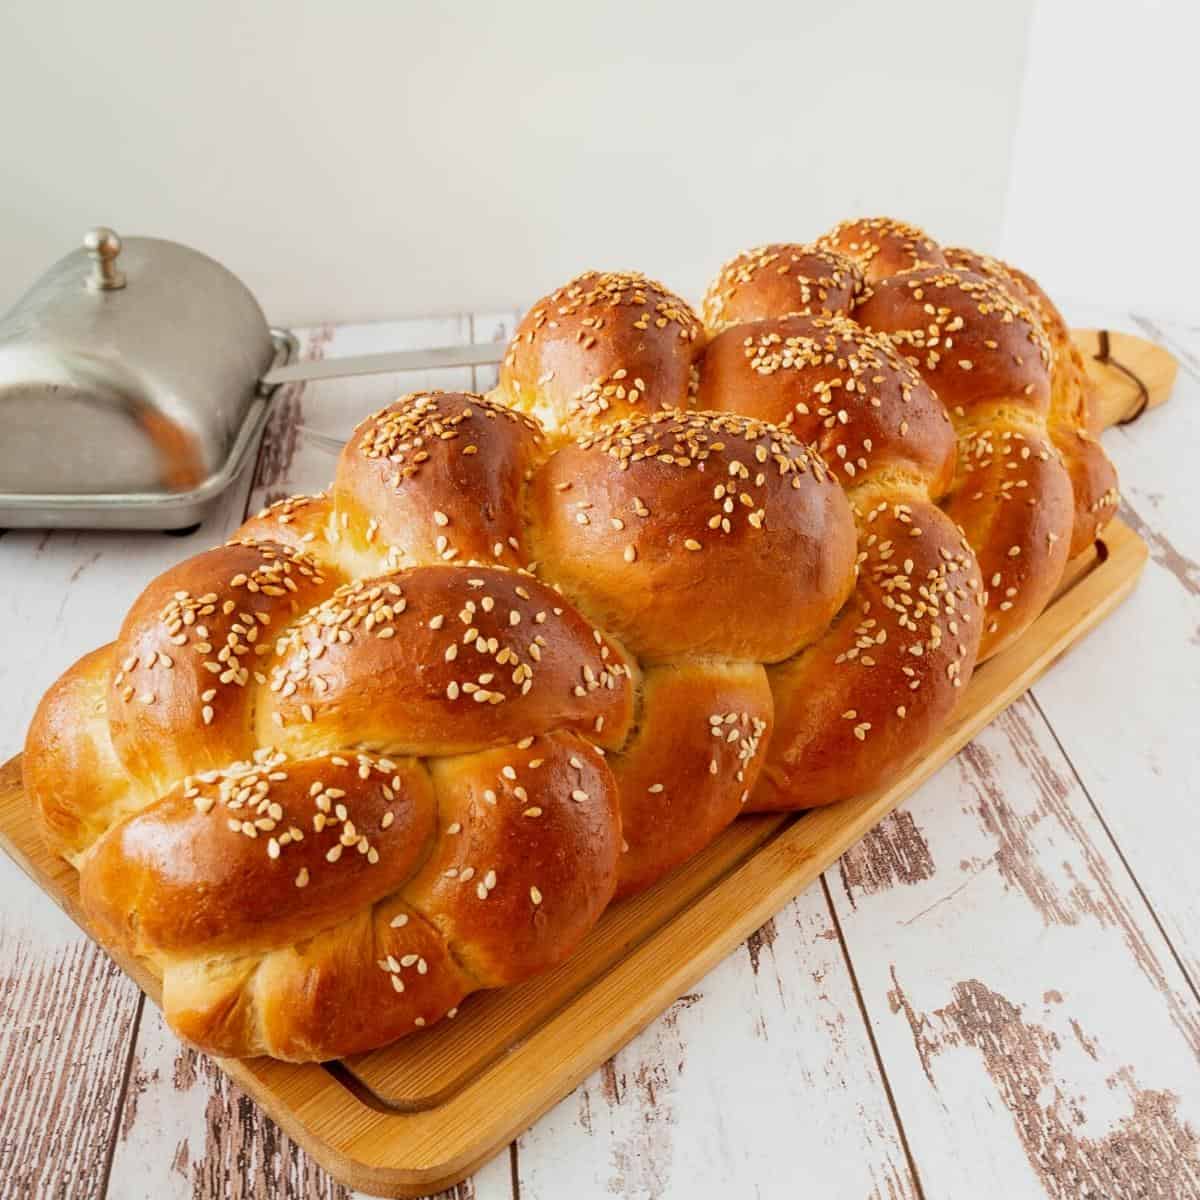
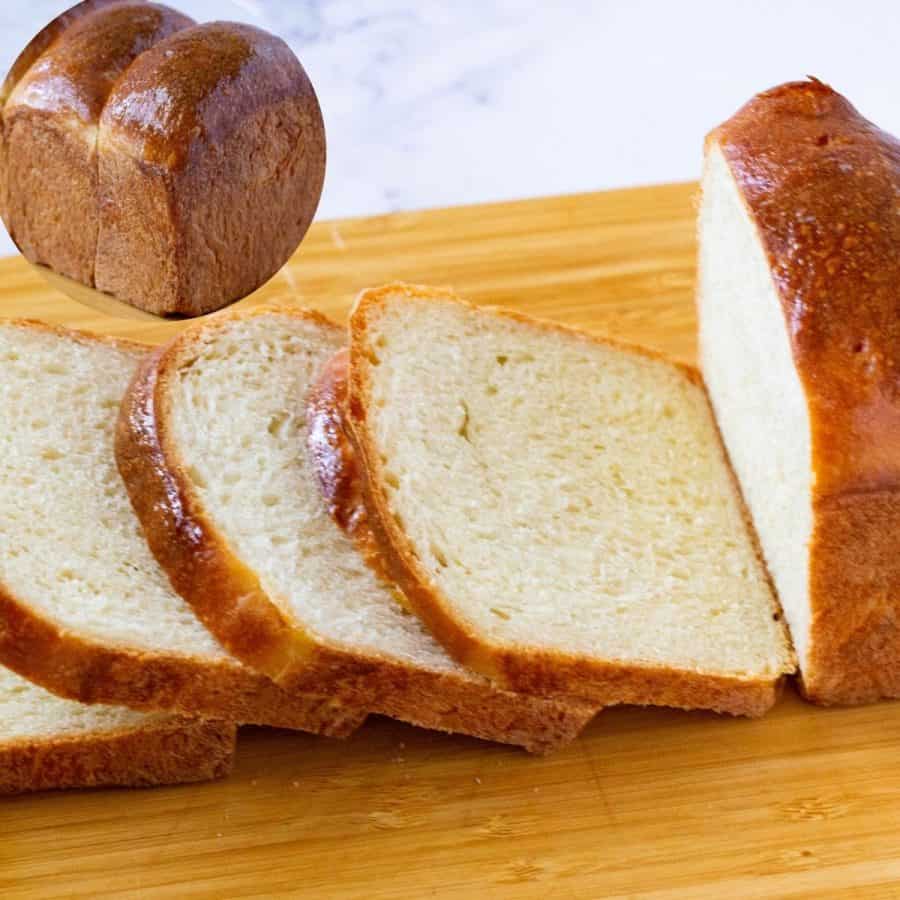
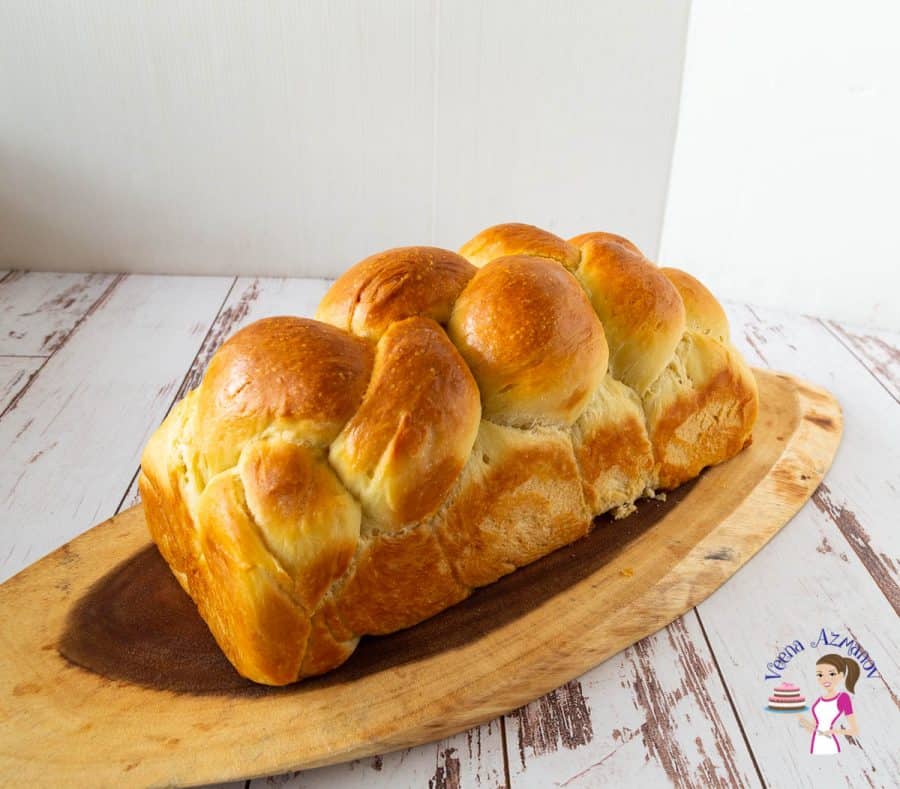
- Challah: A traditional Jewish bread made with eggs, giving it a rich flavor and a soft, slightly sweet taste. It is often braided and served on special occasions.
- Naan: A soft and fluffy Indian bread, typically made with wheat flour and baked in a tandoor (a clay oven). It is famous for accompanying curries and other Indian dishes.
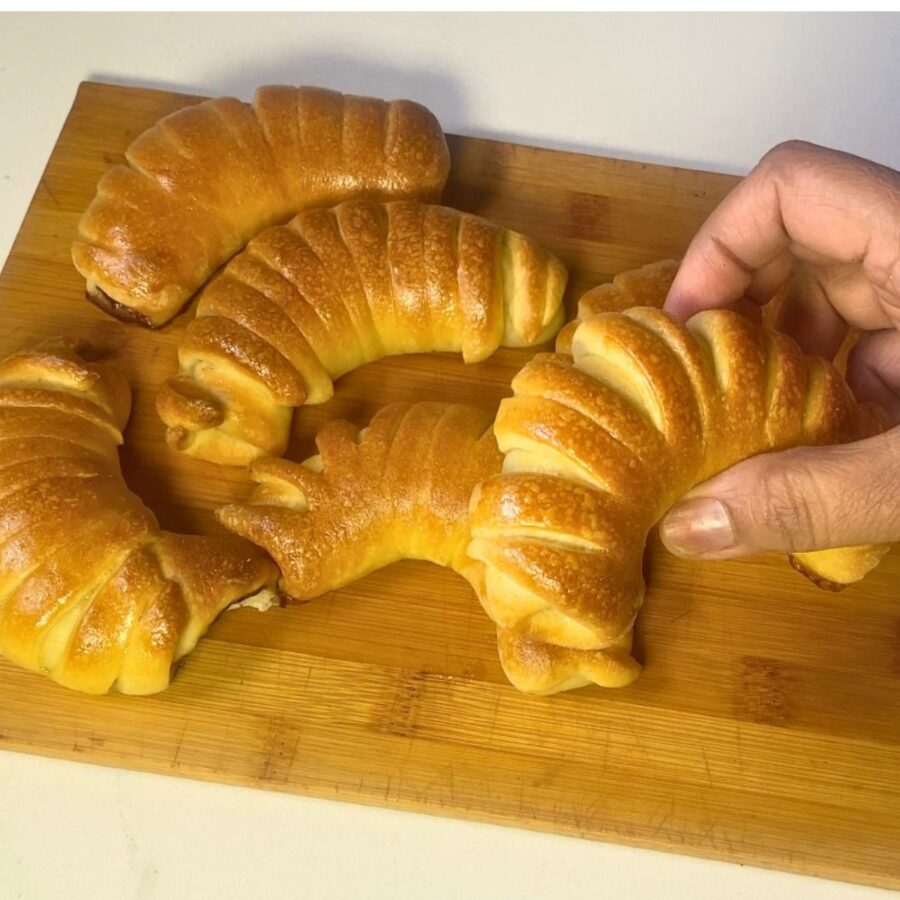
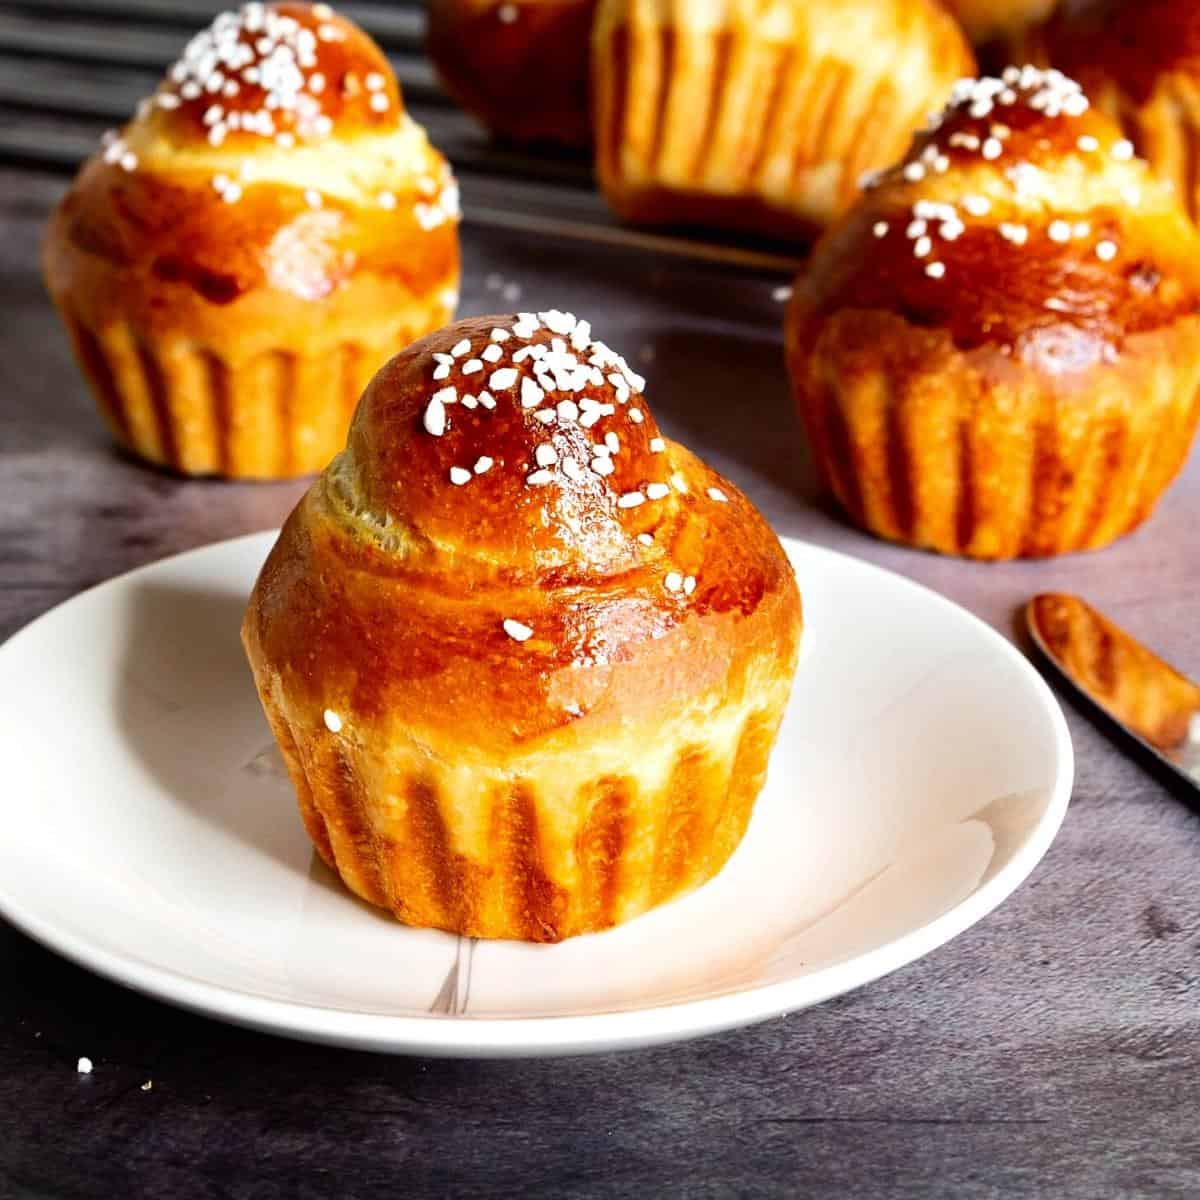
- Brioche: A French bread enriched with butter and eggs, resulting in a tender crumb and a slightly sweet taste. We commonly use it for making pastries and desserts.
These are just a few examples of the wide variety of bread types available. Different cultures and regions have their own unique bread recipes and traditions, making bread a versatile and delicious staple in many cuisines.


Frequently asked questions
Bread baking is a skill that develops with practice. So don’t let the initial results discourage you and keep experimenting and learning from each baking experience.
Starting with simple bread recipes is a great way to begin. Look for recipes that require basic ingredients and straightforward techniques. White bread or a simple whole wheat bread recipe can be a good starting point.
I commonly use all-purpose flour or bread flour for bread baking. All-purpose flour works well for most bread recipes, while bread flour has higher protein content, which helps develop gluten and gives bread a chewier texture.
Properly kneaded dough should be smooth, elastic, and spring back when lightly pressed. You can also perform the windowpane test: Take a small piece of dough and gently stretch it. If it stretches without tearing and becomes thin enough to see light through it, the dough is adequately kneaded.
The rising time can vary depending on the recipe, room temperature, and yeast activity. As a general guideline, the dough should double in size during the first rise and increase by about one and a half times during the second rise. This usually takes around 1 to 2 hours for each rise.
Yes, you can use instant yeast as a substitute for active dry yeast. However, you can also add instant yeast directly to the dry ingredients without proofing in water, unlike active dry yeast. Adjust the amount of yeast accordingly as per the recipe.
To achieve a crispy crust, you can try the following techniques: baking bread at a higher temperature, using steam in the oven during the initial baking phase, and baking on a preheated baking stone or preheated baking sheet.
It is best to store homemade bread in a paper bag or bread box to maintain its crust. If storing for more than a day or two, wrap it in plastic wrap or foil and store at room temperature. Alternatively, you can slice the bread and freeze it for longer-term storage.
Several factors can contribute to dense bread, including insufficient kneading, overproofing, too much flour, or not enough yeast. Ensure you follow the recipe instructions accurately, measure ingredients properly, and pay attention to kneading and proofing times.
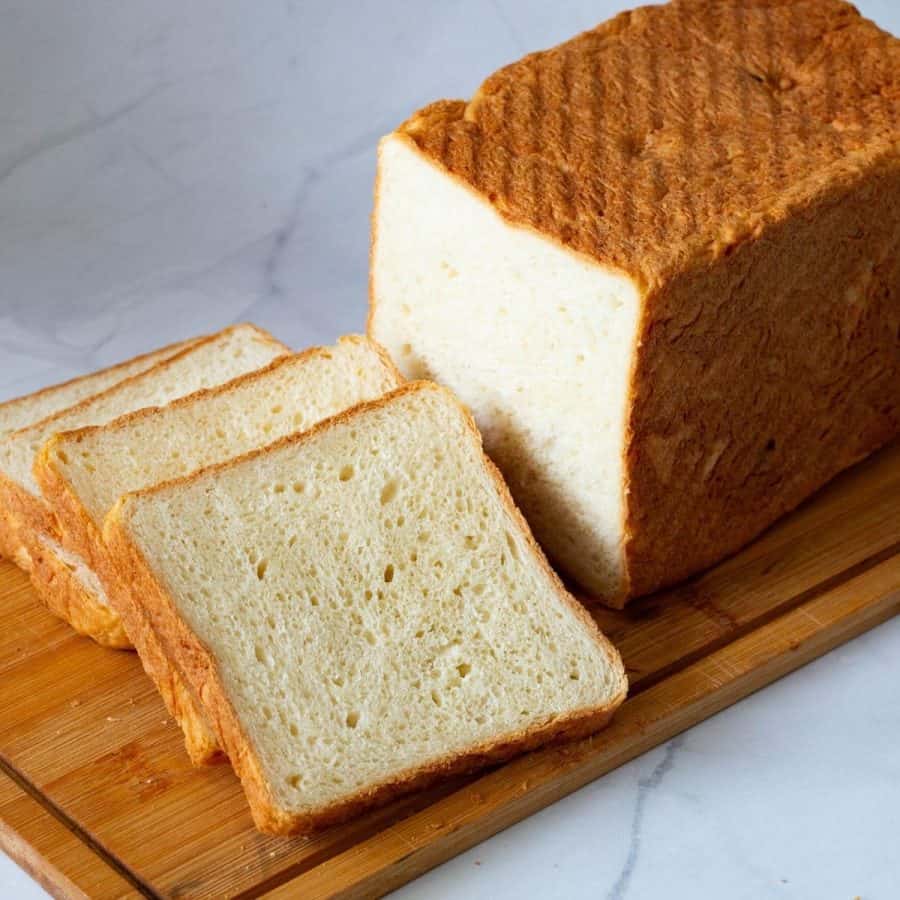
What is the simplest bread to make?
This basic white bread recipe is a great starting point for beginners and produces a delicious homemade loaf. Feel free to experiment and add variations such as seeds, herbs, or whole wheat flour to customize the bread to your taste. However, it’s important to note that baking is also an art, and experience and experimentation play a significant role in achieving the perfect loaf of bread. Enjoy your freshly baked bread!
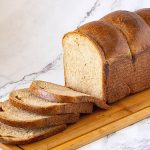
Basic White Bread Recipe
This basic white bread recipe is a great starting point for beginners and produces a delicious homemade loaf. Feel free to experiment and add variations such as seeds, herbs, or whole wheat flour to customize the bread to your taste. Enjoy your freshly baked bread!
Video
Ingredients
- 500 g (4 cups) Bread flour or all-purpose flour
- 8 g (2 tsp) Instant dry yeast
- 8 tg (2 tsp) Kosher salt
- 28 g (2 tbsp) Granulated sugar
- 360 ml (1½ cups) Warm water (100℉)
- 28 g (2 tbsp) Unsalted butter melted (optional, for added richness and flavor)
Method
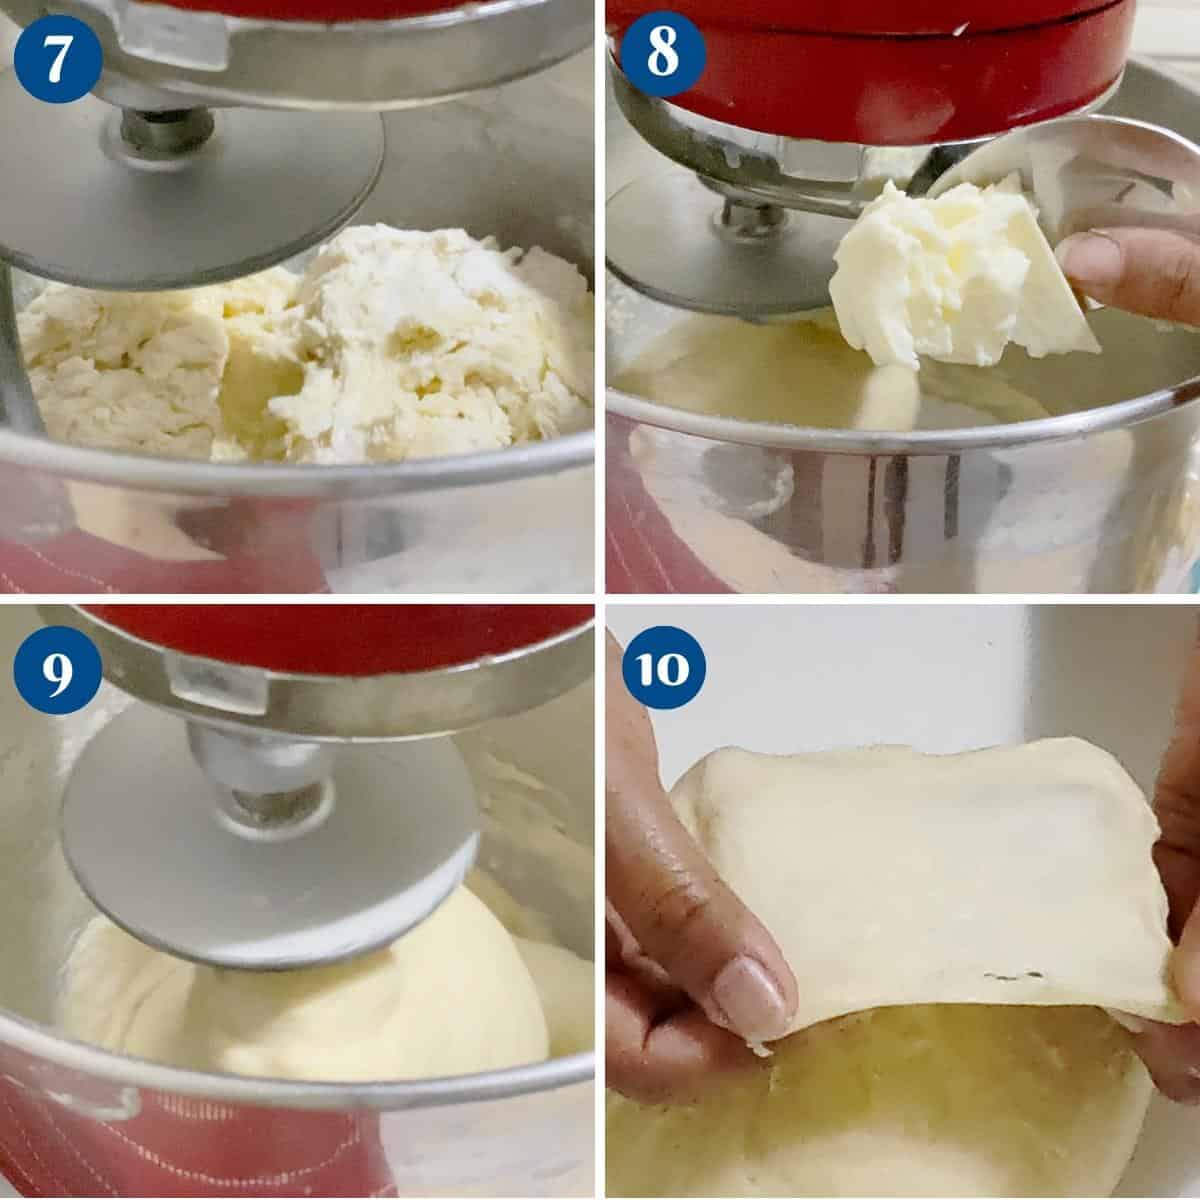
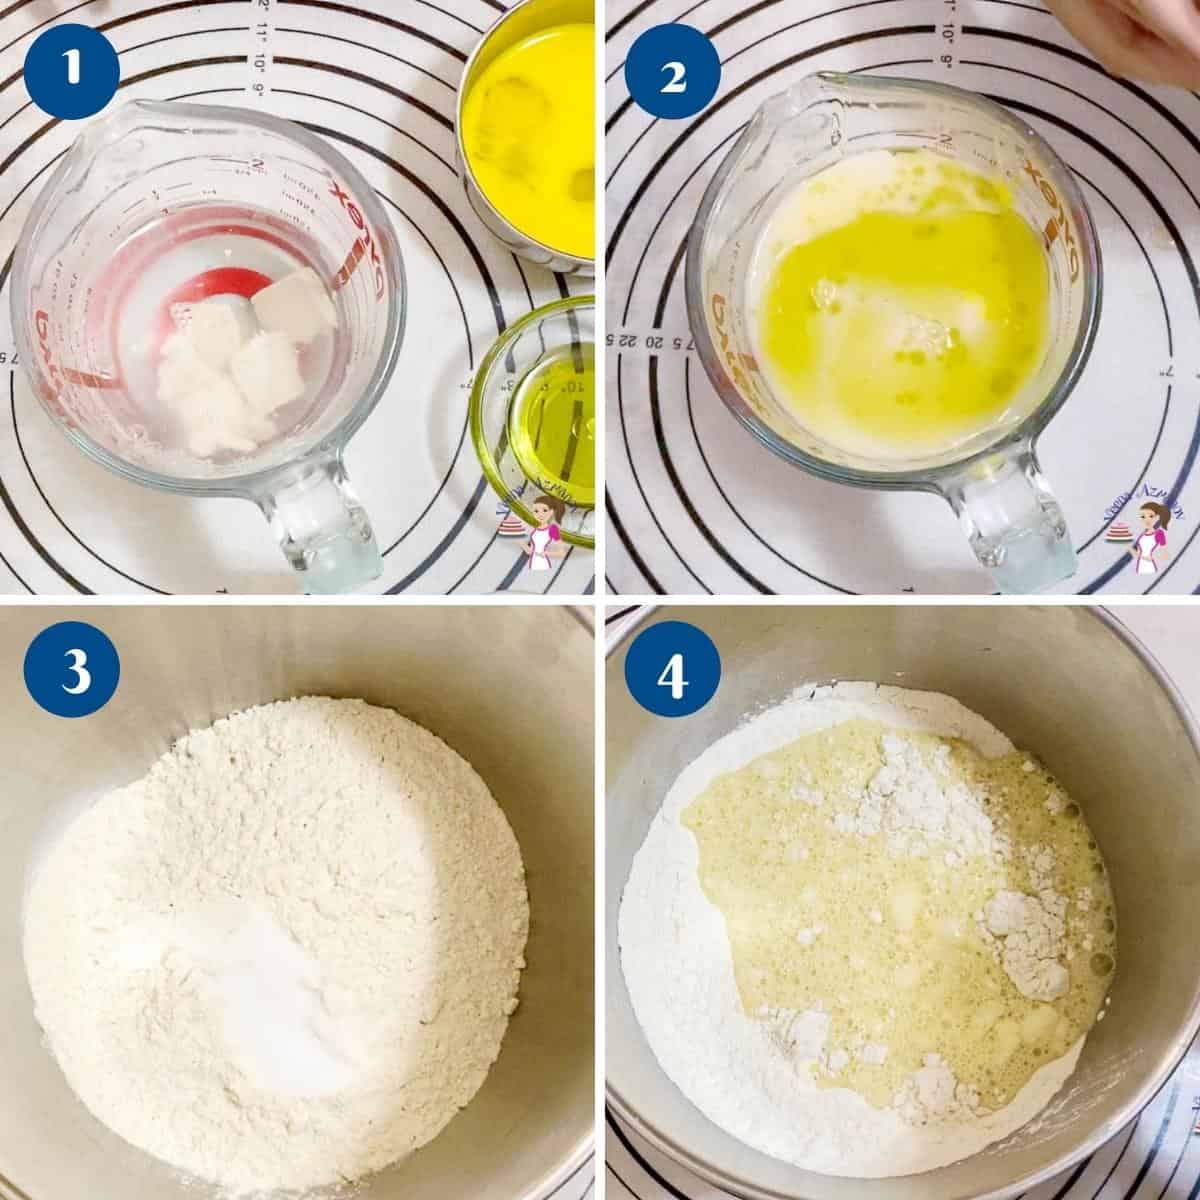
- Combine – In a large mixing bowl of a stand mixer on medium speed, combine the flour, instant yeast, salt, and sugar. Stir the dry ingredients together until well combined.500 g Bread flour, 8 g Instant dry yeast, 8 tg Kosher salt, 28 g Granulated sugar
- Water – Make a well in the center of the dry ingredients and pour in the warm water. If using melted butter, add it to the bowl as well. Stir the mixture with a wooden spoon or dough whisk until a shaggy dough forms.360 ml Warm water, 28 g Unsalted butter
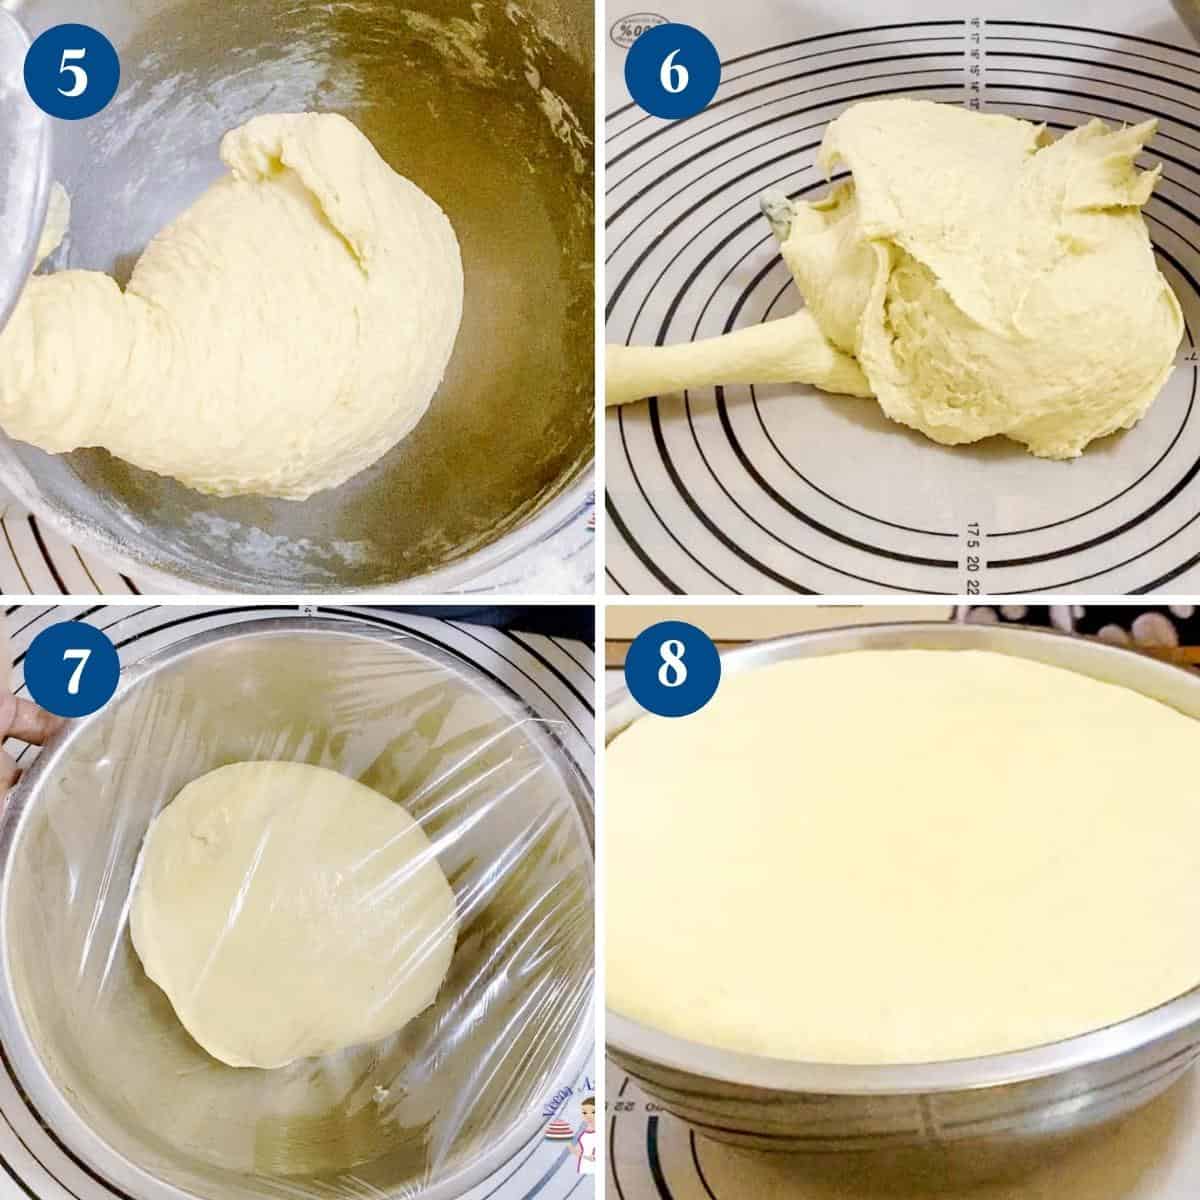
- Knead – Then, knead on medium speed for 12 to 15 minutes until smooth and elastic. Pro tip – Or knead by hand on a lightly floured surface for about 15 to 20 minutes.
- Rise – Shape the dough into a ball and place it back into the mixing bowl. Cover the bowl with a clean kitchen towel or plastic wrap and let the dough rise in a warm, draft-free area for about 1 to 1.5 hours, or until it has doubled.
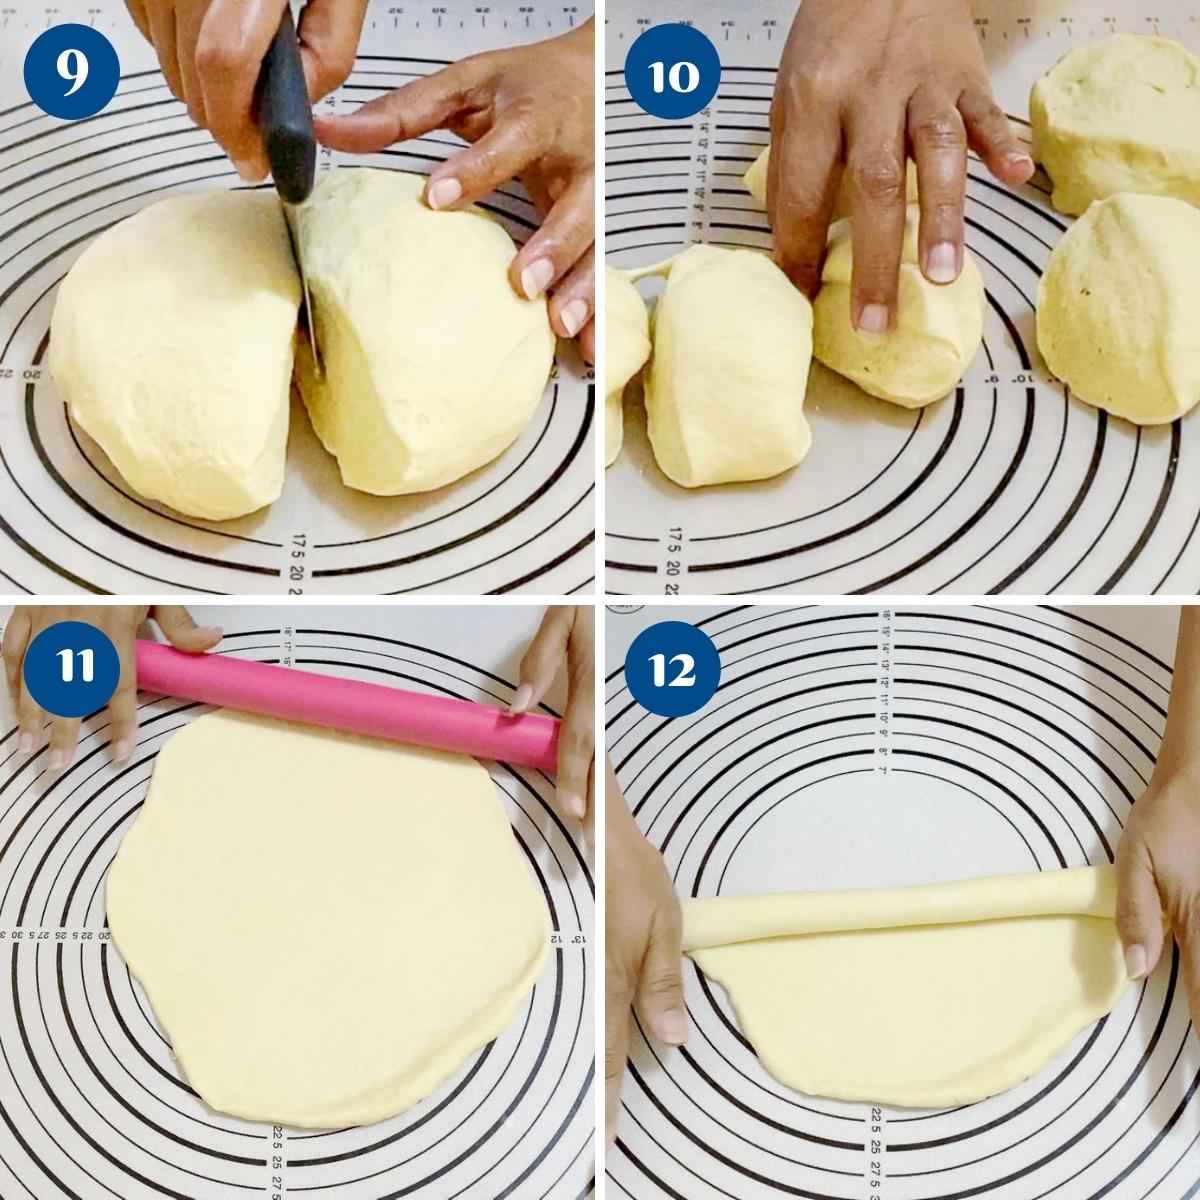
- Punch – Once the dough has risen, punch it down gently to release the air. Turn it onto a lightly floured surface and shape it into a loaf by flattening the dough into a rectangle and tightly rolling it up, starting from one of the shorter ends. Pinch the seams to seal.
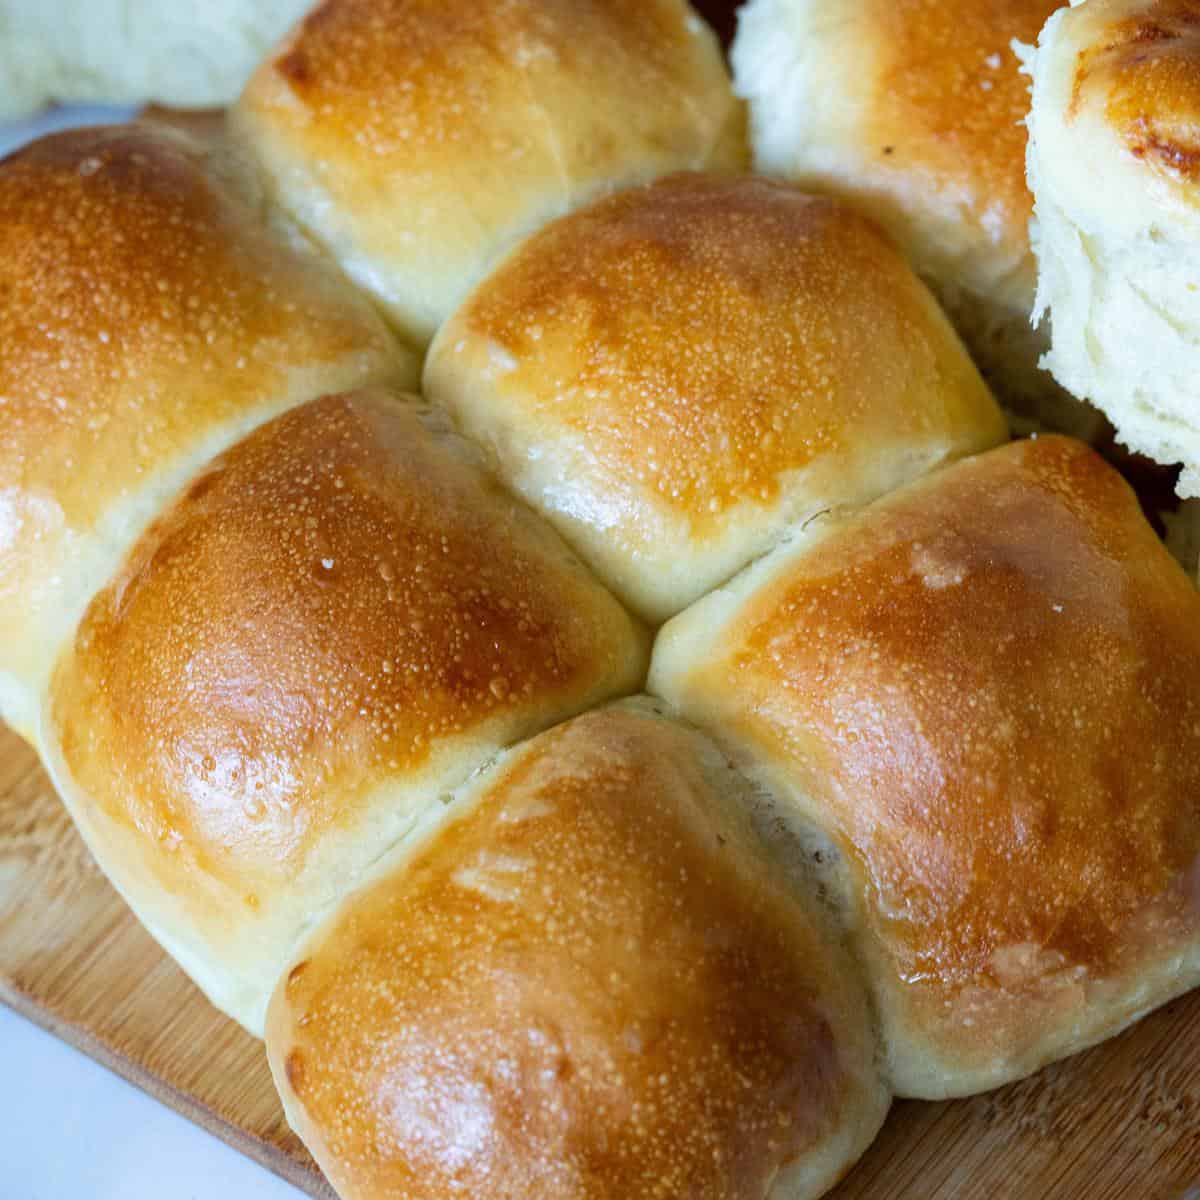
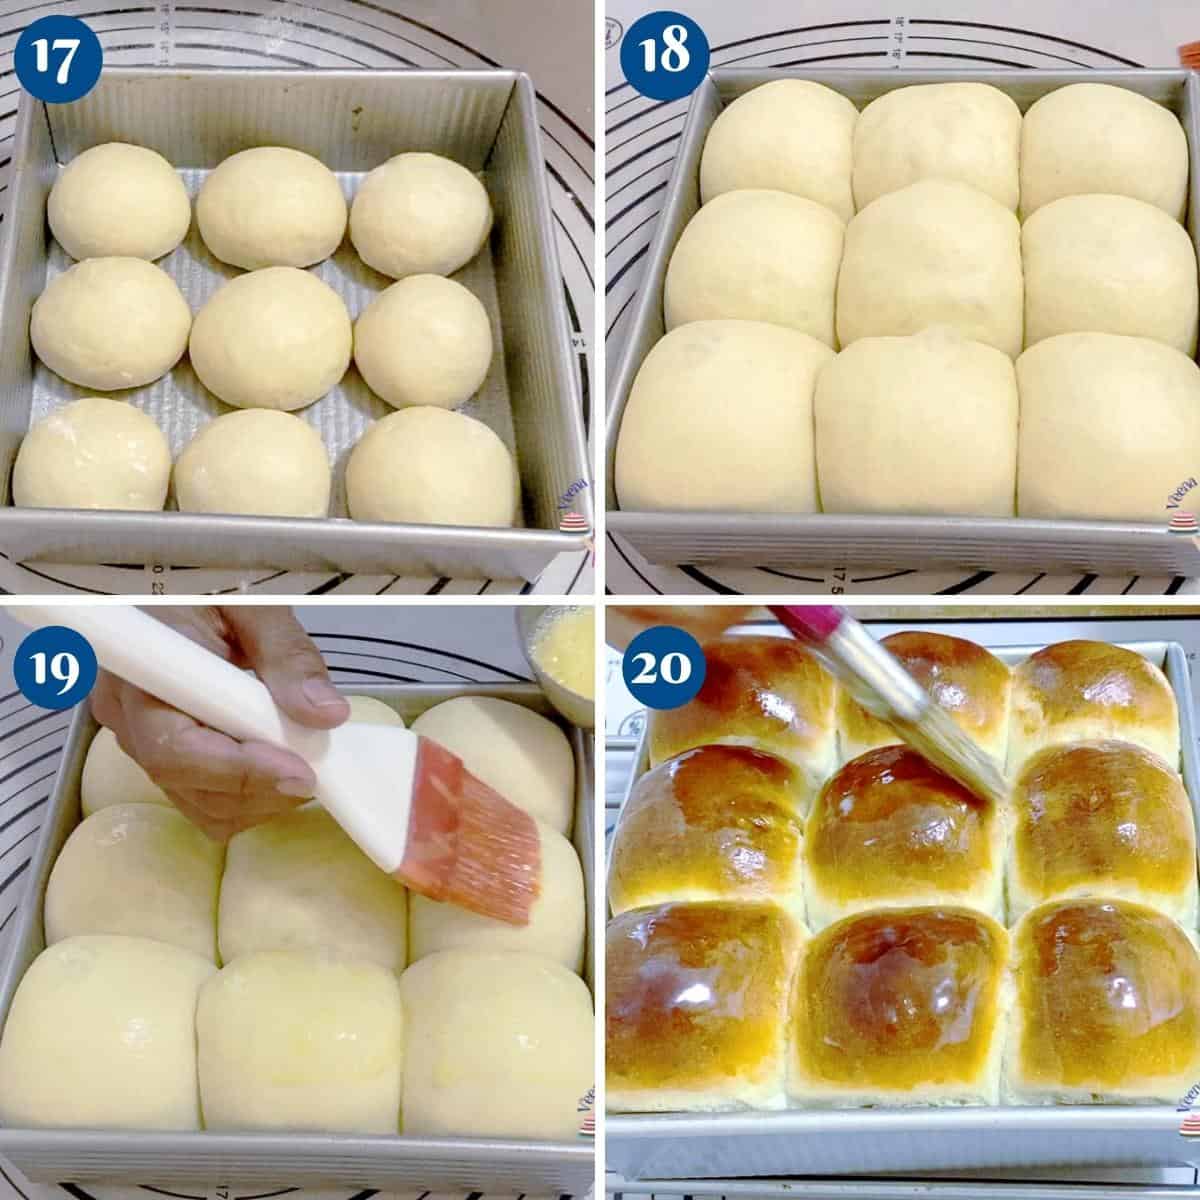
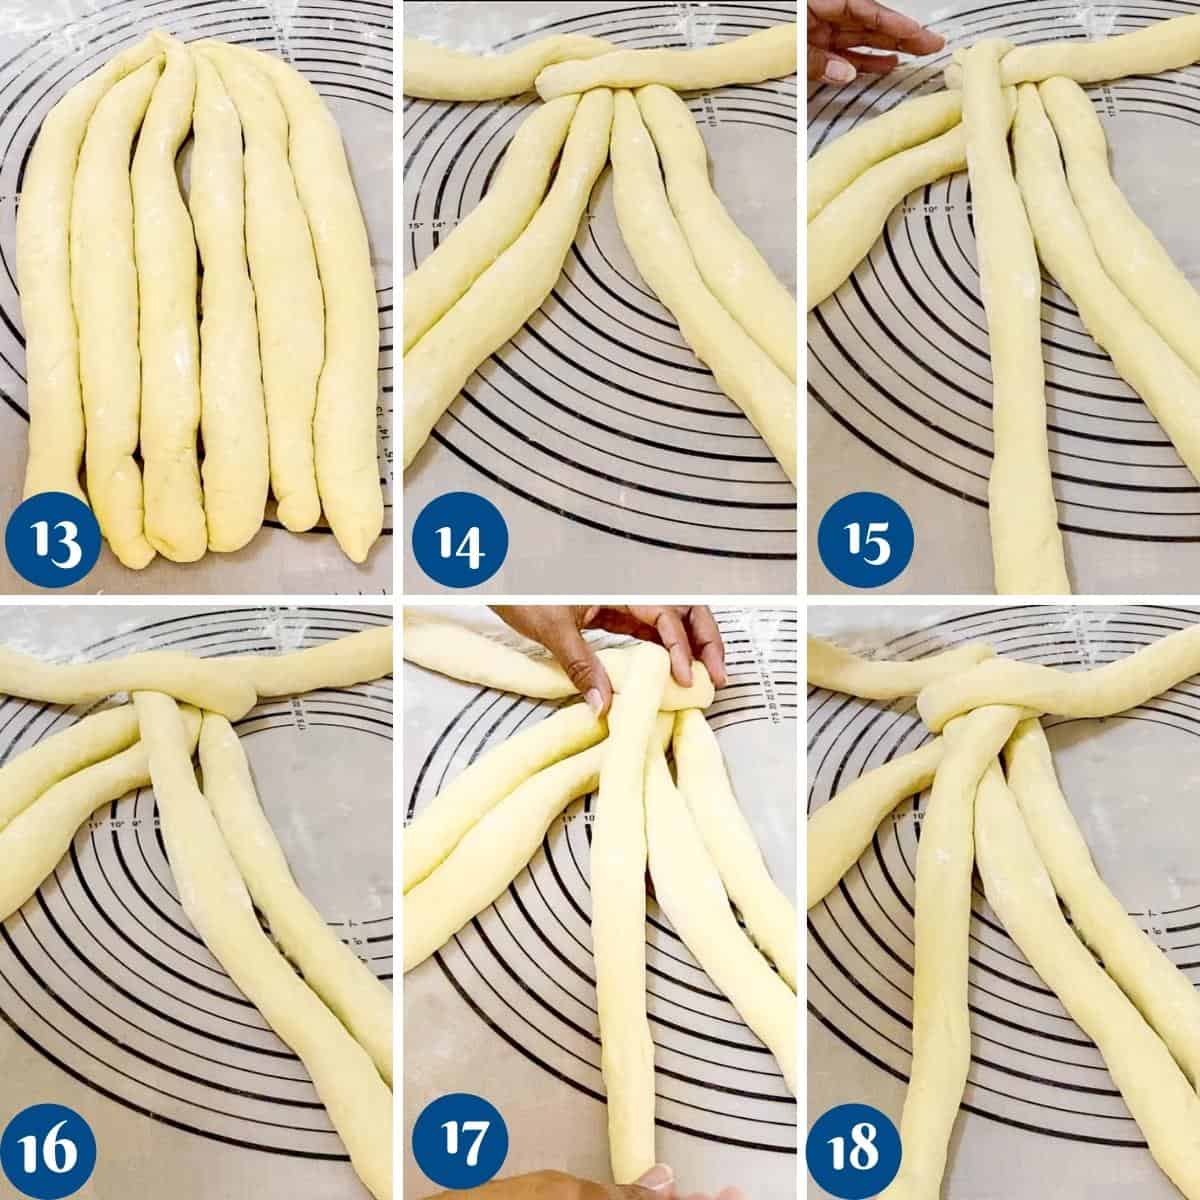
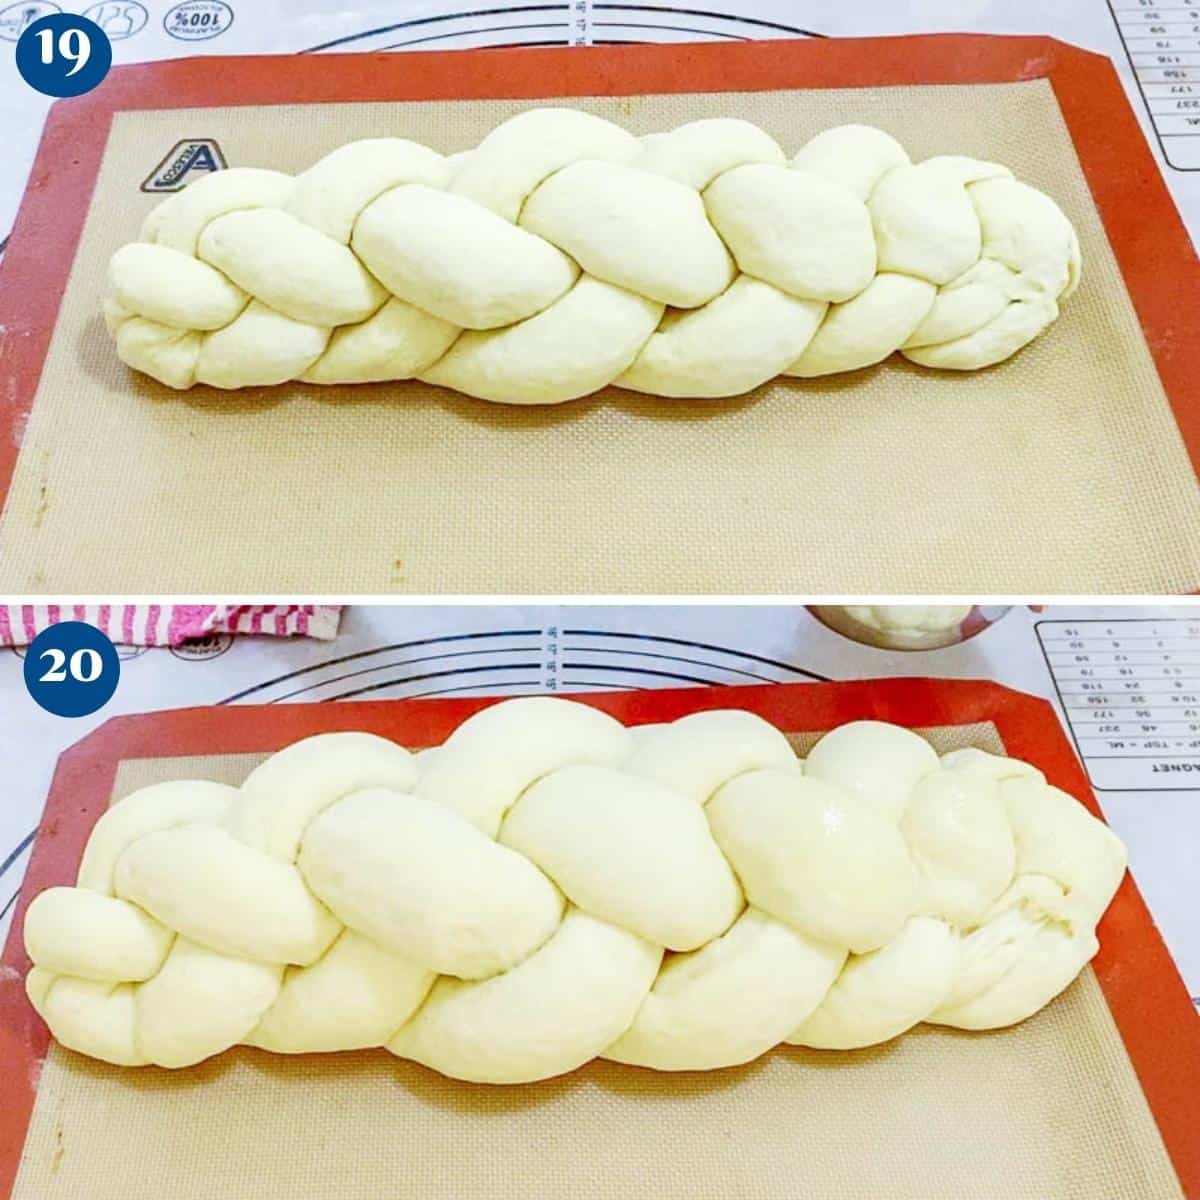
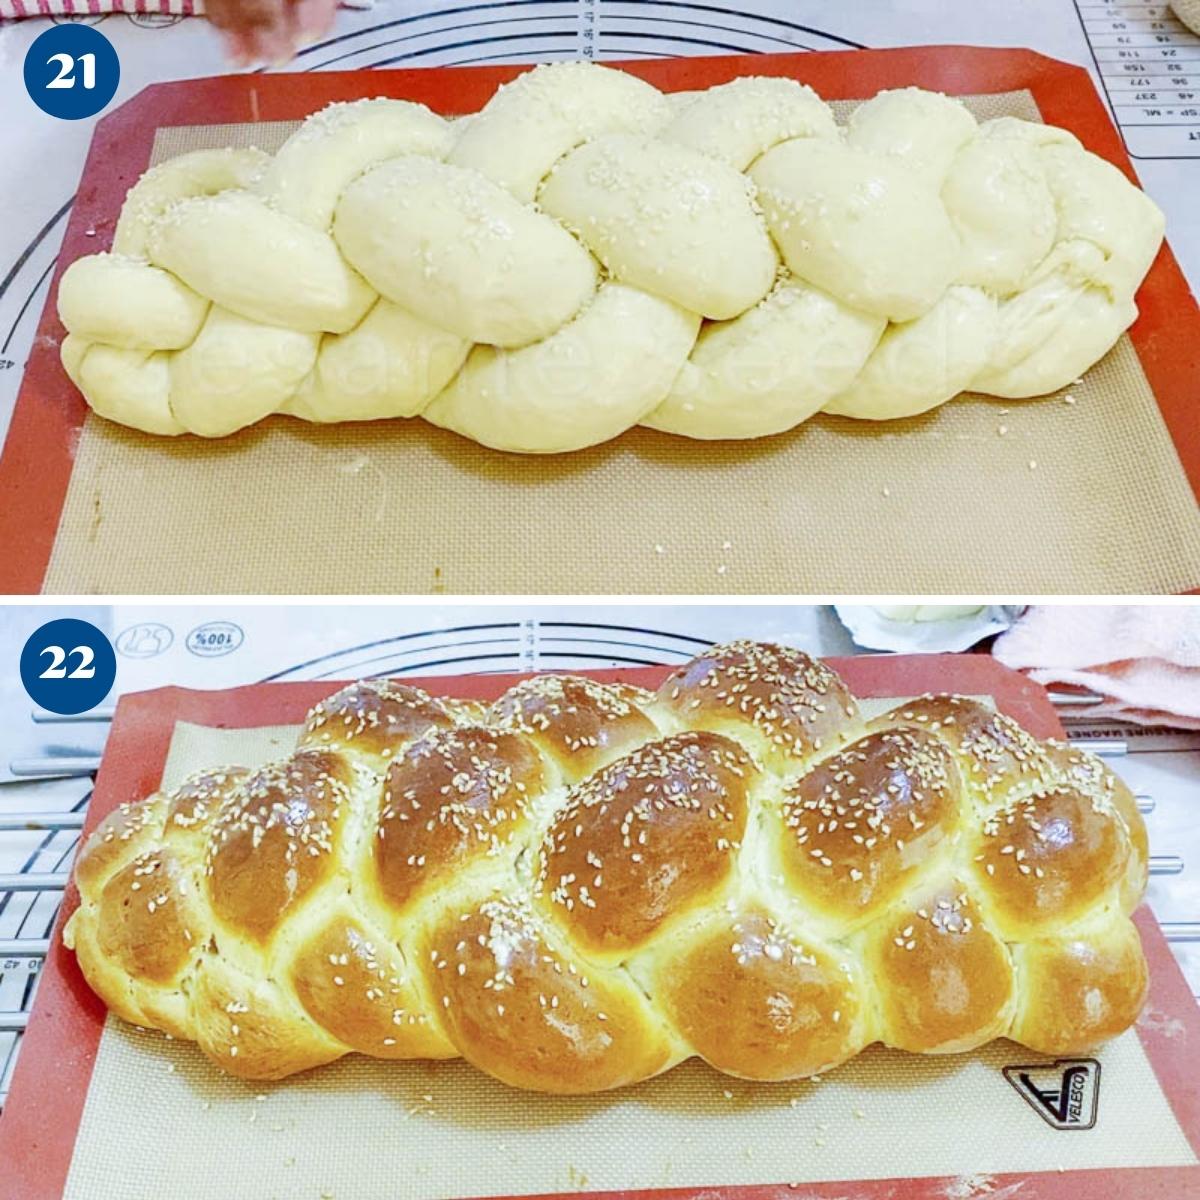
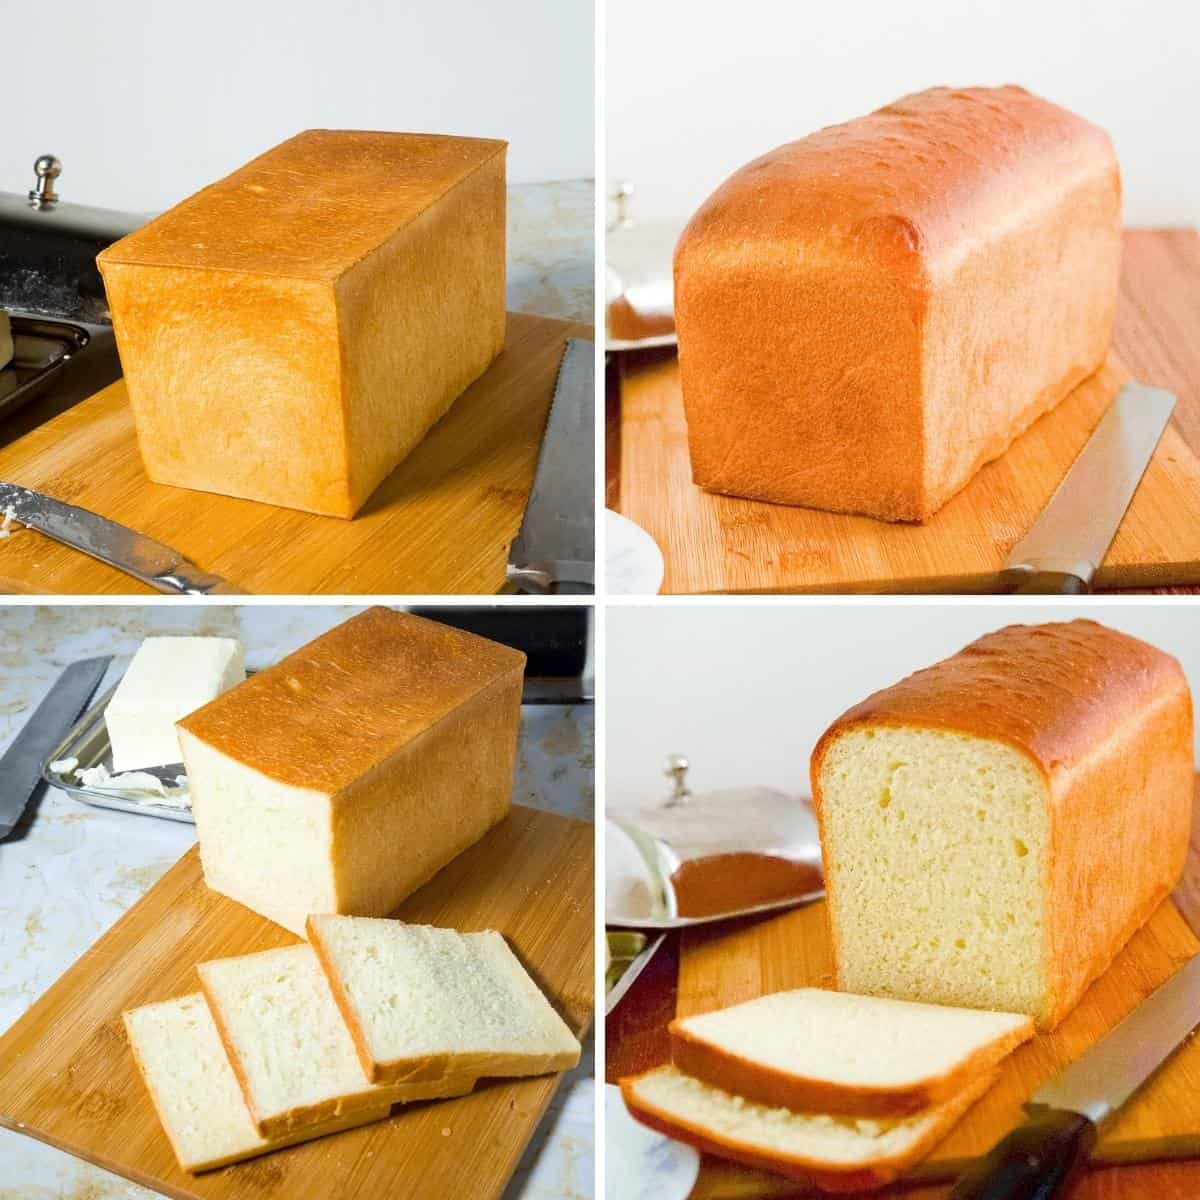
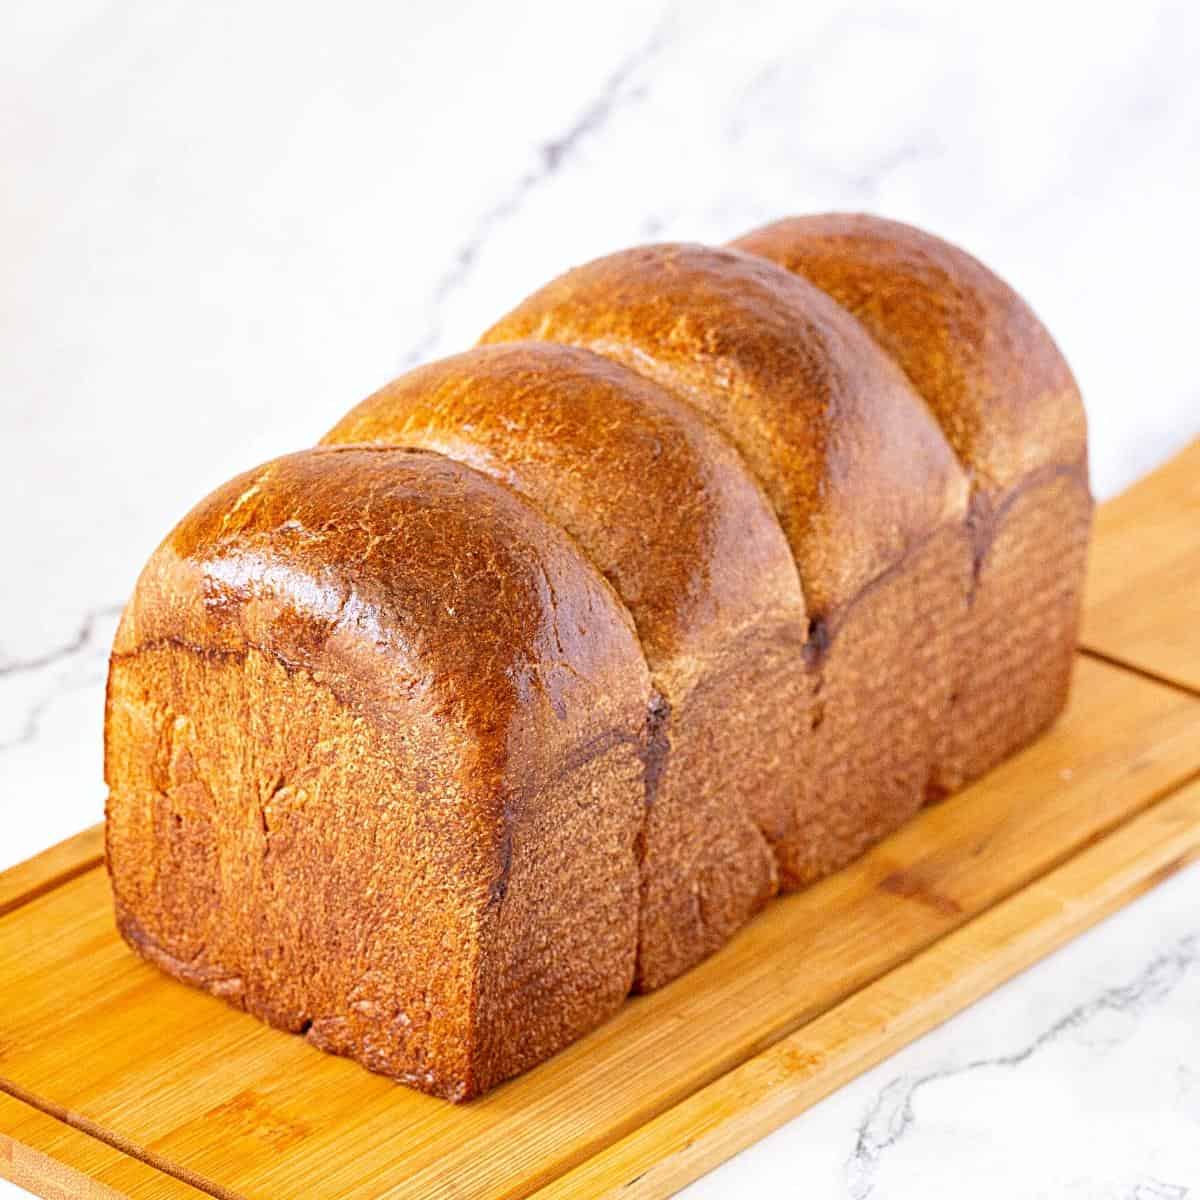
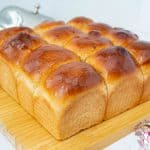
- Shape – Loaf – Place the shaped dough into a greased 9×5-inch (23×13 cm) loaf pan, seam side down. Dinner rolls – Divide the dough into 9 portions. Shape each into a ball and place them in a 9 x 9-inch square greased baking pan. Challah – Divide the dough into 9 portions and roll each into a rope. Shape each into a single-braid challah and place them on a greased parchment paper-lined baking tray.
- Proof – Cover the bread with the towel or plastic wrap and let the dough rise again for 30 to 45 minutes, or until it has risen to the top.
- Oven – Preheat your oven to 375°F (190°C) during the last 10 minutes of the second rise.
- Bake – Remove the cover once the dough has risen and brush with egg wash. Place the bread in the preheated oven on the middle rack. Bake for 30 to 35 minutes until the bread is golden brown on top and sounds hollow when tapped on the bottom.
- Cool – Remove the bread from the oven and let it cool in the pan for a few minutes. Then transfer the loaf to a wire rack to cool completely before slicing.
- This dough can also make a quick pizza Enriched pizza – divide the dough into 2 and leave to rise on a floured baking surface. Pro tip– the pizza dough does not need to be proofed. You can shape and bake in a well-preheated oven at 425℉/220℃/Gas Mark 6
Notes
- Measure all ingredients ahead of time, so you don’t forget anything at the last minute.
- For accuracy, use a weight measure for the ingredients because every cup of flour can weigh differently depending on how you fill it.
- The liquid (milk or water) must be warm (not hot) – about 110F. If the liquid is too hot, it will kill the yeast. Similarly, if the liquid is too cold, it will not activate the yeast.
- Most yeasts have a long shelf life, but they can get ruined. Always check the expiry date on the yeast. If unsure, combine the yeast with water/milk, sugar/honey, and oil/butter from the recipe and let stand 5 minutes. If it gets foamy the yeast is good to go. If not, it’s best to buy fresh yeast or check the temperature of the milk.
- Keep salt away from yeast as it can kill the yeast. I like to combine salt with the flour then add the yeast mixture.
- A soft loose well-hydrated dough is not necessarily a bad thing. Often, it will give you soft puffy bread. So, don’t be tempted to add more flour than mentioned in the recipe.
- Kneading is key to making good bread. While kneading by hand can be therapeutic, using a stand mixer is easier and quicker.
- Leave the dough at room temperature to rise until double in volume. While not recommended, when in haste, you can place it in a warm (30 C / 75 F- not hotter) oven this will expedite the rise.
- Bread does not have to be time-consuming. You can leave the dough in the fridge to rise for a few hours (even overnight) while you go about your chores. A slow rise will give more flavor to the bread.
- Always preheat the oven for at least 10 minutes before you place bread in or the low temperature will spread the dough too much.
Nutrition
Tried this recipe?
Mention @veenaazmanov_kitchen or tag #veenaazmanovkitchen!you may also like
- 10 Best Gifts for Bread Bakers
- 15+ Beginner Bread Recipes for Everyday Baking
- Learn Bread Baking at Home • Step by Step 😄
- Homemade Ciabatta Recipe
- Mini Sausage Rolls
- Homemade Ciabatta Recipe
Don’t lose this recipe! Save it for Later!
📌 Save this Recipe for later on Pinterest so you can easily find it again.
⭐ Add Veena Azmanov Kitchen to your Google Preferred Sources.
It helps Google show you more of our recipes.
📧 Subscribe for new recipes delivered to your inbox.
🎥 Follow us for more recipes


done day 2
Jour 2 terminé! Très intéressant!
Day two completed. Easy directions, soft dough and great bake. My husband loved this!