Delicious Sourdough Ciabatta
 Prep Time 6 hours Cook Time 55 minutes Total Time 14 hours 55 minutes
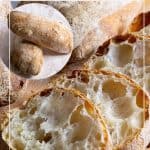
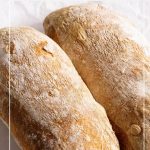
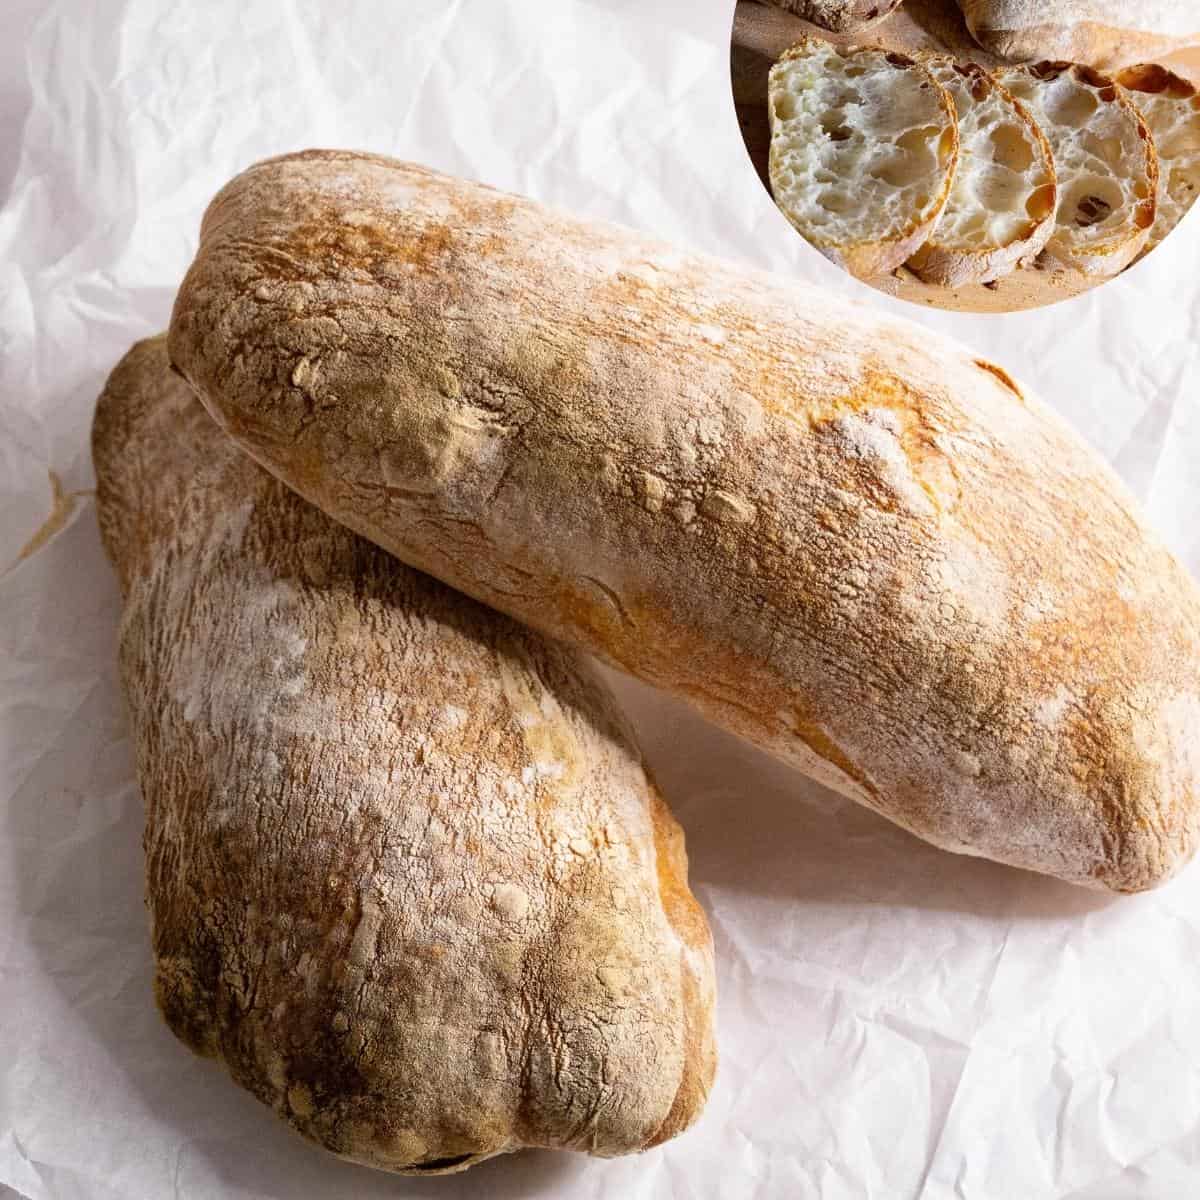
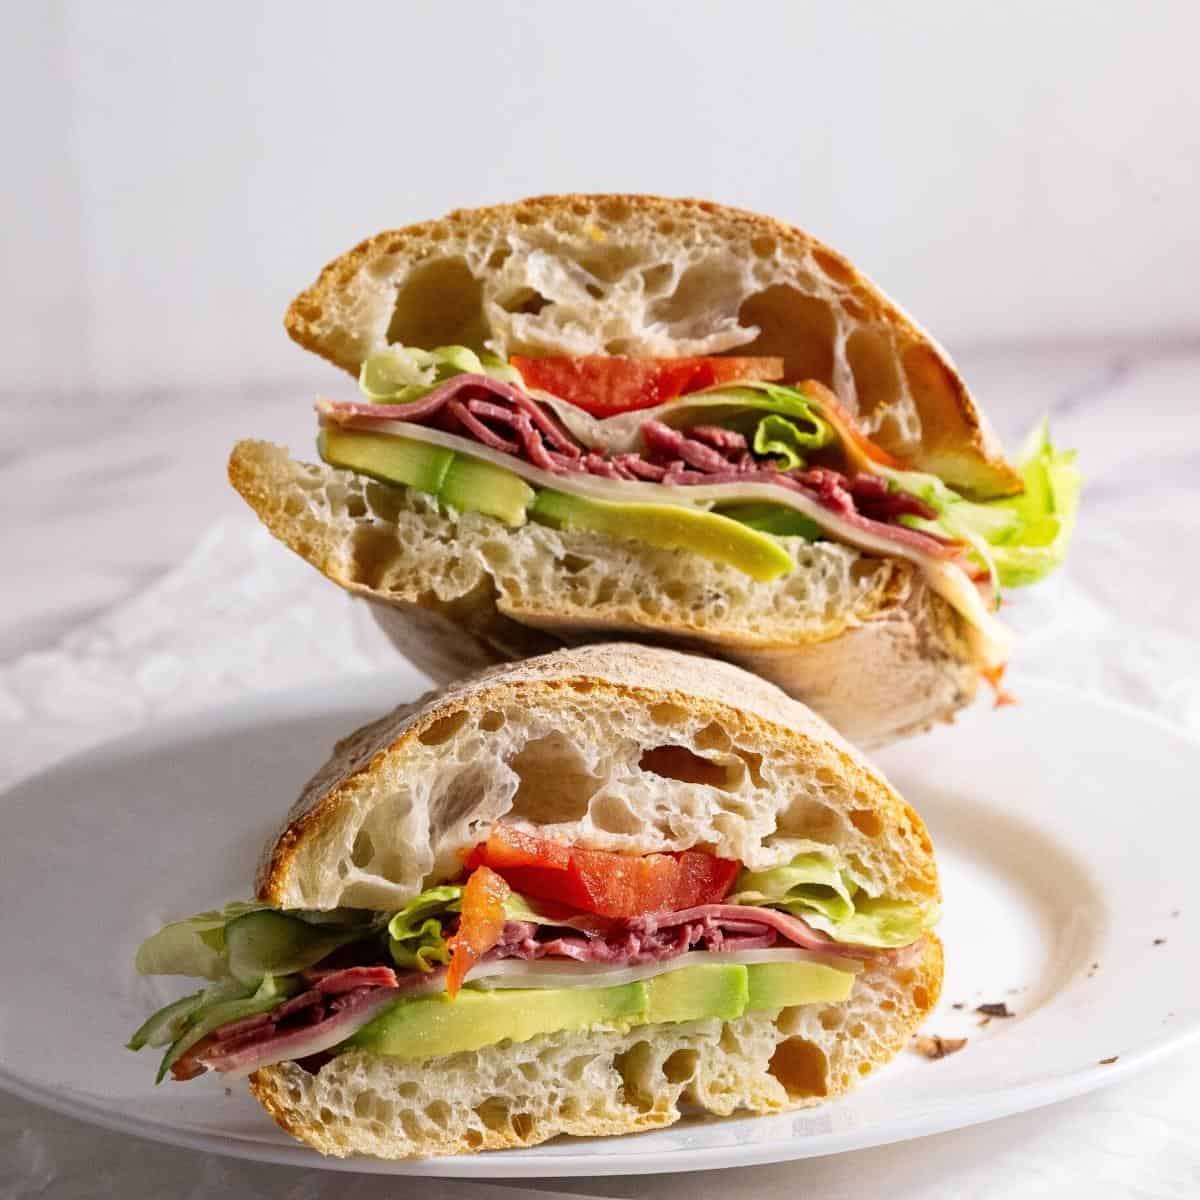
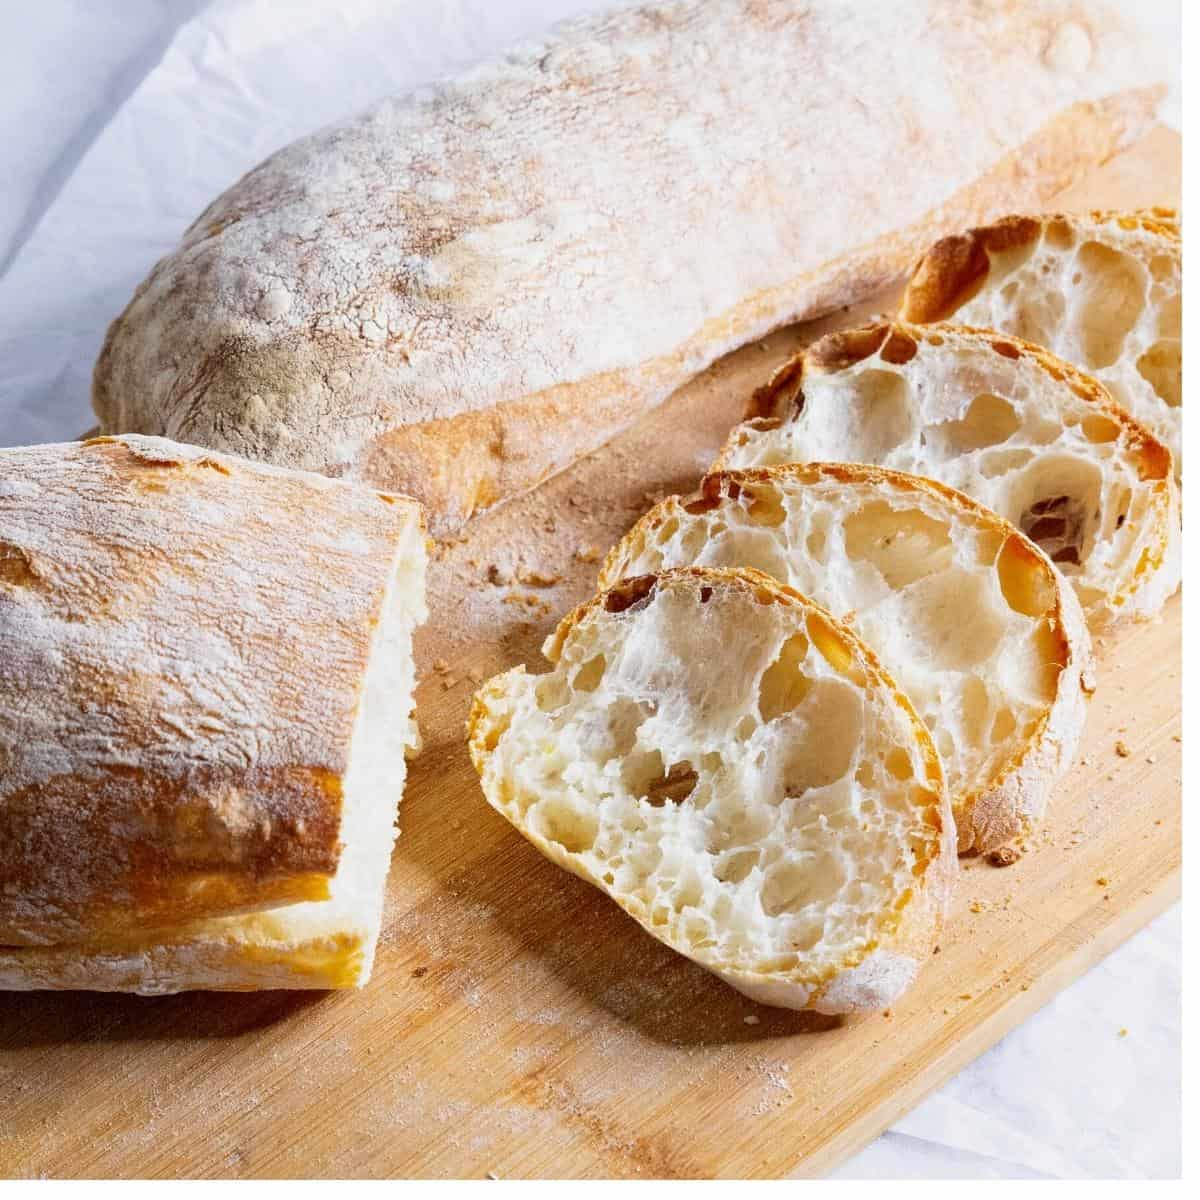
Ciabatta is a traditional Italian bread that’s perfect for sandwiches. With just a few minutes of hands-on time, this sourdough ciabatta boasts a crispy outside and soft, chewy inside.
Using sourdough starter to make ciabatta bread can elevate its flavor, texture, and nutritional profile. The natural fermentation process of sourdough adds depth and complexity to the flavor of the bread, giving it a slightly tangy taste that complements the chewy texture of ciabatta.
Sourdough also helps improve the texture of ciabatta, contributing to its characteristic large, irregular holes and chewy crumb. The long fermentation process of sourdough helps break down gluten and phytic acid, making the bread easier to digest and potentially increasing its nutritional value.
Overall, using sourdough starter in ciabatta bread can enhance its flavor, texture, and nutritional profile, making it a popular choice for home bakers looking to create a more flavorful and wholesome loaf.
Why make this ciabatta
- Flavor: The long fermentation of the sourdough starter enhances the bread’s flavor, giving it a complex, delicious taste.
- Texture: Using sourdough starter helps create a chewy texture with large, irregular holes, which is characteristic of authentic ciabatta bread.
- Digestibility: The fermentation process of sourdough can also make the bread easier to digest, especially for those sensitive to gluten.
- Versatility: Ciabatta bread made with sourdough can be used in a variety of dishes, from sandwiches to bruschetta, adding a delicious and unique flavor.

Ingredients and substitutes
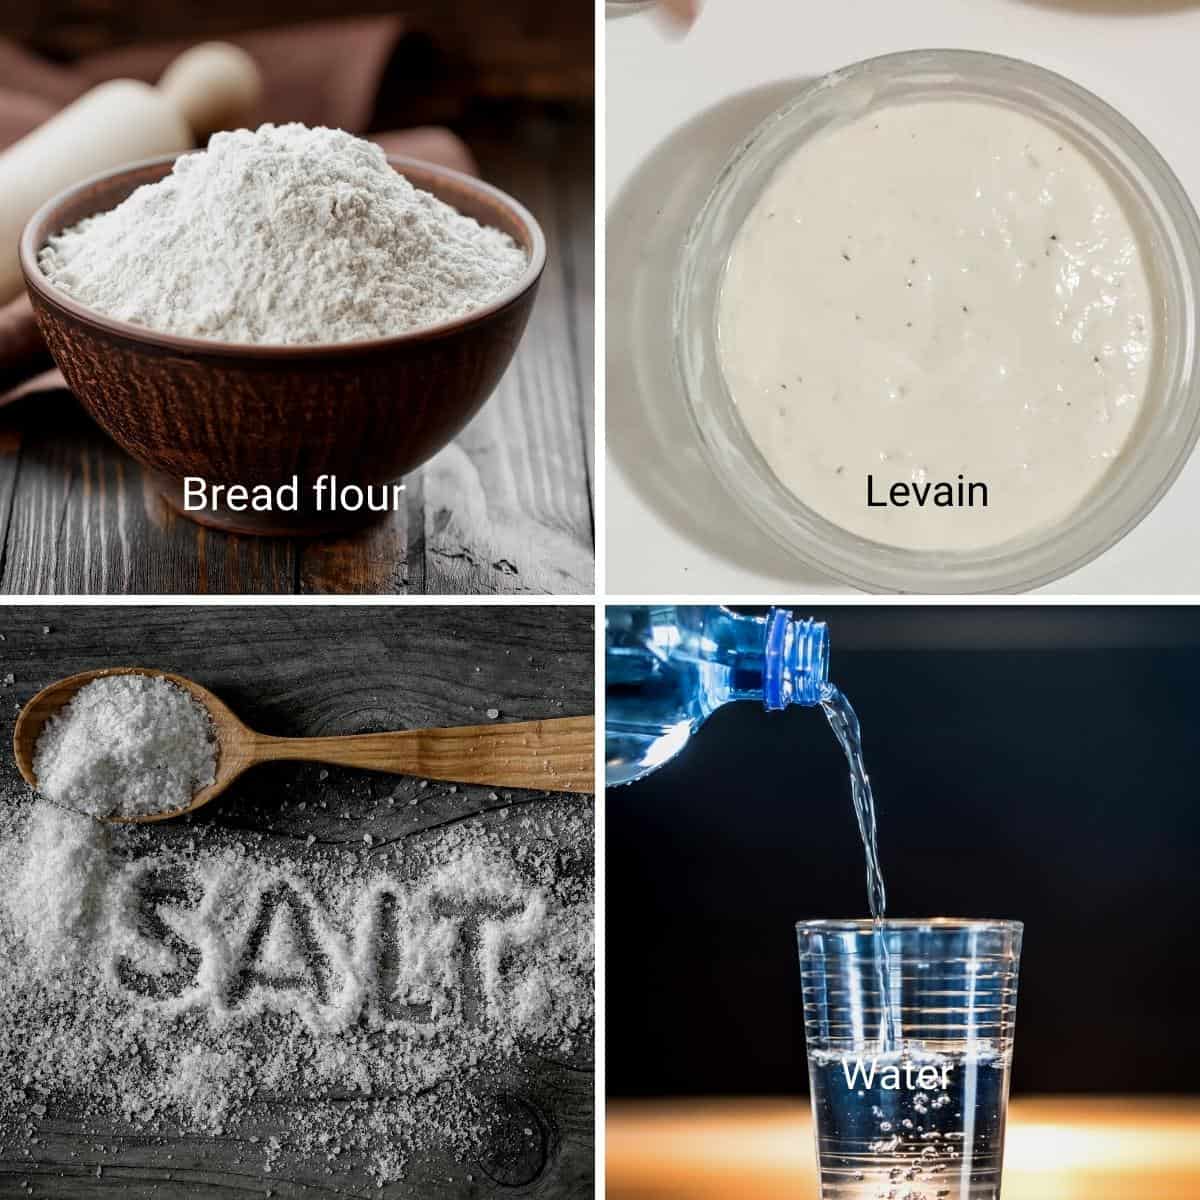
- Flour – I highly recommend bread flour if you love a chewy texture to your sourdough bread. Of course, you can also make sourdough bread with all-purpose flour.
- Water – Since we use a long, slow fermentation process for this bread, room-temperature water works just fine.
- Salt – You can use coarse salt, but I prefer to use fine kosher salt to help the dough absorb it well.
- Sourdough starter /levain– Levain is a larger amount of wild yeast that is made from a small quantity of sourdough starter. So as long as you have the correct amount of starter, you are good to go.
Feeding the sourdough starter
- Active starter/Levain – In a medium bowl, combine 35 grams of sourdough starter, 35 grams of water, and 35 grams of flour. Stir well to combine. Then, cover and leave to rise for 3 hours at room temperature.
Pro tip – You can make the levain up to 5 days in advance and leave it in the fridge.

Step-by-step: Sourdough Ciabatta
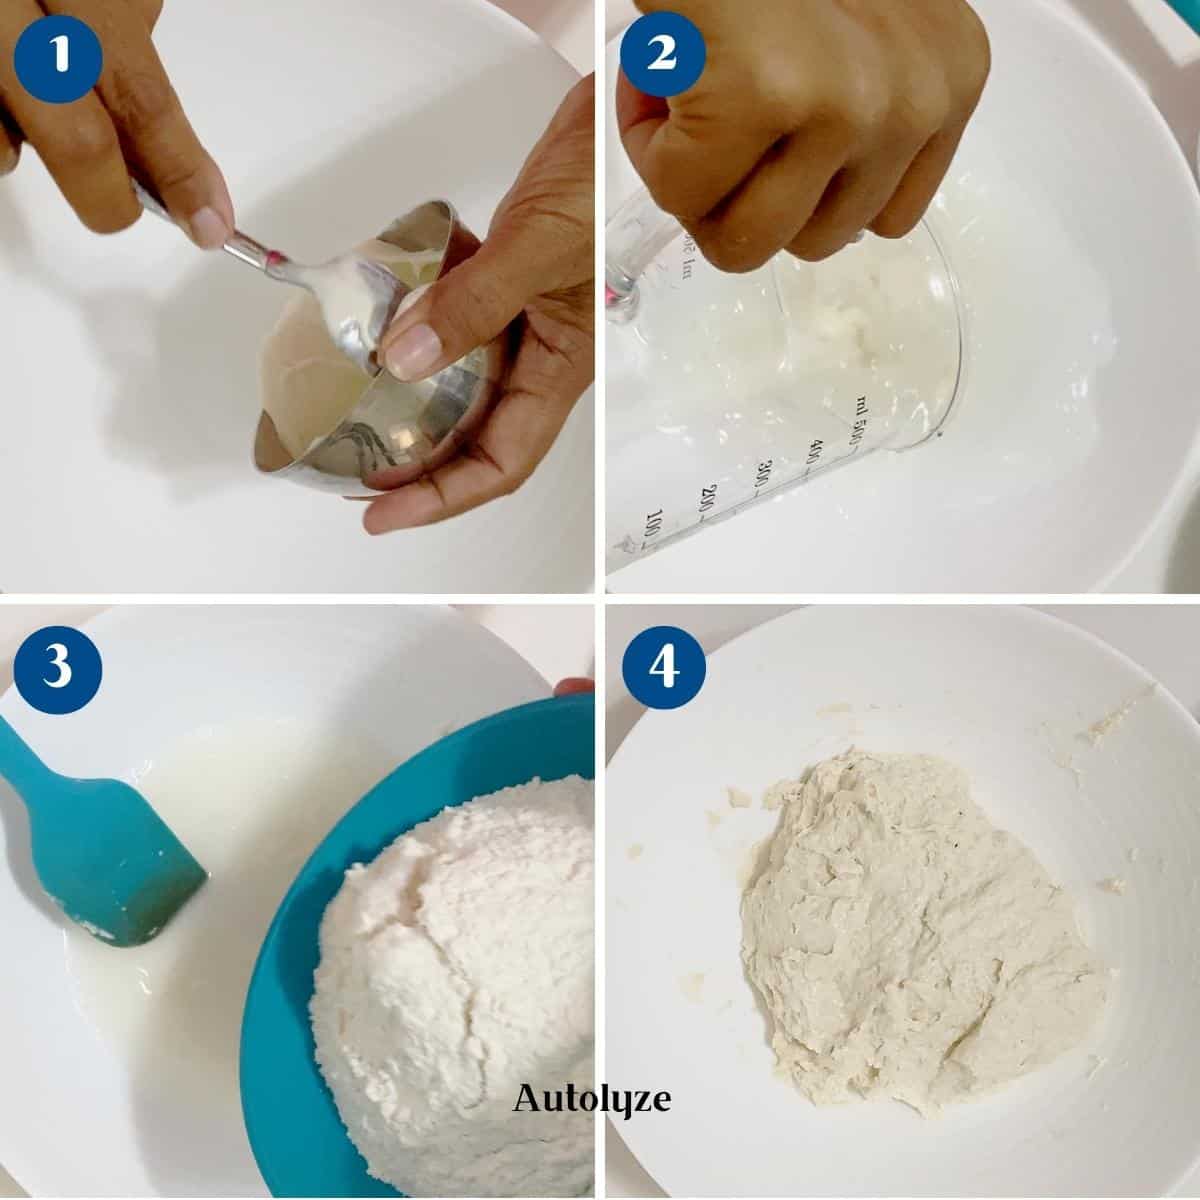
- Autolyze – In a large mixing bowl, add the sourdough starter, water, and flour. Stir well with a wooden spoon or spatula. Then, cover the bowl and leave it to rest for 60 minutes up to 2 hours.
Pro tip – Autolyze will help strengthen the gluten formation in the dough.
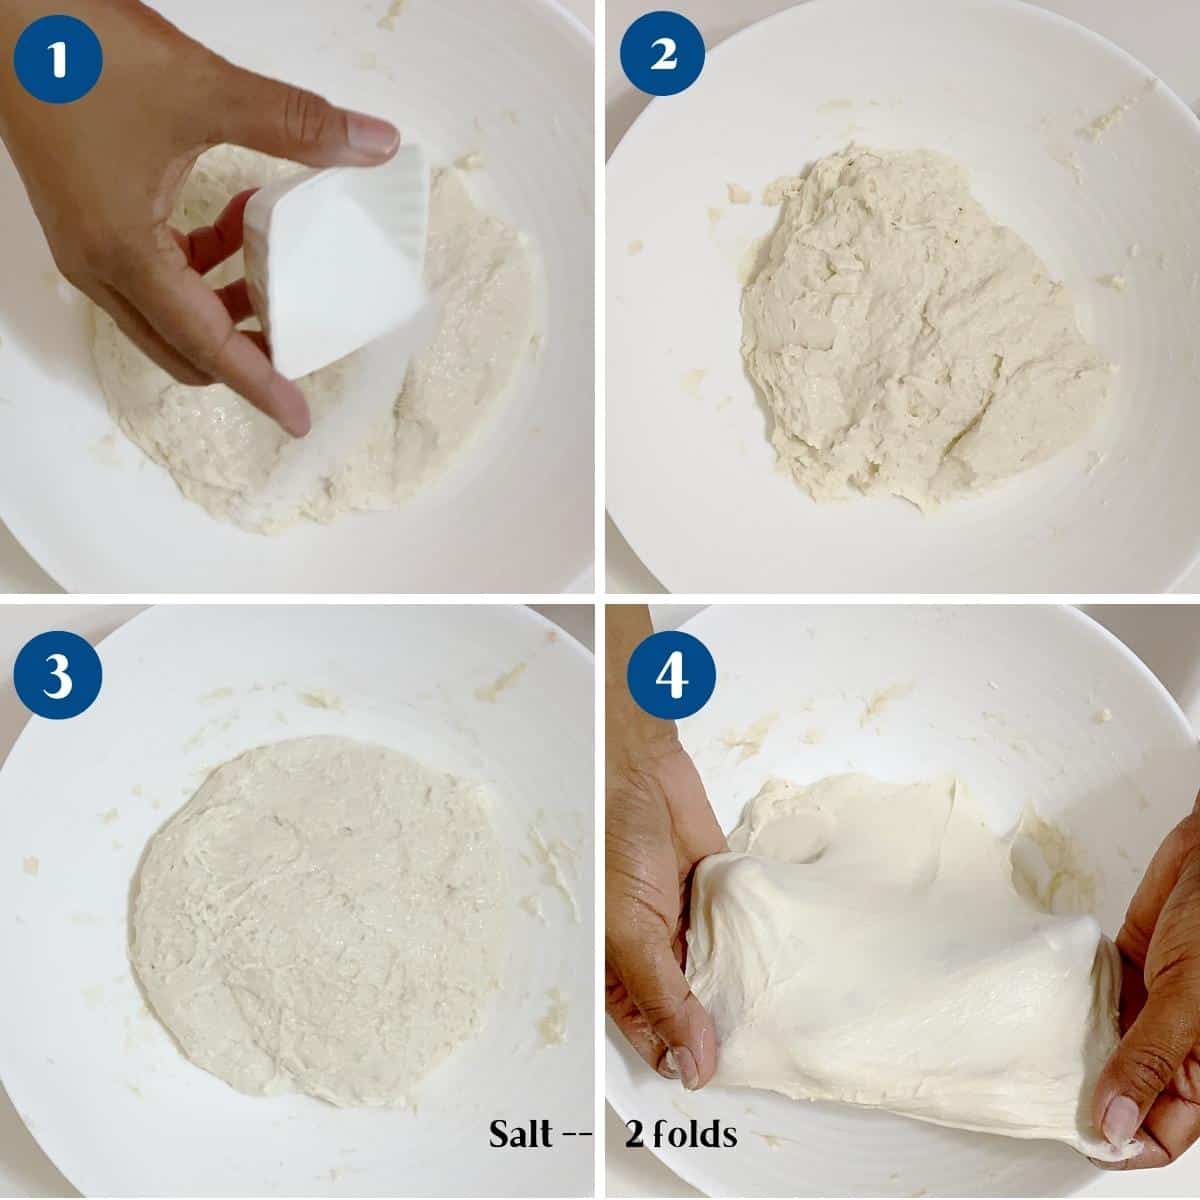
- Salt – Next, add the salt to the starter and combine well for at least 2 minutes. Cover the bowl and let the dough rest for another 30 minutes.
Pro tip – Resting will help rest the gluten and elasticity in the dough. I combine this twice to ensure the salt is well mixed.
Fold
- Folds – Pick the dough from one side and fold it over the other side. Turn the bowl/pan and do the same on the other side. Then, cover and rest for 30 minutes. Fold the dough using this method four times, resting every 30 minutes (watch video).
Pro tip – Folding strengthens the gluten and gives the bread a chewy texture. I usually transfer my dough to a clean rectangular pan for the folds.
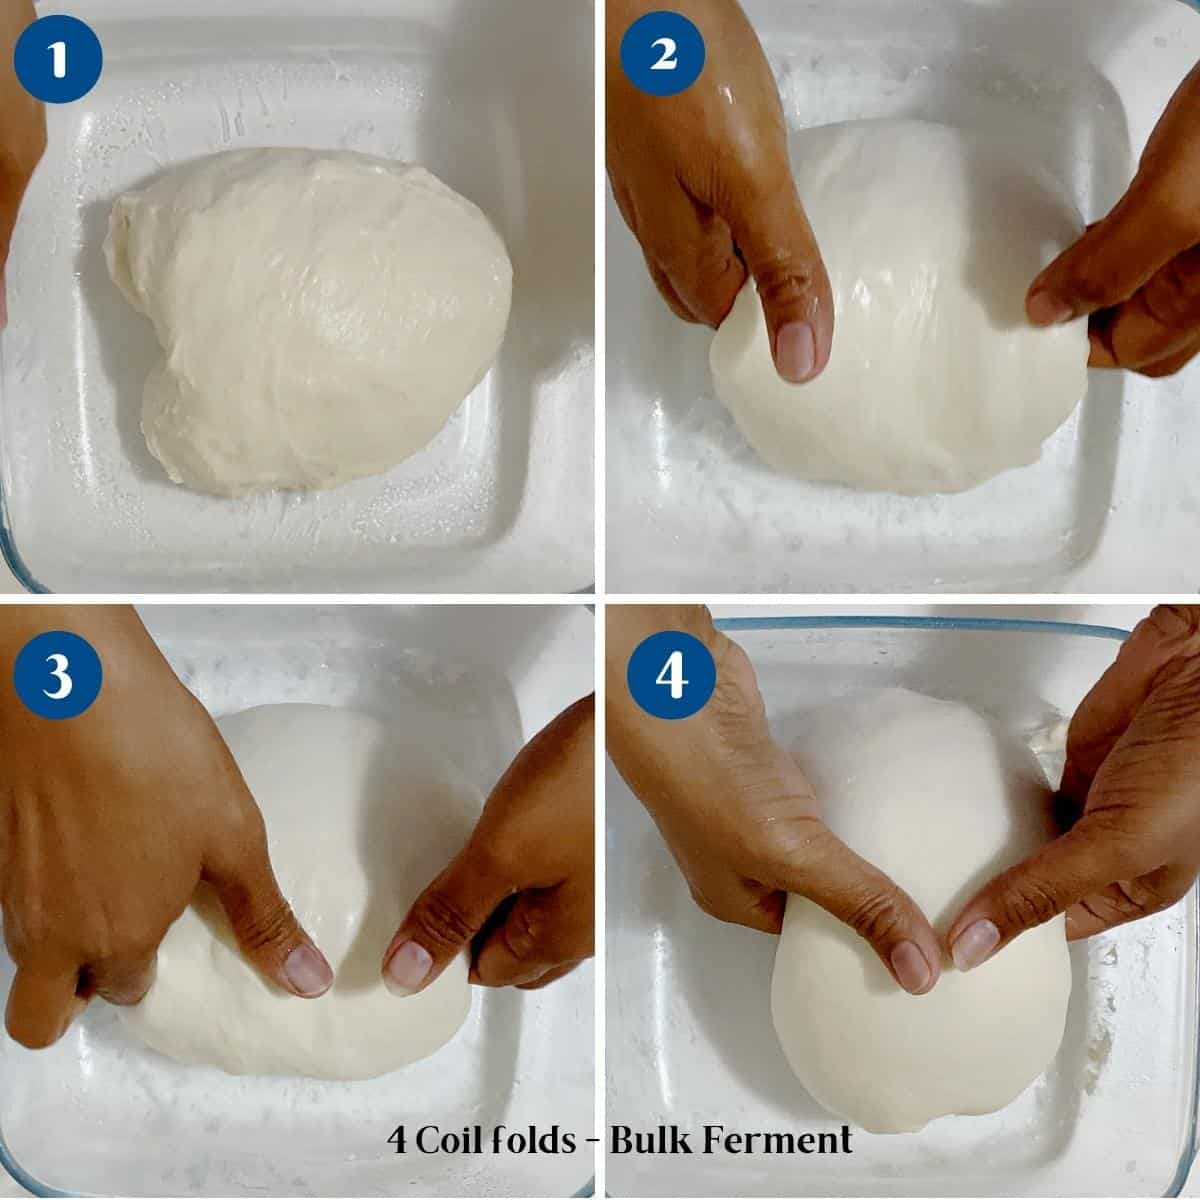
- Bulk ferment – Transfer the dough to an oiled rectangular baking dish. Cover the pan with plastic wrap and leave it to rise in the refrigerator (38°F / 3°C) for 8 hours or up to 16 hours.
Pro tip – Proofing the dough in a rectangular pan will make it easier to shape the dough later.
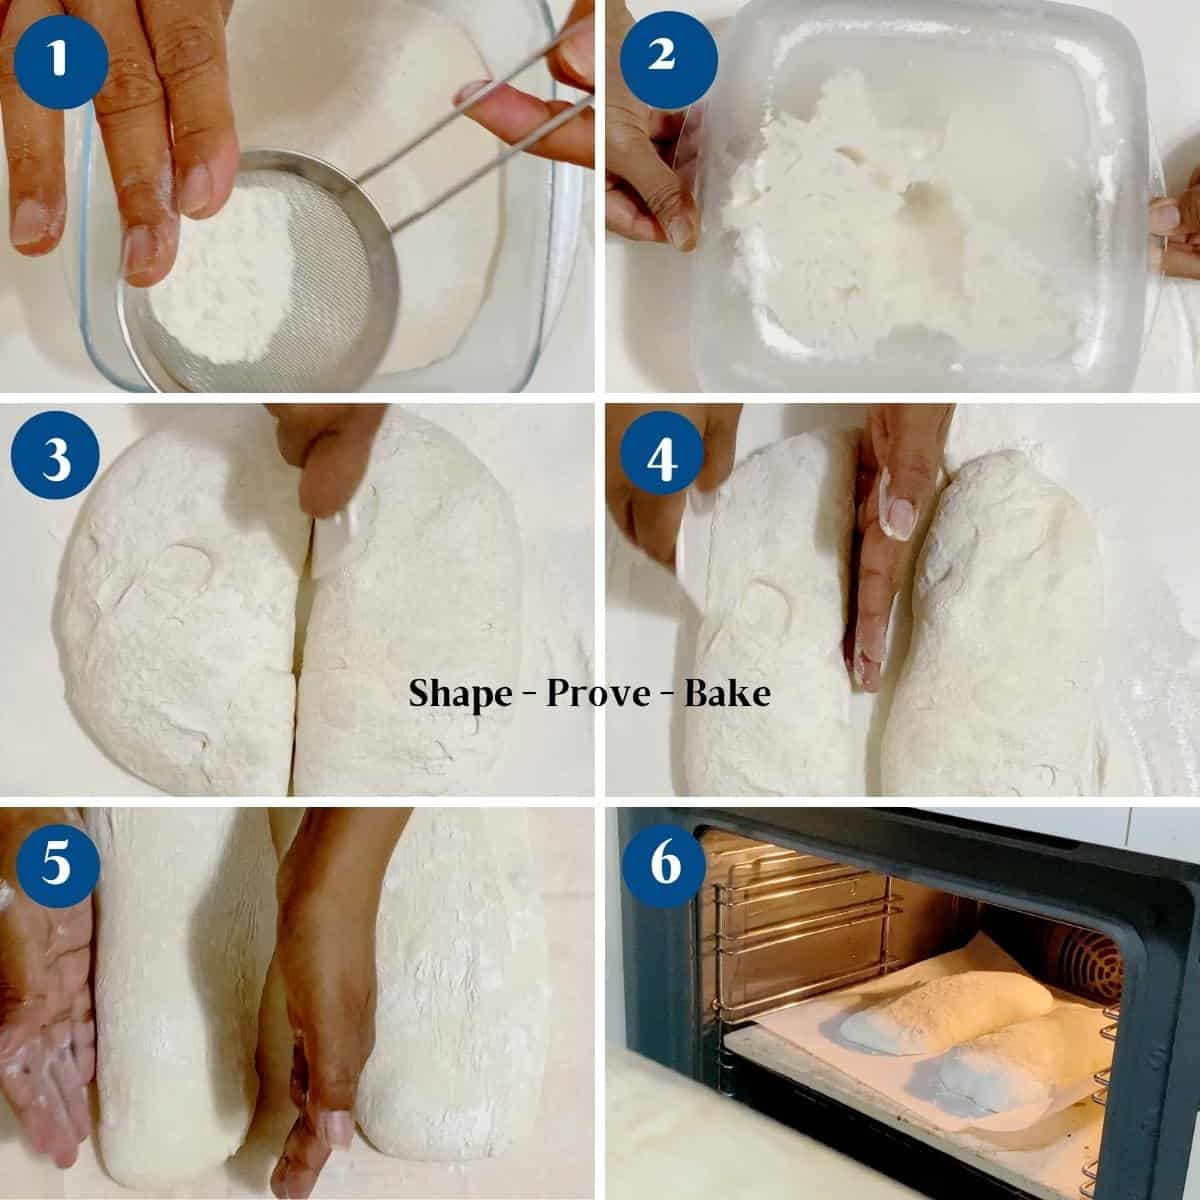
Bake
- Preheat oven – Preheat the oven at 450°F / 230°C / Gas mark 8 with a pizza stone for at least 45 minutes.
Pro tip – A pizza stone will ensure a lovely crust on the outside with an airy loaf on the inside. - Shape – Dust your work surface generously with flour. Make sure you have good coverage to prevent sticking. Dust the top of the dough with flour as well. Then, release the edges of the dough from the bowl/pan, and turn the dough out onto a heavily floured work surface.
Pro tip – High-hydration dough will tend to stick easily. So do less with it and make sure you are generous with the dry flour. - Divide – Using a bench scraper, divide the dough in half, then half again, making four loaves. Then, shape each half into a rectangle, trying not to deflate the dough. Transfer to a well-dusted parchment paper or bread cloche. Then, fold the paper or cloche around the loaves to help keep their shape.
Pro tip – Please note that in the video, I made two loaves using half the recipe. - Proof – Gently, using a cardboard or baking tray (see video), transfer the individual loaves to a well-dusted parchment paper or bread cloche dusted with flour. Fold the paper or cloche around the loaves to help keep their shape. Then, leave to proof for 30 to 45 minutes.

- Bake – Bake for 20 to 25 minutes until golden brown on the top and a hollow sound on the bottom of the bread.
Pro tip – For a hard crust on the loaves, bake them on a heated cloche covered for the first half of baking. Then, uncovered for the next few minutes. - Cool – When baked, remove from the oven and cool on a wire rack for at least an hour before cutting.
Pro tip – When baked, the internal temperature of the sourdough bread should be read about 205 to 210°F (or 96-98°C) on an instant-read thermometer.


Frequently asked questions
Store the bread in a paper bag or bread box at room temperature for up to 2-3 days. To keep it longer, freeze it as mentioned above.
Sourdough bread is healthier than commercial bread. The slow-fermentation process breaks down the gluten and makes the bread more digestible. The probiotics also keep your gut happy.
Yes, you can freeze ciabatta bread. It’s best to freeze it after it has cooled completely, wrapped tightly in plastic wrap and aluminum foil.
Yes, you can add herbs, olives, or other ingredients to the dough for added flavor. However, adjust the amount of flour or hydration as needed to accommodate the added ingredients.
Video
Ingredients
- 500 grams (4 cups) Bread flour
- 380 grams (1⅔ cups) Water room temperature
- 150 grams (⅔ cups) Sourdough starter above
- 9 grams (1 tsp) Kosher salt
Method
- Autolyze – In a large mixing bowl, add the sourdough starter, water, and flour. Stir well with a wooden spoon or spatula. Cover the bowl and leave to rest for 60 minutes up to 2 hours.500 grams Bread flour, 380 grams Water, 150 grams Sourdough starter
- Salt – Next, add the salt to the starter and combine well for at least 2 minutes. Cover the bowl and let the dough rest for another 30 minutes.9 grams Kosher salt
- Folds – Pick the dough from one side and fold it over the other side. Turn the bowl/pan and do the same on the other side. Then, cover and rest for 30 minutes. Fold the dough using this method four times, resting every 30 minutes (watch video).
- Bulk ferment – Transfer the dough to an oiled rectangular baking dish. Cover the pan with plastic wrap and leave it to rise in the refrigerator (38°F / 3°C) for 8 hours or up to 16 hours.
- Preheat oven – Preheat the oven at 450°F / 230°C / Gas mark 8 with a pizza stone for at least 45 minutes.
- Shape – Dust your work surface generously with flour. Make sure you have good coverage to prevent sticking. Dust the top of the dough with flour as well. Release the edges of the dough from the bowl/pan, then turn the dough out onto a heavily floured work surface.
- Divide – Using a bench scraper, divide the dough in half and then in half again to make four loaves. Then, shape each half into a rectangle, trying not to deflate the dough. Transfer to a well-dusted parchment paper or bread cloche. Fold the paper or cloche around the loaves to help keep their shape.
- Prove – Gently, using a cardboard or baking tray (see video), transfer the individual loaves to a well-dusted parchment paper or bread cloche dusted with flour. Fold the paper or cloche around the loaves to help keep their shape. Leave to proof for 30 to 45 minutes.
- Bake – Bake for 20 to 25 minutes until golden brown on the top and a hollow sound on the bottom of the bread.
- Cool – When baked, remove from the oven and cool on a wire rack for at least an hour before cutting. When baked, the internal temperature of the sourdough bread should be about 205 to 210°F (or 96-98°C) on an instant-read thermometer.
Notes
- If this is your first loaf with sourdough starter, don’t get overwhelmed with hours and baking formulas. Just follow the recipe correctly, and you should succeed.
- Also, the bulk fermentation and proofing timeline is quite long, 8 to 16 hours from counter to refrigerator. This means you can start the process 24 hours ahead without being overwhelmed.
- The timeline is a guide to use, which is why I have given you the temperatures. A warm room will help the bread rise faster, and a cooler temperature will slow the rise. So, adjust accordingly.
- Use a kitchen scale when baking with sourdough because that will give you an accurate measure.
- Sourdough bread with high hydration means the dough is very loose. The bench scraper is your best working tool.
- Shape the final loaf of bread on a piece of parchment paper so it is easier to move the dough without losing shape.
- Today, I used a pizza stone, but baking is a special bread pan such as a loaf clouch, Dutch oven, or cast-iron pan with ensures a wonderful crust to your sourdough ciabatta bread and is worth the investment.
- Sourdough must be baked in a hot oven, so make sure to preheat your home oven for no less than 30 minutes or up to an hour.
- Baked bread must be properly cooled on a cooling rack for at least an hour before you slice. Otherwise, the steam from the bread will evaporate, leaving it dry.
Nutrition
Tried this recipe?
Mention @veenaazmanov_kitchen or tag #veenaazmanovkitchen!


Don’t lose this recipe! Save it for Later!
📌 Save this Recipe for later on Pinterest so you can easily find it again.
⭐ Add Veena Azmanov Kitchen to your Google Preferred Sources.
It helps Google show you more of our recipes.
📧 Subscribe for new recipes delivered to your inbox.
🎥 Follow us for more recipes


I saw some recipes use olive oil for ciabatta. Can that be incorporated into this?
Yes, you can add a few tablespoons of olive oil as well!!
This bread has “slather with butter” all over it.
Such an easy and delicious bread recipe to make at home.
My husband will def love this!
I’m still very much a beginner when it comes to sourdough bread. But, I love ciabatta and this sourdough ciabatta looks excellent. Going to roll up my sleeves and give it a go!
I love sourdough bread, but I find myself having trouble making it come out. I followed your recipe exact, and the bread turned out great! Will definitely be making it again!
Thank you for the lovely feedback, Ann.