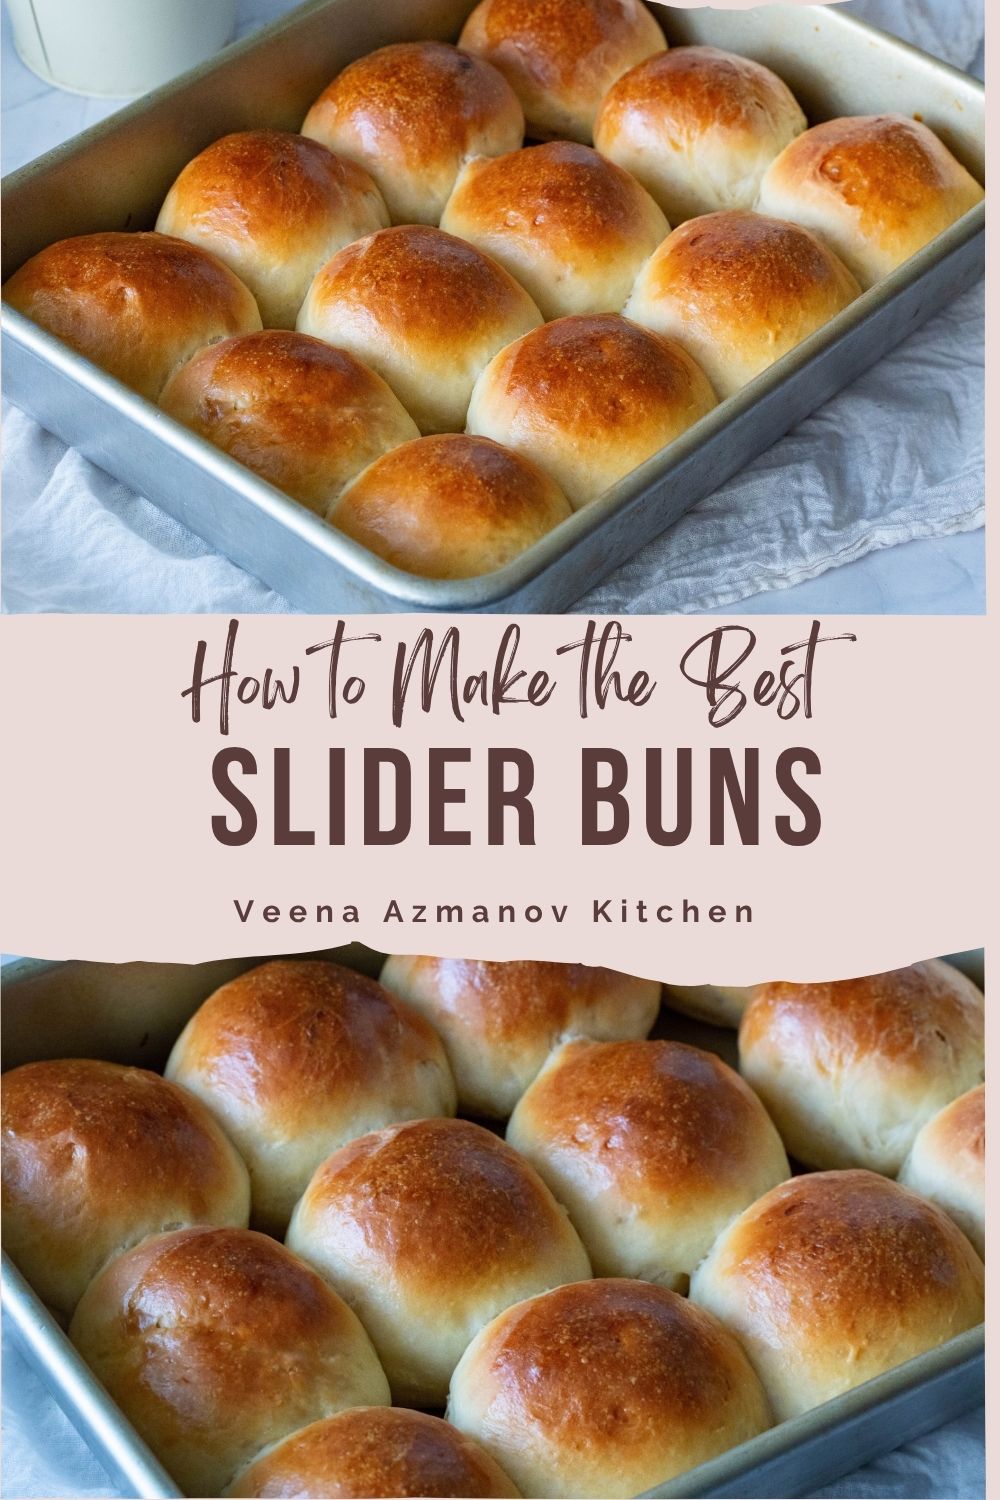
Perfect Homemade Slider Buns


Are you tired of serving mediocre store-bought slider buns that lack flavor and texture? It’s time to up your slider game with these homemade buns. Imagine sinking your teeth into rich, irresistibly soft, and flavorful slider buns that will leave your guests wanting more.
Making homemade sliders has become a cherished tradition in my kitchen, inspired by fond memories of my mom’s homemade slider buns. As a child, I watched in awe as she effortlessly whipped up batches of soft, pillowy buns from scratch, filling our home with the irresistible aroma of freshly baked bread.
Following in her footsteps, I embarked on my own journey of slider-making, determined to recreate the magic of her homemade buns. Armed with her cherished recipe and a sense of determination, I dove headfirst into the world of bread baking.
Why are these slider buns worth the effort?
- One of the key reasons why slider buns are worth the effort is the incredible taste and texture they bring to your sliders. Unlike their store-bought counterparts, homemade slider buns can be customized to your liking.
- When you bake your own buns, you can enjoy them at the peak of their freshness, flavor, and texture.
- These mini buns are not limited to just sliders; they can also be used to make dinner rolls, garlic rolls or stuffed buns!

Ingredients and substitutes
- All-purpose flour works great for these buns. You can also use half bread and half all-purpose for a chewier bun texture.
- Next up is instant yeast, which is essential for activating the dough and achieving a light, airy texture. If you don’t have instant yeast on hand, you can also use active dry yeast instead. But make sure to activate it in warm water first.
- Egg – Adds a lot of flavor to the bread, gives a tender crumb, and strengthens the texture.
- Sugar adds a touch of sweetness and enhances the flavor. You can also use honey or maple syrup in this recipe.
- Butter adds richness and moisture to the buns. You can substitute the butter with any oil you prefer.

Step-by-step: Homemade Slider Buns
- Yeast mixture – In a mixing bowl or measuring cup, combine warm water (110°F), yeast, honey, oil, and eggs. Stir and set aside to foam for 3 minutes.

- Dry mixture – Measure the flour and salt in a mixing bowl or stand mixer with the dough hook.
Pro tip – If you do not like kneading, I highly recommend using a stand mixer with the hook attachment. - Knead – Add the yeast mixture to the flour mixture and combine well on medium-low speed. Knead until smooth and elastic. This should take about 8 to 10 minutes on medium-low in the stand mixer or 15 to 18 minutes by hand on a lightly dusted work surface.

- Bowl – When the dough is smooth, soft, and elastic, shape it into a ball. Then, place the dough in an oiled bowl, seam side down. Coat the surface with oil to prevent drying. Cover with a clean kitchen cloth or plastic wrap.
- Rise – Leave in a warm place. Let rise for 40 to 50 minutes until it doubles in volume.
Pro tip – Alternatively, you can place the dough in the fridge to keep it cold overnight. Thaw at room temperature for an hour before shaping. - Punch – When the dough has doubled in volume, transfer it to a well-floured surface. Punch down and reshape into a ball. Then, roll it into a small log.
Pro tip – At this point, you don’t need any additional flour. So, use a light dusting of flour.

- Divide – Using a dough scraper, divide this log into three portions and then each of those portions into four again. This should give you 12 sliders.
Pro tip – These should be about 2 to 2.5 ounces (56 to 70 grams) each. - Proof – Shape the rolls into a tight ball. Place the rolls in a sheet pan lined with parchment paper. Cover with plastic wrap or clean kitchen cloth and let proof for 45 to 60 minutes.
Pro tip – Spray the plastic wrap with oil to prevent it from sticking to the rolls. - Oven – About 20 minutes before baking, preheat the oven to 350°F /177°C / Gas Mark 4
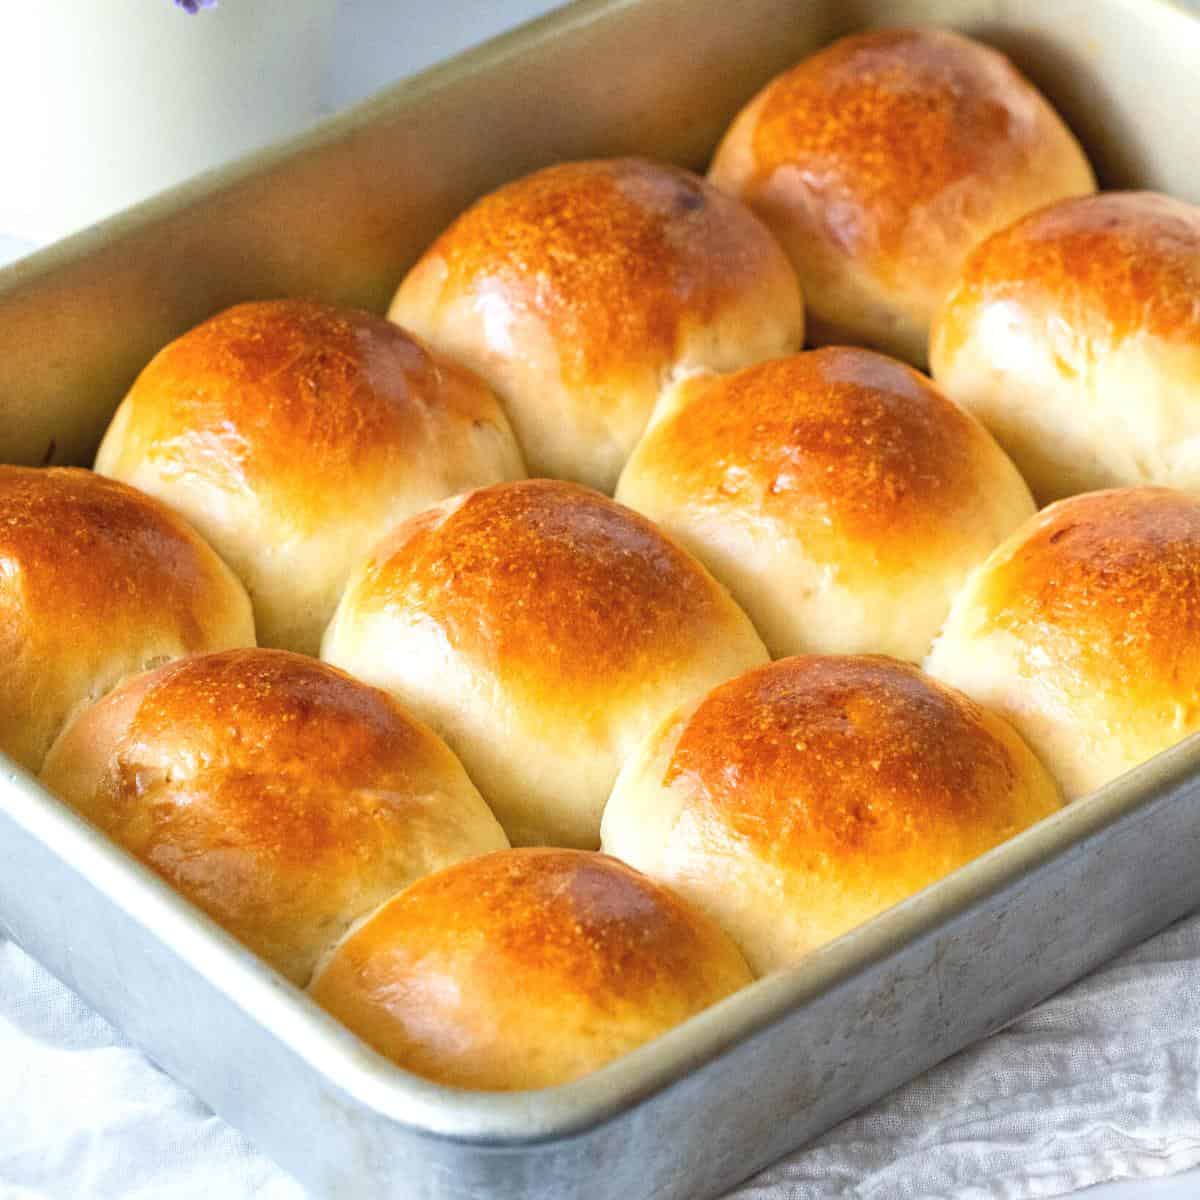
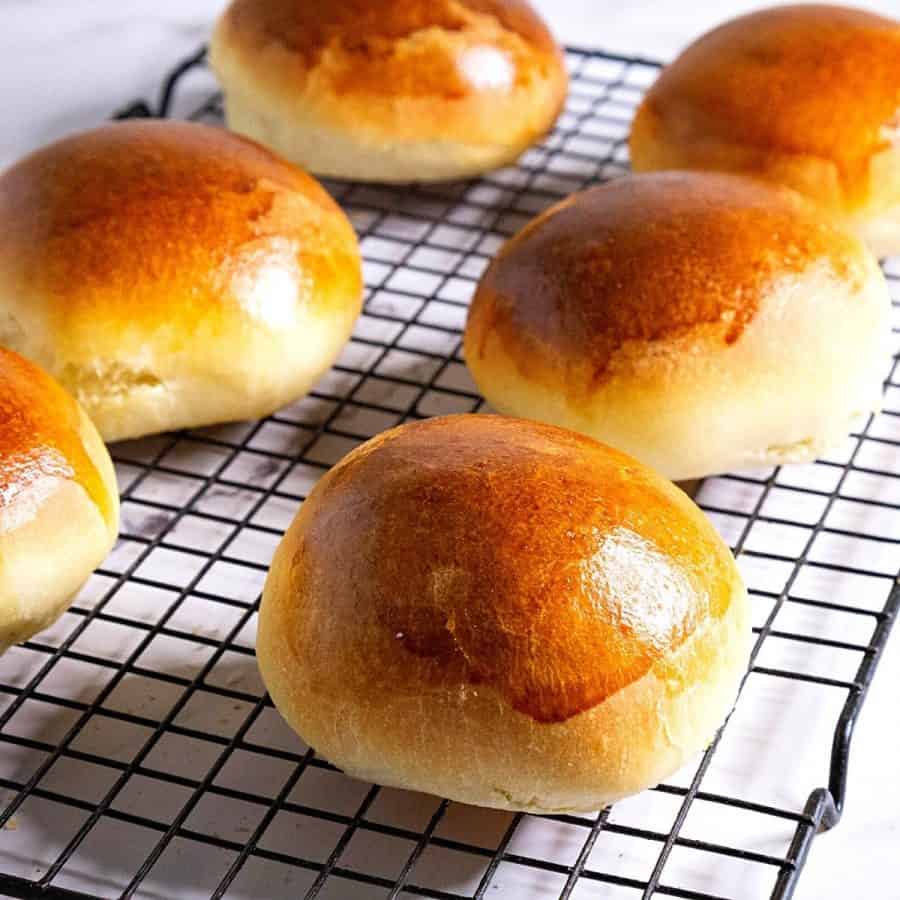
- Bake – Brush the bread with egg wash. Then, bake each loaf on the center rack of the oven for 12 to 15 minutes. When baked, leave to cool completely before filling and making sliders.
- Enjoy!

I used this batch of slider buns to make my homemade meatball sliders

Easy Slider Buns from Scratch
Warm, soft, and flavorful challah rolls are not just for Shabbat. They're great for holiday dinners, parties, and weekday sandwiches. These single-braid challah buns are easy to make and look very impressive when served.
Video
Ingredients
- 240 ml (1 cup) Water or Milk warm 110F
- 7 g (2¼ tsp) Instant dry yeast
- 30 g (2 tbsp) Sugar or honey
- 40 g (2 tbsp) Olive oil or unsalted Butter
- 60 g (1 large) Eggs Use ⅓ cup milk for an eggless recipe
- 437 g (3½ cups) Bread flour or 50% bread and 50% all-purpose flour
- 7 g (1 tsp) Kosher salt
Method
- Yeast mixture – In a mixing bowl or measuring cup, combine warm water or milk (110°F), yeast, honey or sugar, oil or butter, and eggs. Stir and set aside to foam for 3 minutes.240 ml Water or Milk , 7 g Instant dry yeast, 30 g Sugar, 40 g Olive oil or unsalted Butter, 60 g Eggs
- Dry mixture – Measure the flour and salt in a mixing bowl or stand mixer with the dough hook.437 g Bread flour, 7 g Kosher salt
- Knead – Add the yeast mixture to the flour mixture and combine well at medium-low speed. Knead until smooth and elastic. This should take about 8 to 10 minutes on medium-low in the stand mixer or 15 to 18 minutes by hand on a lightly dusted work surface.
- Bowl – When the dough is smooth, soft, and elastic, shape it into a ball. Then, place the dough in an oiled bowl, seam side down. Coat the surface with oil to prevent drying. Cover with a clean kitchen cloth or plastic wrap.
- Rise – Leave in a warm place. Let rise for 40 to 50 minutes until it doubles in volume.
- Punch – When the dough has doubled in volume, transfer it to a well-floured surface. Punch down and reshape into a ball. Then, roll it into a small log.
- Divide – Using a dough scraper, divide the log into three portions, and then each of those portions into four again. This should give you 12 sliders.
- Proof – Shape the rolls into a tight ball. Place the rolls in a sheet pan lined with parchment paper. Cover with plastic wrap or clean kitchen cloth and let proof for 45 to 60 minutes.
- Oven – About 20 minutes before baking, preheat the oven to 350°F (177°C)/ Gas Mark 4.
- Bake – Brush the bread with egg wash. Then, bake each loaf on the center rack of the oven for 12 to 15 minutes. When baked, leave it to cool completely before filling and making sliders.
- Enjoy!
Notes
- Measure the flour correctly – Bread dough should feel soft and slightly tacky, but not sticky. Add the last few tablespoons of flour only if needed, as humidity and the size of the eggs can affect the dough.
- Don’t rush the rise – If your kitchen is cool, the dough may take a little longer to double in size. Time is only a guide—look for the dough to become puffy and doubled before shaping.
- For even-sized buns – Use a kitchen scale to divide the dough into equal portions. This ensures the slider buns bake evenly and look uniform.
- Leave space for expansion – Arrange the dough balls close enough that they can lightly touch as they rise and bake. This gives you soft sides and beautiful pull-apart slider buns.
- Brush before and after baking – An egg wash gives the buns their beautiful golden color. For extra-soft tops, brush them with melted butter as soon as they come out of the oven.
- Make ahead – The dough can be made the night before and left to rise slowly in the refrigerator. Let it come to room temperature before shaping and proceeding with the second rise.
- Storage – Store the cooled buns in an airtight container at room temperature for up to 3 days or freeze for up to 3 months. Thaw at room temperature and warm briefly before serving.
Equipment you will need


Nutrition
Tried this recipe?
Mention @veenaazmanov_kitchen or tag #veenaazmanovkitchen!Tips for Success
- Make sure to divide the dough into equal portions so that each bun is roughly the same size. This will give your sliders a consistent appearance and also ensure they cook evenly.
- If you prefer a softer texture, you can place the formed buns close together on the baking tray to let them rise and bake together, creating a pull-apart effect. On the other hand, if you prefer a slightly crispier exterior, leave more space between the buns to allow for individual expansion.
- Slider buns are typically smaller, so they tend to brown more quickly. To avoid this, you can cover the buns loosely with aluminum foil halfway through baking to prevent them from getting too dark on top.
- Don’t forget to let your freshly baked slider buns cool completely before slicing them. This will help them maintain their structure and prevent them from getting squished or falling apart during assembly.
more homemade rolls for sliders
- Soft Whole Wheat Burger Buns
- Cinnamon Buns Braided
- Burger Buns – Hamburger Buns
- Soft Brioche Buns
- Sourdough Brioche Buns
- Brioche French Toast


Frequently asked questions
To create soft and fluffy slider buns, there are a few key factors to keep in mind. First, make sure your yeast is fresh and active. This will help the dough rise properly and give you that light texture you desire. Additionally, be cautious not to overknead the dough, as this can result in a denser bun. Lastly, allowing the dough to rise in a warm, draft-free area will help it become soft.
Absolutely! Slider buns can be made in advance and stored for later use. Once the buns have cooled completely, you can place them in an airtight container or freezer bag. They will stay fresh for a couple of days at room temperature or up to three months in the freezer. Just make sure to thaw them before using them if frozen.
Certainly! If you or your guests have dietary restrictions, you can easily adapt the recipe to make gluten-free slider buns. There are various gluten-free flour blends available that can be used as a substitute for regular flour. Make sure to follow the instructions on the packaging for the best results.
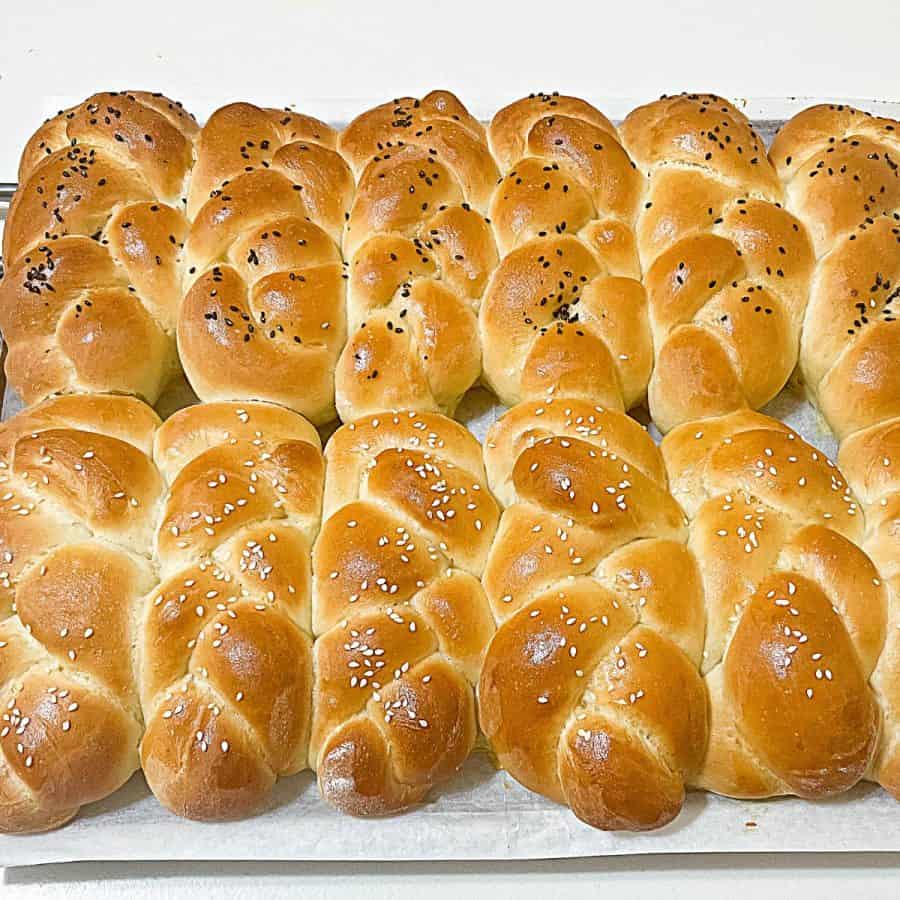
Absolutely! One of the great things about slider buns is their versatility. Feel free to experiment with different toppings and seasonings to suit your taste preferences. Consider adding sesame seeds, poppy seeds, or even a sprinkle of garlic powder on top of the buns before baking for an extra burst of flavor.
more sliders and sandwiches
- Meatball Sliders Recipe
- Ham Cheese Sliders with Garlic Butter
- Turkey Sandwich
- Grilled Chicken Sandwich Recipe
- Crispy Chicken Sandwich Burger (Oven Baked)


Don’t lose this recipe! Save it for Later!
📌 Save this Recipe for later on Pinterest so you can easily find it again.
⭐ Add Veena Azmanov Kitchen to your Google Preferred Sources.
It helps Google show you more of our recipes.
📧 Subscribe for new recipes delivered to your inbox.
🎥 Follow us for more recipes


I’ve always loved making burgers at home, but store-bought buns just never do them justice. I finally decided to try making my own, and WOW—these slider buns were a game-changer! They were soft but sturdy enough to hold up to a juicy burger. My kids even ate them plain with butter, so I think that says it all!
Thank you so much for the lovely feedback, Samantha
I made these for a party I was throwing. We ate them as sliders for brisket sandwiches. Turned out amazing. So tasty! Everyone loved them.
Thank you Jessica for the lovely feedback.
Recipe is okay, but bake time was much longer. I didn’t achieve the outcome shown in the photo promo. Won’t do this one again.
Great recipe and easy to follow. I did have to add more warm water bc the dough was stiff and difficult to knead. Also used regular butter with salt, then eliminated the salt. Nevertheless, very tasty! Thank you for sharing this recipe!
ABSOLUTELY THE BEST!!! First time my bread baking came out soft and fluffy.
Can I use this recipe to make it a loaf of bread too?
Thank you for this great recipe!!!
Yes, Joanne, this can be used as an all-purpose dough to make loaves, dinner rolls, stuffed rolls, braided rolls, etc. It’s very delicious and always a winner.
Turned out great for me! I was nervous because the dough was a little dryer than I expected and was afraid it wouldn’t rise……but it did and the rolls were delicious!
First you say this recipe makes 16 sliders then in the recipe you say 12. Which is it?
Btw, I am making these now but I halved the recipe
Ginny the recipe make 12 slices about 60 to 70 grams each.
You have one egg listed in the recipe but you use 4 eggs in the video. Which is it?
Yes, I made a larger quantity of dough in the video. This recipe makes just enough for the quantity mentioned in the recipe.
Recipe for one batch yields a dry dough. I used the called out value of milk and butter along with the eggs and the dough barely came together. Very dry following the instructions given.
BJ, I’m sorry, but that is not possible. With these measurements, the dough should not be dry at all. Please check that you have used the right measurements as mentioned in the recipe.
I used the exact measurements in the recipe (1 cup water to 3.5 cups bread flour) and after mixing in stand mixer for 30 minutes with hook attachmemt, the dough was too dry and the consistency of beach sand. Tried a second time using 1-1/4 cups water and it worked fine.
I’m glad it worked fine with a little more water. Its always a good idea to look at consistency and adjust when necessary.
Veena, One question, how come the video doesn’t match the recipe, you used milk in the video and butter but water and OVOO in the recipe, Milk and butter sounds much better, Like to have the recipe amounts in the video to try out
Douglas
This recipe is very customizable. You can use water or milk and oil or butter and sugar or honey. Thanks