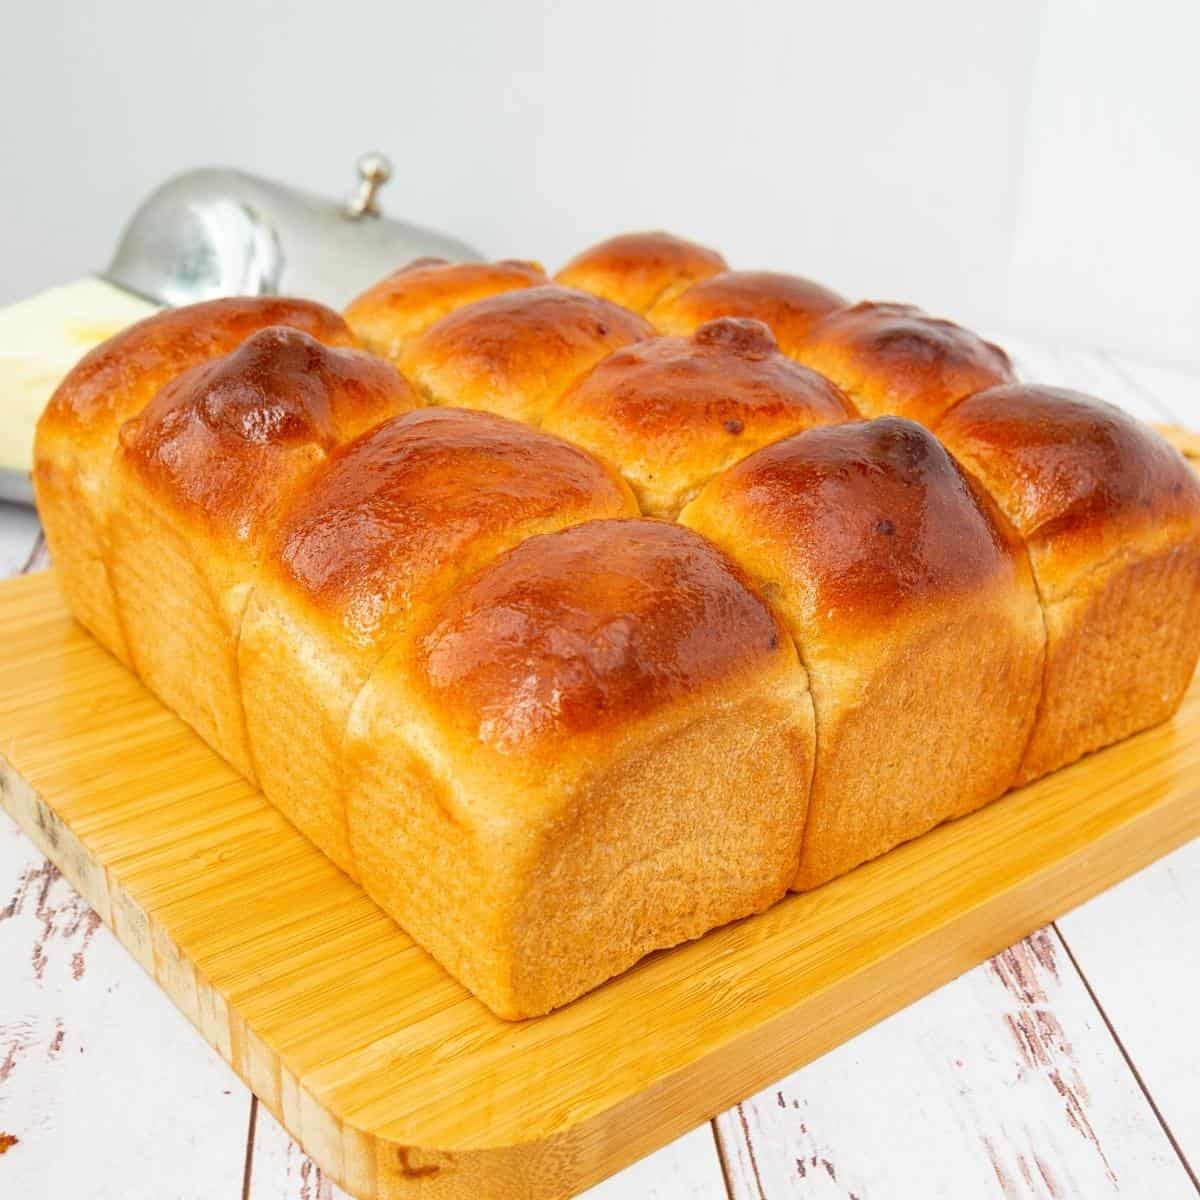
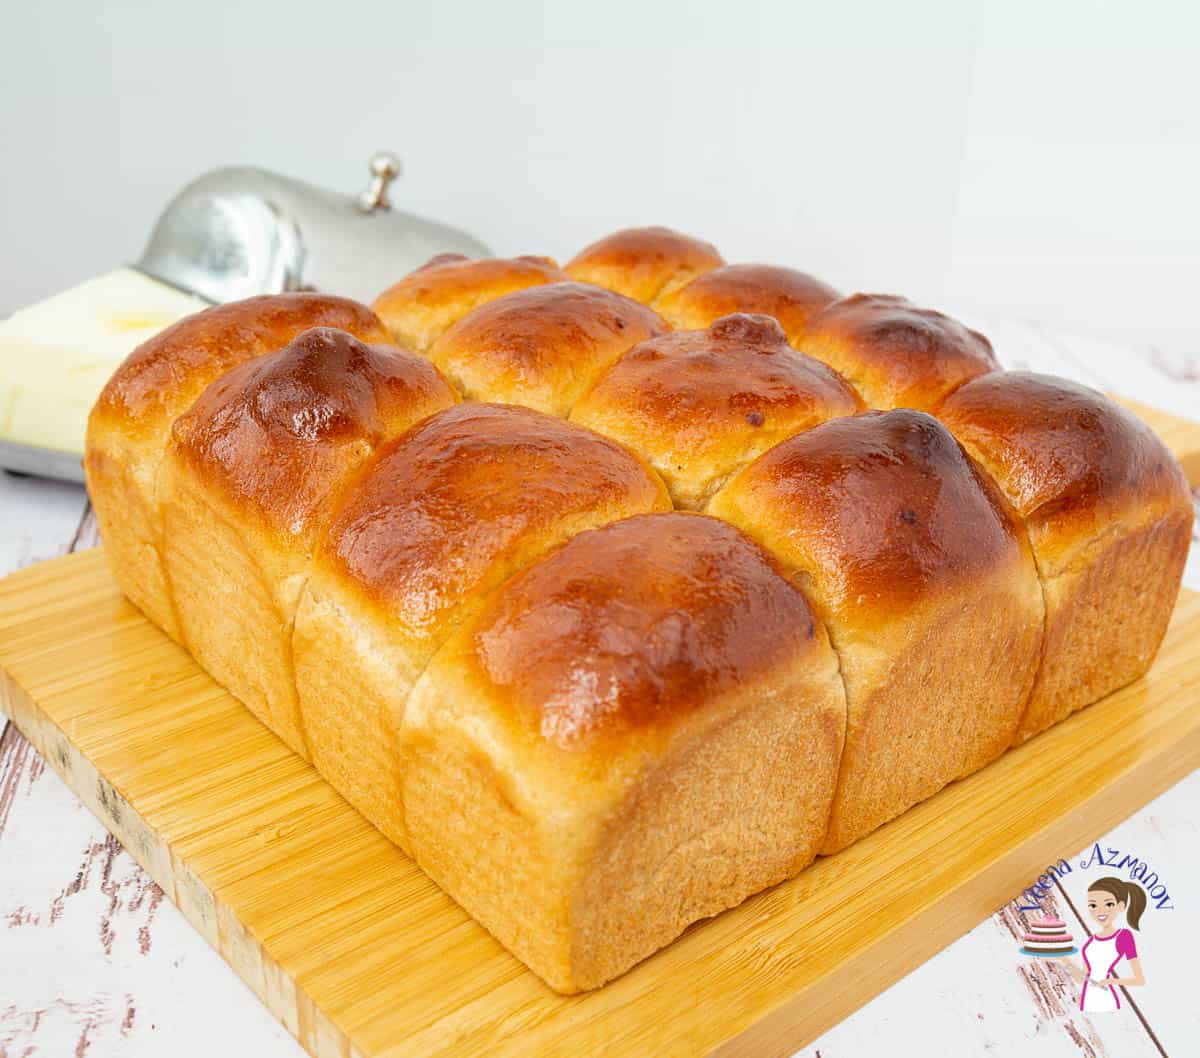
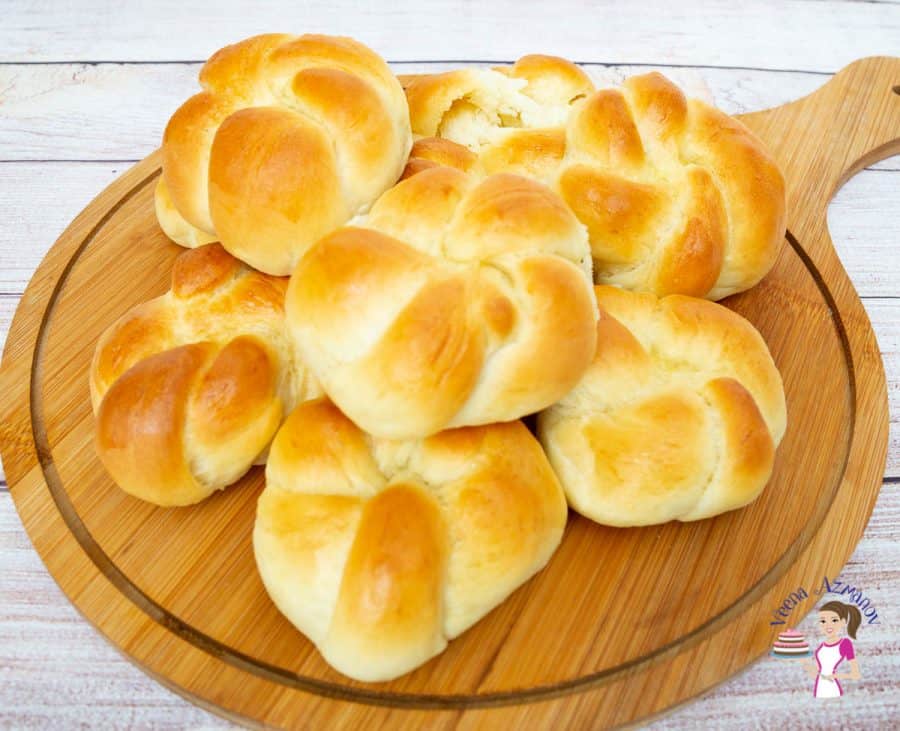
Whole Wheat Dinner Rolls
 Prep Time 10 minutes Cook Time 22 minutes Total Time 2 hours 17 minutes
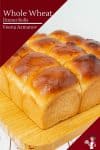
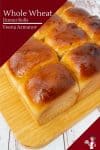
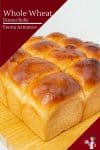
These whole wheat dinner rolls are light and airy and are made with 50% whole wheat flour. The recipe is simple and easy to make and much healthier than most other bread rolls.
If you notice, whole wheat is not so common in my family. My kids still have not warmed up to eating whole-wheat bread.
And yet, many of you requested that I share whole-wheat flour dinner rolls. The truth is that it has taken me a while to get the recipe exactly the way dinner rolls should be. Light, fluffy, and airy. So, after many trials and disappointments, I am finally happy with this recipe.
Why make these rolls
- This is a wonderfully buttery dinner roll that has a soft, chewy, and fluffy texture.
- Most of the ingredients are simple pantry staples and are made without any eggs. I have used sugar and butter, but you can also use honey butter or oil instead of butter.
- These are not 100% whole wheat but 70:30. They contain about 30% white flour, which makes them light and airy. As a result, they are easier for both kids and adults to eat and digest.
- In addition, these are also great to make during the week. Once baked, they keep well in the freezer.
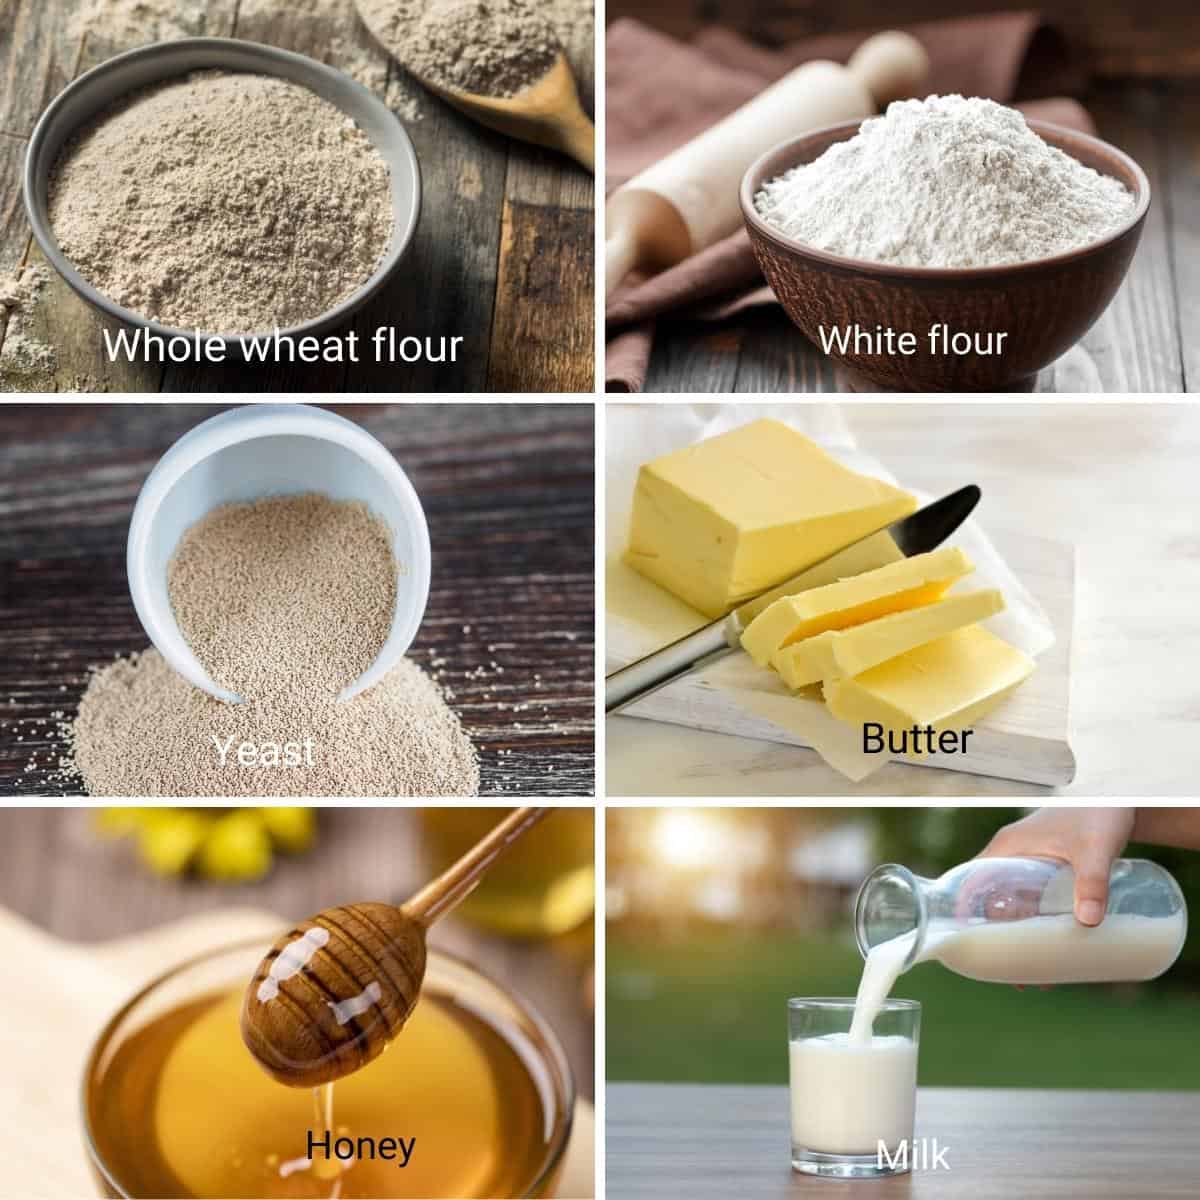
Ingredients and substitutes
- Flour – I like using 50% whole wheat and 50 % white flour. This gives a light and airy texture to the bread.
- Instant dry yeast – I like to use instant dry because I’ve always had great success with it. If you have to use active dry yeast, you will need 2 1/4 tsp or one packet. And, if you use fresh yeast, you will need about 21 grams. Also, it’s not necessary to activate the yeast, but I like to take the guesswork out and make sure my dough will rise.
- Honey – I like to use honey with my whole wheat flour. I think it works better and gives a nicer flavor. You can, however, also use two tablespoons of sugar.
- Butter – I like adding butter, not just to feed the yeast, but also to add flavor. However, you can substitute the butter for two tablespoons of oil in this recipe.
Step-by-step: Whole wheat rolls recipe
- Yeast – In a small bowl or measuring cup, combine the milk (or warm water), yeast, honey, and butter. Use a whisk or wooden spoon to combine well.
- Combine – Measure the white flour, whole wheat flour, and salt in a large mixing bowl of a stand mixer with the dough hook attachment. Add the yeast mixture and combine on medium-high speed until all the flour is well incorporated.
Pro tip – If you do not like kneading, I highly recommend using a stand mixer with the hook attachment.
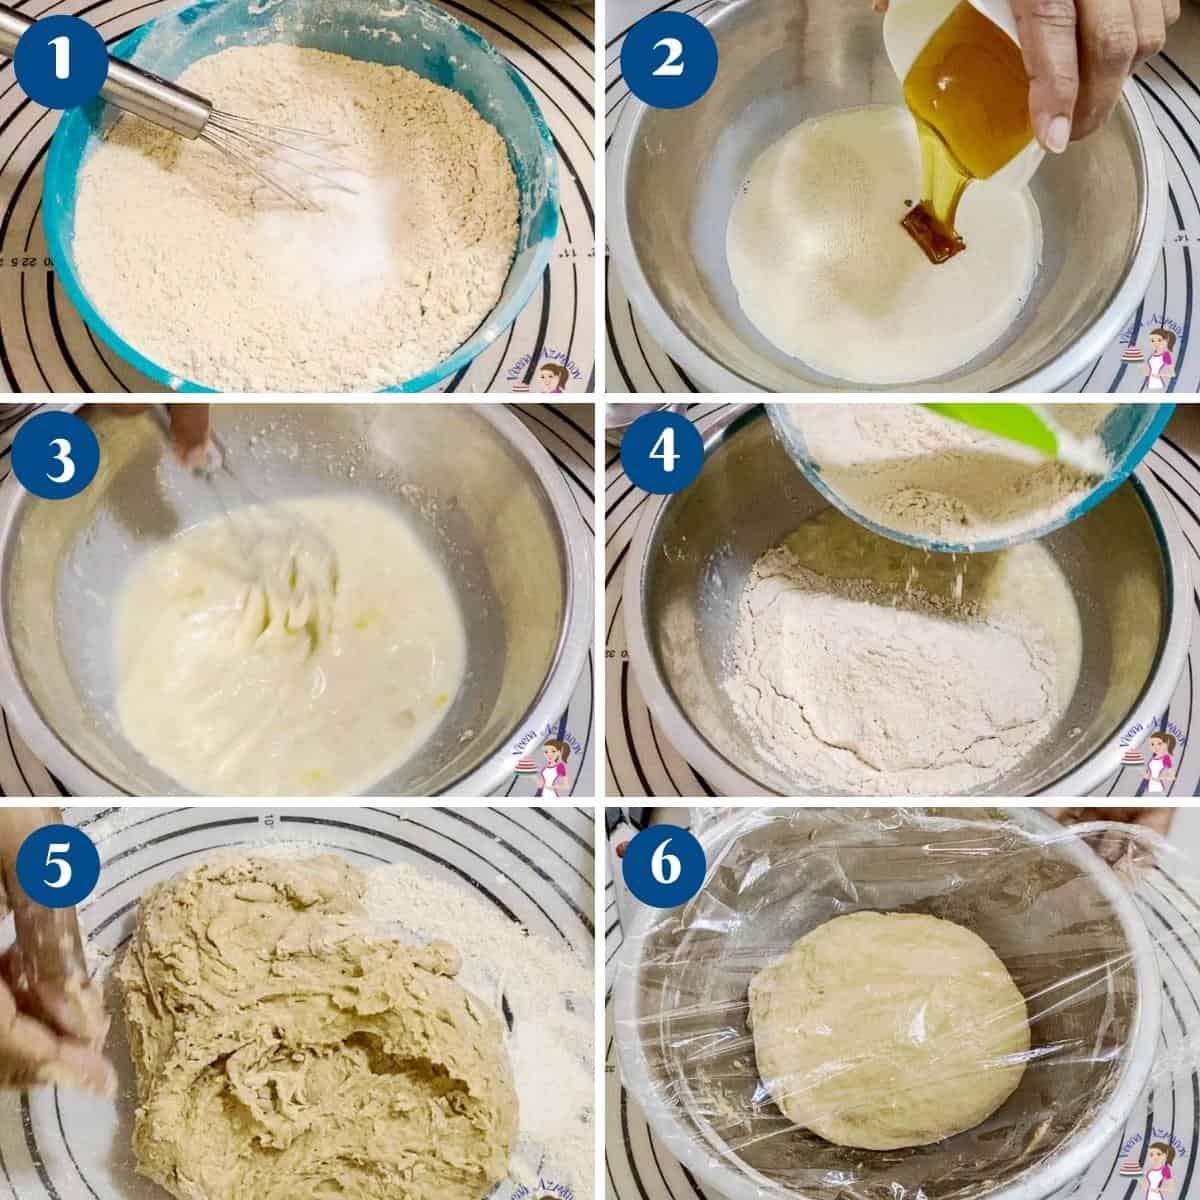
- Knead – Continue to knead on medium speed for 18 to 20 minutes until you have a soft, smooth, and elastic dough.
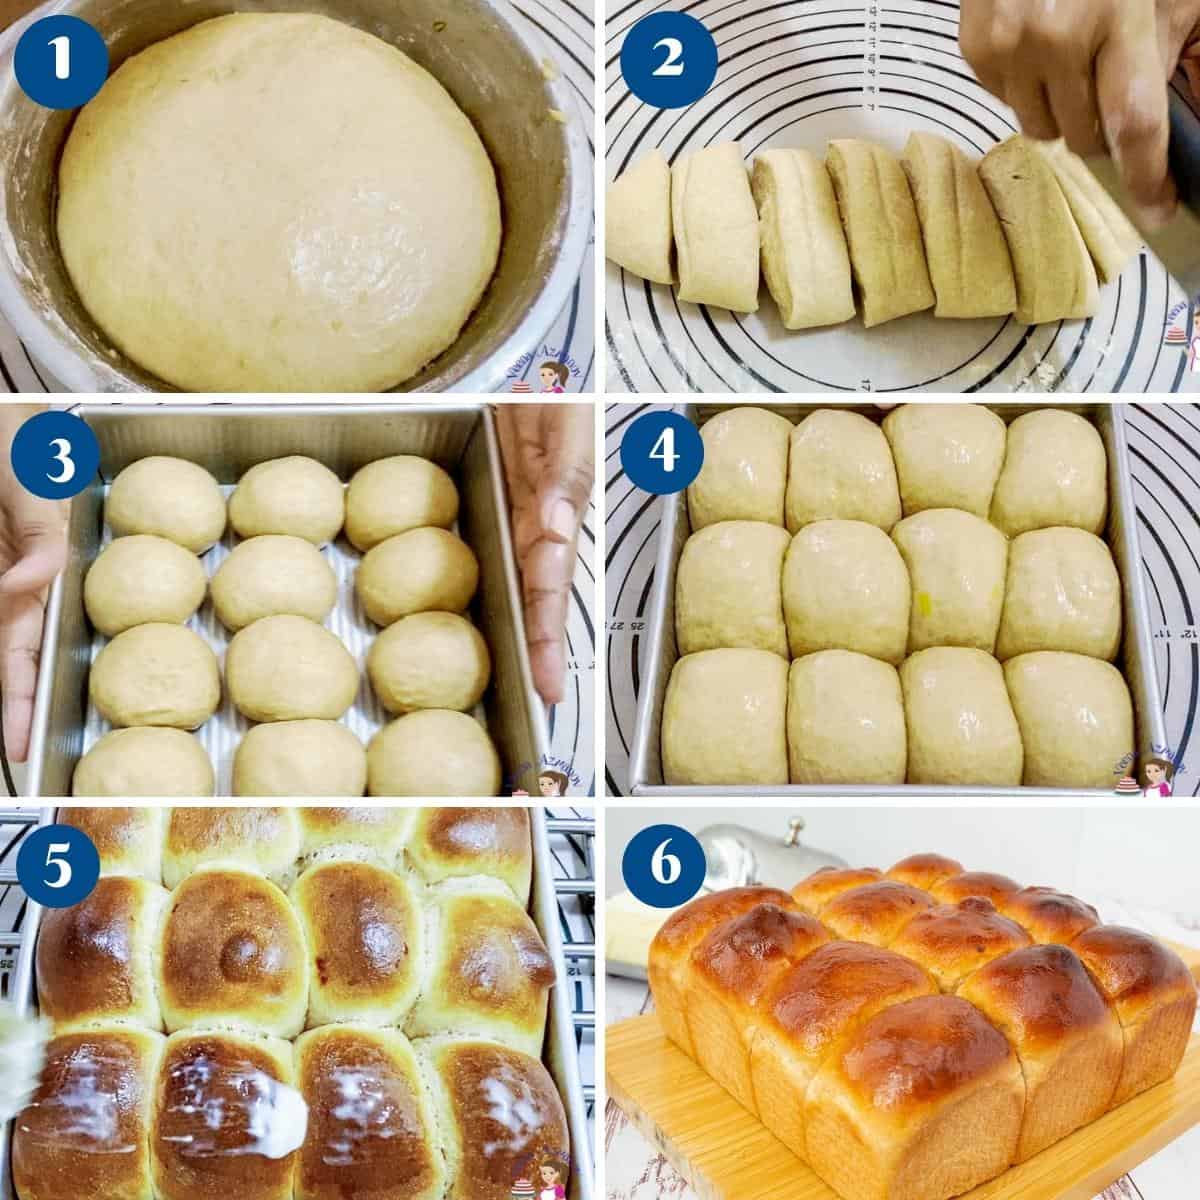
Pro tip – Avoid the temptation to add more flour. We want soft, light, and fluffy rolls, and this is only possible when the dough is soft, elastic, yet slightly sticky. - Bowl – When the dough is soft and shiny, but still slightly sticky, shape it into a ball. Place the dough in an oiled bowl, seam side down. Coat the surface with cooking spray to prevent drying. Cover with a clean kitchen towel or plastic wrap.
- Rise – Leave in a warm place. Let it rise for 60 to 90 minutes until it doubles in volume.
Pro tip – In winter, you may need 90 minutes or more, but in summer, the dough may double in 45 minutes. If you can’t attend to it at that moment, degas, reshape, and let it double in volume again. - Divide – When the dough is doubled in volume, transfer it to a well-dusted floured surface. De-gas, reshape into a ball. Then roll it into a small log.
Pro tip – At this point, there is no need for additional flour. So use a light dusting of flour. - Using a dough scraper, divide this log into three portions, and then divide each of those portions into three again. This should give you nine equal pieces.
Pro tip – The odd number 9 is because we are using a square baking pan. You can also divide into 8 medium or 12 small rolls, and use an 8-inch round or quarter sheet pan.
Shape and Bake
- Shape – Hold each piece of dough in your hand and gather all the seams together. Pinch the seams at the bottom, then place the ball on a non-floured surface while still holding it in your hand. Loosen the grip on the dough and roll it back and forth into a tight circle against the work surface. You will feel the dough become tight and smooth.
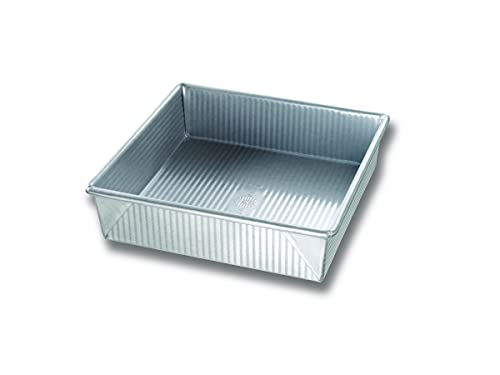
Pro tip – The goal is to create a tight, smooth ball. If you overdo the rolling, you will rip the top surface, which will give a rough, not smooth roll. - Proof – Grease or spray a 9 x 9 square baking pan. Place the rolls in the pan. Seam side down. Cover with a clean kitchen cloth or plastic wrap and leave in a warm place for about 45 minutes until almost doubled in size.
Pro tip – Spray the plastic wrap with oil to prevent it from sticking to the rolls. - Oven – When the rolls are almost doubled in volume at about 30 minutes, preheat the oven to 375°F /190°C / Gas Mark 5
- Egg wash – Brush the rolls with milk, cream, or egg wash.
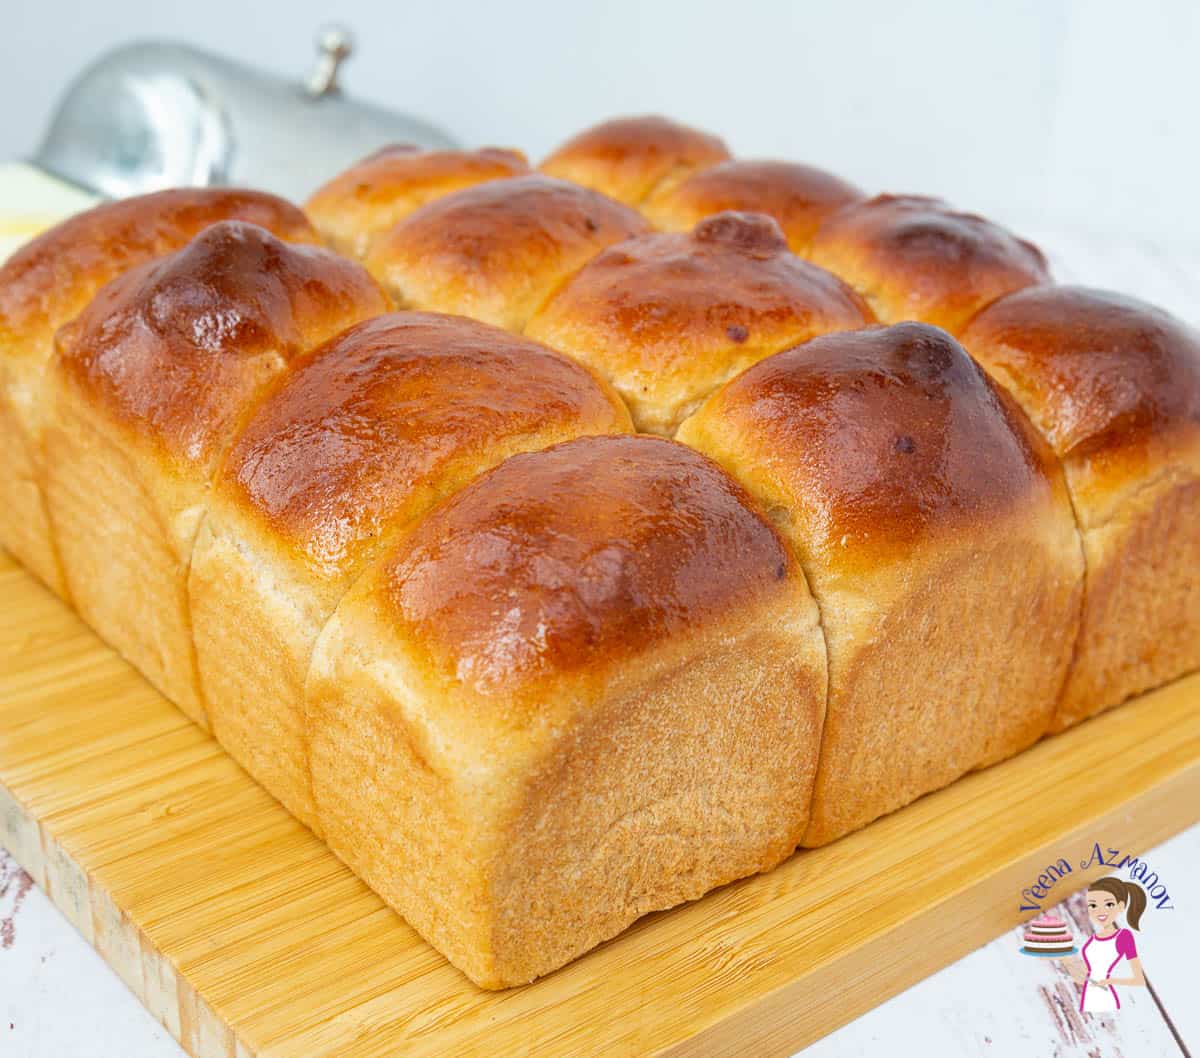
Pro tip – Egg wash is a full egg with 2 tbsp of water. An egg wash will give a nice golden brown color. - Bake for about 20 to 22 minutes until lightly golden on top. When baked, brush with melted butter.
Pro tip – This is optional, but it adds a nice flavor and keeps the top crust soft. - Cool – Take them out of the pan and cover them with a clean kitchen cloth for at least 5 minutes to keep them soft.
Pro tip – Do not leave the rolls in the pan for too long, as the steam will make the bread soggy on the bottom.
Whole Wheat Rolls
These whole wheat dinner rolls are light and airy and made with 70% whole wheat flour. The recipe is simple, easy to make, and much healthier than most bread rolls.
Video
Ingredients
- 360 grams (1½ cups) Warm milk or warm water (110°F)
- 30 grams (2 tbsp) Honey
- 9 grams (2½ tsp) Instant dry yeast
- 60 grams (4 tbsp) Unsalted butter melted
- 250 grams (2 cups) Whole wheat flour
- 250 grams (2 cups) All-purpose flour
- 9 grams (1¼ tsp) Salt
Method
- Yeast – In a small bowl or measuring cup, combine the milk (or warm water), yeast, and honey. Use a whisk or wooden spoon to combine well.360 grams Warm milk, 30 grams Honey, 9 grams Instant dry yeast, 60 grams Unsalted butter
- Combine – Measure the white flour, whole wheat flour, and salt in a large bowl of a stand mixer with the dough hook attachment. Add the yeast mixture and combine on medium-high speed until all the flour is well incorporated.250 grams Whole wheat flour, 250 grams All-purpose flour, 9 grams Salt
- Knead – Continue to knead on medium speed for 10 to 12 minutes until you have a soft, smooth, and elastic dough.
- Bowl – When the dough is soft, shiny, but still slightly sticky, shape it into a ball. Place the dough in an oiled bowl, seam side down. Coat the surface with cooking spray to prevent drying. Cover with a clean kitchen towel or plastic wrap.
- First rise – Leave in a warm place. Let rise for 60 to 90 minutes until it doubles in volume.
- Divide – When the dough is doubled in volume, transfer to a well-dusted floured surface, degas, and reshape into a ball. Then, roll into a small log.
- Using a dough scraper, divide this log into three portions and then each of those portions into three again. This should give you nine equal pieces/ large dinner rolls.
- Shape – Hold each piece of dough in your hand and gather all the seams together. Pinch the seams at the bottom, then place the ball on a non-floured surface while still holding it in your hand. Loosen the grip on the dough and roll back and forth into a tight circle against the work surface. You will feel the dough become tight and smooth.
- Proof – Grease or spray a 9 x 9 square baking pan. Place the rolls in the pan. Seam side down. Cover with a clean kitchen cloth or plastic wrap and leave in a warm place for about 45 minutes until almost doubled in size.
- Oven – When the rolls are almost doubled in volume at about 30 minutes, preheat the oven to 375°F /190°C / Gas Mark 5
- Egg wash – Brush the rolls with milk, cream, or egg wash.
- Bake for about 20 to 22 minutes until lightly golden on top. When baked, brush with melted butter.
- Cool – Take them out of the pan and cover them with a clean kitchen cloth for at least 5 minutes to keep them soft.
Notes
- Measure all ingredients beforehand so you don’t forget anything at the last minute.
- For accuracy, use a weight measure for the ingredients.
- The milk must be warm (not hot), about 110°F. If the milk is too hot, it will kill the yeast; similarly, if it is too cold, it will not activate the yeast.
- Though instant dry yeast has a long shelf life, it can get ruined. Always check the expiry of the yeast. If unsure, combine the wet ingredients from the recipe and let stand 5 minutes. If it gets foamy, the yeast is good to go; if not, best to buy fresh yeast or check the temperature of the milk.
- Keep salt away from yeast as it can kill the yeast. I like combining it with the flour and adding it to the yeast mixture.
- A soft, loose, well-hydrated dough is not necessarily a bad thing; it often will give you soft, fluffy bread, so don’t be tempted to add more flour than mentioned in the recipe.
- Kneading is key to making good bread. While kneading by hand can be therapeutic, using a stand mixer is easier and quicker.
- Leave the dough at room temperature to rise until double in volume. While not recommended when in haste, you can place it in a warm 100°F (not hot) oven; this will expedite the rise.
- Bread does not have to be time-consuming. You can leave the dough in the fridge to rise for a few hours (even overnight) while you go about your chores. A slow rise will give more flavor to the bread.
- Always preheat the oven for at least 10 minutes before you place bread in, or the low temperature will spread the dough too much.
- Overnight Rolls – The dough can be prepared a day in advance. Proof them on the counter for an hour, then punch down and let the dough rest in the fridge overnight. Overnight proofing is a great way to add flavor to the bread. The next day, continue with the recipe as directed, rolling and shaping the chilled dough.
- Storing these rolls– These dinner rolls do freeze beautifully. Cool the baked buns, then place them in a freezer-safe storage bag. These can be frozen for up to a month.
- Kneading the dough – The dough does need kneading, so if possible, try using an electric mixer.
- Bread machine – These rolls can be easily made in a bread machine. Pour all ingredients into the pan set to dough or manual. Start and let the dough run its cycle for about 9 to 10 minutes – continue with the recipe as shown above.
Equipment you will need


Nutrition
Tried this recipe?
Mention @veenaazmanov_kitchen or tag #veenaazmanovkitchen!Troubleshooting
- My dough did not rise.
Most often, the simplest explanation for this is that the liquid (milk) used was not warm. You need the liquid to be no more than 110°F/ 41 °C. Hotter than that will not activate the yeast. In some cases, it could also be that the yeast was old and not good. - My bread is not soft, but dense.
If you add too much flour to the dough, the bread will be dense, not soft. You want the dough to be soft, elastic, and still slightly sticky. Follow the recipe and watch the video to see the dough’s consistency. - My rolls deflated when baking.
Proof the rolls for only 45 minutes or until they almost double in volume. They will continue to rise some more in the oven when baking. If you overproof the rolls, they tend to rise and deflate when baking.
more bread recipes
- Garlic Rolls – White Dinner Roll recipes
- Whole Wheat Sandwich Bread
- Soft Whole Wheat Burger Buns
- and Soft wholewheat Pretzels
- Indian Flatbread – Chapati, Roti, Paratha,
- See all white bread recipes or whole wheat bread recipes


Frequently asked questions
If stored properly, these soft whole wheat dinner rolls will stay for 3 to 4 days at room temperature. They can also be frozen for a month or more. Most importantly, never store bread in the fridge as it dries out.
The best way to keep homemade bread soft is to contain the steam within the bread. So, while they are still hot, place a clean kitchen cloth over them and let them rest for 10 minutes. Keeping these dinner rolls covered will also keep them from drying out.
These are great with any soup, stew, chili, or slow-cooked meat.
For example, soup, salad, and dinner rolls are complete meals in our home.
Also, they are perfect to soak up the gravy in slow-cooked lamb, beef, or chicken dishes. My kids love lamb stew or chili with this bread.
We need some white flour to form gluten. That’s what gives us this light and airy texture. If you use all whole-wheat flour, the rolls will be firmer and denser in texture.
you may also like
- Cheesy Christmas Tree Pull-Apart Bread
- 15+ Beginner Bread Recipes for Everyday Baking
- 15+ Sandwich Bread Recipes
- 15+ Sandwich Bread Recipes
- Baking bread 101 – Beginners Guide


Don’t lose this recipe! Save it for Later!
📌 Save this Recipe for later on Pinterest so you can easily find it again.
⭐ Add Veena Azmanov Kitchen to your Google Preferred Sources.
It helps Google show you more of our recipes.
📧 Subscribe for new recipes delivered to your inbox.
🎥 Follow us for more recipes


Can I sub bread flour for AP flour?
Yes you can and perhaps knead for 2 minutes more to activate gluten
Followed the recipe to the T. I would give it a 0/10. Texture is non existent. You do get a good raise from 2 1/4 tsp of yeast, but It turns like chewing a cotton candy baked dough ball. I didn’t expect open texture like pan-de-crystal or something, but this recipe is certain to ruin any dinner plans one may have.
Partha. I’m sorry you did not enjoy this bread.
As a guide, you only need 7 grams (2 1/4 tsp) per 500 grams of flour. Anything more than that will give you very yeasty bread.
I have made this recipe many times, and because it has 50% white/whole wheat flour it does rise in about 60 to 90 minutes.
The texture is fluffy and the bread is absolutely delicious as you can see in the comments from previous visitors who have tried this recipe.
Thank you
I’m confused about the addition of the butter. It says to add butter to the yeast mixture, and then again once the dough has formed, but it doesn’t say how much… I added all the melted butter to the yeast mixture, and now I have a soupy mess that requires more flour/mixing.
Hey Frances, yes, you can add the butter directly into the yeast mixture or later during kneading. It does not matter as long as you mix it into the dough thoroughly.
The flour will be absorbed by the liquid. Just knead well. Also, you do want the soft and fluffy dough.
If necessary add 1 to 2 tablespoons flour but not too much as you do want a slightly sticky dough.
The egg wash caused my rolls to deflate, I think I will omit it next time I make these. They tested good though.
Omg! These dinner rolls turned out so well! Very soft and great texture. Am very greatful to your recipes ma’am. They’ve never let me down. Thank you so much!
Thank you, Sharaz. For the lovely feedback.
They came out so good!!! I used sugar instead of honey, ripple plant-based milk, plant based butter, Activated yeast and I didn’t have any egg wash on it. They came out perfect thank you!
Thank you. Cat. I am happy you enjoyed this recipe
Thanks for your recipes, they help to enhance my skills in baking.
I love your recipes, I always get a great result. I keep my bread/rolls in a paper bag inside a plastic bag. Sometimes the paper bag gets a little moist, so I transfer the bread to a new one.
Anna. It is best to store bread in a paper bag, never plastic. Plastic encourages mold. Store in a cool dry place. Use it within three days. If you need to keep it longer, slice it and freeze it.
Hello
I have a fan oven are the temperatures shown for fan ovens or do I need to reduce the temperature
Thanks
Clive
These temperatures are for a regular oven. Thanks