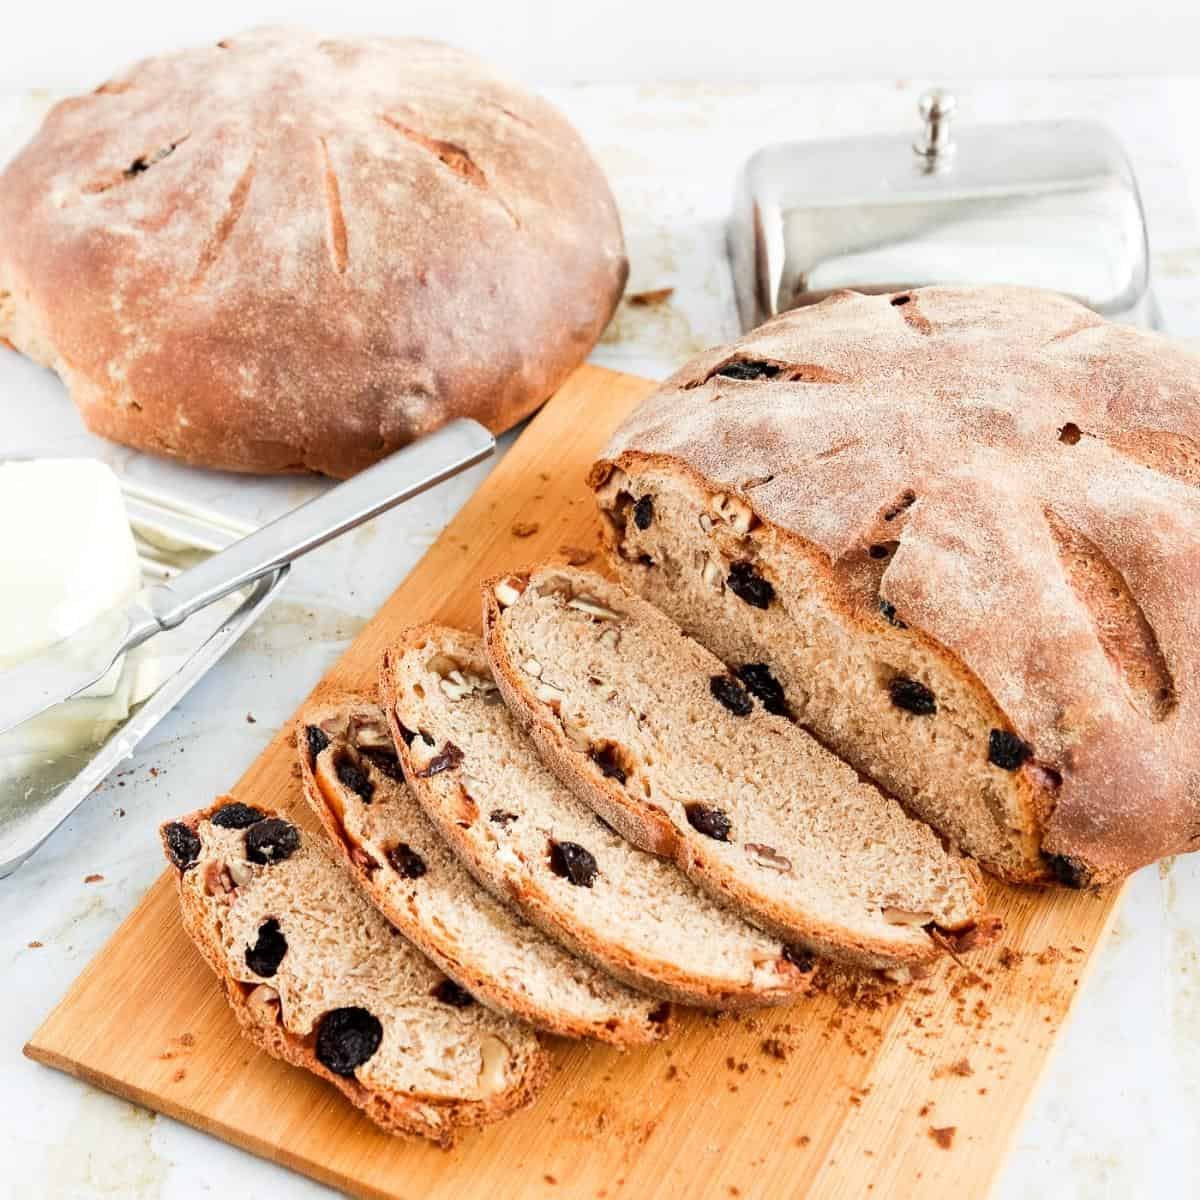
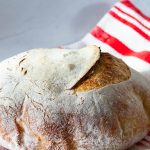
Raisin Walnut Bread
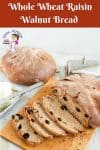
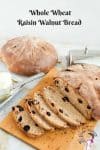


This walnut raisin bread is a delightful blend of soft, fluffy dough studded with sweet raisins and crunchy walnuts, perfect for breakfast or an afternoon snack. The subtle hint of cinnamon adds warmth and depth, making each bite a comforting treat. Its golden crust and tender crumb make it an irresistible addition to any bread lover’s repertoire.

Do you like whole wheat flour? Baking with whole wheat is not easy, especially for those who eat and love white bread. So, if you are just venturing into the world of whole wheat, do not feel compelled to use all whole wheat flour.
For example, you can start with a ratio of half whole wheat and half bread flour. And as you get used to eating whole wheat, adjust the ratio up or down. In fact, when I started, I added only 25% whole wheat to our recipe. Then, I moved onto 50%, and now it’s about 75%.
Why make this bread?
- Well, it all starts with the choice of whole wheat flour. Whole wheat flour adds a depth of flavor and richness that you won’t find in traditional white flour. It gives the bread a nutty undertone that perfectly complements the walnuts and raisins. This loaf uses 75% whole wheat flour but also 25% white flour. Hence, it gives you the best of both, wholesome goodness from whole wheat, and that light and airy structure from the gluten in the white loaf.
- But it’s not just about taste. Whole wheat bread is known for its nutritional benefits. Packed with fiber, vitamins, and minerals, this bread truly nourishes your body. The fiber content slows down digestion, keeping you feeling fuller for longer and helping to regulate blood sugar levels. No more sudden spikes and crashes that leave you reaching for more snacks. This bread satisfies not only your taste buds but also your hunger.
- And let’s not forget about the texture. Using whole wheat flour gives this bread a moist and tender crumb that is simply irresistible. It adds a subtle chewiness that enhances each bite, making it a delight to savor.
- So, by choosing to make this walnut-raisin bread with whole wheat flour, you’re not only adding nutritional value to your baking but also enhancing its taste, texture, and satiety. Get ready to indulge in a slice of moist, irresistible, and wholesome goodness that will leave you wanting more.
Ingredients and substitutes
- First and foremost, let’s discuss the primary ingredients. Flour forms the foundation of the dough, providing the structure and texture that make the rolls light and fluffy. I used all-purpose flour in this recipe, but if you prefer a heartier roll, you can also use whole wheat flour or a mix of both. Keep in mind that using whole wheat flour may result in slightly denser bread. Whole wheat flour adds nutritional value and enhances the taste, texture, and satiety of your bread. However, if you prefer a lighter loaf, you can opt for whole wheat and all-purpose flour.
- Next, let’s talk about the walnuts. These crunchy and buttery nuts bring a delightful nuttiness to the bread. If walnuts aren’t your thing or you have an allergy, fear not! You can easily swap them out with other nuts like pecans, almonds, or even hazelnuts. Just make sure to toast them beforehand to bring out their full flavor.
- Now, let’s move on to the raisins. These sweet and juicy gems add bursts of fruity goodness throughout the bread. If you don’t have raisins, dried cranberries or currants can be excellent substitutes. You can even experiment with dried apricots or chopped dates for a unique twist.
- We can use sugar to sweeten the bread, but you can use honey or maple syrup for a healthier option, adding a subtle caramel flavor. Remember that the sweetness level may vary, so adjust it according to your taste buds.
- This recipe uses instant dry yeast, but you can also use the same amount of active dry yeast. If you use fresh yeast, you will need about 21 grams.

Step-by-step: Walnut raisin bread
- Dough: Combine the warm water and instant yeast in a bowl of a stand mixer with the hook attachment. Add the sugar and oil, followed by the flour and salt. Stir until the dough comes together. Knead the dough on a lightly floured surface for about 8-10 minutes until it becomes smooth and elastic.
- Add Raisins and Walnuts: Gently knead the raisins and walnuts into the dough until they are evenly distributed.

- First Rise: Place the dough in a lightly oiled bowl, cover it with a damp cloth, and let it rise in a warm place for about 1-2 hours or until it has doubled in size.
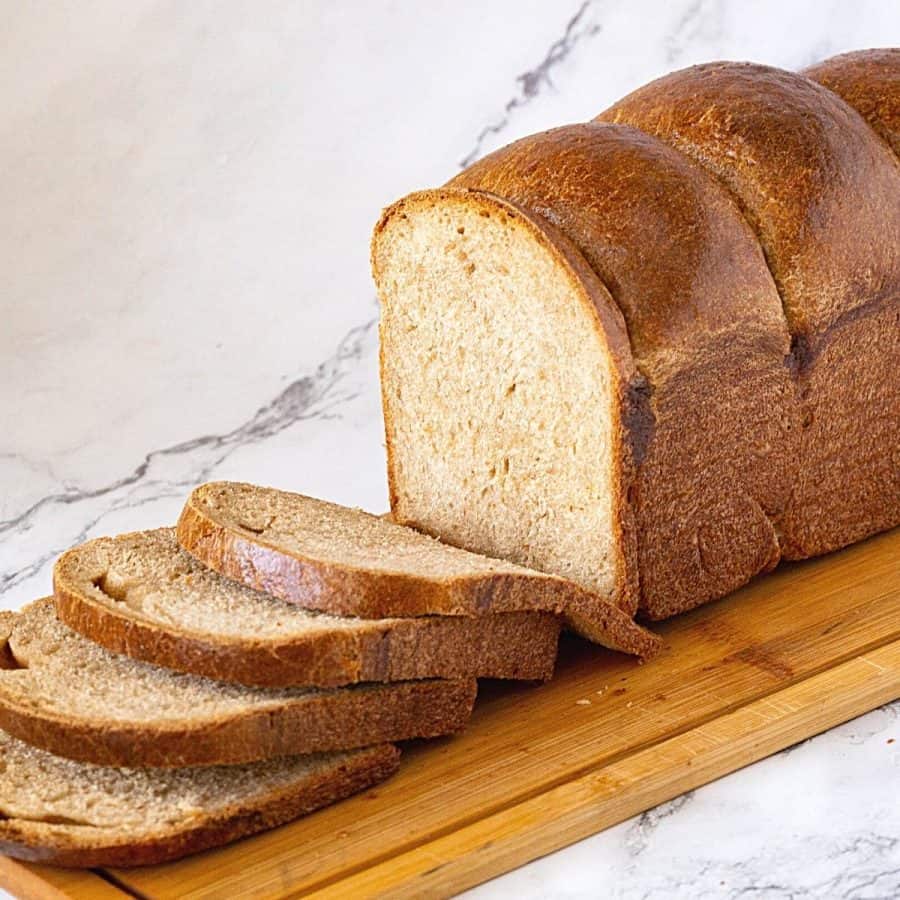
- Shape the Dough: Punch down the risen dough to release the air. Shape it into a loaf or divide it into two smaller loaves. Place the shaped dough into a greased loaf pan (or two smaller pans if divided).
- Second Rise: Cover the dough with a damp cloth and let it rise again in a warm place for about 30-45 minutes or until it has doubled in size.

- Preheat the Oven: Preheat your oven to 375°F (190°C).
- Score: Dust the top with flour and score with a bread scoring tool or razor blade.
- Bake: Bake in the preheated oven for about 30-35 minutes, or until the bread is golden brown and sounds hollow when tapped on the bottom.
- Cool: Remove the bread from the oven and let it cool in the pan for about 10 minutes. Then, transfer it to a wire rack to cool completely before slicing.

Tips for Success
- Firstly, accuracy is key in baking when it comes to measuring your ingredients. Be sure to use measuring cups and spoons specifically designed for dry or liquid ingredients, depending on what you’re measuring. This will ensure your ratios are right and help you achieve a balanced loaf every time.
- Next, pay close attention to the quality of your ingredients. Opt for fresh, high-quality walnuts and plump, juicy raisins to infuse your bread with the most flavorsome bites. Using stale or subpar ingredients can impact your final product’s overall taste and texture.
- To enhance the nutty goodness, lightly toast your walnuts before adding them to the dough. This simple step will bring out their natural oils and intensify their flavor, making every bite of your walnut raisin bread delectable.
- When mixing your ingredients, be mindful not to overwork the dough. Overmixing can result in dense and tough bread. Mix until the ingredients are fully incorporated, and you’ll achieve a tender and moist crumb.
- To prevent your raisins from sinking to the bottom of the bread, toss them in a bit of flour before adding them to the dough. This will help them distribute evenly throughout the bread, ensuring sweetness in every bite.
- Lastly, to add an extra layer of flavor, consider incorporating spices like cinnamon or nutmeg into your dough. These warm, aromatic spices complement the raisins’ sweetness and the walnuts’ earthiness, elevating your whole-wheat walnut raisin bread.

Creative variations
- One creative variation you can try is adding a hint of citrus to your walnut raisin bread. Grate the zest of an orange or a lemon into your dough, and let its vibrant and tangy flavors complement the sweetness of the raisins and the nuttiness of the walnuts. This citrusy twist will add a refreshing dimension to your bread and elevate its taste.
- If you’re looking for a savory twist, consider adding some shredded cheese to the dough. Cheddar, Gouda, or Parmesan all work wonderfully to create a savory and cheesy flavor profile that pairs perfectly with the walnuts and raisins. The melted cheese will infuse the bread with a rich and indulgent taste that is guaranteed to satisfy your savory cravings.
- For those with a love of spices, why not experiment with a touch of cardamom or cloves in your walnut-raisin bread? These warm and aromatic spices will not only add a delightful fragrance to your bread but also deepen its flavor complexity. The combination of spices, walnuts, and raisins will create a taste sensation that is both comforting and unique.
- If you’re feeling adventurous, you can even experiment with different types of raisins or dried fruits. Swap the classic raisins for tangy golden raisins or chewy currants to experience a new dimension of sweetness. Alternatively, you can mix in some diced dried apricots, dates, or figs to introduce a delightful variety of textures and flavors to your bread.

Creative ways to serve raisin bread
- One simple and classic way to serve your walnut-raisin bread is to slice it and spread a generous amount of butter on each slice. The creamy butter perfectly complements the bread’s sweet, nutty flavors, creating a symphony of flavors in every bite. For an extra touch of indulgence, consider using flavored butter, such as cinnamon or honey butter, to elevate the experience even further.
- If you’re in the mood for something more decadent, why not transform your walnut raisin bread into delicious French toast? Dip thick slices of the bread into a mixture of beaten eggs, milk, cinnamon, and a hint of vanilla. After a quick pan-fry in butter, you’ll have a heavenly breakfast or brunch treat that is sure to impress. Top it off with a drizzle of maple syrup or a dusting of powdered sugar for an extra touch of sweetness.
- For a lighter option, consider using your walnut raisin bread as a base for mouthwatering sandwiches. Whether you prefer sweet or savory, the possibilities are endless. Try spreading a layer of creamy goat cheese on a slice of the bread, then layer on some sliced pears and arugula for a delightful and unexpected combination of flavors. Alternatively, you can use the bread as a base for your favorite deli meats and cheeses, adding lettuce, tomato, and a dollop of spicy mustard for a classic and satisfying sandwich.
- If you’re hosting a brunch or afternoon tea, why not serve your walnut raisin bread as part of an elegant bread pudding? Simply cube the bread and soak it in a mixture of eggs, milk, sugar, and a splash of vanilla. Bake until golden and set, and you’ll have a warm and comforting dessert that is sure to impress your guests. Serve it with a dollop of freshly whipped cream or a scoop of vanilla ice cream for a truly indulgent treat.

- Chocolate Walnut Brownies Recipe
- Dark Chocolate Brownies
- Grated Carrot Salad
- Whole Wheat Sandwich Bread
- Recipe for Whole Wheat Sourdough Bread


Frequently asked questions
Another query that often arises is how long the walnut raisin bread stays fresh. When stored properly, homemade walnut raisin bread typically remains fresh for about 3-4 days. However, if you want to enjoy it for a longer period, you can freeze it. Wrap individual slices or the entire loaf tightly in plastic wrap and place it in a freezer-safe bag. Frozen walnut-raisin bread can last up to 3 months. Just remember to thaw it at room temperature before consuming.
To maintain the bread’s moisture and flavor, it is best to store it in an airtight container or wrap it tightly in plastic wrap. This will help prevent it from drying out and becoming stale. Additionally, you can extend its shelf life by refrigerating it, but make sure to bring it to room temperature before serving to enhance its taste and texture.
The answer is yes! After kneading the dough and letting it rise for the first time, you can wrap it tightly in plastic wrap and freeze it for later use. When you’re ready to bake, let the dough thaw in the refrigerator overnight. Then, shape it into a loaf, allow it to rise again, and bake as directed in the recipe. Freezing the dough not only allows for convenient future baking but also helps develop a deeper flavor profile.
If you don’t have walnuts on hand, you can try using pecans or almonds instead. Similarly, if you’re not a fan of raisins, you can experiment with dried cranberries, cherries, or even chopped dates to add a different twist to the bread. Just keep in mind that different substitutions may slightly alter the taste and texture, so it’s always best to try a small batch before making a larger quantity.
Yes, you can substitute some of the raisins and walnuts with dried apricots, dates, figs, and cashews, almonds, sunflower seeds, or pecans. It’s best to keep the final quantity the same or about 1/2 cup more than in the recipe. Any more than that and you risk making the bread too dry.
Yes, you can use all white bread. It will be softer in texture than whole wheat bread. Perhaps try my white sandwich bread recipe instead.
You can, but, of course, the bread will be denser in texture than this half-and-half recipe.
I do have whole-wheat sandwich bread that does not contain any nuts or fruit. Perhaps that tried-and-tested recipe might work better for you.
It might work. But, perhaps, it’s best to use my tried and tested whole wheat burger buns recipes.

Don’t lose this recipe! Save it for Later!
📌 Save this Recipe for later on Pinterest so you can easily find it again.
⭐ Add Veena Azmanov Kitchen to your Google Preferred Sources.
It helps Google show you more of our recipes.
📧 Subscribe for new recipes delivered to your inbox.
🎥 Follow us for more recipes


Walnut Raisin Bread
This walnut raisin bread is a delightful blend of soft, fluffy dough studded with sweet raisins and crunchy walnuts, perfect for breakfast or an afternoon snack. The subtle hint of cinnamon adds warmth and depth, making each bite a comforting treat. Its golden crust and tender crumb make it an irresistible addition to any bread lover's repertoire.
Video
Ingredients
- 375 g (3 cups) Flour (Whole wheat or All-purpose flour) or 50% of both
- 7 g (2¼ tsp) Instant dry yeast
- 240 g (1 cup) Warm water or milk (110F)
- 15 ml (1 tbsp) Olive oil or melted butter
- 15 ml (1 tbsp) Sugar or Honey
- 9 g (1 tsp) Salt
- 120 g (½ cup) Walnuts I used 1/2 pecans
- 60 g (½ cup) Black raisins
Method
- Dough: Combine the warm water and instant yeast in a bowl of a stand mixer with the hook attachment. Add the sugar and oil, followed by the flour and salt. Stir until the dough comes together. Knead the dough on a lightly floured surface for about 8-10 minutes until it becomes smooth and elastic.375 g Flour (Whole wheat or All-purpose flour) , 7 g Instant dry yeast, 240 g Warm water or milk , 15 ml Olive oil or melted butter , 15 ml Sugar or Honey , 9 g Salt
- Add Raisins and Walnuts: Gently knead the raisins and walnuts into the dough until they are evenly distributed.120 g Walnuts, 60 g Black raisins
- First Rise: Place the dough in a lightly oiled bowl, cover it with a damp cloth, and let it rise in a warm place for about 1-2 hours or until it has doubled in size.
- Shape the Dough: Punch down the risen dough to release the air. Shape it into a loaf or divide it into two smaller loaves. Place the shaped dough into a greased loaf pan (or two smaller pans if divided).
- Second Rise: Cover the dough with a damp cloth and let it rise again in a warm place for about 30-45 minutes or until it has doubled in size.
- Preheat the Oven: Preheat your oven to 375°F (190°C).
- Score: Dust the top with flour and score with a bread scoring tool or razor bread.
- Bake: Bake in the preheated oven for about 30-35 minutes, or until the bread is golden brown and sounds hollow when tapped on the bottom.
- Cool: Remove the bread from the oven and let it cool in the pan for about 10 minutes. Then, transfer it to a wire rack to cool completely before slicing.
Notes
- Measure all ingredients ahead of time, so you don’t forget anything at the last minute.
- For accuracy, use a weight measure for the ingredients because every cup of flour can weigh differently depending on how you fill it.
- The liquid (milk or water) must be warm (not hot) – about 110F. If the liquid is too hot, it will kill the yeast. Similarly, if the liquid is too cold, it will not activate the yeast.
- Most yeasts have a long shelf life, but they can get ruined. Always check the expiry date on the yeast. If unsure, combine the yeast with water/milk, sugar/honey, and oil/butter from the recipe and let stand 5 minutes. If it gets foamy the yeast is good to go. If not, it’s best to buy fresh yeast or check the temperature of the milk.
- Keep salt away from yeast as it can kill the yeast. I like to combine salt with the flour then add the yeast mixture.
- A soft loose well-hydrated dough is not necessarily a bad thing. Often, it will give you soft puffy bread. So, don’t be tempted to add more flour than mentioned in the recipe.
- Kneading is key to making good bread. While kneading by hand can be therapeutic, using a stand mixer is easier and quicker.
- Leave the dough at room temperature to rise until double in volume. While not recommended, when in haste, you can place it in a warm (30 C / 75 F- not hotter) oven this will expedite the rise.
- Bread does not have to be time-consuming. You can leave the dough in the fridge to rise for a few hours (even overnight) while you go about your chores. A slow rise will give more flavor to the bread.
- Always preheat the oven for at least 10 minutes before you place bread in or the low temperature will spread the dough too much.
- Overnight dough – The dough can be prepared a day in advance. Proof it for an hour on the counter then punch down and let the dough rest in the fridge overnight. Overnight proofing is a great way to add flavor to the bagels. The next day, let the dough come to room temperature before you shape and bake them.
- Storing bread – These loaves do freeze beautifully. Cool the baked loaves then place them in a freezer-safe storage bag. These can be frozen for up to a month. I like to slice my challah so my kids use a few slices at a time.
- Kneading the dough – If possible use an electric mixer because the dough is soft and sticky.
- Bread machine – this dough can be easily made in a bread machine. Pour all ingredients in the pan set to dough or manual. Start and let the dough run its cycle for about 9 to 10 minutes – continue with the recipe as shown above.


Day 8 done
Day 8 Done !
day 8 Done!
Day 8 done
Day 8,week 1 done!
Day 8 done thank you so much
Day 8 – Done
Day 12. Done
Day 8 Done
Hello, may i ask… Is the amount of salt in the recipe correct? 1.5 tablespoon?
It’s 1 1/2 tsp salt
Day 8 done
Day 8 done
Day 8 Done!! … Thank You
Day 8 done