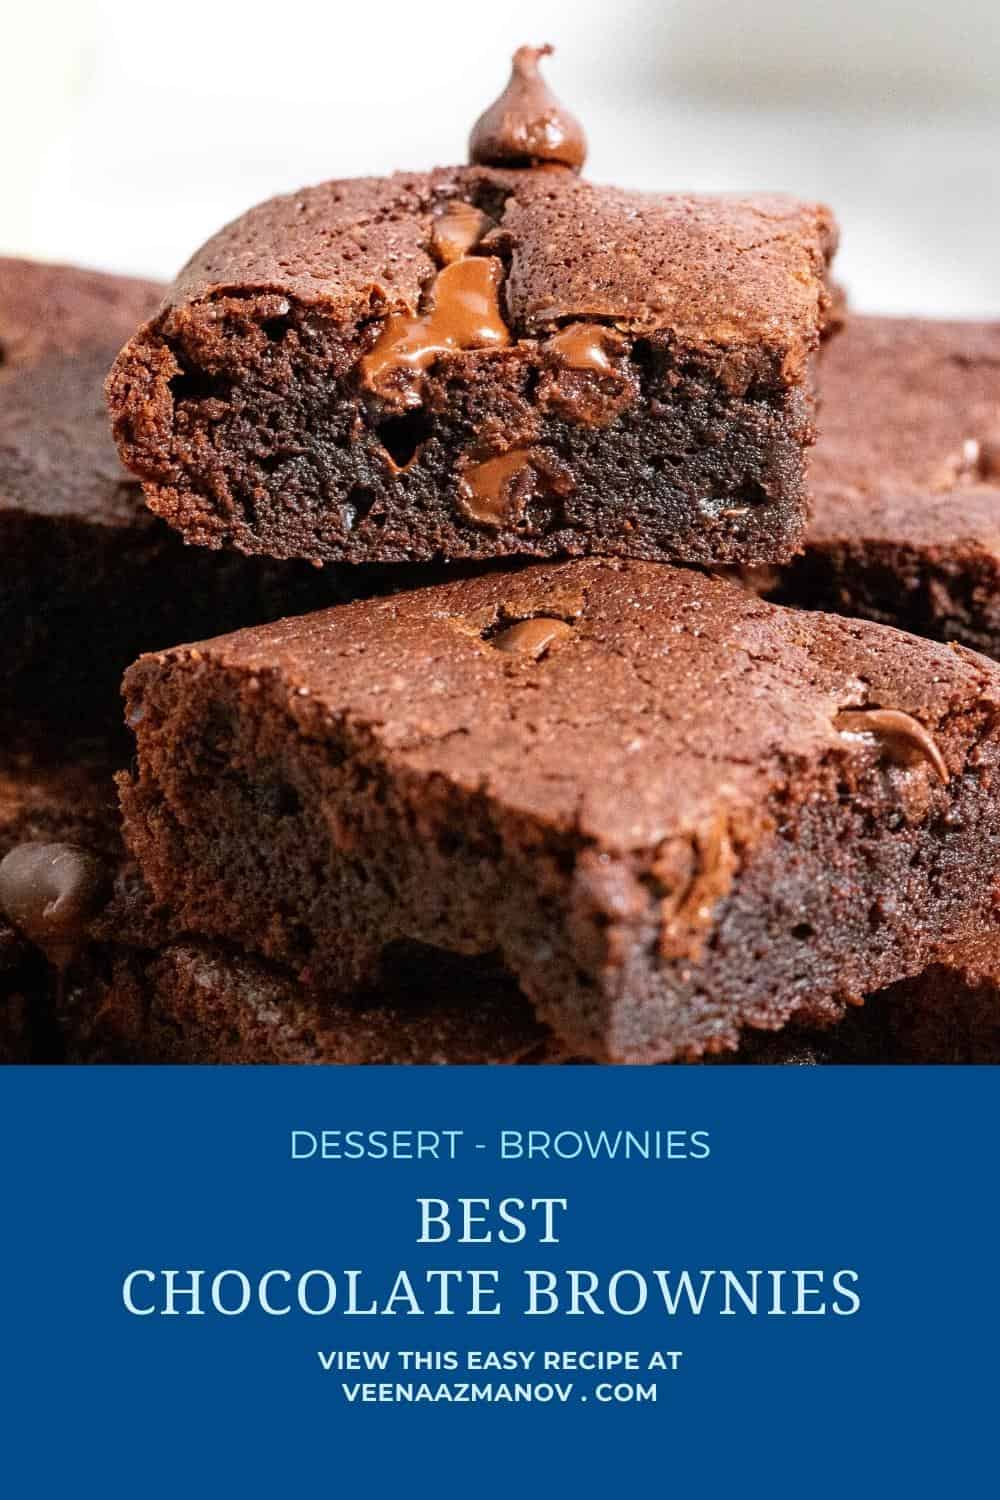
Rich and Fudgy Dark Chocolate Brownies


Brownies are a popular dessert typically made from chocolate, sugar, flour, eggs, and butter. Recipes for brownies are in plenty. Learn about how to make the BEST EVER dark chocolate brownies here.
These dark chocolate brownies are my go-to when I want something rich, bold, and just a little dramatic. The kind of dessert that doesn’t whisper “I’m chocolate”—it declares it.
For the longest time, I used to think brownies had to be sweet and safe—crowd-pleasers with sprinkles and maybe a few chocolate chips. But then I discovered dark chocolate, the kind with that deep, almost bitter edge, and everything changed. Suddenly, I didn’t just want a brownie—I wanted one that made me feel something.
When I bake these, it’s usually for a quiet moment: a rainy afternoon, a late-night craving, or as a not-so-subtle excuse to make a cup of coffee and pause. But every time, they remind me why I fell in love with baking in the first place—because a good brownie can fix almost anything.
Why make these brownies
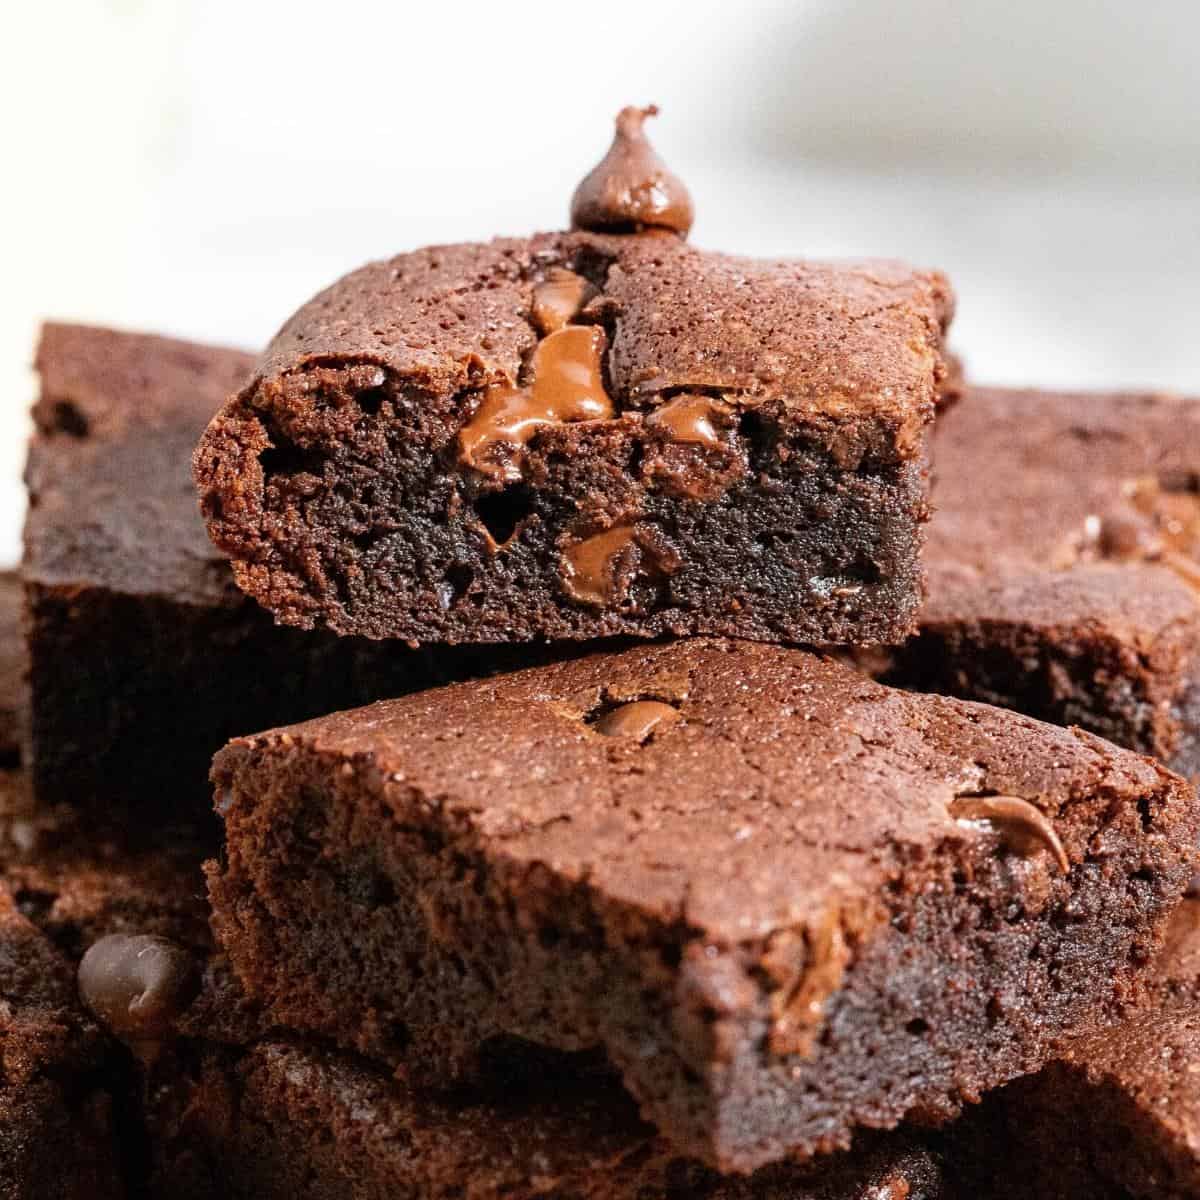
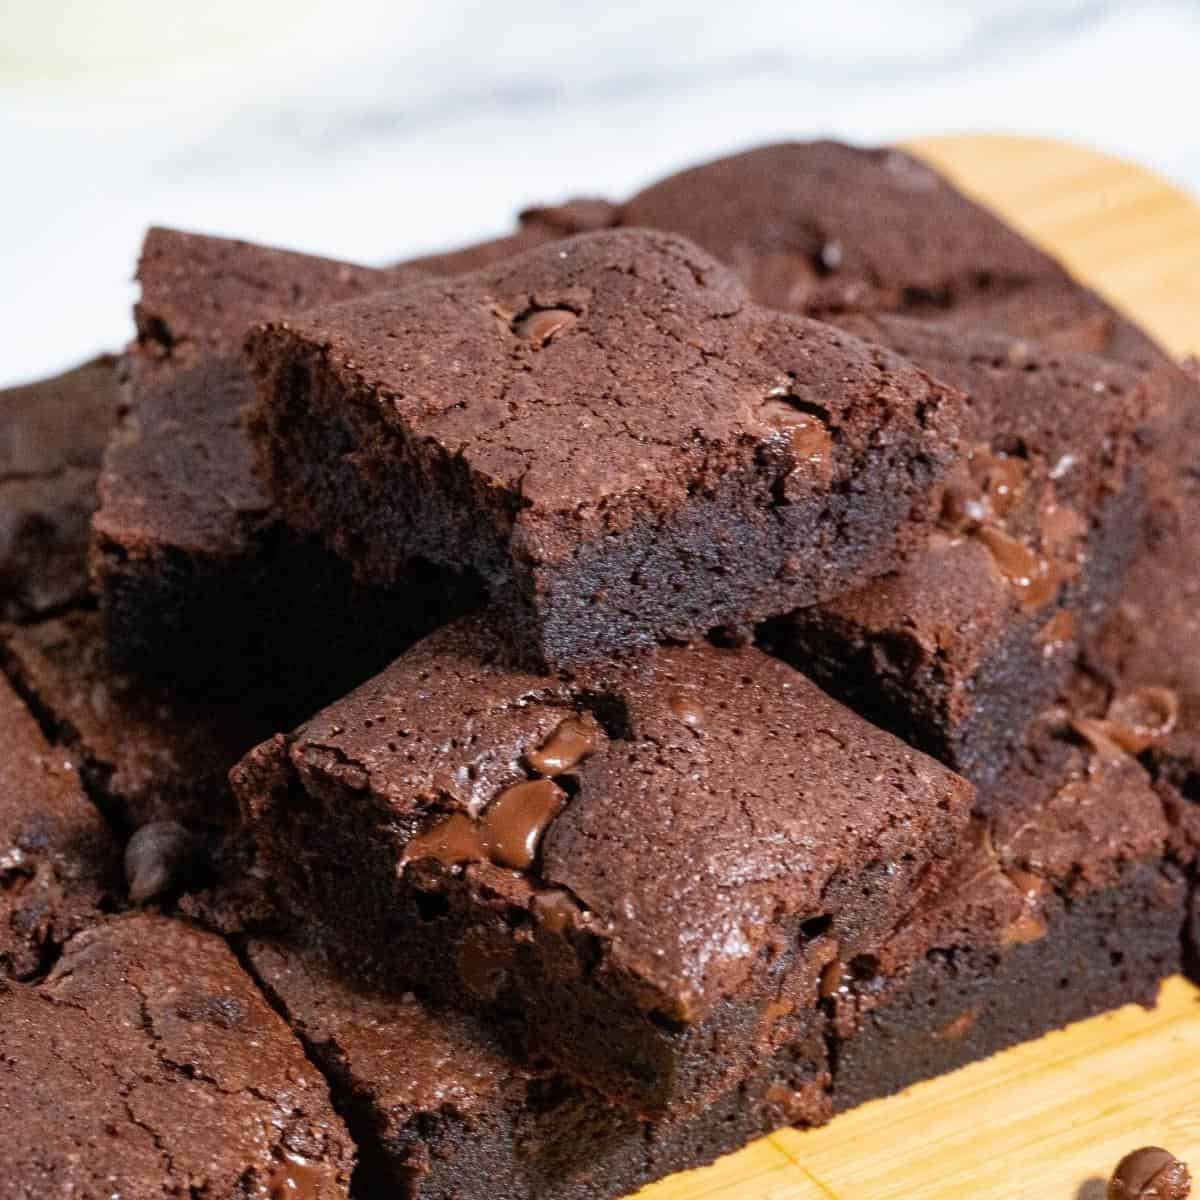
- And, a good brownie should have a little crisp crust on the top with a soft, sweet, fudgy, almost melt-in-your-mouth center. And, that’s what this one is.
- I have tried and tested this recipe for so many years. It’s like a winning formula that works as a base for my other brownie recipes.
- All the ingredients in this recipe are easy to find or pantry staples.
- The process for mixing the brownies is as little as 10 minutes, with baking for 30 minutes.
- You don’t need any electric mixers or stand mixers. Just a large bowl and a whisk work just fine.
- I am using the microwave to melt the butter and chocolate, but you can also make a double boiler with a saucepan over a pot of simmering water.
- These do stay well, so make a big batch (double batch) and save some for later. Leftovers can also be frozen for up to a month.

Ingredients and substitutes
- Chocolate – You know how I feel about my chocolate. If you are going to bake with chocolate, use the best quality dark chocolate for the best chocolate flavor. Please do not use baking chocolate. Nothing is worse than baking a beautiful recipe and realizing you didn’t take it to its ultimate luxury. You can also use dark chocolate chips,
- Sugar – The white sugar adds a bit of crisp skin to the top. You can replace half the sugar with brown sugar for a fudgy texture as it keeps it deliciously soft and moist with that distinct taste from the molasses.
- Eggs – Large eggs work as a leavening agent here. Notice we don’t have any baking powder or baking soda in this recipe.
- Unsweetened cocoa powder – I use Dutch process cocoa powder. It’s what gives the brownies their dense, dark-chocolate color and texture.
- Flour – Adds stability to the brownie. To make it gluten-free, you can use almond or coconut flour, too.
- Coffee – 1 tsp is not much. You can add more if you like. I prefer a subtle hint of coffee that does not take away from my distinct brownie taste.

Step-by-step: Dark chocolate brownies
- Preheat oven to 350°F/ 177°C/ Gas Mark 4.
- Prep pans – Line a 13 x 9 baking dish with cooking spray, parchment paper, or aluminum foil. (I used a 9 x 9 square baking pan in the video)
Pro tip – Make sure to leave an overhang of parchment paper along the edges so you can pick the baked brownie out for easy slicing.

- Dry ingredients – In a medium bowl, combine the flour, cocoa, and salt. Use a whisk to ensure everything is well combined.
- In a large microwave-safe bowl, add the butter and chocolate. Melt it on high at one-minute intervals until smooth.
Pro tip – Alternatively, you can melt the chocolate in a saucepan over low heat.
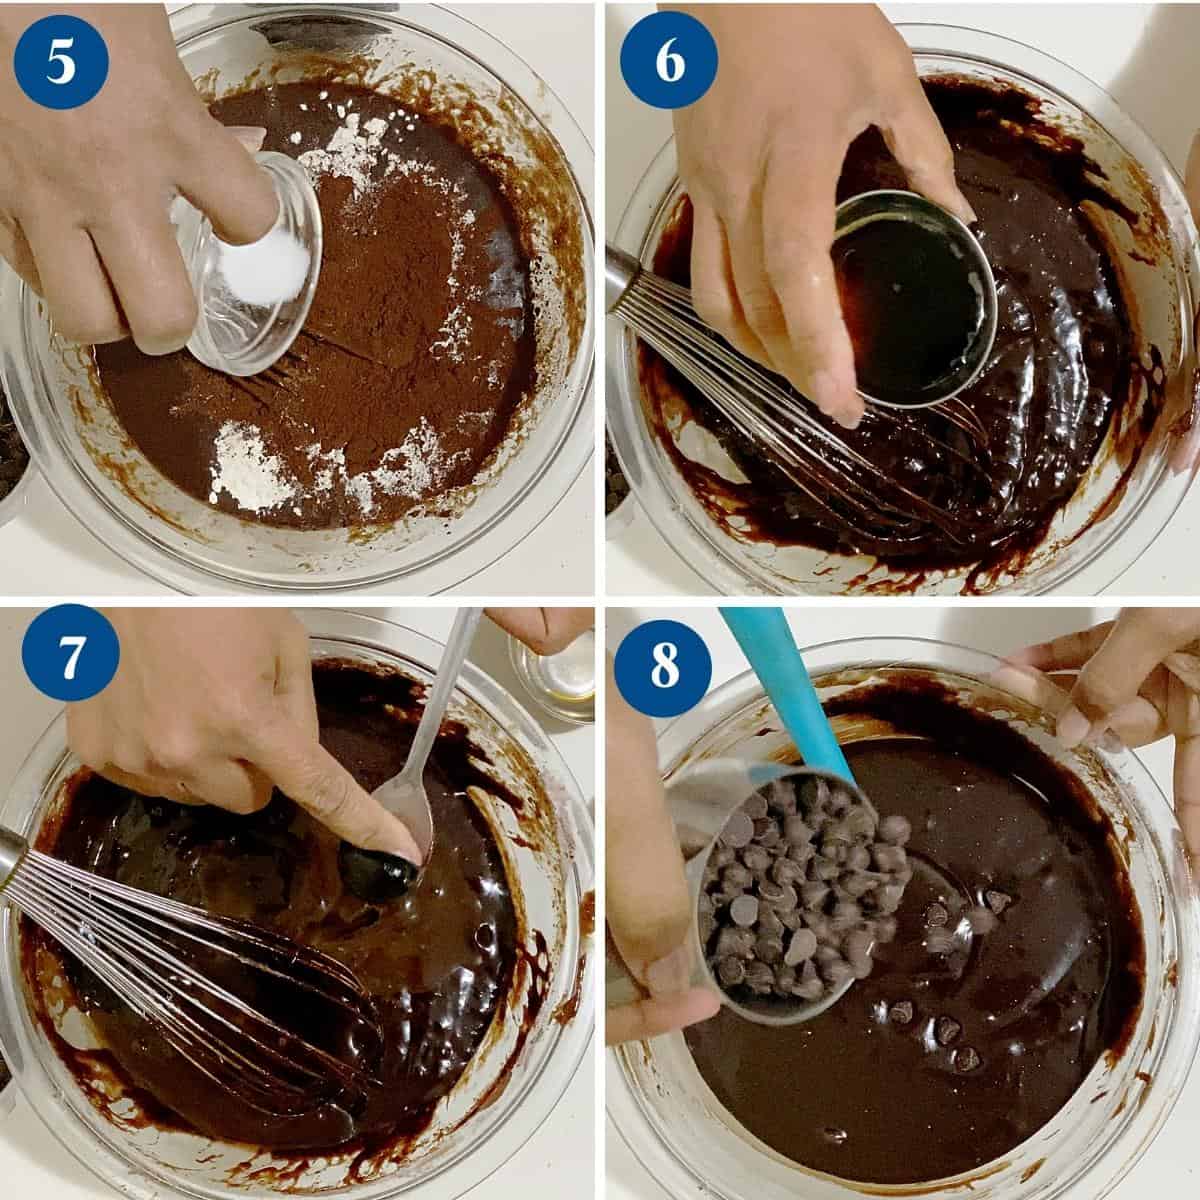
- Wet ingredients – Add sugar to the chocolate-butter mixture and stir until the mixture is almost cooled. Then, add the eggs one at a time, making sure each one is well incorporated before adding the next. Then, add the vanilla extract and brewed coffee.
Pro tip – Combine the sugar well so it cools the chocolate mixture; otherwise, it will curdle the eggs. - Combine dry to wet – Add the flour mixture and chocolate chips. Combine well until no dry flour is seen.
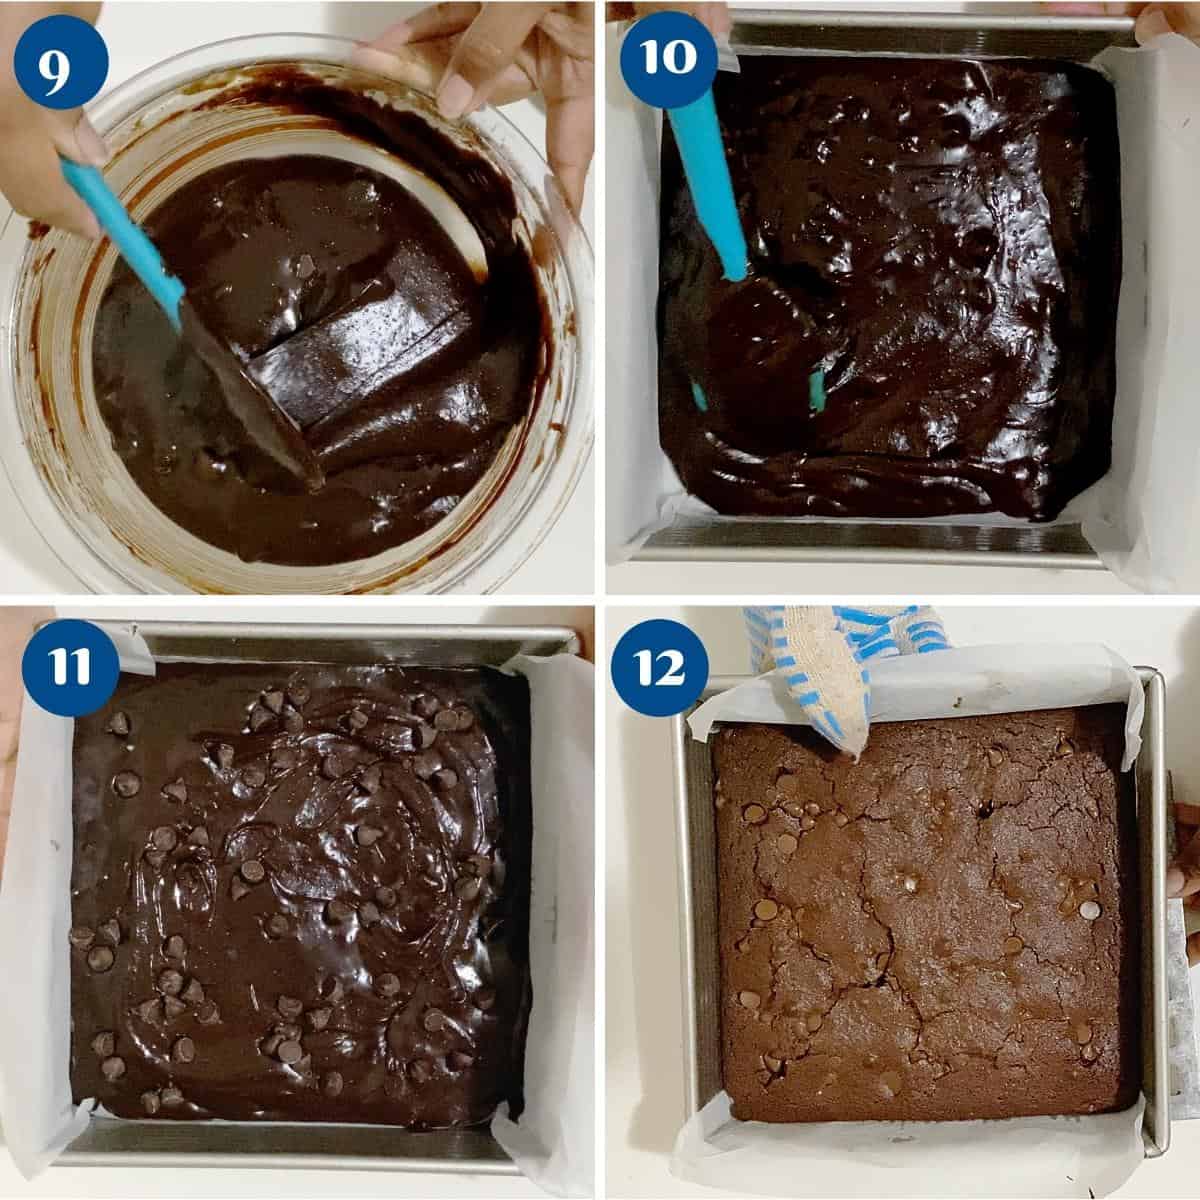
- Bake – Pour the brownie batter into the prepared pan and bake on the middle rack for 30 minutes or until a toothpick inserted in the center comes out with moist crumbs.
Pro tip – Brownies are best undercooked rather than overcooked, so make sure not to overcook the brownies.

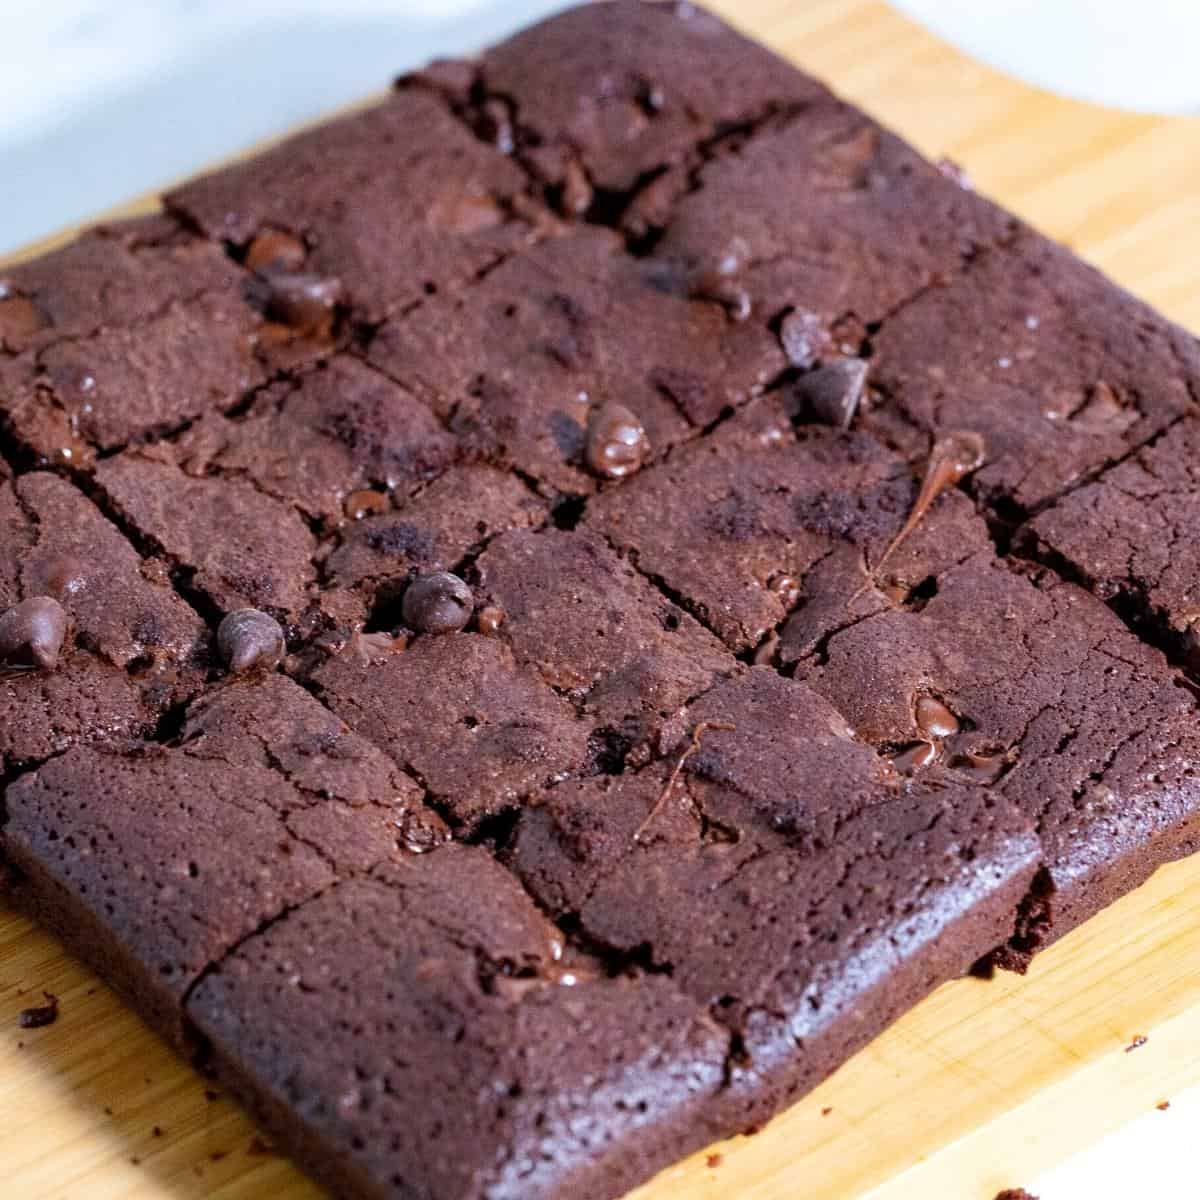
- Cool – Place the baking pan on the wire rack for a few minutes. Then pick the whole slab of brownies out of the pan with the help of the parchment overhang and cool further. Then, cut into 16 squares.


Frequently asked questions
If stored properly, these dark chocolate brownies will last about 3 to 4 days at room temperature or up to a week in the fridge. Store them in an airtight container to prevent them from drying out. You can even freeze them for over a month.
These can be baked up to 3 to 4 days ahead of time. However, if you are making them for a bake sale or to give as gifts, it is best to make them no more than a day ahead, so people will also have some storage time.
Brownies are similar to cakes, and you test them with a toothpick or skewer inserted in the center. However, unlike cake, you do want brownies to still be moist and wet in the center. Hence, it’s better to underbake rather than overbake brownies.
If too much air is incorporated into the mixture, the brownie batter can sink in the middle. Therefore, it’s best not to overmix, especially when adding the eggs.
Dark Chocolate Brownies
Brownies are a popular dessert typically made from chocolate, sugar, flour, eggs, and butter. Recipes for chocolate brownies are in plenty. Learn about how to make the BEST EVER chocolate brownies here
Video
Ingredients
- 8 oz (200 g) Chocolate dark, bittersweet chocolate chips, or semi-sweet chocolate
- 6 oz (170 g) Unsalted butter room temperature
- 1 cup (220 g) Sugar
- 3 large Eggs
- ⅔ cup (80 g) All purpose flour or gluten-free flour
- ¼ tsp Salt
- 2 tbsp (15 g) Cocoa powder
- 1 tsp Vanilla extract
- 4 oz (110 g) Chocolate chips
- ¼ cup (60 ml) Brewed coffee or 1/2 tsp espresso powder
Method
- Preheat oven 350°F/ 177°C/ Gas Mark 4.
- Prep pans – Line a 13 x 9 baking with cooking spray, parchment paper, or aluminum foil. (I used a 9 x 9 square baking pan in the video)Pro tip – make sure to leave an overhang of parchment paper along the edges so you can pick the baked brownie out for easy slicing.
- Dry ingredients – In a medium bowl combine the flour, cocoa, and salt. Use a whisk to ensure everything is well combined.⅔ cup All purpose flour, 2 tbsp Cocoa powder, ¼ tsp Salt
- In a large microwave-safe bowl add the butter and chocolate. Melt it on high at one-minute intervals until smooth. Pro tip – Alternatively, you can melt the chocolate in a saucepan over low heat.8 oz Chocolate, 6 oz Unsalted butter
- Wet ingredients – Add sugar to the chocolate-butter mixture and stir until the mixture is almost cooled. Then, add the eggs one at a time making sure each one is well incorporated before adding the next. Then, add the vanilla extract and brewed coffee. Pro tip – combine the sugar well so it cools the chocolate mixture otherwise it will curdle the eggs.1 cup Sugar, 3 large Eggs, 1 tsp Vanilla extract, ¼ cup Brewed coffee
- Combine dry to wet – Add the flour mixture and chocolate chips. Combine well until no dry flour is seen.4 oz Chocolate chips
- Bake – Pour the brownie batter into the prepared pan and bake on the middle rack for 30 minutes or until a toothpick inserted in the center comes out with moist crumbs. Pro tip – brownies are best undercooked rather than overcooked so make sure not to overcook the brownies.
- Cool – Place the baking pan on the wire rack for a few minutes. Then pick the whole slab of brownies out of the pan with the help of the parchment overhang and cool further. Then, cut into 16 squares.
Notes
- Use good quality chocolate – Chocolate is the star of the show in brownies, so use good quality chocolate that you like to eat. No compound chocolate, baking chocolate, or imitations. I like to use between 60 to 70% Coverture chocolate (Callebaut, Laubeca, Ghiradelli, Godiva are my favorite brands).
- Make sure all ingredients are at room temperature. This will prevent overmixing, as well as the proper combining of all ingredients.
- Line your baking pan with parchment paper so the brownies won’t stick. If possible leave an overhang so you can take the whole slab off the pan to cut into squares. It’s always easier to cut when it is outside the tin as compared to inside the tin.
- Know your preference – If you like soft, fudgy brownies take them off when the batter is baked but still quite moist. If you like them dense, then let them bake until just set. Remember they will continue to bake as they cool.
- Timing is key – It’s always best to underbake brownies rather than overbake, so keep a close eye at the end of baking time.
- Let the brownies cool – This is difficult but so necessary. If you let the brownies cool, you will be able to cut them into nice defined squares. If not, they are too soft so tend to fall apart.
Equipment you will need


Nutrition
Tried this recipe?
Mention @veenaazmanov_kitchen or tag #veenaazmanovkitchen!


Don’t lose this recipe! Save it for Later!
📌 Save this Recipe for later on Pinterest so you can easily find it again.
⭐ Add Veena Azmanov Kitchen to your Google Preferred Sources.
It helps Google show you more of our recipes.
📧 Subscribe for new recipes delivered to your inbox.
🎥 Follow us for more recipes


I made this recipe minus the coffee. I agree with Joy 200 g of butter seen
med a bit much. Actually 200 grams of butter is equal to about 1.76 sticks of butter. Sticks of Butter In the United States, butter is commonly sold in sticks that are 8 tablespoons (1/2 cup) in size, weighing 4 ounces, or about 113 grams.
So understand why some peoples brownies came out very rich.
Mine came out good by using 1 and 3/4 sticks of butter.
the only reason I didn’t give a5 star rating is because I really didn’t get to taste them. I ran into a problem when I went to cut them. They crumbled. I know I didn’t over bake them since I didn’t cook them for the full time. The toothpick came out moist. I let them sit for several hours but they were a big disappointment. I don’t know what I did wrong. Do you have any idea? I haven’t made up my mind if I want to make the walnut! brownies or the fudge brownies with the chocolate glaze. I don’t want to waste my chocolate again. Any suggestions would be appreciated.
Maureen, they can only be crumbly if they had no moisture in them! which usually happens when cakes and brownies are overbaked.
If moist then the moisture would ensure they do not fall apart. Overbaked brownies are a disappointment. I’m sorry.
Veena, did you really mean to use TWO whole sticks of butter? Your recipe calls for 8 ounces of butter, and each stick is 4 ounces, meaning two sticks. Shouldn’t that have been 8 tablespoons, or ONE stick? I had a very small window of time to make my husband’s valentine brownies and unfortunately used this recipe which of course turned out to be a big fatty mess.
hey Joy. The recipe is correct. I do use 200 g (8 oz) of butter in this brownie. it is rich and fudgy. It should not be a problem. I make it all the time.
Hello i wanted to ask for the optional coffee brewed. You mean its optional to put coffee but i will have to put hot water or i can omit completely. Sorry if i sound stupid. Thank you!
You can omit the coffee as well Mariam. Thanks
Just so I understand that too, I will omit the coffee & the 60.ml of water too. So it’s no coffee or water? Thanks, will make these today so hopefully will hear back from you!
Yes, Bea, You can omit the coffee and water too!
Ill be making 150 brownies for a christening and since its impossibke to bake all of them in one day can i freeze the batter so that i can make a cheese frosting on top before baking? If can be done do i bake straight from freeze or not? Thank you very much your recipe rocks !!!
Hey Nicoletta.
Yes, baked brownies can be frozen for up to a month. Pack them well in freeze-safe bags.
Also, brownie batter has no leavening so it is one batter that can be chilled or frozen in freezer-safe bags.
Make sure to thaw in the fridge overnight and at least for 20 minutes before you serve.
What chocolate are u using? Do you mixed with milk chocolate?
I have tried several times but still unable to get the shiny crack top….
Thank you
Hey Daisy. I use coverture chocolate. I like using dark chocolate but I have tried this recipe with many variations – all taste delicious. Look into the baking time for the cracks on the top.
These brownies look so delicious and chocolatey. YUM!
Thanks, Natalie.
I love brownies so much and this recipe looks ahhh-mazing! A must try. Thank you!
Thanks, Megan.
Love this brownie recipe and love the step by step. It’s foolproof…thanks for sharing!
Thank you, Traci.
These look like perfect brownies! Can’t wait to make them for my family. I;m sure they wont last long!
Thanks, Caitlyn