Irresistible Hawaiian Rolls


This homemade Hawaiian rolls recipe captures the essence of the classic sweet and fluffy rolls, perfect for any occasion. With the addition of pineapple juice and a hint of sweetness, these rolls are a delightful treat that pairs well with savory or sweet fillings. Easy to make and versatile in serving, these rolls are sure to become a family favorite.

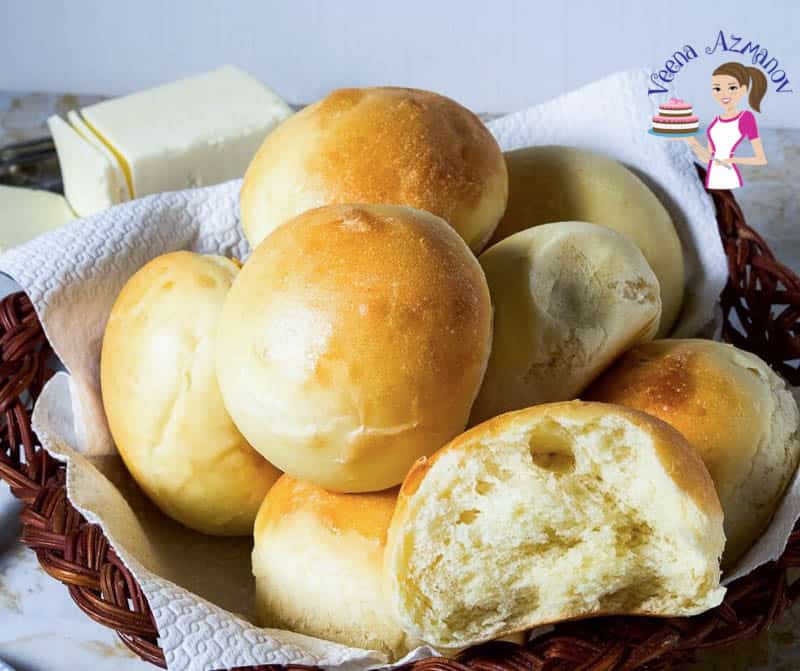
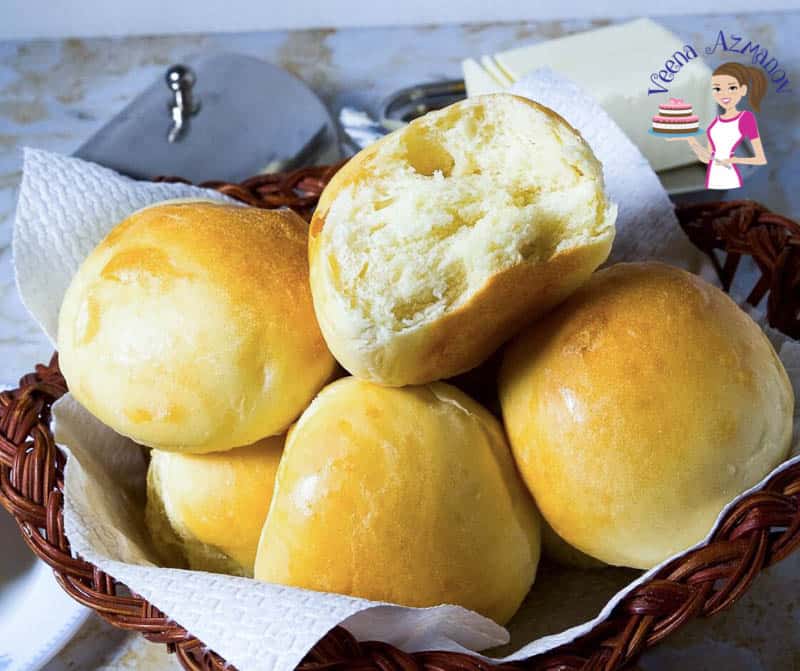
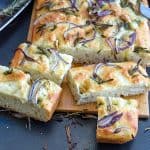
Hawaiian rolls, also known as Hawaiian sweet rolls, are a type of soft, slightly sweet bread roll. They are characterized by their tender texture, golden crust, and hint of sweetness, making them a popular choice for sandwiches, sliders, and as a side dish.
The origin of Hawaiian rolls is somewhat unclear, but they are believed to have been inspired by Portuguese sweet bread brought to Hawaii by Portuguese immigrants. Adding pineapple juice to the dough is said to be a nod to Hawaii’s abundant pineapple crops. Over time, the recipe evolved to become the fluffy, sweet rolls we know today.
Why is this the best recipe
- Authentic Flavor: The inclusion of pineapple juice gives these rolls a true Hawaiian flavor, reminiscent of the classic store-bought version.
- Soft and Fluffy Texture: The combination of butter, eggs, and careful kneading results in a soft, fluffy texture that is perfect for dinner rolls.
- Easy Preparation: Despite the multiple steps, this recipe is straightforward and easy to follow, making it accessible for bakers of all skill levels.
- Customizable: While this recipe is for classic rolls, you can easily customize it by adding ingredients like ham, cheese, or herbs to suit different tastes.
Ingredients and substitutes
- Pineapple Juice: Provides flavor and sweetness characteristic of Hawaiian rolls. You can also use orange juice or apple juice, though the flavor will be slightly different.
- Active Dry Yeast: Helps the dough rise and gives the rolls their airy texture. You can also use instant yeast as a substitute, but follow the package instructions for conversion.
- Sugar: Feeds the yeast and adds sweetness. You can also use honey or maple syrup as substitutes, adjusting the amount to taste.
- Unsalted Butter: Adds richness and flavor to the rolls. You can also use salted butter, but reduce the amount of salt in the recipe accordingly.
- Eggs: Provide structure and richness to the dough. To omit the egg in this recipe, add a bit more pineapple juice or warm water.
- All-Purpose Flour: Provides structure and texture to the rolls. You can also use bread flour for a slightly chewier texture, but all-purpose flour works well.
- Salt: Enhances the flavor of the rolls and helps control yeast activity. Use sea salt or kosher salt as substitutes for table salt, adjusting the amount as needed.

Step-by-Step: Sweet Hawaiian Rolls
- Yeast – Combine the warm water and yeast in a small bowl. Let it sit for 5-10 minutes or until frothy. Add the pineapple juice, sugar, melted butter, and egg.
- Dough – Add the flour and salt, mixing until a dough forms. Knead the dough on medium speed with the hook attachment for 4 to 5 minutes or on a floured surface for about 7-8 minutes or until it becomes smooth and elastic.
- Rise—Place the dough in a greased bowl, cover it with a clean towel, and let it rise in a warm place for 1-2 hours, or until it doubles in size.

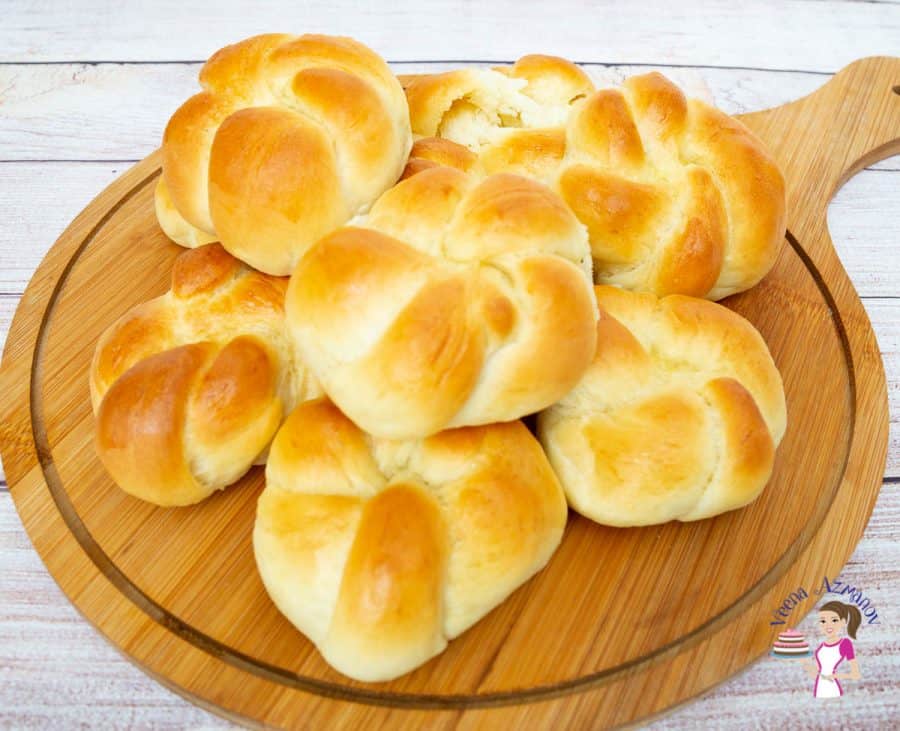
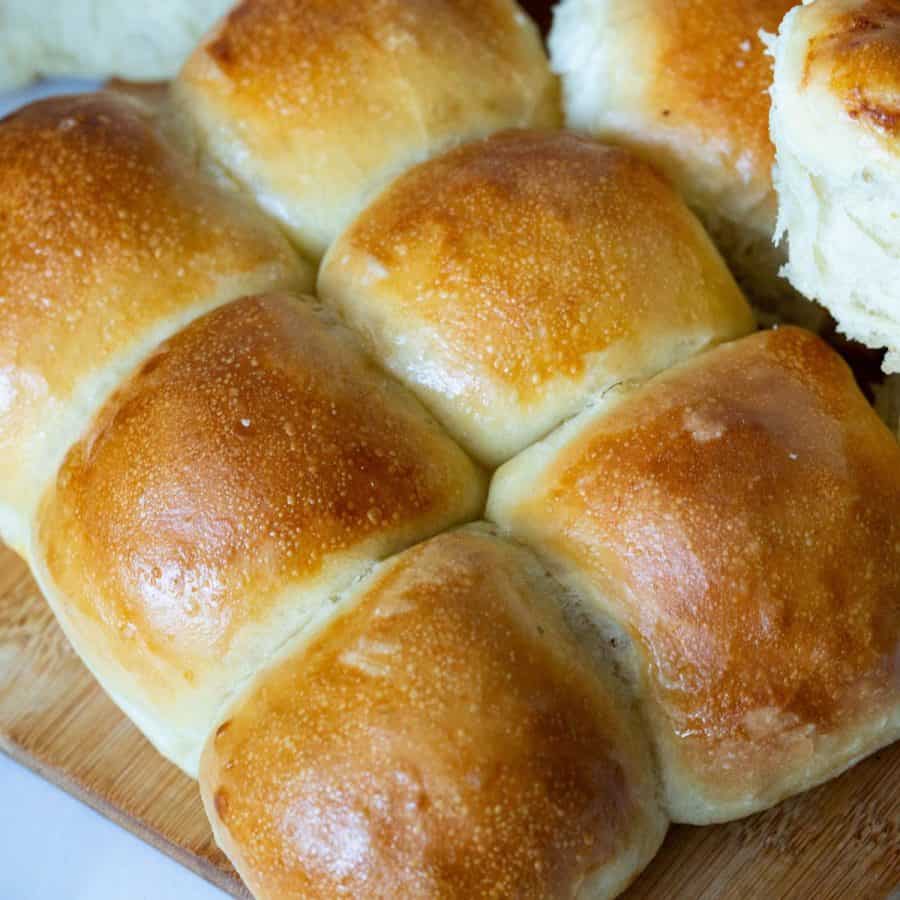
- Shape – Punch down the dough and divide it into 12 equal pieces. Shape each piece into a ball and place them on a parchment-lined baking tray or in a greased 9×13-inch baking pan.
- Proof – Cover the pan with a towel and let the rolls rise for another 30-60 minutes or until they double in size.
- Bake – Preheat the oven to 350°F /175°C/ Gas Mark 4. Bake the rolls for 20-25 minutes or until they are golden brown.
- Rest – Remove the rolls from the oven and brush them with melted butter. Let the rolls cool slightly before serving.


Frequently asked questions
If stored properly, these soft rolls will stay for 2 to 3 days at room temperature. You can also freeze it for a month or more. Never store bread in the fridge as it dries out.
Yes, you can make Hawaiian rolls ahead of time. They can be baked and then stored in an airtight container for a few days, or you can freeze them for longer storage.
You want to keep bread covered in an airtight container or ziplock bag to prevent air from drying them out. I like to use my reusable silicone bags to keep bread fresh.
These are great with any soup, stew, chili, or slow-cooked meat. Also, soup, salad, and dinner rolls are a complete meal in our home.
In addition, they are perfect to soak up the gravy in slow-cooked lamb, beef, or chicken dishes. In fact, my kids love lamb stew or chili with this bread.
Soft Hawaiian Rolls Recipes
This homemade Hawaiian rolls recipe captures the essence of the classic sweet and fluffy rolls, perfect for any occasion. With the addition of pineapple juice and a hint of sweetness, these rolls are a delightful treat that pairs well with savory or sweet fillings. Easy to make and versatile in serving, these Hawaiian rolls are sure to become a family favorite.
Ingredients
- 120 g (½ cups) Pineapple juice warm
- 120 g (½ cups) Warm water 100°F
- 6 g (1 tsp) Active dry yeast or instant dry yeast
- 30 g (2 tbsp) Sugar
- 50 g (3½ tbsp) Unsalted butter melted
- 50 g (1 large) Eggs
- 6 g (1 tsp) Salt
- 400 g (3¼ cups) All-purpose flour
- Additional melted butter for brushing
Method
- Yeast – Combine the warm water and yeast in a small bowl. Let it sit for 5-10 minutes or until frothy. add the pineapple juice, sugar, melted butter, and egg.120 g Pineapple juice, 120 g Warm water, 6 g Active dry yeast, 30 g Sugar, 50 g Unsalted butter, 50 g Eggs
- Dough – Add the flour and salt, mixing until a dough forms. Knead the dough on medium speed with the hook attachment for 4 to 5 minutes or on a floured surface for about 7-8 minutes or until it becomes smooth and elastic.6 g Salt, 400 g All-purpose flour
- Rise—Place the dough in a greased bowl, cover it with a clean towel, and let it rise in a warm place for 1-2 hours, or until it doubles in size.
- Shape – Punch down the dough and divide it into 12 equal pieces. Shape each piece into a ball and place them on a parchment-lined baking tray or in a greased 9×13-inch baking pan.
- Proof – Cover the pan with a towel and let the rolls rise for another 30-60 minutes or until they double in size.
- Bake – Preheat the oven to 350°F /175°C/ Gas Mark 4. Bake the rolls for 20-25 minutes or until they are golden brown.
- Rest – Remove the rolls from the oven and brush them with melted butter. Let the rolls cool slightly before serving.Additional melted butter for brushing
Notes
- Use Fresh Ingredients: Ensure your yeast, flour, and other ingredients are fresh to ensure proper rising and flavor.
- Temperature Matters: Use warm (not hot) water for activating the yeast, and make sure the melted butter is not too hot when adding it to the dough.
- Proper Kneading: Knead the dough until it’s smooth and elastic. This helps develop gluten, which gives the rolls their structure and texture.
- Rising Time: Allow the dough to rise in a warm, draft-free place. It should double in size during the first rise and slightly increase during the second rise.
- Baking Time and Temperature: Bake the rolls at the specified temperature until they are golden brown. Underbaking can result in doughy rolls, while overbaking can make them dry.
- Brushing with Butter: Brushing the rolls with melted butter after baking adds flavor and helps keep them soft.
- Cooling Properly: Allow the rolls to cool slightly in the pan before transferring them to a wire rack to cool completely. This helps them retain moisture and prevents them from becoming soggy.
Equipment you will need


Nutrition
Tried this recipe?
Mention @veenaazmanov_kitchen or tag #veenaazmanovkitchen!- BEST Sandwich Bread Recipe
- Whole Wheat Sandwich Bread
- Softest Hamburger Buns
- Soft Whole Wheat Burger Buns


Don’t lose this recipe! Save it for Later!
📌 Save this Recipe for later on Pinterest so you can easily find it again.
⭐ Add Veena Azmanov Kitchen to your Google Preferred Sources.
It helps Google show you more of our recipes.
📧 Subscribe for new recipes delivered to your inbox.
🎥 Follow us for more recipes


Day 11 done. Thank you.
Your site is wonderful and very informative. There is a broken link from your recipe listing and from a search on google for your meat stuffed pleated bread. All references on google and Pinterest and your site automatically link to this page, Hawaiian rolls.
Thank you Judy. Yes, that was an old post which I deleted long ago but the links are still out there. Will check with my webguys to see how I can fix this. Thank you so much
XXX
Yay, now I don’t need to keep buying Hawaiian rolls from the grocery store. And homemade is even better. 🙂
Thanks, Anita. Yes, these are so easy to make.
I don’t know much that is better than homemade bread. These rolls are incredible! I loved them and so did my whole family.
Thank yo so much, Krissy. So happy your family enjoyed these. Thanks for coming back to write this feedback.
What a delicious recipe. My oldest son LOVES these rolls! Its always a battle to see how gets the extra rolls at the family dinner! I need to make this in double!
Thanks, Cindy. So happy you enjoy these. I do love making double batches for the freezer.
These look so wonderfully soft and tender. I like the sound of the flavors as well.
Thanks, Caroline.
These dinner rolls look delicious!
Thanks, Genevieve.
Made this last weekend for a reunion. LOVE it. Thanks
Thank you so much, Arthur. So happy to hear you enjoyed this so much. Thank you for coming back to write this feedback.
Made this last week.. So good. Thanks
Thank you, Schmidt. So happy you enjoyed this recipe. Thank you for taking the time to write this feedback. Love hearing back from those who try my recipe. Have a great day.
Tried this last week and OMG so good. Thanks
Thank you, Frank. So happy to hear you had success with this recipe and loved it. Thanks for coming back to write this feedback. Have a lovely week.