Car Cake Tutorial


A car cake can make a great celebration cake for a boy or man of any age. Whether it’s a six-year-old kid or a 60-year-old adult, they will surely love their car birthday cake. This simple and easy tutorial can be used to carve the car cake no matter which car brand or make you choose and no matter how big or small the cake size you need.
Here’s another cake that is so versatile. No matter what age, most men (and some women) love their cars. In fact, I know a few who are obsessed with their cars.
Today’s Tip has been shared by the lovely Sarah Clark of The Cake Tin. If you don’t know Sarah, you are missing out on some really gorgeous cakes. Not to mention how amazing she is. You can visit Sarah on her website here – The Cake Tin Website or The Cake Tin Facebook Page.
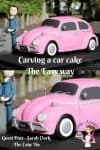
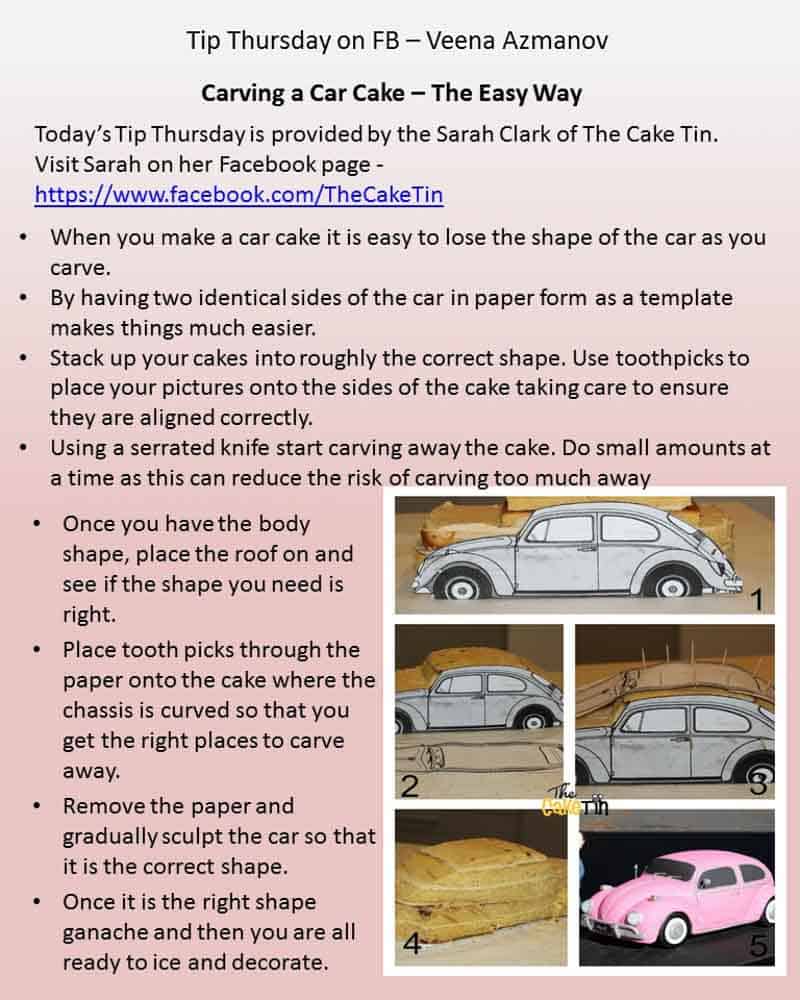
Carving a Car Cake the Easy Way
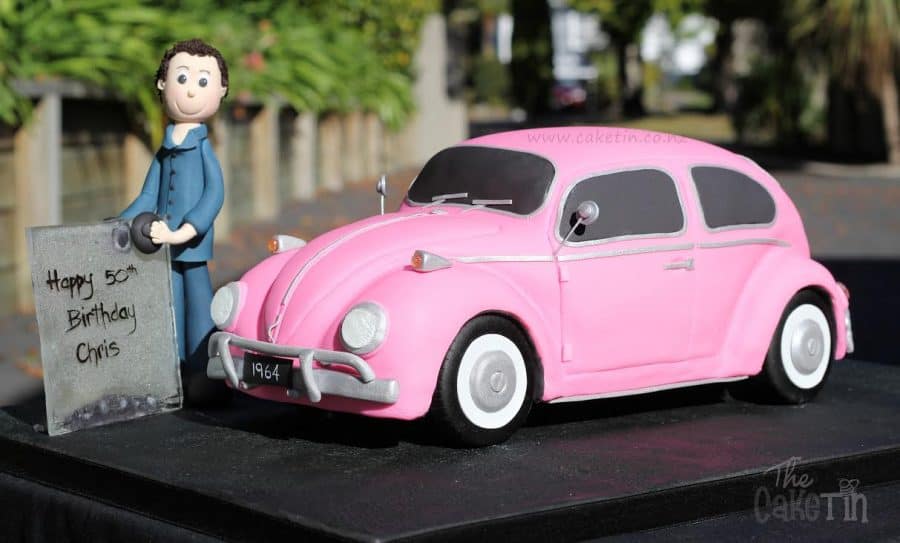
When you make a car cake, it is easy to lose the shape of the car as you carve. So here are a few tips and progress pictures that might help you.
Here I am carving a Beetle, but any car shape with the same template will work as well.
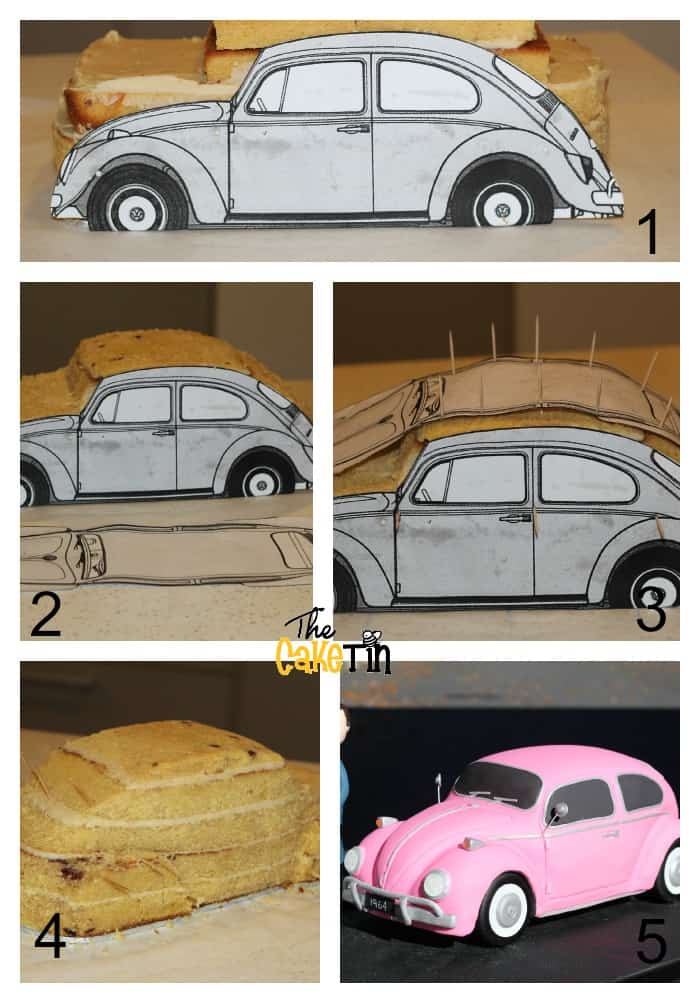
- Having two identical sides of the car in paper form as a template makes things much easier.
- Stack up your cakes into roughly the correct shape. Use toothpicks to place your pictures onto the sides of the cake, taking care to ensure they are aligned correctly.
- Using a serrated knife, start carving away the cake. Do small amounts at a time, as this can reduce the risk of carving too much away.
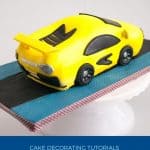
- Once you have the body shape, place the roof on and see if the shape you need is right.
- Place toothpicks through the paper on the cake, where the chassis is curved so that you get the right places to carve away.
- Remove the paper and gradually sculpt the car so that it is the correct shape.
- Once it is the right shape and ganache, you are all ready to ice and decorate.
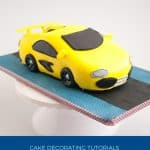
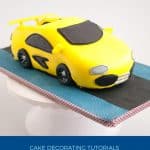
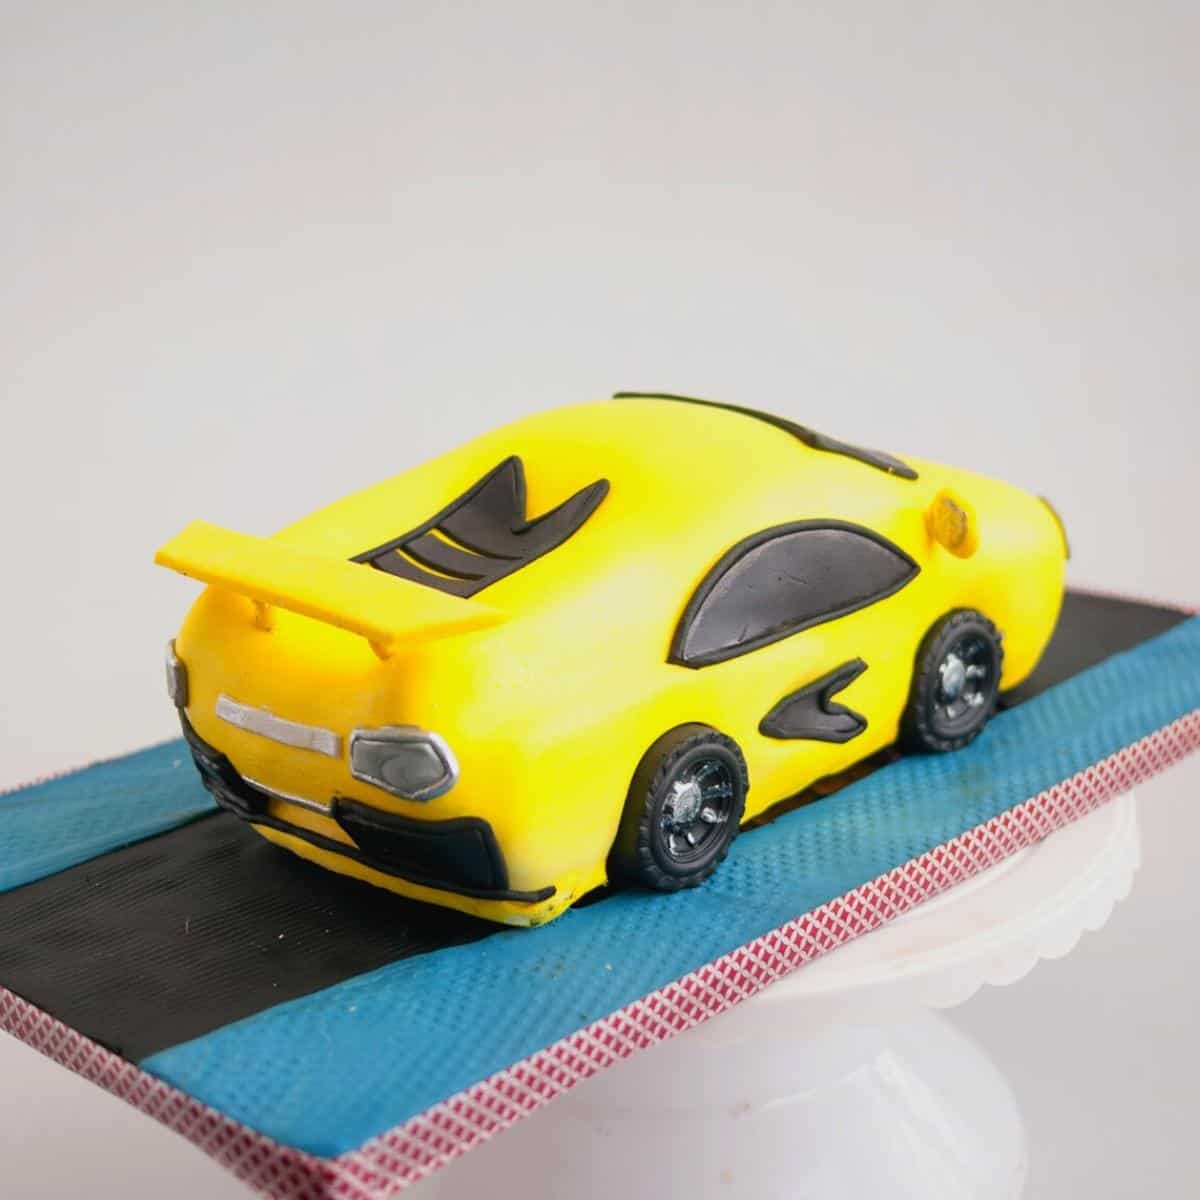
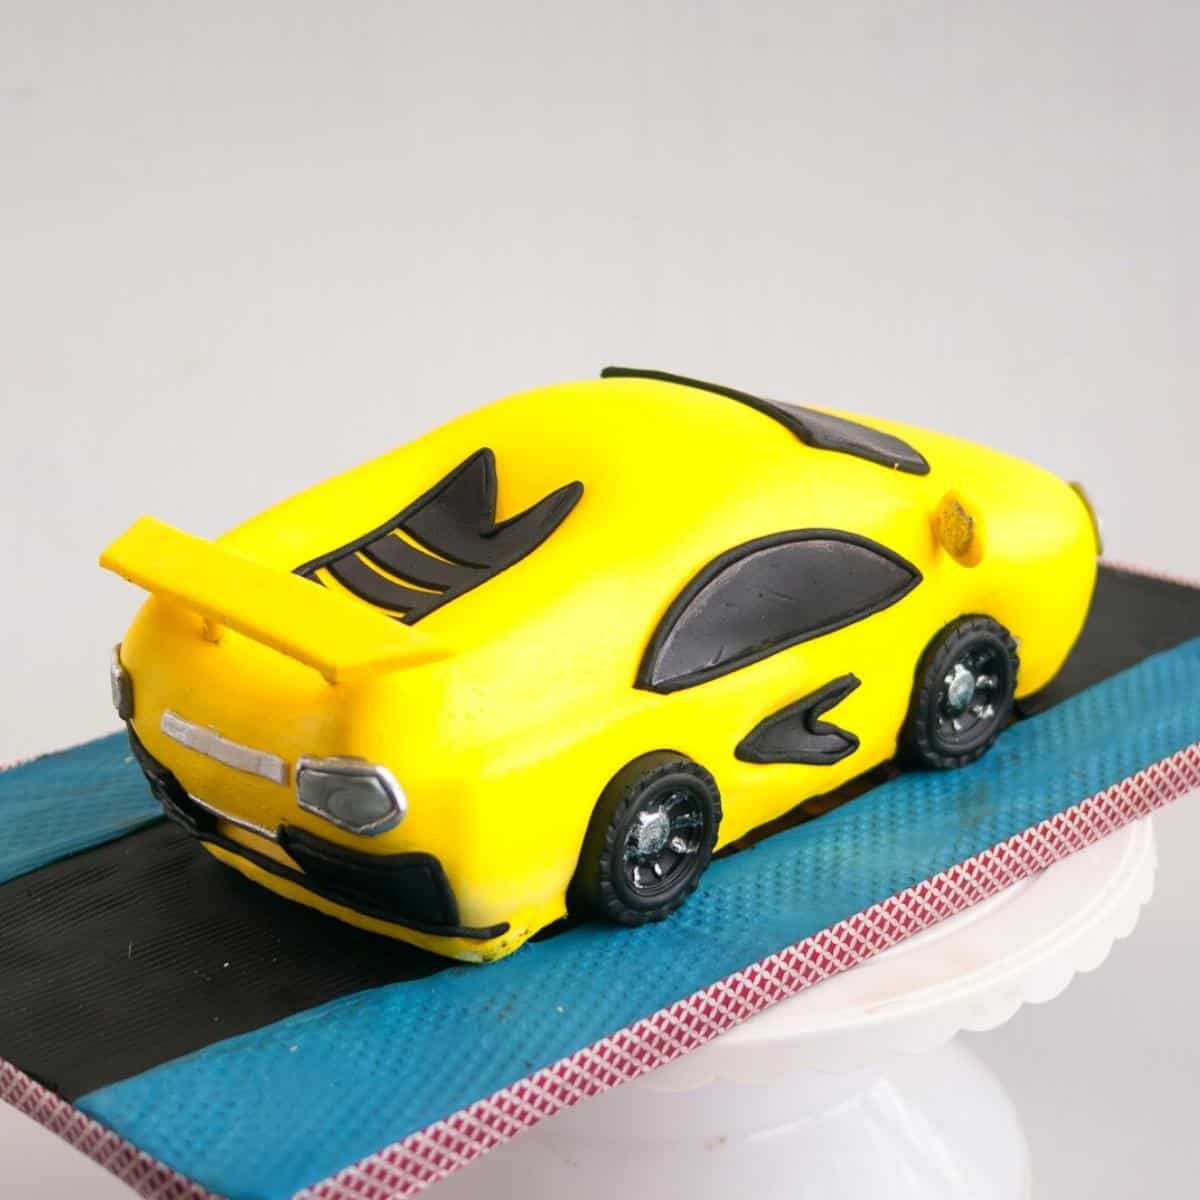
My yellow Lamborgini cake for my son Aadi
I have used Sarah’s tutorial in a few of my cakes. This is a Lamborghini cake I made for my Aadi not long ago.
Well, we started with the picture and template of a Lamborghini, but as you can see from the video and the pictures, my son kept changing his mind about the design. So, I could not really do justice to the cake or the tutorial.

It was his cake, and I wanted it to be what he wanted. Having said that, I still shared the beginning carving of the cake with you, and below, I have given you detailed step-by-step instructions on how I made this cake.
You can also see a short video on how I carved the cake using my template.
Cake recipe
- Cake Recipe – Trust me, you don’t need a cake mix. The cake recipe below is my moist chocolate sheet cake baked in a sheet pan. You may also like to try my chocolate cake or vanilla cake for carving recipes. Depending on the car design, you may need to use other plans such as a loaf pan, a square pan, or a combination of two shapes that will be frosted together to make one shape. You can find more cake recipes here – 30 plus layer cake recipes.
- Frosting – Cake decorators chocolate ganache – I’ve used Ganache today because it’s hot and humid (40 C here in summer), but any other buttercream icing or frosting will work. You can find a huge selection of my frosting recipes here – 30 plus buttercream frosting recipes
- Fondant – This is marshmallow fondant. You can find all my fondant recipes here. I highly recommend you tint the fondant in the color you want the car, especially dark colors such as red fondant, black fondant, grey fondant.
How to make a car cake
Chocolate sheet cake
- Prepare – Preheat the oven to 350°F/ 177°C/ Gas mark. Prepare a 15 x 17 sheet cake pan for baking – grease and line with parchment paper. If you don’t have a sheet pan, you can also use 2 x 8-inch square tins.
- Dry ingredients – In a bowl, combine flour, baking powder, baking soda, and salt. And set aside.
- Wet ingredients – In the bowl of a stand mixer, cream butter and sugar until light and fluffy. Add eggs one at a time until well combined. Use a spatula and scrape the sides of the bowl when necessary. Next, add the flour and milk mixture in three batches. Then, add the vanilla extract.
- Bake – Pour the batter into the prepared sheet pan or appropriate pans and bake on the middle rack for 50 to 55 minutes or until a skewer inserted inside the cake comes out clean.
Pro tip – Freeze the cake for an hour or two. It helps to make fewer crumbs when you carve.
Frosting
- In a large bowl (microwave-safe), combine the chocolate and heavy cream. Heat for a minute or more until all the chocolate is melted and smooth. Add the vanilla extract and combine well. Cover and leave to set in the refrigerator for a few hours overnight.

Decorate
- Template – Search and print the car template you plan to make from Google. Print it to the size you want the cake – actual size! Alternatively, you may like to draw the diagram of a fantasy car on paper and use it as a template.
Pro tip – For a big cake, you may need to scale the print on a few pages. - Carve – Using your template, carve the cake as shown in the video. When cutting cakes, arrange the pieces and layer them according to the template. Make sure to pay attention to the hood and make sure it matches the design of your car.
- Ganache – Once you have carved the shape. Frost the cake with frosting between layers and crumb coat the cake with a thin layer of frosting. Place the cake in the fridge for 15 minutes. Then, add more frosting and frost the truck, making sure you have nice square corners. Smooth the cake with a flexible smoother and let it chill until the frosting is firm.
Pro tip – Don’t forget to brush the layers with simple syrup before frosting. - Fondant – Tint the fondant with the gel food color you want your car. Roll the fondant and cover the whole cake. Cut excess fondant from around the cake. I used white fondant and airbrushed it yellow, but it’s easier to use a pre-colored fondant. Use a cake smoother to smooth and create square corners around the cake.
Pro tip – I added the back and side fondant pieces first to create an embossed or bumped look then covered the cake in fondant.
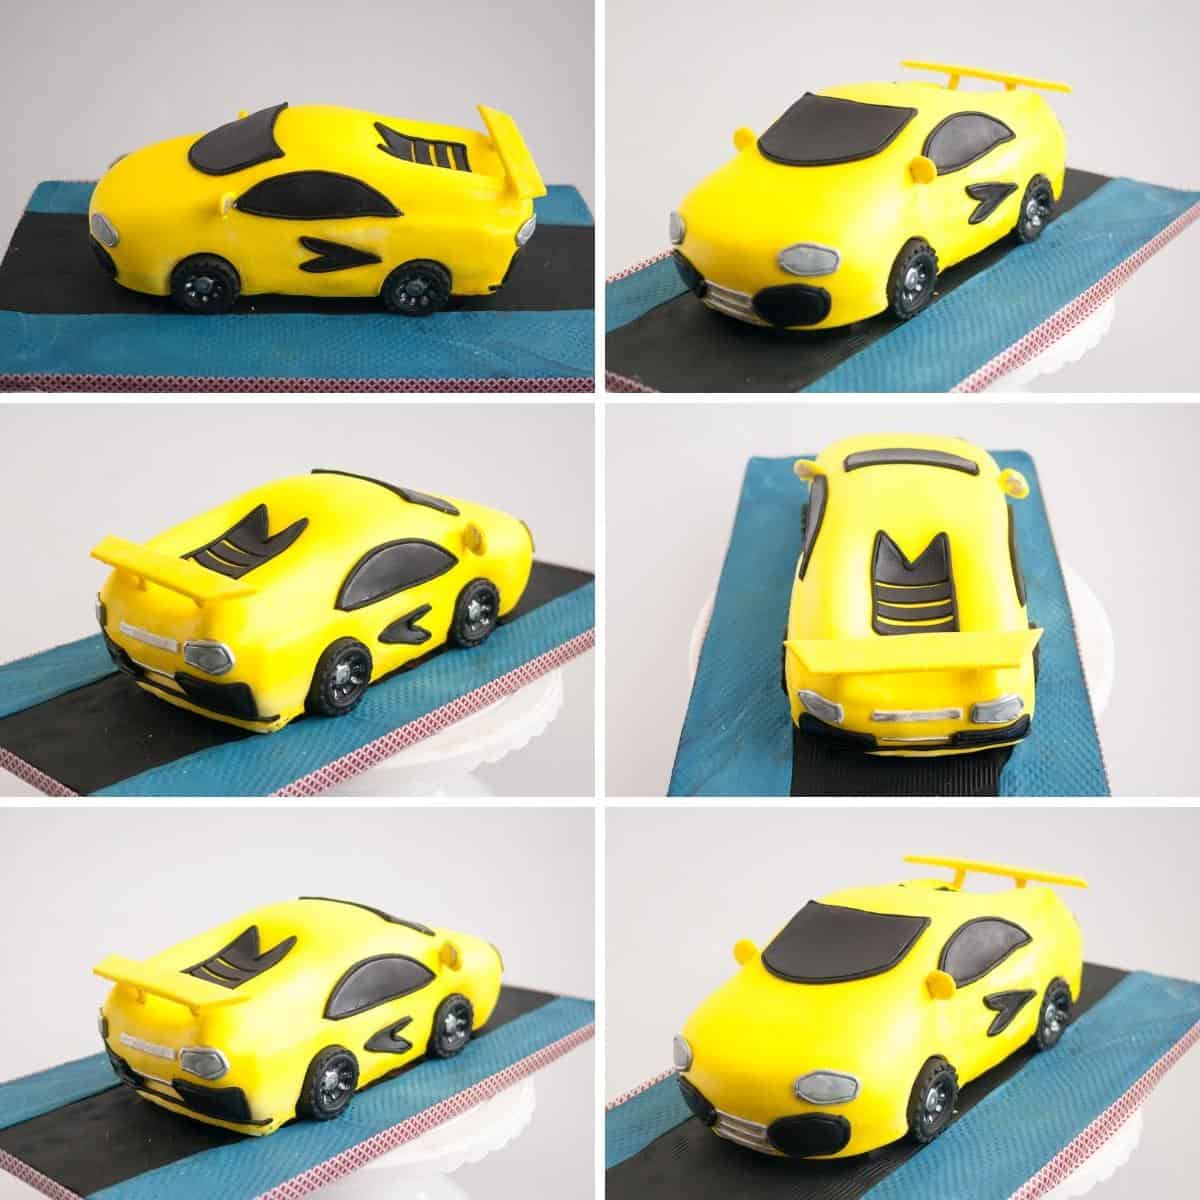
Complete the design
- Use your master template as a guide – cut additional templates to the appropriate size and use them to cut fondant in the color and size of the car. Outline the windows and doors, then add the extra fondant cutouts. I used black fondant for the front and back glass, doors, wheels, etc.
- Bumpers – I also added the front and back elements like bumpers and racing stripes. I used silver luster dust for a metallic look.
- Headlights – Use black or white fondant and then paint with silver metallic luster dust with alcohol. You can also use colorful candy for
- Wheels – You can use silicone molds for car wheels or make them from scratch, as I did in my tutorial for the fire truck cake. Today, I used my son’s car wheel as a model and created my own silicone mold. Once the mold was ready, I filled it with black fondant and added the rest of the details accordingly.
- Extra elements – Based on the car you chose, you may need to make other elements. For example, race cars like Lightning McQueen need strips, logs, and Rustezes, which are easier to make with edible prints.
- A fondant board – Is a great way to add more elements and dimensions to your car. I used the cake board to create a road. For sports cars, you may like to make a racing track on the cake board. Also, you can use cake scraps to create more elements on the cake board, such as a slope or road.

You may also like
- Teapot cake tutorial
- Minion Cake Tutorial or Minon cake tutorial
- Stained glass cake
- Car cake tutorial
- Dora the explorer
- Fondant billowing technique
- Buttercream ruffle cake tutorial
- Doughnut cake tutorial
- Pink sunset cake
- Donut cake with Hommer Simpson
And here is today’s Tip Thursday – on my Facebook Page –
you can see more Tip Thursdays here on the blog
You can save more of my Tip Thursdays here on Pinterest

How to Carve a Cake the Easy Way
A car cake can make a great celebration cake for a boy or man of any age. Whether a six-year-old boy or a 60-year-old man, he sure loves his car. This simple, easy, and effortless car cake tutorial can be used to carve the car cake no matter which car brand or make you choose and no matter how big or small the size you need.
Video
Ingredients
- 4 cups (500 g) All-purpose flour
- 2 cups (400 g) Sugar
- 1½ Unsalted butter
- 5 large Eggs
- 3 Baking powder
- 1 tsp Baking soda
- ½ tsp Salt
- 2 tsp Vanilla extract
- 18 oz (510 g) Chocolate bittersweet or semisweet
- 1 cup (240 ml) Heavy cream (38%)
- 2 tsp Vanilla extract
- 700 grams Marshmallow Fondant
Method
- Prepare – Preheat the oven to 350°F/ 177°C/ Gas mark. Prepare a 15 x 17 sheet cake pan for baking – grease and line with parchment paper. If you don't have a sheet pan, you can also use 2 x 8-inch square tins.
- Dry ingredients – In a bowl, combine flour, baking powder, baking soda, and salt. And set aside.
- Wet ingredients – In the bowl of a stand mixer, cream butter and sugar until light and fluffy. Add eggs one at a time until well combined. Use a spatula and scrape the sides of the bowl when necessary. Next, add the flour and milk mixture in three batches. Then, add the vanilla extract.
- Bake – Pour the batter into the prepared sheet pan or appropriate pans and bake on the middle rack for 50 to 55 minutes or until a skewer inserted inside the cake comes out clean.
- In a large bowl (microwave-safe), combine the chocolate and heavy cream. Heat for a minute or more until all the chocolate is melted and smooth. Add the vanilla extract and combine well. Cover and leave to set in the refrigerator for a few hours overnight.
- Template – Search and print the template of the car you plan to make from Google. Print it to the size you want the cake – actual size! Alternatively, you may like to draw the diagram of a fantasy car on paper and use it as a template.
- Carve – Using your template, carve the cake as shown in the video. When cutting cakes, arrange the pieces and layer them according to the template. Make sure to pay attention to the hood and make sure it matches the design of your car.
- Ganache – Once you have carved the shape, frost the cake with frosting between layers and crumb coat the cake with a thin layer of frosting. Place the cake in the refrigerator for 15 minutes. Then, add more frosting and frost the truck, making sure you have nice square corners. Smooth the cake with a flexible smoother and let it chill until the frosting is firm.
- Fondant – Tint the fondant with the gel food color you want your car. Roll the fondant and cover the whole cake. Cut excess fondant from around the cake. I used white fondant and airbrushed it yellow, but it's easier to use a pre-colored fondant.Use a cake smoother to smooth and create square corners around the cake.
- Use your master template as a guide. Cut additional templates to the appropriate size and use them to cut fondant in the color and size of the car. Outline the windows and doors, then add the extra fondant cutouts. I used black fondant for the front and back glass, doors, wheels, etc.
- Bumpers – I also added the front and back elements like bumpers and racing stripes. I used silver luster dust for a metallic look.
- Headlights – Use black or white fondant and then paint with silver metallic luster dust with alcohol. You can also use colorful candy for
- Wheels – You can use silicone molds for car wheels or make them from scratch, as I did in my tutorial for a fire truck cake. Today, I used my son's car wheel as a model and created my own silicone mold. Once the mold was ready, I filled it with black fondant and added the rest of the details accordingly.
- Extra elements —Depending on the car you choose, you may need to make other elements. For example, race cars like Lightning McQueen need strips, logs, and Rustezes, which are easier to make with edible prints.
- A fondant board – Is a great way to add more elements and dimensions to your car. I used the cake board to create a road. For sports cars, you may like to make a racing track on the cake board. Also, you can use cake scraps to create more elements on the cake board, such as a slope or road.


great job!