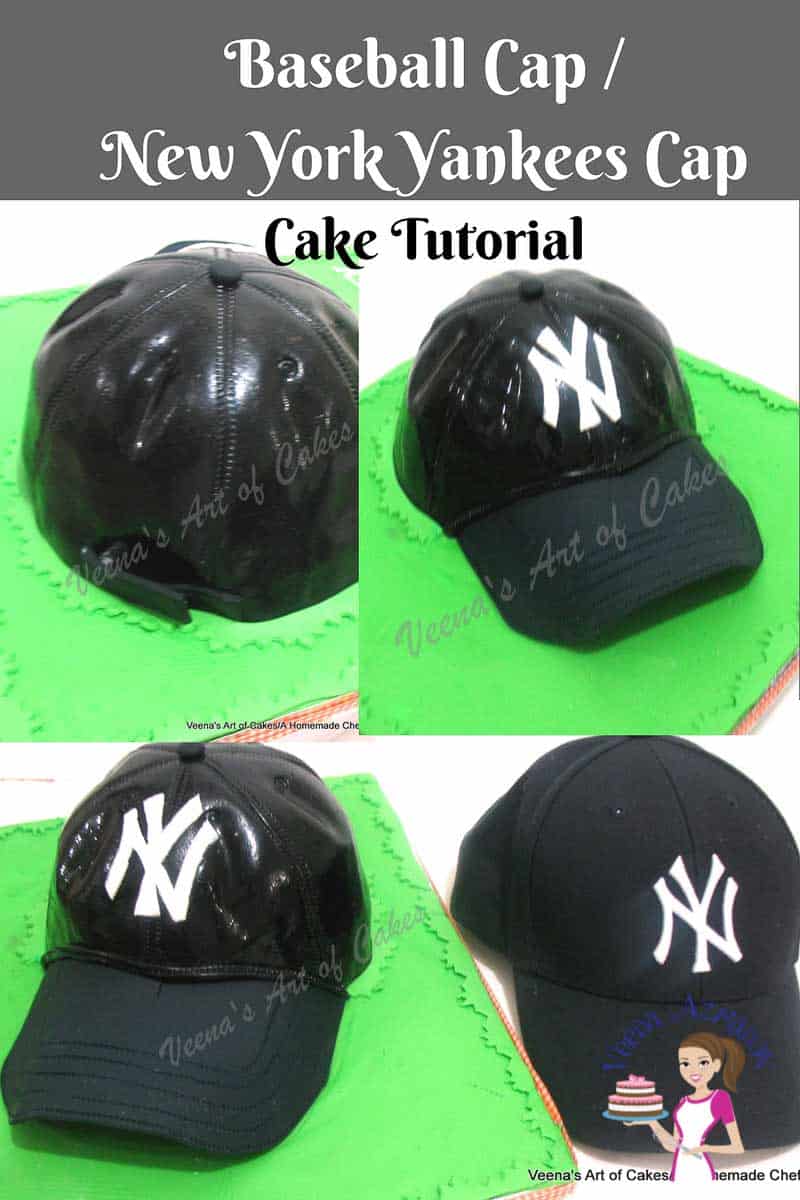
The Ultimate Baseball Cap Cake Tutorial

This New York Yankees Baseball Cap cake recipe and tutorial provides a detailed and easy-to-follow guide for creating a stunning cake that resembles the iconic Yankees cap. The moist chocolate cake, decadent chocolate ganache, and vibrant fondant decorations make this cake not only visually impressive but also delicious. Whether you’re a Yankees fan or simply looking for a show-stopping dessert, this recipe is sure to impress!
The New York Yankees, one of the most iconic teams in baseball history, have a legacy that transcends sports. One of the most recognizable symbols of the Yankees is their iconic NY Yankees cap. This simple yet powerful emblem has become synonymous with the team’s rich history, storied tradition, and unwavering legacy of excellence.
The NY Yankees cap is not just a piece of headwear; it represents a sense of pride, loyalty, and belonging for fans worldwide. Its classic design and timeless appeal make it a fashion statement both on and off the field. The cap’s popularity extends beyond baseball enthusiasts, captivating fashionistas and trendsetters alike.
Creating a New York Yankees Cap cake is a wonderful way to pay homage to this legendary team and its iconic symbol. Whether you’re a die-hard Yankees fan celebrating a special occasion or simply want to impress your guests with a stunning cake, this recipe is sure to be a hit. The cake’s rich chocolatey flavor, decadent ganache, and eye-catching fondant design make it a show-stopping centerpiece for any party or event.
This cake is perfect for anyone who loves the New York Yankees or appreciates the history and tradition of this iconic team. Whether you’re making it for a birthday, sports-themed party, or simply to show your support for the Yankees, this cake is sure to delight fans of all ages. So put on your pinstripes, grab your bat and glove, and celebrate in style with a New York Yankees Cap cake!
Why is this the best recipe and tutorial
- Detailed Instructions: The tutorial provides step-by-step instructions, making it easy for both beginners and experienced bakers to follow along and achieve great results.
- Adaptable: The recipe can be easily adapted to suit different dietary needs and preferences by using alternative ingredients or adjusting the flavors and decorations.
- Iconic Design: The cake’s design pays homage to the iconic New York Yankees cap, making it perfect for fans of the team or anyone looking to create a visually stunning cake.
- Delicious Flavor: The chocolate cake recipe is moist and rich in flavor, providing a perfect base for the decadent chocolate ganache and fondant decorations.
- Professional Finish: The tutorial includes tips for achieving a smooth fondant finish and professional-looking details, ensuring that your cake looks as impressive as it tastes.
- Versatile Occasion: This cake is suitable for a wide range of occasions, from birthday parties to sports-themed events, making it a versatile and crowd-pleasing choice.

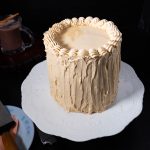
How I made the New York Yankees baseball cap cake brim
- This was very easy because I used my husband’s cap to make the template and then cut out a piece of gum paste exactly to the size of the template.
- Made the stitch lines using a tool stick or just prick with a toothpick.
- I placed a parchment paper template below the gum paste brim I made and placed it on the cap brim to dry. This way, the brim kept its natural shape.
Step by step: New York Yankees Cape Cake
Bake the cake
- Preheat your oven to 350°F (175°C) and grease and flour the ball pan.
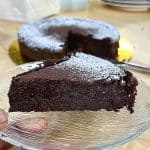
- For the chocolate cake, add all ingredients in a large bowl and combine until smooth without any lumps. Fill the ball pan with the batter, leaving space at the top for the cake to rise.
- Bake for 45-50 minutes, or until a toothpick inserted into the center comes out clean. Allow the cake to cool completely before proceeding.
Chocolate ganache
- Place the chopped dark chocolate in a heatproof bowl. In a small saucepan, heat the heavy cream over medium heat until it just begins to simmer. Do not let it boil.
- Pour the hot cream over the chopped chocolate and let it sit for 2-3 minutes. Stir the chocolate and cream together until smooth and glossy. Set aside to cool slightly and thicke
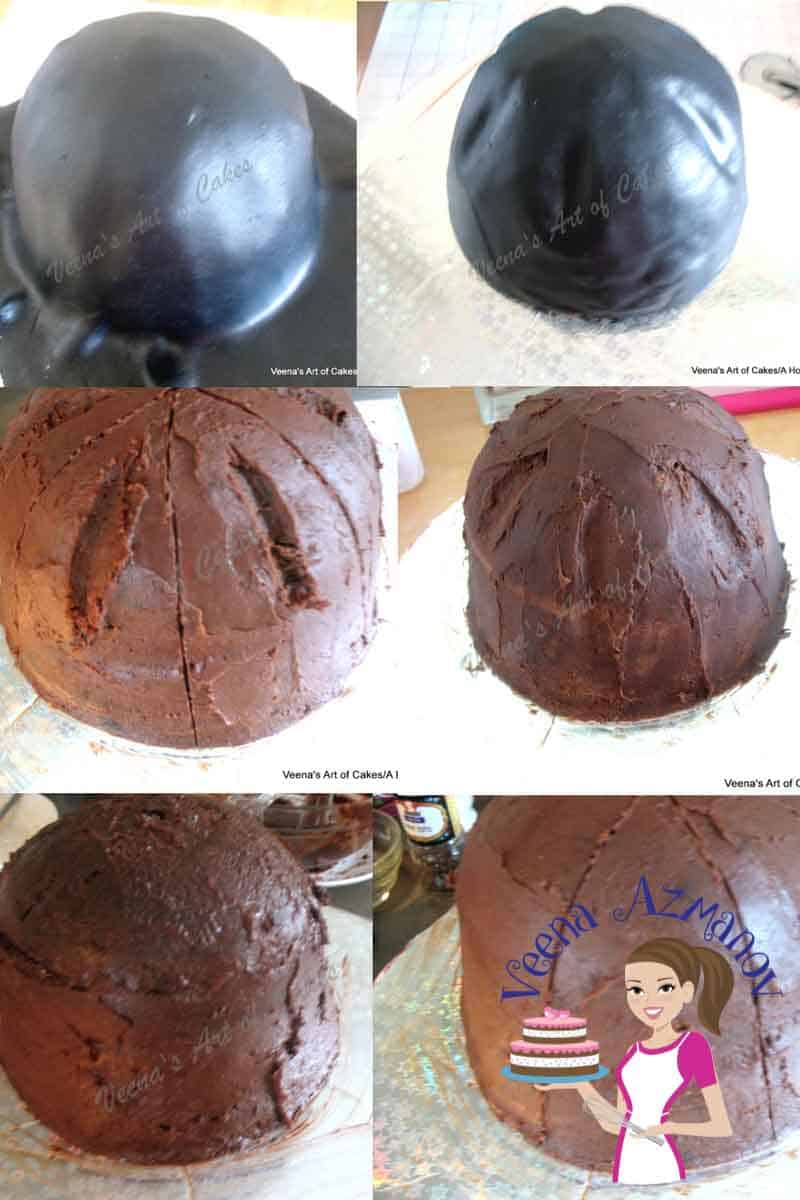
Carve the cake
- Once the cake has cooled, carefully remove it from the ball pan and place it on a flat surface.
- Use a serrated knife to carve the cake into the shape of a baseball cap, with a rounded top, and use gumpaste to make the flat brim.
- Spread a thin layer of chocolate ganache over the entire cake to seal in the crumbs. This will create a smooth base for the fondant.
Cover with fondant
- Knead the white fondant until it is soft and pliable. Divide the fondant into two portions, one slightly larger than the other. Tint the larger portion of fondant blue using the blue food coloring gel. Knead until the color is evenly distributed.
- Roll out the blue fondant to a thickness of about 1/4 inch. Carefully drape the rolled-out blue fondant over the cake, smoothing it down the sides gently to avoid any wrinkles.
- Carefully drape the rolled-out blue fondant over the cake, smoothing it down the sides gently to avoid any wrinkles.
- Trim off any excess fondant from the bottom of the cake using a sharp knife. Use your hands to smooth the fondant and ensure it adheres to the ganache layer.
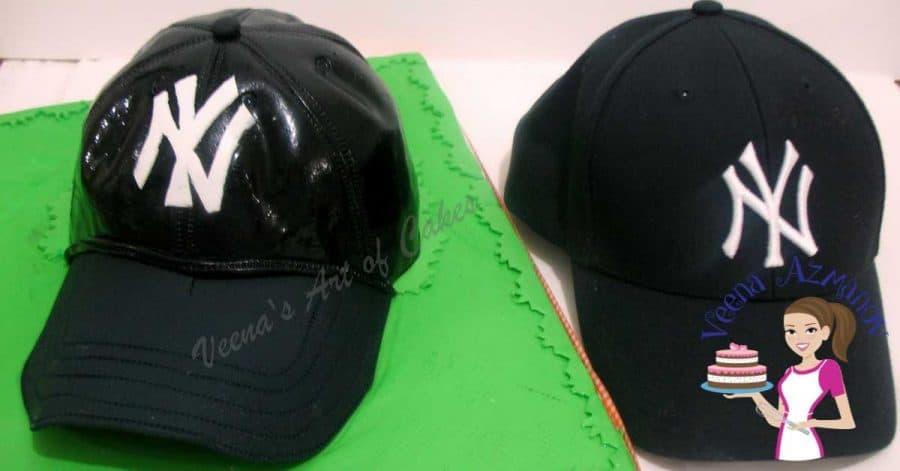
Create the Yankee logo
- Roll out the white fondant to a thickness of about 1/8 inch. Using a sharp knife or fondant cutter, cut out the letters “N” and “Y” to create the Yankees logo.
- Using a sharp knife or fondant cutter, cut out the letters “N” and “Y” to create the Yankees logo. Place the letters on the front of the cap, using piping gel or edible glue to attach them if necessary.
Add finishing touches
- Use the remaining white fondant to create any additional detailing, such as the brim of the cap or stitching. Use edible markers or food coloring to add any additional details, such as the MLB logo or player number.
- Allow the cake to set for at least 1 hour before serving to allow the fondant to firm up slightly.
- Slice and serve the cake to your guests, and enjoy the delicious chocolatey goodness!
Here you can see the cake and my husband’s cap besides each other.
Tips for Success
- Prepare Your Pan Correctly: Ensure your ball pan is thoroughly greased and floured to prevent the cake from sticking.
- Use High-Quality Ingredients: Opt for high-quality cocoa powder and chocolate for the best flavor in your chocolate cake and ganache.
- Allow for Proper Cooling: Let the cake cool completely before carving and decorating to avoid crumbling and melting of the ganache or fondant.
- Practice Patience: Take your time when carving and decorating the cake to achieve the desired shape and finish.
- Experiment with Colors: Adjust the shade of blue for the fondant to match your preference or team colors.
- Personalize the Design: Add extra details such as stitching, logos, or player numbers to make the cake unique and tailored to your preferences.
- Plan Ahead: Start preparing the cake a day in advance to allow enough time for baking, cooling, and decorating.
No posts
Frequently asked questions
Yes, you can use your favorite chocolate cake recipe or even a different flavor if you prefer. Just make sure it’s a sturdy cake that can hold its shape when carved.
Yes, you can bake the cake and make the ganache a day or two in advance. Store the cake wrapped in plastic wrap at room temperature and the ganache in an airtight container in the refrigerator. Bring the ganache to room temperature and reheat gently before using.
Yes, you can use store-bought fondant if you prefer. Just make sure to knead it well and roll it out to the right thickness for covering the cake.
The finished cake can be stored at room temperature for up to 2-3 days, or in the refrigerator for up to a week. Make sure to cover it well to prevent drying out.
Yes, you can freeze the cake before decorating. Wrap it tightly in plastic wrap and then in aluminum foil before freezing. Thaw in the refrigerator overnight before decorating.
No posts
Don’t lose this recipe! Save it for Later!
📌 Save this Recipe for later on Pinterest so you can easily find it again.
⭐ Add Veena Azmanov Kitchen to your Google Preferred Sources.
It helps Google show you more of our recipes.
📧 Subscribe for new recipes delivered to your inbox.
🎥 Follow us for more recipes

New York Yankees Cap Cake
This New York Yankees Baseball Cap cake recipe and tutorial provides a detailed and easy-to-follow guide for creating a stunning cake that resembles the iconic Yankees cap. The moist chocolate cake, decadent chocolate ganache, and vibrant fondant decorations make this cake not only visually impressive but also delicious. Whether you're a Yankees fan or simply looking for a show-stopping dessert, this recipe is sure to impress!
Ingredients
- 1 6-inch spear chocolate cake (recipe below)
- 1 batch Chocolate ganache (recipe below)
- 1 batch Fondant (store-bought or homemade)
- Blue food coloring gel
- White fondant for detailing
- Piping gel or edible glue
- 1 cup All-purpose flour
- ⅓ cup Unsweetened cocoa powder
- 1 cups Granulated sugar
- 1 tsp Baking soda
- ½ tsp Baking powder
- ½ tsp Salt
- 1 large Eggs
- ½ cup Buttermilk
- ¼ cup Vegetable oil
- 1 tsp Vanilla extract
- ½ cup Hot water
- 150 g Dark chocolate chopped
- 150 ml Heavy cream
Method
- Preheat your oven to 350°F (175°C) and grease and flour the ball pan.
- For the chocolate cake, add all ingredients in a large bowl and combine until smooth without any lumps. Fill the ball pan with the batter, leaving space at the top for the cake to rise.1 cup All-purpose flour, ⅓ cup Unsweetened cocoa powder, 1 cups Granulated sugar, 1 tsp Baking soda, ½ tsp Baking powder, ½ tsp Salt, 1 large Eggs, ½ cup Buttermilk , ¼ cup Vegetable oil, 1 tsp Vanilla extract, ½ cup Hot water
- Bake for 45-50 minutes, or until a toothpick inserted into the center comes out clean. Allow the cake to cool completely before proceeding.
- Place the chopped dark chocolate in a heatproof bowl. In a small saucepan, heat the heavy cream over medium heat until it just begins to simmer. Do not let it boil.150 g Dark chocolate, 150 ml Heavy cream
- Pour the hot cream over the chopped chocolate and let it sit for 2-3 minutes. Stir the chocolate and cream together until smooth and glossy. Set aside to cool slightly and thicke1 batch Chocolate ganache
- Once the cake has cooled, carefully remove it from the ball pan and place it on a flat surface.
- Use a serrated knife to carve the cake into the shape of a baseball cap, with a rounded top and a flat brim.
- Spread a thin layer of chocolate ganache over the entire cake to seal in the crumbs. This will create a smooth base for the fondant.1 6-inch spear chocolate cake
- Knead the white fondant until it is soft and pliable. Divide the fondant into two portions, one slightly larger than the other. Tint the larger portion of fondant blue using the blue food coloring gel. Knead until the color is evenly distributed.1 batch Fondant
- Roll out the blue fondant to a thickness of about 1/4 inch. Carefully drape the rolled-out blue fondant over the cake, smoothing it down the sides gently to avoid any wrinkles.
- Carefully drape the rolled-out blue fondant over the cake, smoothing it down the sides gently to avoid any wrinkles.
- Trim off any excess fondant from the bottom of the cake using a sharp knife. Use your hands to smooth the fondant and ensure it adheres to the ganache layer.
- Roll out the white fondant to a thickness of about 1/8 inch. Using a sharp knife or fondant cutter, cut out the letters "N" and "Y" to create the Yankees logo.
- Using a sharp knife or fondant cutter, cut out the letters "N" and "Y" to create the Yankees logo. Place the letters on the front of the cap, using piping gel or edible glue to attach them if necessary.
- Use the remaining white fondant to create any additional detailing, such as the brim of the cap or stitching. Use edible markers or food coloring to add any additional details, such as the MLB logo or player number.
- Allow the cake to set for at least 1 hour before serving to allow the fondant to firm up slightly.
- Slice and serve the cake to your guests, and enjoy the delicious chocolatey goodness!
Notes
- Prepare Your Pan Correctly: Ensure your ball pan is thoroughly greased and floured to prevent the cake from sticking.
- Use High-Quality Ingredients: Opt for high-quality cocoa powder and chocolate for the best flavor in your chocolate cake and ganache.
- Allow for Proper Cooling: Let the cake cool completely before carving and decorating to avoid crumbling and melting of the ganache or fondant.
- Practice Patience: Take your time when carving and decorating the cake to achieve the desired shape and finish.
- Experiment with Colors: Adjust the shade of blue for the fondant to match your preference or team colors.
- Personalize the Design: Add extra details such as stitching, logos, or player numbers to make the cake unique and tailored to your preferences.
- Plan Ahead: Start preparing the cake a day in advance to allow enough time for baking, cooling, and decorating.


I’ve never tried making a shaped cake before but your tutorial actually made it feel manageable. My son was very impressed with the final result.
That’s so great to hear! These novelty cakes can look intimidating at first, so I’m glad the tutorial helped.
I have a question how do you get your fondant to be so black without drying out or falling apart what do you use? I have trouble with dark colors like red and black or dark purple. Thanks for any help you can give!
Hi Anonymous writer 🙂
Just color my fondant red for the first time. I did use Wilton red-red and red no taste (and a bit of red extra from sugar flair). Good luck
That turned out great! Keep up the fabulous work.Exceptional recipes – very moist, very rich,Love both the cakes!!