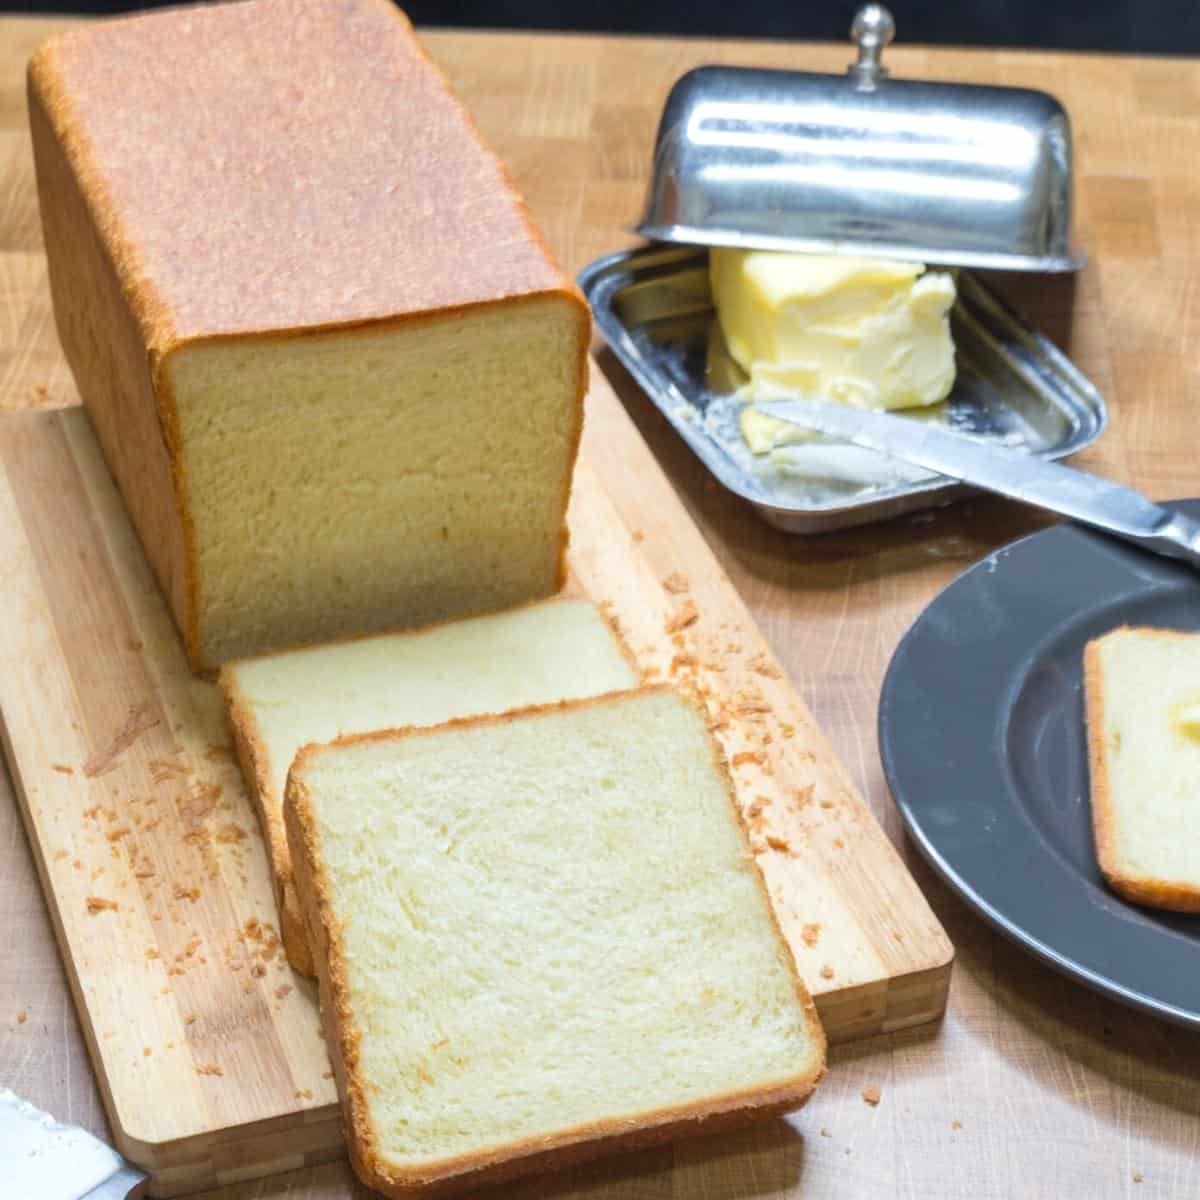
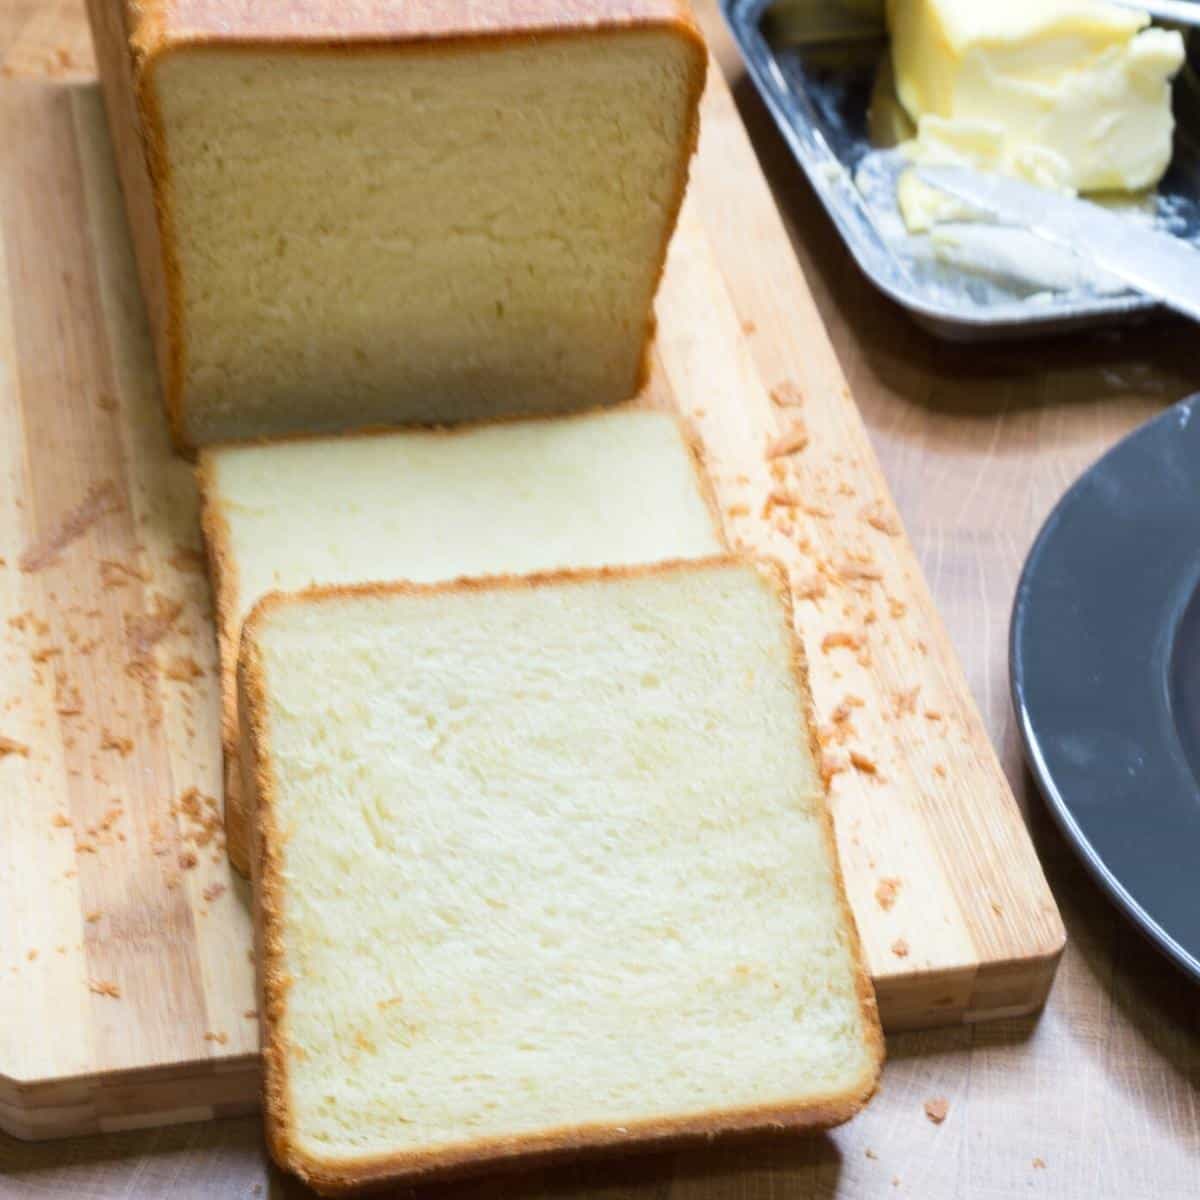
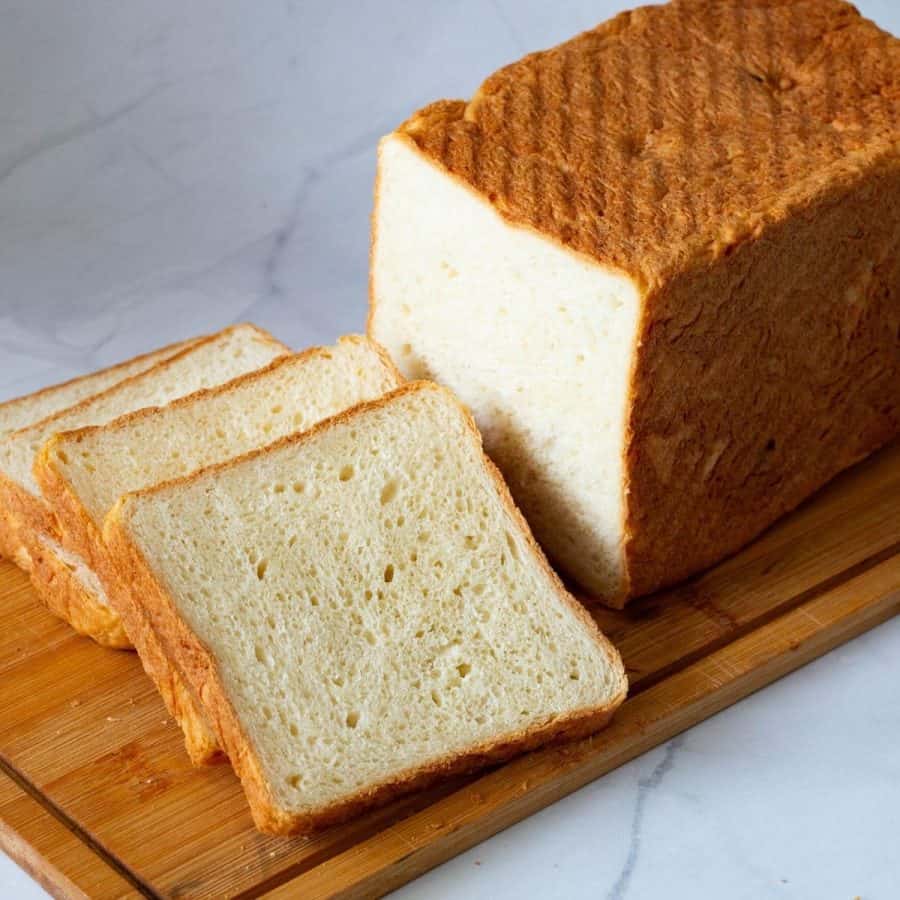
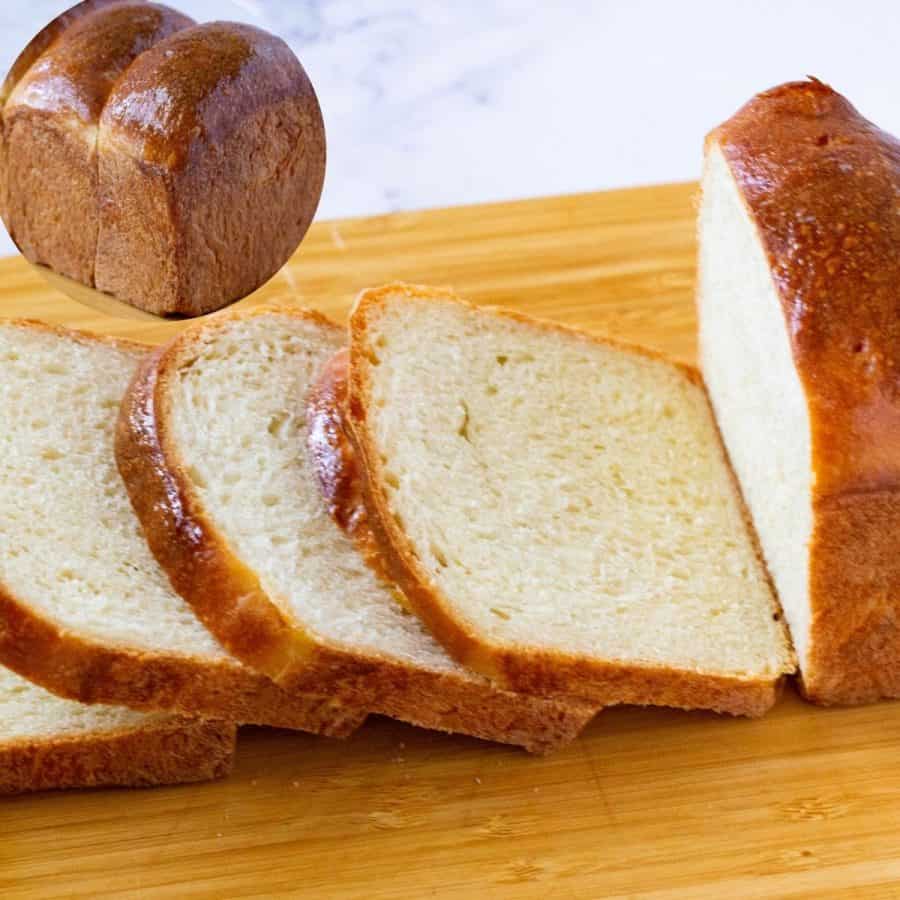
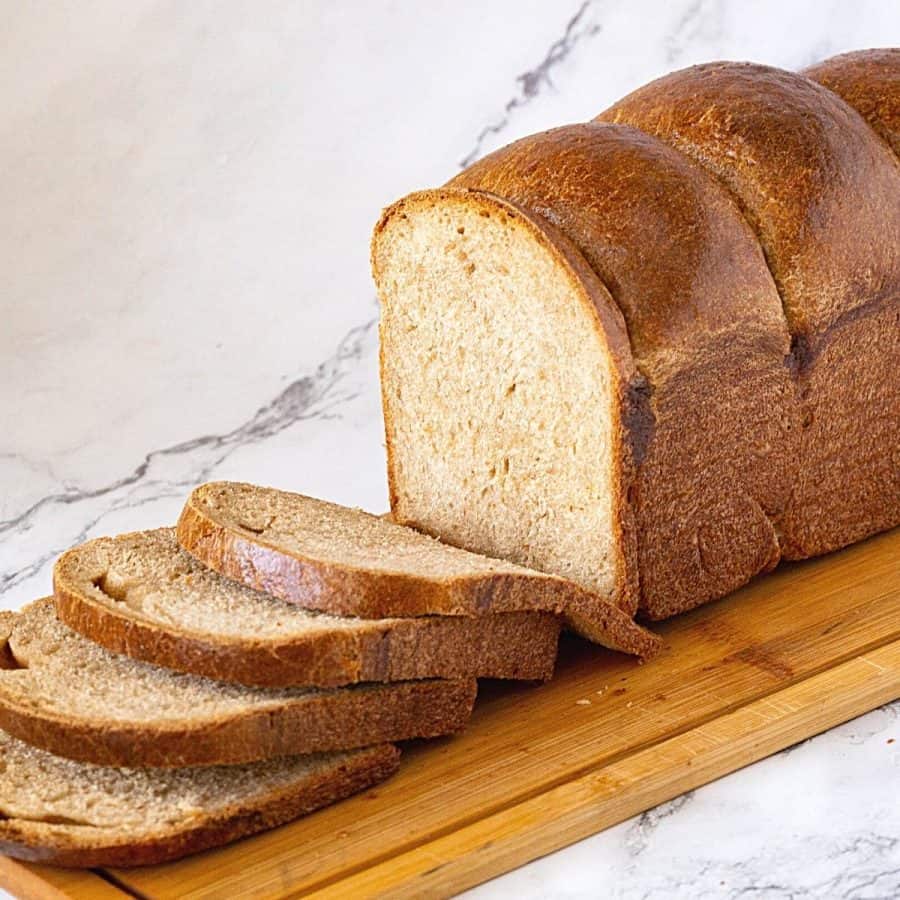
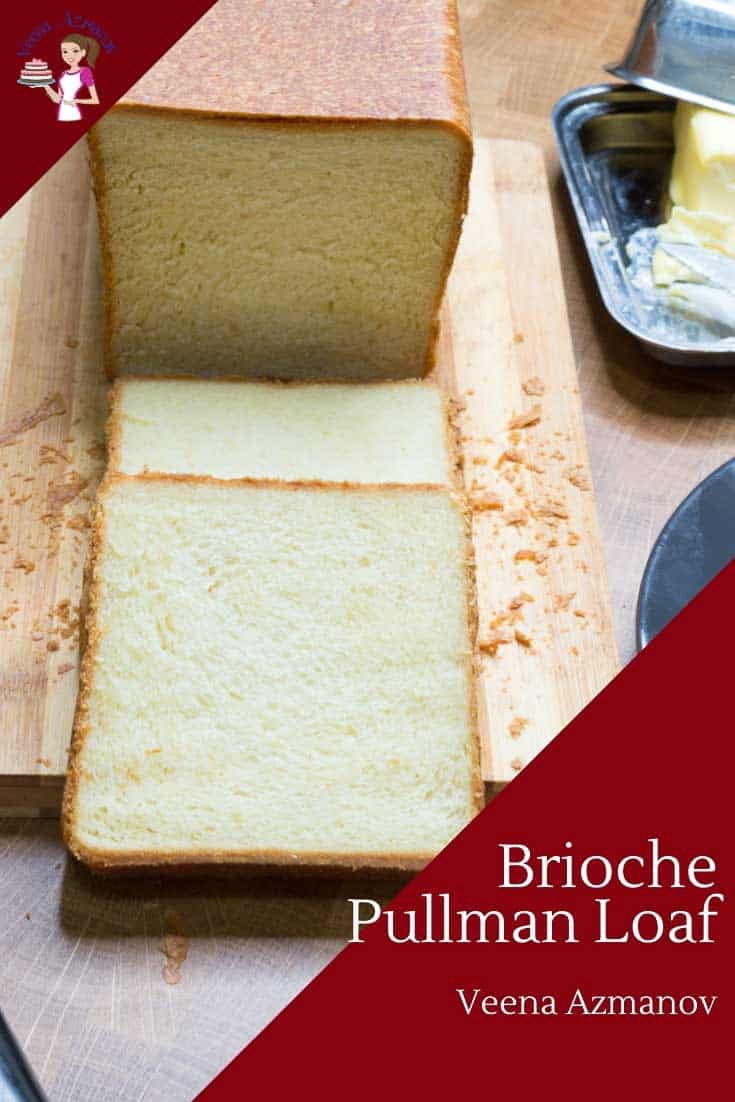
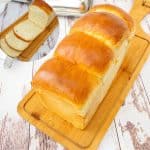
Brioche Pullman Bread
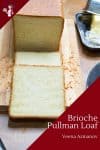

The French brioche bread is a classic yeast bread rich in butter and eggs, often described as cake-like. Today, we use the dough to make a brioche loaf, also known as brioche pain de mie in French, using a Pullman loaf pan. This brioche bread recipe is simple and easy, with a long chilling and resting period between steps.
People often think brioche pastry or viennoiserie is hard to make, but, on the contrary, it’s rather simple. I always knew soft Brioche buns, classic brioche or brioche à tête, and yet never realized I could make it into a sandwich bread until one day when I had lunch at a deli in Lourdes (south of France). The bread they used was a brioche pain de mie. I absolutely loved the flavor and texture – so soft and buttery.
I’m not really sure how true this really is, but I read somewhere that the Pullman railway company invented this bread back in the old days to make storage and transport easy. With this shape, they could stack the bread one on top of the other, using space more efficiently.
Why make this brioche loaf
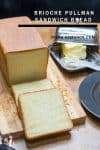
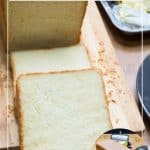
- This recipe makes a delicious loaf with an exceptionally soft, inflated, and fine-textured crumb.
- Unlike classic Pullman bread, this brioche Pullman dough is buttery and rich, with a crisp, golden brown crumb and four square corners, making for the perfect sandwich.
- Most of the ingredients are simple and easy to find or pantry staples.
- Brioche dough is not a quick bread. We let the dough rise in the refrigerator for 6 to 12 hours. This helps the yeast develop more flavor, tastes better, and also makes it easier to work with. But it also means you have more time to organize things, and there is no need to rush.
Ingredients and substitutes
- Flour – Bread flour is recommended for making homemade bread because it is high in protein. But you can certainly use all-purpose flour with a bit more kneading.
- Instant dry yeast – I like to use instant dry because I’ve always had great success with it. If you have to use the same amount of active dry yeast or 21 grams of fresh or baker’s yeast.
- Sugar – Brioche is a slightly sweeter dough than most everyday bread. But it enriches the dough, making it so much more wonderful, soft, and rich.
- Butter – This is a rich dough with a large amount of room-temperature unsalted butter. That’s what makes these so buttery, soft, and delicious.
- Egg –This recipe uses whole eggs. If you prefer a richer brioche, you can replace part of the whole eggs with additional egg yolks, keeping the total weight the same. Using more yolks will give the loaf a deeper color and softer crumb.
- Milk – Use whole milk. It enhances the flavor and tenderizes the dough, giving it a soft texture.

Step-by-step: Brioche Pullman Sandwich Bread
Dough
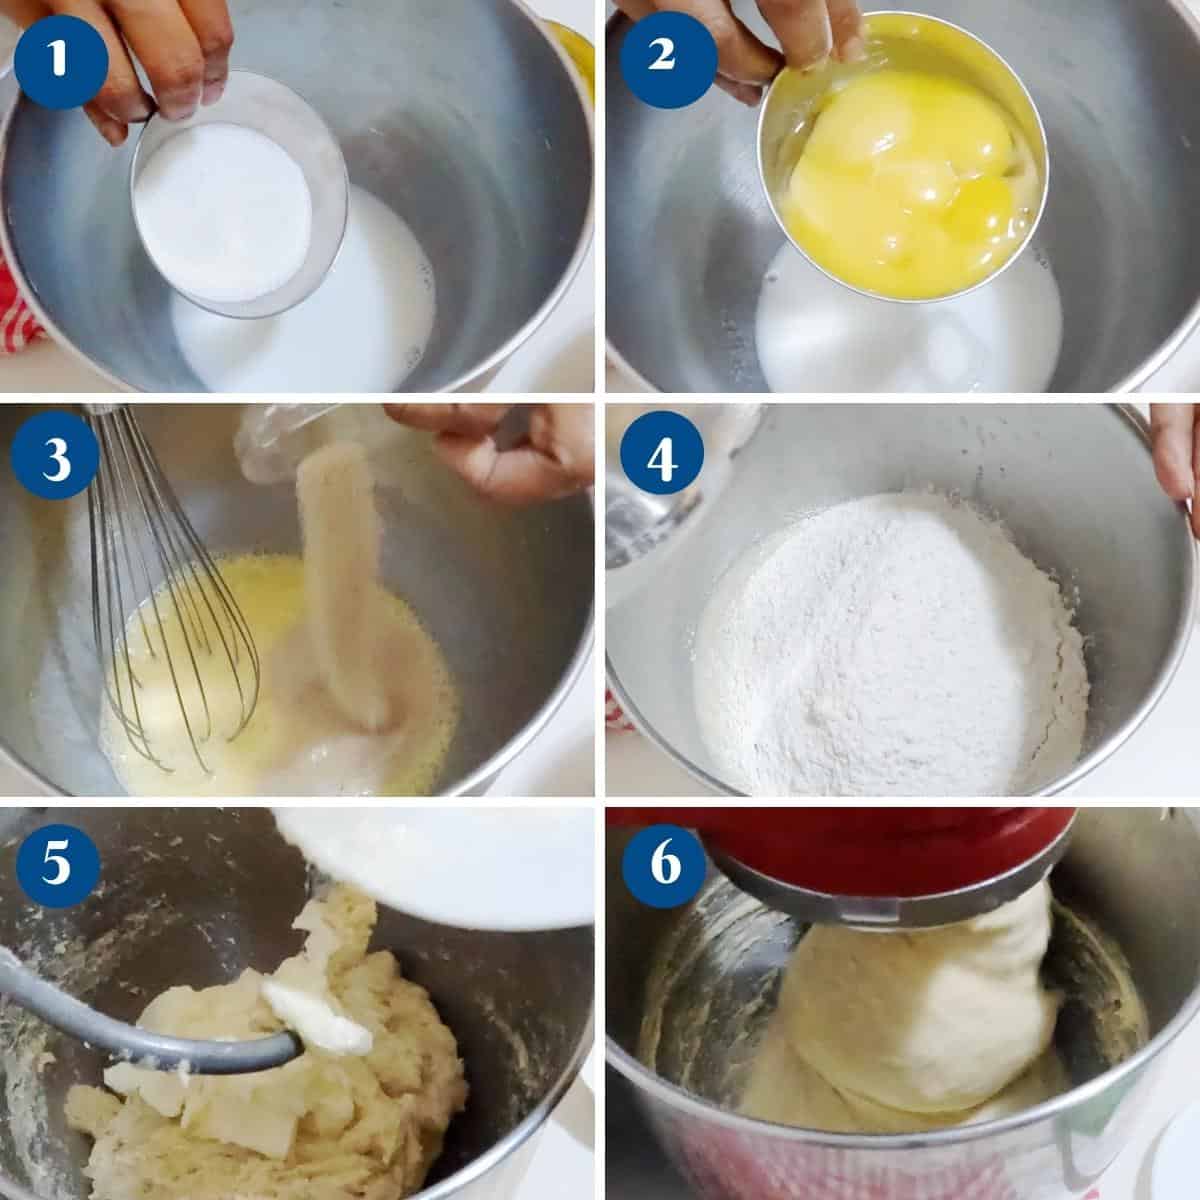
Wet ingredients – In the bowl of a stand mixer fitted with the dough hook, combine the warm milk and sugar. Add the eggs and instant yeast, and mix briefly to combine.
Dry ingredients – In a separate bowl, combine the flour and salt. Add this to the mixer and knead on medium speed for about a minute, scraping down the sides of the bowl as needed.
Knea – Once all the flour is incorporated, continue kneading the dough for 8 to 10 minutes until it becomes smooth and elastic. The dough will be soft and slightly sticky, but should pull away from the sides of the bowl.
👉 Pro tip – The dough should show some elasticity before adding the butter. This helps build structure in this enriched dough.
Butter – Add the soft, room-temperature butter gradually, one piece at a time, allowing each addition to fully incorporate before adding more.
Once all the butter is incorporated, continue kneading for another 4 to 5 minutes until the dough is smooth, elastic, and slightly glossy.
👉 Pro tip – This is a very soft dough, so resist the temptation to add extra flour. It will firm up as it develops.
First proof
Transfer the dough to a lightly floured surface and shape it into a smooth ball. Place it in a lightly oiled bowl and cover with plastic wrap or a damp kitchen cloth.
Let it rise in a warm place for about 45 to 60 minutes, until slightly puffy (it does not need to double at this stage).
Then transfer to the refrigerator and let it ferment for 6 to 8 hours or overnight until well chilled and firm.
👉 Pro tip – The slow, cold fermentation improves flavor and makes this butter-rich dough much easier to shape.

Shape and proof
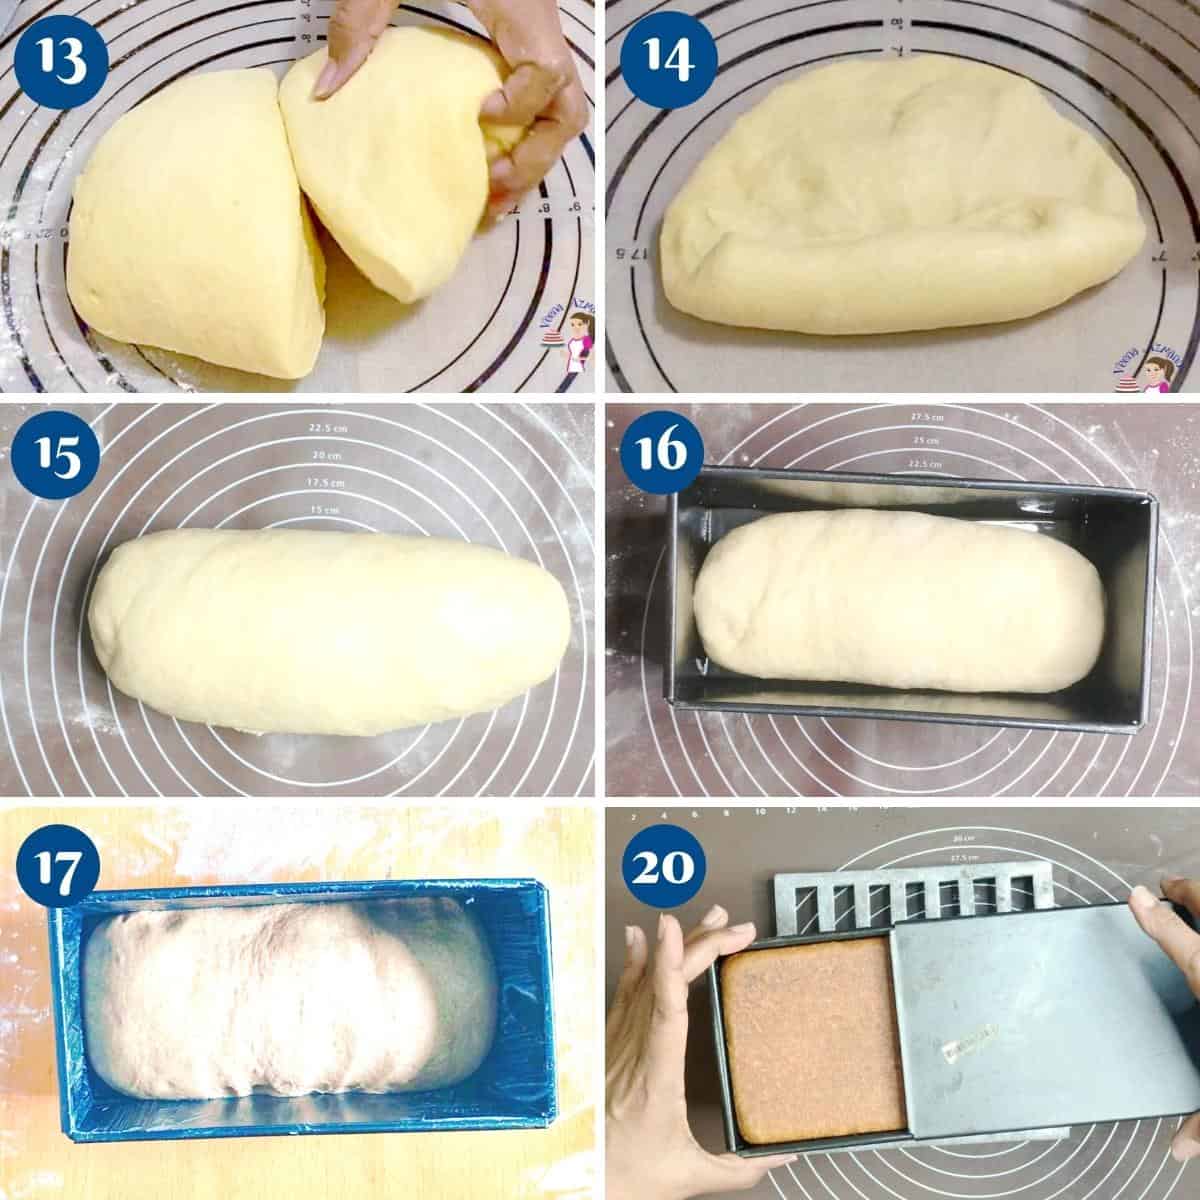
Punch – Invert the chilled dough onto a lightly floured surface. Gently deflate it and shape it into a ball.
Shape – Roll the dough out lightly, then shape like a jelly roll:
- Fold from the top to the center
- Fold the sides inward
- Roll tightly toward the end
- Pinch the seams to seal
👉 Pro tip – The dough will be cold and firm at this stage, which makes shaping much easier.
Final proof
Place the dough seam-side down into a buttered Pullman loaf pan. Cover loosely with plastic wrap and let it rise in a warm place for 90 minutes to 2 hours, or until it reaches about ¾ of the height of the pan.
Lid – When the dough is just below the top of the pan (about halfway to three-quarters up), lightly grease the Pullman lid and slide it on.
Bake
Oven – Preheat the oven to 380°F / 190°C for at least 20 minutes.
Place the pan on a baking tray and bake:
- 13-inch loaf: 45 to 50 minutes
- 9-inch loaf: 25 to 30 minutes
- 7-inch loaf: 20 to 25 minutes
👉 Pro tip – The bread is done when:
- it sounds hollow when tapped
- OR the internal temperature reaches 88–93°C / 190–200°F

Cool
Partially open the lid and let the bread cool in the pan for 10 minutes, then invert onto a cooling rack.
Cover loosely with a clean kitchen towel for 5 minutes to keep the crust soft.
👉 Pro tip – Trapping some steam helps keep the crust tender.
Rest
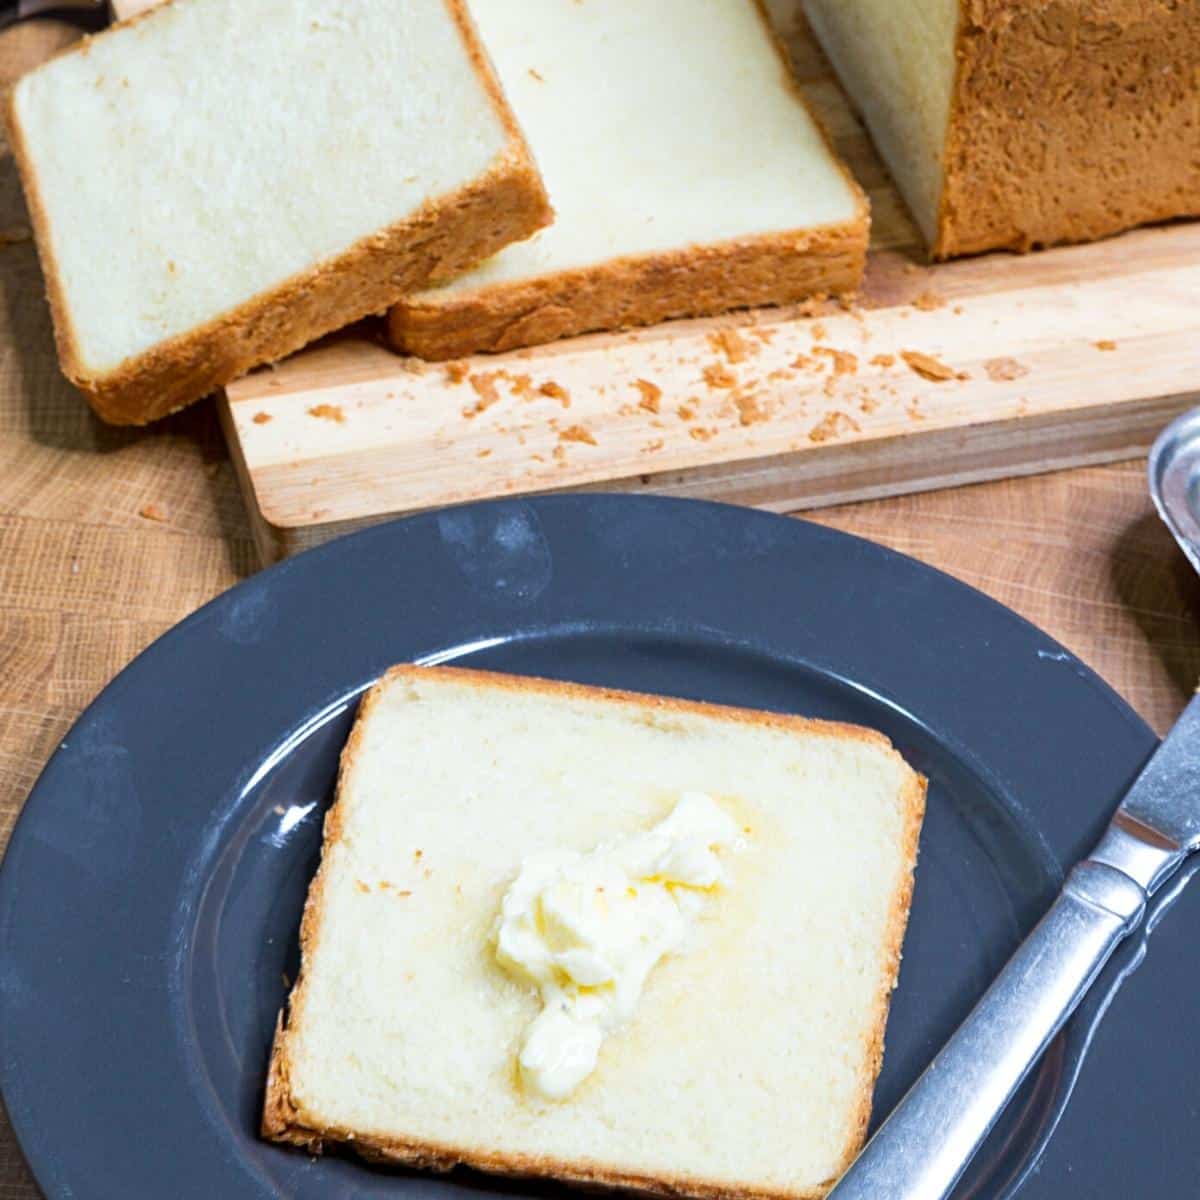
Let the bread rest for at least 1 hour before slicing.
👉 Note – Cutting too early releases steam and can make the crumb gummy instead of soft and fluffy.
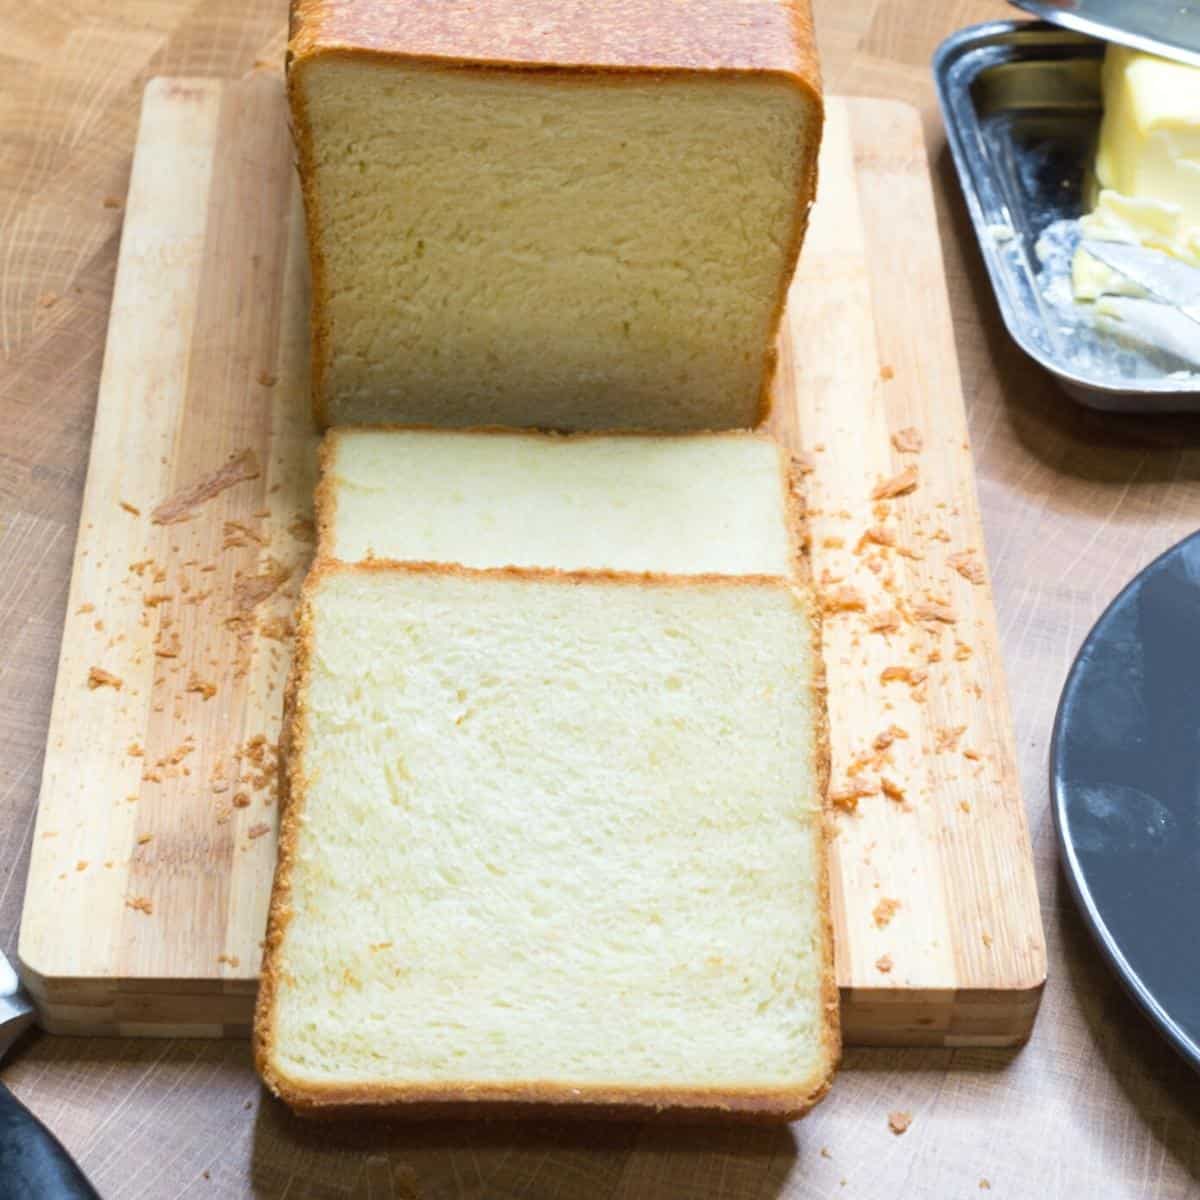
Soft Brioche Pullman Sandwich Loaf (Perfect for Slicing)
This soft brioche Pullman bread is rich, tender, and perfect for slicing. Made with milk, eggs, and butter, the dough is soft and enriched, then cold-fermented for better flavor and easier handling. The result is a light, fluffy sandwich loaf with a fine, even crumb.
Video
Ingredients
- 180 g (¾ cups) Whole milk
- 50 g (4 tbsp) Sugar
- 200 g (4 Eggs) Eggs
- 10 g (3¼ tsp) Instant dry yeast
- 600 g (5 cups) Bread flour
- 12 g (1½ tsp) Kosher salt
- 180 g (¾ cup) Butter, room temperature, unsalted room temperature, unsalted
- 120 g (½ cups) Whole milk 3%
- 35 g (3 tbsp) Sugar
- 7 g (2¼ tsp) Instant dry yeast
- 150 g (3 Eggs) Eggs
- 420 g (3½ cups) Bread flour
- 8 g (1½ tsp) Salt
- 125 g (½ cup) Butter room temperature, unsalted
- 90 g (½ cups) Whole milk 3%
- 25 g (2 tbsp) Sugar
- 100 g (2 Eggs) Eggs
- 5 g (1¾ tsp) Instant dry yeast
- 315 g (2½ cups) Bread flour
- 6 g (¾ tsp) Salt
- 90 g (7 tbsp) Butter room temperature, unsalted
Method
- Mix the dough – In the bowl of a stand mixer fitted with a dough hook, combine the warm milk and sugar. Add the eggs and instant yeast and mix briefly.Add the flour and salt, and knead on medium speed until the dough comes together.180 g Whole milk, 50 g Sugar, 200 g Eggs, 10 g Instant dry yeast, 600 g Bread flour, 12 g Kosher salt
- Knead -Continue kneading for 8 to 10 minutes until the dough becomes smooth and elastic. The dough will be soft and slightly sticky.
- Butter – Add the soft butter gradually, one piece at a time, allowing each addition to fully incorporate before adding more.Continue kneading for another 4 to 5 minutes until the dough is smooth, elastic, and slightly glossy.180 g Butter, room temperature, unsalted
- First Rise – Shape the dough into a ball and place it in a lightly oiled bowl. Cover and let it rise at room temperature for 45 to 60 minutes, until slightly puffy.Transfer to the refrigerator and chill for 6 to 8 hours or overnight.
- Shape – Turn the chilled dough onto a lightly floured surface and gently deflate it.Shape into a log by folding and rolling tightly, then place seam-side down into a buttered Pullman pan.
- Final Proof– Cover loosely and let rise in a warm place for 90 minutes to 2 hours, or until the dough reaches about ¾ height of the pan.Slide the greased lid on.
- Cover – Once you see your dough is almost halfway up the sides – spray the cover of the Pullman pan lid and place it on.
- Bake – Preheat oven to 190°C / 380°F. Transfer the pan to the oven and bake 13-inch pan: 45 to 50 minutes9-inch pan: 25 to 30 minutes7-inch pan: 20 to 25 minutes
- Cool – Partially open the lid and let cool in the pan for 10 minutes, then invert onto a cooling rack.Cover loosely with a towel for a few minutes to keep the crust soft.
- Rest – Let the bread cool for at least 1 hour before slicing.
- Note – Always let bread rest for at least an hour before you cut it – this is the hardest part!! But, it will prevent the steam from escaping and making the bread dry.
Notes
- The dough will be soft—avoid adding extra flour.
- Cold fermentation improves both flavor and structure.
- If the dough springs back while shaping, let it rest for a few minutes.
- Bread is fully baked when internal temperature reaches 88–93°C (190–200°F).
- Store in an airtight container for up to 3 days or freeze for longer storage.
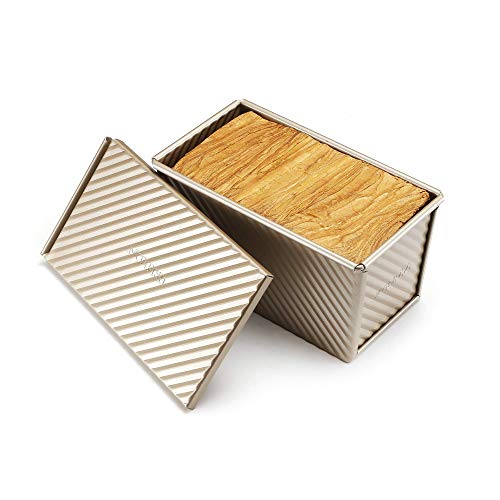
Equipment you will need

Nutrition
Tried this recipe?
Mention @veenaazmanov_kitchen or tag #veenaazmanovkitchen!Tips for Success
- Use room temperature eggs and soft butter for easier mixing
- Knead well before adding butter to build structure
- Add butter gradually, letting each piece fully incorporate
- Expect a soft, slightly sticky dough—don’t add extra flour
- Chill the dough—cold dough is easier to shape
- Proof until ¾ of the pan height, not just by time
- Avoid overproofing—don’t let it reach the top before baking
- Bake until internal temp reaches 88–93°C / 190–200°F
- Let the bread cool at least 1 hour before slicing
Troubleshooting brioche bread
| Problem | Possible Cause | Solution |
|---|---|---|
| Dense or heavy texture | Insufficient proofing | Brioche needs a longer rise due to its high fat content. Let the dough rise until fully doubled and slightly puffy before baking. |
| Overmixing | Overmixing can overdevelop gluten and tighten the crumb. Mix until the dough is smooth and elastic, then stop. | |
| Inactive yeast | Always check that your yeast is fresh and active. Expired yeast will prevent proper rising. | |
| Dry or crumbly bread | Dough too dry | Brioche dough should be soft and slightly sticky. If it feels dry, add 1–2 tablespoons of liquid during mixing. |
| Too little butter | Brioche relies on butter for tenderness. Make sure the full amount of butter is incorporated gradually. | |
| Overbaking | Bake just until golden brown. Overbaking will dry out the crumb. Remove once the loaf sounds hollow when tapped. | |
| Weak or bland flavor | Too little sugar | Brioche is lightly sweet. Increase the sugar slightly if you prefer a richer flavor. |
| Low-quality ingredients | Use good-quality butter, eggs, and vanilla. These have a big impact on flavor in enriched doughs. |
Frequently asked questions
If stored properly, this white bread will stay for 4 to 5 days at room temperature. It can be frozen for a month or more, too. Never store bread in the fridge as it dries out.
Brioche is a highly enriched dough, so overnight proofing helps enhance its flavor and strengthen and relax the gluten. Overnight proofing is highly recommended. However, you can leave it to rise on the counter for longer, but you will still need to chill the dough before you shape, proof, and bake it.
Pain de mie is a French term for soft, white, or brown sliced bread. ‘Pain’ means bread, and ‘(de) la
This is not a pan you buy often. And just because you buy a Pullman loaf pan does not mean you can’t make regular sandwich loaves in there. If you do not use the lid, what you get is a regular sandwich loaf with a round edge. I love those too! However, if you buy a regular loaf pan, then you can’t make a Pullman sandwich bread without the lid.
So, the smart choice, according to me? If you must buy one loaf pan, buy the Pullman sandwich loaf pan. That way, you can make the regular bread without the lid or a Pullman sandwich bread with the lid. You can see me using it without the lid when I made my white sandwich bread, as well as whole wheat sandwich bread – both of these are made with this same pan, but without the lid.
Each Pullman pan will have its own guide for total dough weight.
16x4x4 about 1300 – 1400 grams
13x4x4 about 1100 – 1200 grams
9x4x4 about 750 – 850 grams
7x4x4 about 550 – 650 grams
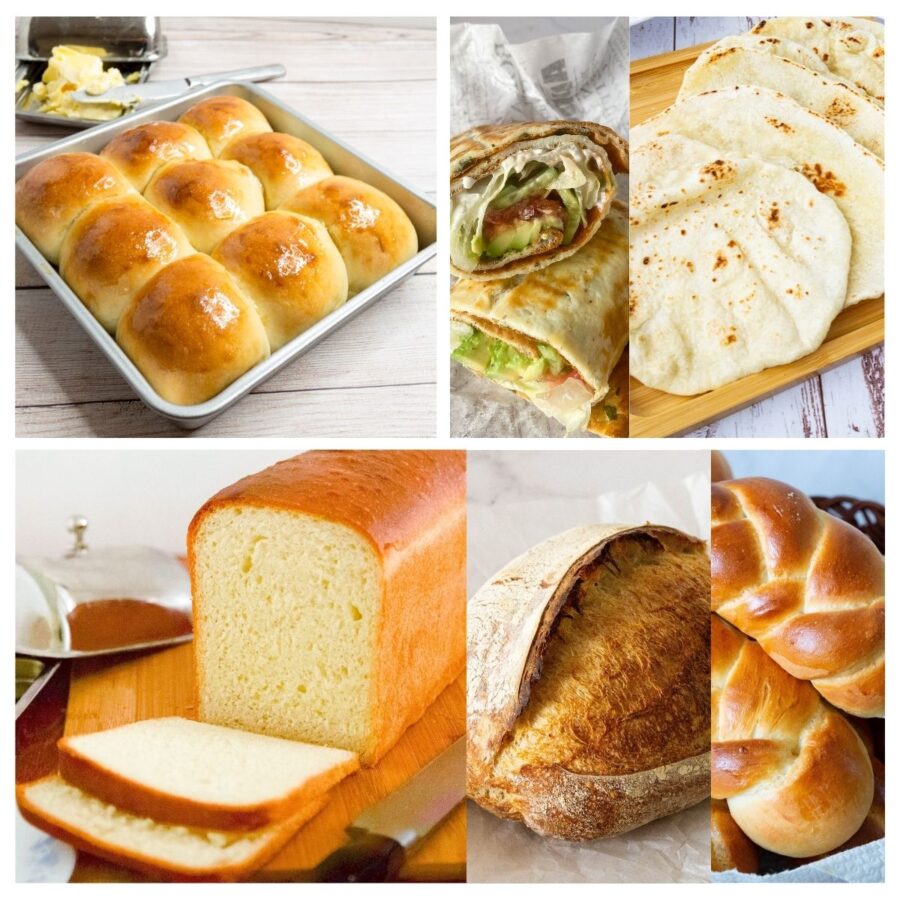
you may also like
- 10 Best Gifts for Bread Bakers
- 15+ Beginner Bread Recipes for Everyday Baking
- Learn Bread Baking at Home • Step by Step 😄
- Homemade Ciabatta Recipe
- Mini Sausage Rolls


Don’t lose this recipe! Save it for Later!
📌 Save this Recipe for later on Pinterest so you can easily find it again.
⭐ Add Veena Azmanov Kitchen to your Google Preferred Sources.
It helps Google show you more of our recipes.
📧 Subscribe for new recipes delivered to your inbox.
🎥 Follow us for more recipes


Hi Veena, would it be possible for you to give a correct amount of ingredents (or call it the recepie) for the above Brioche Pullman Bread for pullman loaf pan size 16x5x5. Would really apprecite if thats possible for you……. Kind regards
Hey Pali – no, I don’t have measurements for a 16-inch loaf pan. I haven’t tried it, but you can make a 1.5X (one and a half) recipe and then use the dough to fill about 2/3 full. Leave to rise, cover, and bake. Of course, this is based on experience; I have not tested it yet. Sorry, I could not be much help.
Hi Veena,
I’m trying your brioche in a pullman pan soon. You mentioned in your notes that you only use egg yolks. The recipe calls for 4 eggs, meaning yolks only? Or do I need to adjust liquid if I leave out the whites?
Thank you for your recipe, I will let you know how I do!
John
Hey John, you can use whole eggs or only egg yolks, but by weight, not the number –
For example, 2 eggs would be approximately 100 grams, but you would need 100 grams of yolks if you use all yolks.
I often did that in the past, but now I prefer to use a combination of whole eggs and egg yolks. I think the texture is better.
Hope that helps.
This is the third time I have made this recipe. The first one came out just like your photo. The 2nd and 3 ones did not. The dough originally doubled, was put in the fridge for over 8 hrs. I took it out of the fridge, shaped it and put in the Pullman pan (I have the small one). It told about 4 hours to proof yo to about to the 3/4 part of the pan. I put the lid on and baked for 25 min (temp was 181) but he dough never rises enough to fill the pan to make 4 corners. What am I doing wrong? Help
Carla – sounds like the dough in the pan was too little and then over-proofed to reach 3/4 up. So, in the oven, there was nothing left to rise. If you double the recipe, divide in half for each pan. So the amount going in will be correct.
What did you mean to double the dough? Double the recipe? My first rise more than double within an hour. I then refrigerated it for 8 hours, it fell slightly, punched it down and shaped it and put it in the pan, it took forever to rise so you said it was overproofed right? What do I need to do differently? Thanks for your help
Yes, I mean double the recipe. Carla. Have you tried the recipe as is? I suggest you first see how the recipe works for you without any changes. Then double the recipe and divide the dough into 2 for the two pans. I have doubled the recipe many times (though I usually make other things with the second half)
I did the first one just as the recipe stated, but the 2nd and 3rd ones failed. When I take the dough from the mixer and let stand at room temp for about an hour, mine has already doubled in size at that point. I then put it in the fridge overnight, shaped and put in the 7x4x4 Pullman pan but like I said it took several hours to fill the pan 3/4 . When I baked it it hardly rose and did not make a square loaf. Should I not put it in the fridge and just in the Pullman pan and let it rise that way? It is really stiff when comes out of the fridge and hard to shape. I really appreciate you walking me through this process.
Carla, the recipe is the same. The quantities are different for the smaller pans, but the stiffness of the dough should be the same.
If necessary, let it sit out for a few minutes, then shape it and proof it again.
We keep the dough in the fridge to develop flavor, so it doesn’t matter how long it takes to double in size (sometimes the kitchen is warmer), as long as it’s ready, put it in the fridge.
My dough went flat overnight in the fridge. Is it still good?
Perhaps it was overproofed. Punch down, reshape and proof again. Then bake!
I have the large size Pullman loaf pan, but not the lid. Do I really need the lid???
The lid gives you the square shape, Georgianne. Otherwise, the top will be a dome, like a classic sandwich shape.
Excellent recipe, very rich and toasts well.
Just had a quick question: are the kneading times by hand or by mixer?
Thanks!
The times is for kneading by hand.
Love this dough it is so tasty and so easy to work with- I doubled this dough and then made dinner rolls with half and pullman with the other.
Thank you so much Matty. So happy you enjoyed this recipe. yes, I like doubling the dough too – I make two pullmans and then slice and freeze for the kids – they love using these for sandwiches
I think you mean 12 grams is 1 1/4 Tablespoons not teaspoons. If 1 Tablespoon is 9 grams.
Thanks for your comment, Donna. The yeast amount in the recipe is correct and is given in grams for accuracy. Spoon measurements for yeast can vary depending on brand and granule size, which is why weight is the most reliable reference in baking. This brioche recipe has been tested and made successfully by many readers over the years.
Excellent bread recipe. I made it exactly as written. Nice and soft, excellent slicing.
Thank you I will definitely make this bread recipe again.
Thank you Mary
This is a great recipe and I’ve made it three times already. Thank you so much much for the detailed instructions. Definitely my new go to recipe.
No Donn, You don’t need to divide – just choose the right measurements for your pan then shape, proof, and bake.
Hello Veena,
I made the Brioche Pullman bread receipe this morning, it’s presnetly baking in the oven at this moment, I can’t wait to taste.
With the half of the rest of the dough, I made the Braided Cinnamon receipe, I used a rounded bottom removable pan and circle the buns inside. We just tasted, it is absolutly devide … I’ll definitively make this recipe again.
Thank you for sharing your tips and recipes!
Thank you for the lovely feedback, Louise