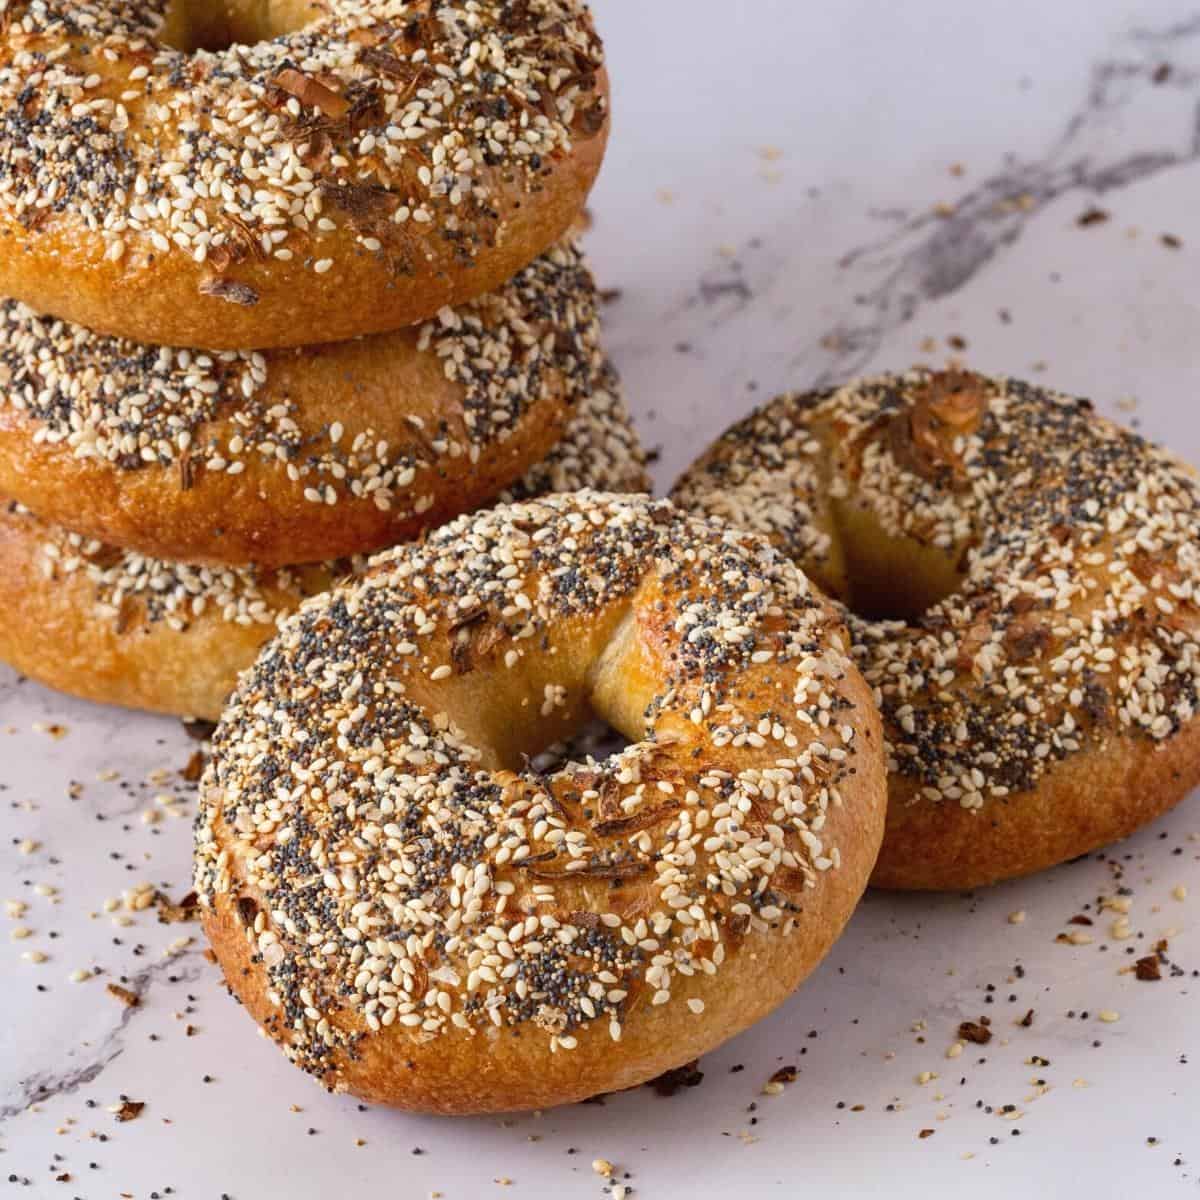
Homemade Everything Bagels


Homemade bagels have a great yeasty flavor, a soft yet chewy texture, and crisp crusts on the outside. If you make these chewy bagels with everything bagel seasoning, I promise you will never want to buy them from a store again. Expert tips included.
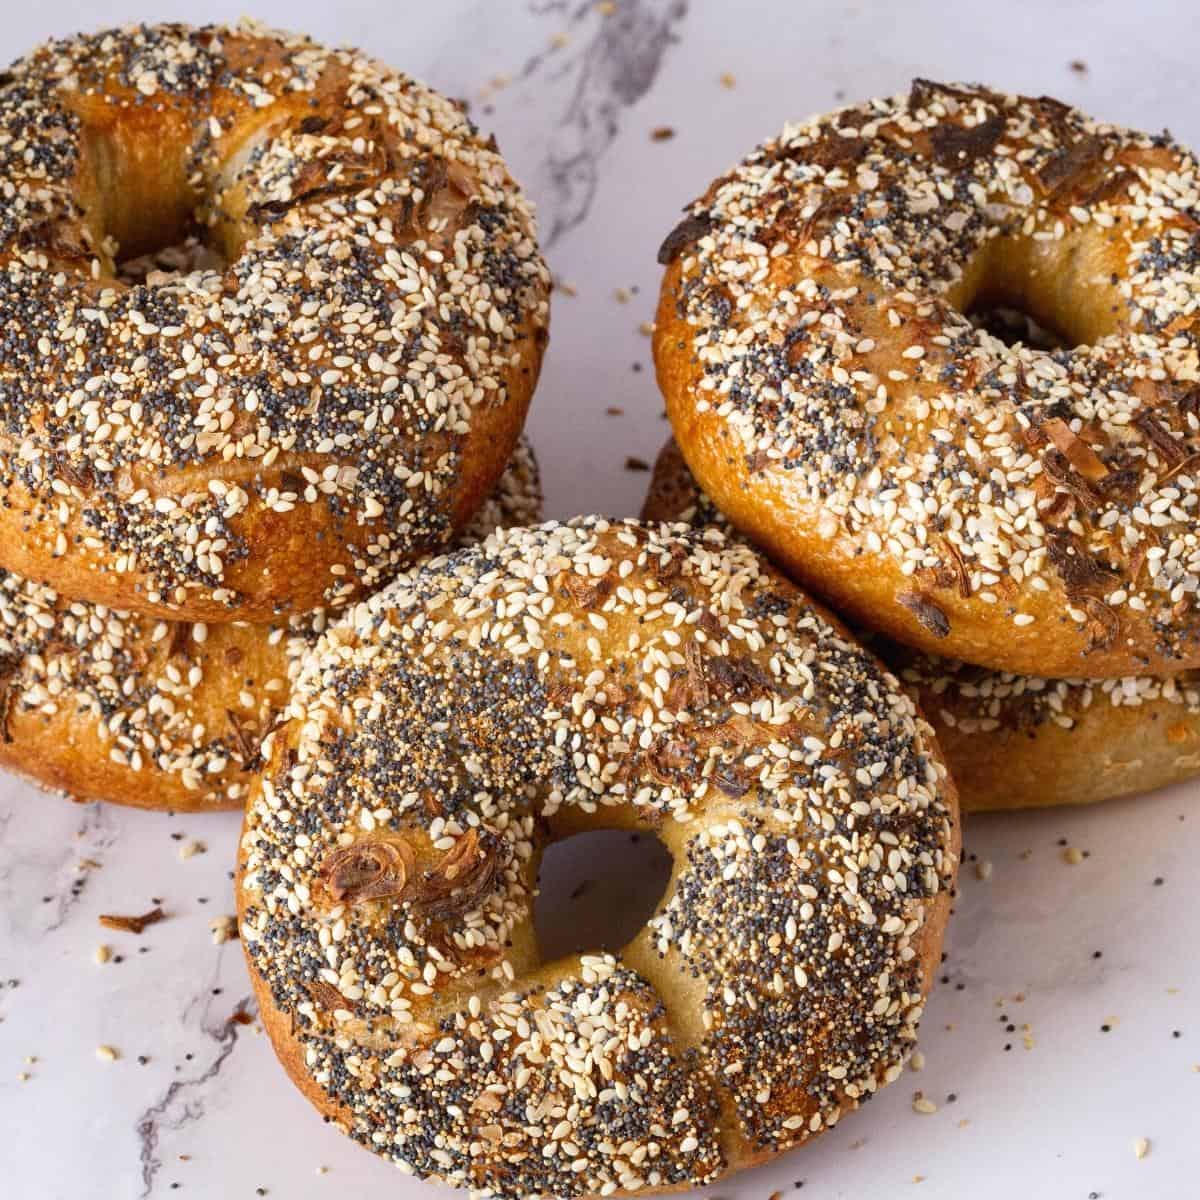
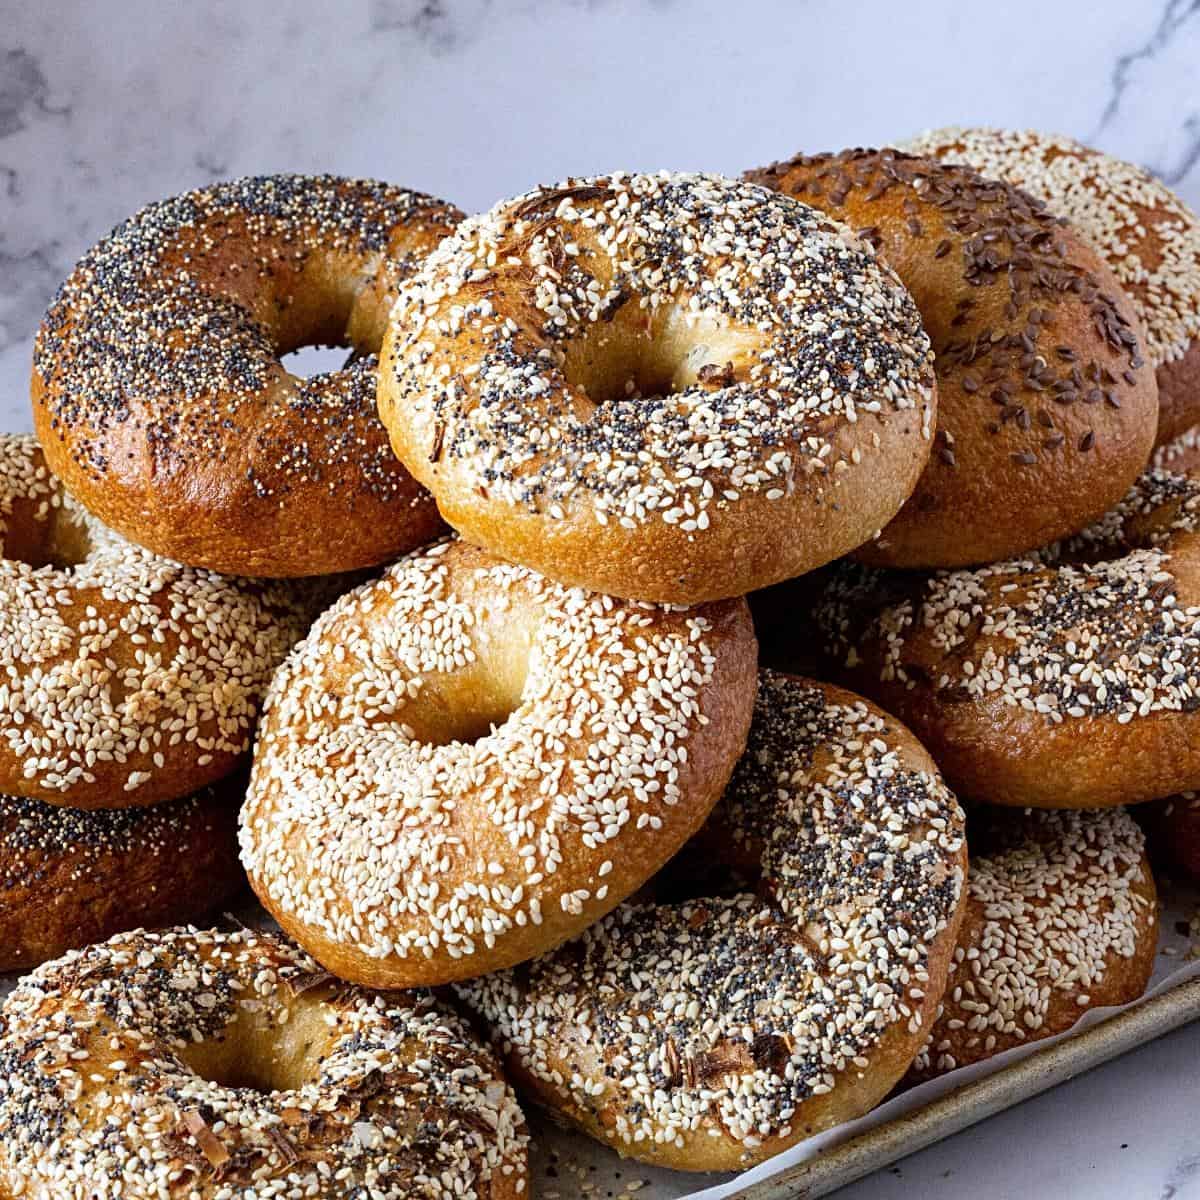
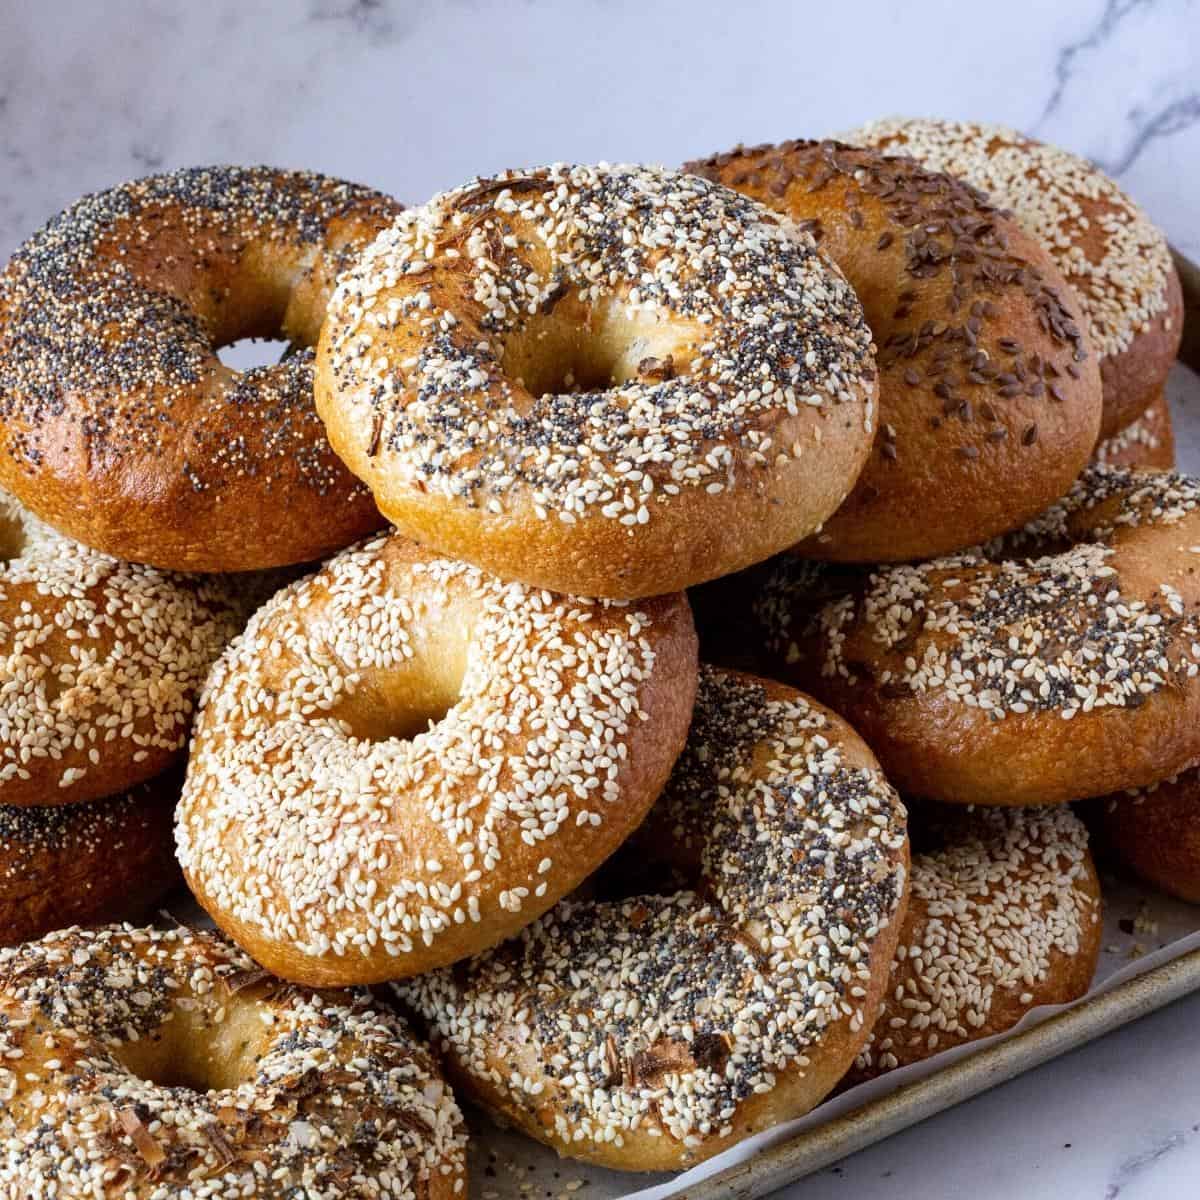
These are my classic bagels recipe with everything bagel seasoning that includes everything from sesame seeds to garlic, onions, and more.
Bagels have been around for approximately 500 years, dating back to the 16th century. These are a type of yeast bread made from dough shaped into a ring and then boiled in a water bath before baking. They are quick, easy, and reasonably nutritious. You can have them for breakfast, lunch, or dinner. They’re also convenient for sandwiches or with just about any topping for a quick snack.
The bagels you buy from the bagel shop are OK, but there’s just something about making your own from scratch. Even a New Yorker won’t guess this is a homemade bagel recipe.
Why homemade bagels?
- These are the basic bagel recipe topped with everything bagel seasoning. The seasoning is what gives these a wonderful flavor!
- And we do the classic boiling of them in a baking soda bath, which gives us that thick, chewy skin on the surface while still keeping that soft and light texture on the inside.
- You can make these on the same day or a day in advance because letting them rise and proof overnight means extra flavor.
- These are delicious on their own, but they also make perfect sandwiches with roast meat, or salads and pasta. Leftovers can be used to make bagel French toast, too!
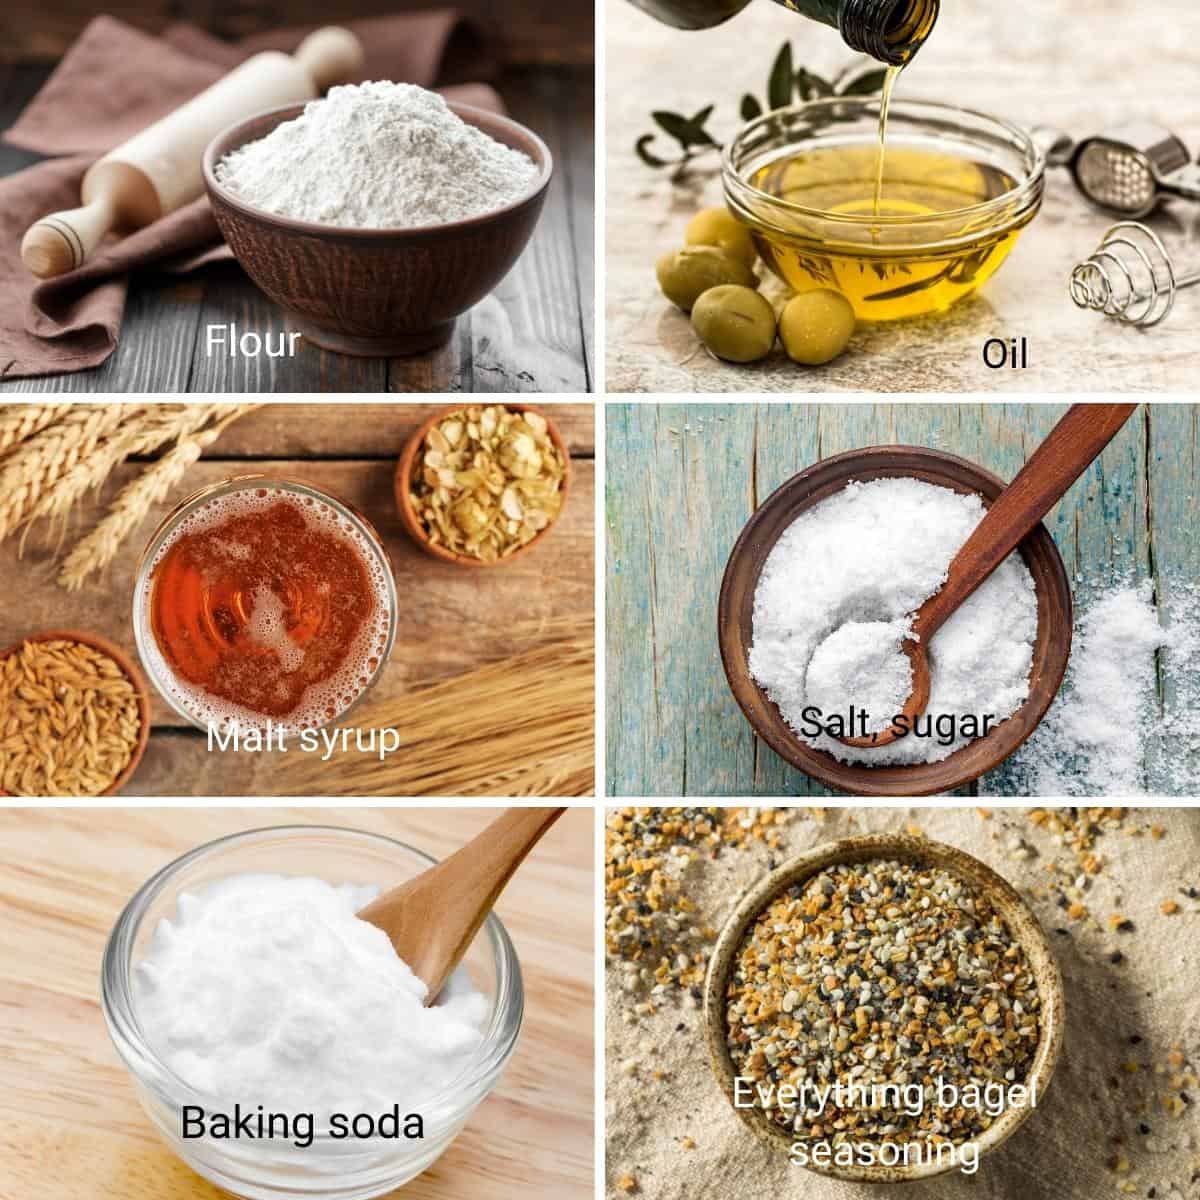
Ingredients and substitutes
- Flour – I prefer to use a combination of bread flour and a little all-purpose flour. Bread flour has high gluten, which makes these the most deliciously chewy bagels. Having said that, you can certainly make bagels with all-purpose flour, too.
- Water – The water in the dough must be warm, about 110°F. You don’t need a thermometer; lukewarm is a good word to describe it.
- Yeast – I like to use instant dry because I’ve always had great success with it. You can also use the same amount of active dry yeast or 21 grams of fresh baker’s yeast.
- Oil – I like to use olive oil. Coconut oil, canola oil, or avocado oil also work wonderfully.
- Baking soda – Poaching the bagels in soda water is what gives them their unique flavor and texture. So don’t skip this step.
- Malt syrup – Gives that wonderful traditional malty flavor that is unique to bagels. You can also use honey or brown sugar instead. You can buy barley malt syrup at natural food stores.
Step-by-step: Everyday Bagels Recipe
Everything seasoning
- Combine all the seasoning ingredients in a small bowl or dry mason jar. Give it a good mix. Set aside until ready to use.
Pro tip – This seasoning will keep in a cool, dry place for up to 2 months.

Bagel dough
- Combine – In the bowl of a stand mixer with the dough hook attachment on medium-high speed, combine with a whisk the warm water, yeast, oil, and barley malt syrup (or honey). Add the bread, all-purpose flour, and salt.
- Knead – Start the mixer at medium-high speed until all the flour is well incorporated. Then, continue to knead on medium speed for 8 to 10 minutes.
- Rise – When the dough is smooth, soft, and elastic, shape it into a ball. Place the dough in an oiled bowl, seam side down. Cover with a clean kitchen towel or plastic wrap. Leave in a warm place. Let it rise for 60 to 90 minutes until it doubles in volume. Or let it slowly rise in the fridge overnight.
Pro tip – In winter, you may need 90 minutes or more for the dough to rise. But, in summer, the dough may double in 45 minutes. If you can’t attend to it at that moment, degas and reshape the dough into a ball, then leave it to double in volume again.

- Divide – When the dough doubles in volume, transfer it to a well-dusted floured surface. Punch it down and remove any air bubbles. Divide the dough into two portions, then each portion into six equal pieces. This makes 12 bagels of approximately 125 grams each.
Pro tip – At this point, there is no need for additional flour. So use a light dusting of flour if necessary. - Ball – Roll each piece of dough into a tight ball, tucking all the seams under. Let the dough balls rest for 15 minutes.
Pro trip – Resting the dough in between steps is crucial to help the gluten relax. Otherwise, stretching and shaping become a challenge.

Shape & proof
Method 1
- Using your fingers, poke a hole in the center of each ball.
- Stretch it so the hole is at least 1 1/2 to 2 inches wide.
Pro tip – Make sure the hole is big enough; otherwise, it will close during proofing and baking.

Method 2
- Press the ball into a flat disc.
- Roll from one side to the other and roll to about 10 to 11 inches long rope. Flatten one side of the rope like a fan,
- Twist the rope, and then tuck the other side into the fan.
- Pinch the seams well.
Pro tip – Do not use too much flour, as it will prevent the dough from sticking together.

Method 3
- Press the ball into a flat disc.
- Roll from one side to the other and roll into a 10 to 11-inch-long rope.
- Twist the rope and bring the two ends together, and attach them.
- Put your hand through the hole in the center and roll the dough back and forth on the unfloured work surface until the two ends are sealed together almost seamlessly.
Pro tip – You can use a dab of water to pinch the two ends together, but too much water will prevent them from sticking.
- Baking tray – Line three large baking sheets with parchment paper. Spray the parchment with nonstick spray or dust with flour. Place them on the parchment, leaving enough room for them to rise.
Pro tip – The oiled parchment-lined baking sheet works better for me as it makes it easier to pick them without them sticking. You can also use silicone mats. - Proof
- Counter – Leave to rise on the counter at room temperature for 60 to 90 minutes or until almost doubled in size.
- Overnight – Alternatively, you can leave them in the fridge overnight to slow-proof. Take them out on the counter for 45 to 60 minutes before you poach them in a water bath.
Pro tip – In summer, the dough rises quicker, while in winter it may take longer, so use double in volume as a guide.
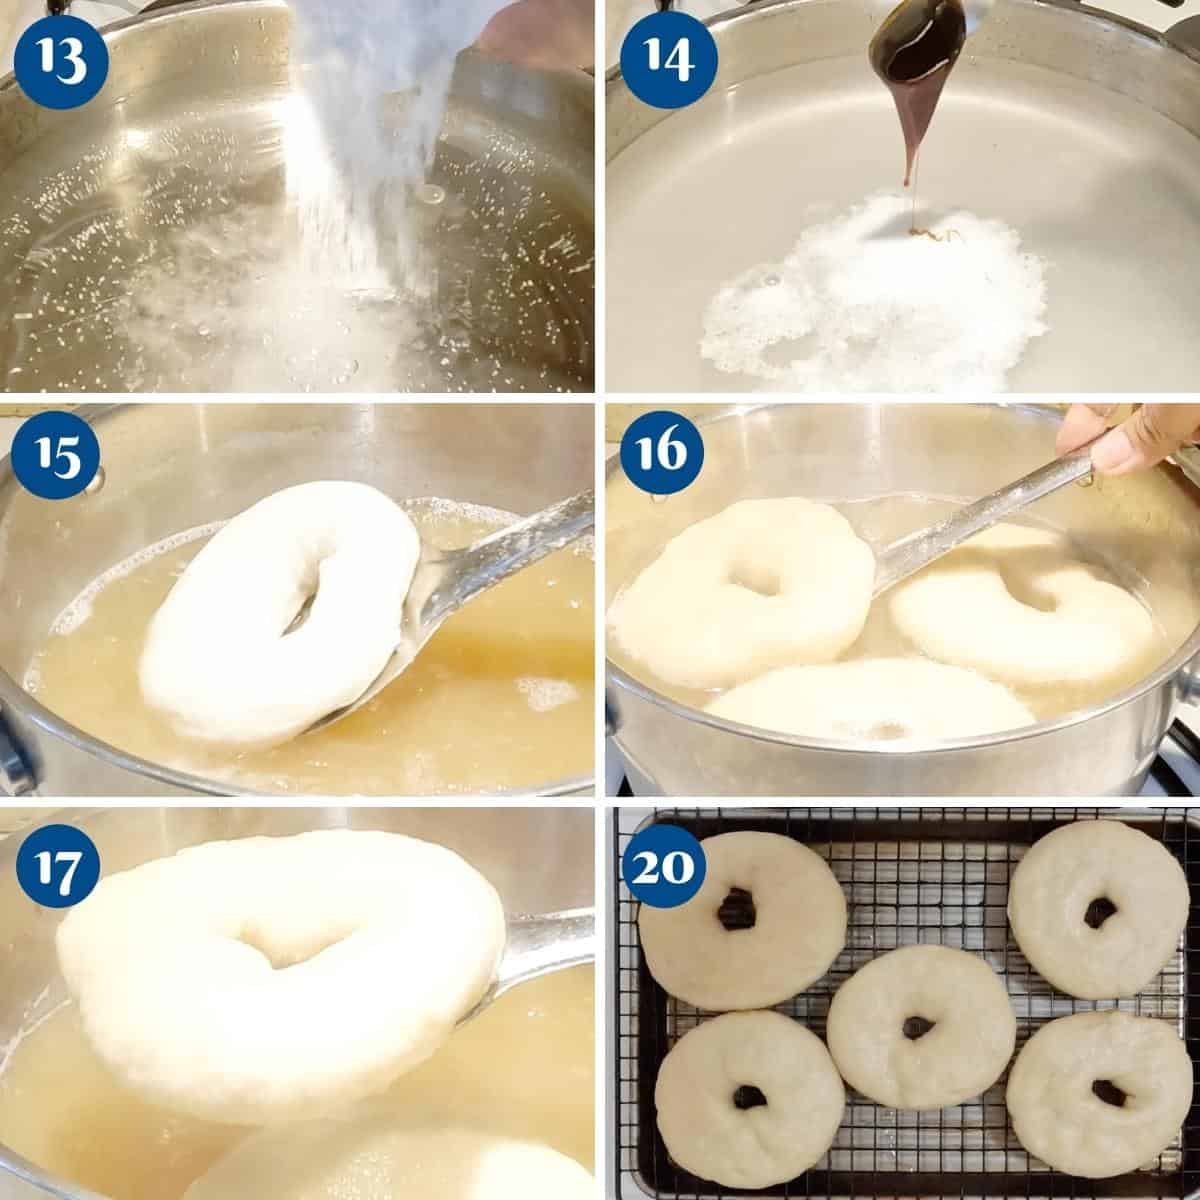
Boil
- Preheat the oven to 390°F / 200°C/ Gas Mark 6
- Boiling liquid – Bring a large pot of water to a boil. Add the salt, sugar, baking soda, and malt syrup.
Pro tip – We need a wide, shallow pan so you can add 3 to 4 at once. Otherwise, the water will be deep, but not be enough space for them. - Water bath – Once the water comes to a boil, carefully add them a few at a time. Boil the shaped bagels for 30 seconds on each side. Remove and place them on a third baking sheet lined with a wire rack to drain excess water.
Pro tip – Overcrowding the pan will lower the water’s temperature. The longer you boil them, the thicker and chewier the crust will be.
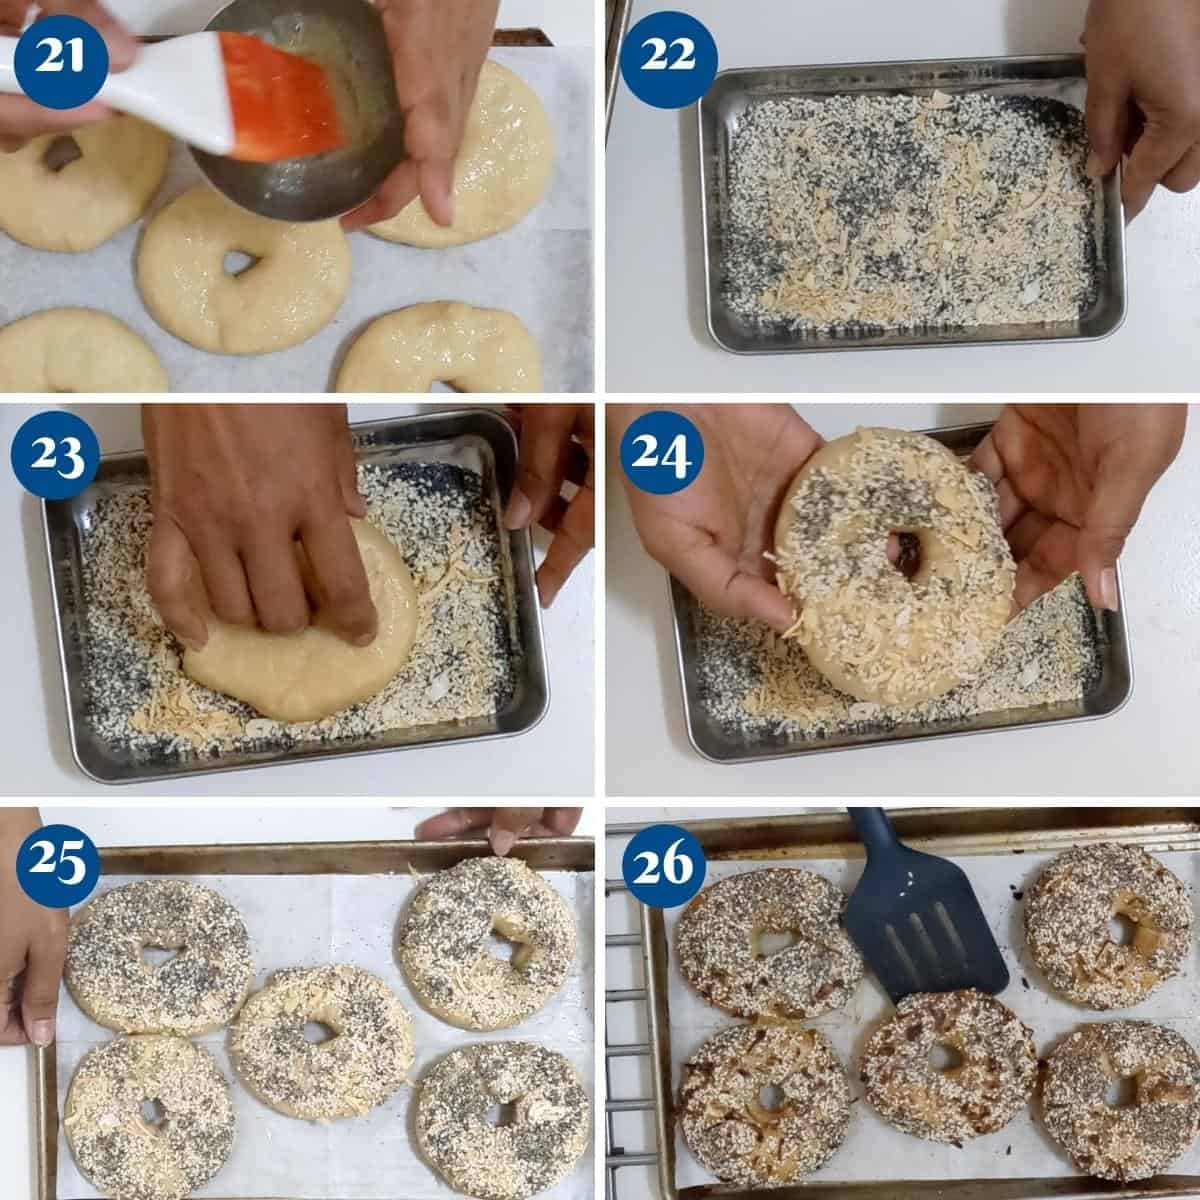
Bake
- Egg wash – Transfer the bagels back to the baking sheet lined with parchment paper or wipe excess moisture from the tray. Then, brush the top and sides of each bagel with beaten egg white or olive oil using a pastry brush.
Pro tip – Excess liquid in the baking tray will create steam during baking. This will make the crust harder. So, wipe out excess liquid. - Toppings – You can place them upside down in the topping, in everything seasoning for a thicker coating, or just sprinkle the topping on the bagel for a lighter spread.
Pro tip – I’ve used everything seasoning today, but you can also just use sesame seeds, poppy seeds, flax seeds, or other flavors discussed above. - Bake for 20 to 25 minutes until the top is dark golden brown. As soon as they come out of the oven, move them to the baking tray to prevent them from sticking.
Pro tip – The egg whites and water can cause them to stick to the parchment paper, so move them to the tray while they are still hot. - Cool – Let cool on the baking tray for 3 to 5 minutes. Then, transfer to a wire rack to cool further. Bagels are at their best the day they are baked. But leftovers make great toast. They also keep well in the freezer.

Tips for Success
- Use bread flour – It gives a chewier bagel than all-purpose flour.
- The dough is very easy to knead by hand, too. It must be soft and elastic. Use just enough flour necessary for kneading. And if you add too much flour, it will be a very dense bagel.
- If you want the dough to rise quicker than 60 minutes, place the bowl in a warm oven with the light on. This usually takes only 30 to 45 minutes for me.
- And let the bagels proof for 45 to 60 minutes before you boil them in baking soda. These will ensure the inside is wonderfully light.
- Also, the poaching liquid must be boiling when you add the bagels. Adding salt to the baking soda helps it come to a rolling boil. The bagel must float on the water, not sink. If they sink, it means the water is not hot enough. It’s best to wait.
- Wipe all excess moisture from the baking pan. This moisture can create steam in the oven when baking. The steam causes the crust to become hard. We want a chewy, not hard crust.
- And brush the bagels with egg white – this will help the toppings stick. To make them egg-free, brush with olive oil.
- Toppings – Avoid using onion flakes or garlic flakes as these tend to burn when baking. The granules work better. Alternatively, you can bake the bagels plain and then brush them with egg white and add the garlic/onion flakes in the final 2 minutes of baking.
- Browning – Too much or not enough. You can tent the bagels to prevent them from getting too brown. And if your bagels don’t get a brown color, it usually means the oven is not hot enough, or there is uneven heating.

Troubleshooting
- My bagels are flat. Why? If you overboil them in boiling water, it can deflate them, losing all the air incorporated during the proofing. They can deflate and will end up baking flat, hard, and dry.
- The bagel holes are closed. Why? When shaping the bagels, make the holes about 1 1/2 to 2 inches. These will get smaller as they proof and bake. And if you make them too small, they will close when baking. Having said that, the holes do not affect the taste. They will still taste incredibly delicious.
- The bagels got stuck to the bottom of the pan. The water must be boiling. Do not add them unless the water has come to a boil. When you add them in, it must instantly float. This means the water is ready. If not, wait until the water is boiling. Covering the pot can help bring it up to a boil.
- The bagel toppings are burnt. Some toppings do well when baking, some don’t. For example, seeds such as sesame, poppy, and salt do well. But garlic and onion flakes tend to burn. Instead, use garlic and onion granules.
- Homemade Classic Bagels Recipe
- Easy Homemade Pretzels, Soft Whole Wheat Pretzels
- Milk and Honey Challah
- Shokupan Sandwich Bread
- Homemade Soft Dinner Rolls
- Sourdough Loaf Bread
- See all Bread recipes


Frequently asked questions
Bagels are best on the day they are made. If you have any spares, I highly recommend you freeze them in a layer of aluminum foil. I find freezing works better than room temperature or the fridge.
The Everything Bagel is a seasoning blend made with all the toppings often used on it. For example, instead of choosing one topping of sesame seeds, poppy seeds, garlic, onion, or coarse salt, this seasoning has it all. That’s why it is so popular too!
The dough can be prepared a day in advance. Proof them for an hour on the counter, then punch down and let the dough rest in the fridge overnight. In fact, overnight proofing is a great way to add flavor to the bagels. The next day, let the dough come to room temperature before you shape and boil it.
Brush them with egg white or olive oil. The sticky egg whites hold on to the toppings.
Homemade Everything Bagels
Homemade bagels have a great yeasty flavor, a soft yet chewy texture, and crisp crusts on the outside. If you make these chewy bagels with everything bagel seasoning, I promise you will never want to buy them from a store again. Expert tips included.
Video
Ingredients
- 500 g (2.11 cups) Warm water 110 F
- 14 g (1½ tbsp) Instant dry yeast
- 30 g (2 tbsp) Olive oil
- 30 g (2 tbsp) Barley malt syrup or honey
- 733 g (5¾ cups) Bread flour
- 183 g (1½ cups) All-purpose flour
- 13 g (2 tsp) Salt
- 1½ ltr (6 cups) Water
- 30 g (2.5 tbsp) Baking soda
- 30 g (2.5 tbsp) Sugar
- 15 g (¾ tbsp) Salt
- 15 g (1.25 tbsp) Sugar
- 1 Egg white beaten
- 2 tbsp sesame seeds
- 2 tbsp poppy seeds
- 1 tbsp garlic granules
- 1 tbsp dried minced onions granules not flakes
- 1 tbsp coarse sea salt
Method
- Combine all the seasoning ingredients in a bowl or dry mason jar. Give it a good mix. Set aside until ready to use.2 tbsp sesame seeds, 2 tbsp poppy seeds, 1 tbsp garlic granules, 1 tbsp dried minced onions , 1 tbsp coarse sea salt
- Combine – In the bowl of a stand mixer with the dough hook attachment on medium-high speed, combine the warm water, yeast, oil, and barley malt syrup (or honey). Add the bread, all-purpose flour, and salt.500 g Warm water , 14 g Instant dry yeast, 30 g Olive oil, 30 g Barley malt syrup , 733 g Bread flour, 183 g All-purpose flour, 13 g Salt
- Knead – Start the mixer at medium speed. Once all the flour is well incorporated, continue to knead on medium-low speed for 8 to 10 minutes or by hand on a well-dusted surface for 10 to 12 minutes.
- Rise – When the dough is smooth, soft, and elastic, shape it into a ball. Place the dough in an oiled bowl, seam side down. Cover with a clean kitchen cloth or plastic wrap. Leave in a warm place. Let rise for 60 to 90 minutes until it doubles in volume. You can also leave it to slow rise in the refrigerator overnight.
- Divide—When the dough is doubled in volume, transfer it to a well-dusted floured surface. Punch it down and remove any air bubbles. Divide the dough into two portions, each portion into six equal pieces. This makes 12 bagels of approximately 125 grams each.
- Ball – Roll each piece of dough into a tight ball, tucking all the seams under. Let the dough balls rest for 15 minutes.
- Method 1– Using your fingers, poke a hole in the center of each ball. – Stretch it so the hole is at least 1 1/2 to 2 inches wide.
- Method 2 – Press the ball into a flat disc. – Roll from one side to the other and roll to about 10 to 11 inches long rope.– Flatten one side of the rope like a fan, – Twist the rope, and then tuck the other side into the fan. – Pinch the seams well.
- Method 3– Press the ball into a flat disc. – Roll from one side to the other and roll into a 10 to 11-inch-long rope. – Twist the rope and bring the two ends together and attach them. – Put your hand through the hole in the center and roll the dough back and forth on the unfloured work surface until the two ends are sealed together almost seamlessly.
- Baking tray – Line two large baking sheets with parchment paper. Spray the parchment with nonstick spray or dust with flour. Place the bagel on the parchment, leaving enough room to rise.
- Proof Counter – Leave to rise on the counter at room temperature for 60 to 90 minutes or until almost doubled in size. Overnight – Alternatively, you can leave the bagels in the refrigerator overnight to slow proof. Take them out on the counter for 45 to 60 minutes before you poach them in a water bath.
- Preheat the oven at 390°F / 200°C/ Gas Mark 6
- Boiling liquid – Bring a large pot of water to a boil. Add the salt, sugar, baking soda, and malt syrup.1½ ltr Water, 30 g Baking soda, 30 g Sugar, 15 g Salt, 15 g Sugar
- Water bath – Once the water comes to a boil, carefully add them a few at a time. Boil each bagel for 30 seconds on each side. Remove them back onto a baking tray lined with a wire rack to drain excess water.
- Egg wash – Transfer the bagels back to the baking sheet lined with parchment paper or wipe excess moisture from the tray. Then, brush the top and sides of the bagel with beaten egg white or olive oil using a pastry brush.1 Egg white
- Toppings – You can place them upside down in the topping in everything seasoning for a thicker coating or sprinkle the topping on the bagel for a lighter spread.
- Bake for 20 to 25 minutes until the top is golden brown. When they come out of the oven, move them to the baking tray to prevent them from sticking.
- Cool – Let cool on the baking tray for 3 to 5 minutes. Then, transfer to a wire rack to cool further. Bagels are at their best the day they are baked. But, leftovers make great toast. They also keep well in the freezer.
Notes
- If possible, use bread flour. I think it gives a chewier bagel than all-purpose flour.
- The dough is very easy to knead. It must be soft and elastic. Use just enough flour necessary for kneading. If you add too much flour, it will be difficult to shape the bagel later.
- If you want the dough to rise quicker than 60 minutes, place the bowl in a warm oven with the light on. This usually takes only 30 to 45 minutes for me.
- Let the bagels proof for 30 minutes before you boil them in baking soda. These will ensure the inside is wonderfully light.
- The poaching liquid must be boiling when you add the bagels. Adding salt to the baking soda helps it come to a rolling boil.
- The bagel must float on the water, not sink. If they sink, it means the water is not hot enough. It’s best to wait.
- Wipe all excess moisture from the baking pan. This moisture can create steam in the oven when baking. The steam causes the crust to become hard. We want a chewy, not hard crust.
- Brush the bagels with egg white – this will help the toppings stick.
- Toppings – Avoid using onion or garlic flakes as these tend to burn when baking. The granules work better. You can also brush egg white and add the garlic/onion flakes in the final 2 minutes of baking.
- Browning – too much or not enough. You can tent the bagels to prevent them from getting too brown. If your bagels don’t get a brown color, you can brush them with an egg wash made with egg yolks instead of egg whites.
- Overnight instructions – The dough can be prepared a day in advance. Proof them on the counter for an hour, then punch down and let the dough rest in the fridge overnight. Overnight proofing is a great way to add flavor to the bagels. The next day, let the dough come to room temperature before you shape and boil them.
- Storing Bagels – Bagels are best eaten the same day they are made, but they freeze beautifully. Cool the baked bagels, then place them in a freezer-safe storage bag. These can be frozen for up to 3 months.
- Seasoning – The options for topping are endless. Try sesame seeds, poppy seeds, nigella seeds, sea salt, as well as everything bagel seasoning. It can be found in most supermarkets, but you can also make it yourself.
- Kneading the dough – In the video, I kneaded the dough by hand, which takes about 5 to 6 minutes, but you can also use an electric mixer.
- Bread machine – Bagels can be easily made in a bread machine. Pour all ingredients in the pan of the machine, and set to dough or manual. Start and let the dough run its cycle for about 9 to 10 minutes – continue with the steps as shown above
Equipment you will need


Nutrition
Tried this recipe?
Mention @veenaazmanov_kitchen or tag #veenaazmanovkitchen!
Don’t lose this recipe! Save it for Later!
📌 Save this Recipe for later on Pinterest so you can easily find it again.
⭐ Add Veena Azmanov Kitchen to your Google Preferred Sources.
It helps Google show you more of our recipes.
📧 Subscribe for new recipes delivered to your inbox.
🎥 Follow us for more recipes


Can i use wholemeal flour for this recipe?
I suggest replacing half the flour with whole wheat so it’s not too dense. Thanks
For November Baking and Cooking Challenge.- “Homemade Everything Bagles”
It was fun in making bagles for the first time. Thankyou Veena Mam for sharing such a beautiful and a simple perfect recipe. Happy to get good results of the recipe, by following detailed step by steps instruction notes. Whole family praised and enjoyed the new recipe. We relished bagles with jam, butter, tried veg sandwich form, put veg cutlet inbetween and enjoyed like burger. My daughter also enjoyed with honey. On demand of little daughter, made few bagles by having few tutty fruity on them. Those were yummy too.
I am a pure vegetarian, so I avoided using eggwash. Instead , I washed bagles by applying mixture of fresh milk cream, sugar and butter. It created similar effect, beautiful golden colour and chewy soft inside. Thankyou again Veena Mam for beautiful recipe.
Thank you, Krishna. Tutty fruity sounds delicious.
November Challenge ❤️
For November Challenge I chose to make Homemade Everything Bagels as I was so tempted to make them. I am new to bread baking but Veena ji’s recipe is so easy with detailed instructions to follow! I loved making Bagels, they were just Yummy!!!
We had some with cream cheese and also made sandwiches with thousand island sauce, onion and tomato. You can have them with just cream cheese or sandwich them with sauces and veggies of your choice. They were superb in taste, so soft and chewy. My family enjoyed them ? After all family, happy us right?
Than you Bhakti
For November Baking and Cooking Challenge.- “Homemade Everything Bagles”
It was fun in making bagles for the first time. Thankyou Veena Mam for sharing such a beautiful and a simple perfect recipe. Happy to get good results of the recipe, by following detailed step by steps instruction notes. Whole family praised and enjoyed the new recipe. We relished bagles with jam, butter, tried veg sandwich form, put veg cutlet inbetween and enjoyed like burger. My daughter also enjoyed with honey. On demand of little daughter, made few bagles by having few tutty fruity on them. Those were yummy too.
I am a pure vegetarian, so I avoided using eggwash. Instead , I washed bagles by applying mixture of fresh milk cream, sugar and butter. It created similar effect, beautiful golden colour and chewy soft inside. Thankyou again Veena Mam for beautiful recipe.
Hello – me again!!! I am struggling with the 1/41/4 baking soda (I am in the uk) I will have to guess as they are proving as I type but, please could you give an approximate in tbsp/tsp?
Thank you
Marianne
It’s just 1/4 cup baking soda. yes, it is a lot but then we also use a lot of water. Thanks
For November Baking and Cooking Challenge.- “Homemade Everything Bagles”
It was fun in making bagles for the first time. Thankyou Veena Mam for sharing such a beautiful and a simple perfect recipe. Happy to get good results of the recipe, by following detailed step by steps instruction notes. Whole family praised and enjoyed the new recipe. We relished bagles with jam, butter, tried veg sandwich form, put veg cutlet inbetween and enjoyed like burger. My daughter also enjoyed with honey. On demand of little daughter, made few bagles by having few tutty fruity on them. Those were yummy too.
I am a pure vegetarian, so I avoided using eggwash. Instead , I washed bagles by applying mixture of fresh milk cream, sugar and butter. It created similar effect, beautiful golden colour and chewy soft inside. Thankyou again Veena Mam for beautiful recipe.
Thank you, Krishna. Happy you enjoyed these bagels
Hello, due to lockdown, I am baking for my local hospital (again…)
If I make these bagels the day/nigh before I give them to the doctors will they still be ok? Or, should I bake, freeze and defrost the night before?
Thank you – they loved the ham and cheese stuffed bread this summer so will be making again!!
yes, they should be ok for a few hours. You can also freeze them and use them as and when they want to eat them. Happy they enjoyed the ham and cheese bread
I would love to make these bagels as I never really made bread before. In the recipe for the, Everything Bagel Seasoning beside the egg white for brushing do you combine the other ingredients for the bagel or do you choose one or more to put on the bagel?
I
Hey Kathy, Not sure I understand your question? Can you please explain
Growing up in NY, these bagels were on every street corner! But being out of the city, it’s been a while since I’ve had it. Your recipe just brought back all of those city memories with these bagels. 🙂
Thank you, Connie. I hope you try these
What a great EASY recipe for everything bagels! Thank you so much for making it simple but delicious!
Thank you, Chandice.
It’s amazing how easy it is to make homemade everything bagels right at home with this recipe!
Thank you Sharon.