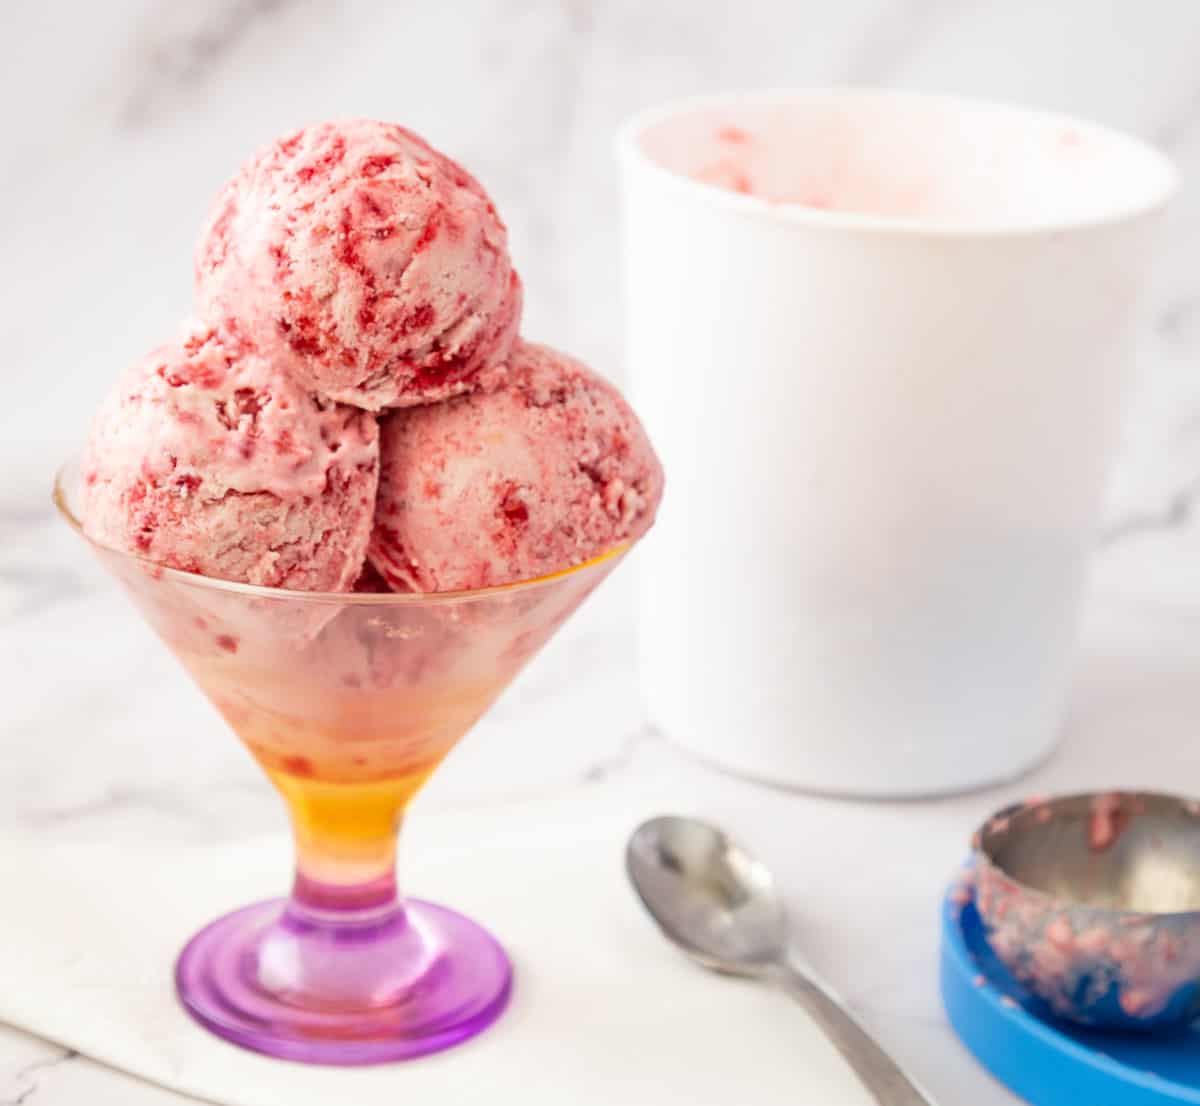
Easy Raspberry Ice Cream Recipe


This no-churn raspberry ice cream is creamy, fruity, and bursting with fresh raspberry flavor. Made with whipped cream, sour cream, condensed milk, and raspberries, it comes together in minutes without an ice cream maker. The sour cream balances the sweetness and gives the ice cream a richer, more authentic flavor that lets the raspberries shine.
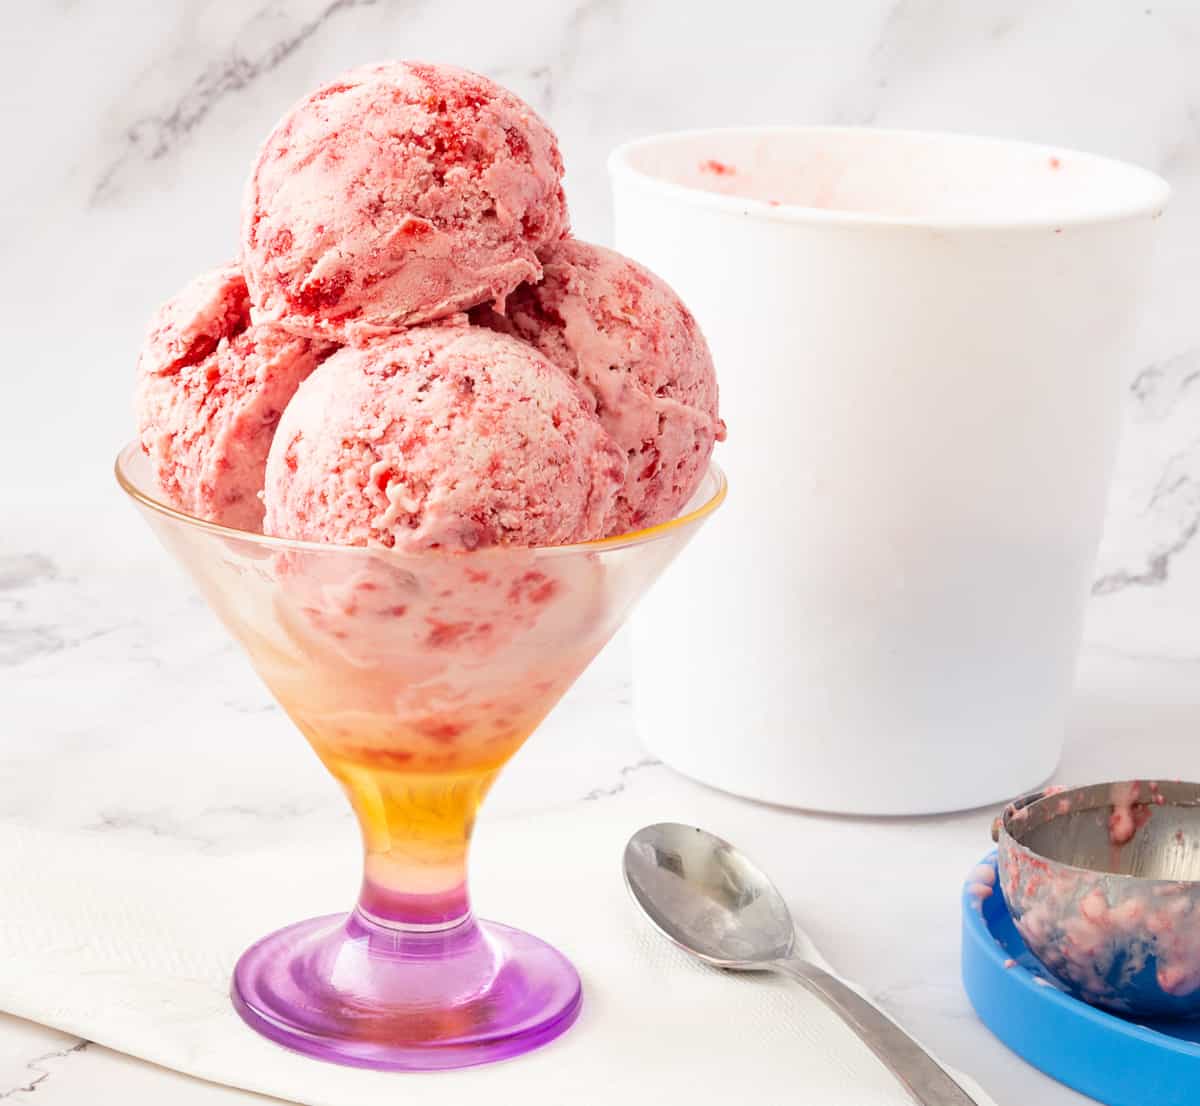
Raspberry ice cream has always felt a little more special than strawberry because of its bright flavor and beautiful color. Over the years, I’ve made dozens of no-churn ice creams, but I found many of them a little too sweet. Adding sour cream completely changed that. It balances the sweetness from the condensed milk and gives the ice cream a smoother, creamier texture. Now it’s my favorite way to make raspberry ice cream, whether I’m using fresh summer raspberries or frozen berries from the freezer.
Why You’ll Love This Raspberry Ice Cream
- No ice cream maker required.
- Fresh or frozen raspberries both work beautifully.
- Sour cream balances the sweetness and adds extra creaminess.
- Made with only 5 simple ingredients.
- Easy to customize with lemon, white chocolate, or berry swirls.
- Perfect make-ahead summer dessert.
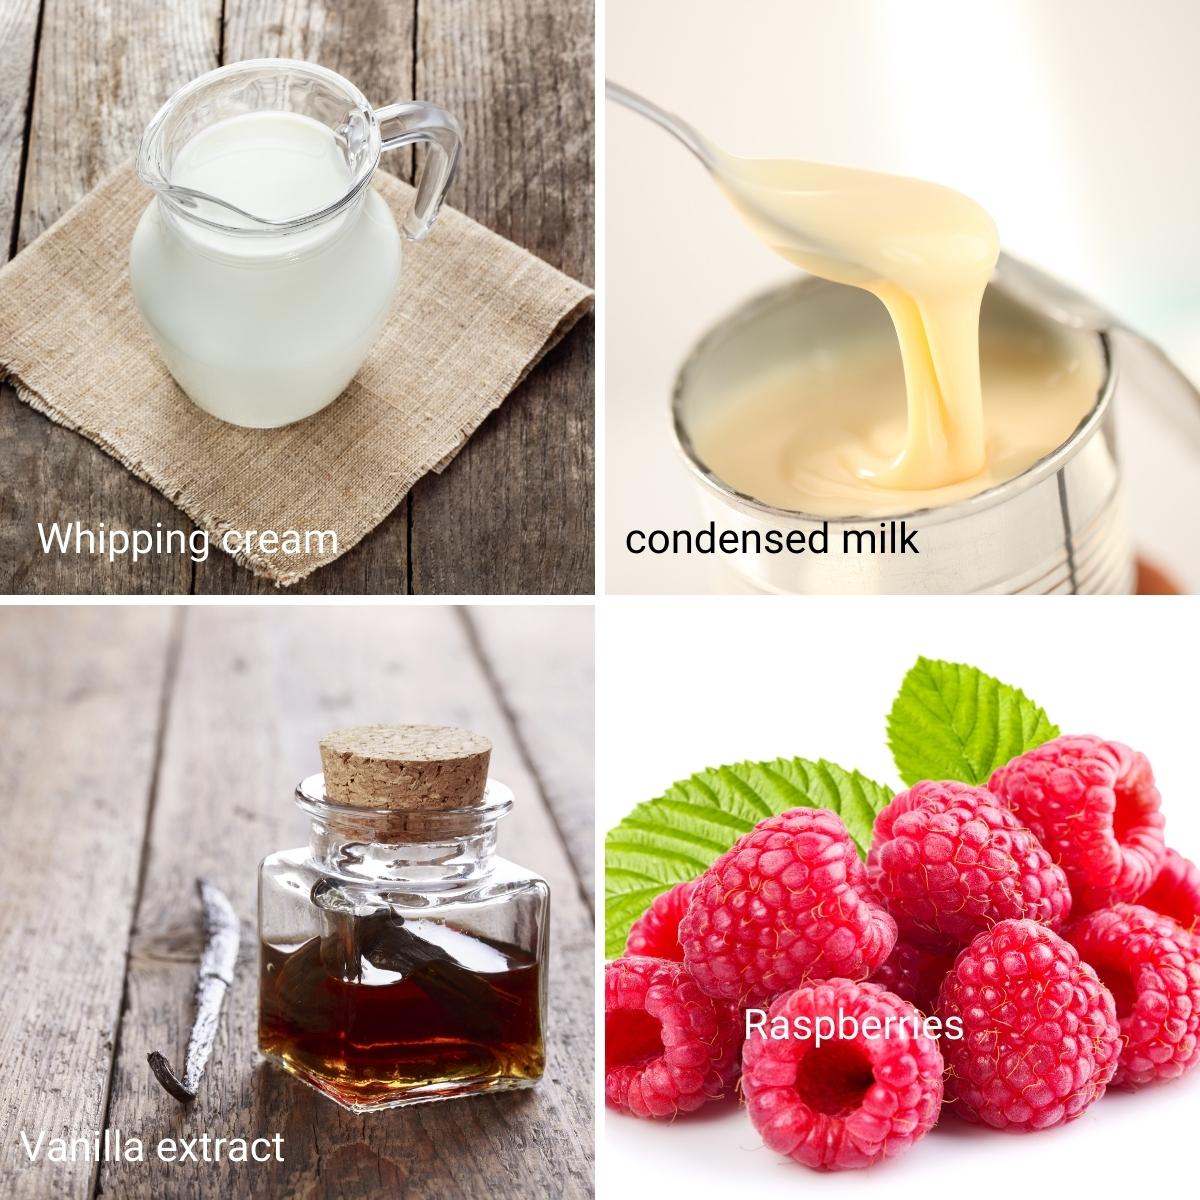
Ingredients and substitutes
- Whipping cream/Heavy cream – The higher the fat, the creamier your ice cream. I use heavy cream with 38% fat.
- Sour cream – My secret ingredient. It balances the sweetness from the condensed milk while giving the ice cream a smoother, richer flavor.
- Condensed milk – Condensed milk is sweetened, so we do not add any additional sugar. You can use homemade condensed milk as well.
- Vanilla – Condensed milk usually has vanilla, so feel free to omit it. But a little extra vanilla extract just makes the flavors pop.
- Raspberries – Use fresh or frozen raspberries for this ice cream. I like to crush the raspberries with a fork so I have large chunks that give a nice marble look. You can also pulse them in a blender, then strain them through a fine-mesh sieve or strainer to remove the fiber and seeds, making a smooth raspberry puree. It really depends on the flavor, texture, and color you like. For a more concentrated flavor, add the puree to a small saucepan and cook over medium-high heat until reduced to almost half.
Step-by-step: Raspberry ice cream recipe
- In the large bowl of a stand mixer with the whisk attachment, whip the whipping cream and sour cream until they form almost soft peaks.
- Next, add the condensed milk and vanilla extract. Mix for a minute more to combine.
- Crush the raspberries with a fork. Then, add them to the whipped cream mixture and combine.
Pro tip – I like to give it a gentle swirl just enough to combine and marble it. Alternatively, stir vigorously to blend it into a smooth, raspberry-pink color.
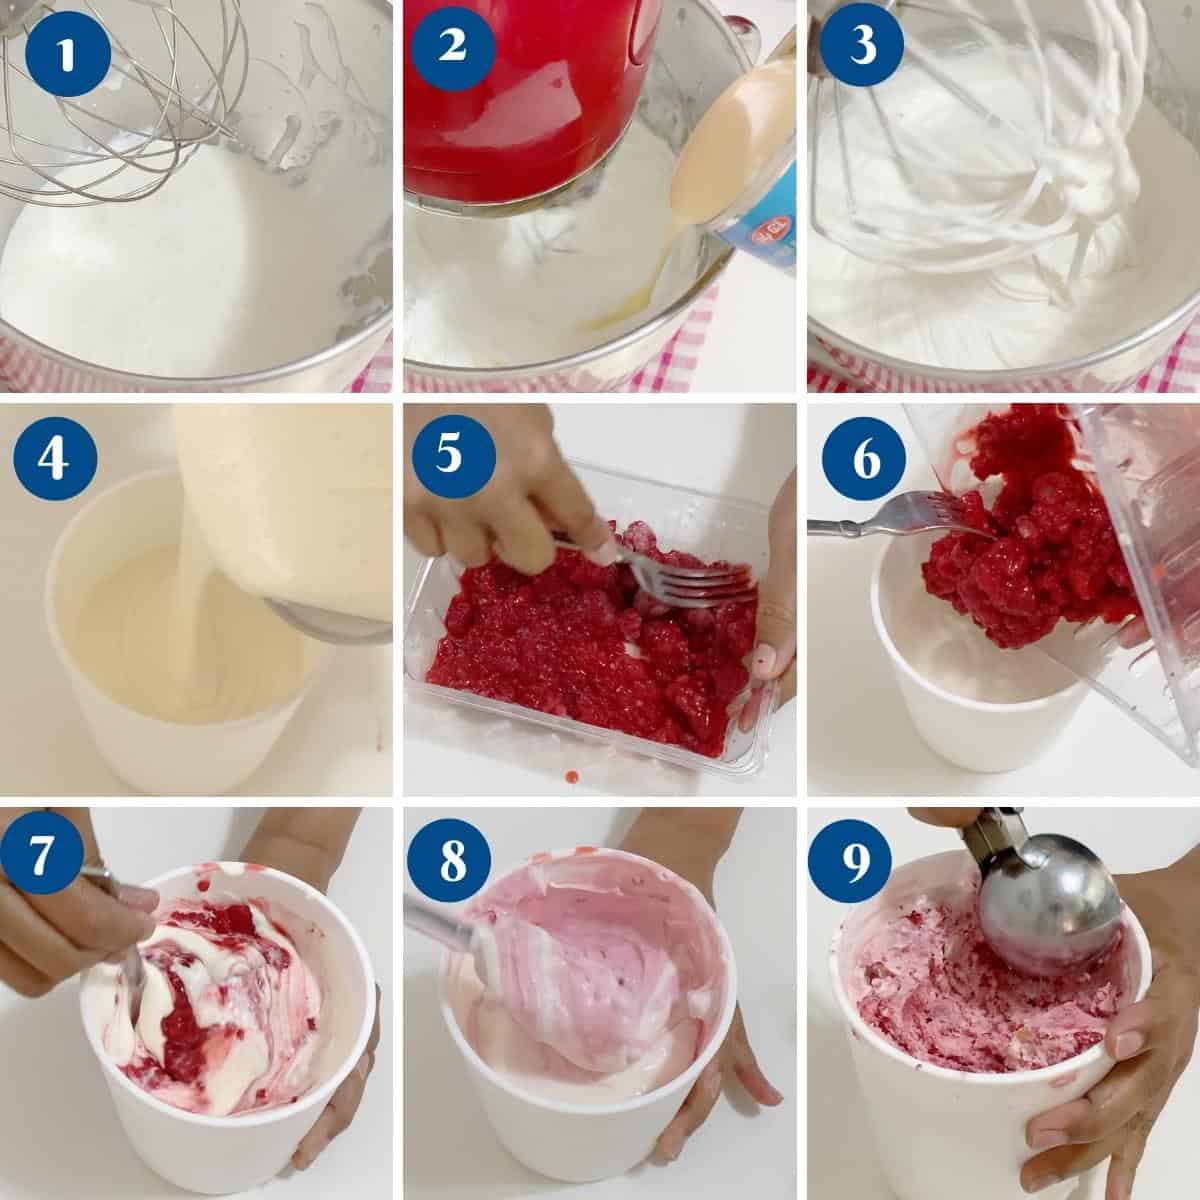
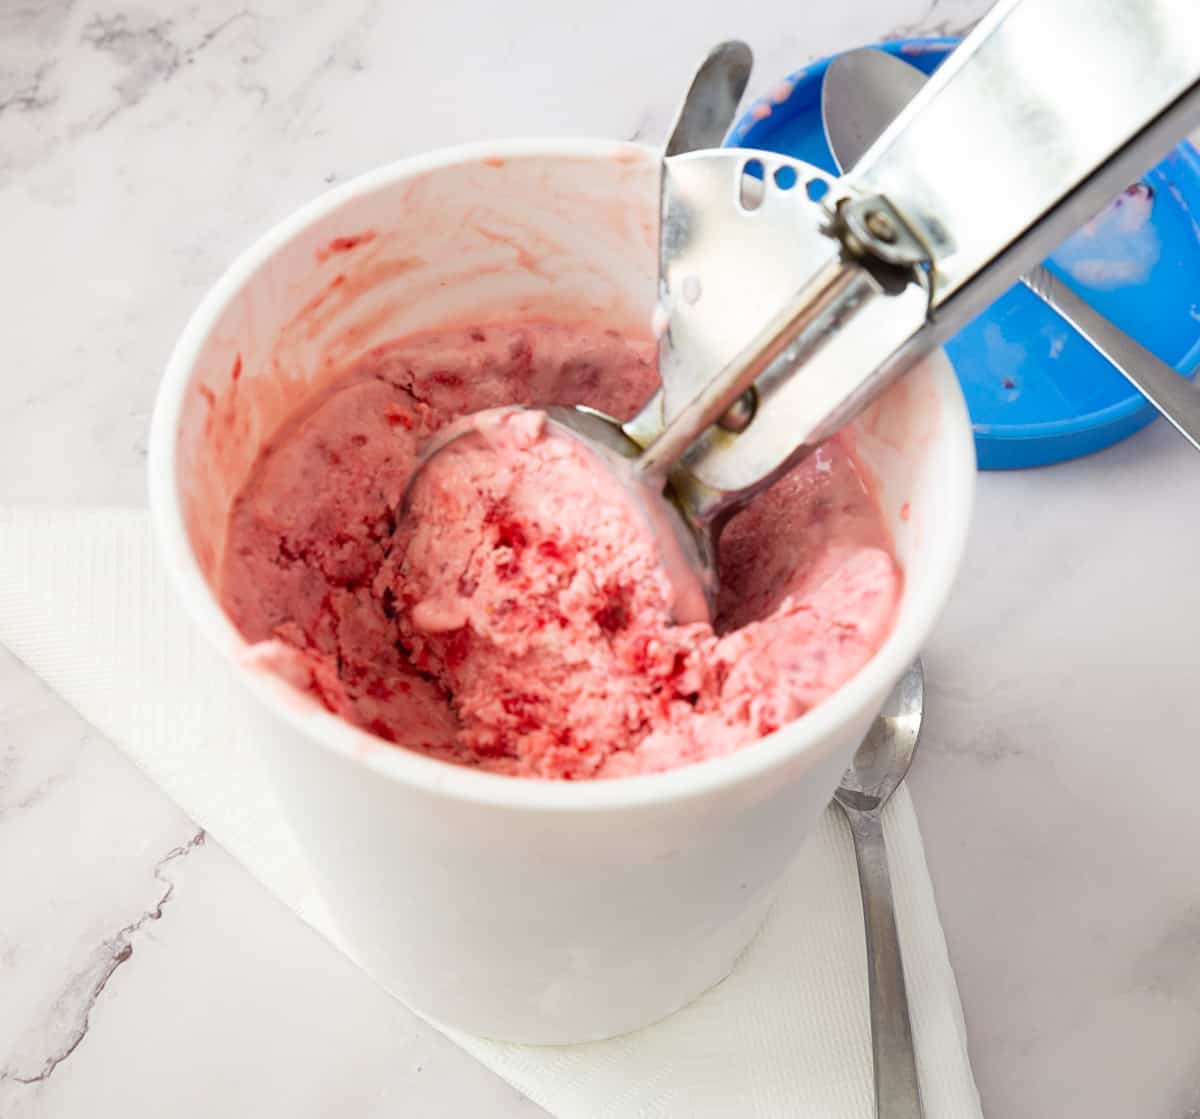
- Pour into an ice cream storage container and freeze for at least 4 hours or overnight.
Pro tip – For the creamiest ice cream, thaw the container for at least 10 minutes before you attempt to scoop the ice cream. This will soften any ice crystals. - Enjoy!
Storage
- Freezer: Store in an airtight container for up to 2 months.
- Prevent Ice Crystals: Press plastic wrap directly onto the surface before sealing.
- Serving: Let soften for 5 to 10 minutes before scooping.
Can I use frozen raspberries?
Yes. Thaw them first and drain excess liquid before adding them to the ice cream mixture.

Raspberry Ice Cream – No Churn
Indulge in the simplicity of homemade no-churn raspberry ice cream, a delightful treat that requires just a few ingredients. Blend fresh raspberries with sweetened condensed milk, vanilla extract, and whipped cream until smooth and creamy. Freeze until firm, and enjoy the burst of fruity flavor in every scoop without needing an ice cream maker.
Video
Ingredients
- 240 ml (1 cup) Whipping cream
- 120 ml (cup) Sour Cream
- 120 ml (½ cup) Condensed milk
- 200 g (7 oz) Raspberries
- 1 tsp Vanilla extract
Method
- In the bowl of a stand mixer with the whisk attachment, whip the whipping cream and sour cream until they form soft peaks.240 ml Whipping cream, 120 ml Sour Cream
- Next, add the condensed milk and vanilla extract. Mix a minute more to combine.120 ml Condensed milk, 1 tsp Vanilla extract
- Crush the raspberries with a fork. Then, add them to the whipped cream mixture and combine.200 g Raspberries
- Pour into an ice cream storage container and freeze for at least 4 hours or overnight.
- Enjoy!
Notes
- Whip the cream separately, then fold the rest of the mixture into the whipped cream. This makes the ice cream softer and creamier in texture.
- Crushed fruits will have a marbled effect, and pureed fruits will perfectly blend. Adding a combination of all crushed, pureed, and whole gives a wonderful experience.
- If you use less fat, the possibility of ice crystals forming can be high. A great way to reduce that is to just stir the ice cream once or twice in between.
- You can store ice cream in a metal loaf pan wrapped in aluminum foil. The foil helps prevent the formation of ice crystals. I like to use these silicone ice cream tubs with firm lids.
- Let the ice cream thaw a few minutes before you attempt to scoop it. This will give the ice crystals a moment to soften.
- I like to dip my ice cream scoop in water. This helps scoop the ice cream better.
Equipment you will need


Nutrition
Tried this recipe?
Mention @veenaazmanov_kitchen or tag #veenaazmanovkitchen!Tips for Success
- Use cold whipping cream and sour cream for the best volume and texture.
- Do not overwhip the cream or it can become grainy.
- Fresh or frozen raspberries both work well. If using frozen berries, thaw and drain excess liquid first.
- For a smoother ice cream, puree the raspberries and strain out the seeds before adding them to the mixture.
- For a more intense raspberry flavor, simmer the puree until reduced by half, then cool completely before using.
- Gently fold in the raspberries for a pretty ripple effect, or stir completely for a uniform raspberry-pink color.
- Freeze overnight for the firmest texture.
- Let the ice cream sit at room temperature for 5 to 10 minutes before scooping.
more ice cream recipes
- Strawberry Ice Cream, Blueberry Ice Cream
- Mixed Berry Ice Cream, Mango Ice Cream
- Blackberry Ice Cream or Raspberry Pavlova Ice Cream
- Pistachio Matcha Ice Cream
- Popsicles – Mango, Strawberry, Dulce De Leche
- See all ice cream and popsicle recipes


Frequently asked questions
Homemade raspberry ice cream will keep well in the freezer for up to 2 months when stored in an airtight container. For the best flavor and texture, press a piece of plastic wrap directly onto the surface before sealing the container. Let the ice cream sit at room temperature for 5 to 10 minutes before scooping for the creamiest texture.
No, because it won’t be sweet! The difference between evaporated and condensed milk is that condensed milk is sweet with a caramel-like flavor, while evaporated milk is just thick milk with 60% of the liquid evaporated.
Yes. This is a no-churn recipe designed specifically to be made without any special equipment.
Sour cream balances the sweetness of condensed milk and creates a creamier texture.
Yes. Puree the raspberries and pass them through a fine-mesh sieve for a smoother ice cream.
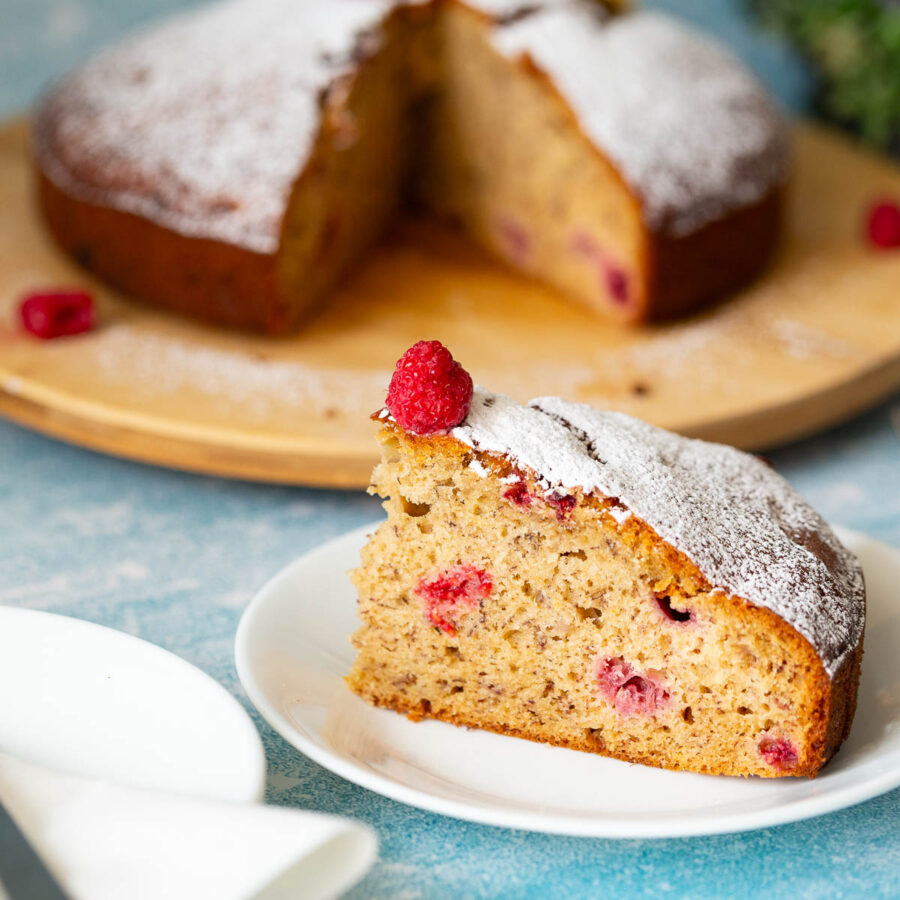
more raspberry recipes
- Raspberry Macarons
- Raspberry Swirl Cake
- Mini Cheesecakes • Raspberry
- Raspberry Lemon Pavlova
- Lemon Raspberry Cheesecake Tarts


Don’t lose this recipe! Save it for Later!
📌 Save this Recipe for later on Pinterest so you can easily find it again.
⭐ Add Veena Azmanov Kitchen to your Google Preferred Sources.
It helps Google show you more of our recipes.
📧 Subscribe for new recipes delivered to your inbox.
🎥 Follow us for more recipes


Delicious! and easy to make. We loved licking the bowl at the end, too 🙂
I love recipes that have minimal ingredients! This looks so refreshing. Lovely photos, too!
Thanks Stephine – Can’t beat three ingredients for sure.
Beyond kulfi, I have not made any ice cream. I love your recipes because as a beginner they are so simple to understand and you are so detailed in explaining. Love the beautiful color from the raspberry.
Oh you must try at least one no-churn ice cream Sandhya. It’s so simple and easy. You will be addicted. The kids will love it