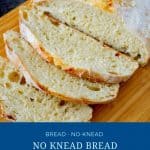
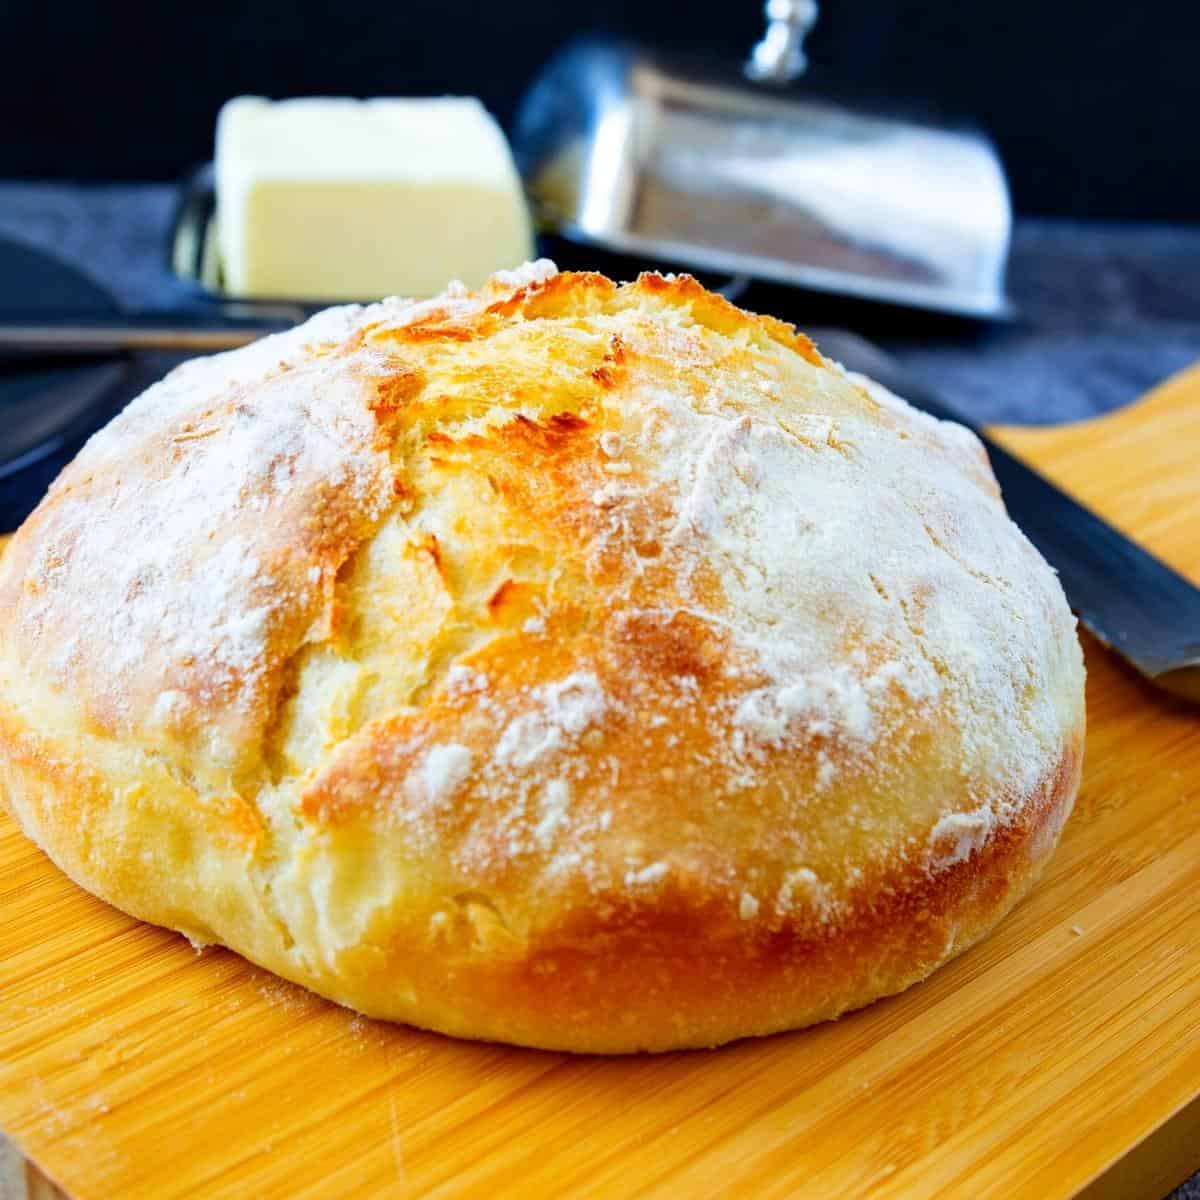
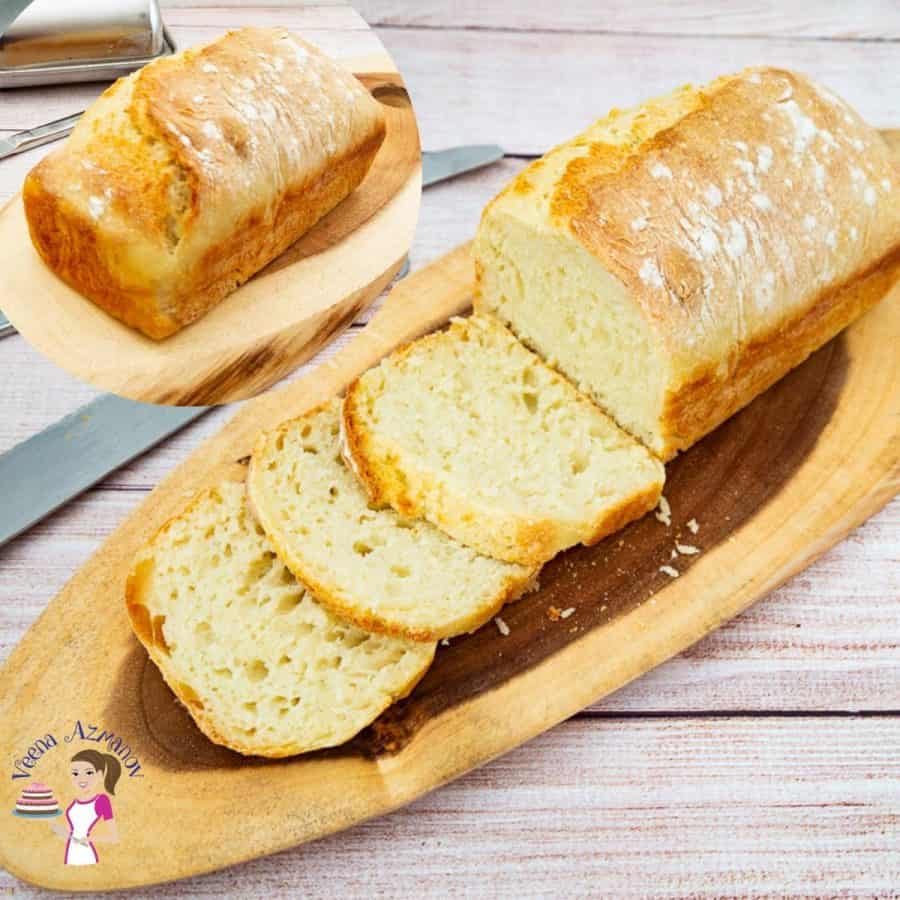
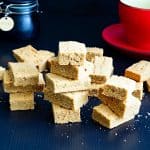
No-Knead Bread Without a Dutch Oven
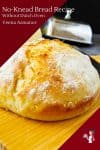
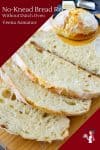
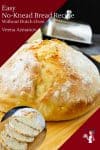

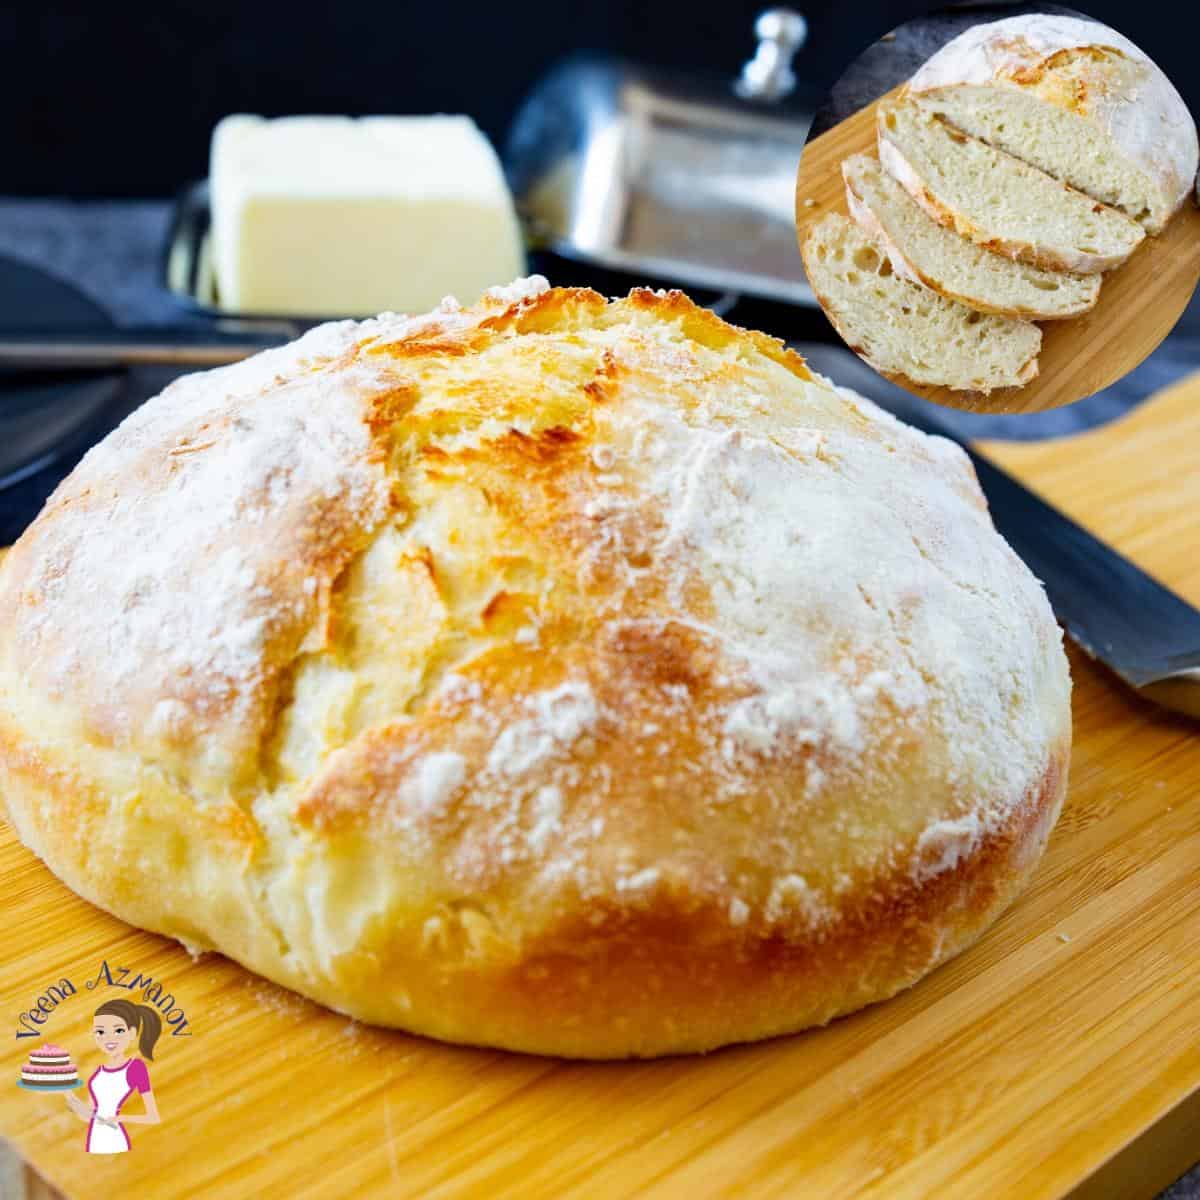
If you’ve ever wondered how to make no-knead bread without a Dutch oven, this recipe is for you. Just 4 ingredients, a bowl, and a simple pan are all you need for a crusty artisan loaf. The wonders of this no-knead bread recipe are endless…
As a passionate baker, I’ve spent countless hours perfecting my craft, particularly bread-making. From sourdough boules to delicate baguettes, I’ve honed my skills to the point where I can confidently call myself a pro. However, even the most dedicated bakers have days when time feels like an elusive luxury.
In this dilemma, I turn to a trusty companion in the bread-making world: the no-knead bread recipe. It’s a marvel of simplicity, requiring only a handful of ingredients and a fraction of the effort demanded by traditional bread recipes.
While my days as a bread-making enthusiast often involve intricate techniques and elaborate recipes, there’s something profoundly satisfying about this humble no-knead bread, a reminder that even amidst the chaos of life, there’s always time for a little homemade, effortless comfort.
Why You’ll Love This Easy Artisan Bread (Without a Dutch Oven)
- Ready in just 5 minutes of hands-on time.
- No Dutch oven needed—works in Pyrex, ceramic, enamel, or even a regular cake pan.
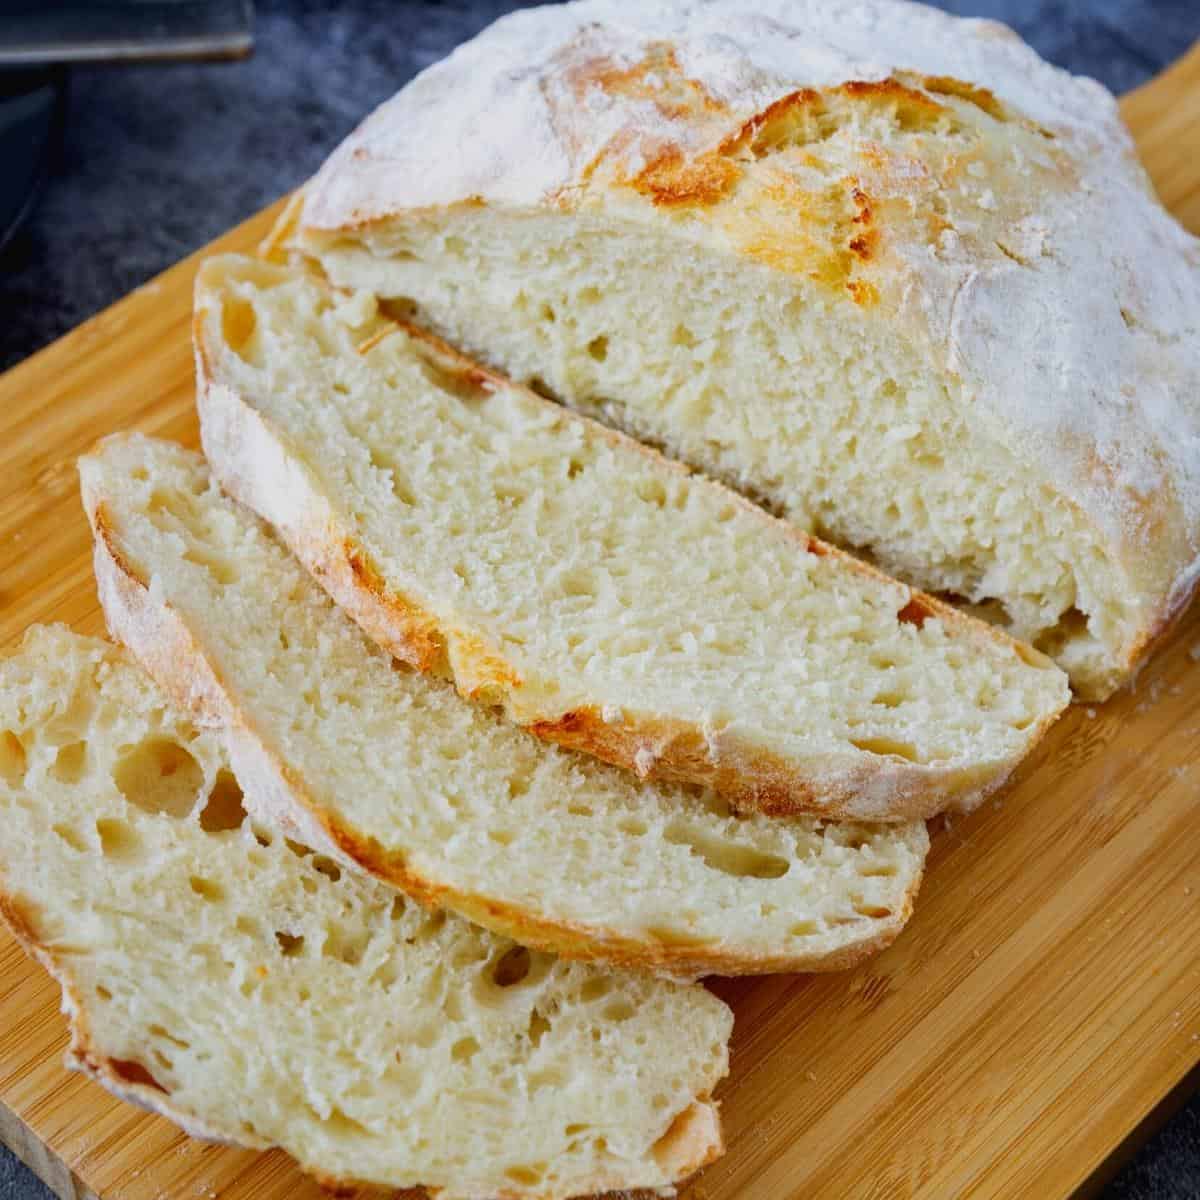
- Crusty artisan-style bread with a soft, airy crumb.
- Beginner-friendly—no kneading, no fancy tools required.
- Versatile—make it plain, whole wheat, multigrain, or even beer bread.

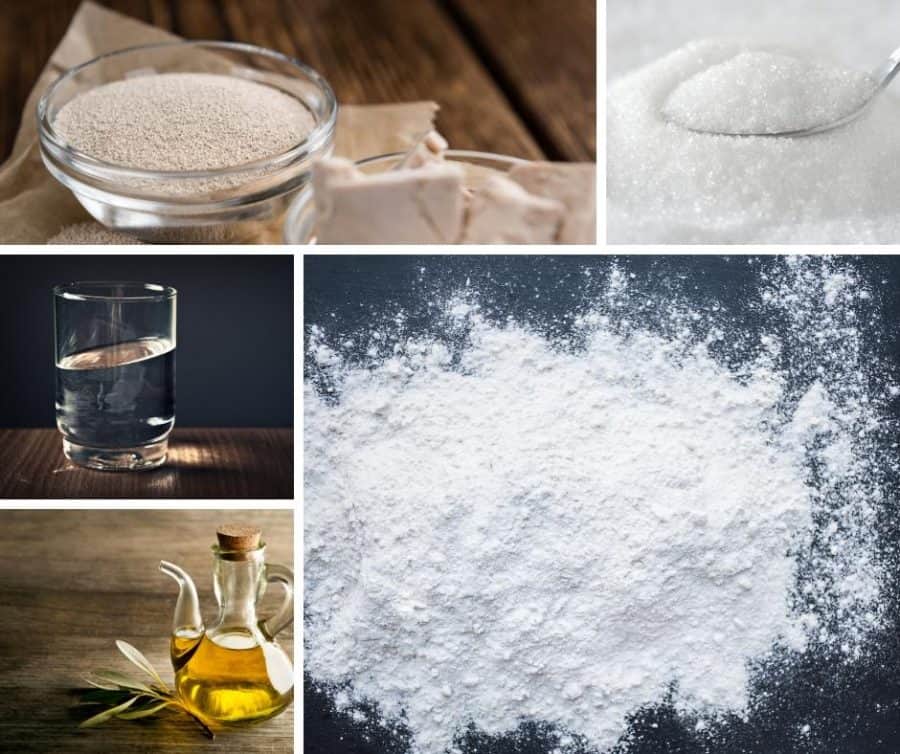
Ingredients & Substitutes for Beginner-Friendly Bread Recipe
- Flour – You can use either bread flour or all-purpose flour. Bread flour will give the bread a chewier texture.
- Water – It is very important to use warm water, not cold or hot water. Cold water will not revive the yeast, and hot water will kill it.
- Instant dry yeast – I like to use instant yeast because I’ve always had great success with it. However, you can also use the same amount of active dry yeast or 15 grams of fresh baker’s yeast.
- Sugar – The sugar here is not really to add sweetness. So no, the one tablespoon won’t make your homemade dinner rolls sweet. The sugar and fat in the recipe are there to feed the yeast.
- Olive oil – A good source of food for the yeast, and also adds a nice flavor.
How to Make No-Knead Bread Without a Dutch Oven (Step-by-Step)
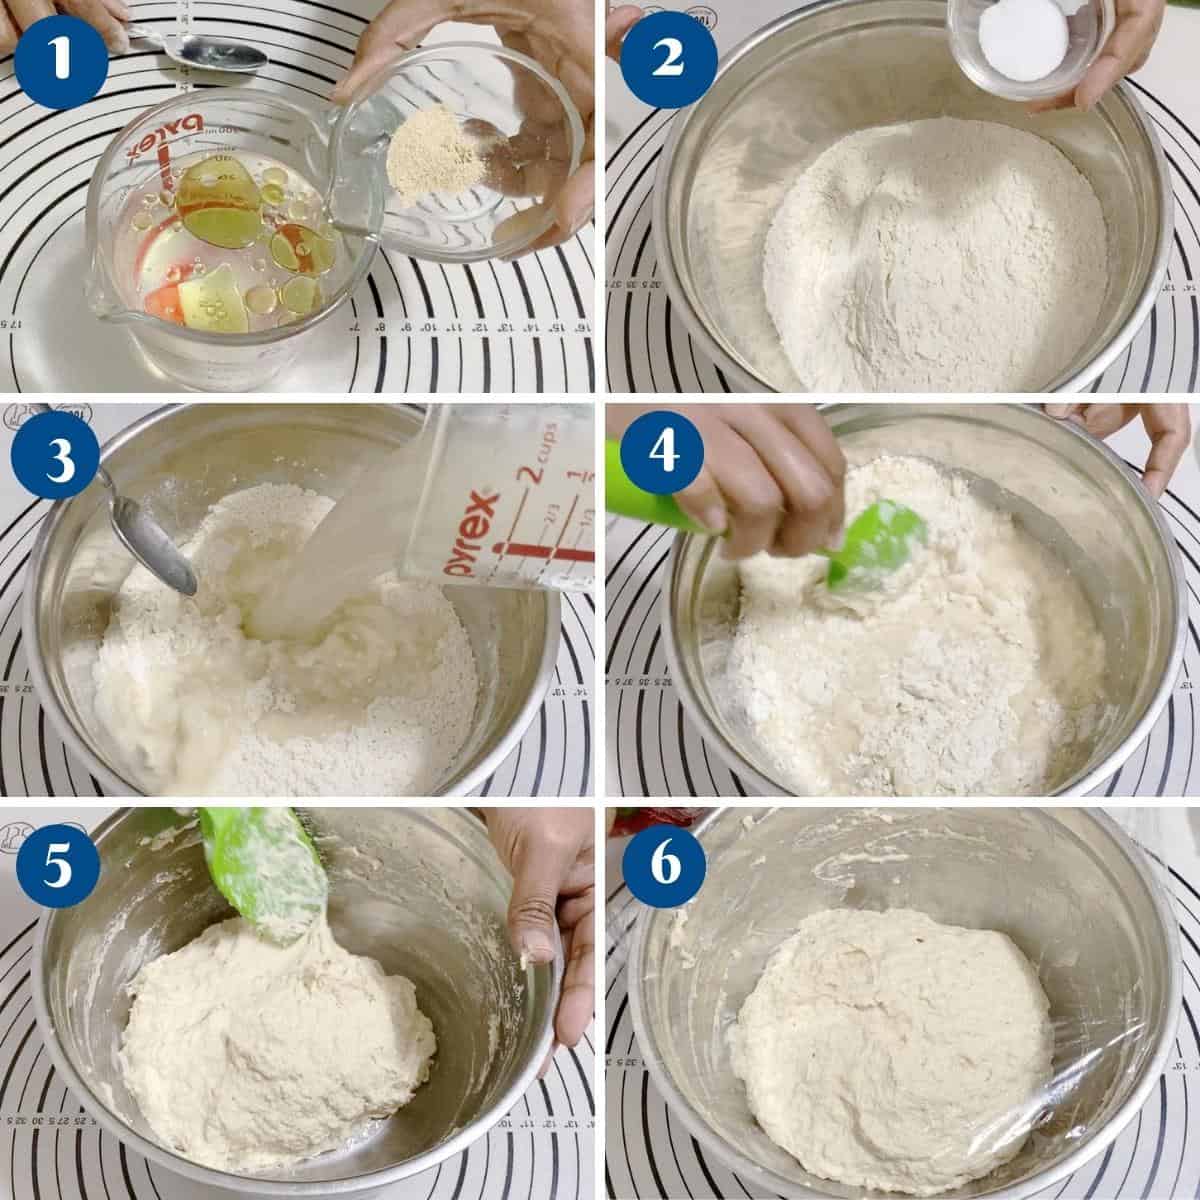
- Dry ingredients – In a large bowl, combine flour and salt, and set aside.
- Wet ingredients – In a measuring cup or medium bowl, measure the warm water, and add olive oil, sugar, and yeast. Combine well.
- Dry to wet – Add the yeast mixture to the flour mixture. Then, use a wooden spoon or spatula to combine the mixture thoroughly, ensuring that no dry flour remains on the bottom.
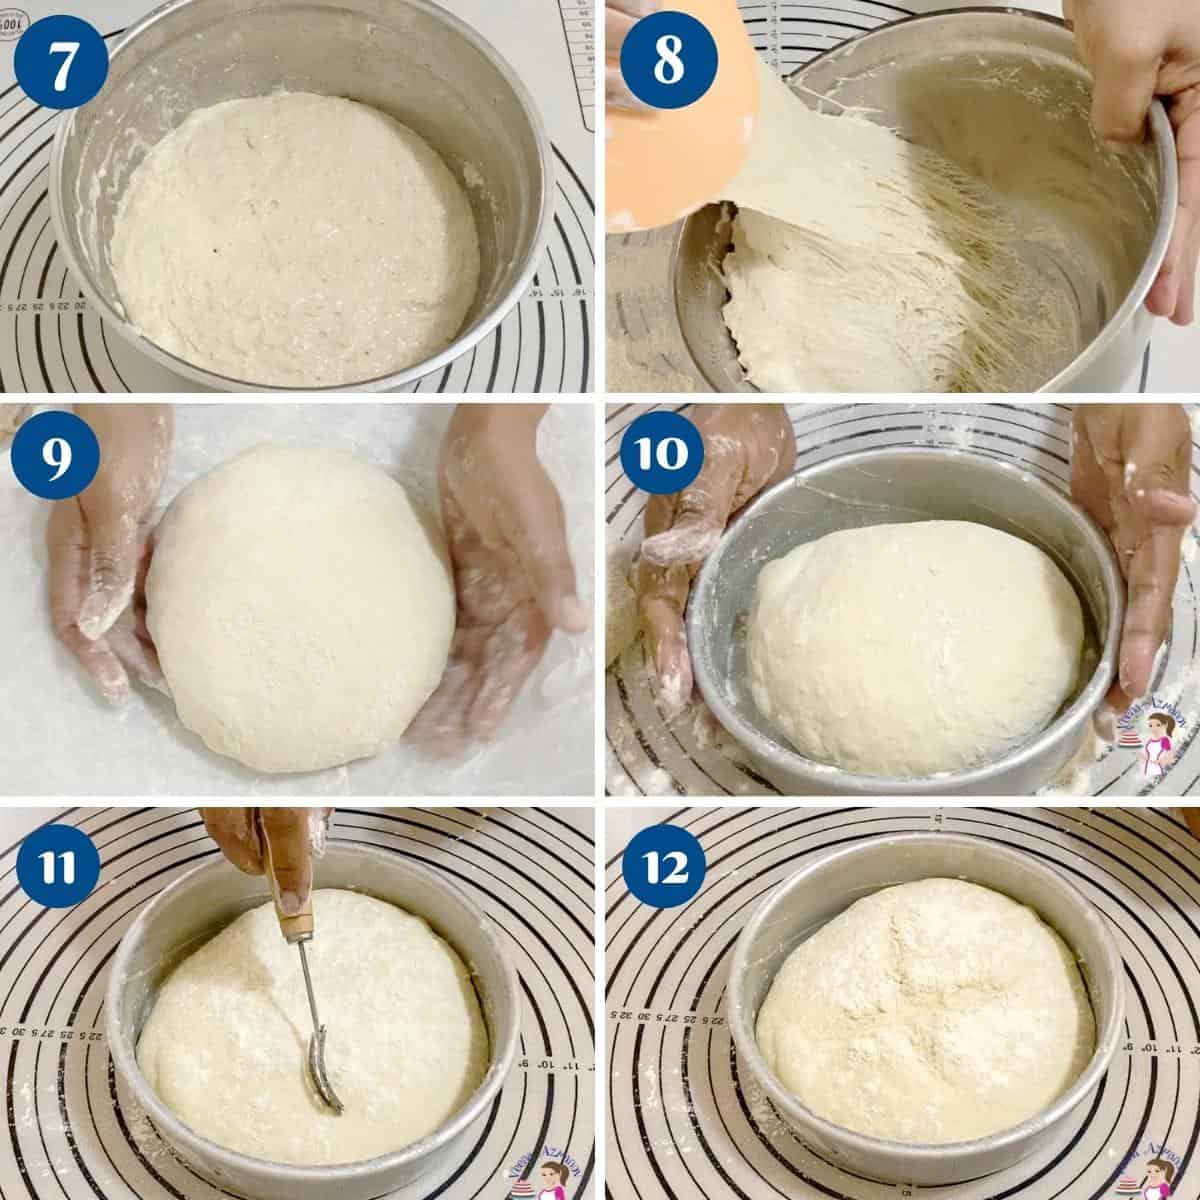
Pro tip – This is what makes no-knead bread so unique—while it rests, the gluten develops naturally, so you don’t need kneading. - Rise – Cover with a clean cotton towel or plastic wrap. Let it sit on the countertop in a warm room for an hour. Then, place in the fridge for 4 hours to 12 hours. I like to leave it overnight.
- Shape – Remove the dough from the fridge. Dust your work surface with enough flour to prevent sticking. Then, turn the dough onto the floured work surface. It is best to use a bench scraper or spatula.
- Divide the dough into two pieces with a bench scraper (this makes two loaves). Gently use your hands to bring each portion together into a ball (see video). Do the same with both loaves.
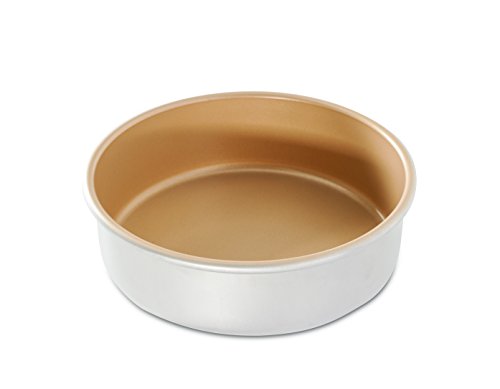
- Proof – Dust two 8-inch round baking pans with flour. Next, place the dough into each baking pan, seam side down. Shake the pan to help the dough center. Sprinkle some dry flour on top. Then, cover the bowl and let it proof for 30 minutes. Alternatively, you can place the dough on parchment paper to move from the work surface to the pan. Also, you can use a Pyrex, enamel, or ceramic pot.
- Preheat oven to 400°F/ 200°C / Gas Mark 6 for at least half an hour (30 minutes) before baking.
- Score – Using a blade or a sharp knife, slash the top of the proofed bread (see video). This will help release steam from the bread.
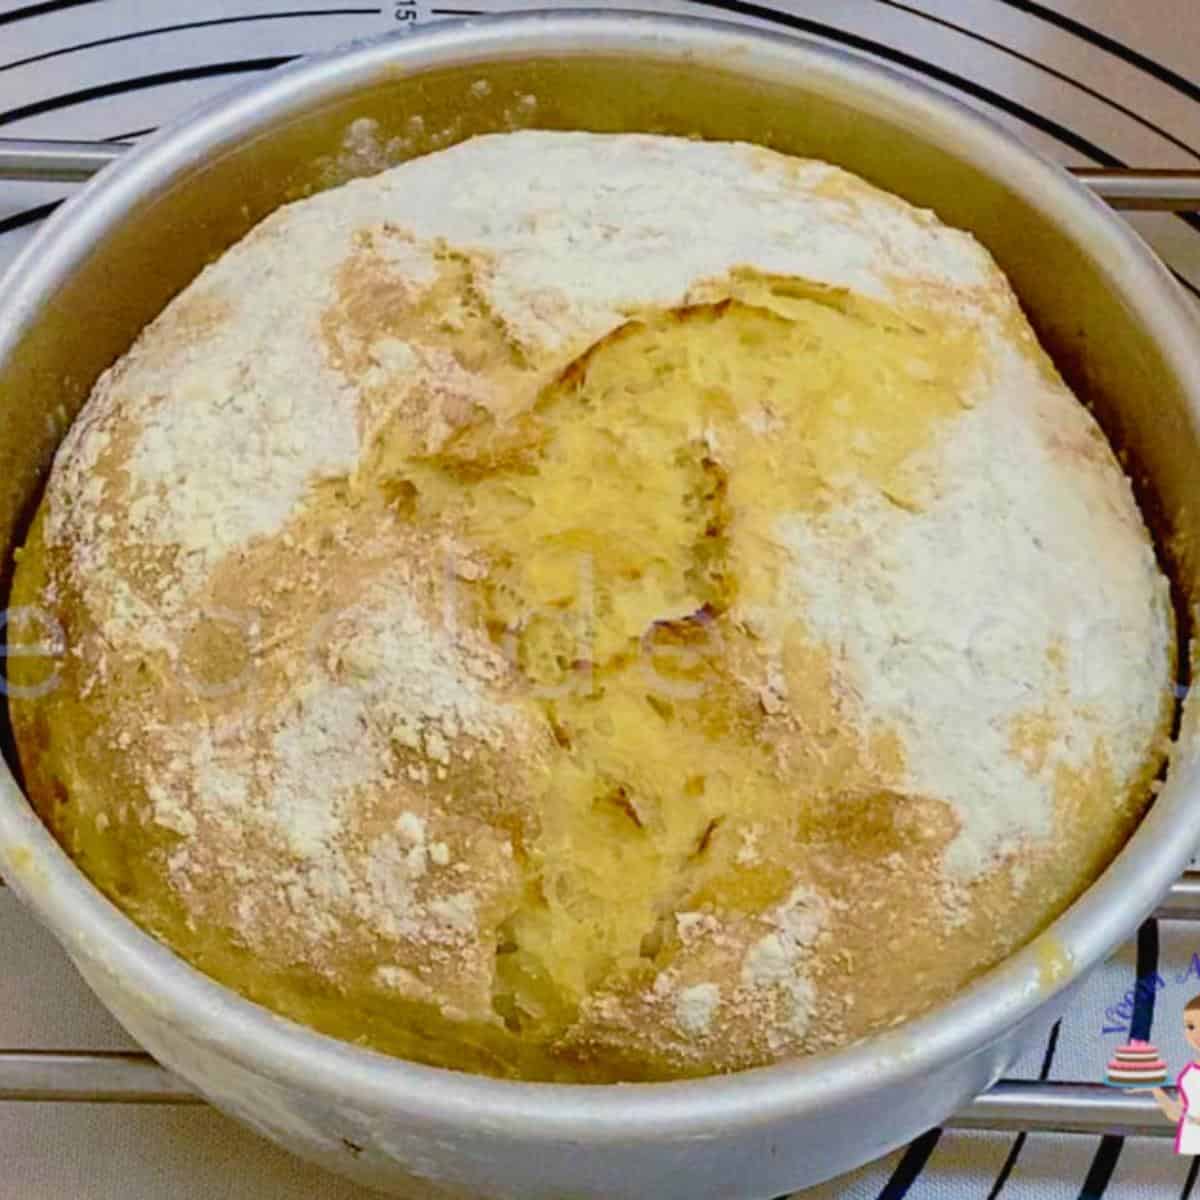
- Bake – Place the bread pans in the hot oven on the middle shelf. Place a bowl or tray of water on the bottom of the oven. Bake for about 35 minutes until lightly golden on top.
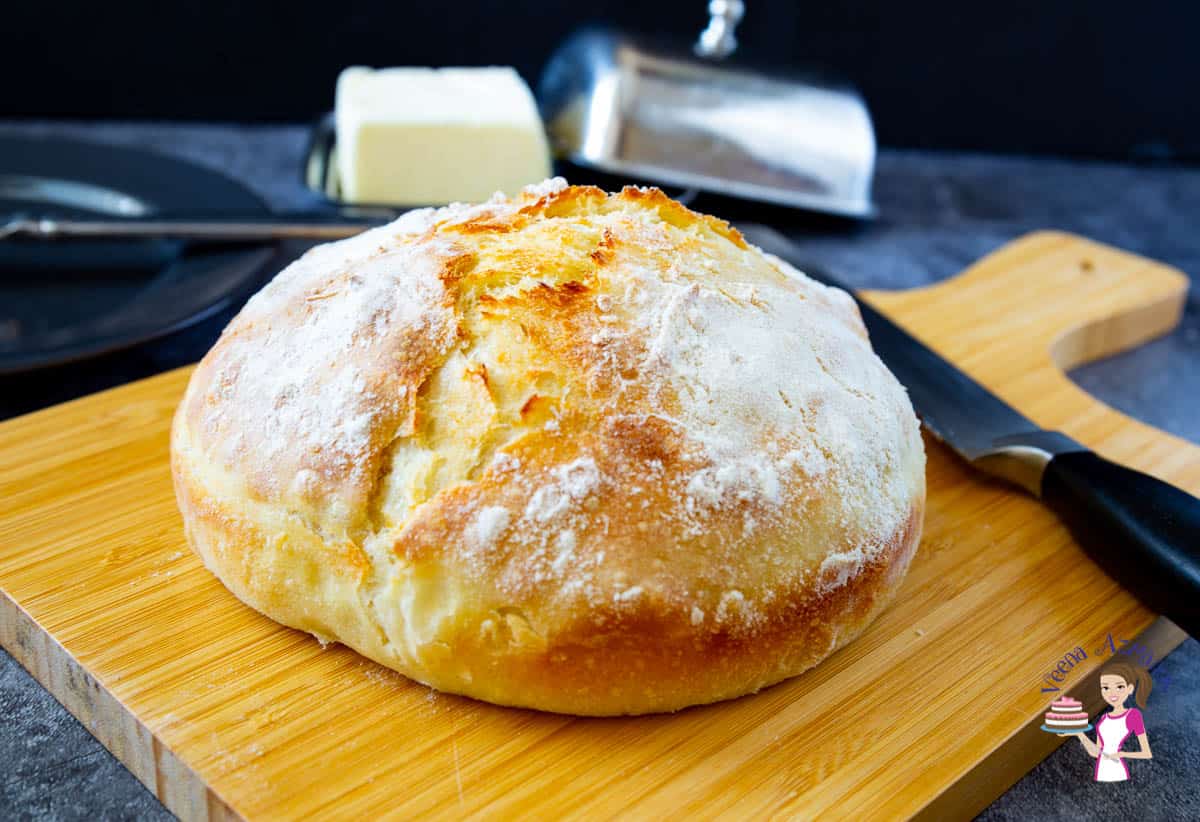
Pro tip – Water will create steam, which will give us a nice crust on the top. - Cool – Remove the bread from the oven and take it out of the pan. Then, place the bread on a wire rack – this will prevent the bread from becoming soggy on the bottom due to the steam. Let it cool for at least 20 minutes before you cut it into the bread.
- Enjoy!
Easy No-Knead Bread Recipe without Dutch Oven
Video
Ingredients
- 4 cups (500 g) All-purpose flour
- 1 ½ tsp (7 g) Salt
- 1½ tsp (5 g) Instant dry yeast
- 1½ cup (350 ml) Water warm (110F)
- 1 tbsp (15 g) Olive oil
- 1 tbsp (15 g) Sugar
Method
- Dry ingredients – In a large bowl, combine flour and salt, and set aside.4 cups All-purpose flour, 1 ½ tsp Salt
- Wet ingredients – In a measuring cup or medium bowl, measure the warm water, add olive oil, sugar, and yeast. Combine well.1½ tsp Instant dry yeast, 1½ cup Water warm, 1 tbsp Olive oil, 1 tbsp Sugar
- Dry to wet – Add the yeast mixture to the flour mixture. Use a wooden spoon or spatula to combine the ingredients thoroughly, ensuring no dry flour remains on the bottom.
- Rise – Cover with a clean cotton towel or plastic wrap. Let it sit on the countertop in a warm room for an hour. Then place in the fridge for 4 hours, or up to 12 hours. I like to leave it overnight.
- Shape – Remove the dough from the fridge. Dust your work surface with enough flour to prevent sticking. Turn the dough onto the floured work surface. It is best to use a bench scraper or spatula.
- Divide the dough into two with a bench scraper (this makes two loaves). Gently use your hands to bring each portion together into a ball (see video). Do the same with both loaves.
- Proof – Dust two 8-inch round baking pans with flour. Place the dough into each baking pan, seam side down. Shake the pan to help the dough settle in the center. Sprinkle some dry flour on top. Cover the bowl and let it proof for 30 minutes.Alternatively, you can place the dough on parchment paper to move from the work surface to the pan. Also, you can also use a Pyrex, enamel, or ceramic pot.
- Preheat the oven to 400°F/ 200°C / Gas Mark 6 for at least half an hour (30 minutes) before baking.
- Score – Using a blade, or a sharp kitchen knife, slash the proofed bread on top (see video) (this will help release steam from the bread).
- Bake – Place the bread pans on the middle shelf. Place a bowl or tray of water on the bottom of the oven. Bake for about 35 minutes until lightly golden on top.
- Cool – Remove the bread from the oven and take it out of the pan. Place the bread on a wire rack – this will prevent the bread from becoming soggy on the bottom due to steam. Let the bread cool for at least 20 minutes before you cut it.
Notes
Tips for Success with No-Knead Bread (Without a Dutch Oven)
- Choose the right vessel – A heavy metal, ceramic, Pyrex, or cast iron pan works fine; just make sure it’s oven-safe at high heat.
- Preheat well – Heat your oven and pan for at least 30 minutes for better oven spring and a crisp crust.
- Add steam – Place a tray of water in the oven or mist the dough before baking to mimic Dutch oven results.
- Use parchment paper – Prevents sticking and makes transferring the dough easier.
- Score the dough – A quick slash on top lets the bread expand evenly.
- Watch baking time – If the crust browns too fast, lower the temp slightly; bread is done when it sounds hollow or reaches 190–200°F (88–93°C).
Equipment you will need


Nutrition
Tried this recipe?
Mention @veenaazmanov_kitchen or tag #veenaazmanovkitchen!Tips for Success (Crusty Artisan Loaf Every Time)
- Choose the right vessel – A heavy metal, ceramic, Pyrex, or cast iron pan works fine; just make sure it’s oven-safe at high heat.
- Preheat well – Heat your oven and pan for at least 30 minutes for better oven spring and a crisp crust.
- Add steam – Place a tray of water in the oven or mist the dough before baking to mimic Dutch oven results.
- Use parchment paper – Prevents sticking and makes transferring the dough easier.
- Score the dough – A quick slash on top lets the bread expand evenly.
- Watch baking time – If the crust browns too fast, lower the temp slightly; bread is done when it sounds hollow or reaches 190–200°F (88–93°C).
Troubleshooting for an easy no-knead bread recipe
| Problem | Possible Cause | Solution |
|---|---|---|
| The bread sank in the middle | The oven or pan is not hot enough before baking | Always preheat oven and baking pan for at least 30 minutes. Hot surfaces give better oven spring. |
| Bread too dense | Too much flour was added; the dough is not sticky enough | No-knead bread dough should be soft, wet, and sticky. Avoid extra flour—this bread develops gluten through resting, not kneading. |
| The dough didn’t rise | Yeast not activated, or water too hot/cold | Use warm water (110°F/43°C). Cold water slows yeast; hot water kills it. Always check yeast is fresh. |
| Pale crust, not crispy | Lack of steam in the oven without a Dutch oven | Place a tray of water in the oven while baking, or spritz dough with water before baking for a crusty artisan-style finish. |
| Bread stuck to the pan | Dough too wet, or the pan is not floured properly | Dust the pan generously with flour or line it with parchment paper before adding the dough. |
| Overbaked or dry bread | The oven temperature is too high or baked too long | Bake at 400°F/200°C for about 35 minutes, then check. Bread should sound hollow when tapped on the bottom. |
more no-knead bread recipes you may like
- No-Knead Olive Bread
- and No-Knead flatbread recipe
- Crusty No-Knead Bread
- Soft Flatbread Without Yeast (no-knead)
- No-Knead Beer Bread


Frequently asked questions
This no-knead bread will keep at room temperature for 2 to 3 days. Once cut, be sure to wrap the cut side of the bread well to prevent it from drying out.
Yes. You can use a Pyrex dish, a ceramic pot, an enamel dish, a cast-iron skillet, or even a regular cake pan.
A heavy pot with a lid, a Pyrex dish, a ceramic dish, or a large metal bowl to cover a baking sheet will all work.
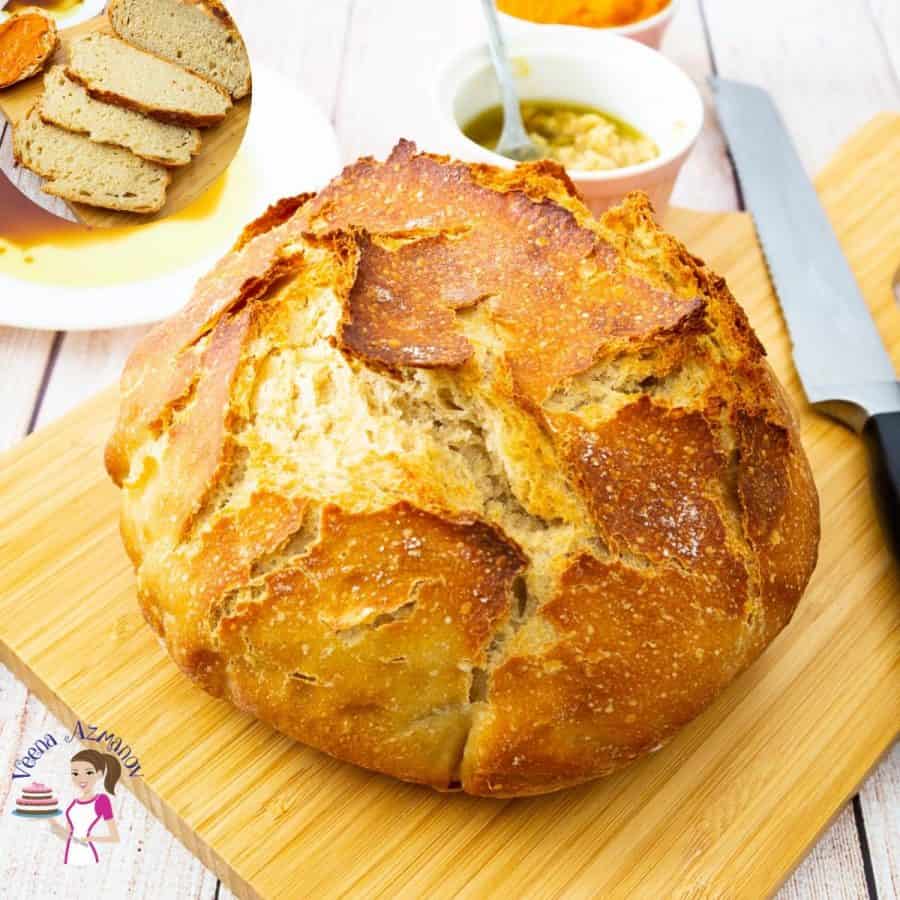
Yes. No-knead bread is a type of artisan bread—the long rest creates that chewy crust and airy crumb.
Absolutely. Swap part of the all-purpose flour with whole wheat or multigrain for a heartier loaf.
Yes. Replace some of the water with beer for flavor, or swap a portion of the yeast with sourdough starter.
Absolutely. I cut the bread into slices. Place it into a reusable silicone storage bag in the freezer. When I need it, I just thaw slices in the microwave for 15 to 30 seconds.
You can use bread flour. Personally, I prefer the texture of the dough with all-purpose flour. Bread flour gives a softer, chewier bread with a tough crust.
Yes, you can let it rise for about 2 hours at room temperature, though overnight fermentation gives the best flavor.
The Dutch oven gives a wonderful crust and helps the bread rise. I shared that recipe with you previously. You can also bake it open on a baking tray, but the bread will spread more. The cake pan gives a better shape. You can, of course, also use a loaf pan as I have done previously in my no-knead sandwich bread. The texture and crumb of all these breads will be completely different from each other, but still delicious.
- No-Knead Knotted Rolls
- and No-Knead Sandwich Bread
- Soft Flatbread Without Yeast (no-knead)
- No-Knead flatbread recipe

Don’t lose this recipe! Save it for Later!
📌 Save this Recipe for later on Pinterest so you can easily find it again.
⭐ Add Veena Azmanov Kitchen to your Google Preferred Sources.
It helps Google show you more of our recipes.
📧 Subscribe for new recipes delivered to your inbox.
🎥 Follow us for more recipes


Hi,
I have just made this bread, I only did half size as I am trying to keep the carbs down which did not happen once I tried it.
I left it for 21 hours and it hardly rose so I was a bit worried, I think the yeast is quite old so will be trying it with new stuff. In the oven though it rose to around 3 times the size. The dough was very sloppy and the best I could do was roll it around in the flour and scoop it up with a pair of scrapers and drop it in the tin.
Just a thought, could you add cheese to the recipe.
Thank you for the feedback, Bob. Yes, no-knead doughs are usually quite difficult to work with due to the lack of gluten development. You can definitely add cheese to this bread. The taste is absolutely delicious. You can even make garlic butter bread with this one.
My dough has barely risen after an hour on the counter and. four hours in the fridge. Any thoughts?
Cynthia sounds like you need to check the yeast. Also, if the weather is cold, it will take longer to rise. But, by 4 hours it should have risen well.
Have you ever made this bread with whole wheat flour? Wonder how the recipe should be adjusted for it.
Yes, Regina. I have made this with half whole wheat flour. Added some olives to it too. Works wonderfully and will share the recipe soon too.
I’ve made this bread twice and both times it was absolutely superb!
Thank you so much, Carmen, for the lovely feedback. Appreciate you coming back to leave this comment.
Hello, is the oven temperature fan forced or normal ? thanks 🙂
Normal, Rosey. Thanks
so easy and so delicious!
Thankyou for sharing this!
I have 2 questions. 1) Can I use pie pans instead or an 8′ cake pan? 2) What changes do I need to make this in high altitude? Thank you so much for your help!
Annie – You can use a 9-inch pie pan for this.
I don’t bake at high altitudes so I honestly don’t have any experience baking bread at high-altitude.
However, this site/post has some good information that you might find useful.
Sorry, I can’t be much help in this.
It was my first time to make no-knead bread. I bake a lot using my bread machine but I love this kind of bread and I’ve wanted to try this for sometime now. This is a great recipe. I improvised a lot though. I did not put it in the fridge, and let it proof inside the oven for six hours. Then I shaped the dough, added raisins and walnuts, let it rest for another two hours, then bake as instructed. My bread was a perfect walnut and raisin crusted bread!
Thank you, Marby. I am so happy you enjoyed this recipe. Thank you for coming back to leave this feedback.
I measured everything with a scale the dough was so wet I couldn’t shape it. Not sure where I went wrong.
Jennifer its ok to add a little more flour. All flour absorbs water differently so it’s ok if you add a little more flour or water as needed. Thanks
This is amazing!! First time making bread and we ate the whole loaf of bread in one sitting! #noshame
Thank you, Rhoda. Happy your family enjoyed it. Yes, bread can be addictive
I tried the mix the. Flour with the yeast mixture and there must be a mistake with the water ! 4 cups of flour and 1 3/4 water ?? Not enough water , so dry hard to stir
Hey Lee-Anne. Sounds like you have more flour than 4 cups? The quantity is right. It should not be dry. In fact, quite wet. You can certainly add more water if necessary.