How to Make Yogurt At Home (Homemade Greek Yogurt Too)


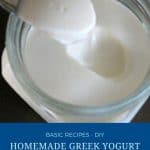

This is how to make yogurt or Greek yogurt at home with just 2 ingredients. It makes a rich, creamy, healthy, and wholesome dish. Use it with granola, parfaits, cakes, and other cooking or baking recipes.
Growing up in India, fresh homemade yogurt was just a part of everyday life. Every night, my mom would set a fresh batch, and by morning, it was perfectly set and ready to be chilled in the fridge. By the time breakfast rolled around, we had cold, creamy yogurt waiting for us—no store-bought tubs, no shortcuts, just pure homemade goodness.
She didn’t stop there. She’d mash up whatever seasonal fruit we had—a ripe banana, sweet mango, or juicy berries—with just a fork, creating the most delicious flavored yogurt. And in the hot summer months? She turned it into refreshing yogurt drinks, sometimes with fruit, sometimes with fresh mint. It was effortless for her, something she did so naturally that we never thought of it as a task—just part of our daily routine.
Fast forward to today, and we’re so used to grabbing yogurt off the grocery store shelf that we forget what real, homemade yogurt tastes like. But every once in a while, when I take the time to make it from scratch, I’m reminded—gosh, the difference is HUGE. The taste, the texture, the freshness… nothing compares.
If you’ve never tried making your own yogurt, trust me, it’s worth it. And if you grew up with homemade yogurt as I did, this is your sign to bring it back.
Why make homemade yogurt
- Only two ingredients – All you need is milk and a little yogurt with live cultures to start your first batch.
- Fresh and creamy – Homemade yogurt has a clean, fresh taste without added thickeners or unnecessary ingredients.
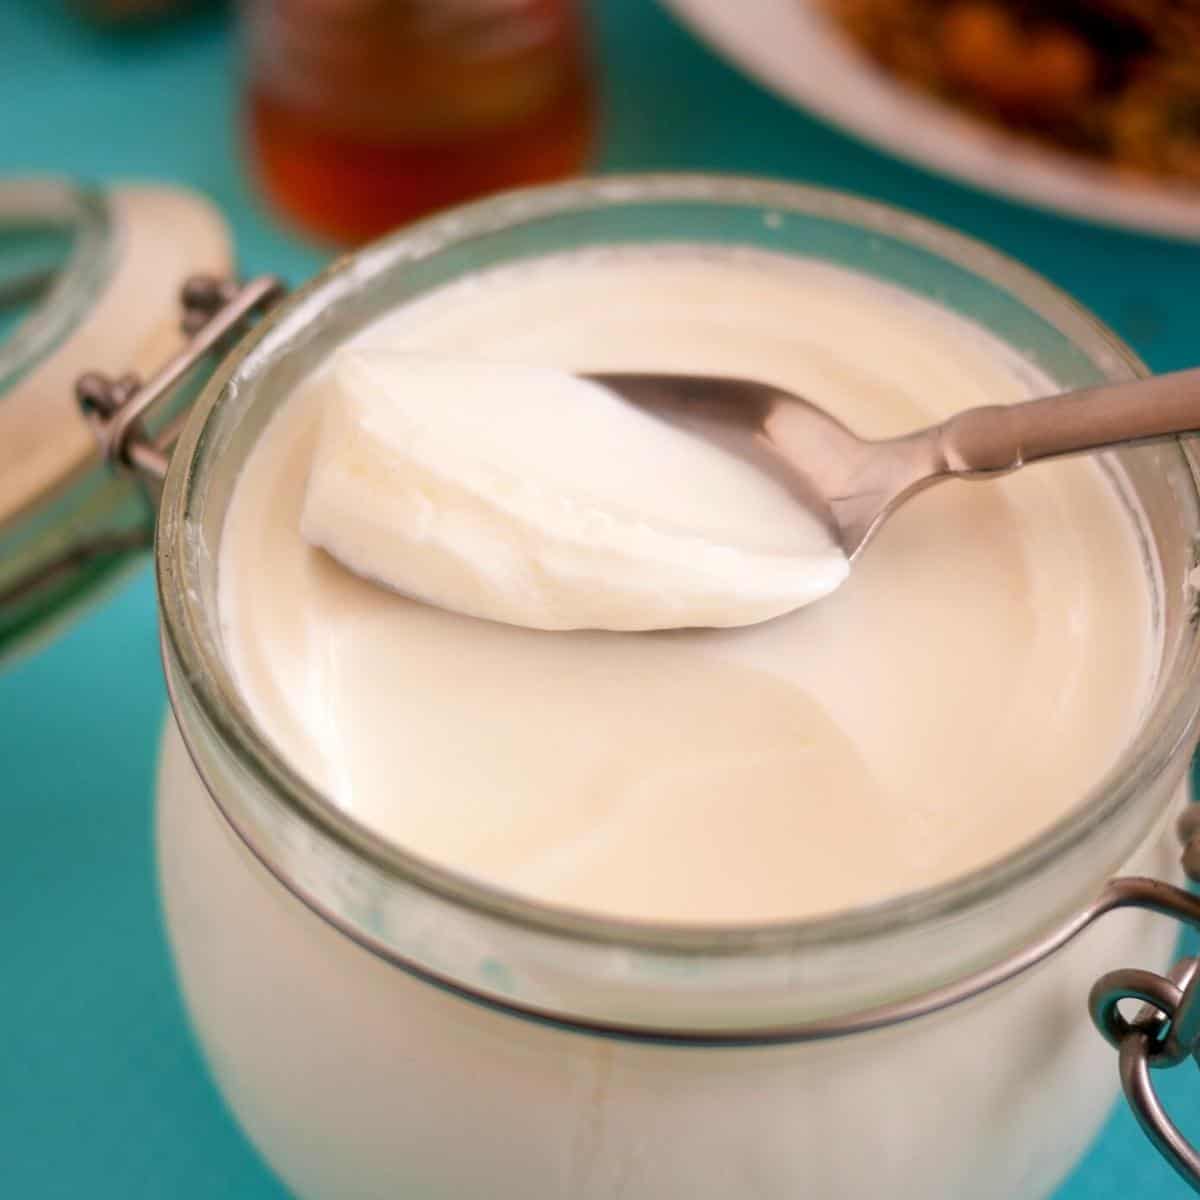
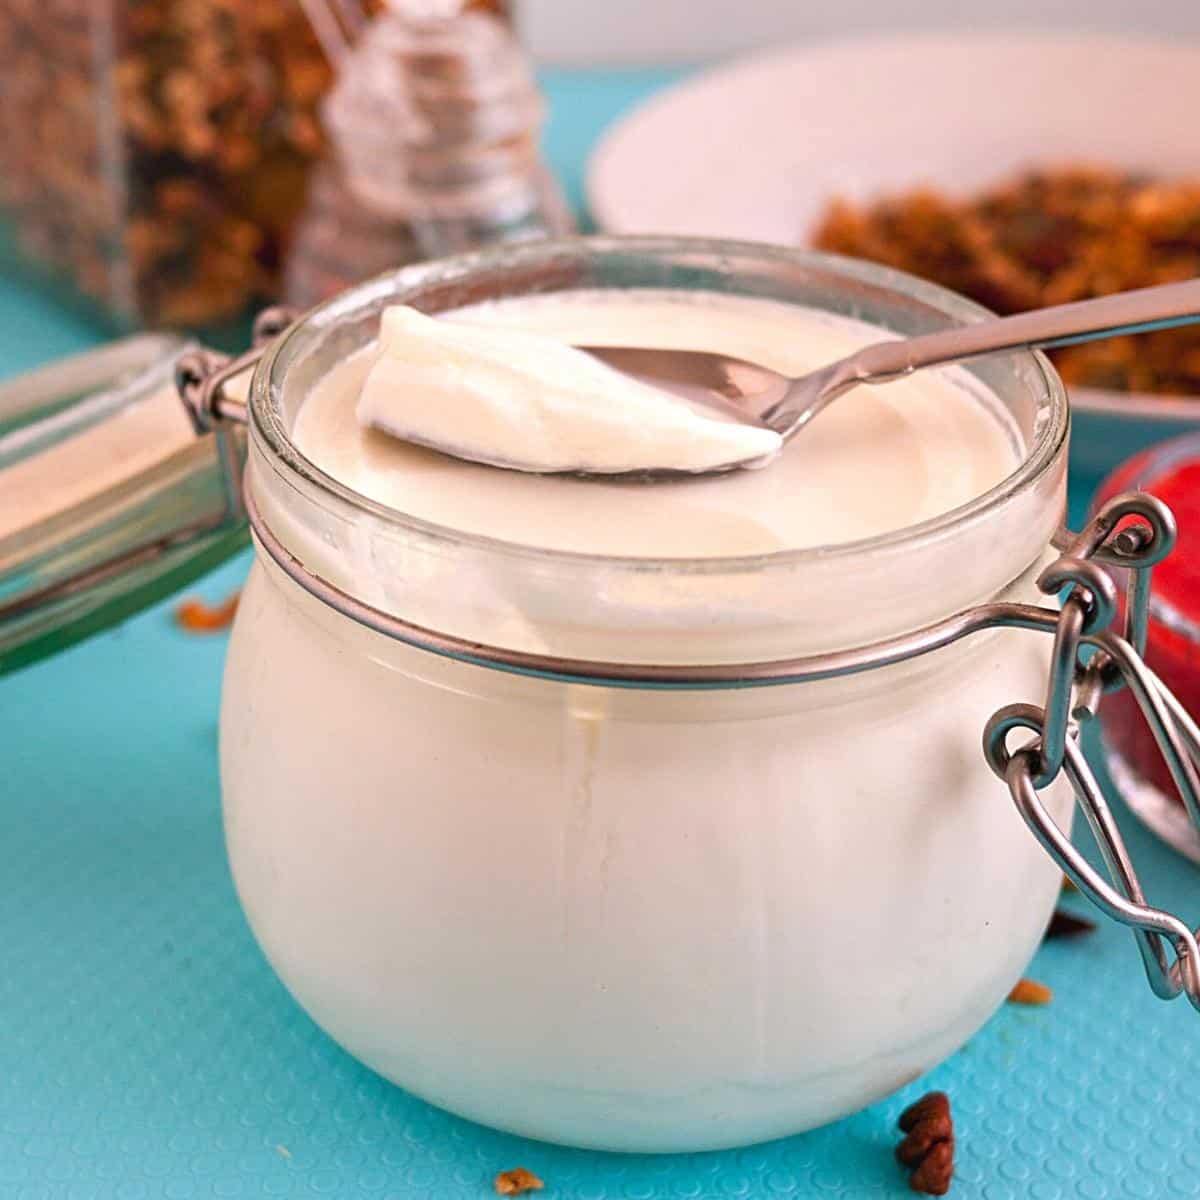
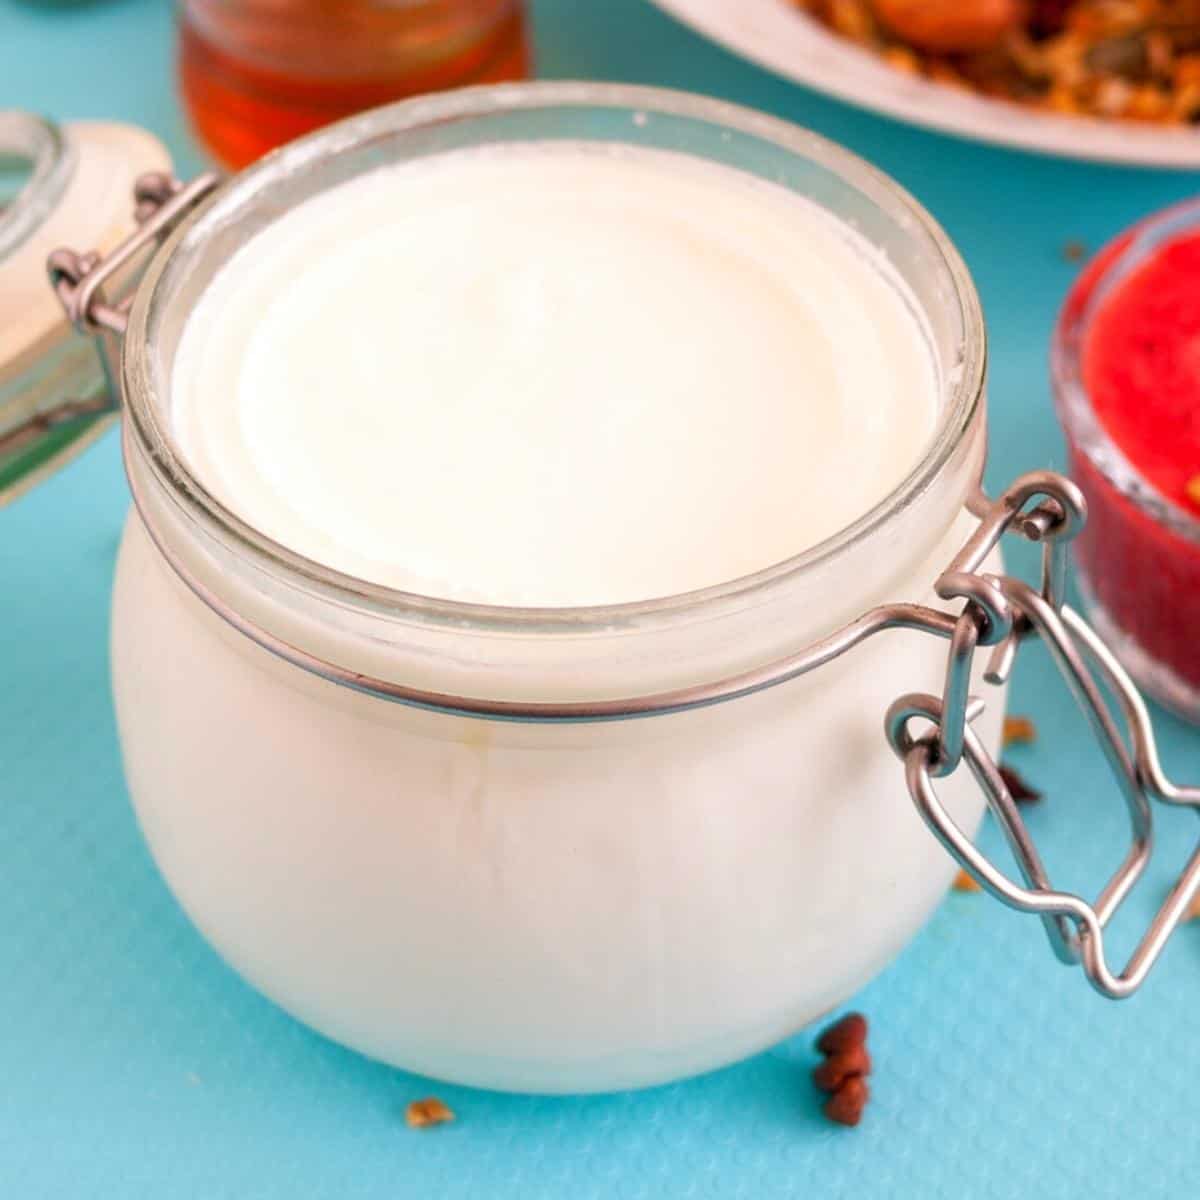
- Control the texture – Keep it soft and creamy or strain it longer to make thick Greek yogurt.
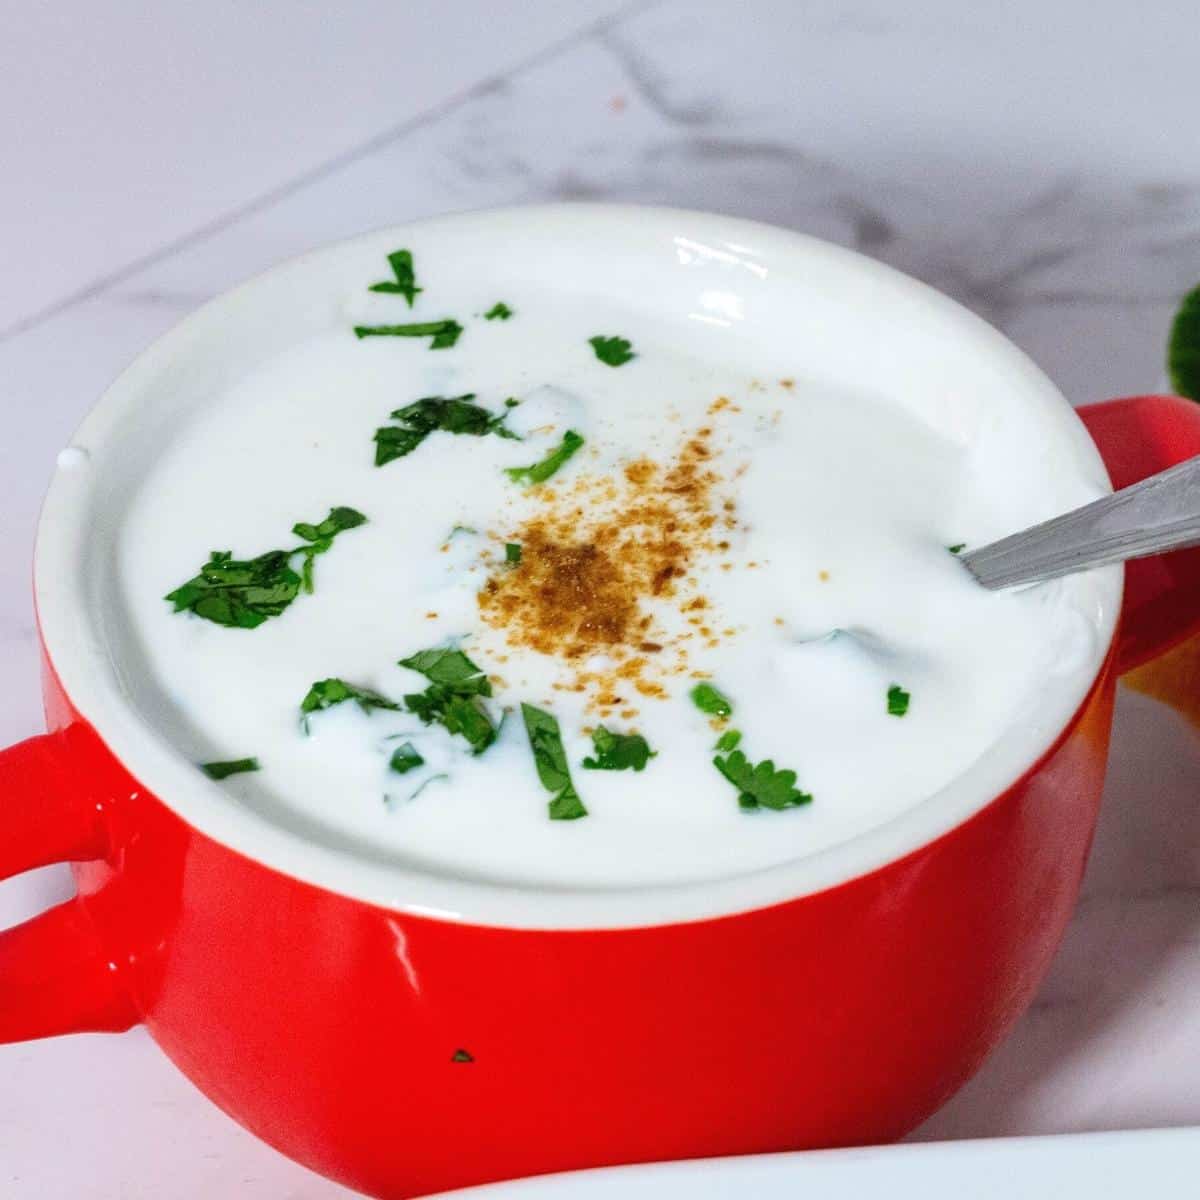
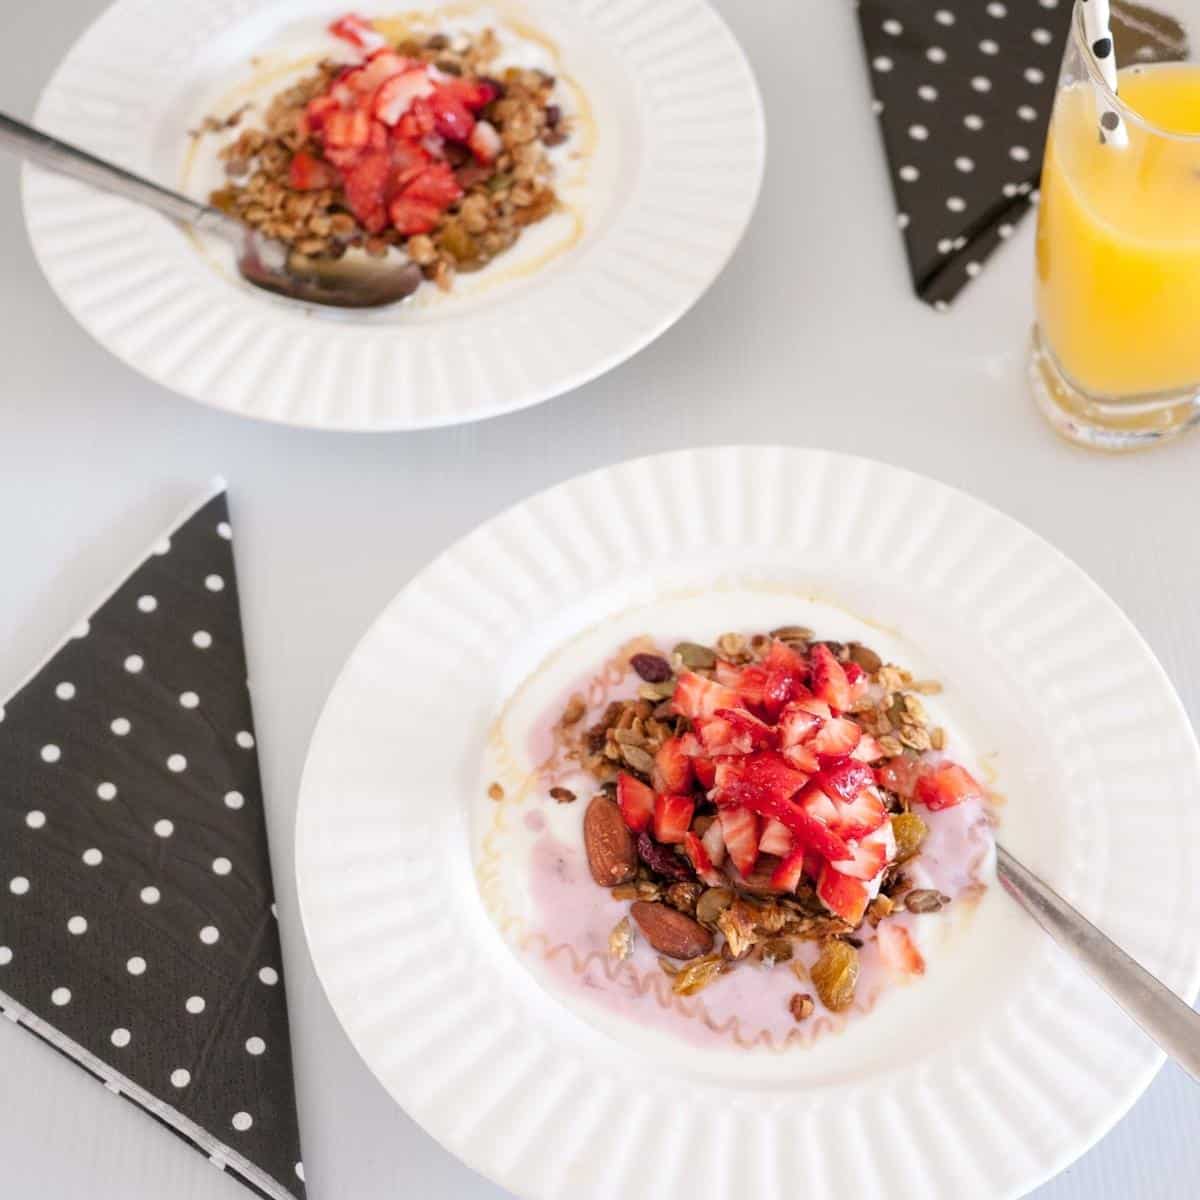
- Use it every day – Perfect for breakfast bowls, smoothies, marinades, baking, sauces, and Indian recipes like raita.
Ingredients and substitutes
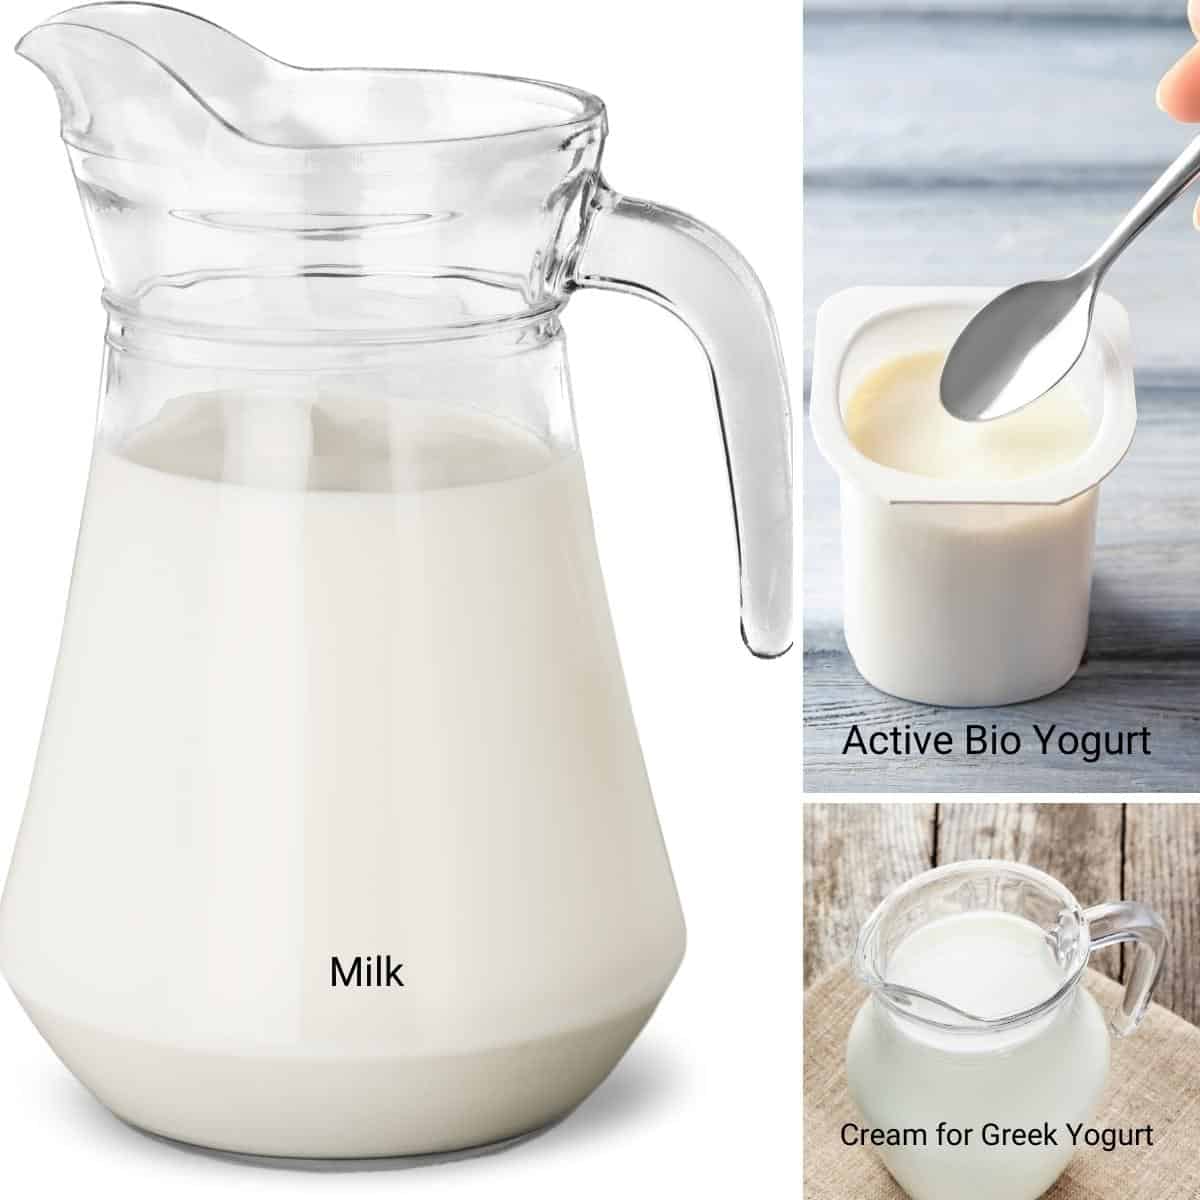
- Milk: You can use any type of milk you prefer, such as cow’s milk, goat’s milk, or plant-based milks like almond milk or soy milk. It is best to use whole milk, but you can also use 1% or 2%. The difference is that whole milk will be a wonderful, thick, luscious milk like you see in the pictures, but skimmed milk will have more whey, obviously, because it lacks milk fat.
- Yogurt with live active cultures: If you don’t have plain yogurt with live active cultures, you can also use a yogurt starter culture, which you can purchase online or at health food stores.
- Active bio culture – Alternatively, you can find freeze-dried yogurt sachets on Amazon called Active Yogurt Culture. And yet, I strongly suggest you go to the nearest supermarket and look in the dairy aisle. There will be one that contains Active Bio Culture. Usually, they are labeled as BIO.
- Citric acid – Also, if you do not have active bio yogurt, you can also use citric acid or freeze-dried active culture.
Step-by-step: Homemade yogurt (with bio yogurt starter)
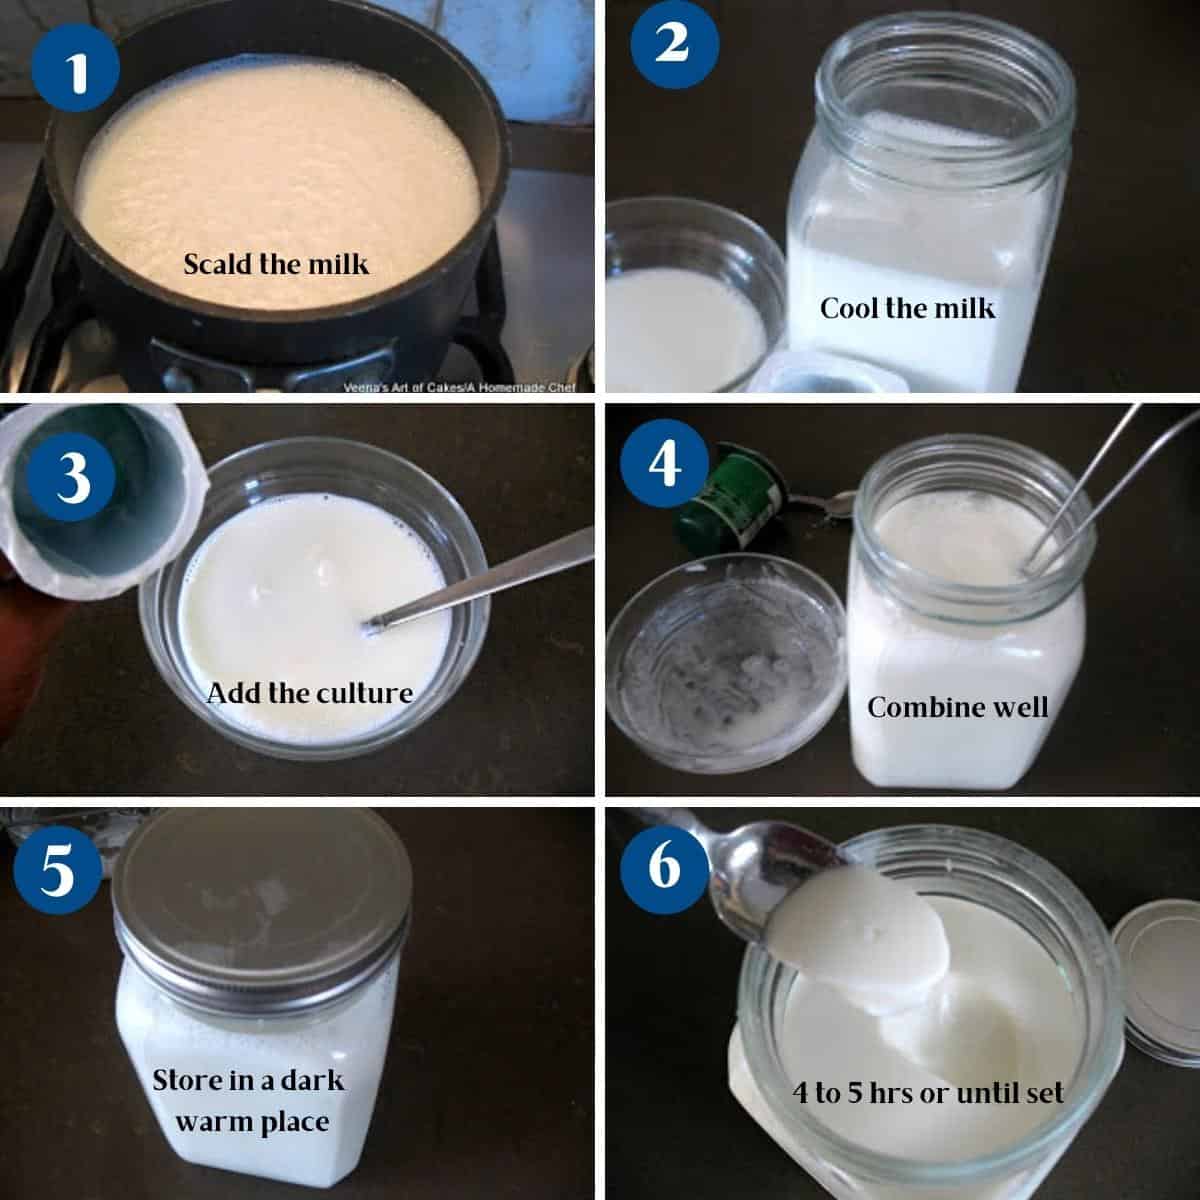
- Scald – Pour milk into a saucepan and heat on medium until it almost comes to a boil. (180°F or 82°C)
- Cool – Cool the milk to room temperature (110°F or 43°C). Then, pour the milk into a glass jar or stainless steel bowl, but do not use aluminum.
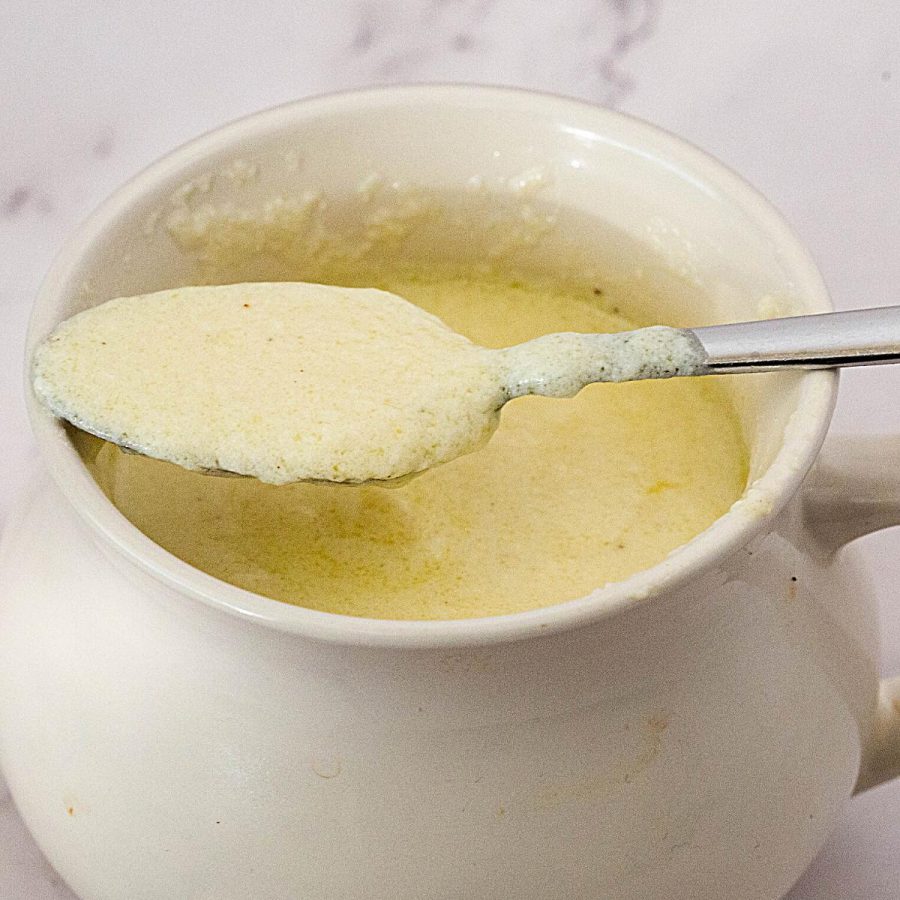
Pro tip – You do not need a thermometer. Just leave it until it is barely warm, similar to milk used for making bread. - Culture – Add the active yogurt to the milk and combine well with a whisk.
Pro tip – I like to take half a cup of milk in a bowl and add the yogurt. Use a whisk to ensure there are no lumps. Then add this to the rest of the milk. - Rest – Cover the milk jar with a clean kitchen cloth or paper hand towel, and store in a warm place, untouched, for 4 to 6 hours.
Pro tip – Cover loosely while the yogurt sets. The cultures need a warm, stable environment to ferment properly. - Chill – After 4 to 6 hours, it should be set. Next, place it in the fridge and let it chill for a couple of hours.
Pro tip – At this point, the culture is set, but leaving it in the fridge will help it mature better without becoming too sour.
Can you make yogurt without a yogurt starter?
Traditional yogurt needs live cultures to ferment properly, which usually come from a spoonful of existing yogurt or a freeze-dried yogurt starter. If you don’t have yogurt, you can use a purchased starter culture. Some methods use alternatives like citric acid, but they will create a different texture and flavor because they do not contain the same live yogurt cultures.
Step-by-step: Homemade yogurt without starter – bioculture
- Scald – Pour milk into a saucepan and heat on medium until it almost comes to a boil. (180°F or 82°C)
- Cool – Cool the milk to room temperature (110°F or 43°C). Then, pour the milk into a glass jar or stainless steel bowl, but do not use aluminum.
Pro tip – You do not need a thermometer. Just leave it until it is barely warm, similar to milk used for making bread. - Culture – Add the citric acid or freeze-dried culture starter to the milk and combine well with a whisk.
Pro tip – Adding citric acid to hot milk will cause it to curdle, so make sure the milk is at room temperature. - Rest – Cover the milk jar with a clean kitchen cloth or paper hand towel, and store in a warm place, untouched, for 4 to 6 hours.
Pro tip – Do not put the lid on tightly. The yeast in the milk needs to breathe. - Chill – After 4 to 6 hours, it should be set. Next, place it in the fridge and let it chill for a couple of hours.
Pro tip – At this point, the culture is set, but leaving it in the fridge will help it mature better without becoming too sour.
Step-by-step: How to make Greek yogurt
- Scald – Pour milk and cream into a saucepan and heat on medium until it almost comes to a boil (180°F or 82°C).
- Cool – Cool the milk to room temperature (110°F or 43°C). Then, pour the milk into a glass jar or stainless steel bowl, but do not use aluminum.
Pro tip – You do not need a thermometer. Just leave it until it is barely warm, similar to milk used for making bread. - Culture – Add the active yogurt (or freeze-dried active culture) to the milk and combine well with a whisk.
- Rest – Cover the milk jar with a clean kitchen cloth or paper hand towel, and store in a warm place, untouched, for 4 to 6 hours.
Pro tip – Do not put the lid on tightly. The yeast in the milk needs to breathe. - Chill – After 4 to 6 hours, it should have been set. Next, place it in the fridge and let it chill for a couple of hours.
Pro tip – At this point, the culture is set, but leaving it in the fridge will help it mature better without becoming too sour.
How to make low-fat yogurt?
Low-fat is made exactly the same way as above, using low-fat milk (1% or 2%). Due to the lack of sufficient milk fat.
- It may take longer for the culture to develop, so instead of 4 to 6, it may take up to 8 or more hours
- The appearance of low-fat is that it can be thinner because it has more whey and less milk fat.
- Commercial low-fat varieties are thickened. You can thicken the low-fat milk using no-fat milk powder or a tiny amount of unflavored gelatin. Add the gelatin to the milk while still cold, then continue with the recipe below.
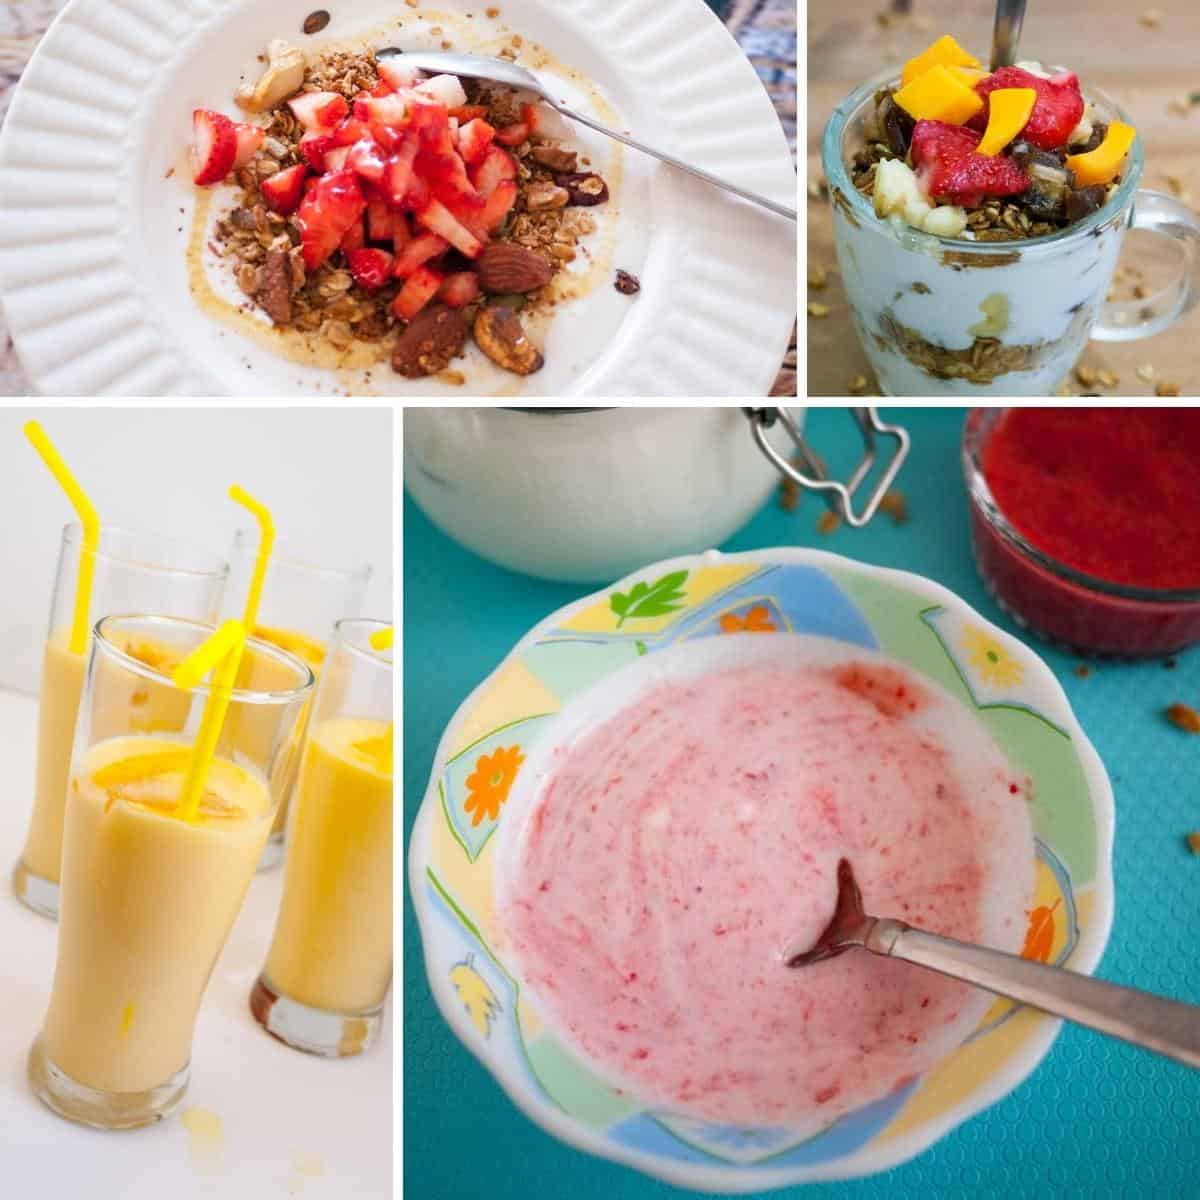
Homemade fruit yogurt?
It is straightforward to make fruit-flavored drinks at home. In fact, all you need is fruit puree or fresh, finely chopped fruits.
- Add 2 tbsp fruit puree to 1 cup of homemade yogurt (or 1 cup puree to 4 cups yogurt)
- And, depending on the fruit you use, you may or may not need a drizzle of honey or maple syrup for sweetness.

Homemade yogurt drink?
The most delicious way to use it is in smoothies and yogurt drinks. Blend the following in a blender until smooth.
- 1 cup yogurt (regular or Greek)
- 1 cup ice
- and 1 tbsp honey, maple, or agave syrup.
- Add 1 cup of chopped fruits to make an amazing fruit yogurt drink.
See all my milkshakes, smoothies, and drinks

How to Make Yogurt or Greek Yogurt
This is how to make yogurt or Greek yogurt at home with just 2 ingredients. It makes a rich, creamy, healthier, and wholesome yogurt. Use it with granola, parfaits, cakes, and as well as other cooking or baking recipes.
Ingredients
- 2 cups (470 ml) Milk whole, 1% or 2%
- 2 tbsp Plain bioactive yogurt (or 1 tbsp freeze-dried starter)
- 2 cups (470 ml) Whole milk
- ¼ tsp Citric Acid
- 2 cups (470 ml) Whole milk 3% (not skimmed)
- 1 cup (240 ml) Whipping cream 28% to 39%
- ¼ cup Plain bioactive yogurt
Method
- Heat– pour milk into a saucepan and heat on medium until it almost comes to a boil. (180°F or 82°C). Cool the milk to room temperature (110°F or 43°C). Pour the milk in a glass jar or stainless steel bowl but do not use aluminum.Pro tip – You do not need a thermometer. Just leave it until it is barely warm, like milk used for making bread.2 cups Milk
- Culture – Add the active yogurt to the milk and combine well with a whisk. Pro tip – I like to take half a cup of milk in a bowl and add the yogurt. Use a whisk to ensure there are no lumps. Then add this to the rest of the milk.2 tbsp Plain bioactive yogurt
- Rest – Cover the milk jar with a clean kitchen cloth or paper hand towel and store in a warm place untouched for 4 to 6 hours.Pro tip – Do not put the lid on tightly. The yeast in the milk needs to breathe.
- Chill – After 4 to 6 hours, the yogurt should have been set. Place it in the fridge and let chill for a couple of hours.Pro tip – at this point the culture is set but leaving it in the fridge will help it mature better without becoming too sour.
- Heat – pour milk into a saucepan and heat on medium until it almost comes to a boil. (180°F or 82°C). Cool the milk to room temperature (110°F or 43°C). Pour the milk in a glass jar or stainless steel bowl but do not use aluminum.Pro tip – You do not need a thermometer. Just leave it until it is barely warm, like milk used for making bread.2 cups Whole milk
- Culture – Add the citric acid or freeze-dried culture to the milk and combine well with a whisk. Pro tip – Adding citric acid to hot milk will cause it to curdle so make sure the milk is at room temperature.¼ tsp Citric Acid
- Rest – Cover the milk jar with a clean kitchen cloth or paper hand towel and store in a warm place untouched for 4 to 6 hours.Pro tip – Do not put the lid on tightly. The yeast in the milk needs to breathe.
- Chill – After 4 to 6 hours, the yogurt should have been set. Place it in the fridge and let chill for a couple of hours.Pro tip – at this point the culture is set but leaving it in the fridge will help it mature better without becoming too sour.
- pour milk and cream into a saucepan and heat on medium until it almost boils. (180°F or 82°C). Cool the milk to room temperature (110°F or 43°C). Pour the milk in a glass jar or stainless steel bowl but do not use aluminum.Pro tip – You do not need a thermometer. Just leave it until it is barely warm similar to milk used for making bread.2 cups Whole milk , 1 cup Whipping cream
- Culture – Add the active yogurt (or freeze-dried culture) to the milk and combine well with a whisk. Pro tip – I like to take half a cup of milk in a bowl and add the yogurt. Use a whisk to ensure there are no lumps. Then add this to the rest of the milk.¼ cup Plain bioactive yogurt
- Rest – Cover the milk jar with a clean kitchen cloth or paper hand towel and store in a warm place untouched for 4 to 6 hours.Pro tip – Do not put the lid on tightly. The yeast in the milk needs to breathe.
- Chill – After 4 to 6 hours, the yogurt should have been set. Place it in the fridge and let chill for a couple of hours.Pro tip – at this point the culture is set but leaving it in the fridge will help it mature better without becoming too sour.
Notes
- Use fresh milk: Start with fresh, high-quality milk for the best results. Avoid using milk that is close to its expiration date.
- Use a thermometer: Use a kitchen thermometer to monitor the temperature of the milk. Heating the milk to the right temperature is crucial for the yogurt cultures to thrive.
- Use a starter: Use a yogurt starter with live active cultures for the best results. You can use store-bought plain yogurt with live cultures as a starter, or use a yogurt starter culture.
- Keep it warm: Maintain a warm and stable temperature (around 110°F or 43°C) for the yogurt to incubate. You can use a yogurt maker, a warm spot in your kitchen, or an oven with just the light turned on for incubation.
- Be patient: Allow the yogurt to incubate for at least 4-6 hours, or until it reaches your desired thickness. Longer incubation times will result in thicker and tangier yogurt.
- Strain for Greek yogurt: If you prefer Greek yogurt, strain the homemade yogurt using a cheesecloth or a fine mesh strainer over a bowl for a few hours or overnight in the refrigerator. The longer you strain it, the thicker it will become.
- Save the starter: Save a small portion of your homemade yogurt to use as a starter for your next batch. This will save you from having to buy yogurt or starter cultures every time you make yogurt.
- Experiment: Don’t be afraid to experiment with different types of milk, cultures, and incubation times to find the perfect recipe for your taste preferences.
How to flavor homemade yogurt?
- Honey – One tablespoon of honey per one cup of yogurt
- Honey – one tbsp honey, 1 tsp vanilla per one cup of yogurt
- Maple – One tablespoon of maple syrup per one cup of yogurt.
- Date yogurt with Silan – One tablespoon of silane (date honey) per one cup of yogurt
- Mango – 2 tbsp mashed mango flesh per cup yogurt – add 1 tsp honey if you want it sweeter.
- Banana – 1/2 mashed banana flesh per cup yogurt – add 1 tsp honey if you want it sweeter.
Fruit yogurt with jam is a perfect mid-day snack.
- Blueberry yogurt – One tablespoon of blueberry jam per one cup of yogurt (Y)
- Strawberry yogurt – one tbsp strawberry jam per one cup of Y
- Mixed berry yogurt – one tbsp mixed berry jam per one cup of Y
- Raspberry yogurt- one tbsp raspberry jam per one cup of Y
Equipment you will need

Nutrition
Tried this recipe?
Mention @veenaazmanov_kitchen or tag #veenaazmanovkitchen!more DIY recipes


Frequently asked questions
Homemade can last in the refrigerator for about 1-2 weeks. Be sure to store it in a tightly sealed container to maintain freshness.
Yes, you can use non-dairy milk such as almond milk, soy milk, or coconut milk to make yogurt. However, you may need to use a thickener or stabilizer, such as agar-agar or tapioca starch, to achieve a creamy texture.
To make it thicker, you can strain it through cheesecloth or a fine-mesh strainer to remove excess whey. The longer you strain it, the thicker it will become.
Homemade can be healthier than store-bought. You have control over the ingredients and can avoid added sugars, preservatives, and artificial flavors. Plus, homemade contains live active cultures, which are beneficial for gut health.
- Homemade Dulce De Leche
- Homemade Caramel Sauce
- Creamy Caramel Filling for Cakes Tarts Desserts
- Homemade Butterscotch Sauce


Don’t lose this recipe! Save it for Later!
📌 Save this Recipe for later on Pinterest so you can easily find it again.
⭐ Add Veena Azmanov Kitchen to your Google Preferred Sources.
It helps Google show you more of our recipes.
📧 Subscribe for new recipes delivered to your inbox.
🎥 Follow us for more recipes


mine is still liquid after 7 hours. i put back in a warm dark place. did i mess it up checking? is it going to go bad?
Candace? Did you make sure the milk is at the right temperature? And that it was not too hot when you added the yogurt? It will become – it’s ok if it takes longer. Leave it untouched for a few more hours.
Hi Veena,
I just put up a single recipe of Homemade Yogurt without yogurt starter and I mistakenly put in an entire teaspoon of citric acid.
Will it be okay or should I throw it out and start over?
Thanks!
Don’t throw it. Let it set and see how it tastes. Then decide. Citric acid is edible but may be strong in taste.
Greetings, Veena.
Thank you so much for sharing both the recipe and the methods. I tried it more or less the way your mom made it, and the product was very nice — mild in flavour, and tasty. The method was very easy and convenient, especially with the tip of warming the oven before turning it off and leaving the mixture in overnight. I do have a question for you, though.
My finished yogourt was more ”glutinous” or ”gelatinous” or ”thick” in the middle and towards the bottom than in the rest of the container. Is there anything I should do differently to get the same consistency throughout, or is it just a matter of stirring before use?
Hey Susanne. That is strange. Are you using a different type of milk? Perhaps check the milk you are using. Is it made from milk powder? Perhaps the milk protein is not well distributed.
Sorry, I’m just trying to troubleshoot. I hope this help.
Greetings, Veena.
Thanks for the quick response. I used ordinary 3.25% milk. I’ll just try again. The yogourt is tasty, so this isn’t a big problem.
Also, I meant to give the recipe a 5 star rating, but I guess I clicked the wrong end of the stars. Anyway, your recipe tastes good and is very easy to follow. You provided a lot of information. Thank you for having been so thorough.
Best regards,
Suzanne
Thank you Suzzanne. Yes, I used 3.8% for my everyday yogurt too!
Hi, I’m planning on making yogurt with my Instant Pot for the first time using citric acid. I’m concerned the cooled down “room temperature” in the recipe of 110 degrees Fahrenheit will cause the milk to curdle after I add in the citric acid, should I wait until the milk cools to a closer real temperature like 80 degrees Fahrenheit before mixing in the citric acid?
Thanks
Yes, when in doubt let the milk get close to room temperature rather than warmer. Because warmer will cause the milk to split.
Thanks for the response, I’m just not sure why the citric acid recipe that you took the time to single out from the others calls for milk that’s 110 degrees Fahrenheit when citric acid will for sure without doubt curdle it at that temperature, I mean why even have the recipe like that in the first place? Have you ever made this recipe with citric acid when the milk is 110 degrees Fahrenheit? Did you just copy it from somewhere without testing it? It’s very confusing.
I didn’t say don’t use it at 110F – I meant if you are not sure it is better to go less warm than warmer! That’s all.
There are plenty of ways to make yogurt but I’ve only tried these that’s why I have given only the options that I have tied.
My favorite method is still the old-school method my mom used – a few tablespoons of bio yogurt.
Thanks
In YOUR recipe ABOVE (check it out), under “Homemade Yogurt without yogurt starter” Step 2 reads as follows “Cool – Cool the milk to room temperature (110°F or 43°C). Pour the milk in a glass jar or stainless steel bowl but do not use aluminum.”
I’m not sure why you’re getting defensive, I’m asking if it’s a mistake (seems to be) as milk that warm (110°F or 43°C) would curdle if citric acid were added to it, maybe rewrite that section to reflect the correct temperature the milk should be after cooling so adding citric acid wouldn’t curdle it. This was mean actually making this and testing it before putting it in YOUR recipe.
You’re the one offering this recipe, I’m simply asking questions as to why.
Its the same temperature we use when working with yeast and that’s what I use.
Really informative and from what I understand the prepared yogurt can be used to make more yogurt as many times as needed provided the culture is kept alive, I assume the bacteria replicates in each new batch. I use fat free greek yogurt or low fat live yogurt as a starter but have always used a multicooker to ferment the mixture, now I am using your glass jar method.
homemade yogurt is so full of calcium, vitamins and protein and I add jam and/or fruit compote to a bowl, heaven
If your following the yogurt starter recipe how do you make it more sour? I’m trying to make a sour yogurt , do you Judy leave it out longer outside of the fridge ?
Usually, you just leave it out longer to ferment. The longer it stays out the more mature (sour) it gets.
Hello…can you use lemon juice instead of citric acid?
I have not tried it with lemon juice, Ginger. So, can’t say it will work.
The milk curdled as soon as I added the citric acid to a little bit of it as you said to. What did I do wrong?
Krista. Sorry to hear that. Make sure the milk is not hot it will split with citric acid. The best and most flavorful yogurt is to make it with plain bio yogurt. Thanks
You mentioned that your mom would seperate the milk out into 3 batches. One batch for yogurt making. What were the other two batches used for?
Yes, she made one batch for yogurt. One for general purposes like coffee and tea and the other was for use to drink. She’d make us golden milk with almond meal and turmeric powder
No this really does look easy! I have to try this! I’ve been wanting to try my hand at making yogurt but haven’t tried it yet!
Most people are surprised at how simple and easy it is to make homemade yogurt.
Hi Veena, can you tell me how much milk you use and how much yogurt. Starter batch..
Celia. The recipe card below shows 4 cups milk with 1/4 cup bio yogurt. Thanks