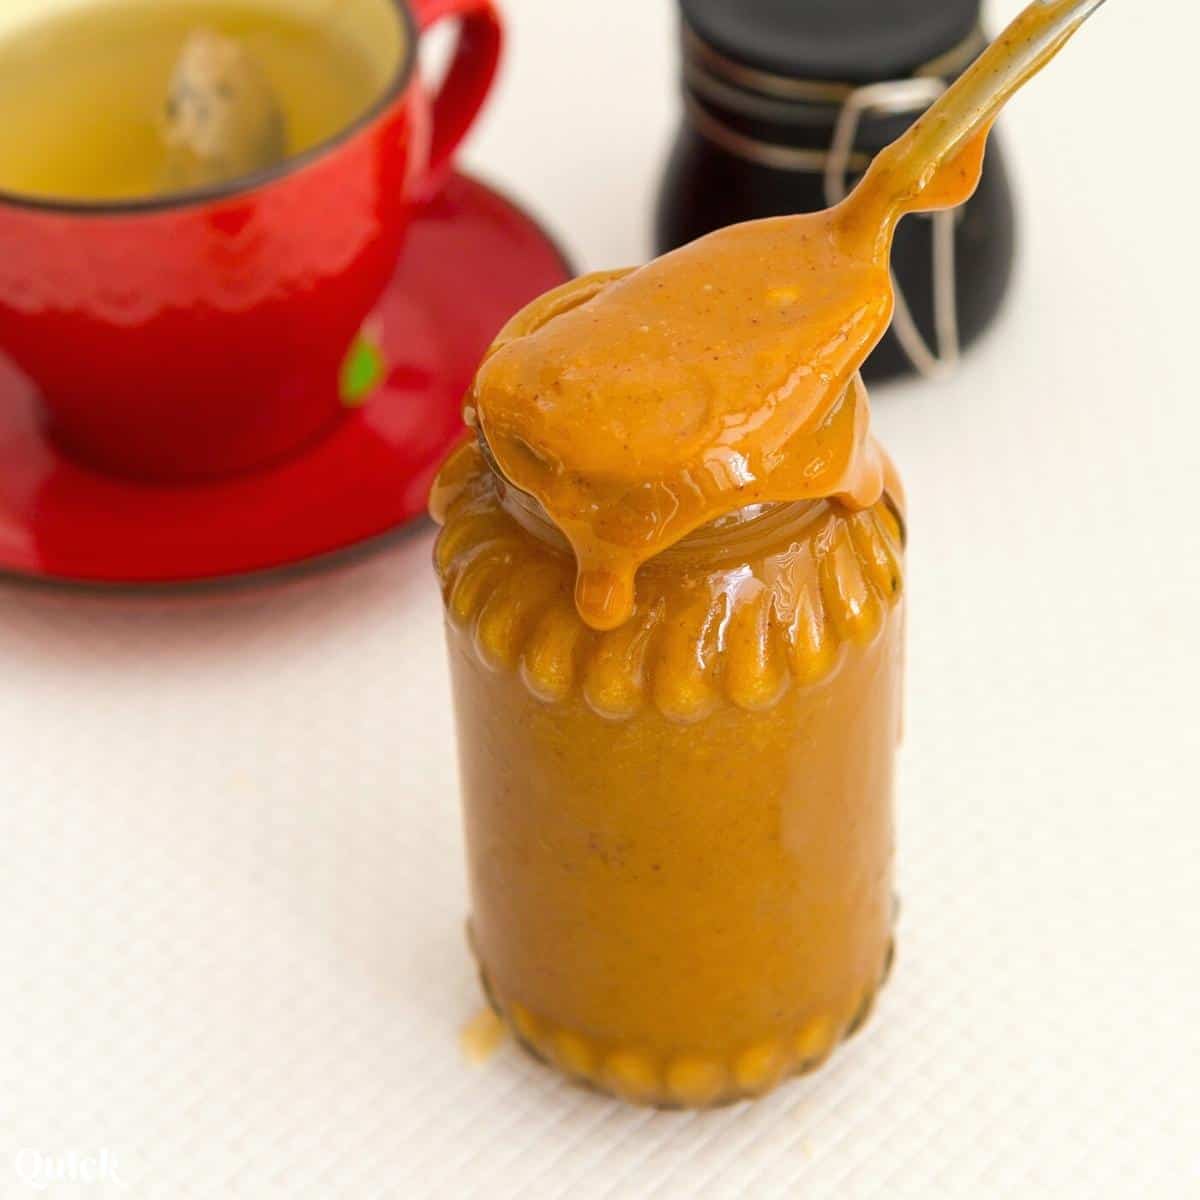
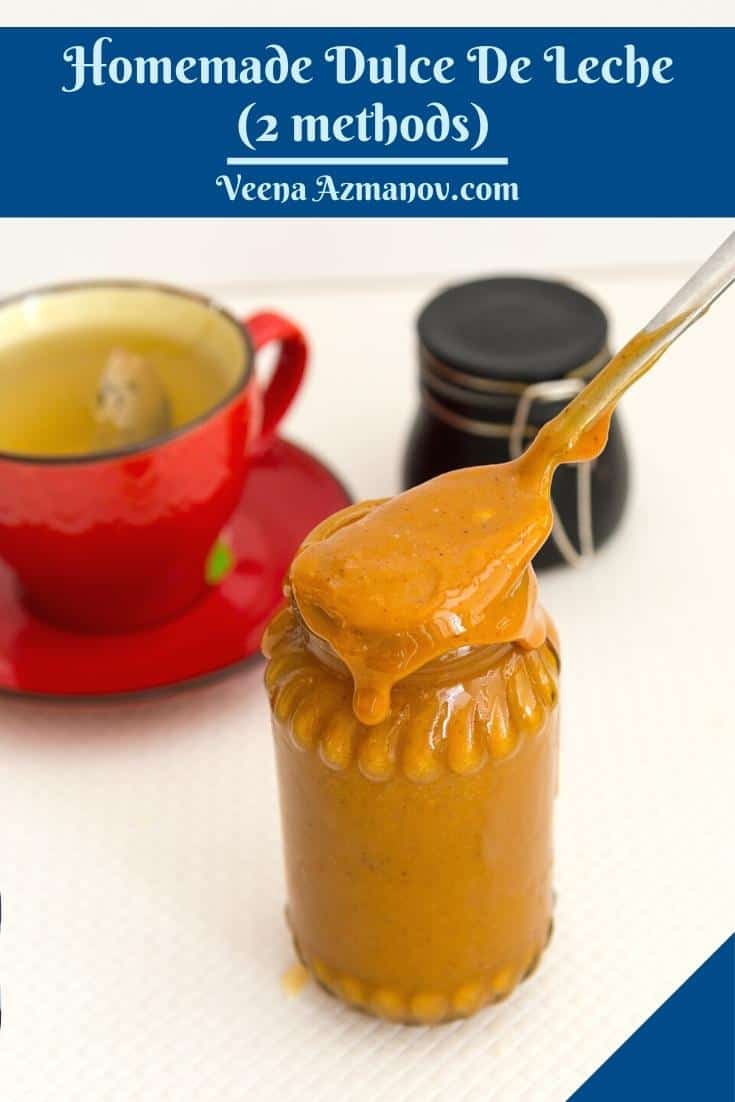
Homemade Dulce De Leche (5 ways)
 Prep Time 10 minutes Cook Time 2 hours Total Time 2 hours 10 minutes


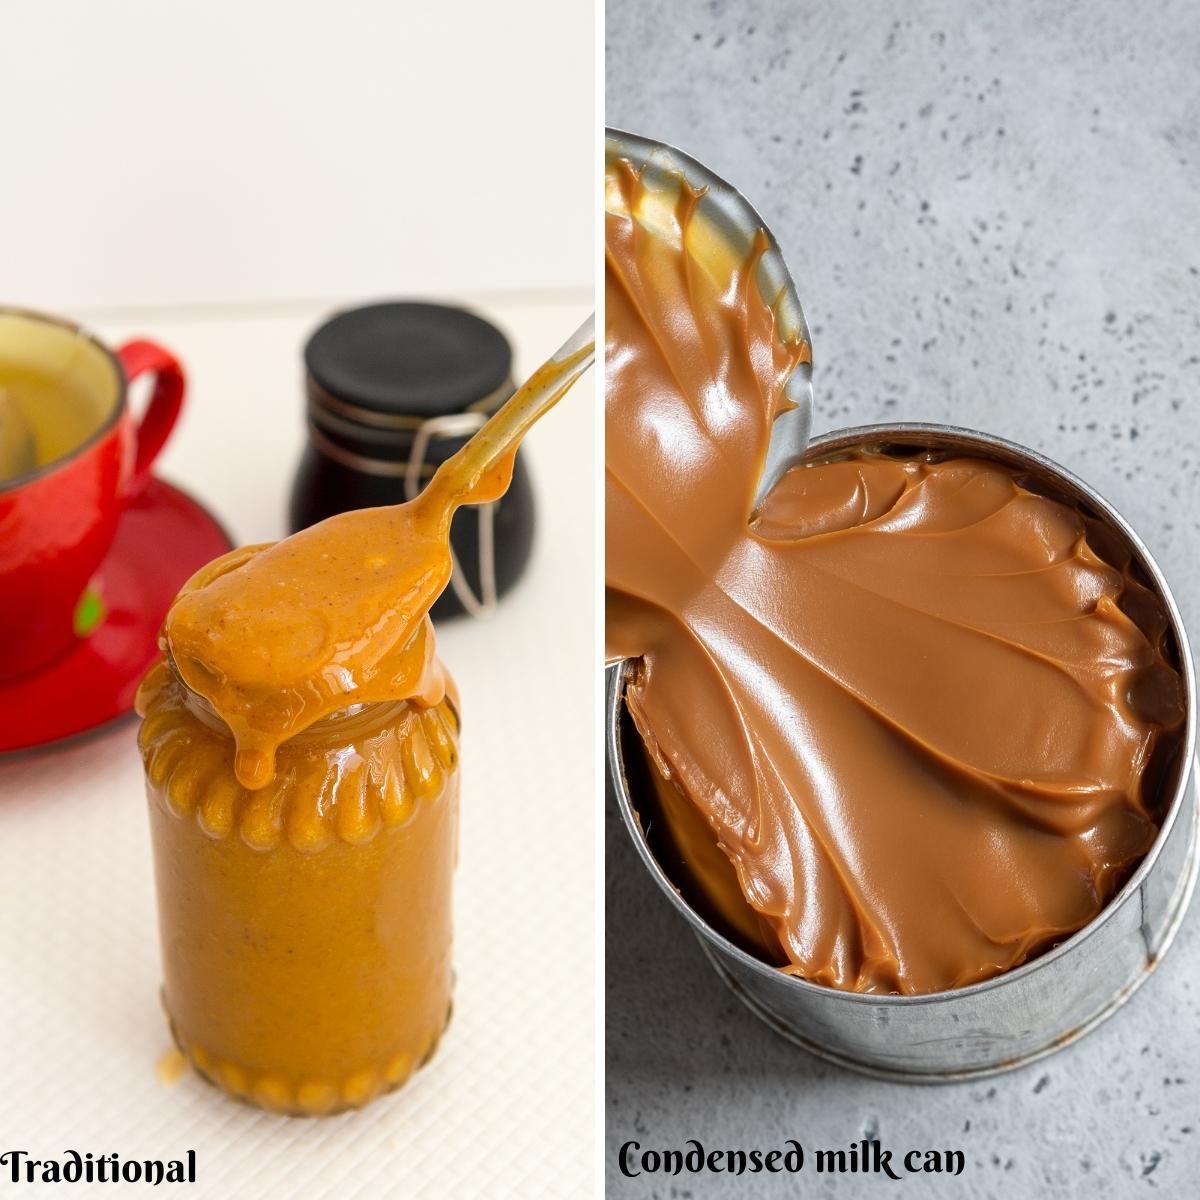
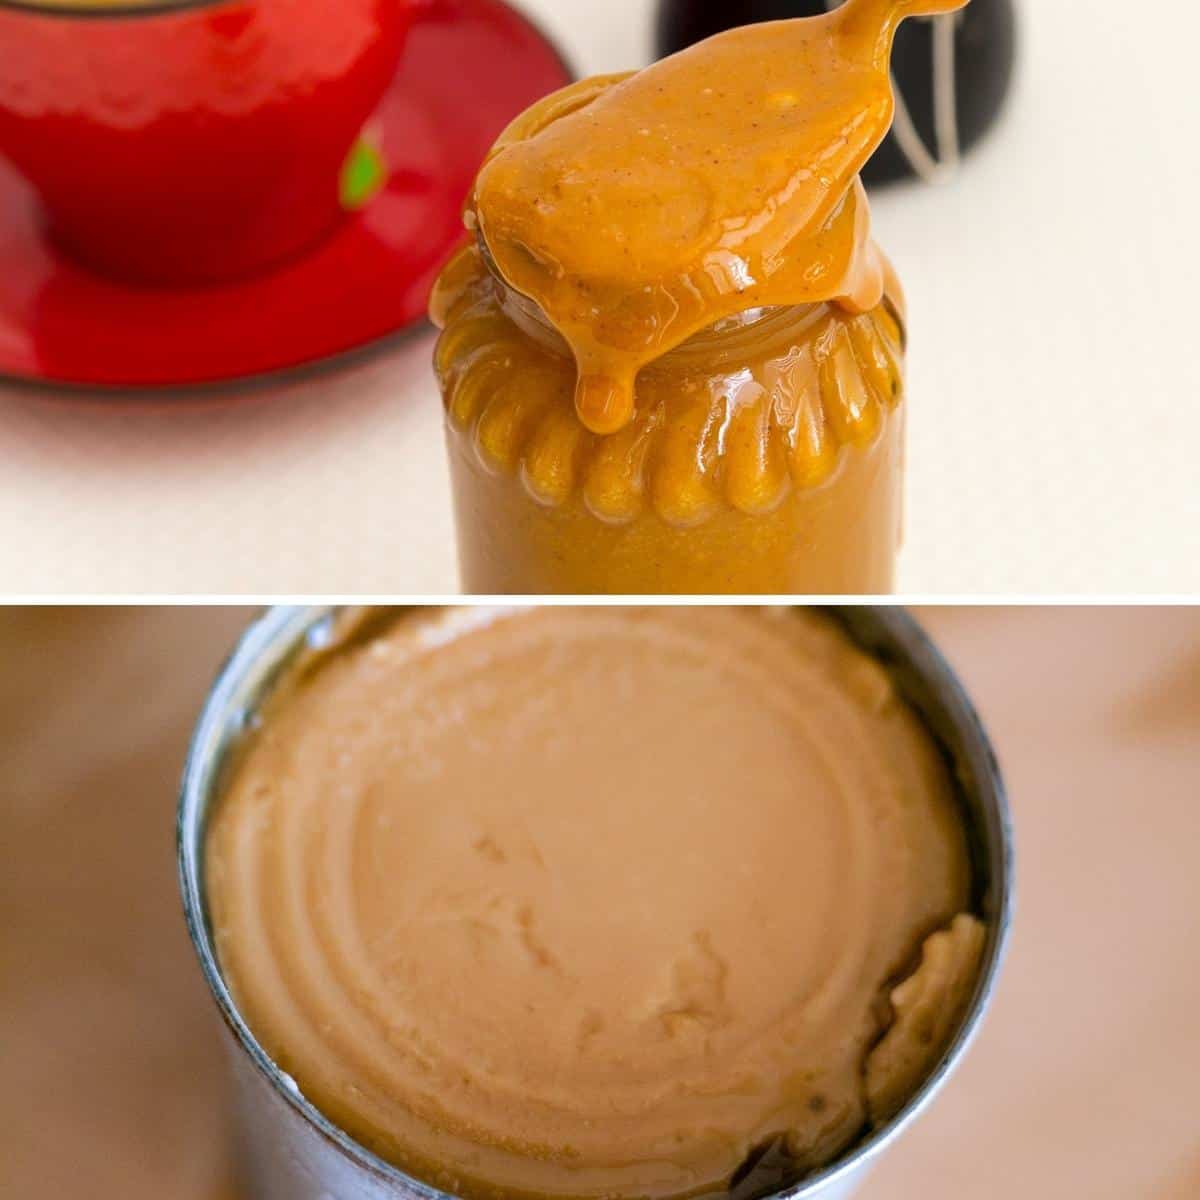
Rich, creamy, and delicious dulce de leche can take any dessert to the next level. Below are two methods to make your own. One is the traditional method of using milk with sugar, and the second using condensed milk in a can.

When I was a kid, dulce de leche wasn’t something you bought—it was something you made. My mom would patiently cook down milk and sugar for what felt like hours, stirring constantly until it transformed into a thick, golden caramel. No shortcuts, no quick fixes—just time, patience, and that unmistakable homemade taste.
These days, we can simply grab a jar off the shelf. And while making it from scratch is still an option, I have to admit—there’s an easier way. Simmering a can of sweetened condensed milk gets you that same rich, creamy goodness without all the stirring. It may not be the old-school method, but it’s a game-changer for busy kitchens.
Still, nothing beats the nostalgia of watching milk slowly turn into caramel, the house filling with that deep, sweet aroma. Whether you go the traditional route or take the condensed milk shortcut, homemade always has a little extra magic.
Have you ever made dulce de leche from scratch? Or do you go for the shortcut?
Methods to make dulce de leche at home
There are a few ways to make homemade dulce de leche from traditional stovetop to slow cooker, oven, or instant pot.
- Traditional stovetop version – From scratch, using two basic ingredients: fresh milk and sugar. Then, cook on low heat until it becomes thick and deep golden in color. This one needs your constant supervision.
- Water bath method – Boiling the can of sweetened condensed milk in a large pot of water for several hours on the stovetop. The advantage of this method is that you do not need to keep an eye on it all the time. As long as there is water around the can you can leave it on its own.
- Oven method – Pour the sweetened condensed milk in a baking dish covered with aluminum foil in an oven-water bath for 90 mins.
- In an instant pot – Still in the can but cooked under pressure for 90 mins.
- Slow cooker – You put sealed cans in the slow cooker and cook for 8 to 10 hours.
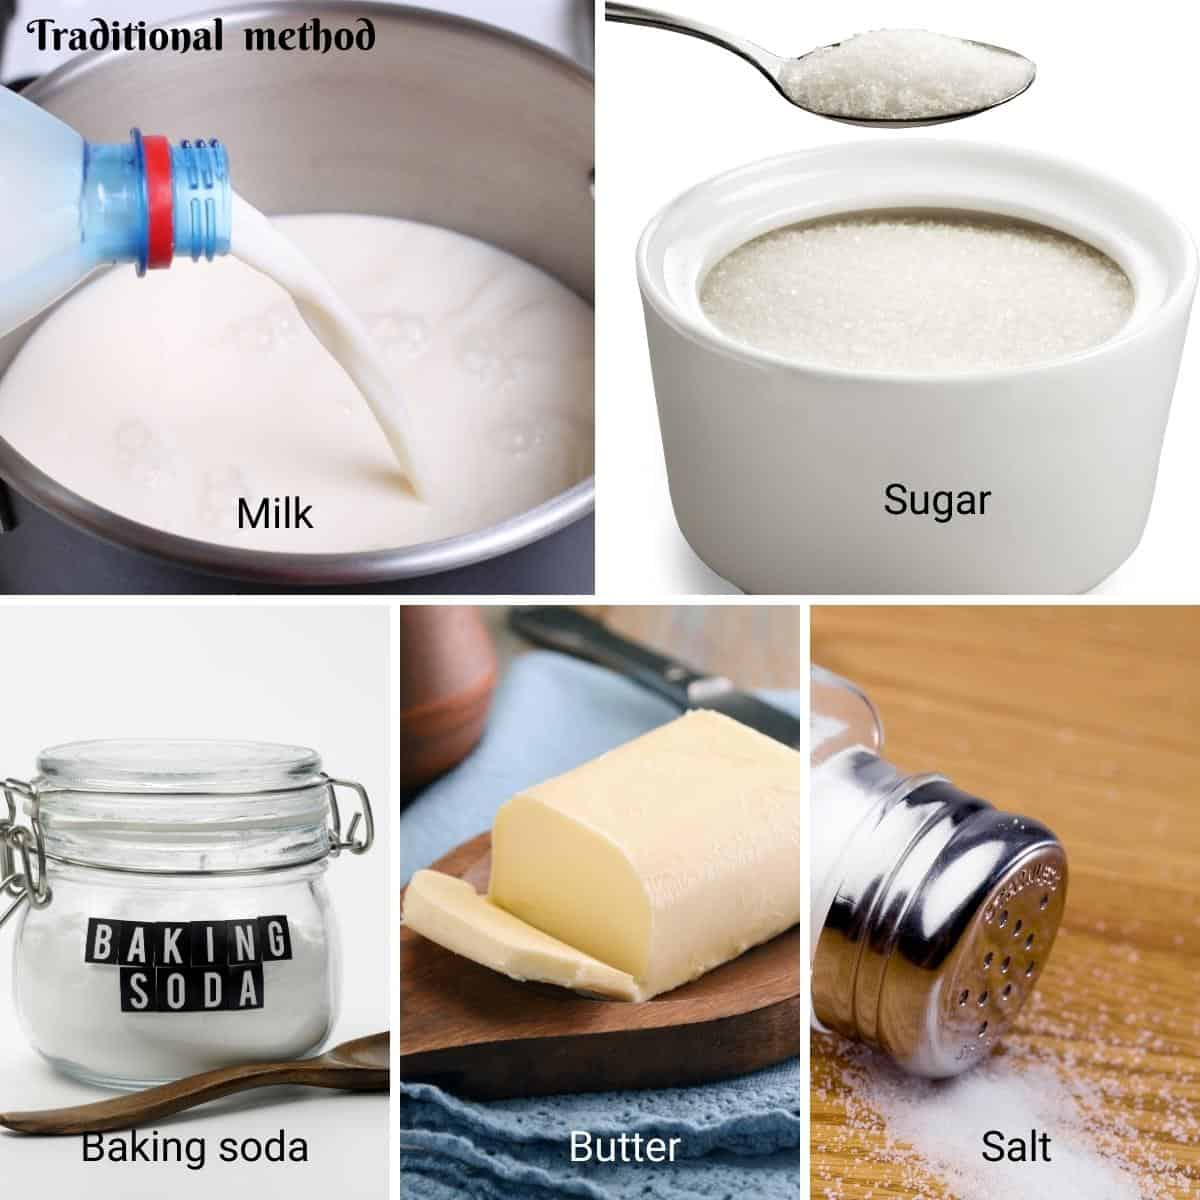
Ingredients and substitutes
- Milk – it’s best to use whole milk that’s at least 3% fat. Skimmed milk or low-fat milk has too much liquid so it will take longer to evaporate and you won’t get thick milk. You can also use coconut milk, almond milk, or oats milk.
- Baking soda – The baking soda helps prevent lumps and uneven cooking by keeping the milk proteins from coagulating. Yes, you can omit it and use a blender to blend out any lumps later.
- Vanilla – Use good quality vanilla extract because it makes a huge difference.
- Butter – This adds richness as well as a silky smooth, velvet-like texture and mouth-feel you won’t be able to stop eating.
Step-by-step: homemade dulce de leche
1. Traditional dulce de leche recipe
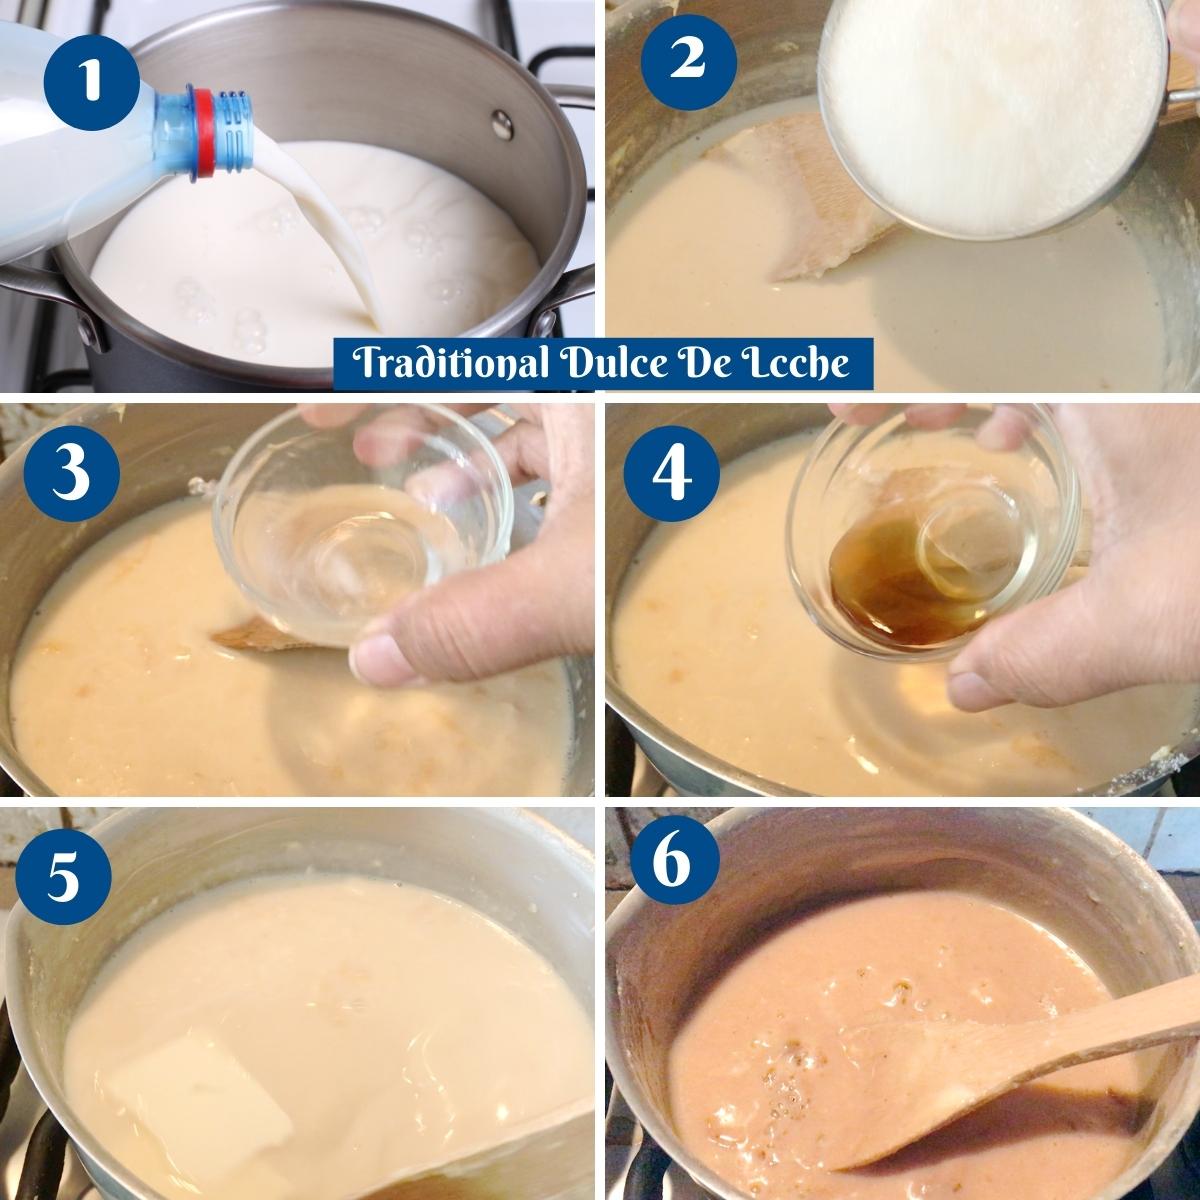
- Boil – Place milk in a heavy-bottom saucepan over medium heat and let it come to an almost boil. Then, turn the heat down to an almost simmer and continue to simmer stirring frequently – almost every 3 to 5 minutes.
Pro tip – It is important to keep the heat low and stir frequently. Otherwise, the milk will scorch on the bottom giving the condensed milk a burnt smell. - Sweeten – When the milk has reduced to about half, add the sugar and continue to simmer on low stirring frequently.
Pro tip – We added the sugar after half the milk was reduced because sugar can burn easily. - Remove lumps – Next, add 2 tbsp water to the baking soda, and add it to the milk.
Pro tip – Baking soda prevents lumps. I prefer to add it now after the milk has been reduced to half. This way, I don’t have to worry about the milk overflowing. - Simmer – Continue to cook the milk on a low simmer until it is reduced to about 1/3 of its original volume. Then, add the butter and vanilla extract. Continue to cook on low stirring continuously.
Pro tip – As the milk thickens you will need to stir continuously to prevent it from scorching at the bottom. Use a whisk to ensure there are no lumps. - Cool – When the milk is thick and about 1/3 its original volume (1 1/2 cups), take it off the heat.
Pro tip – The milk will continue to thicken as it cools. But, don’t worry, you can add a few tablespoons of warm milk if it becomes too thick. - Store – Then, pour into a clean mason jar or glass container. Let it cool completely at room temperature. Then, store it in the fridge for up to 2 weeks.
2. Dulce de leche in a can
- Place the can of condensed milk in a pot of water. The water must be at least 3 inches above the can.
Pro tip – If possible, remove the label from the can, but if it’s glued strong leave it for now and take it out later, when it releases in the hot water. - Place on the stovetop on medium-high heat until it comes to a boil. Once it comes to a boil, reduce the heat to a simmer.
Pro tip – Keep the heat on medium-low and turn the cans around once in a while so it does not cook on one side for too long. - Continue to simmer on medium-low for about 3 hours adding more hot water as required to the pot.
Pro tip – The can must be immersed in water at all times. So, make sure to top with more hot water as necessary. - After three hours, turn the heat off and let the can cool in the water for another hour. When the water is warm, remove the can, cool on a wire rack. Then open it when cooled.
Pro tip – Try not to open the can when it is still hot because it can cause the hot dulce de leche to spill out of the can and cause injuries. - Next, pour the contents into a bowl or mason jar and give it a good stir. This will combine all the uneven cooking in the can. This can now be used or stored in the fridge for up to 2 weeks.

3. Dulce de leche in the oven
- Preheat the oven at 425F/ 220C/ Gas Mark 6
- Pour the sweetened condensed milk into a baking dish (preferably glass) and cover it with an aluminum foil. Then, place the baking dish in a roasting pan. Pour water into the roasting pan enough to come halfway up the sides of the baking dish.
- Bake for 90 minutes, stirring at least once or twice to help cook it evenly. When done, leave it to cool naturally. Cooling will help thicken it more.
4. Dulce de leche in a slow cooker
- Place the sealed cans of condensed milk in the slow cooker. Fill it with water halfway up to cans. Cover and cook for 8 to 10 hours on low heat.
5. Dulce de leche in an Instant pot
- Set the rack in the bottom of the instant pot.
- Using a can opener, open the cans of dulce de leche and then cover them tightly with aluminum foil. Place the cans in the instant pot with enough water to come halfway up to the sides of the jars.
- Set to pressure for 35 minutes. Then, follow the quick-release carefully and open the instant pot.
- Gently, using tongs, pick the cans out of the IP and open the foils. Pour the contents into a bowl and stir with a whisk.
How to use leftover dulce de leche?
- Well, you can eat it like a jam and spread on toast, pancakes, or waffles for breakfast. I love to drizzle it on a bowl of goat’s milk yogurt.
- Often, you can substitute caramel sauce with a delicious dulce de leche.
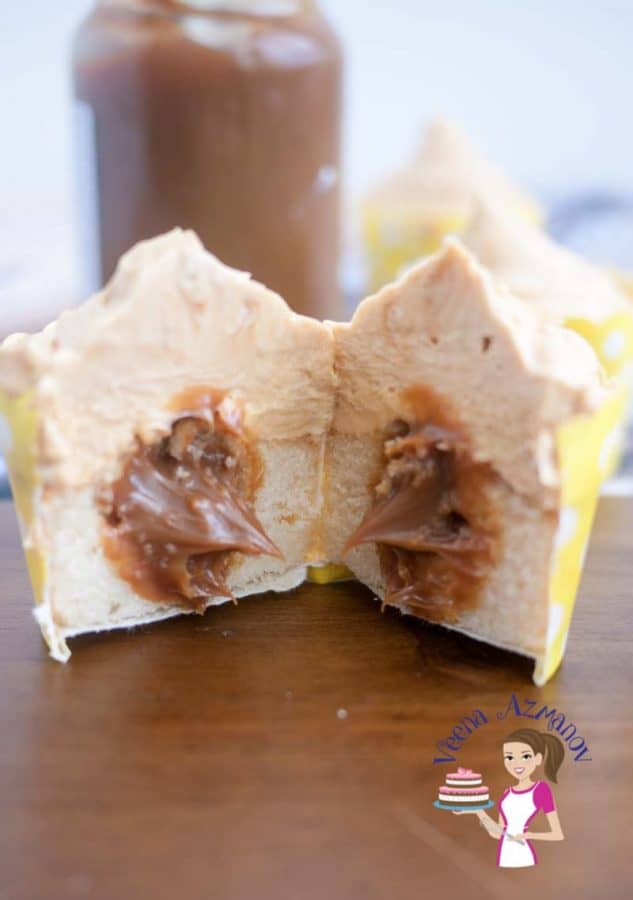
- Use it as a cake filling, in cookies such as alfajores. Use it in a banoffee pie with bananas.
- Fill it in pastries just like you would fruit jams or peanut butter.
- Use it as a filling in between cake layers, pies.
- Drizzle it over ice creams or tarts similar to using caramel or butterscotch sauce.
- Use it as an ingredient to make treats like my Dulce De Leche ice cream, glazed donuts, filled doughnuts/sufganiyot, cupcakes, Popsicles.
- Sweetened Condensed Milk Cookies
- Evaporated Milk Recipe (2 Methods)
- Homemade Caramel Sauce
- Creamy Caramel Filling for Cakes Tarts Desserts
- See all DIY basic recipes


Frequently asked questions
Evaporated milk is condensed milk that is unsweetened. You can use the milk and add sugar to shorten the cooking time. However, you can’t use the same process of cooking the cans in hot water because without the sugar you won’t have dulce de leche just thicked milk fat.
In most cases, you can use caramel. Having said that, dulce de leche has a distinct flavor, color, and taste. So you will be able to tell that it is dulce de leche, not caramel.
Not really.
– Caramel is made with sugar, butter, and heavy whipping cream, while dulce de leche is made with only milk and sugar.
– Caramel has a slight bitterness to it from the caramelized sugar. Dulce de leche has a rich milk taste.
– Also, caramel can be made in a matter of minutes while dulce de leche can take hours depending on the quantity.
Dulce de leche is often referred to as cajeta. They are very similar but not the same. While dulce de leche is made with cow’s milk cajeta is made with goat’s milk. Often people who are sensitive to cow’s milk can substitute it with cajeta.
Homemade Dulce De Leche
Rich, creamy, and delicious dulce de leche can take any dessert to the next level. Below are two methods to make your own. One is the traditional method of using milk with sugar, and the second using condensed milk in a can.
Video
Ingredients
- 4 cup (1 liter) Milk full-fat
- 1 cup (200 g) sugar
- ¼ tsp Baking soda
- ¼ cup (60 g) Butter unsalted
- 1 tsp Vanilla
- 1 can (396 g) Condensed milk (14 oz)
Method
- Boil – Place milk in a heavy-bottom saucepan over medium to low heat and let come to an almost boil. Then, turn the heat down to an almost simmer and continue to simmer stirring frequently – almost every 3 to 5 minutes.4 cup Milk
- Simmer – When the milk has reduced to about half, add the sugar and continue to simmer on low stirring frequently. Next, add 2 tbsp water to the baking soda to the milk.1 cup sugar, 1/4 cup Butter, 1/4 tsp Baking soda
- Sweeten – Cook the milk on a low simmer until it is reduced to about 1/3 of its original volume. Then, add the butter and vanilla extract. And continue to cook on low, stirring continuously.1 tsp Vanilla
- Cool – When the milk is thick and about 1/3 its original volume (1½ cups) take it off the heat. Then, pour into a clean mason jar or glass container. Let it cool completely at room temperature. Then, store it in the fridge for up to 2 weeks.
- Place the can of condensed milk in a pot of water. The water must be at least 3 inches above the can. Place on the stovetop on medium-high heat until it comes to a boil. Once it comes to a boil, reduce the heat to a simmer. Continue to simmer on medium-low for about 3 hours, adding more hot water to the pot.
- After three hours, turn the heat off and let the can cool in the water for another hour. When the water is warm, remove the can and open it. Next, pour the contents into a bowl or mason jar and give it a good stir this will combine all the uneven cooking in the can. This can now be used or stored in the fridge for up to 2 weeks.
- Preheat the oven at 425F/ 220C/ Gas Mark 6.
- Pour the sweetened condensed milk into a baking dish (preferable glass) and cover it with an aluminum foil. Then place the baking dish in a roasting pan. Pour water into the roasting pan enough to come halfway up the sides of the baking dish.
- Bake for 90 minutes stirring at least once or twice to help even cook it evenly. When done, leave it to cool naturally. Cooling will help thicken it more.
- Place the sealed cans of condensed milk in the slow cooker. Fill it with water halfway up to cans. Cover and cook for 8 to 10 hours on low heat.
- Set the rack in the bottom of the instant pot.
- Open the cans of condensed milk and cover them tightly with aluminum foil. Place the cans in the instant pot with enough water to come halfway up to the sides of the jars.
- Set to pressure for 35 minutes. Then, follow the quick-release carefully and open the instant pot. Gently pick the cans out of the IP and open the foils. Pour the contents into a bowl and stir with a whisk.
Notes
- Use a heavy-bottom pan so the milk won’t scorch to the bottom.
- Reducing the milk on its own first means we don’t risk the sugar caramelizing too quickly and we can stir less often
- Make sure you keep the heat on medium-low and prevent the milk from scorching. A dulce de leche with the smell of burnt milk is not pleasant
- If you turn the heat on medium-high, make sure to stand and stir continuously to prevent the sugar from caramelizing too quickly.
- When making dulce de leche in a can – make sure the can is not dented or leaking. This will allow water to go into the can.
- It’s best to let the can cool until warm so you don’t risk hot the mixture on your hands.
Equipment you will need


Nutrition
Tried this recipe?
Mention @veenaazmanov_kitchen or tag #veenaazmanovkitchen!- Homemade Butterscotch Sauce
- Homemade Whipped Cream – 4 Methods
- How to Make Stabilized Whipped Cream (5 Methods)
- Homemade Cheesecake Crust Recipe

Don’t lose this recipe! Save it for Later!
📌 Save this Recipe for later on Pinterest so you can easily find it again.
⭐ Add Veena Azmanov Kitchen to your Google Preferred Sources.
It helps Google show you more of our recipes.
📧 Subscribe for new recipes delivered to your inbox.
🎥 Follow us for more recipes


I appreciated you pointing out that a dulce de leche is not pleasant if it has the smell of burnt milk. My friend wants to buy dulce de leche syrup. I should advise her to look for a store that offers ethnic products.
Question. I make Banoffee Pie but feel the condensed milk and brown sugar is just too sweet. Should I make your homemade condensed milk( I’ll use Fairlife) it has less sugar, and then make the caramel (condensed milk plus brown sugar) or something else???
The advantage of making homemade condensed milk is that you can use less sugar.
Hi Veena, thank you for the detailed recipe. Can you please let me know if dulce de leche can be stored for longer time than 2 weeks in any other way.
I have not kept it in the fridge for more than 10 days. Sorry.
I’ve made the condensed milk version but never the traditional! Thanks for sharing both:) can’t wait to try the traditional way!
I’ve never tried making my own dulce de leche before (have eaten plenty!!), but you’ve made it sound totally achievable – great to have so many methods and your top tips are really helpful. Thanks so much!