Christmas Cookie Decorating Ideas
 Prep Time 10 minutes Cook Time 10 minutes Total Time 1 hour 20 minutes


Sure, it’s easy to throw some red and green sprinkles on your baked Christmas cookies. And they still taste good that way. But there is something special about decorating your Christmas cookies with fondant. Try these Christmas cookie decorating ideas.
Christmas is a special time of the year. Everybody loves decorated Christmas cookies, no matter what age you are. Nestled inside snowy branches and quilted with snowflakes, fondant-decorated cookies are a wonderful addition to your holiday spread.
The moment I start listening to Christmas music I start thinking of Christmas goodies. Of course, kids also get excited! So, I wanted to make a tutorial for you and I thought how about some Christmas cookie decorating, with fondant.
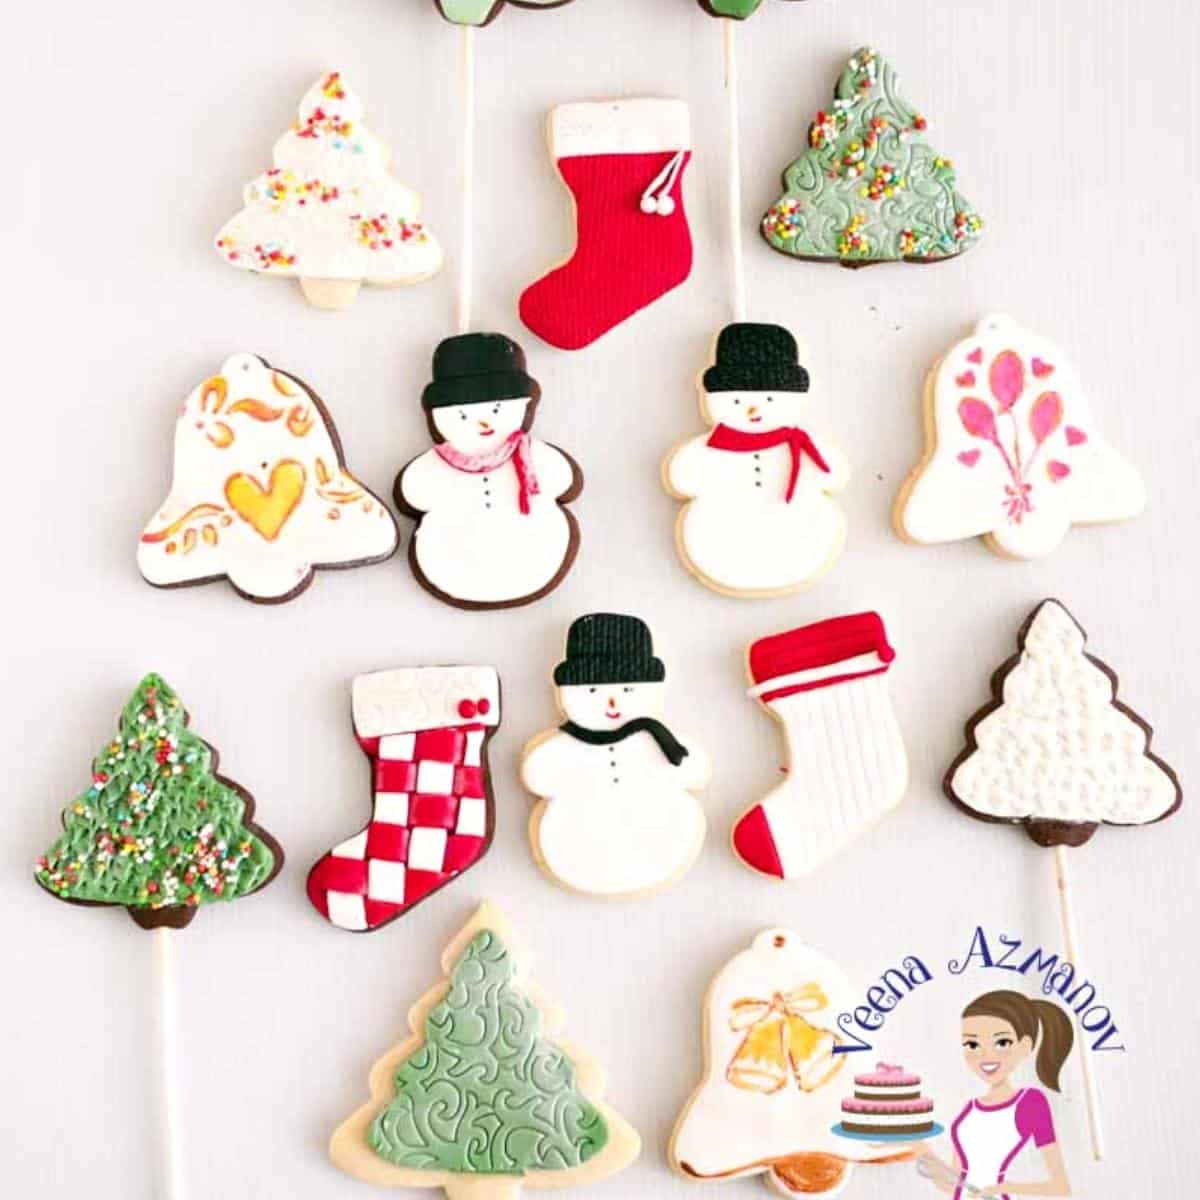
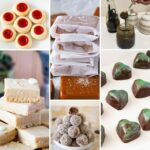
Below, you can see the various cookies that I made. In fact, I tried to keep it simple and easy. And, I hope you enjoy this tutorial.
Also, I put some on a cookie pop stick. Kids love those. And, they are easy to make and perfect to distribute to kids at the party.
Ingredients and substitutes
- Cookies – I hope you already know and have used my Vanilla Sugar Cookie Recipe and Chocolate Sugar Cookie Recipes. In fact, I use all of these all the time. And, if you need eggless sugar cookies, you can also use my recipes, Eggless Vanilla Sugar Cookies and Eggless Chocolate Sugar Cookies.
- Fondant – Today, I used my marshmallow fondant, but you can use classic cake decorators’ fondant or vegetarian fondant.
- Glue – To stick the fondant to the cookies, you can use thick sugar syrup or light corn syrup.
Materials
- Cutters – I’ve used my Christmas cookie set from Wilton. But the options for cookie cutters on the market are endless
- Edible food colors – you can buy pre-colored fondant, or you can use gel food colors to dye white fondant.
- Luster dust – gives the fondant a lovely sheen and glow.
Videos
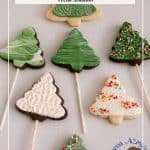
So here are my Christmas trees
I have shown you three different cookies here. The simple embossed mat, the marbled and the textured, as well as the 3D ones in white and green. And, you can see that they are simple and really easy to make. In fact, you don’t have to be a professional cake decorator to make simple cookies like this.

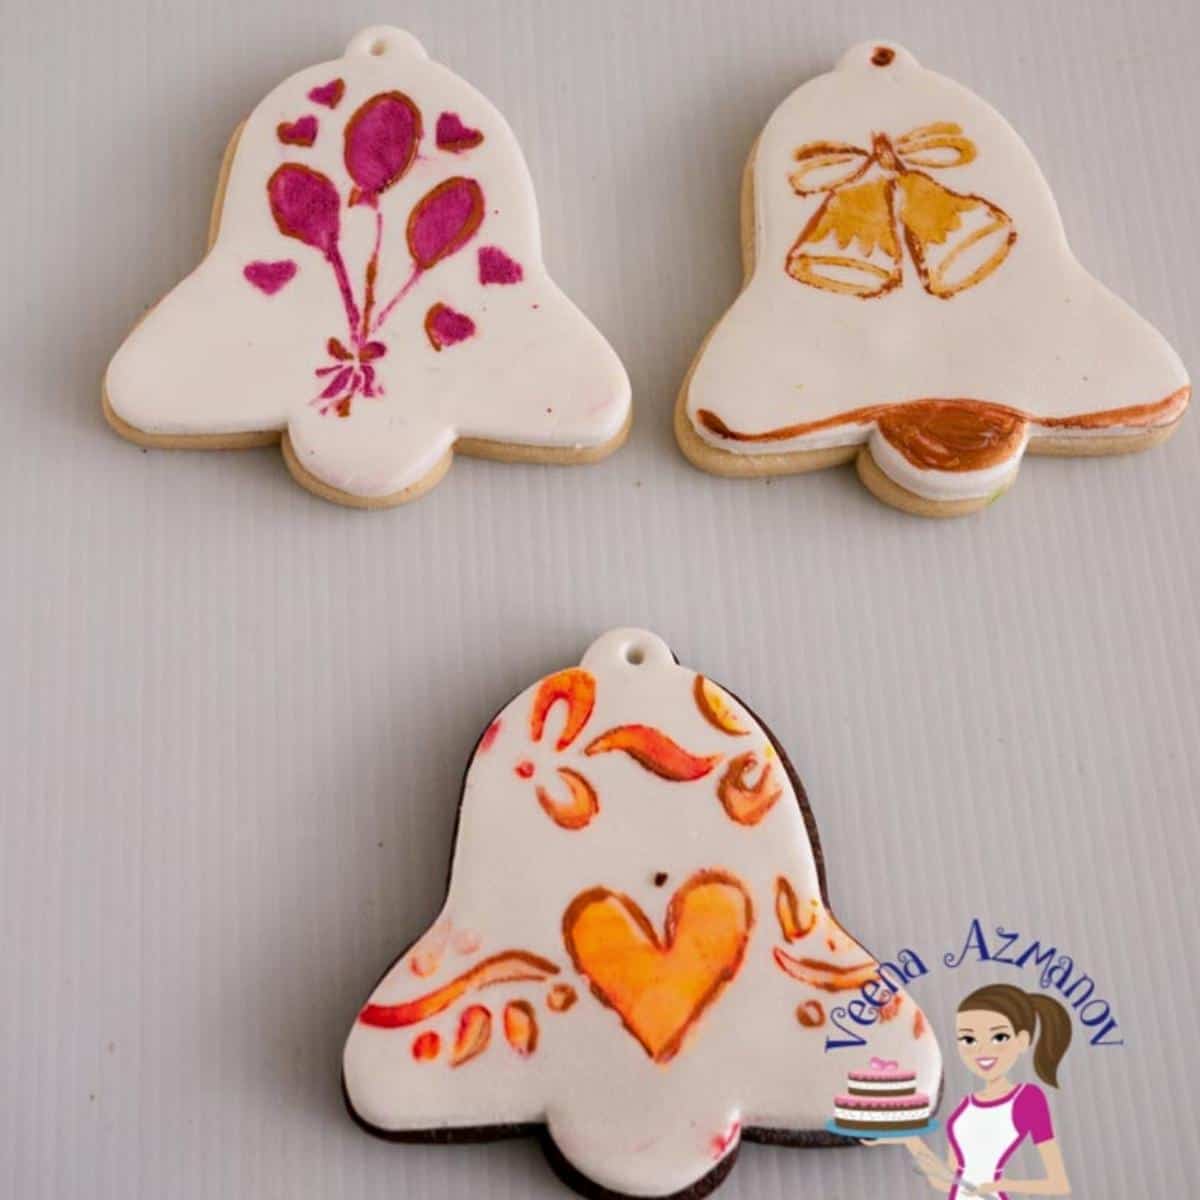
These are my Christmas bells
I have stenciled these – and I show you how I stencil each one and add more details. For example, two-tone shading, as well as bronze detailing, is defined.
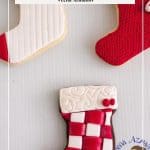
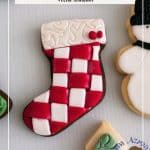
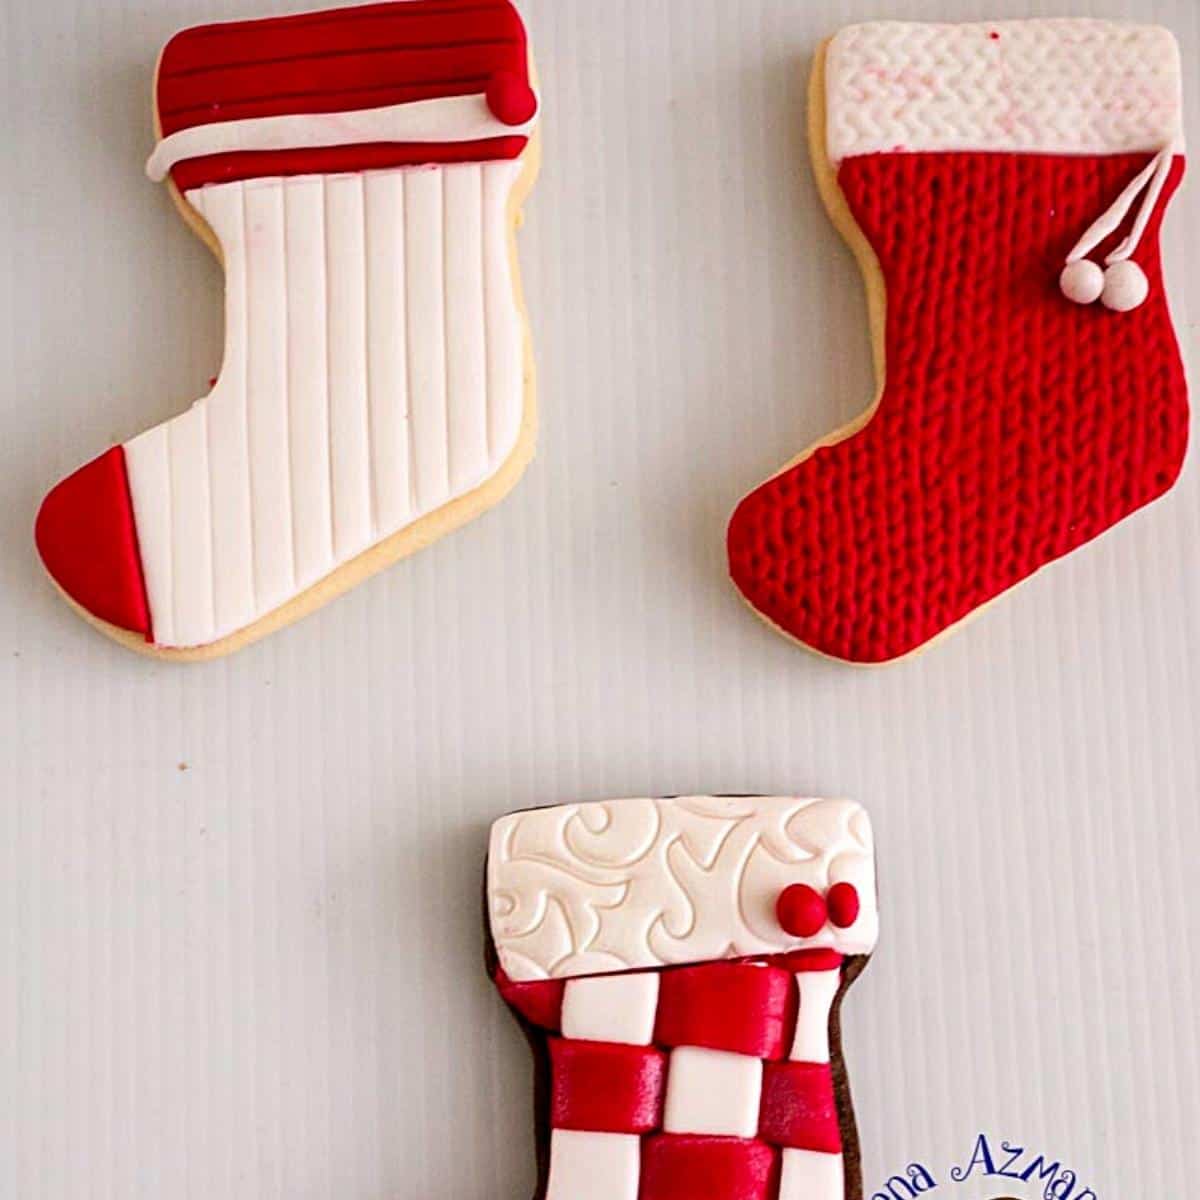
The Christmas stockings sugar cookies
For these, I have used the kit wear or sweater embossed mat, an embossed mat, and a fondant embossed mat. They do look impressive and may be difficult to make, but honestly? Actually, the embossing does most of the work for you. And, if you see the video, you will see they are SO SIMPLE and easy.
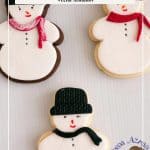
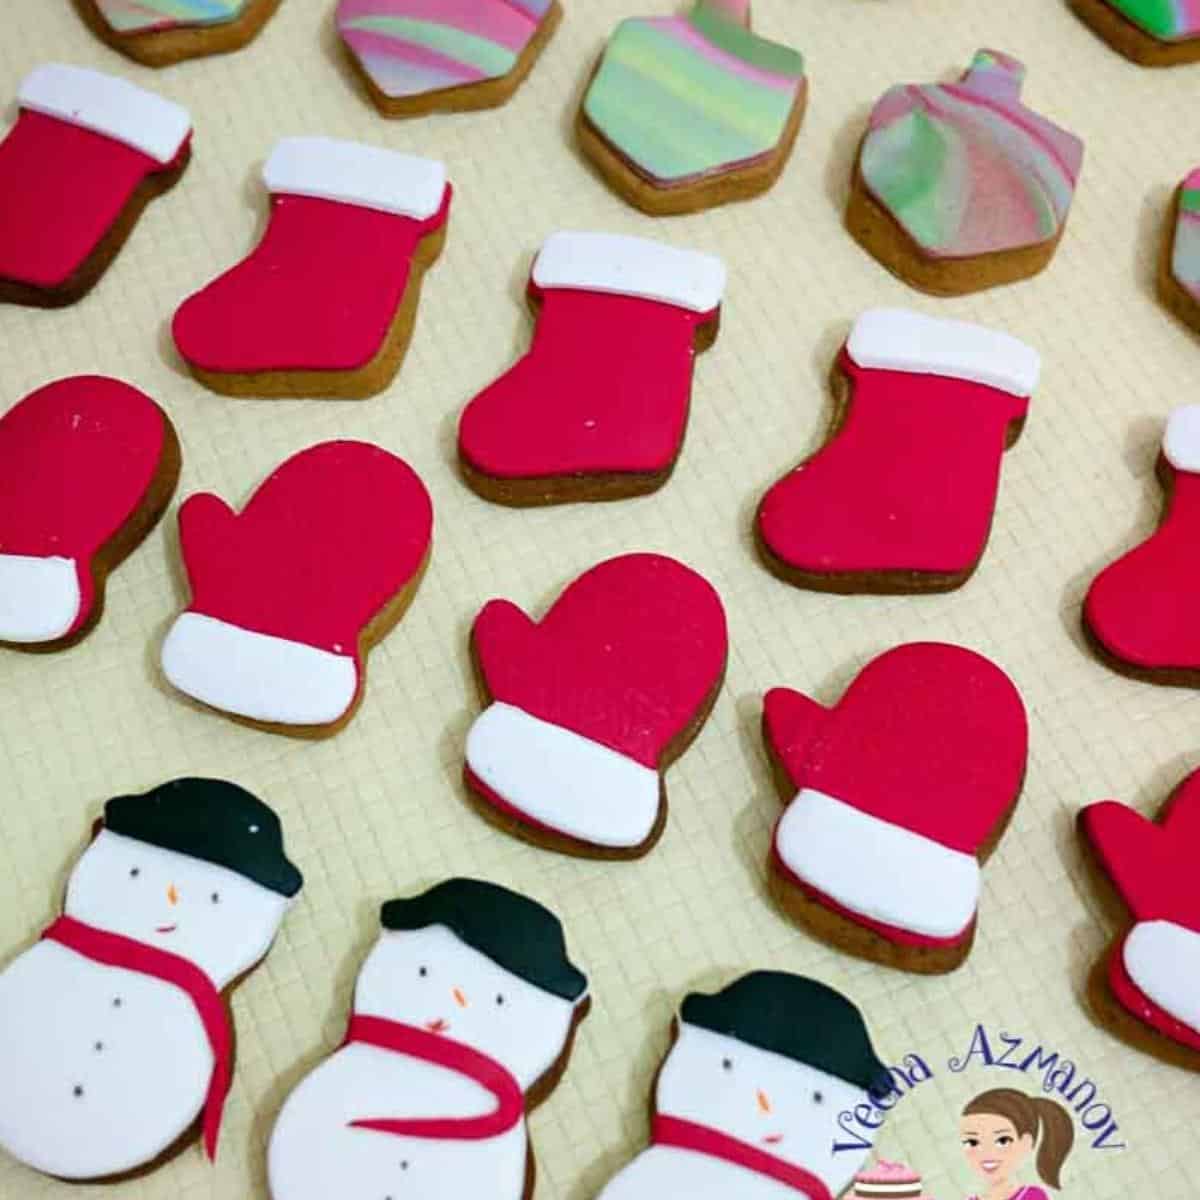
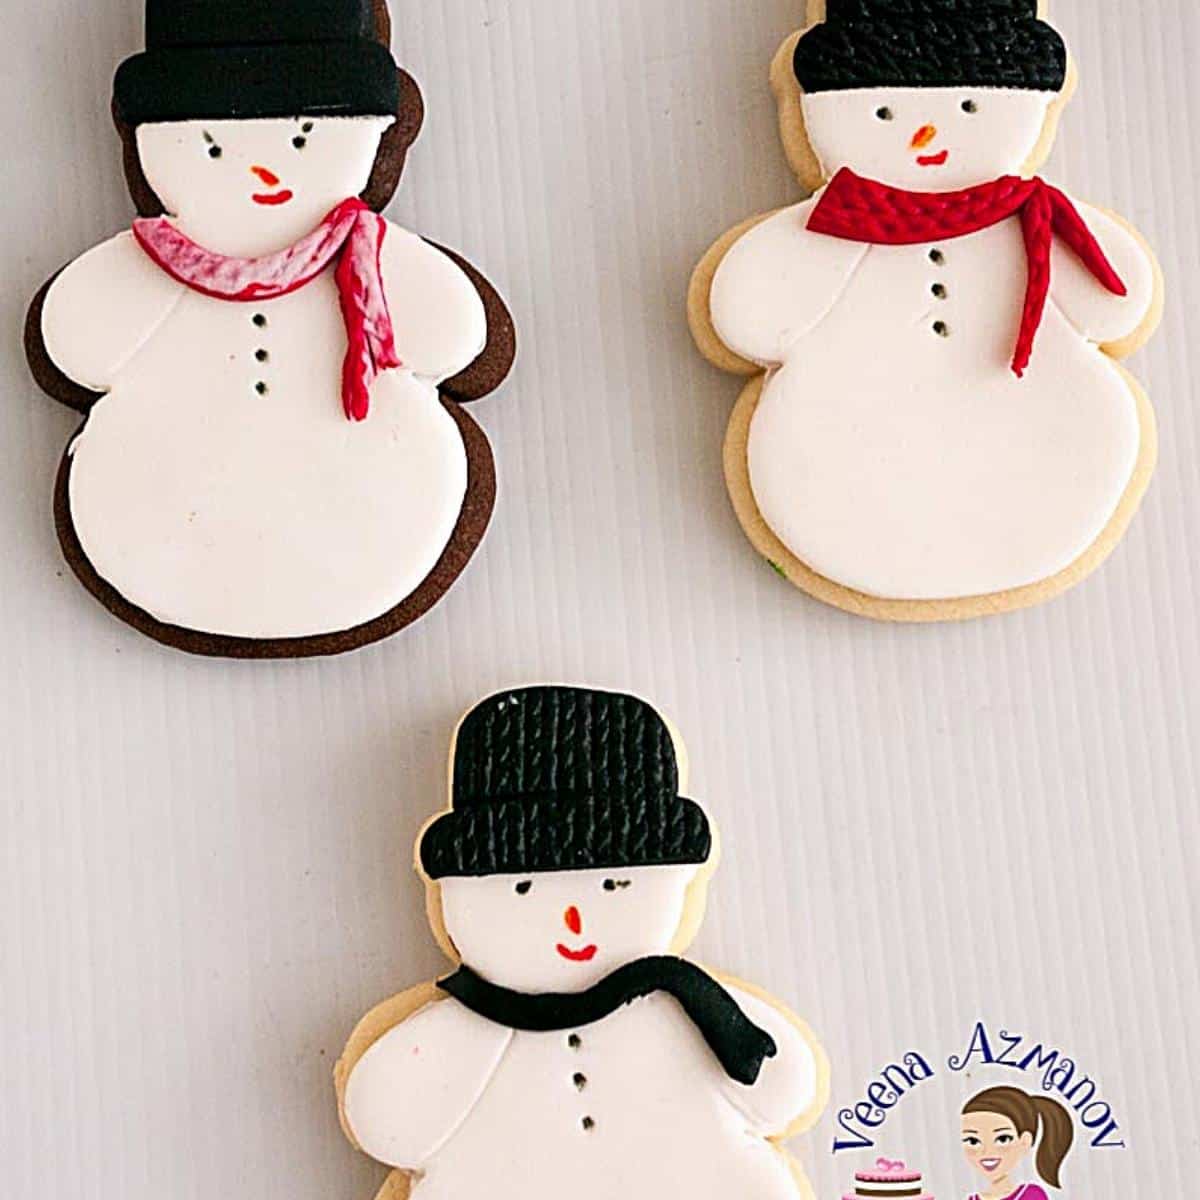
And finally, my Aadi’s favorite – The snowman sugar cookies
Again, I used the sweater silicon mold for the hat, but kept them simple. And, these are probably the easiest cookies in the whole batch.
Cookie dough that does not spread
- Dry ingredients – In a medium bowl, sift together the flour and salt. Set aside
- Creaming – In a large bowl of a stand mixer with the paddle attachment on medium speed, cream the butter and sugar until light and fluffy.
Pro tip – Do not skip this creaming step for the butter/sugar. Creaming works best when the butter is at firm room temperature, not soft room temperature. - Wet ingredients – Add the vanilla extract, followed by the eggs one at a time, making sure each is well incorporated.
Pro tip – I combined the vanilla extract with the eggs in the video. But you don’t necessarily have to do that. - Wet to dry – Next, add the flour mixture. Combine well, but do not over-mix at this time.
Pro tip – We do not want to activate the gluten in the dough, so avoid overmixing the flour.
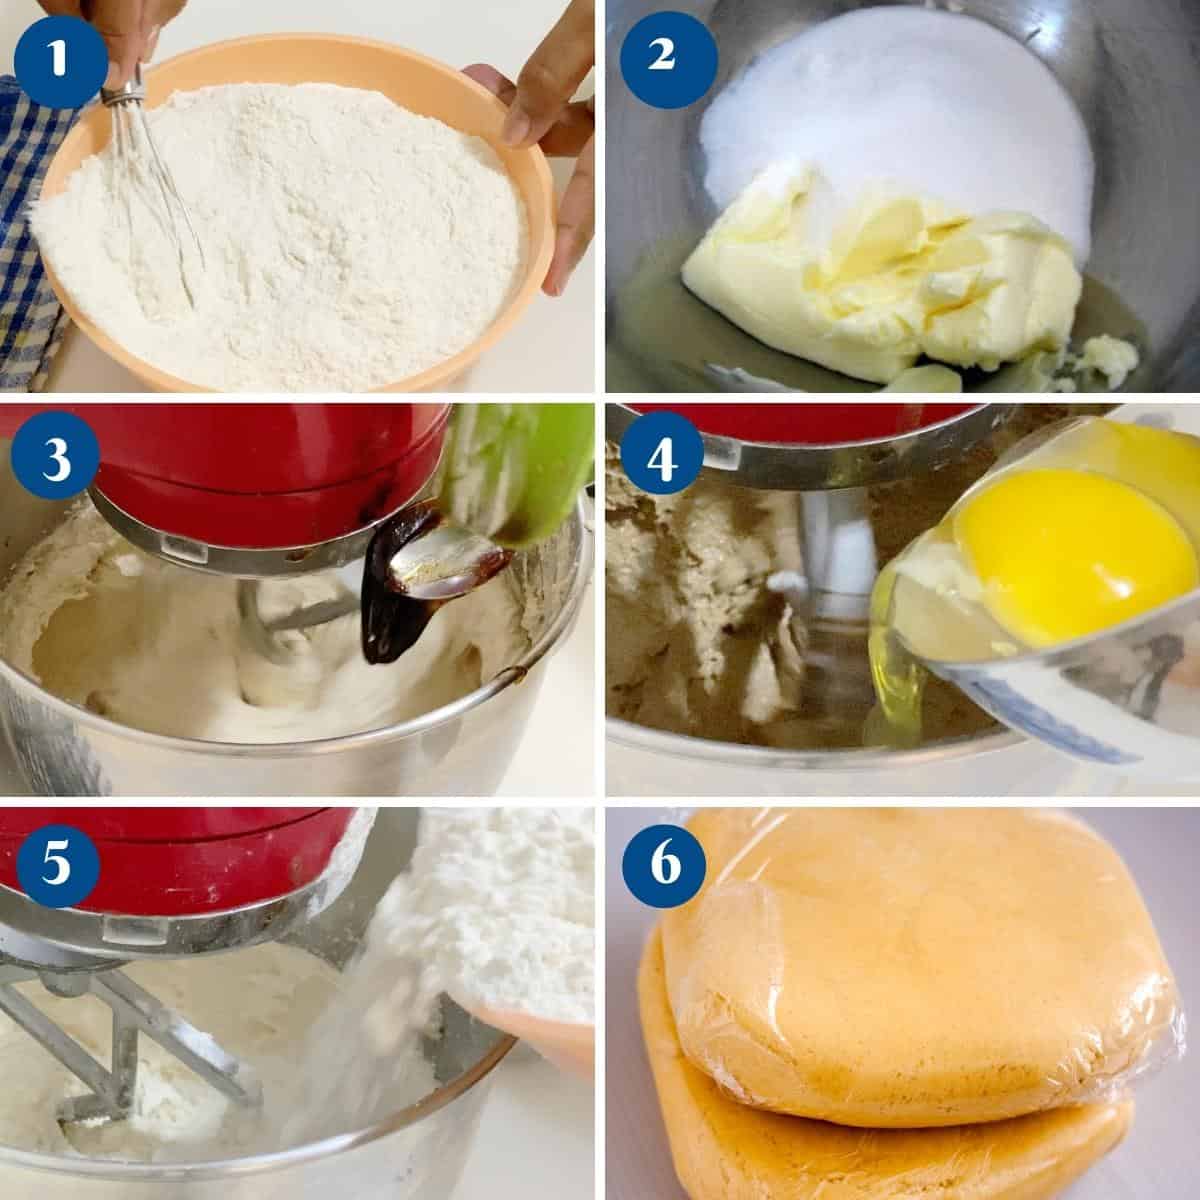
- Chill – Transfer the dough onto a work surface and divide the dough into two discs. Wrap each in plastic wrap and chill in the fridge until firm enough to roll, about 30 minutes to an hour at least.
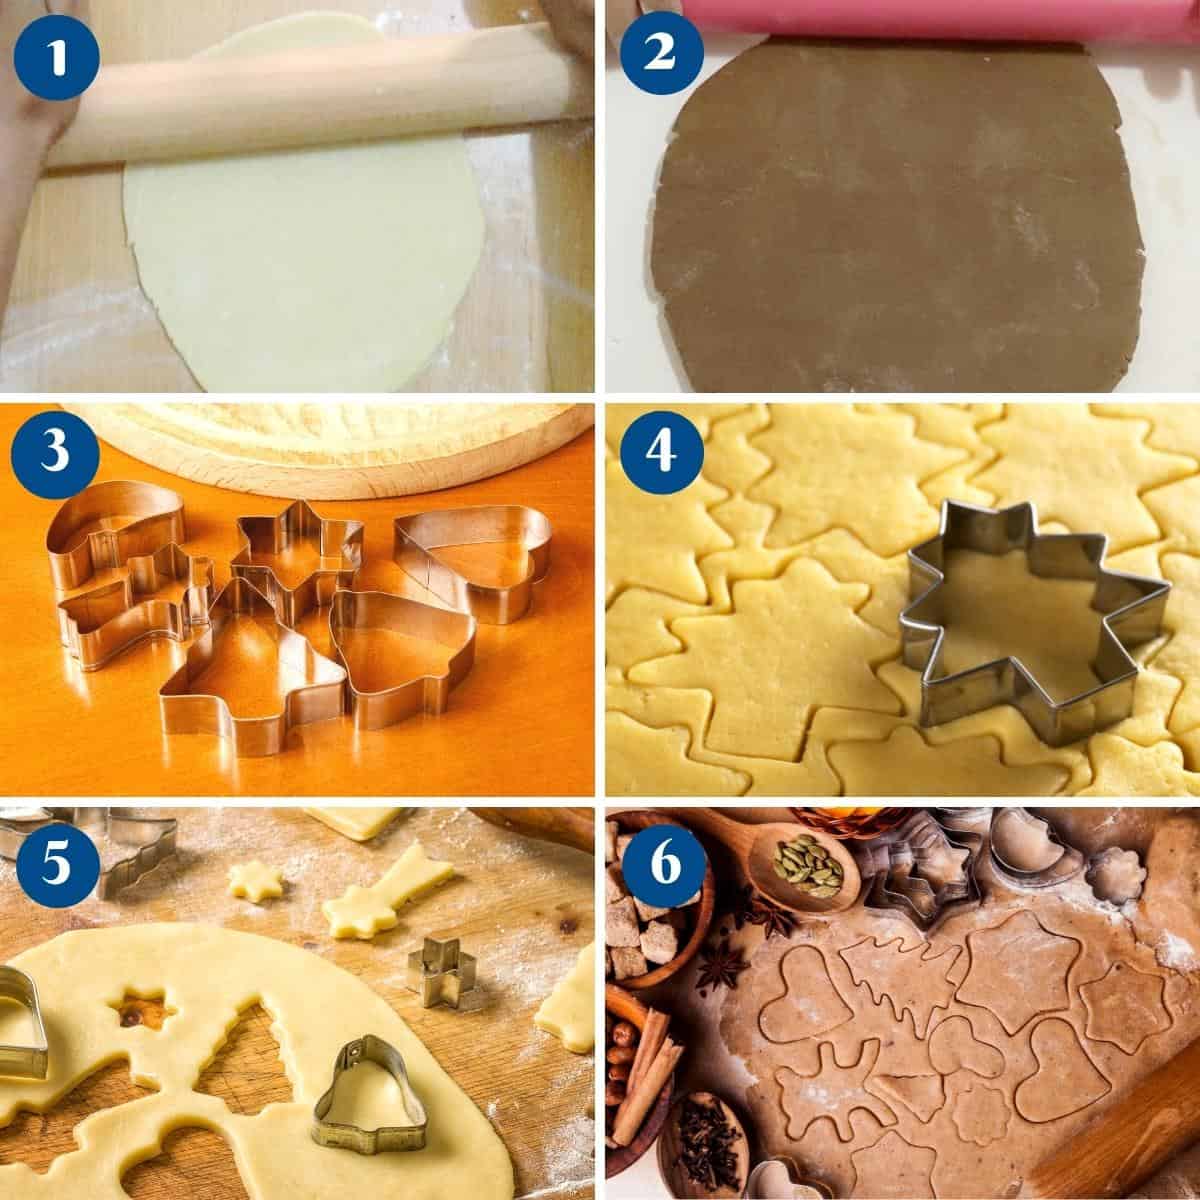
Pro tip – you can keep the dough chilled in the fridge for up to 4 days. You can even freeze the dough for up to a month. - Roll – Once the dough is chilled, roll the dough on a lightly floured surface evenly.
Pro tip – I roll my cookies to about 1/4-inch or 6 mm thickness using a rolling pin with spacers. Read – 10 Tips – how to roll and cut sugar cookies - Cut – Using your Christmas cookie cutter, cut out desired shaped cookies and place them on a cookie sheet one inch apart. I’ve used some 3-inch round and square cookie cutters for these cookies.
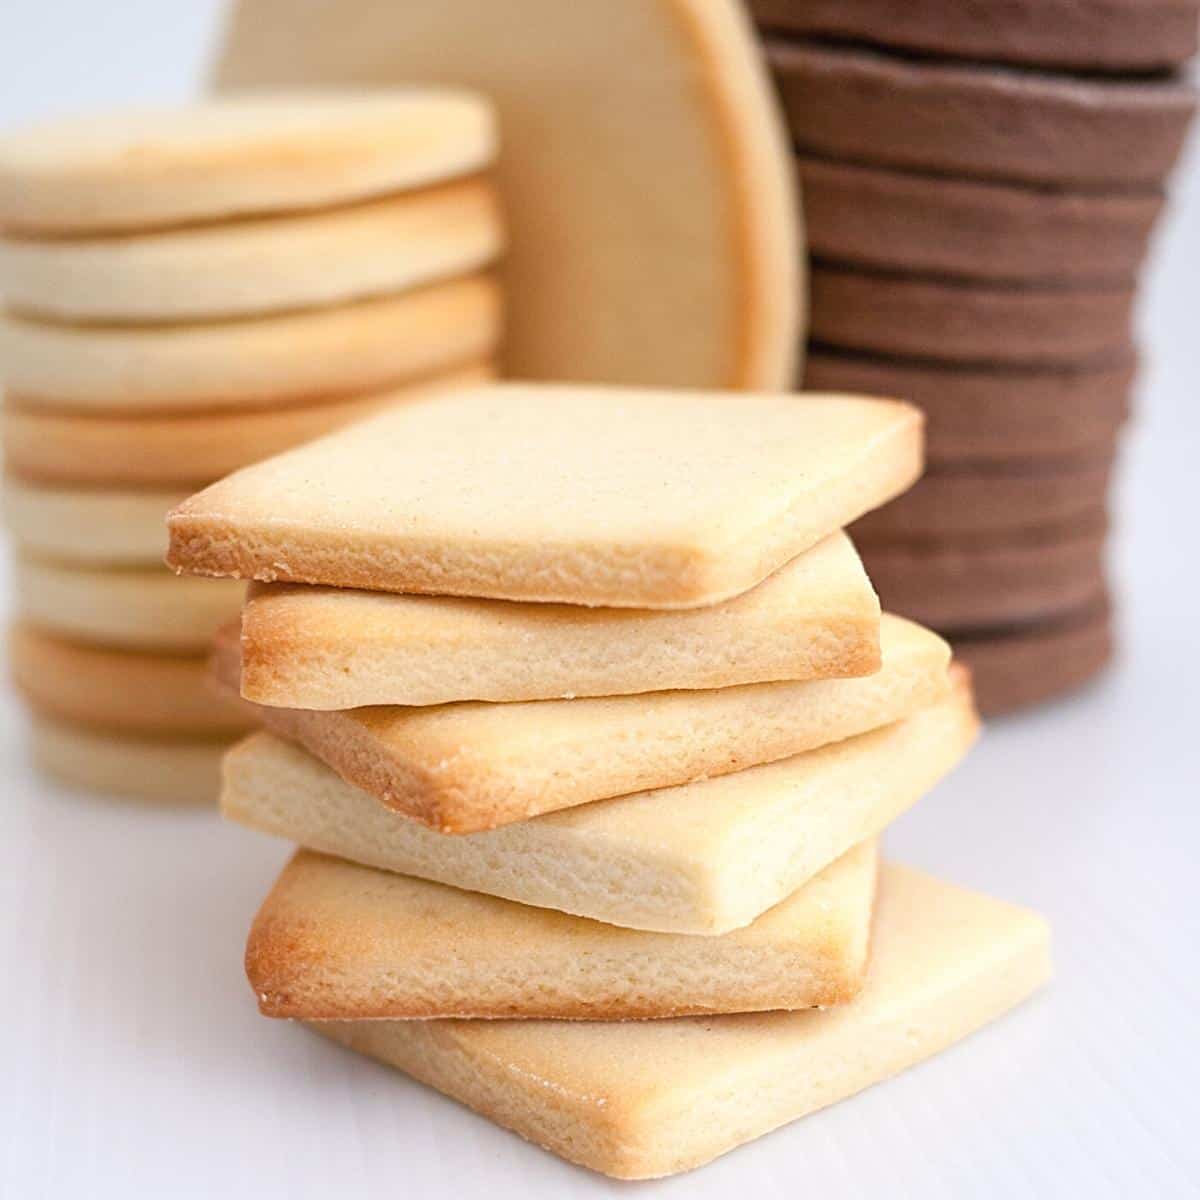
- Oven – Preheat the oven to 350°F/ 177°C/ Gas Mark 4
Pro tip – It is best to keep the cookies chilled in the refrigerator while the oven is preheating. Chilled cookies will prevent spreading. - Bake – Transfer the chilled cookies to the oven and bake on the middle rack for about 8 to 10 minutes, depending on the thickness of the cookies.
Pro tip – The cookies must not be dark around the edges. As soon as they get a slight color on the bottom, they are ready. They will continue to cook with the residual heat on the baking tray. - Cool – When baked, let cool on the baking sheet for 10 minutes, then transfer to a cooling rack to cool further before you transfer to an airtight container.
Pro tip – always frost cold cookies; otherwise, the icing will melt. - Frost the cookies as shown in the video.

For those who cannot watch the video above, here’s my YouTube video. And don’t forget to subscribe to my channel to see next week’s video. I have a new video every week. Sometimes two..!!
Tips for Success
- Always have all the ingredients at room temperature so the butter and sugar can cream until light and fluffy.
- Rest the dough before rolling the cookies. Resting helps the butter firm up again, which makes it easier to work and prevents spreading.
- If the rolled cookie dough is soft, put it back in the refrigerator for 15 minutes. Chilled cookie dough will give well-defined shapes, so you won’t have to struggle with them being so soft.
- Preheat the oven for a good 15 minutes, making sure the oven is at the right temperature. A cold oven will spread the cookies.
- Place cut cookies in the fridge while the oven is preheating to prevent them from spreading.
- When baked, leave the cookies on the baking sheet for 5 minutes. Then, transfer to a cooling rack to cool completely. This will prevent them from sweating on the bottom.
- When the cookie is done, the centers will still be melted and bubbling. CAUTION!! Keep the kids away as the sugar center is really hot.
- Do not try to move the cookies from the baking tray until they are completely cooled. This can cause the center to break off.
- I waited for 10 minutes until I could move the spatula under each cookie. Then, I moved it to the cooling rack.
- Attempt to add a ribbon through the hole only when completely cooled.

Frequently asked questions
These cookies will keep at room temperature for 5 to 6 days. You can even keep them in the fridge for up to 2 weeks. And of course, freeze them in the freezer for up to 2 months.
These cookies must be kept on the baking tray until the fondant is dry; otherwise, the fondant will get impressions and marks.
Orange – Orange is a good flavor that blends well with ginger and cinnamon.
Ginger, Cinnamon, Cloves – A good blend of spices, but you can go less or more. If you don’t like too much cinnamon, you can reduce it to one teaspoon of cinnamon.
Spice mixes – try gingerbread spice, pumpkin spice, chai spice for a different flavor.
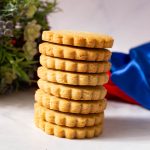
The Best Sugar Cookies Recipe
Vanilla sugar cookies are a classic treat loved for their simplicity and delicious flavor. These cookies are made with basic ingredients like flour, butter, sugar, and vanilla extract, resulting in a sweet and buttery cookie with a hint of vanilla. They're perfect for any occasion and can be decorated with icing, sprinkles, or enjoyed plain.
Video
Ingredients
- 470 g (3¾ cups) All-purpose flour
- ½ tsp Kosher salt
- 226 g (1 c) Unsalted butter room temperature
- 200 g (1 cup) White sugar
- 2 large Eggs
- 2 tsp Vanilla extract
- 420 g (3⅓ cups) All purpose flour
- 50 g (½ cups) Cocoa powder
- 226 g (1 cups) Unsalted butter room temperature
- 200 g (1 cups) White sugar
- 2 large Eggs
- 2 tsp Vanilla extract
- ½ tsp Coffee powder
Method
- Dry ingredients – In a medium bowl, sift together the flour and salt. Set aside.Note: If making chocolate sugar cookies, add the cocoa powder and coffee too.470 g All-purpose flour, 1/2 tsp Kosher salt
- Creaming – In a large bowl of a stand mixer with the paddle attachment on medium speed, cream the butter and sugar until light and fluffy.226 g Unsalted butter, 200 g White sugar
- Wet ingredients – Add the vanilla extract followed by the eggs one at a time making sure each is well incorporated.2 large Eggs, 2 tsp Vanilla extract
- Wet to dry – Next, add the flour mixture. Combine well, but do not over-mix at this time.
- Chill – Transfer the dough onto a work surface and divide the dough into two discs. Wrap each in plastic wrap and chill in the fridge until firm enough to roll About 30 minutes to an hour at least.
- Roll – Once the dough is chilled, roll the dough on a lightly floured surface evenly. Pro tip – I roll my cookies to about 1/4-inch or 6 mm thickness using a rolling pin with spacers. Read – 10 Tips – how to roll and cut sugar cookies
- Cut – Using your favorite cookie cutter cut out desired shaped cookies and place them on a cookie sheet one inch apart. I've used some 3-inch round and square cookie cutters for these cookies.
- Oven – Preheat the oven to 350°F/ 177°C/ Gas Mark 4
- Bake – Transfer the chilled cookies to the oven and bake on the middle rack for about 8 to 10 minutes, depending on the thickness of the cookies.
- Cool – When baked, let cool on the baking sheet for 10 minutes, then transfer to a cooling rack to cool completely. Then transfer to an airtight container.
Notes
- Use Room Temperature Ingredients: Make sure your butter, eggs, and any other dairy ingredients are at room temperature. This helps them incorporate better into the dough.
- Cream Butter and Sugar Thoroughly: Creaming the butter and sugar together until light and fluffy helps create a tender cookie texture.
- Don’t Overmix: Once you add the flour mixture, mix the dough just until everything is combined. Overmixing can result in tough cookies.
- Chill the Dough: Chilling the dough for at least an hour (or overnight) helps solidify the fats in the dough, which can prevent spreading and result in a better texture.
- Roll Dough Evenly: When rolling out the dough, try to keep it an even thickness to ensure even baking. Using spacers or rolling guides can help achieve this.
- Use Parchment Paper: Line your baking sheets with parchment paper to prevent the cookies from sticking and to make cleanup easier.
- Preheat Your Oven: Make sure your oven is fully preheated before baking the cookies to ensure they bake evenly and at the right temperature.
- Rotate Baking Sheets: If you’re baking multiple trays of cookies at once, rotate the trays halfway through baking to ensure even cooking.
- Cool Baking Sheets: Allow baking sheets to cool completely between batches to prevent the dough from spreading too much.
- Decorate with Care: If decorating with icing or frosting, make sure the cookies are completely cool before decorating to prevent the icing from melting.
Equipment you will need


Nutrition
Tried this recipe?
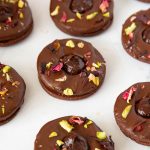
Mention @veenaazmanov_kitchen or tag #veenaazmanovkitchen!- Christmas MM Cookies or Candy Christmas Cookies
- Christmas Tree Cookies Gingerbread
- and Christmas Star Cookies or Christmas snowflake cookies
- Christmas Wreath Cake or Christmas Pavlova
- Christmas Spritz Cookies or Stenciled Christmas Sugar Cookies
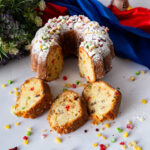
- Cranberry Cake Christmas, Yule log cake, or Maripan cake
- See all holiday cookies or see all Christmas recipes


Don’t lose this recipe! Save it for Later!
📌 Save this Recipe for later on Pinterest so you can easily find it again.
⭐ Add Veena Azmanov Kitchen to your Google Preferred Sources.
It helps Google show you more of our recipes.
📧 Subscribe for new recipes delivered to your inbox.
🎥 Follow us for more recipes


I made these for my kids Christmas party last week. They were so pretty I was hoping they’d stay on the table longer but they were the first to get over. The kids loved it. The sugar is just right and the cookie is not dense or but rather fluffy, just the way kids like it.
Thank you so much, Gail. So happy you had success with this recipe and that the kids enjoyed these so much. Thank you for coming back to write this feedback. Appreciate it very much. I love hearing from those who try my recipes.
I am so happy to get your blog Veena. I love decorating cookies but not a big fan of Royal Icing so these with fondant worked out great. I also used your Vanilla Sugar Cookies which by the way is the BEST Cookie recipe ever. I’ve purchased cookie recipes from other bloggers but this one. Sure is a winner.
Thank you so much, Matheson. Welcome to my blog. So happy you had success with this recipe and that you enjoyed these cookies so much. Yes, I have not patience with royal icing too. I do think very highly of my Vanilla Sugar Cookies too. Thank you for coming back to write this feedback. Appreciate it very much. I love hearing from those who try my recipes.
Hi,
I have been asked to make bride and groom cookies as wedding favors. My question is if I use fondant to decorate rather than royal icing; how can I ensure that the fondant stays firm when individually wrapped?
Thanks
Cheryl
hi Cheryl. Depending on the weather, fondant gets dry on the cookies in a few hours so you can still stack them but unlike royal icing it wont’ get firm. I have an old recipe for rolled royal icing which I usually mix in with my fondant because it’s a bit hard to work with it. You can try a small batch and see if that works for you.
These look amazing! I love all of your gorgeous designs!
Thank you Emily !
These cookies are gorgeous!! I love all your creative designs!
Thank you so much Emily!
What gorgeous cookie designs! Thank you so much for making that video – it really takes the guesswork out of decorating cookies for those of us who have never tried it. I really love the idea to put cookies on sticks. I can see adults enjoying it too! And you could stick the cookies in a piece of decorative foam and use it as a centerpiece!
Luci’s Morsels | fashion. food. frivolity.
Absolutely Luci… the creativity for this is endless. You are very welcome – Glad to see you enjoying my video. Thank you so much for your lovely Comment
Those are absolutely gorgeous! I’m awful at decorating anything, and I’m pretty sure I’d just give up and eat the cookies plain. Haha! Great job!
Than you so much Raia. I know what you mean. They do take a little patience but I’m sure you can do it. Thanks
Wow! These Christmas cookies are absolutely beautiful! I don’t know if I would want to eat them, haha!
Thank you Kristine.. Yeah I know what you mean.. They are too pretty to eat ain’t they. I feel the same about decorated goodies… The kids had no problem gobbling them up though..
You are to talented. These cookies are amazing! I wish I would have skills to make such beauties myself 🙂
Thank you so much Igor – Thank you ! They are truly easy – I’m sure you can