Christmas Star Cookies


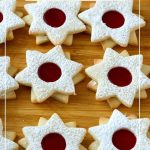

Looking to create a sweet sensation this Christmas that will dazzle your guests and leave them begging for more? Look no further than these show-stopping Star Cookies. With their delicate shape and irresistible taste, these star-shaped sandwich cookies are guaranteed to bring a touch of elegance to your holiday feast.

Star-shaped cookies hold great significance during the holidays, as they symbolize the guiding light of the Christmas season. Just as the star led the way for the three wise men to baby Jesus, these show-stopping Star Cookies have the power to bring people together and create cherished moments of joy and togetherness. The familiar shape of the star evokes feelings of wonder and magic, reminding us of the beauty and miracles that can happen during this special time of year.
These delightful treats hold a more profound meaning beyond their delicious taste. As you gather around the table to enjoy these star cookies with loved ones, you are savoring a sweet indulgence and the love and warmth permeating the holiday season. The simple act of baking and sharing star-shaped cookies can foster a sense of unity and connection, reminding us of the importance of family, friends, and the true spirit of Christmas.
By incorporating these star cookies into your Christmas feast, you are adding a visually stunning touch to your dessert table and a symbol of hope and joy.
Why is this the best recipe?
- The secret to the greatness of this recipe lies in its ability to transcend the boundaries of a simple treat. These star cookies are not just ordinary cookies; they hold greater significance, making them the best choice for your holiday spread. With every bite, they convey messages of love, togetherness, and the pure joy of celebrating the holiday season.
- Not only do these cookies look stunning, but they also have a beautiful story behind them. Their presence on your dessert table will create a sense of wonder and enchantment among your guests, making them feel like they’ve entered a magical winter wonderland. The star shape symbolizes hope, shining brightly to guide us through the darkest nights while also representing the joy and excitement of the holiday season.
- Moreover, these star cookies are a testament to the power of sharing. As you prepare and bake these delightful treats, you’ll immerse yourself in the warmth and joy of creating something with love. And when you present them to your loved ones or guests, you share a delicious cookie and a piece of yourself, your time, and your care.

Ingredients and substitutes
- Flour forms the backbone of any good cookie recipe; these star cookies are no exception. All-purpose flour provides structure and stability to the dough, ensuring that your cookies bake evenly and hold their shape.
- Baking powder is the leavening agent that gives these star cookies a light and airy texture. It works with the flour to create a tender and delicate crumb, making each bite melt in your mouth.
- Powdered sugar sweetens these star cookies and contributes to their soft and tender texture. Its fine texture blends seamlessly with the other ingredients, ensuring a smooth and velvety dough that’s easy to work with.
- Egg yolks add richness and moisture to these star cookies. They provide a smooth and creamy texture and act as a binding agent, holding the dough together and giving the cookies a tender bite.
- Finally, vanilla extract adds a touch of warmth and depth of flavor to these star cookies. Its sweet and fragrant notes enhance the overall taste experience, making each bite a delightful treat for your taste buds.

Step-by-step: Star sandwich cookies
- First, preheat your oven to 350°F/175°C/Gas mark 4 to ensure your cookies bake evenly and achieve that perfect color.

- In a small bowl, combine the dry ingredients – flour, baking powder, and salt. Set aside.
- For the wet ingredients, cream the room-temperature softened butter and powdered sugar in an electric mixer or a bowl and a wooden spoon. Add the vanilla extract and make sure everything is well combined.
- Next, incorporate the dry ingredients into the wet mixture. Mix until a firm dough forms, scraping the sides of the bowl to ensure all the ingredients are thoroughly combined.
- Once your dough is mixed to perfection, bring it all together into a ball. Wrap it in plastic and chill in the refrigerator for 15 minutes or until easy to roll.

- Now, it’s time to roll the dough. Lightly flour a clean surface and roll the dough to your 1/4 inch thickness, considering that a thinner dough will yield crisper cookies, while a thicker one will result in softer, chewier treats.
- To achieve those iconic star-shaped cookies, use a cookie cutter with a star-shaped design, making sure to press firmly to create clean and defined edges.
- You will need the same number of star-shaped cookies for the top cookies with centers. But, use a small round (or star-shaped) cookie cutter to cut out the center, as shown in the video.
- As you cut out each star shape, carefully transfer it to a parchment-lined baking sheet, leaving enough space between each cookie to allow for some expansion during baking. Maintaining consistent sizing and thickness ensures even baking and uniformity in the final presentation.
- Place your baking sheets in the preheated oven and let the magic happen. Depending on their thickness, these will take about 7 to 8 minutes to bake. Keep a close eye on the cookies to prevent over-browning, as they can go from perfectly golden to burnt in minutes. Once they are beautifully baked to a golden hue, remove them from the oven and let them cool completely on wire racks before moving on to the next step.
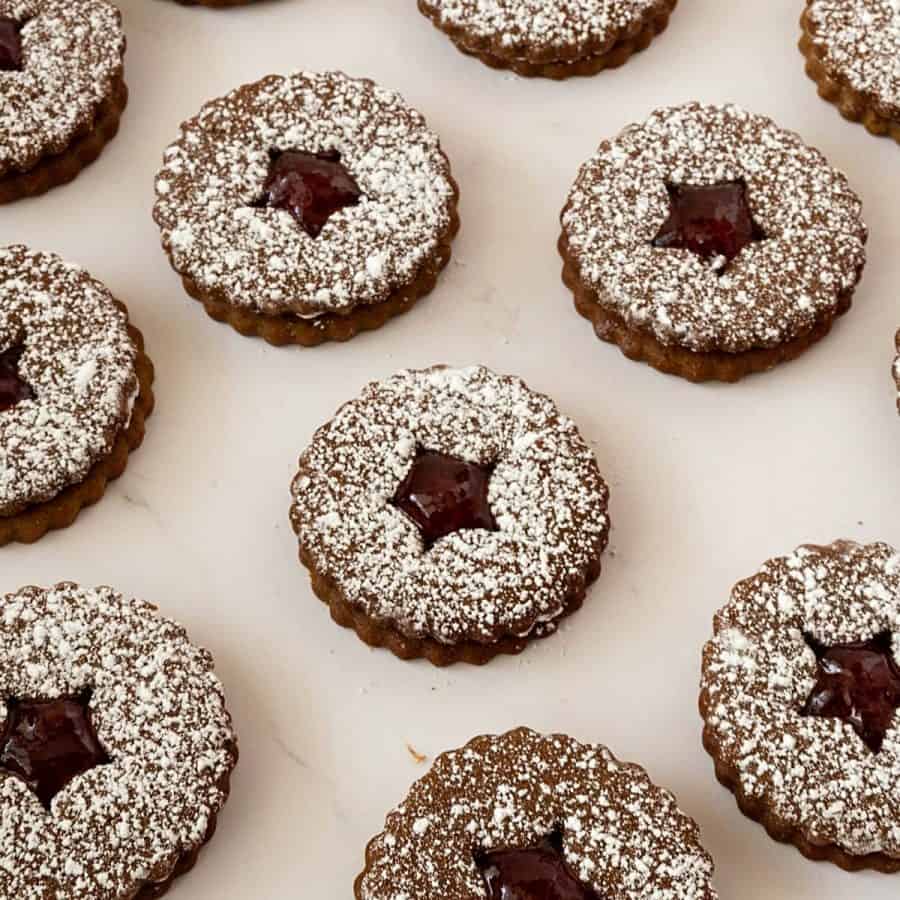
- Now that you have a tray full of perfectly baked star cookies, it’s time to take them to the next level by turning them into delightful sandwich cookies. Match up cookies of similar sizes and spread a generous layer of your favorite filling – creamy chocolate ganache, tangy raspberry jam, or velvety buttercream ( I used strawberry jelly) – on the flat side of one cookie.
- Dust the top cookies with powdered sugar. Gently press the top cookie on top with holes to create a charming sandwich. I like the placement of the top cookie offset so the corners are in between rather than over each other.
- Repeat this process until all the star cookies have found their perfect match. The filling will enhance the taste and add visual appeal and a lovely surprise when bitten into.

Tips for Success
- First and foremost, measure all your ingredients correctly before you begin. Baking is a science, and accurate measurements are crucial for achieving the perfect texture and taste. Use the appropriate measuring cups and spoons, and level each ingredient to ensure precision.
- When it comes to the dough, chilling is key. After you’ve mixed all the ingredients, resist the temptation to skip the chilling step. Refrigerating the dough for at least 30 minutes to an hour will make it easier to handle and allow the flavors to meld and the dough to firm up for better shape retention during baking.
- While rolling out the dough, remember to flour your work surface and rolling pin lightly. This will prevent the dough from sticking and tearing, ensuring smooth and even cookies. Roll the dough to a consistent thickness, ideally around 1/4 inch, to ensure all the cookies bake evenly.
- Once you start cutting out the star shapes, it’s important to work efficiently. Arrange the stars on a baking sheet lined with parchment paper, leaving enough space between each cookie to allow for spreading during baking. If you don’t have multiple baking sheets, you can rotate them in and out of the refrigerator between batches to keep the dough chilled.
- When it’s time to bake, preheat your oven and set a timer. Keeping a close eye on the cookies as they bake will prevent them from over-browning or burning. The exact baking time will depend on your oven, so it’s a good idea to bake a test cookie first to gauge the optimal baking time for your specific setup.
- Once the cookies have cooled completely, it’s time for the fun part: assembling the sandwiches. Gently press another cookie on top to create a charming sandwich. Repeat this process until all the star cookies have found their perfect match. The filling will enhance the taste and add visual appeal and a lovely surprise when bitten into.

Troubleshooting
- One common issue when assembling the sandwich cookies is that they might not stick together properly. If your cookies are not staying together, try spreading a thin layer of frosting on the bottom of one cookie before pressing another cookie on top. This will act as a glue and help the cookies stick together more effectively.
- Another problem you might encounter is that the filling overflows or oozes out from the sides when you press the cookies together. To prevent this, make sure not to overfill the cookies. Use a teaspoon or piping bag to add the filling, placing it closer to the center of the cookie rather than spreading it to the edges. This will help keep the filling contained within the cookies.
- Additionally, if you find the cookies turning out too dry or crumbly, you may be overbaking them. Keep a close eye on the baking time and remove the cookies from the oven as soon as they are lightly golden around the edges. Overbaking can result in dry and brittle cookies, so be mindful of the baking time to achieve that perfect texture.
- Finally, if you’re looking to make your star cookies gluten-free or vegan, there are simple substitutions you can make. Instead of using all-purpose flour, opt for a gluten-free flour blend or almond flour for a gluten-free version. For a vegan option, replace the butter with coconut oil or a vegan butter substitute, and use non-dairy milk in the frosting.


Frequently asked questions
If appropriately stored in a cookie box, these will stay fresh for up to a week. Place cookies in a cookie jar or an airtight container to prevent them from going soft.
Yes, you can freeze the dough wrapped well in a ziplock bag. Then, when ready to use, thaw in the fridge overnight.
You can also freeze the rolled cookies on a cookie sheet between parchment paper. Wrap the tray in plastic to prevent drying out.
Alternatively, freeze the baked cookies between parchment papers and thaw in the fridge overnight when ready to use.
These cookies take 8 to 10 minutes, depending on the thickness. The outside of the cookies will have a slight color. Always consider that the cookies will continue to cook on the hot baking pan even after you take them out of the oven.
Leavening will make the cookies puffy with rounded corners, removing those sharp edges. They will also spread a bit. Creaming the butter and sugar until light and fluffy is very important in making these cookies light and airy without leavening.
Chill the dough before baking to keep your star cookies in their desired shape. This step helps solidify the fats in the dough, reducing the chances of spreading. Additionally, avoid overmixing the dough, as this can incorporate excess air and make the cookies spread more. Using a sturdy baking sheet and cooling the sheet between batches can also help control spreading.
To maintain the freshness and texture of your star cookies, store them in an airtight container at room temperature. Placing a piece of bread in the container can help absorb excess moisture and keep the cookies soft. If you live in a humid climate, adding a desiccant packet can further prevent the cookies from becoming stale. If you need to store the cookies for an extended period, you can also freeze them in an airtight container or freezer bag.
Absolutely! Baking is all about experimentation and adapting recipes to your preferences. While the star cookie recipe suggests using vanilla extract, feel free to substitute it with almond or peppermint extract for a different flavor twist. If you have dietary restrictions, you can explore alternatives like gluten-free flour or dairy-free butter. Just remember that ingredient substitutions may affect the texture and taste. So, it’s best to make small test batches before committing to a large quantity.
Christmas Star Cookies
Looking to create a sweet sensation this Christmas that will dazzle your guests and leave them begging for more? Look no further than these show-stopping Star Cookies. With their delicate shape and irresistible taste, these star-shaped sandwich cookies are guaranteed to bring a touch of elegance to your holiday feast.
Video
Ingredients
- 2 cups (250 g) All-purpose flour
- ½ teaspoon Baking powder
- 1¼ teaspoon Salt
- 1 cup (227 g) Unsalted butter soft at room temperature
- ½ cup (60 g) Powdered sugar
- 1 large Egg yolk
- 1 tsp Vanilla extract
- ½ cup (170 g) Strawberry jam
Method
- Oven – Preheat your oven to 350°F (175°C) and line two baking sheets with parchment paper.
- Dry ingredients – Whisk together the all-purpose flour, baking powder, and salt in a medium-sized mixing bowl. Set this dry mixture aside.2 cups All-purpose flour, ½ teaspoon Baking powder, 1¼ teaspoon Salt
- Wet ingredients – In a large mixing bowl, cream the softened butter and granulated sugar until it becomes light and fluffy. You can use an electric mixer or a wooden spoon for this step. Add the egg yolk and vanilla extract to the butter and sugar mixture. Mix until well combined.1 cup Unsalted butter, ½ cup Powdered sugar, 1 large Egg yolk, 1 tsp Vanilla extract
- Wet to dry – Gradually add the dry ingredient mixture to the wet mixture. Mix until the dough comes together. It should be smooth and slightly soft.
- Chill – Divide the dough in half. Wrap the portion in plastic and chill in the fridge for at least 30 minutes.
- Roll – Take one portion of the dough and roll it out on a lightly floured surface or between two sheets of parchment paper to about 1/4-inch thickness. You can use a rolling pin with spacers to do this.
- Roll portion one – Use star-shaped cookie cutters to cut out cookies from the rolled dough. Place the star-shaped cookies on the prepared baking sheets, leaving some space between them.
- Roll portion two – Use the same star-shaped cookie cutters and cut out cookies from the rolled dough. Place the star-shaped cookies on the prepared baking sheets. Using a small round cutter, cut out the center of the cookies to create a window for the jam.
- Repeat and re-roll – Gather any leftover dough scraps, re-roll them, and cut out more star shapes until you've used up all the dough. You should end up with about 48 individual star-shaped cookies.
- Bake – Place the baking sheets in the preheated oven and bake for about 7-8 minutes or until the edges of the cookies turn a light golden brown. Keep a close eye on them to avoid overbaking.
- Cool – Remove the cookies from the oven and let them cool on the baking sheets for a few minutes. Then, transfer them to wire racks to cool completely.
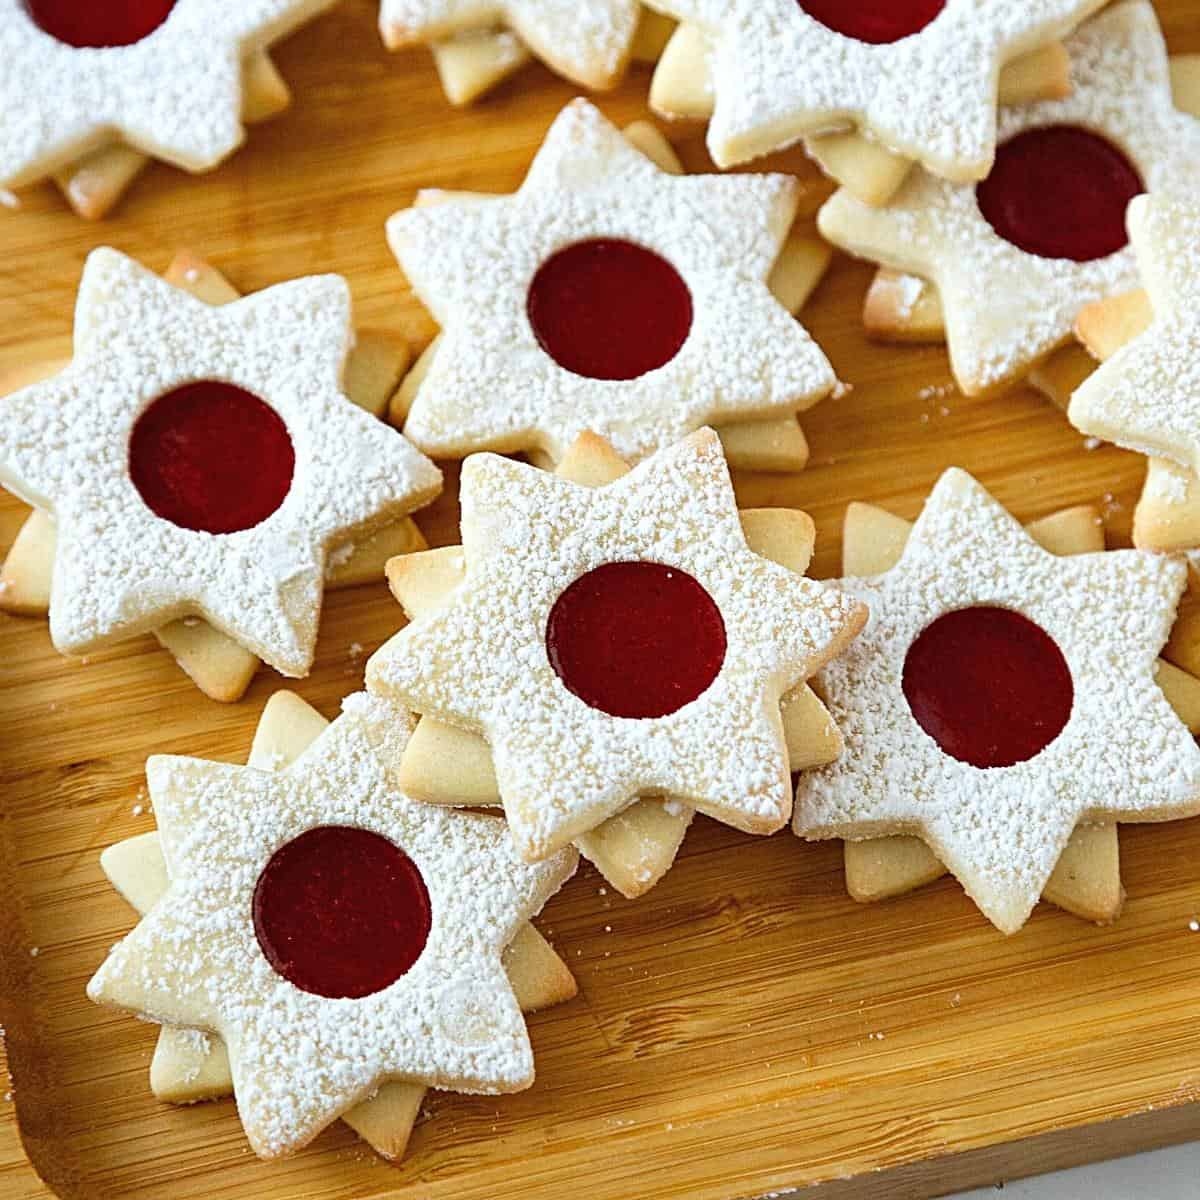
- Assemble – Once the cookies are completely cooled, take the bottom cookies (without the center hole) and spread a small amount (about 1/2 teaspoon) of strawberry jam on the flat side of the cookie. Dust the bottom cookies with powdered sugar, then place on top to create a sandwich. Gently press them together to distribute the jam evenly. I like to place the top cookie offset from the bottom so they do not meet. This highlights the star shapes, as you can see in the video. Note – I used strawberry jelly, but the choice of fillings is endless, from creamy chocolate ganache, tangy raspberry jam, or velvety buttercream; you can even use Nutella or Biscoff spread.1/2 cup Strawberry jam
- Serve – Your star sandwich cookies are now ready to be enjoyed! Serve them on a platter and watch them disappear.
Notes
- First and foremost, make sure to properly measure all your ingredients before you begin. Baking is a science, and accurate measurements are crucial for achieving the perfect texture and taste. Use the appropriate measuring cups and spoons, and level off each ingredient to ensure precision.
- When it comes to the dough, chilling is key. After you’ve mixed all the ingredients together, resist the temptation to skip the chilling step. Refrigerating the dough for at least an hour will not only make it easier to handle, but it will also allow the flavors to meld and the dough to firm up for better shape retention during baking.
- While rolling out the dough, remember to lightly flour your work surface and rolling pin. This will prevent the dough from sticking and tearing, ensuring smooth and even cookies. Roll the dough to a consistent thickness, ideally around 1/4 inch, to ensure all the cookies bake evenly.
- Once you start cutting out the star shapes, it’s important to work efficiently. Arrange the stars on a baking sheet lined with parchment paper, leaving enough space between each cookie to allow for spreading during baking. If you don’t have multiple baking sheets, you can rotate them in and out of the refrigerator between batches to keep the dough chilled.
- When it’s time to bake, preheat your oven and set a timer. Keeping a close eye on the cookies as they bake will prevent them from over-browning or burning. The exact baking time will depend on your oven, so it’s a good idea to bake a test cookie first to gauge the optimal baking time for your specific setup.
- Once the cookies have cooled completely, it’s time for the fun part: assembling the sandwiches. Gently press another cookie on top to create a charming sandwich. Repeat this process until all the star cookies have found their perfect match. The filling will not only enhance the taste but also add visual appeal and a lovely surprise when bitten into.
Equipment you will need


Nutrition
Tried this recipe?
Mention @veenaazmanov_kitchen or tag #veenaazmanovkitchen!Creative variations
- One fun variation you can try is adding different flavors to your cookie dough. Incorporate a touch of peppermint extract or crushed candy canes for a refreshing twist. If you prefer a cozy and comforting flavor, try adding a hint of cinnamon or nutmeg to the dough. Experimenting with different flavors will add a delicious element to your cookies and make them stand out from the traditional batch.
- Adding decorative elements is another way to get creative with your star cookies. Before baking, sprinkle colored sugar or edible glitter on top of the cookies to make them sparkle. You can also use small, festive-shaped cookie cutters within the large star shape to create unique patterns. Adding these decorative touches will elevate your cookies and make them visually enticing.
- To take your star cookies to the next level, consider sandwiching them with a creamy filling. After baking, let the cookies cool and then pair them up. Spread a thin layer of chocolate ganache or cream cheese frosting between two cookies to create a delightful sandwich cookie. Not only will this variation add an extra layer of flavor, but it will also make your cookies look more intricate and impressive.
- Lastly, why not change the size of your star cookies? Use smaller star-shaped cookie cutters to create bite-sized treats perfect for a holiday party or as a gift. Alternatively, make a giant star-shaped cookie that can be the centerpiece of your dessert table. By playing around with the size of your cookies, you can create a visually stunning display that will impress your guests.
Creative ways to serve star cookies
- One idea is to arrange them on a tiered serving tray, layering them from largest to smallest to create a visually stunning centerpiece. This adds height and dimension to your dessert table and allows guests to select their favorite size and shape of star cookie easily.
- Another creative way to serve star cookies is to incorporate them into a holiday-themed dessert display. Place the cookies alongside other festive treats like gingerbread houses, peppermint bark, and eggnog cupcakes. This adds a touch of whimsy to your spread and allows your star cookies to be part of a more prominent, cohesive dessert theme.
- If you want to take your star cookies to the next level, consider adding a decorative touch. Drizzle melted white or dark chocolate over the cookies, creating a beautiful contrast against the golden brown dough. You can also sprinkle edible glitter or colored sugar on top to make the cookies sparkle and shimmer. These small details will enhance the visual appeal of your star cookies and add an extra layer of flavor and texture.
- Finally, think outside the box when serving your star cookies. Instead of placing them on a traditional plate, arrange them on a rustic wooden cutting board or a vintage serving tray. You can also use a decorative box lined with festive tissue paper to create a unique presentation. These unexpected serving options will make your star cookies stand out and add a touch of personality to your holiday gathering.


Don’t lose this recipe! Save it for Later!
📌 Save this Recipe for later on Pinterest so you can easily find it again.
⭐ Add Veena Azmanov Kitchen to your Google Preferred Sources.
It helps Google show you more of our recipes.
📧 Subscribe for new recipes delivered to your inbox.
🎥 Follow us for more recipes


Hi Veena,
A fan of your Lovely recipes, I will try it soon. Byany chance can I skip egg?
Thank you in advance.
Poornima. I have not tried these without eggs but perhaps you can use my eggless cookies recipe instead
Ya Veena, that’s my favourite cookies recipe and always work with.
Thanks
Thank you, Poornima
These are my type of cookies, easy and buttery
Perfect timing! We were just looking for a good Christmas cookie recipe to try making as a family this week!
These cookies are just the cutest, and so easy to make! Will make a great addition to our usual cookie spread this year.
I can’t wait to make these as they look so incredible and I will freeze down any leftovers.
These cookies are stunning. I am going to make them on Christmas Eve.