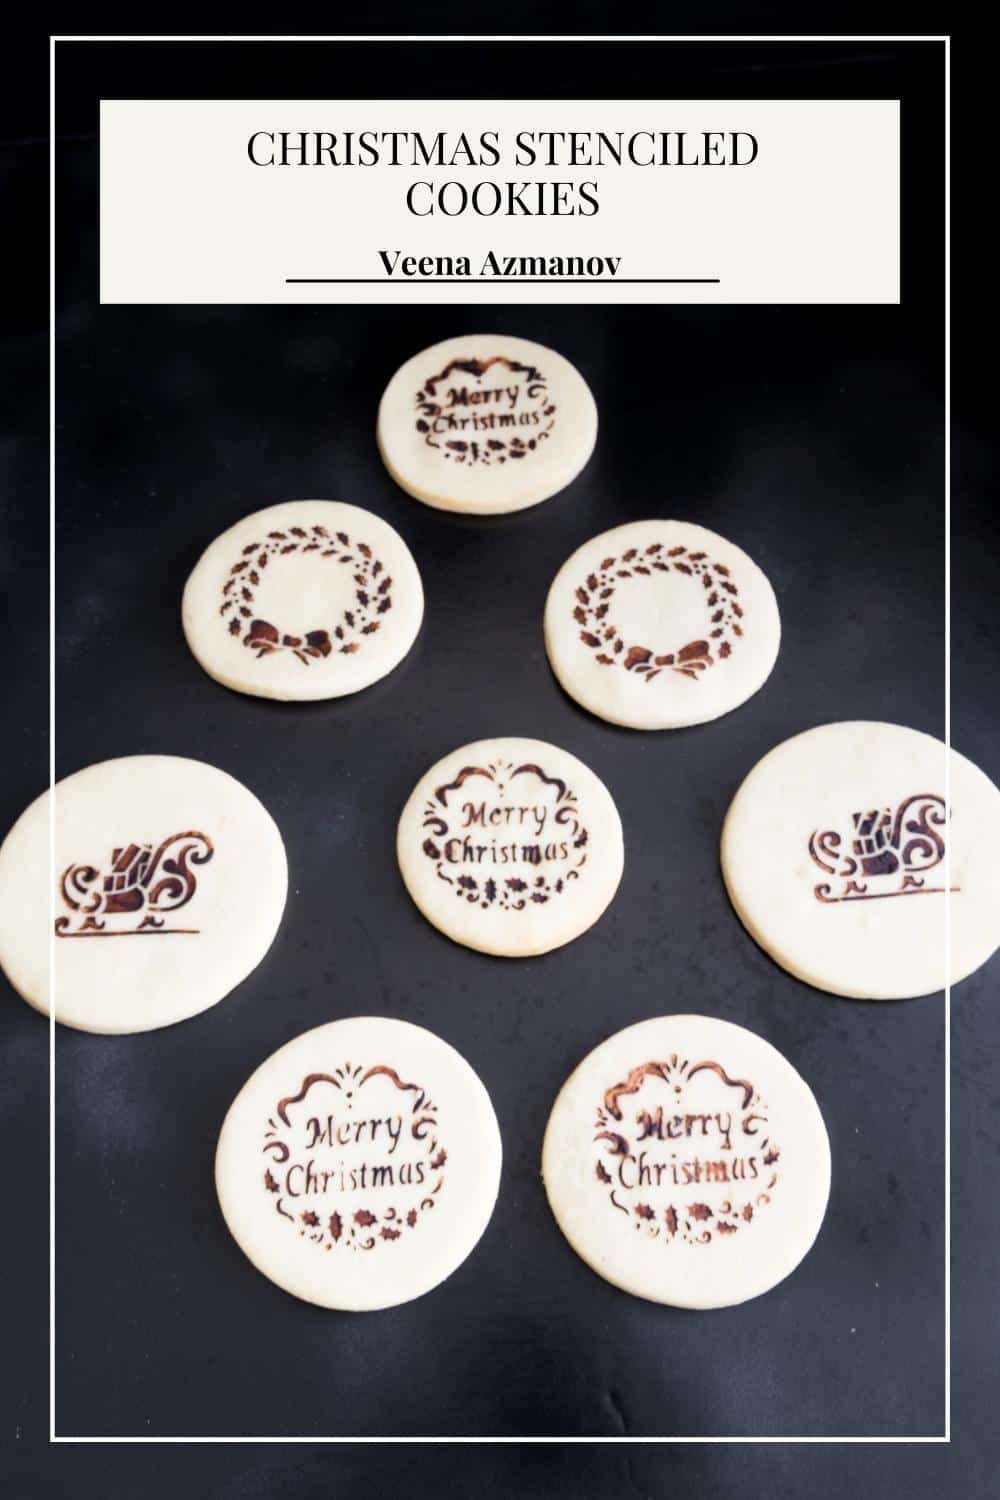
Christmas Stenciled Cookies


Impress your guests this holiday season with stunning Christmas stenciled cookies. Imagine the awe in their eyes as they bite into a treat adorned with intricate designs, perfectly etched onto the surface. If you’ve ever wondered how to achieve such baking mastery, look no further.

Why is stenciling on cookies so popular?
- One of the reasons why stenciling on cookies has gained such popularity is its versatility. With a wide range of stencils available in various designs and themes, you can easily customize your cookies to fit any occasion. Whether you’re celebrating Christmas, a birthday, or a special event, there’s a stencil for you. This allows you to infuse your cookies with a personal touch, making them delicious and visually appealing.
- Another factor contributing to the popularity of stenciling on cookies is its accessibility. Unlike complex decorating techniques that require advanced skills and specialized tools, everyone can enjoy stenciling, regardless of their baking expertise. Even if you’re a beginner in the kitchen, you can still create impressive designs on your cookies with minimal effort. All you need is a stencil, some icing, and a steady hand, and you’re ready to go.
- Furthermore, stenciling on cookies allows for consistent and professional-looking results. The precise lines and intricate patterns that can be achieved through stenciling give your cookies a polished and refined appearance. This is particularly appealing for those who want to impress their guests with bakery-worthy treats. Stenciling eliminates the guesswork and ensures that every cookie you make looks like a masterpiece, elevating your holiday baking game to a whole new level.
- In conclusion, the popularity of stenciling on cookies can be attributed to its ability to transform ordinary treats into extraordinary creations. The versatility, accessibility, and professional results achieved through stenciling make it an appealing choice for both seasoned bakers and novices.

Methods to stencil
By exploring different methods of stenciling, you can find the one that suits your skills and preferences best. Whether you choose royal icing, powdered sugar, cocoa paste, airbrushing, or even alternative materials, the key is to have fun and let your creativity shine through.
- Royal icing is the key to achieving perfectly stenciled Christmas cookies, but it’s not the only method you can use to create beautiful and intricate designs. While royal icing is the most popular choice for stenciling due to its smooth and glossy finish, other options can yield equally impressive results.
- One alternative method is using powdered sugar and a stencil brush. This technique involves lightly dusting the stencil with powdered sugar and gently tapping the brush over the stencil to transfer the design onto the cookie. It’s a more straightforward approach that requires less precision, making it an excellent option for beginners or those who prefer a more rustic look.
- If you use vanilla sugar cookies, then the cocoa paste is the simplest, most accessible, and most effective way to stencil.
- Another method worth exploring is airbrushing. With an airbrush gun and edible food coloring, you can create stunning gradients and intricate details with ease. This technique allows for more control over the intensity of the colors and can give your cookies a professional-looking finish. It’s important to note, however, that airbrushing requires some practice and familiarity with the equipment.
- If you’re feeling extra creative, you can even experiment with other edible materials like cocoa powder or colored sanding sugar. These materials can be dusted or sprinkled over the stencil to create different textures and effects on your cookies. It’s a fun and innovative way to add dimension and visual interest to your designs.
Choosing the Right Stencil
When it comes to stenciling, choosing the right stencil is crucial for achieving the perfect results. There are countless stencil designs available, ranging from traditional holiday motifs like snowflakes and reindeer to more whimsical patterns like Christmas trees and candy canes. The key is to select a stencil that fits the overall theme and aesthetic you want to achieve with your Christmas cookies.
- Consider the size and shape of your cookies when choosing a stencil. If you’re working with small cookies, intricate designs with fine details may also not appear, so opting for more extensive, bolder patterns might be a better choice. On the other hand, if you’re decorating more giant cookies, you have more room to play with and can experiment with intricate and bold stencil designs.
- Another factor to consider is the material of the stencil itself. Stencils made from flexible materials like plastic or silicone are ideal for achieving clean and precise lines. These types of stencils allow for easy removal without smudging or distorting the design. Additionally, look for stencils with a defined thickness that will prevent excessive bleeding or smudging of the icing or powdered sugar onto the surrounding areas of the cookie.
- While traditional stencil designs can be a great starting point, don’t be afraid to think outside the box and explore unique and unconventional stencil options. Look for stencils that reflect your personal style and interests. You can even create your own stencils using food-safe materials like cardboard or acetate sheets. This way, you can truly customize your cookies and make them stand out from the crowd.
Choosing the right cookie dough
To ensure your cookies look stunning and taste delicious, it’s crucial to select the right dough that complements your stencil designs. When it comes to choosing cookie dough for stenciling, there are a few factors to consider.
- First and foremost, you’ll want a dough that holds its shape well during baking. This is especially important when using intricate stencil designs, as a dough that spreads too much can blur the details of your pattern. Look for cookie dough recipes that are specifically designed for cut-out or rolled cookies, as these tend to have a higher starch content, resulting in cookies that hold their shape beautifully.
- The texture of your cookie dough also plays a role in the final outcome of your stenciled cookies. Some stencils work better with softer doughs, while others require a sturdier base. If you’re using a stencil with fine details or delicate lines, a softer dough will help prevent the stencil from tearing or breaking when you apply pressure. On the other hand, if you’re working with a larger, more open stencil design, a slightly firmer dough can offer better support and prevent any unwanted stretching or distortion.
- Furthermore, the flavor of your cookie dough should complement your stencil designs and create a harmonious taste experience. Consider the flavor profiles of your chosen stencil patterns and select a cookie dough that complements or enhances those flavors. For example, if you’re using a stencil with festive holiday motifs like peppermint or gingerbread, consider using a corresponding dough flavor such as peppermint or gingerbread cookie dough. This attention to detail will elevate the overall taste and presentation of your finished cookies.
Applying the Stencil
Applying the stencil is where the magic truly happens, as you transform a simple cookie into a work of edible art. Follow these tips to ensure your stenciling process goes smoothly and yields professional-looking results.
- First, ensure your stencil is clean and free of crumbs or dried icing from previous use. A dirty stencil can leave unwanted marks or smudges on your cookies, detracting from the overall presentation. Take a few moments to carefully clean and inspect your stencil before placing it on your dough.
- To affix the stencil to your dough, gently press it down with your fingertips, ensuring it lies flat against the surface. It’s crucial to secure the stencil firmly to prevent any movement or shifting while you’re applying the icing or sugar. An easy way to achieve this is by using some edible adhesive spray, which will keep the stencil in place without leaving any residue.
- When it comes to applying the icing or sugar, less is more. Begin by evenly covering the design by sprinkling a small amount of powdered sugar or cocoa powder over the stencil.
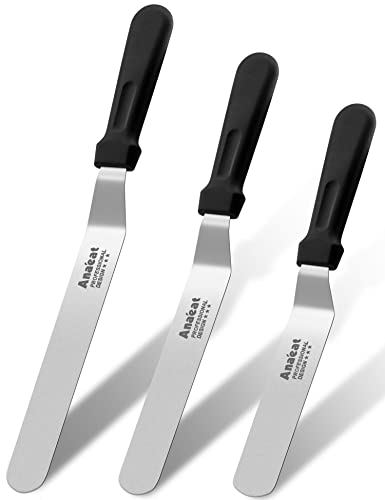
- On the other hand, if you’re using icing or paste instead of powdered sugar, opt for a stiff consistency. This will help maintain the sharp edges and intricate details of the stencil. Using a small offset spatula or a palette knife, apply a thin layer of icing over the stencil, using smooth and even strokes. Be mindful not to apply too much pressure, as it may cause the icing to seep underneath the stencil.

Achieving crisp and professional-looking designs
One of the keys to achieving this is ensuring that the paste is evenly distributed across the stencil. This will help create a clean and uniform design for your cookies.
- To achieve even distribution, gently tap the stencil on the surface of the icing or sugar. This will help the material settle into the openings and create a smooth layer. Then, using a straight edge like a bench scraper or a spatula, carefully spread the icing or sugar across the stencil in a thin and even layer. Take your time and make sure to cover all the openings completely.
- Once the stencil is completely covered, it’s time to remove it from the dough. Carefully lift it off, pulling straight up to avoid smudging the design. This step is crucial in maintaining the crispness of your designs. If you notice any smudging or imperfections, don’t worry. Remember, imperfections are part of the charm of homemade treats and add a touch of authenticity to your creations.
- If you’re not completely satisfied with the result, don’t fret. Practice makes perfect, and with patience and experimentation, you’ll soon master the art of perfectly stenciled Christmas cookies.
Tips and troubleshooting
To help you on your journey to cookie perfection, here are some tips and troubleshooting advice:
- Consistency is key: When it comes to the icing used for stenciling, the right consistency makes all the difference. If your icing is too thick, it won’t spread smoothly across the stencil, resulting in uneven designs. On the other hand, if it’s too thin, the icing may bleed under the stencil, causing blurred lines. Experiment with different icing consistencies until you find the one that works best for you.
- Stencil placement: Properly aligning the stencil on your cookie is crucial for achieving a clean, professional look. Make sure the stencil is flat against the cookie surface, and secure it in place using gentle pressure. This will help prevent movement or smudging while applying the icing.
- Gentle pressure: When applying the icing, use a light and even stress. Avoid pressing too hard, as this can cause the icing to seep underneath the stencil or smudge the design. Slow and steady wins the race – take your time to build up the desired color and thickness.
- The right tools: Investing in high-quality stencils and brushes can significantly improve your stenciling experience. Look for stencils made from food-grade materials that are durable and easy to clean. Similarly, choose soft bristles that apply the icing smoothly without leaving brush marks.
- Clean edges: If you notice that the edges of your stenciled design are not as sharp as you’d like, try using a small offset spatula or a toothpick to clean up any imperfections. Gently scrape away any excess icing that may have seeped under the stencil, and carefully touch up any areas that need it.
Sugar cookies recipe
- Vanilla sugar cookies
- Classic vanilla sugar cookies
- Eggless vanilla sugar cookies.
- Chocolate sugar cookies,
- Eggless chocolate sugar cookies
Frequently asked questions
One common issue when stenciling cookies is the stencil shifting or moving while you’re applying the icing. To prevent this, make sure to secure the stencil firmly in place before you begin. You can use a food-safe tape, such as masking tape or painter’s tape, to hold the stencil in place on the cookie’s surface. Alternatively, you can try using a stencil holder or hold the stencil down with your fingertips. Whichever method you choose, ensure that the stencil is stable and won’t budge while you work.
The key to achieving a sharp and clean design with your stencils is to apply the icing in a consistent and even manner. Start by using a small amount of icing on your spatula or palette knife and spread it over the stencil in a smooth, gentle motion. Avoid applying too much pressure or dragging the icing across the stencil, as this may cause the design to bleed and lose its sharpness. Take your time and be patient to ensure a precise outcome.
If you find that the icing smears or smudges the design when you lift the stencil, there are a few possible reasons. First, make sure that the icing consistency is appropriate. If it’s too thin or runny, it’s more likely to blur the design. Adjust the thickness of your icing by adding more powdered sugar if needed. Additionally, try to remove the stencil smoothly and quickly after applying the icing. Lift it gently and avoid any unnecessary contact with the fresh icing. Lastly, ensure that the icing has fully dried before adding any additional decorations or layers to prevent smudging.
Yes, most stencils can be reused for future cookie projects. To preserve the life of your stencils, be sure to clean them thoroughly after each use. Wash them with warm, soapy water, gently scrubbing away any residue or icing. Allow them to air dry completely before storing them in a clean, dry place. Storing your stencils in a protective sleeve or folder can help prevent them from bending or getting damaged. With proper care, your stencils can be used for many batches of beautifully stenciled cookies.
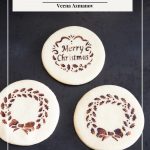
Christmas Stenciled Cookies
Celebrate the season with stenciled Christmas sugar cookies as a fun project to make with the kids. Stenciled on my popular recipe for vanilla sugar cookies these are such an ideal treat. My video show just how simple, easy and effortless the stenciling technique is. You and the kids will have loads of fun. Give them as gifts and everyone will be impressed.
Video
Ingredients
- 1 batch (1 batch) Vanilla Sugar Cookies OR
- 1 batch (1 batch) Eggless Vanilla sugar cookies
- 4 tbsp (30 g) Cocoa powder
- 4 tbsp Water.
Method
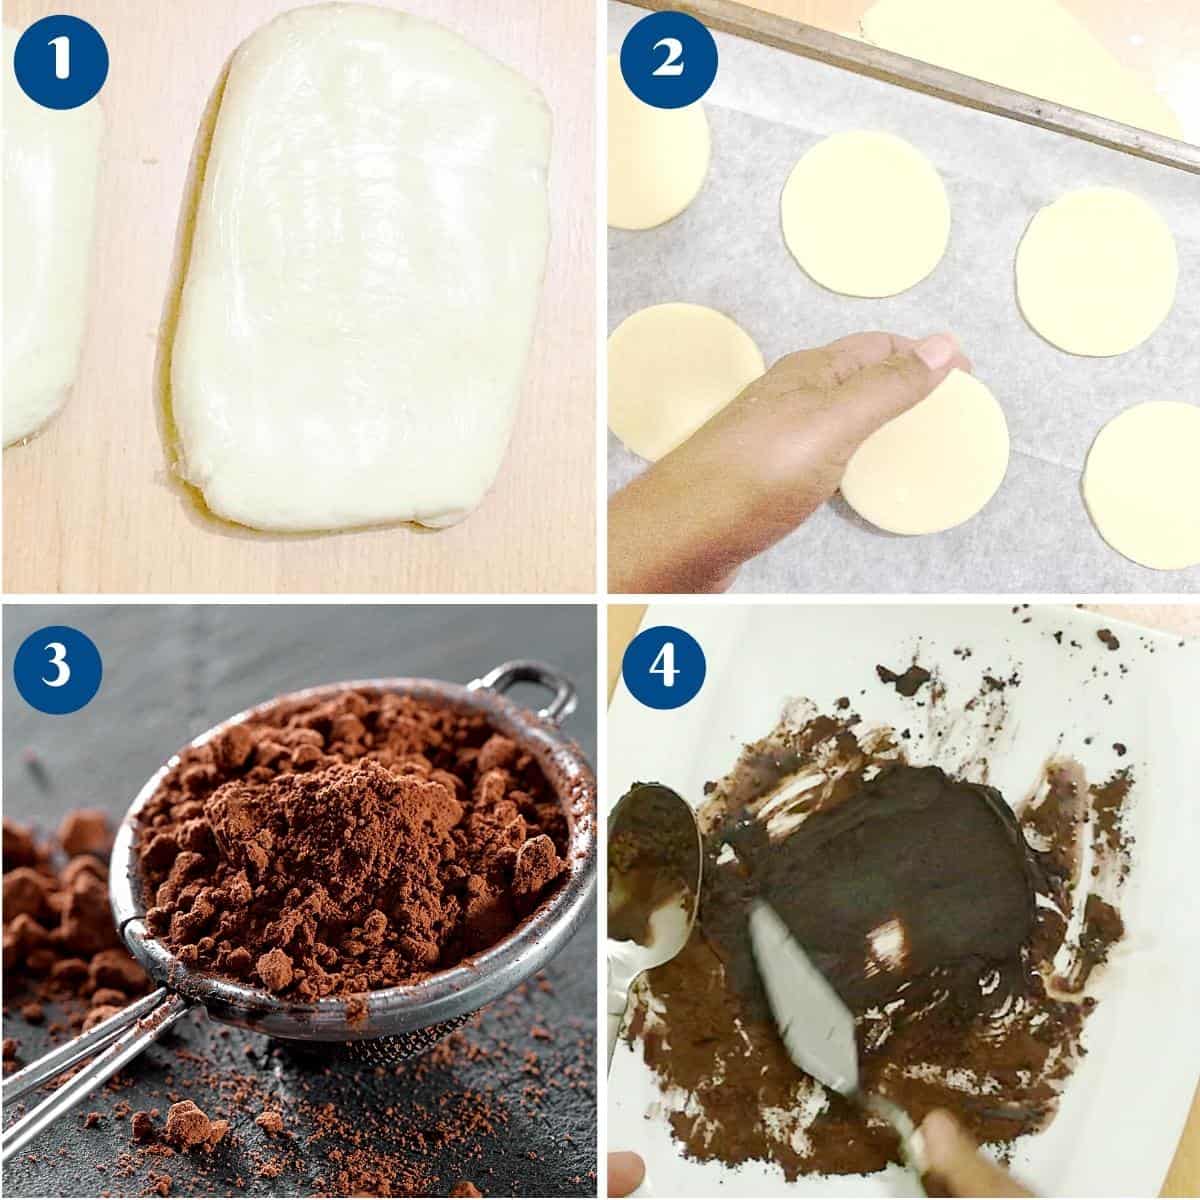
- Cooking – Prepare vanilla sugar cookies as shown in the recipe and video here. Roll and cut sugar cookies into desired shapes. Chill the cookies for at least 2 hours or until firm.1 batch Vanilla Sugar Cookies , 1 batch Eggless Vanilla sugar cookies
- Cocoa paste – Combine the cocoa powder and water to form a paste. The ratio of cocoa powder to water is just a guide. What you looking for is a paste consistency.4 tbsp Cocoa powder, 4 tbsp Water.
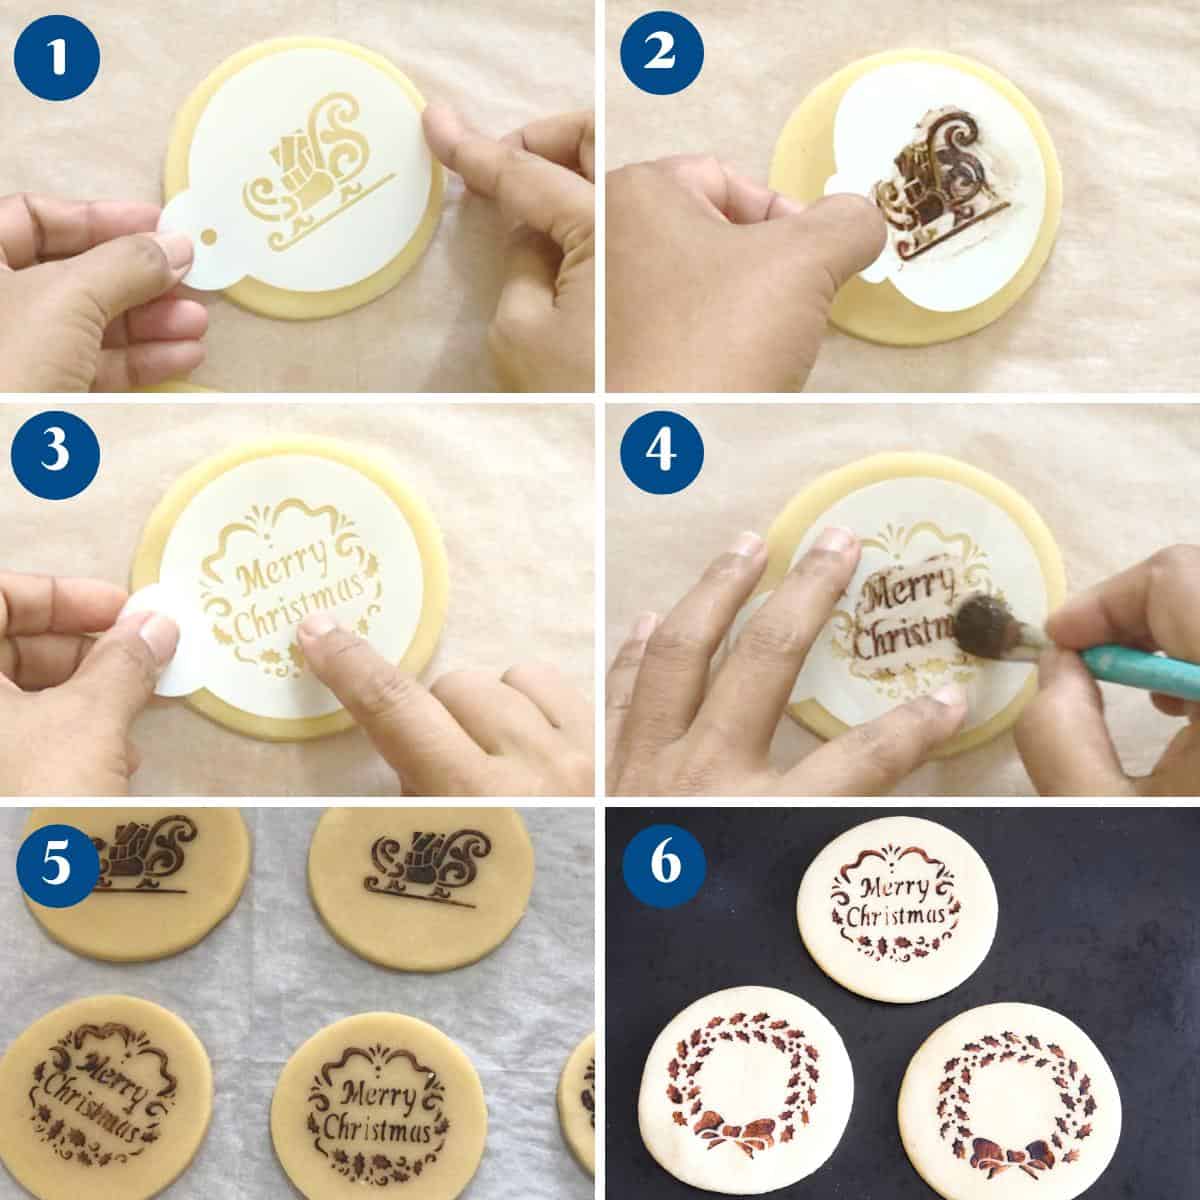
- Stencil – Ensure cookies are firm to the touch. Place a stencil on the cookie. Using a damp paintbrush, lightly dipped in the cocoa paste. Hold the stencil firmly on the cookie (which is why we need the cookies to be chilled well).
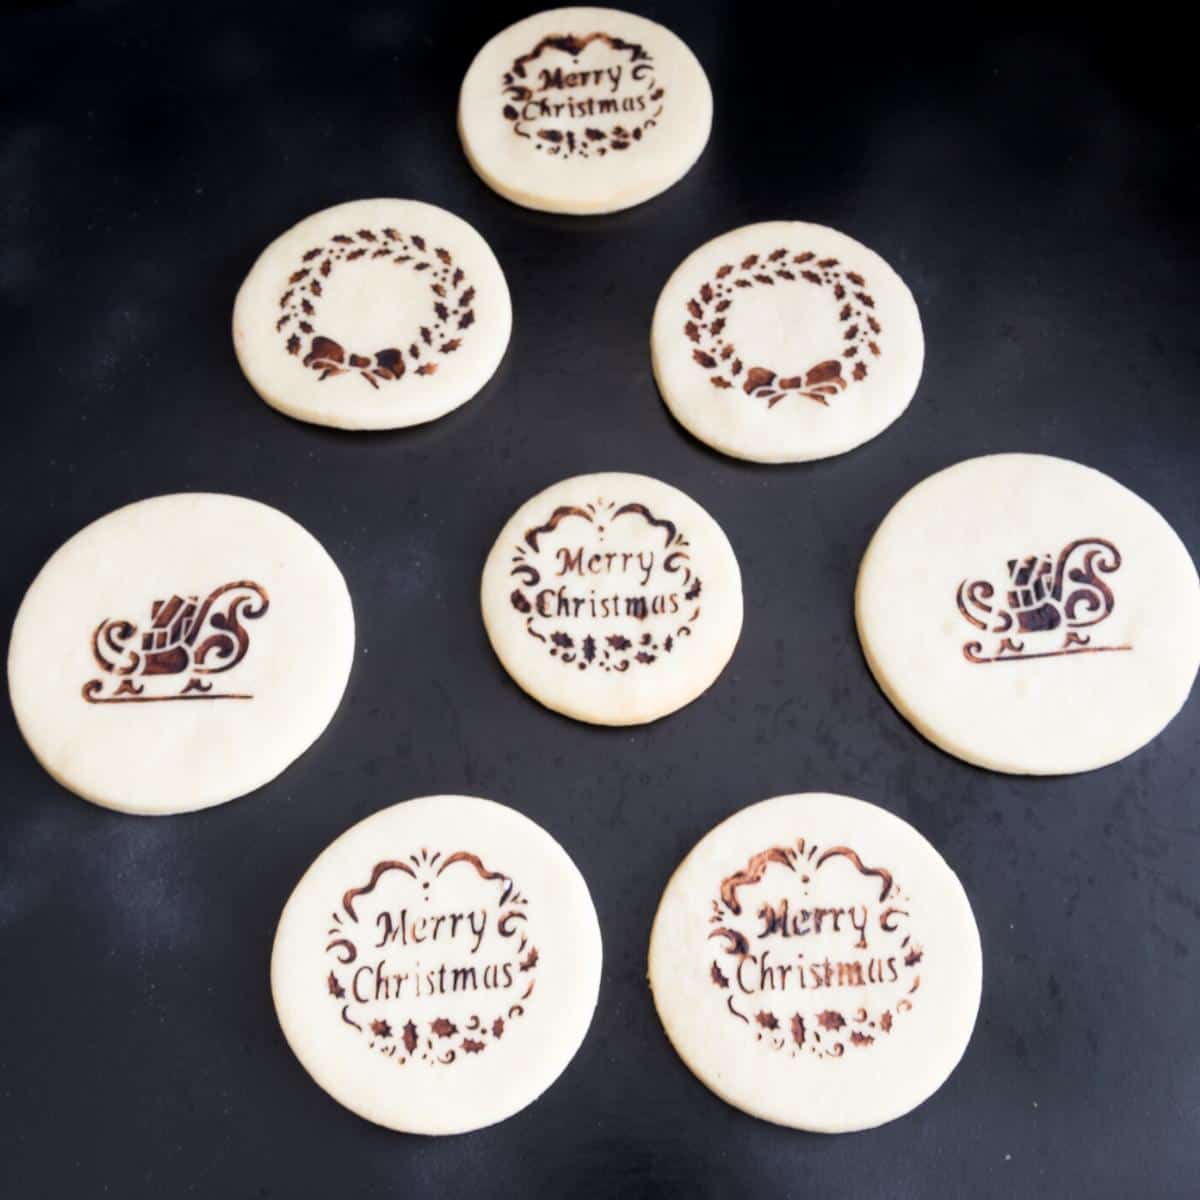
- Paint – Brush the cocoa paste on the stencil, as shown in the video. When done – lift the stencil carefully to reveal the design. Place the cookies on a parchment lined baking tray. Pro tip – Any minor cocoa paste smears can be cleaned gently with a wet paper towel.
- Chill – Chill the cookies in the fridge for 15 minutes while you preheat the oven to 375℉/190℃/ Gas mark 5.
- Bake – Bake the cookies for 10 to 12 minutes until lightly golden on the edges. Then, transfer to a cooling rack to cool completely.
Notes
- Consistency is key: When it comes to the icing used for stenciling, the right consistency makes all the difference. If your icing is too thick, it won’t spread smoothly across the stencil, resulting in uneven designs. On the other hand, if it’s too thin, the icing may bleed under the stencil, causing blurred lines. Experiment with different icing consistencies until you find the one that works best for you.
- Stencil placement: Properly aligning the stencil on your cookie is crucial for achieving a clean, professional look. Make sure the stencil is flat against the cookie surface, and secure it in place using gentle pressure. This will help prevent movement or smudging while applying the icing.
- Gentle pressure: When applying the icing, use a light and even stress. Avoid pressing too hard, as this can cause the icing to seep underneath the stencil or smudge the design. Slow and steady wins the race – take your time to build up the desired color and thickness.
- The right tools: Investing in high-quality stencils and brushes can significantly improve your stenciling experience. Look for stencils made from food-grade materials that are durable and easy to clean. Similarly, choose soft bristles that apply the icing smoothly without leaving brush marks.
- Clean edges: If you notice that the edges of your stenciled design are not as sharp as you’d like, try using a small offset spatula or a toothpick to clean up any imperfections. Gently scrape away any excess icing that may have seeped under the stencil, and carefully touch up any areas that need it.
Equipment you will need


Nutrition
Tried this recipe?
Mention @veenaazmanov_kitchen or tag #veenaazmanovkitchen!Don’t lose this recipe! Save it for Later!
📌 Save this Recipe for later on Pinterest so you can easily find it again.
⭐ Add Veena Azmanov Kitchen to your Google Preferred Sources.
It helps Google show you more of our recipes.
📧 Subscribe for new recipes delivered to your inbox.
🎥 Follow us for more recipes


I love these!! Unusual, but so pretty! They will work great with my assortment of Christmas cookies this year!
Thank you, Pam
These cookies look amazing, absolutely delicious. I definitely need to give them a try!
Thanks, Bintu.