DIY Cake Boards – How to Make your own cake boards at home
Making your own cake boards at home is simple, affordable, and gives you complete control over the size, strength, and design. And yet, a good cake board is more than just wrapping a form board with paper. Whether you need a quick board for cupcakes or a sturdy base for a celebration cake, you can make one with basic materials in minutes.
I used to make all my cake boards myself back when I ran my cake business. From simple birthday cakes to wedding cakes, I needed boards that were strong, clean, and matched the design.
Over time, I learned a few simple methods that work every time—no special tools, just basic materials and a neat finish. These are the same techniques I still use today.
What makes a good cake board?
A cake board is not just something you wrap in paper—it’s the base that supports, stabilizes, and finishes your cake.
From my cake decorating experience, a good cake board needs to do three things:
1. Be strong enough for the cake
Light cakes can sit on a single board, but heavier or tiered cakes need double boards or MDF to prevent bending.
2. Have a clean, smooth finish
The board should look neat and polished. Wrinkles, bubbles, or uneven edges can make even a beautiful cake look unfinished.
3. Match the design of the cake
The board is part of the presentation. Whether it’s covered in paper, fondant, or textured finishes like woodgrain, it should complement the cake—not distract from it.
When you focus on these three things, even a simple DIY cake board can look professional.

What is the best material for a cake board?
- Cardboard or foam board – best for most cakes
- MDF board – for heavy or tiered cakes
- Double boards – for extra support
Why cover a cake board?
- Makes the cake look clean and professional
- Adds a food-safe barrier between cake and board
- Helps with transport and stability
- Matches your cake design

How I make my own cake boards
What you need:
- Strong cardboard or foam board (or MDF for large and tiered cakes)
- Wrapping paper or decorative paper
- Clear adhesive tape or double-sided tape
- Scissors
- Ruler or measuring tape
- Pencil or pen

Step-by-step
1. Measure and cut
Cut your board at least 2 inches larger than your cake.
2. Cut your paper
Cut decorative paper slightly larger than the board.
3. Wrap the board
Place the board upside down and wrap the paper tightly around it.
4. Secure the edges
Tape or glue the back neatly. Keep the top smooth.
5. Optional finish
Add ribbon or trim around the edges for a clean look.

Best paper for cake boards
When choosing the paper for covering cake boards, ensure it is clean, free from any printing ink or dyes that might transfer onto the cake, and appropriate for food contact if the cake will come into direct contact with the board. Additionally, consider the sturdiness, aesthetics, and theme of your cake to select the best paper that suits your needs.
- Wrapping paper – easy and affordable
- Cardstock – stronger and cleaner finish
- Scrapbook paper – decorative
- Freezer paper – food-safe option

How to cover a cake board with fondant
- Roll fondant slightly larger than the board
- Brush board lightly with water or sugar syrup
- Place the fondant and smooth it. Alternatively, create the texture if desired using texture mats, rolling pins, dollies, a fork, a spatula, etc.
- Trim edges clean
What size cake board do I need?
- 6-inch cake → 8-inch board
- 8-inch cake → 10-inch board
- 10-inch cake → 12-inch board
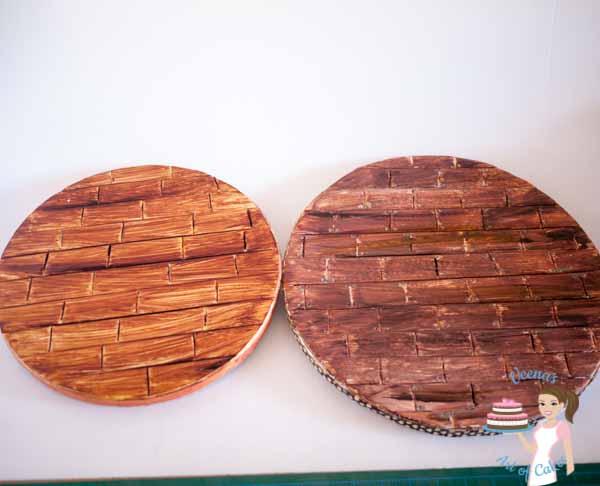
How to make a fondant woodgrain cake board?
Creating a fondant woodgrain effect on a cake board can add a realistic and rustic touch to your cake presentation. Here’s a step-by-step guide on how to make a fondant woodgrain cake board:
Materials you’ll need:
- Cake board
- Fondant (brown and white)
- Gel food coloring (brown, black)
- Rolling pin
- Veining tool or toothpick
- Paintbrush (food-safe)
- Cornstarch or powdered sugar (for dusting)
- Clear alcohol (vodka or clear extract) – optional
1. Prepare the fondant
Color your fondant with brown gel color. Add a tiny bit of black for a deeper wood tone if needed.
2. Roll the fondant
Roll it into a thin sheet, slightly larger than your cake board.
3. Create the woodgrain
Use a toothpick or veining tool to draw long, uneven lines. Add a few knots and curves to keep it natural—don’t make it too perfect.
4. Add highlights (optional)
Add thin streaks of white fondant and lightly blend them in for a more realistic look.
5. Cover the board
Place the fondant over the cake board and smooth from the center outward. Trim the edges clean.
6. Finish (optional)
Brush lightly with a little clear alcohol or extract for a soft sheen.

Tips for strong cake boards
- Use double layers for heavier cakes
- Tape edges securely
- Keep surface smooth and flat
- Use MDF for tiered cakes


Frequently asked questions
I personally use a foam core board for most of my cakes. I find that they are firm and can be trusted to travel. A foam core comes in various sizes but I usually use ½ inch core boards.
For single tier cakes I place my cake directly on the cake board, so my cake is set on the cake board itself.
For multiple tiers – I I always cut two circles – One is minimum two inches bigger than the cake and the second is the same size as the cake.
The smaller circle goes under the larger circle. The little gap created gives me space to put my fingers under and lift my cake.
Have you ever dressed for a party? You know bought a pretty dress you spent half your salary on? ha!! I have!! Shhhh..!
So imagine this – You wear this pretty dress, put gorgeous makeup on. You looking absolutely stunning. (are you there with me)
Now wear your everyday slippers on! (what happened? – I ruined the image!!)
So you see just as everyday slippers don’t make a good statement with your pretty dress. In the same way, a pretty cake needs a petty cake board too!
Make an effort with those cake boards and you will see that it makes a huge difference in how people view your cakes.
The cake board is not an extra job it’s a part of your cake.
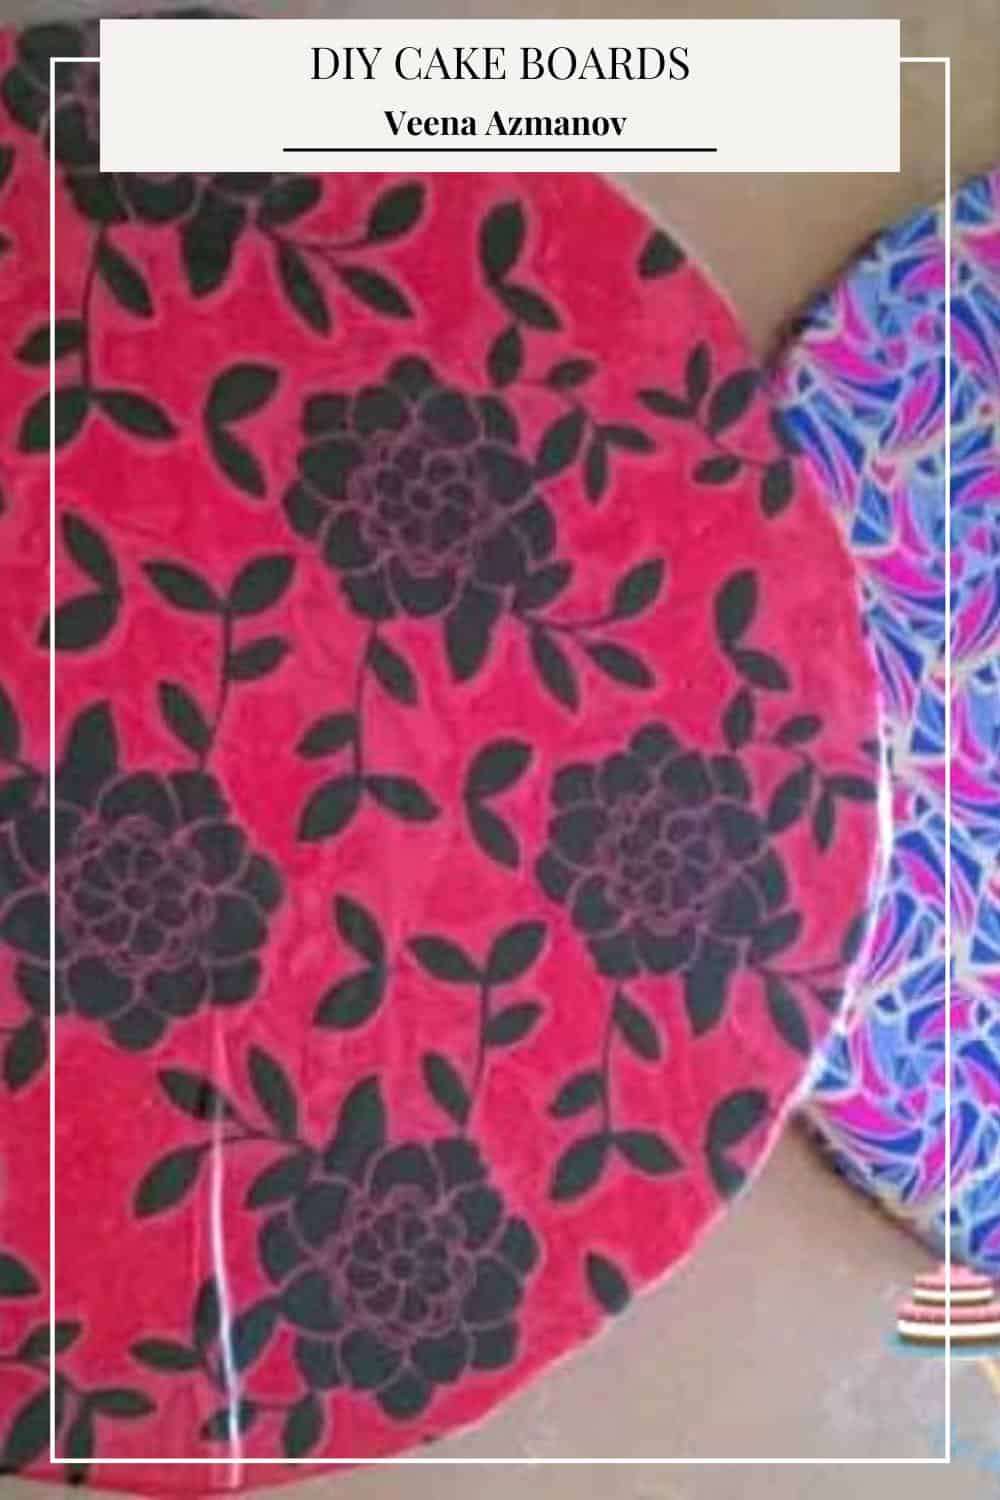
Almost all of my cakes are usually covered in fondant, which I prefer over all other methods. Fondant can be expensive if you are on a budget but it can be an extension of your cake itself. In this, I have extended the design of the enchanted forest with some elements on the board.
You don’t always have to make an elaborate cake board. You can cover a cake board in white fondant and you can also use cookie cutters to create patterns on the fondant for added design.
Wood grain is one of my most common cake boards. I love making them because I can use up my leftover old dry fondant that is not good for my cakes anymore.
Don’t lose this recipe! Save it for Later!
📌 Save this Recipe for later on Pinterest so you can easily find it again.
⭐ Add Veena Azmanov Kitchen to your Google Preferred Sources.
It helps Google show you more of our recipes.
📧 Subscribe for new recipes delivered to your inbox.
🎥 Follow us for more recipes


Hello! Once you cover the board in Fondant, what do you use to adhere your cake to board to make sure it does not move?
Hey Jinny. I use just ganache or buttercream on my board before I place the first layer of cake. Usually, once the frosting sets it does hold well. I hope this help
Hi Veena, I wanted to know how you attach the cake that is on the cake board to the fondant covered board. Thanks!
Oh. Yes, I cut out the circle of fondant from the cake board the same size as the board then I place the cake on the board using ganache. Since there is no fondant the two boards stay together as the ganache sets. However, in summer here ganache stays soft so I use a little hot glue. I hope that answers your question
Thank you for the tip on cutting it three times. Now I have smooth edges. I use to struggle with that. Love your blog
Thank you, Jeffrey. So happy to hear you found this post useful. Yes, cutting it slow reduces ragged edges. Thanks for coming back to write this feedback. Have a lovely day.
Thank you so much for this. The cake boards here are so expensive I now only use this method. Appreciate you sharing this. Thanks
Thank you, Saia. Glad to hear this tutorial was useful. Thanks for coming back to write this feedback.