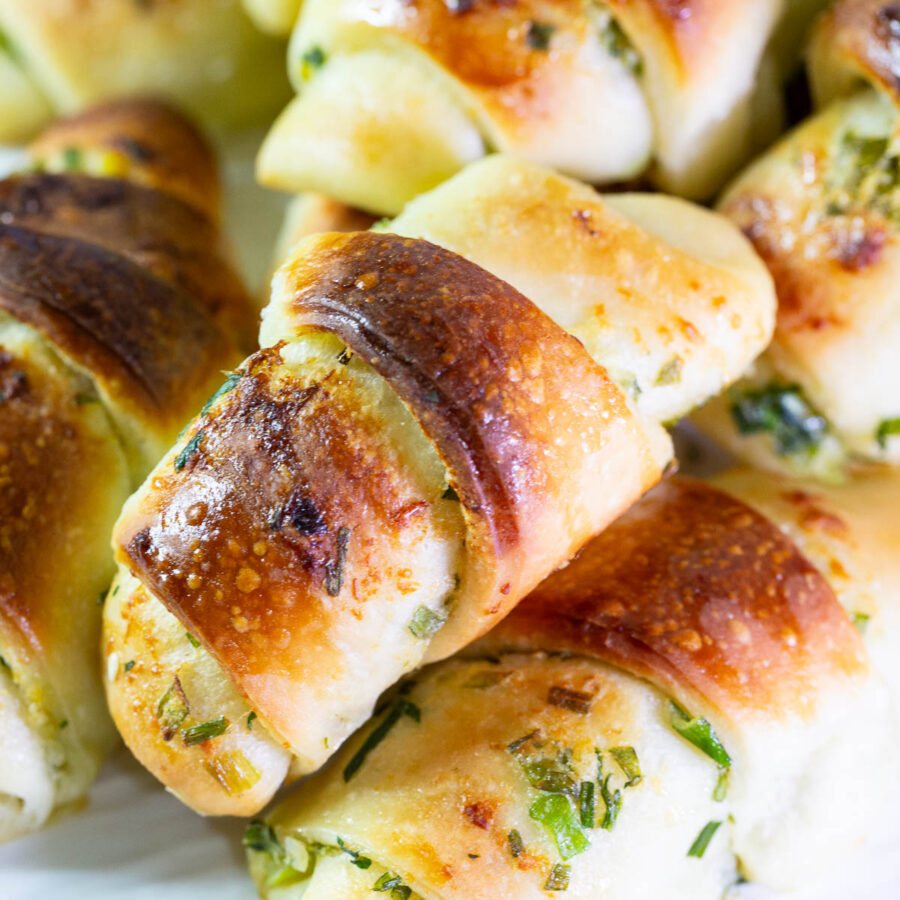
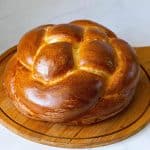
Soft Fluffy Crescent Rolls
 Prep Time 20 minutes Cook Time 15 minutes Total Time 3 hours 20 minutes
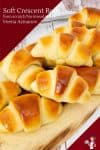

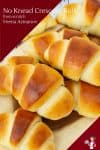
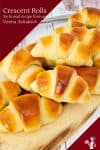
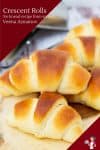
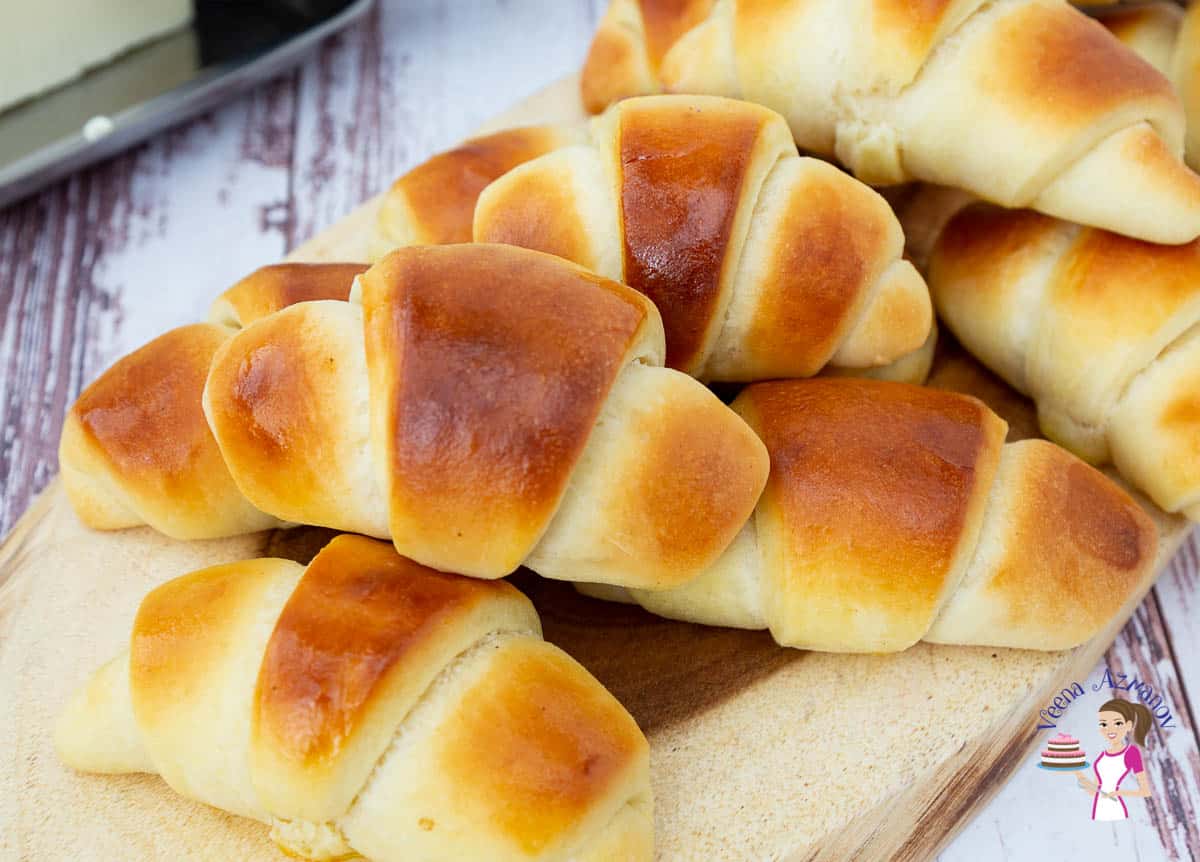
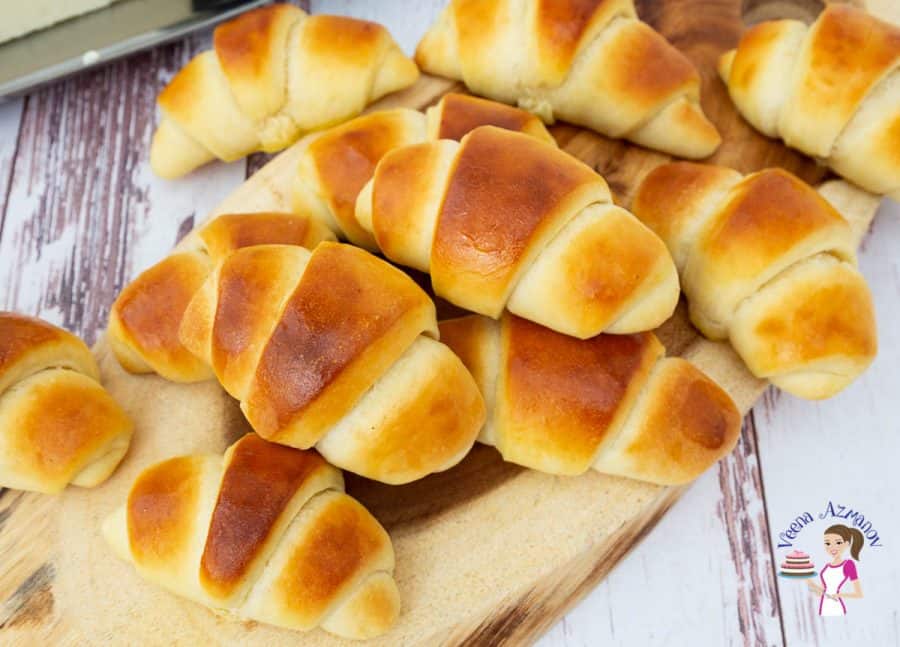
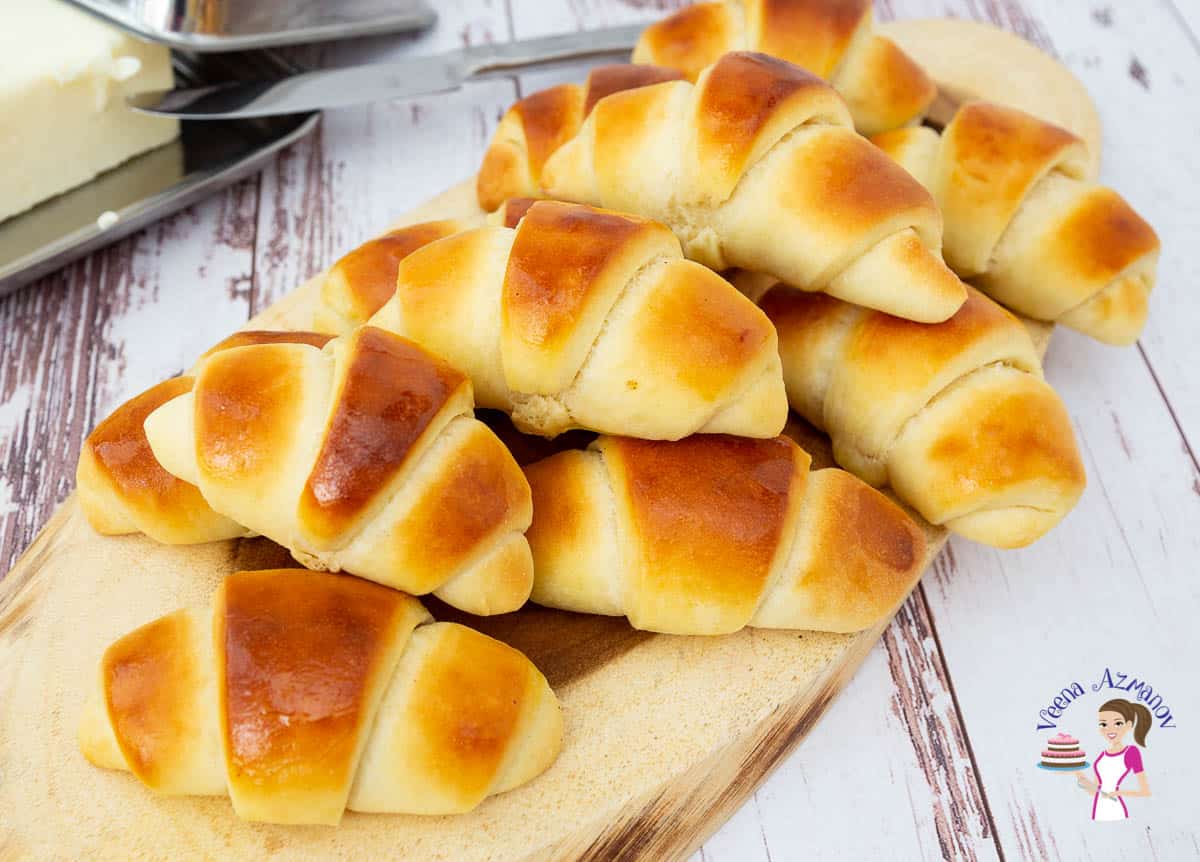
Crescent rolls are buttery, flaky pastries with a tender, airy interior, perfect for any meal or occasion. Their easy preparation and versatility make them a favorite among bakers and food lovers alike. Enjoy them plain or filled with sweet or savory ingredients for a delightful treat every time.

Crescents, often referred to as crescent rolls, are delightful pastries characterized by their distinctive crescent shape. Made from a rich, buttery dough that is rolled into a circle, cut into wedges, and then rolled up from the wide end to the point, these pastries bake into flaky, golden-brown treats with a soft, airy interior. They can be enjoyed plain or filled with sweet or savory ingredients, making them versatile for any occasion.
Why is this the best recipe?
- Rich, Buttery Flavor: The generous use of butter in both the dough and the brushing process ensures that each crescent is packed with a rich, buttery flavor that is both indulgent and satisfying.
- Perfect Texture: The combination of yeast and a well-kneaded dough creates a light, airy, and fluffy texture inside, while the exterior bakes to a beautiful golden brown with a slight crispiness.
- Easy to Follow: The recipe is straightforward, with clear instructions that make it accessible even for novice bakers. The steps are logical and easy to follow, ensuring consistent results every time.
- Versatile and Customizable: This recipe serves as an excellent base for various customizations. You can add fillings like chocolate, jam, or cheese before rolling the wedges, or sprinkle toppings like sesame seeds or herbs for added flavor and visual appeal.
Ingredients and substitutes
- All-Purpose Flour: Provides structure and body to the dough. The gluten formed during kneading helps give the crescents their chewy texture. You can also use bread flour (for a chewier texture) and whole wheat flour (for a denser, more nutritious crescent; use 50-50 with all-purpose to maintain some lightness).
- Active Dry Yeast: Leavens the dough, making it rise and become light and airy. You can also use instant yeast (use the same amount, and it doesn’t need to be activated in warm milk).
- Granulated Sugar: Adds sweetness, feeds the yeast, and contributes to the browning of the crescents. You can also use honey or maple syrup (adjust liquid content accordingly) or brown sugar (for a slightly different flavor).
- Salt: Enhances flavor and controls yeast fermentation. You can also use sea salt or kosher salt (use slightly more due to the larger grain size).
- Warm Milk (about 110°F/45°C): Activates the yeast, adds moisture, and enriches the dough. You can also use warm water (less rich flavor) and non-dairy milk (almond, soy, or oat milk).
- Large Eggs: Adds richness, structure, and helps with leavening. You can also use flax eggs (1 tablespoon ground flaxseed + 3 tablespoons water per egg), applesauce (¼ cup per egg, for a slightly different texture).
- Unsalted Butter: Adds flavor, tenderness, and moisture to the dough. You can also use margarine, coconut oil (for a different flavor), or vegan butter.

Step-by-step: Soft Fluffy Crescent Rolls
- Activate the Yeast: In a small bowl, dissolve the sugar in the warm milk. Sprinkle the yeast over the milk and let it sit for about 5-10 minutes until it becomes frothy.
- Prepare the Dough: Combine the flour and salt in a large mixing bowl. Pour in the activated yeast mixture, eggs, and melted butter. Mix until a soft dough forms.
- Rise: Place the dough in a greased bowl, cover with a damp cloth, and let it rise in a warm place for about 1-2 hours or until it has doubled in size.
- Shape the Crescents: Punch down the risen dough and divide it into two equal parts. Roll each part into a circle about ¼ inch thick. Brush the entire surface of the dough with melted butter.
- Cut and Roll: Using a pizza cutter or sharp knife, cut the circle into 8-12 wedges (like slicing a pizza). Starting from the wide end, roll each wedge up towards the point to form a crescent shape. Place the crescents on a baking sheet lined with parchment paper, leaving some space between each one.
- Second Rise: Cover the baking sheet with a damp cloth and let the crescents rise again for about 30-45 minutes until they are puffy.
- Bake: Preheat your oven to 375°F (190°C). Brush the tops of the crescents with more melted butter. Bake for 15-20 minutes, or until the crescents are golden brown.
- Cool and Serve: Remove from the oven and let the crescents cool on a wire rack. Enjoy your buttery crescents warm or at room temperature.
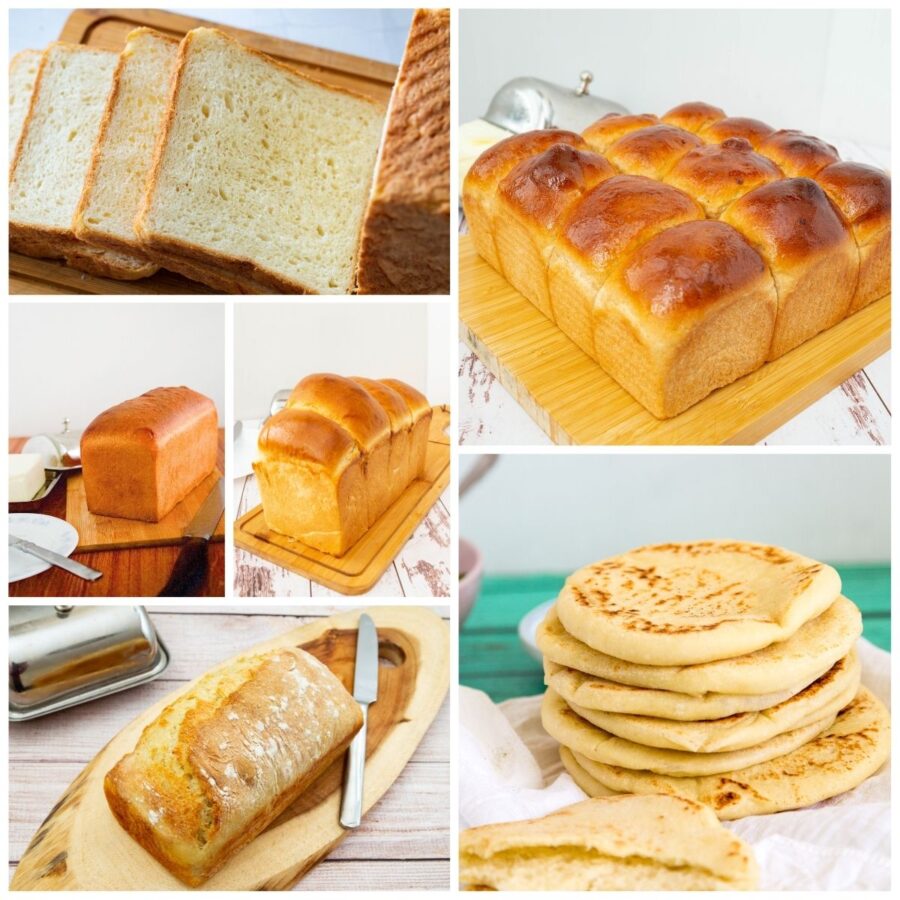
- Cinnamon Crescent Rolls
- Vanilla Crescents Recipe That Will Blow Your Mind!
- Soft Pumpkin Crescent Rolls
- Perfectly Flaky Almond Crescent Cookies (GF)
- Impress Your Guests with a Giant Cinnamon Roll Cake

Frequently asked questions
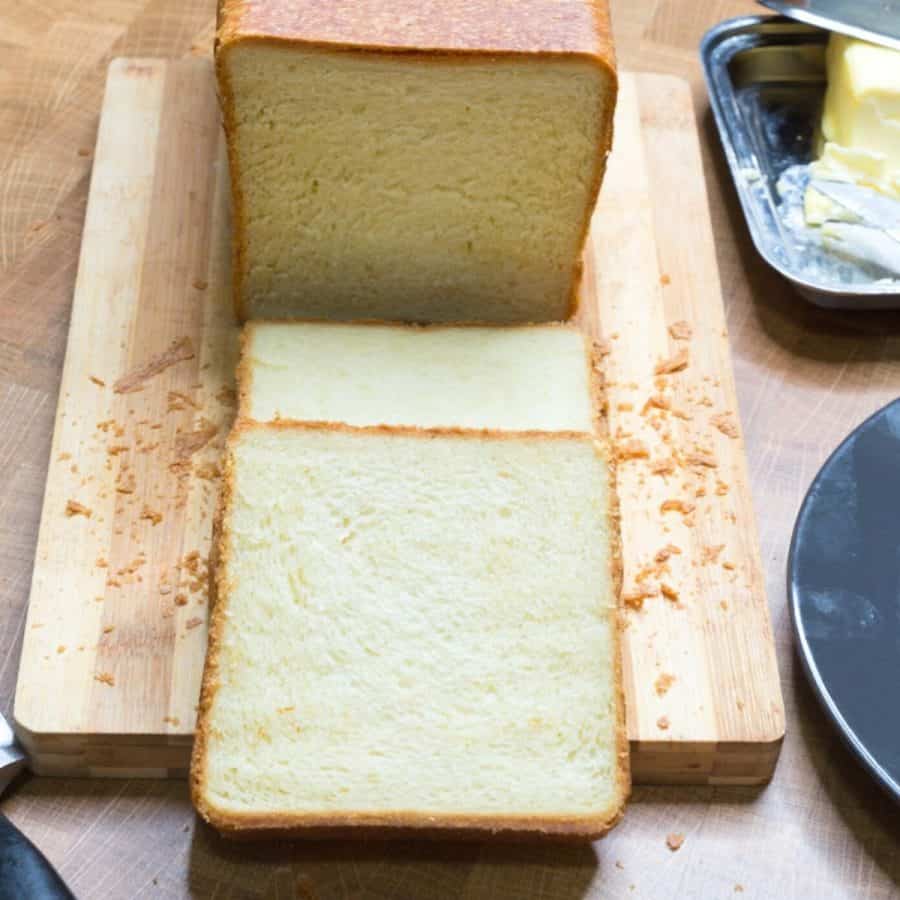
If stored properly, these soft dinner rolls will stay for 3 to 4 days at room temperature. They can also be frozen for a month or more. Never store bread in the fridge as it dries out.
You want to keep bread covered in an airtight container or ziplock bag to prevent air from drying it out. I like to use my reusable silicone bags to keep bread fresh.
The best way to keep homemade bread soft is to contain the steam within the bread. So, while they are still hot, place a clean kitchen cloth over them and let them rest for 10 minutes. Keeping these dinner rolls covered will also keep them from drying out.
We use these as crescent rolls. So rich, soft, buttery, and delicious. These are great with any soup, stew, chili, or slow-cooked meat.
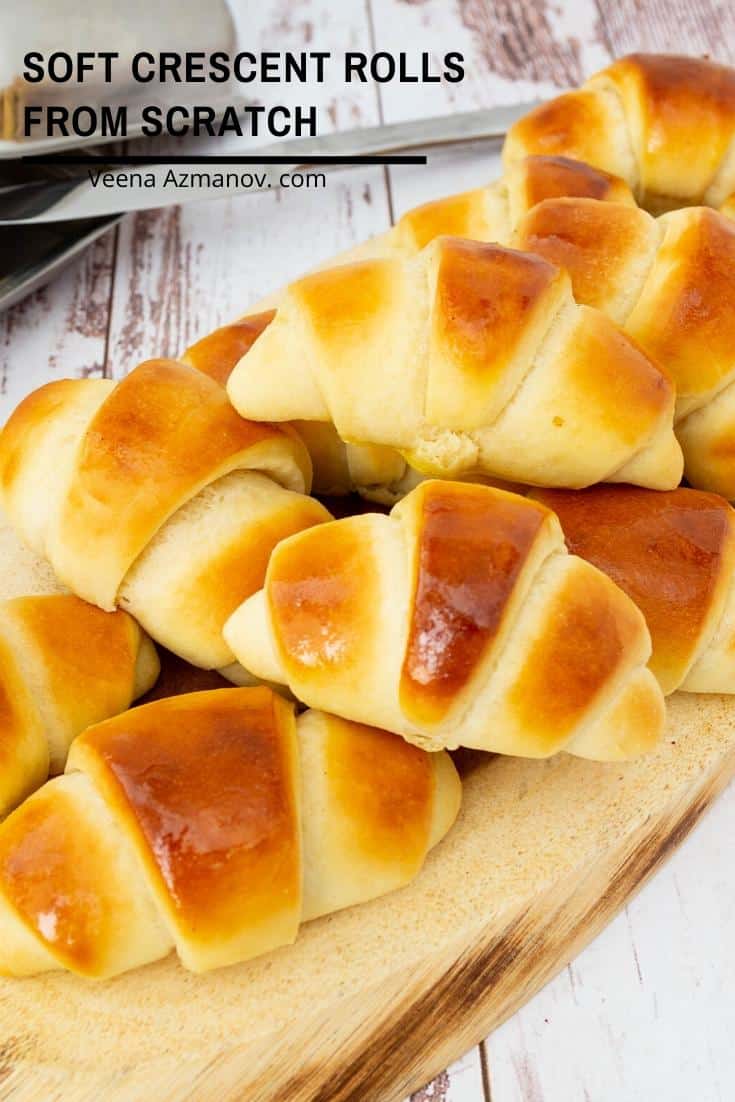
Soft And Fluffy Crescent Rolls (No-Knead)
Crescent rolls are buttery, flaky pastries with a tender, airy interior, perfect for any meal or occasion. Their easy preparation and versatility make them a favorite among bakers and food lovers alike. Enjoy them plain or filled with sweet or savory ingredients for a delightful treat every time.
Video
Ingredients
- 500 g (4 cups) All-purpose flour
- 9 g (1.5 tsp) Salt
- 7 g (2 tsp) Instant dry yeast
- 100 g (2 large) Eggs
- 113 g (4 oz) Butter unsalted, room temperature
- 240 g (1 cup) Whole Milk (about 110°F/45°C)
- 15 g (1 tbsp) Sugar
- 30 g (2 tbsp) Butter unsalted, room temperature
- ½ Egg for eggwash
Method
- Activate the Yeast: In a small bowl, dissolve the sugar in the warm milk. Sprinkle the yeast over the milk and let it sit for about 5-10 minutes until it becomes frothy.7 g Instant dry yeast, 15 g Sugar, 240 g Whole Milk
- Prepare the Dough: Combine the flour and salt in a large mixing bowl. Pour in the activated yeast mixture, eggs, and melted butter. Mix until a soft dough forms.500 g All-purpose flour, 9 g Salt, 100 g Eggs, 113 g Butter
- Rise: Place the dough in a greased bowl, cover it with a damp cloth, and let it rise in a warm place for about 1-2 hours or until it has doubled in size.
- Shape the Crescents: Punch down the risen dough and divide it into two equal parts. Roll each part into a circle about ¼ inch thick. Brush the entire surface of the dough with melted butter.30 g Butter
- Cut and Roll: Using a pizza cutter or sharp knife, cut the circle into 8-12 wedges (like slicing a pizza). Starting from the wide end, roll each wedge up towards the point to form a crescent shape. Place the crescents on a baking sheet lined with parchment paper, leaving some space between each one.
- Second Rise: Cover the baking sheet with a damp cloth and let the crescents rise again for about 30-45 minutes until they are puffy.
- Bake: Preheat your oven to 375°F (190°C). Brush the tops of the crescents with more melted butter or egg wash. Bake for 15-20 minutes or until the crescents are golden brown.1/2 Egg
- Cool and Serve: Remove from the oven and let the crescents cool on a wire rack. Enjoy your buttery crescents warm or at room temperature.
Notes
-
- Proper Yeast Activation: Ensure your yeast is fresh and active. Check the expiration date on the packet. Use warm milk (about 110°F/45°C). Too hot, and it can kill the yeast; too cold, and the yeast won’t activate properly.
-
- Correct Dough Consistency: The dough should be soft and slightly sticky but not overly wet. If it’s too sticky, add a little more flour, one tablespoon at a time. Knead the dough until it’s smooth and elastic. This usually takes about 5-7 minutes by hand or 3-5 minutes in a stand mixer.
-
- Proper Rising: Allow the dough to rise in a warm, draft-free environment. If your kitchen is cold, you can place the bowl in an oven with just the light on, or use the proof setting if your oven has one. Ensure the dough doubles in size during the first rise. This might take longer in cooler environments.
-
- Shaping the Crescents: Roll the dough out evenly to ensure uniform baking. Use a ruler or a round cake pan as a guide for a perfect circle. When cutting the dough into wedges, use a sharp knife or pizza cutter for clean cuts.
-
- Rolling Technique: Start rolling from the wide end of the wedge to the point, keeping the roll tight but not overly tight. This helps create the crescent shape and ensures even baking. Tuck the point under the roll slightly to prevent it from unrolling during baking.
-
- Second Rise: Don’t skip the second rise. This step is crucial for achieving light, fluffy crescents. Cover the shaped crescents with a damp cloth or plastic wrap to prevent them from drying out during the second rise.
-
- Baking: Preheat your oven to ensure it’s at the correct temperature when you place the crescents inside. Bake until the crescents are golden brown. Oven temperatures can vary, so keep an eye on them and adjust the baking time as needed.
-
- Brush with Butter: Brush the crescents with melted butter before and after baking for an extra rich buttery flavor. Optionally, sprinkle with coarse sugar or sea salt before baking for added texture and taste.
-
- Cooling: Allow the crescents to cool on a wire rack after baking to prevent the bottoms from becoming soggy.
-
- Storage: Store any leftovers in an airtight container at room temperature for up to two days, or freeze for longer storage. Reheat gently in the oven to refresh their texture.
Equipment you will need


Nutrition
Tried this recipe?
Mention @veenaazmanov_kitchen or tag #veenaazmanovkitchen!


Don’t lose this recipe! Save it for Later!
📌 Save this Recipe for later on Pinterest so you can easily find it again.
⭐ Add Veena Azmanov Kitchen to your Google Preferred Sources.
It helps Google show you more of our recipes.
📧 Subscribe for new recipes delivered to your inbox.
🎥 Follow us for more recipes


KNEADING DOUGH IS RELAXING,,I JUST CLOSE MY EYES AND GET GOING WITH THE KNEADING, I ADD ALL SORTS OF HERBS AND LOTS OF PUREED GARLIC, ….
THANKS …QUERINO..
Thank you Veena for sharing your recipes and also taking the time to make these videos for us. Your recipes and instructions are super easy to follow. You make everything look so effortless. I must say, you are very talented and very gifted not only in baking but in cooking other dishes as well.
I used to live in Mumbai too but presently living in Vancouver, BC. for the last 20 years and have been following your recipes for a couple of years now. I can’t thank you enough for sharing them with us. ?
God Bless you.
Thank you so much for your kind words Liz. I am happy to hear you are enjoying my recipes. Stay blessed
I love,love,love this recipe? It came out beautiful, light,soft and oh-so buttery???Your recipes and instructions are easy to follow. Hence, every single bake comes out perfect ( well,almost perfect) on my first attempt. Thank you Veena?
Thank you, so much. Lucy. So happy you enjoyed it
All of your baking tips are so helpful in making these yummy crescent rolls! Thank you!
Thank you, Marlynn
I can’t wait to make this recipe for lunch tomorrow! They look incredibly delicious and soft!
Yes, they are very soft Rika.
I love how soft these are, and thanks for showing how to roll them, it was super helpful.
You are very welcome, Romina.
The video was so helpful~ you make it look so easy! Going to make these this weekend and cannot wait! Thank you!
Thank you, Tawnie. Let me know how they were
How soft and buttery are this rolls. A must try!
Thank you, Kushi
Hi Veena! I tried the crescent roll recipe few months back and it came out perfect. Yesterday I tried it again by making ham and cheese rollups. I have some queries. The dough was proofed and chilled. Last night I rolled out and layered with ham and cheese and left it to chill overnight. The next day, after cutting into 1inch slices, do you recommend to second proof the rolls? Can I take them out cold and bake them in a hot oven without proofing?
Thank you for sharing and your guidance.
Mary, you must prove them again or they will not rise fully in the oven. Thanks