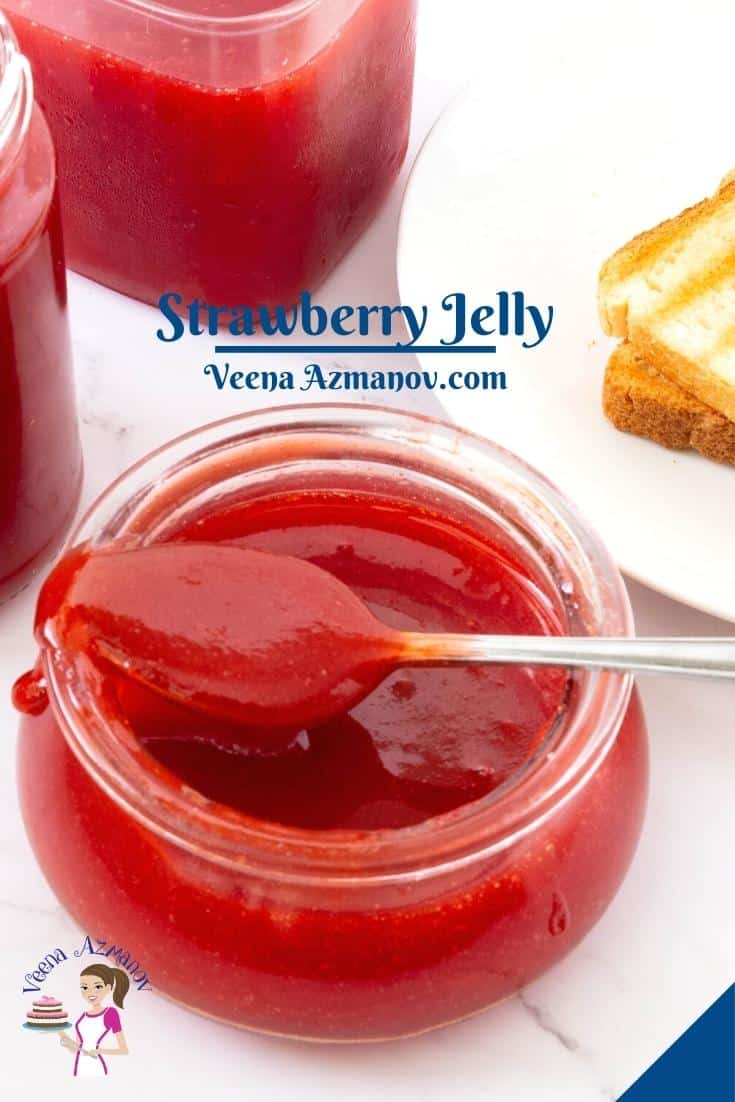
Homemade Strawberry Jelly – 20 Mins

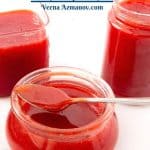

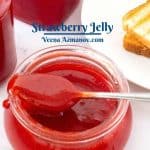

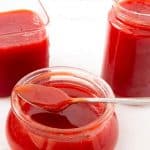
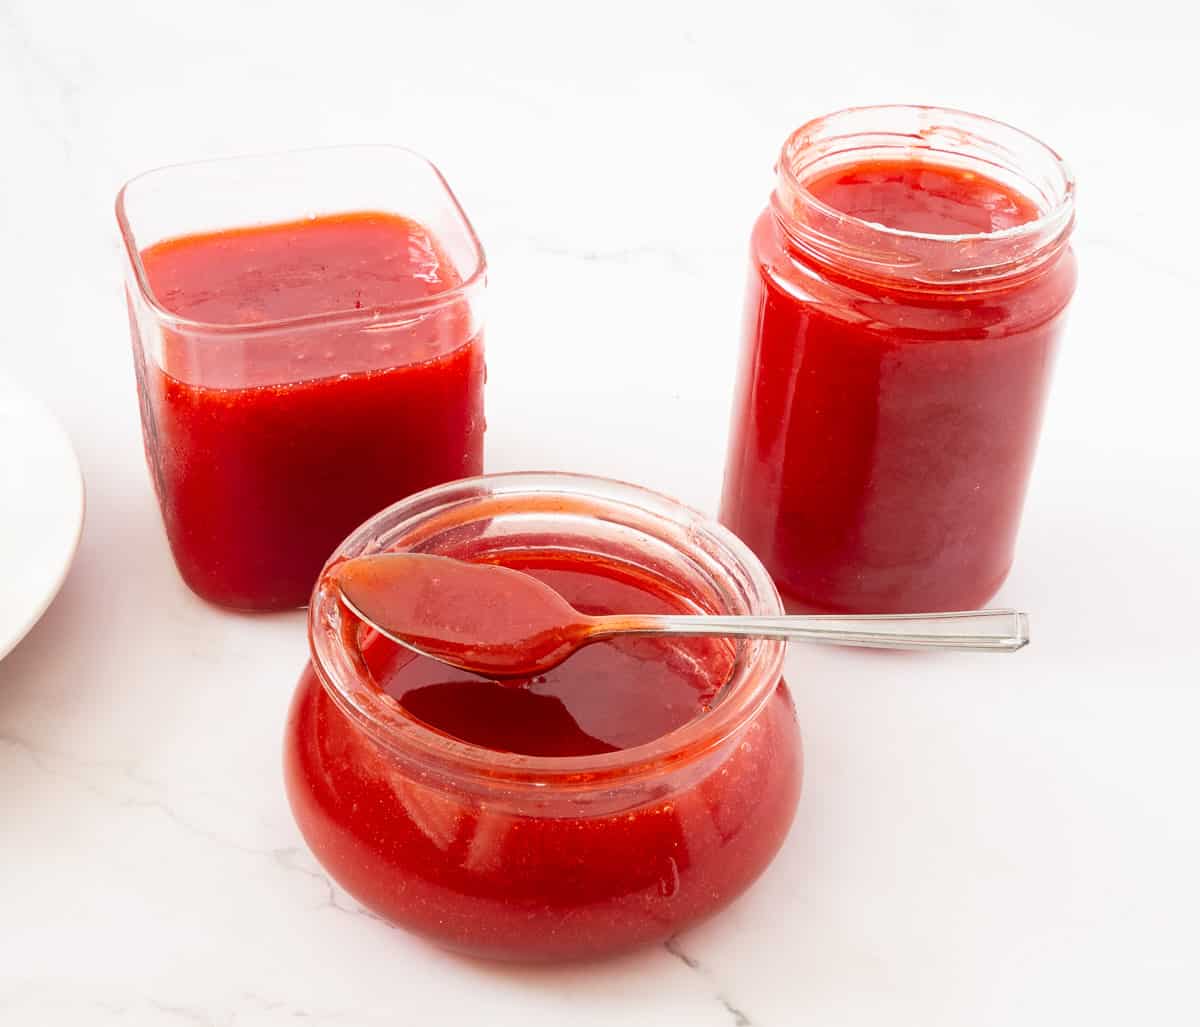
This strawberry jelly is smooth, transparent, and low in sugar. It is simple and easy to make in less than 20 minutes using fresh or frozen strawberries.
I started making strawberry jelly because my kids were obsessed with it—but I hated how store-bought ones were basically red sugar. So one day I just made my own.
Turns out, it was way easier than I expected—and the flavor? Actual strawberries, not some artificial version of them. Now every time strawberries are in season, I make a batch. The kids still eat it by the spoonful or spread it thick on toast. I use it in cakes, swirled into yogurt, or just as an excuse to make fresh bread.
Once you’ve made it at home, you can’t go back.
Why make homemade jelly?
- No-fail method – This recipe is simple and easy. And if you’ve never made homemade jam and jellies before, you will definitely start now.
- No- canning – This is a homemade freezer jam recipe without the fuss of canning, so you don’t need to put the jars in a boiling water bath. Just pour the jelly into sterilized jars and save them in the fridge or freezer. However, below, I have also given you the detailed process for canning.
- With pectin – Ideally, you can make strawberry jam or jelly with just two ingredients: fruit and sugar. However, since we remove the fruit fiber and seeds, where the natural pectin is, for jelly, we need to add artificial pectin. Artificial pectin is usually made from fruit rind and is safe and easy to use.
- Low-sugar – Fresh strawberries are naturally soft and sweet. Therefore, you don’t need to add a lot of sugar to this jelly.
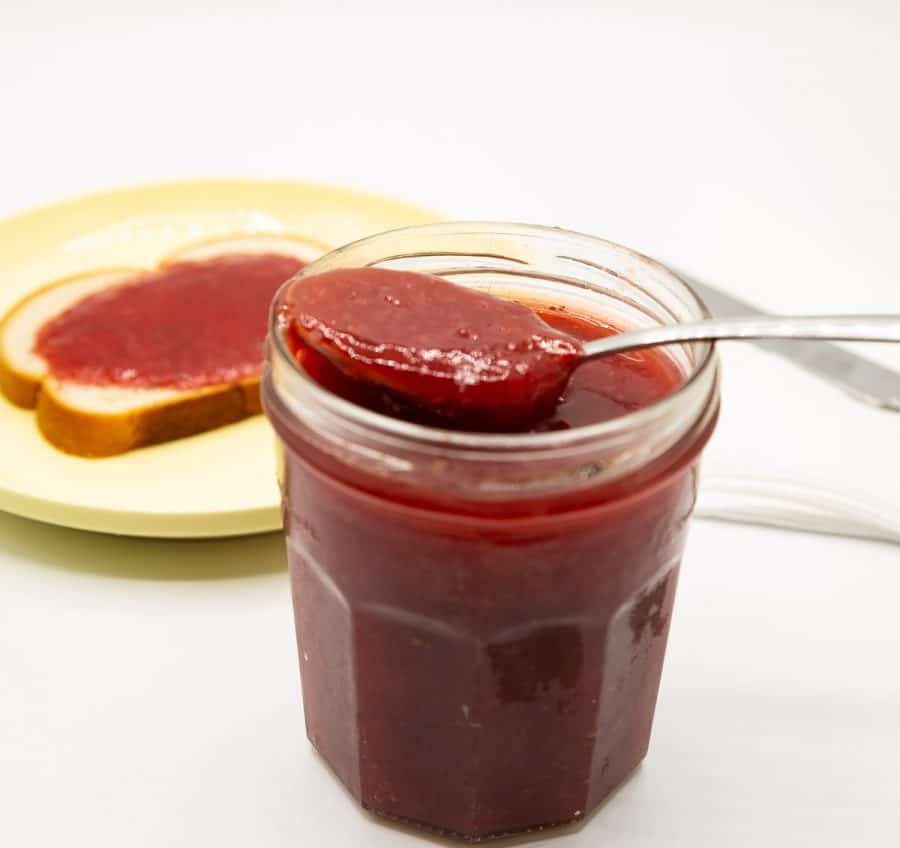
- You can use this jelly on toast or French toast, as well as in cookies such as thumbprint cookies. Of course, in jelly donuts, too.

Ingredients and substitutes
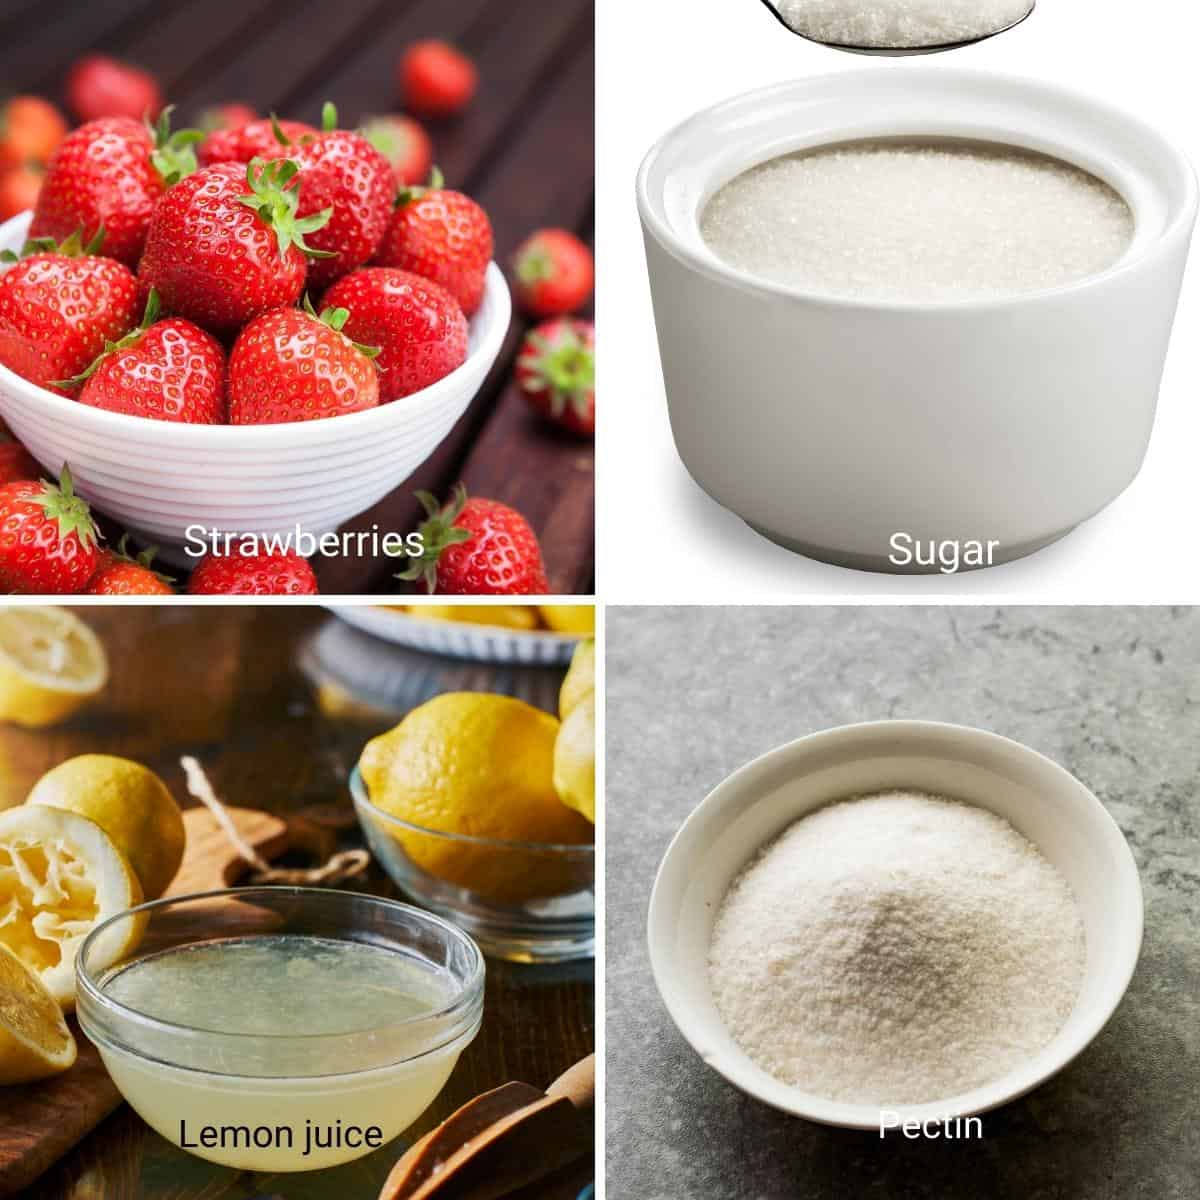
- Strawberries – The best candidates for jams are ripe strawberries that are dark red and more on the soft side. Ones that have been kept aside in the fridge for a day or two.
Pro tip – Never let the strawberries soak in water, as they absorb water, making a very runny jam. I like to wash, hull, and dry the strawberries with a paper towel or leave them in the fridge to completely dry – this helps reduce the cooking time. - Sugar – Unlike commercial jelly, I like to use less sugar, which is usually half the quantity of fruit. For example, if I have 1 kg of fruit, I usually add 500 grams of sugar. But you can use up to 750 grams for 1 kg of fruit.
- Lemon juice – It’s best to use fresh lemon juice.
- Pectin – This is fruit pectin and can be found in most supermarkets.
Step-by-step: How to make strawberry jelly
- Check the strawberries and remove any bad, discolored, or bruised ones.
Pro tip – You can use soft strawberries, but discolored and bruised ones will ruin the jelly. Also, don’t soak the fruit in water for too long, as they do soak up moisture. - Place the strawberries in a food processor and blend until smooth. Pour the puree into a sieve /mesh, cheesecloth, or jelly bag to strain out only the strawberry juice. Discard the seeds and fruit fiber.
Pro tip – I like to use my blender instead of a food processor, so I don’t lose all the fruit fiber. The disadvantage of keeping fruit fiber, though, is that the jelly is less transparent.
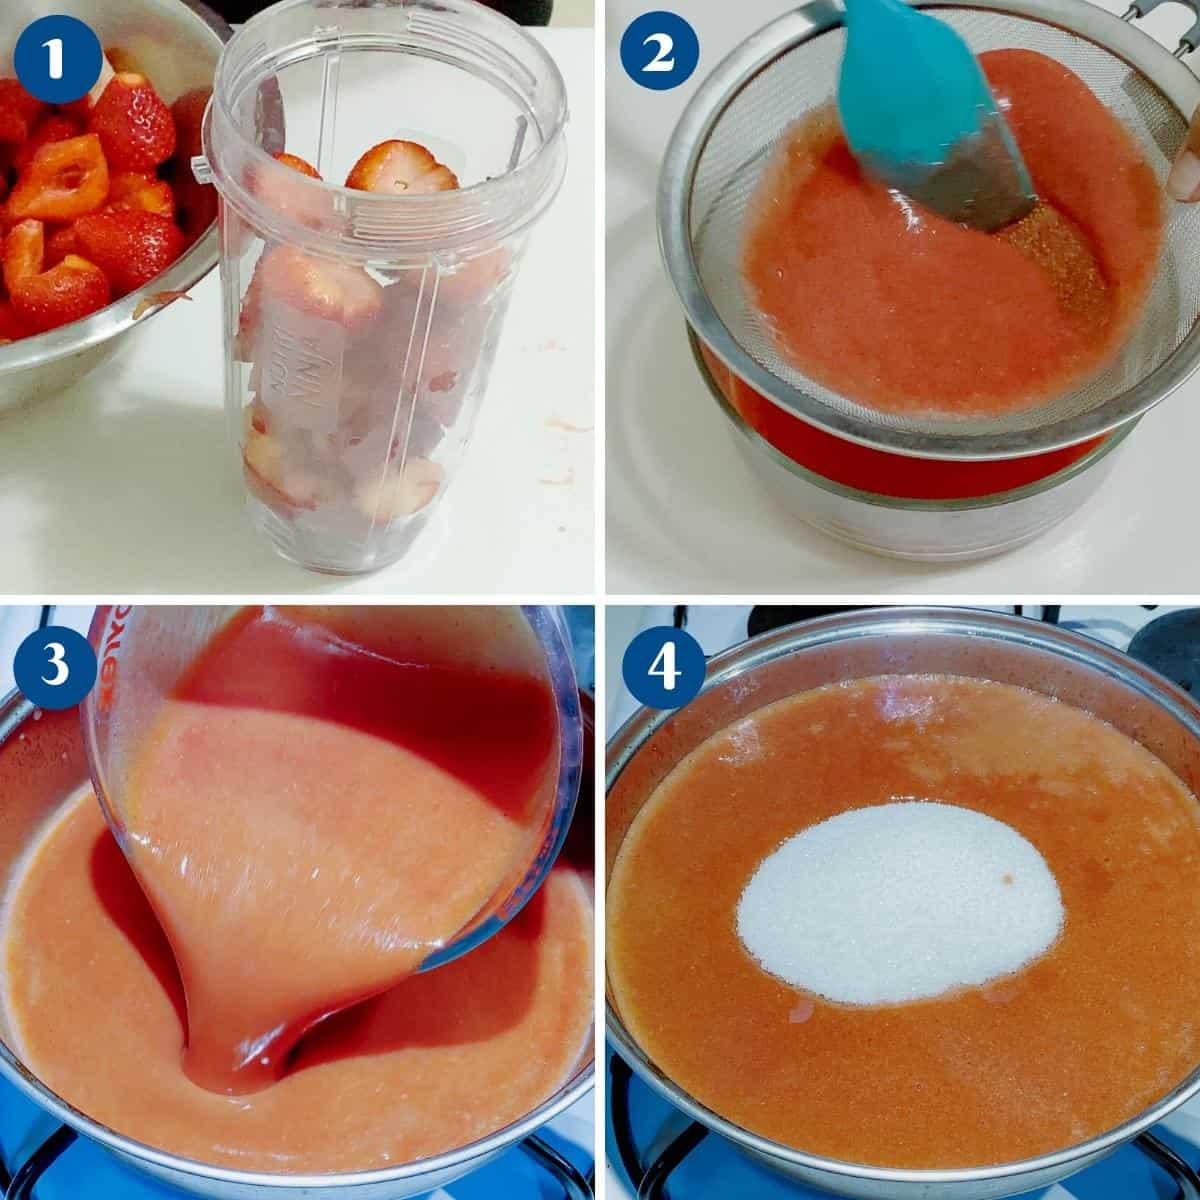
- In a heavy-bottomed large pot (a large saucepan works too), combine the strawberries, sugar, salt, pectin powder, and lemon juice. Give it a good stir.
Pro tip – Some pectin can become lumpy when added to the pan, but it does dissolve during cooking. Alternatively, you can add the pectin to a small batch of strawberry puree and then add it to the pot. - Cook on medium heat until the sugar is dissolved. Then, turn the heat up and let the mixture come to a boil. Let it boil for two minutes on medium-high. Skim any foam that rises to the top with a metal spoon.
Pro tip – The foam does not affect the taste of the jelly, but it does give the jelly a cloudy appearance. - Then, turn the heat to medium-low and cook for just about 5 minutes. If there is still some scum on the top, you can add a tablespoon of butter to dissolve it.
Pro tip – Ideally, you do not need to reduce jelly or jam with pectin. But, since we are using less pectin in our jelly, we will cook and reduce it for just about 5 minutes more.
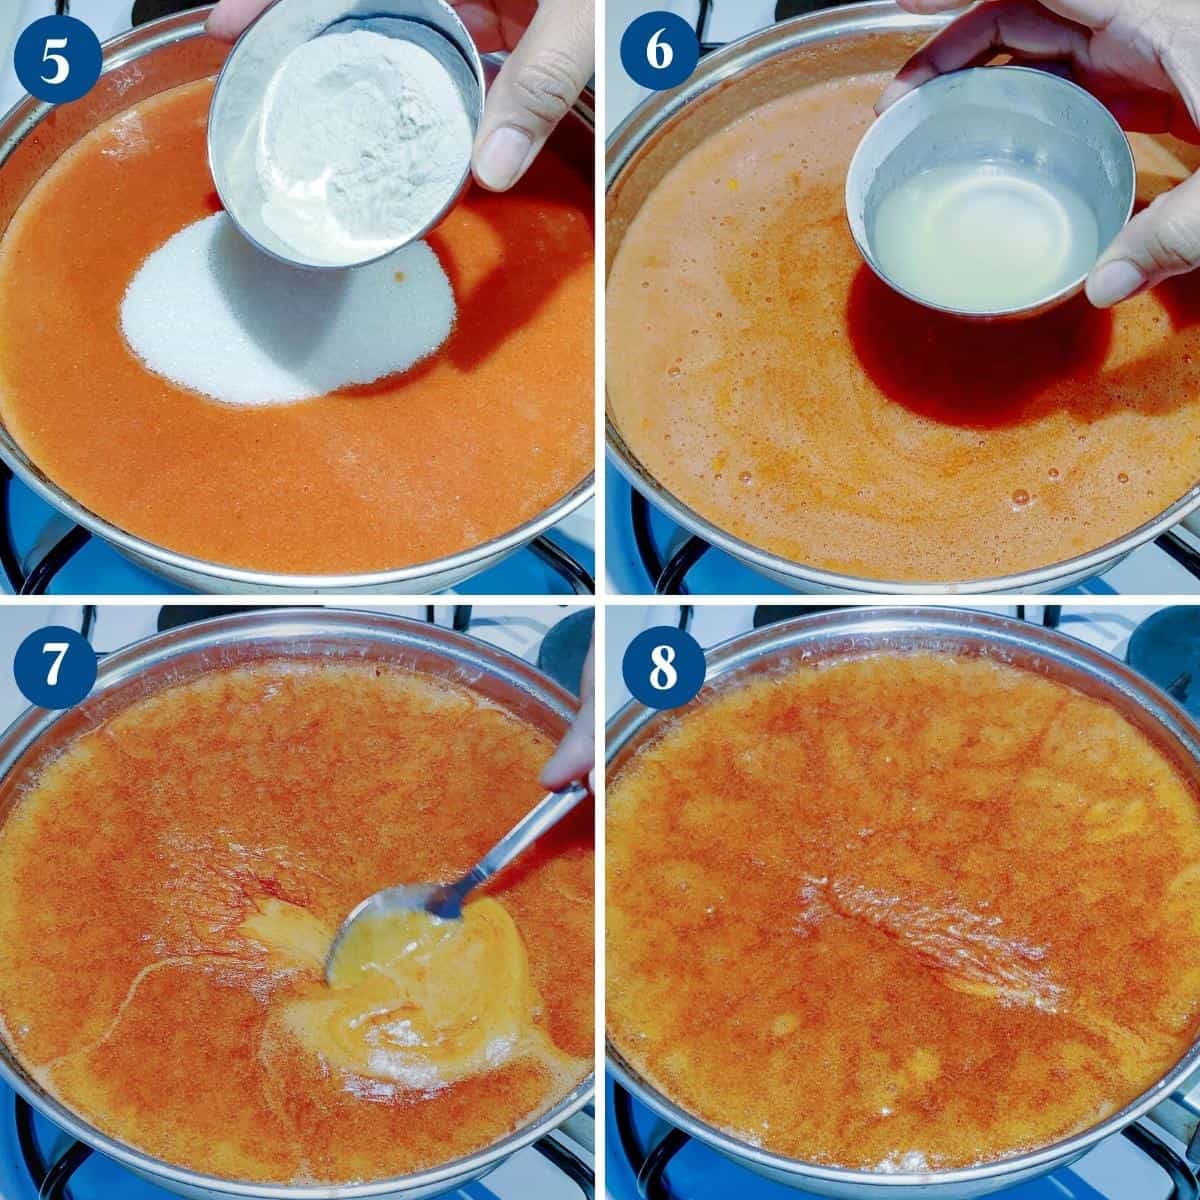
- Turn the heat off and let the jam sit in the pan for 2 to 3 minutes.
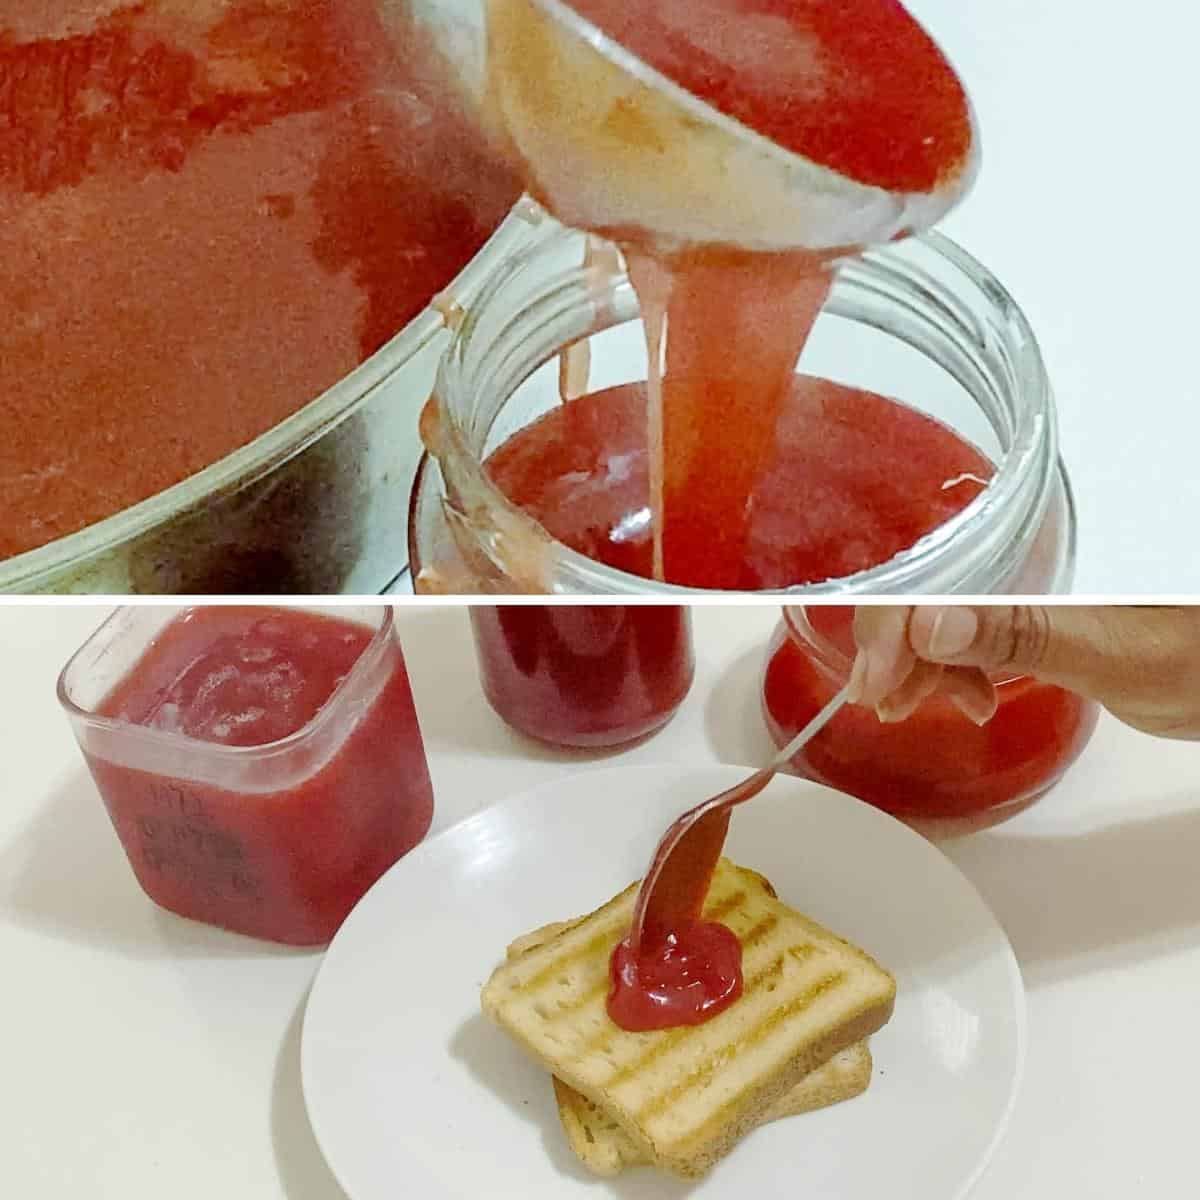
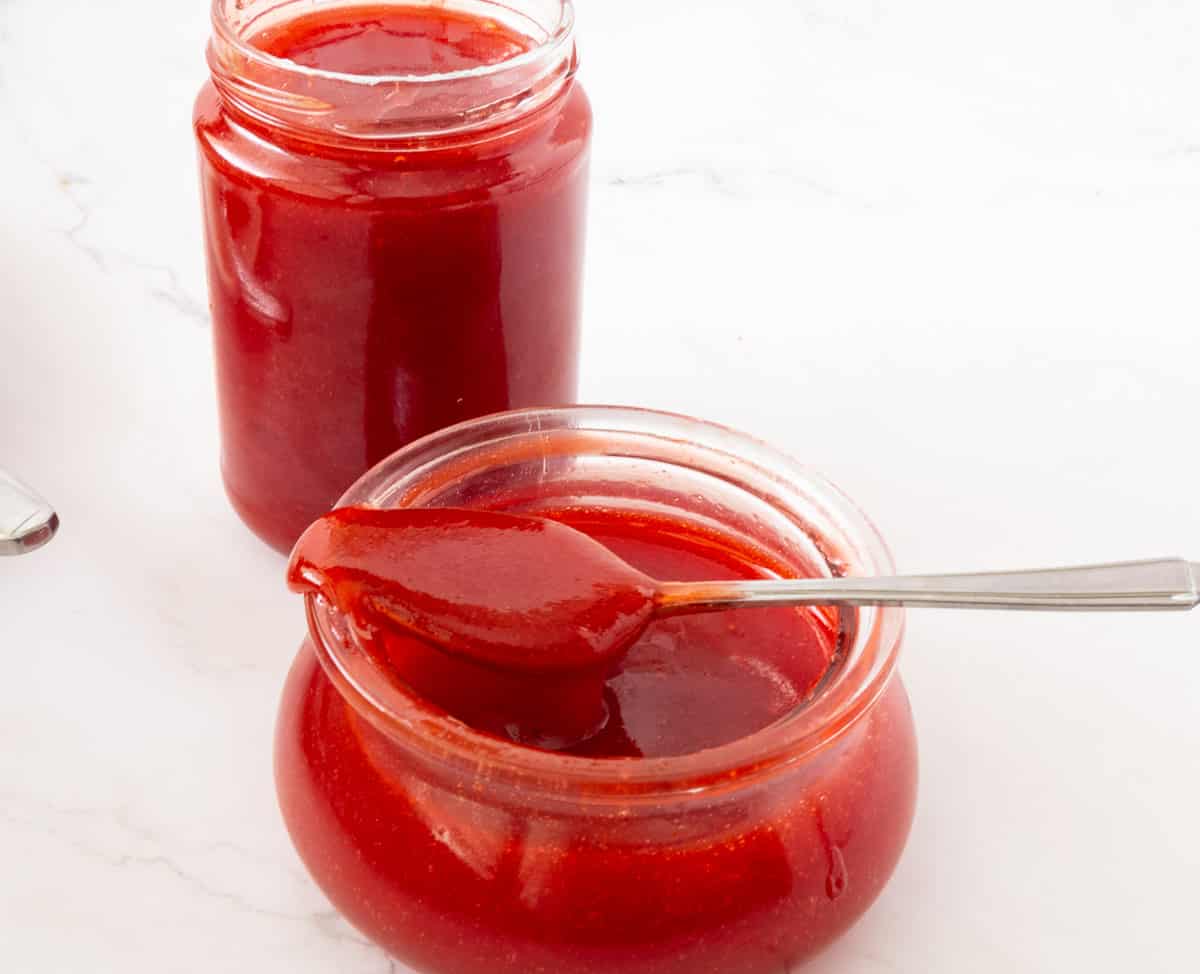
Pro tip – When using pectin, there is no need to test the jam using the traditional method. But, if unsure, you can use a candy thermometer – the jelly should still reach 105 C / 221 F. - Pour the jelly into warm, sterilized jars, leaving 1/4 inch space from the top. Use a clean, sterilized knife or spatula to move the jelly a bit – this will remove any air pockets.
- Place a piece of wax paper on the top before you place the lid on tightly. Clean the rim of the jar with a clean paper hand towel. Top the lid.
Alternatively, use the lid with screw-on rings that come with the canning jars.
The canning process (if you plan to can the jelly)
Sterilize the jars
- Sterilize 4 x 8 oz (250 g) jars by washing them in soapy warm water or cleaning them in the dishwasher with a gentle cycle. Then, place them in the oven for 20 minutes at a low 284 F / 140 C.
Pro tip – I find the dishwasher works well to wash jars, and the oven dries any excess moisture in the bottles. - Note – Leave them in the oven until you are ready to use them (you can turn the oven off). Don’t forget to wash and sterilize the bottle lids as well.
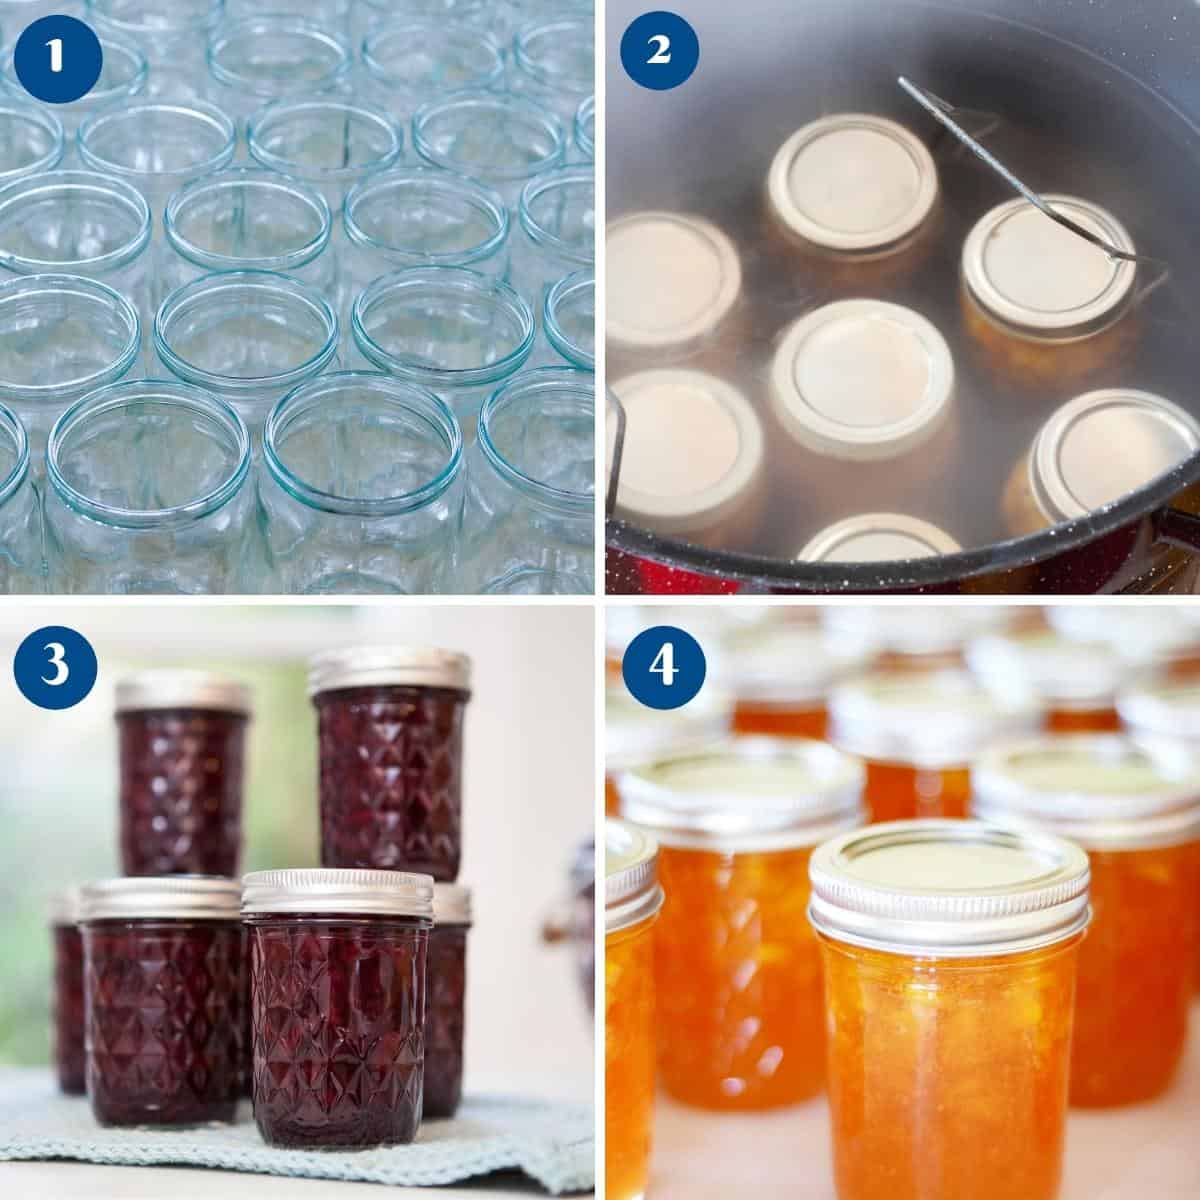
Canning process
- Place a rack at the bottom of a large stockpot or water-bath canner. Fill half the pot with water. Bring the water in the pot to a boil on high heat.
- Lower the filled jars over the rack, leaving enough space between the jars.
Pro tip – The water level should be at least an inch above the tops of the jars. So, if necessary, pour more boiling water. - Bring the water to a boil again. Cover the pot and process/simmer for 15 minutes.
- Then, carefully remove the jars from the stockpot and place them upside down on a kitchen towel to absorb any excess moisture. Cool completely.
Pro tip – The hot jars are very delicate, so make sure to use tongs when taking them out and place them on soft towels to prevent them from breaking. Do not touch the inside of the jar to prevent mold. - Press the top of the lid to ensure the seal is tight – the lid should not move at all. Store in a cool, dry place.
Storage
- If canning, the canned jelly will stay in a cool, dry place in the pantry for up to a year or even longer.
- When not canned, the jelly will stay at room temperature for a month or more in good weather.
- You can also keep the jelly in the fridge for 3 to 6 months.
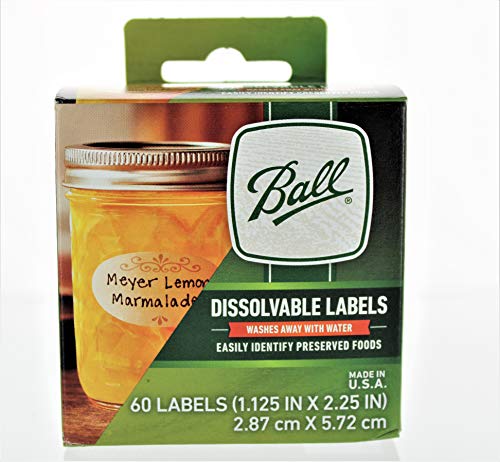
- Label the jar with the name and date so you know what is in it and when you made it.

- Blueberry Jam – No Pectin
- Plum Peach Jam – No-Pectin
- Cherry Jam – No Pectin (3 ingredients)
- Fresh Fig Jam – No Pectin (just 3 ingredients)
- See all jam recipes


Frequently asked questions
Pectin is an essential ingredient for jams, jellies, and preserves. Without pectin, our jams and jellies will not set. Pectin is naturally found in many fruit seeds and skins, but can also be produced artificially.
Commercial pectin is usually made from the fruit rind. Using artificial pectin can reduce the jam cooking time and also produce a larger quantity of jam without having to stir for a long time.
Using pectin is a sure way to ensure that the jam or jelly will set. So, unlike traditional jams, you do not need to test this jelly over chilled plates. But, if unsure, you can use a candy thermometer – the jelly should still reach 105 C / 221 F.
No matter what jam you make, there is so much you can do with it other than just spread it on toast. I often use jam in my macarons for a quick fruit filling. My kids love to help me make shortbread cookies so they can stick their thumb in the center and add jam. Also, nothing beats fresh, homemade fried donuts filled with a jam or jelly that just melts in the mouth. These classic Linzer cookies are made every year for gifts.
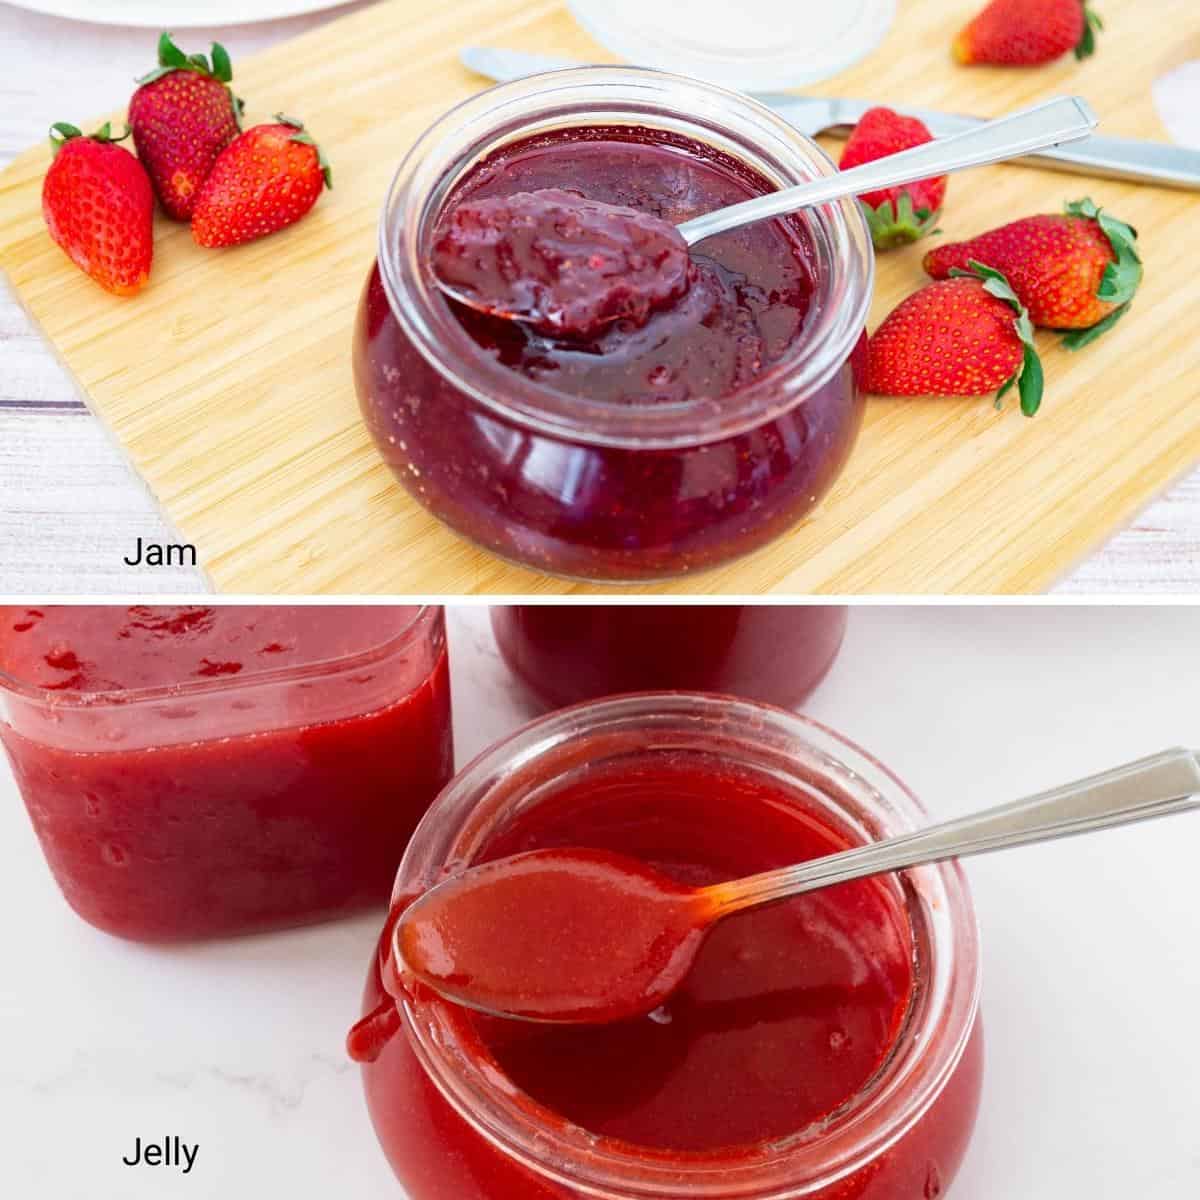
While in a jam, you use the whole fruit, including the seeds and fruit fiber or skin; for jelly, we strain the seeds and fruit fiber or skin. This gives the jelly that smooth, transparent, glossy look.
But this also means the mixture contains no natural ingredients for preparing natural pectin. So, we have to use artificial pectin. Don’t worry, pectin is made from fruit rind, so it is safe to eat.
Cooking jelly is much easier because it does not need the long, slow process of cooking and testing. In fact, it really needs between 3 and 5 minutes of quick boiling when we use pectin.
Because we use pectin and cook much less, the quantity of jelly you get from the same amount of fruit is more.
Strawberry Jelly
This strawberry jelly is smooth, transparent, and low in sugar. It is simple and easy to make in less than 20 minutes using fresh or frozen strawberries.
Video
Ingredients
- 6 cup (900 g) Strawberries
- 2½ cups (500 g) Sugar
- 1 tbsp Lemon juice
- 4 tbsp Pectin
- ¼ tsp Salt (optional)
Method
- Check the strawberries and remove any bad, discolored, or bruised ones. Place the strawberries in a food processor and blend until smooth. Pour the puree into a sieve /mesh, cheesecloth, or jelly bag to strain out only the strawberry juice. Discard the seeds and fruit fiber.6 cup Strawberries
- In a heavy bottom large pot (a large saucepan works too), combine the strawberries, sugar, salt, pectin powder, and lemon juice. Give it a good stir.2½ cups Sugar, 1 tbsp Lemon juice, 4 tbsp Pectin, ¼ tsp Salt
- Cook on medium heat until the sugar is dissolved. Then, turn the heat up and let the mixture come to a full rolling boil. Let it boil for two minutes on medium-high. Skim any foam that rises to the top with a metal spoon.
- Then, turn the heat to medium-low and cook for just about 5 minutes. If there is still some scum on the top, you can add a tablespoon of butter to dissolve it.
- Turn the heat off and let the jam sit in the pan for 2 to 3 minutes. Pro tip – When using pectin there is no need to test jam the traditional method. But, if unsure you can use a candy thermometer – the jelly should still reach 105 C / 221 F.
- Pour the jelly into warm sterilized jars leaving 1/4 inch headspace from the top. Use a clean sterilized knife or spatula to move the jelly a bit – this will remove any air pockets.
- Place a piece of wax paper on the top before you place the lid on tightly. Clean the rim of the jar with a clean paper towel. Top the lid. Alternatively, use the lid with screw-on rings that come with the canning jars.
- Sterilize the jars – Sterilize 4 x 8 oz (250 g) jars by washing them in hot soapy water or cleaning them in the dishwasher with a gentle cycle. Then, place them in the oven and bake for 20 minutes at a low temperature of 284°F / 140°C.
- Place a rack in the bottom of a large stockpot or water bath canner. Fill half the pot with water. Bring the water in the pot to a boil on high heat.
- Lower the filled jars onto the rack, leaving sufficient space between them. Bring the water back to a boil. Cover the pot and process/simmer for 15 minutes.
- Then, carefully remove the jars from the stockpot and place them on a kitchen towel to absorb any excess moisture. Cool completely.
- Press the top of the lid to ensure the seal is tight – the lid should not move at all. Store in a cool dry place.
Notes
- Shelf life – Homemade jelly made with sugar and fresh fruit can have a long shelf life. If processed with the canning method, and stored properly in a cool dark place, this jelly can last for up to 2 years. Once opened it can be kept in the refrigerator for up to 3 months
- Do you need lemon juice? Almost all jams and jellies use lemon juice. Lemon is a great way to cut down on that sweetness with a citrus edge. It also prevents the sugar from crystallizing. Most importantly lemon is necessary for activating pectin in our jelly.
- How long do you cook jelly? because we use artificial pectin in our jelly there is no need to cook the long slow traditional cooking method. All we need to do is activate the pectin and take it off heat.
- Jelly no setting – the amount of pectin used will determine how the jelly will set. Personally, I do not like a soft spreadable jelly, not one that needs to be cut with a spoon.
- Over-cooked jelly – It is possible to overcook jelly. It is better to undercook rather than overcook a jam or jelly. When undercooked you can place it back on the stove and cook some more. Overcooked jam or jelly with pectin will result in a sticky jelly that sets like toffee.
- My jelly is not transparent – the presence of fruit fiber or pulp and the amount of sugar you use will result in how glossy or transparent the jelly becomes. Today, we blended the strawberries in a blender that keeps some of the fiber and we used less sugar so unlike commercial jelly our jelly is less glossy or transparent.
- Processing time – The processing time listed is for altitudes of 1,000 feet or less. Add 1 minute to the processing time for each 1,000 feet of additional altitude.
Storage
- If canning the canned jelly will stay in a cool dry place in the pantry for up to a year or more
- When not canned the jelly will stay at room temperature for a month or more in good weather.
- You can also keep the jelly in the fridge for 3 to 6 months.
- Label the jar with the name and date so you know what is in and when you made it.
Equipment you will need


Nutrition
Tried this recipe?
Mention @veenaazmanov_kitchen or tag #veenaazmanovkitchen!- Strawberry Jam recipe – No Pectin or Microwave Strawberry Jam
- Apricot Jam – No Pectin or Apricot Peach Jam
- Mixed Berry Jam – No Pectin (low-sugar)
- Old Fashioned Raspberry Jam – No Pectin
Don’t lose this recipe! Save it for Later!
📌 Save this Recipe for later on Pinterest so you can easily find it again.
⭐ Add Veena Azmanov Kitchen to your Google Preferred Sources.
It helps Google show you more of our recipes.
📧 Subscribe for new recipes delivered to your inbox.
🎥 Follow us for more recipes


Can I use the converted amount of liquid pectin to make this jelly as long as I add the pectin after the fruit has come to the boil? By my calculations four Tbsp. of powdered pectin equals six ounces of liquid. Any thoughts?
Thank you.
I think that should work. I have not tested it with this recipe. Thanks
Thank you! I will let you know ?
When you say 6 cups, does that mean after they have been in the blender? Or just cut up?
After they have been cut up. It is best to use weight measurements because everyone can cut the fruit to various sizes. Thanks.
This looks like a lovely recipe. I’ll be using frozen strawberries, I assume I need to thaw them first to be able to puree? They do get quite mushy when thawed so wondering if it’s still ok?
Thanks!
Hey Laurie. No need to thaw them unless they are loaded with ice. I would remove as much ice crystals as possible before pulsing them.
About how much “juice” is supposed to be left after I strain? I am not sure if I strained enough but some of the seeds are coming through the seive.
If you measure the strawberries by weight, it should be just enough juice. Use a fine mesh strainer to remove the seeds.
This was my first ever jelly attempt with some strawberries that we picked a couple weeks ago that I froze. I was quite successful, thank you! The only hiccup is your recipe calls for salt, but nowhere do you indicate how much?
I ended up not using anything and I’m not missing the salt in the taste but I assume if the recipe calls for you it you need some amount?
Happy you enjoyed this jelly, Amber. Yes, the 1/4 tsp salt is optional. I did add it to the ingredients. Thanks for bringing it to my attention and for the lovely feedback.
Homemade jelly is always the best! it’s always the best option to make things by yourself and this is a great example! I am definitely going to be trying this out. Thank you for sharing this recipe!
Love strawberries and what a beautiful and smooth texture and color. Pinned to try this soon.
Jenny
I usually make strawberry jam with strawberries from my garden every year. But this year I want to try this jelly. It looks really good!