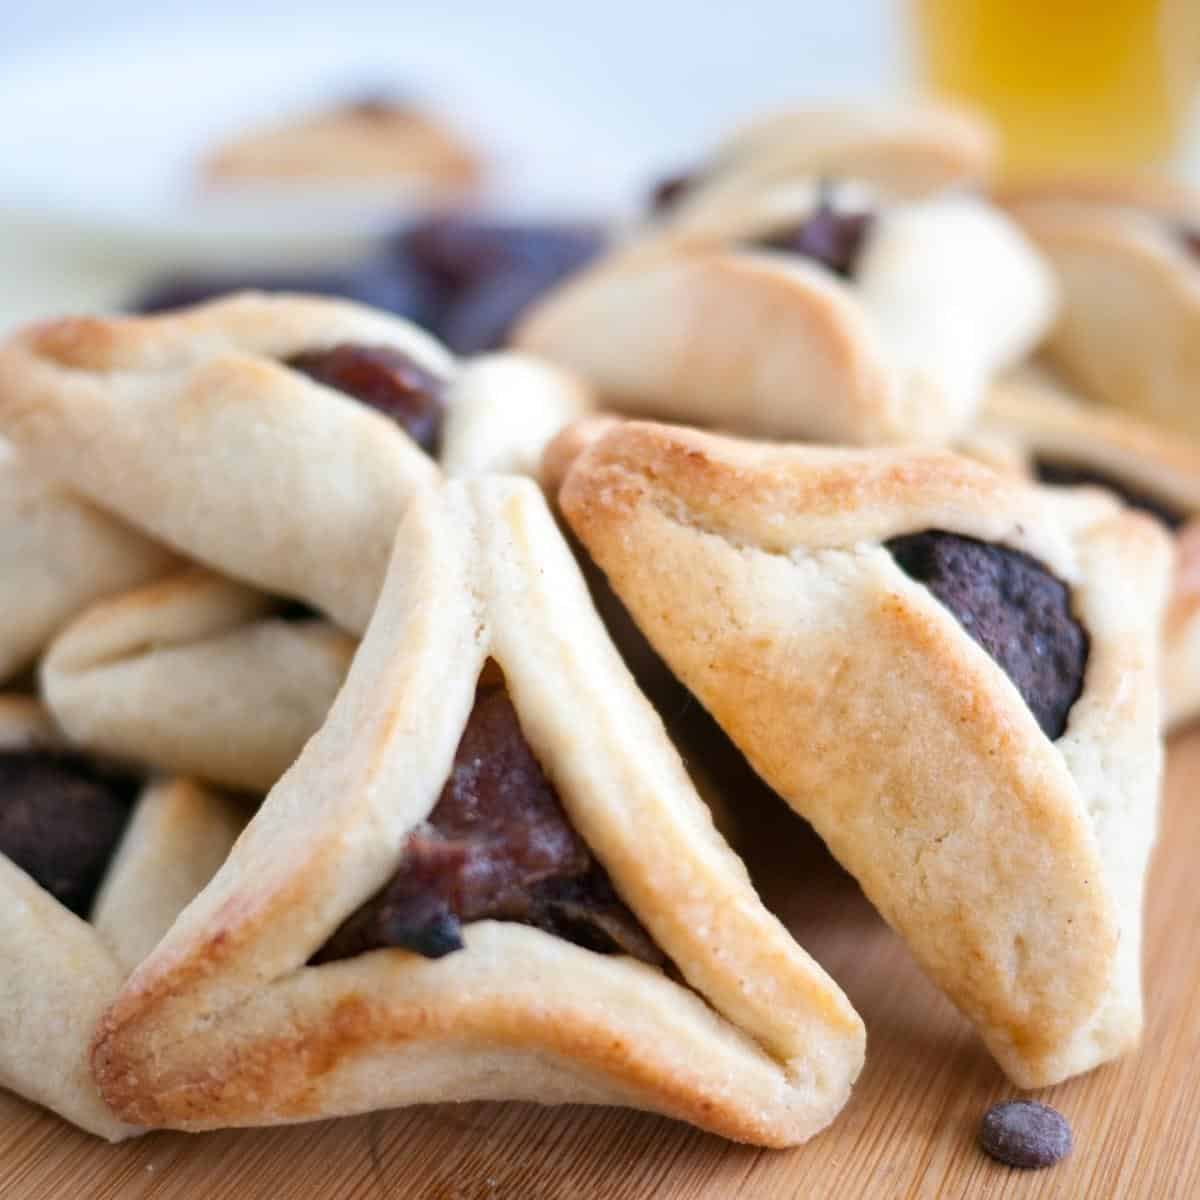
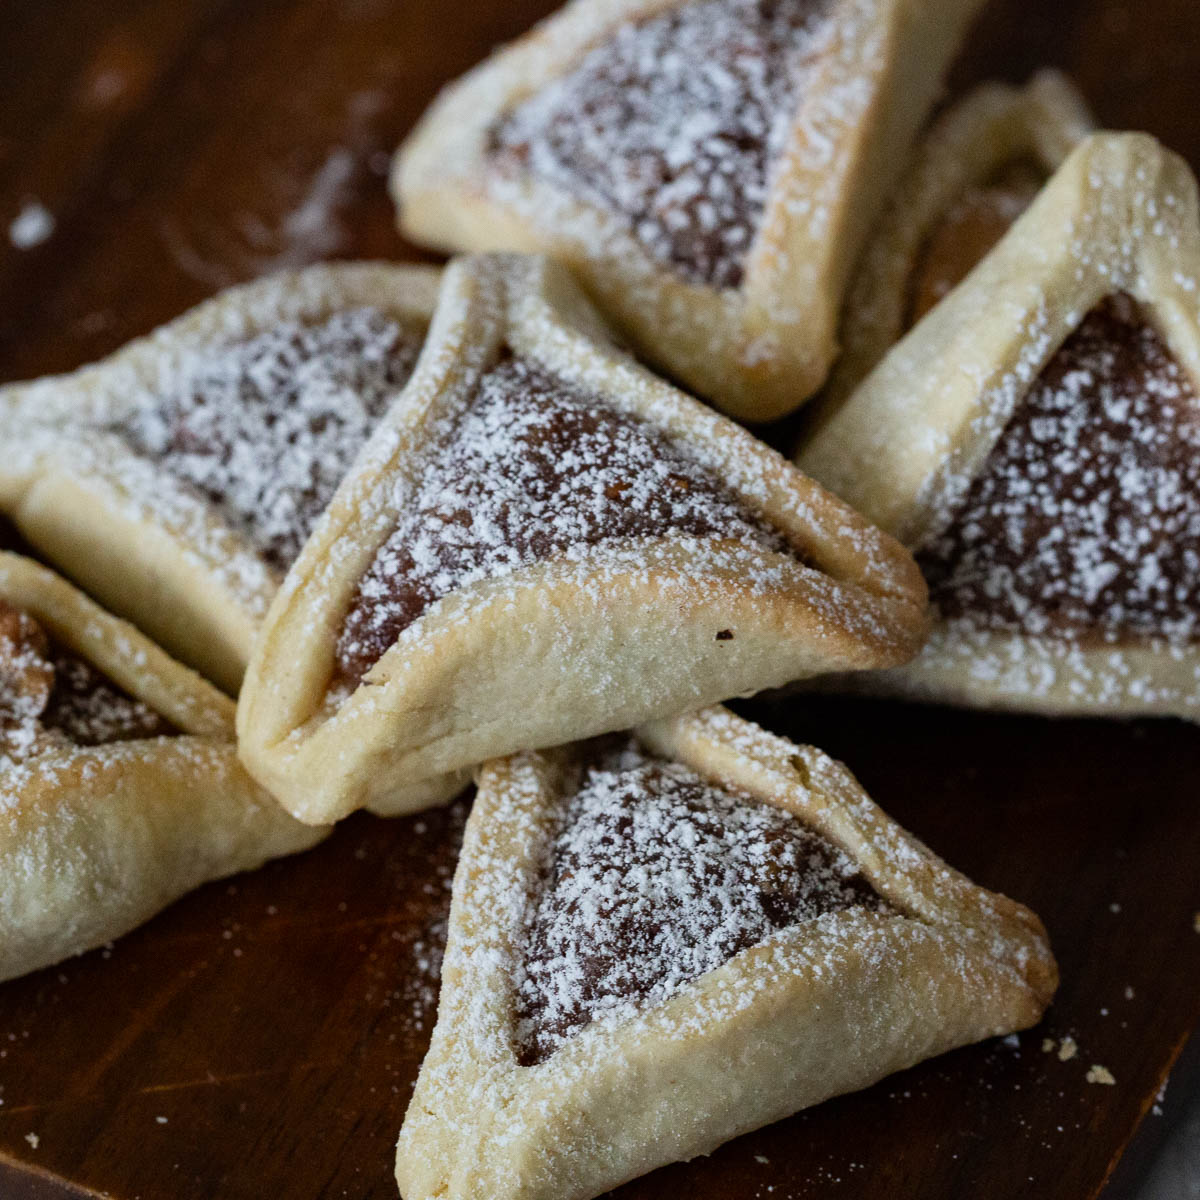
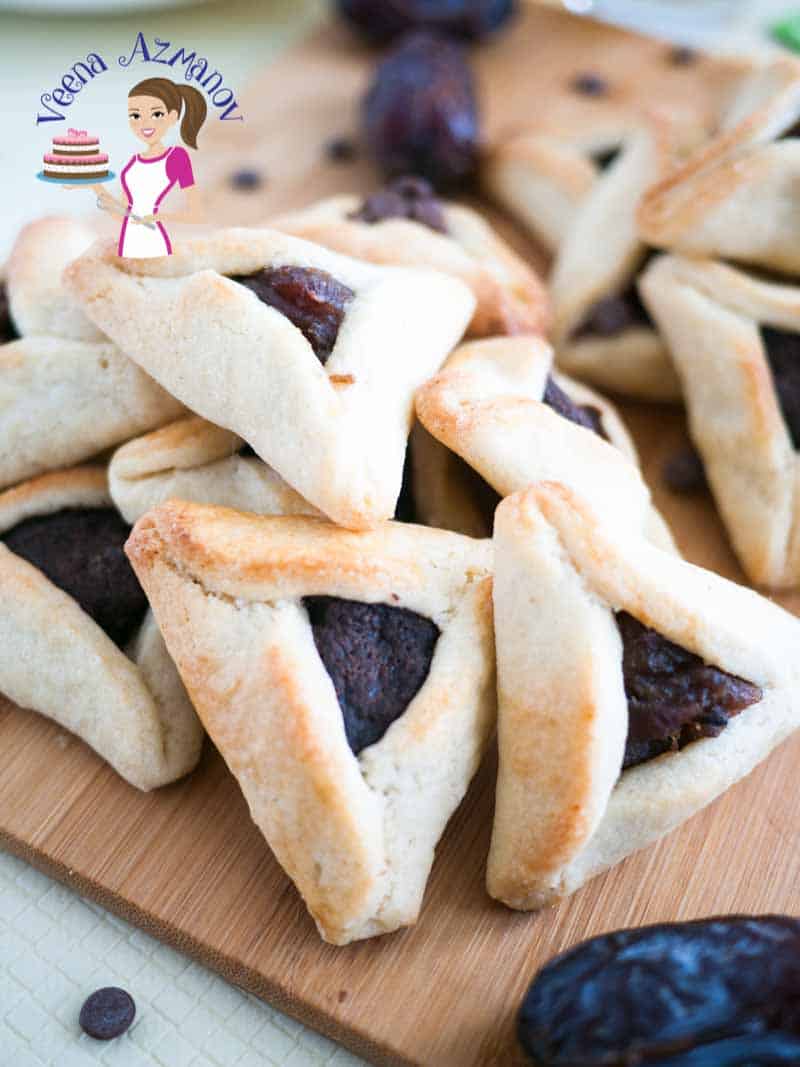
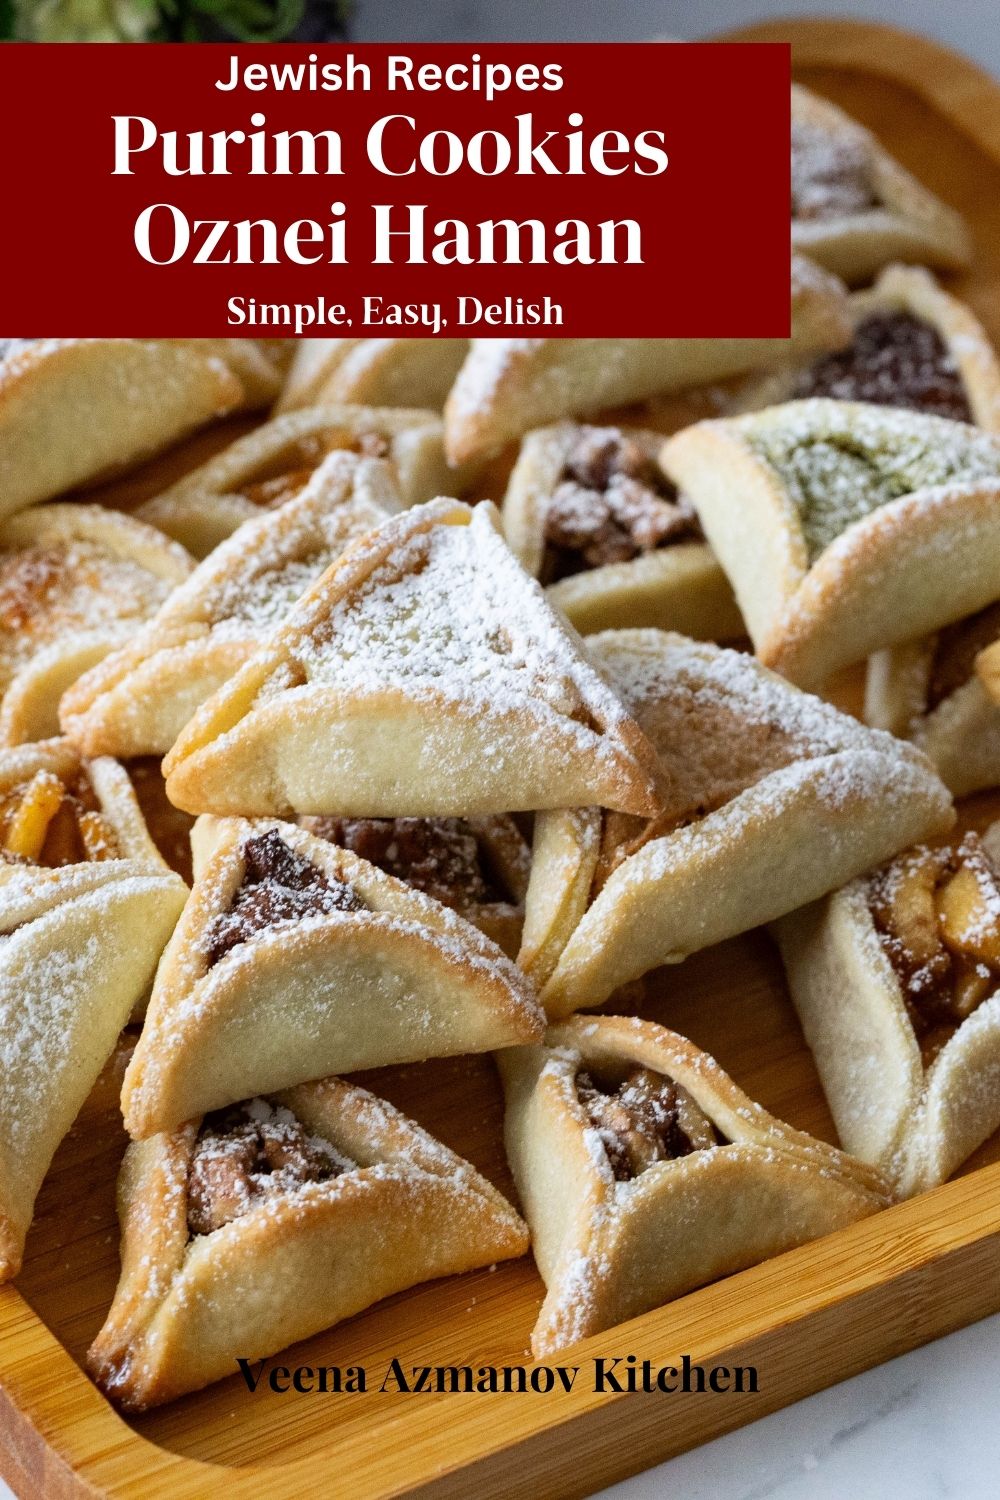
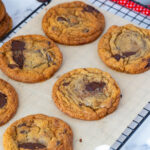
Purim Cookies – Oznei Haman
 Prep Time 30 minutes Cook Time 15 minutes Total Time 1 hour 45 minutes
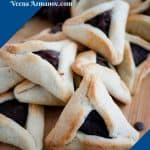
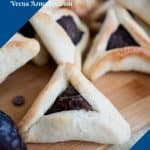
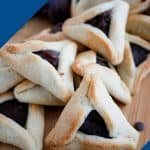

These Purim cookies are a special treat during the Jewish Purim festival. A shortbread cookie dough with hundreds of choices for fillings, from traditional poppy seed and dates to modern chocolate, halva, apple pie, pecan pie, strawberry, dulce de leche, and more.
If you are Jewish or are associated with Jewish food, then the names Hamantaschen, Oznei Haman, or Purim cookies are not new to you. I learned of these years ago when I came to Israel. I started making them because my kids LOVE them. And now, every year for this Jewish holiday of Purim, I make lovely cookies with new flavors for my kids to try.
One of the most fascinating things I learned about these cookies is the many names it has and the reason for those names. It’s all associated with the Purim story involving a bad guy name Haman, a Jewish lady named Esther, and her victory over his plot to destroy the Jewish People. The cookie is shaped to resemble the three corners of Haman’s hat. Purim is the name of the festival and both Hamantaschen and Oznei Haman are derived from his name.
Why make these cookies?
- The cookie dough is like a shortbread cookie filling with this wonderful traditional or modern filling.
- The dough is very simple and easy to make. In fact, you don’t need any special equipment. A bowl and spatula would work too.
- The dough needs some chilling time in between while you prepare the filling. But, you can keep the dough in the fridge for up to 2 days ahead or kept frozen for up to a month.
- The filling has a long shelf life too. It stays in the fridge for up to 4 days or in the freezer for up to 3 months.

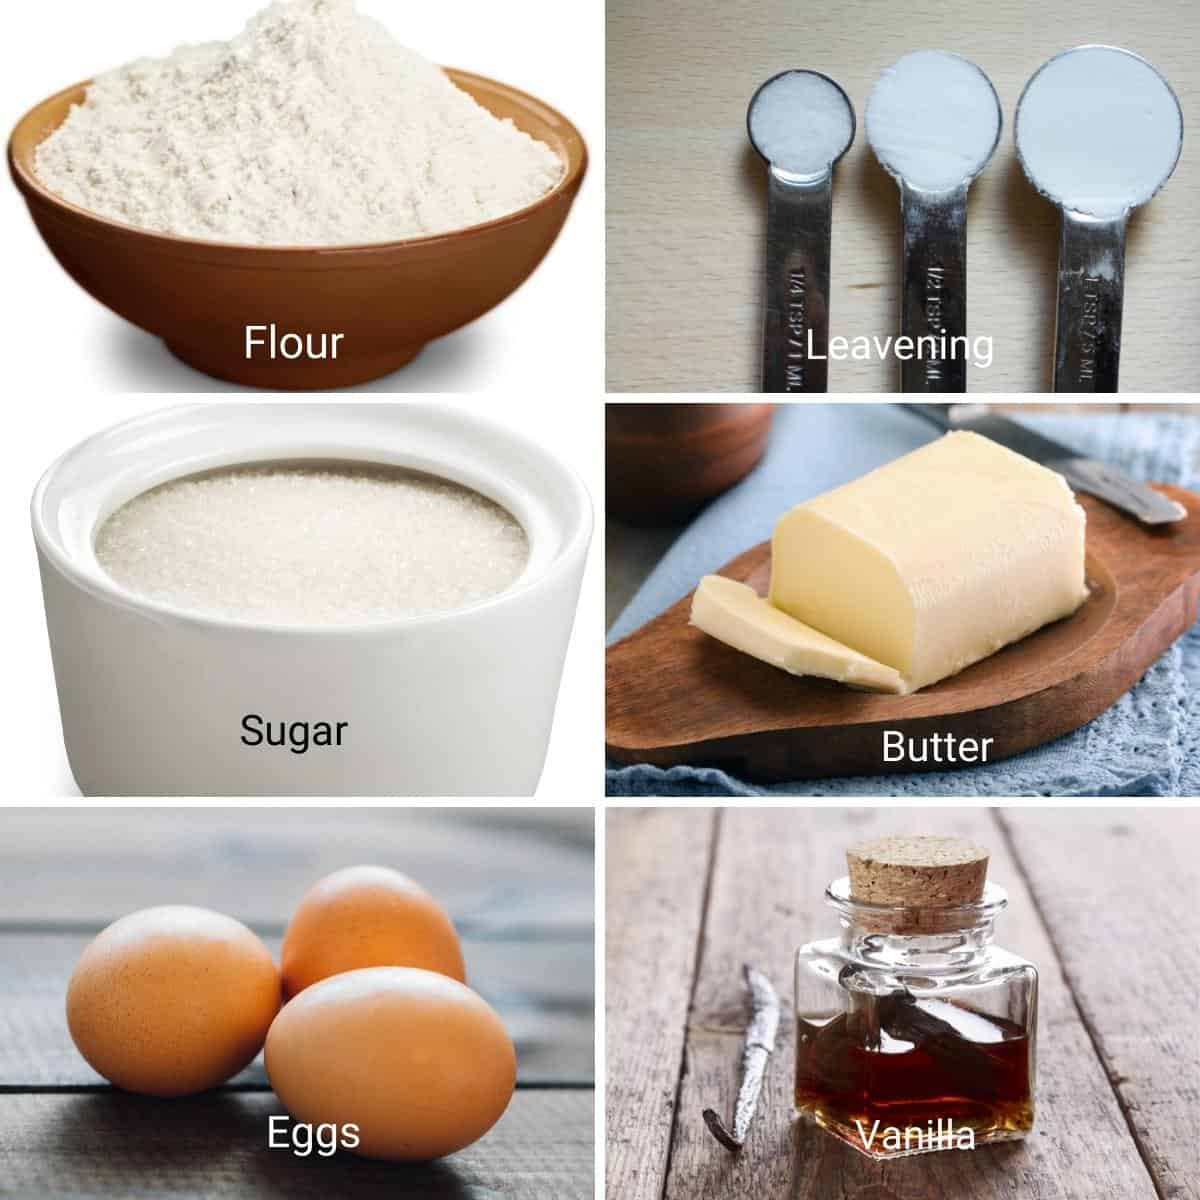
Ingredients and substitutes
- Butter – I always use unsalted butter because I like to control the amount of salt. And yet, if salted butter is all you have, go ahead and use it. Just omit salt in the recipe.
- Sugar – I highly recommend you use fine grain sugar to shorten the creaming time. Always cream the butter and sugar well, and fine grain sugar works best.
- Eggs – I use large eggs, about 60 to 65 grams each.
- Extract – Orange is traditional with these cookies. And yet, if you don’t have some go ahead and omit the orange. Also, vanilla extract always works like a treat.
- Fillings – I usually choose between one or two of the fillings to get two types of cookies at the same time. Chocolate is my kids’ favorite filling.
Step-by-step: Purim Cookies: Oznei Haman
Dough
- Dry ingredients – In a bowl, sift and combine together flour, cornstarch, baking powder, and salt.
- Wet ingredients – In the stand mixer bowl with the paddle attachment, cream the butter and sugar until light and creamy. Add the egg and egg yolk one at a time. Followed by the vanilla extract and orange extract
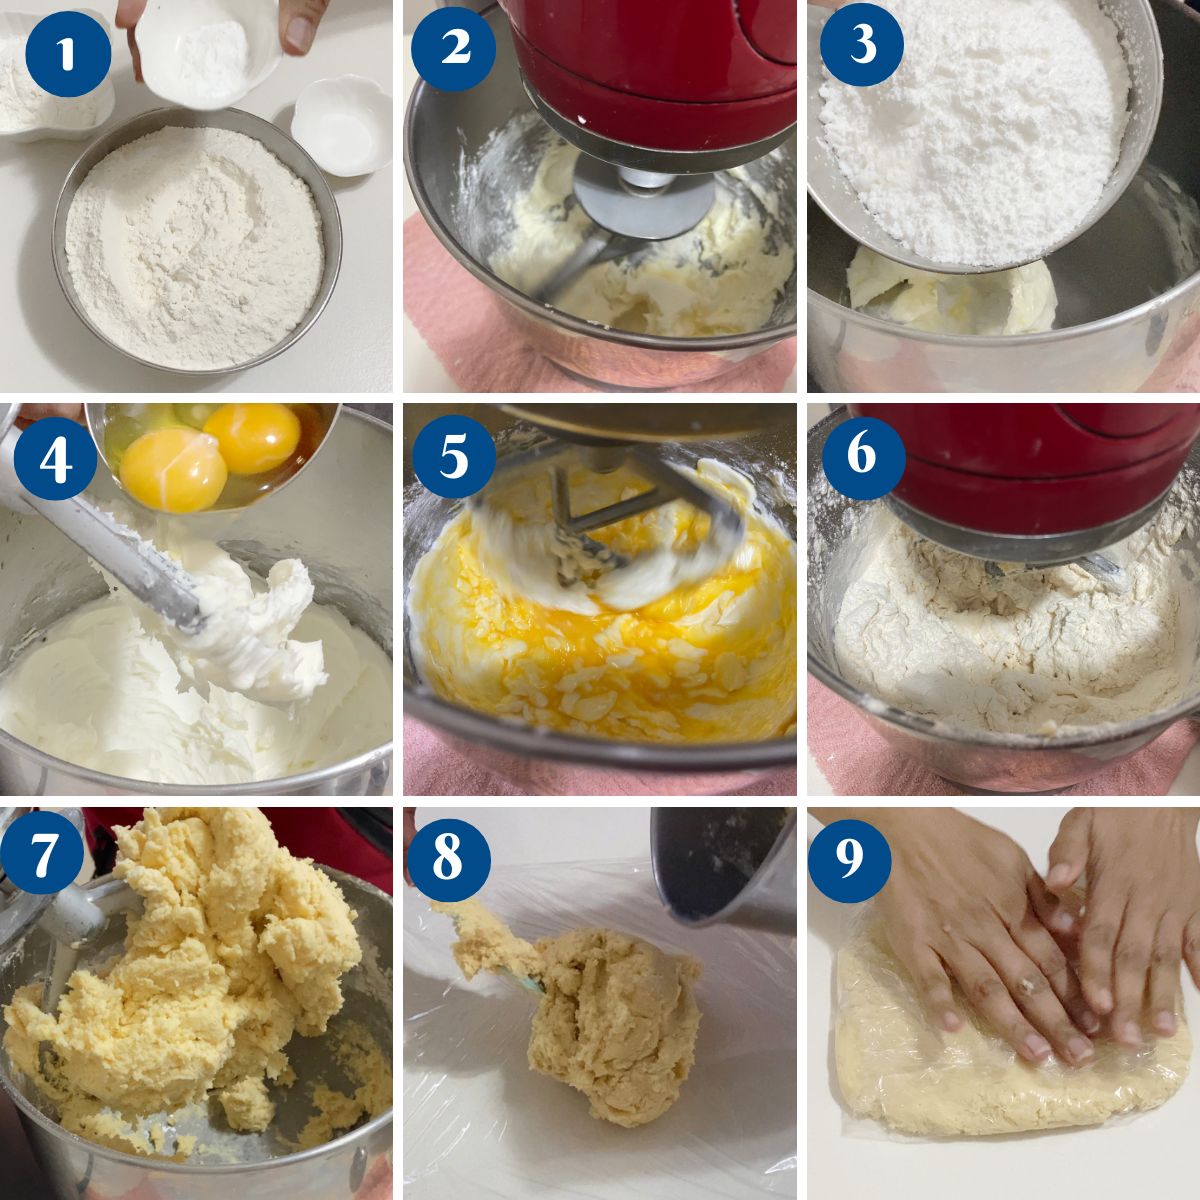
- Chill – Next, add the flour mixture and orange juice. Combine well into a soft dough. Divide the dough into two discs. Wrap well in plastic wrap and chill for at least 2 hours or until firm enough to roll.
- Preheat Oven: Set your oven to 350°F (175°C) and line a baking sheet with parchment paper.
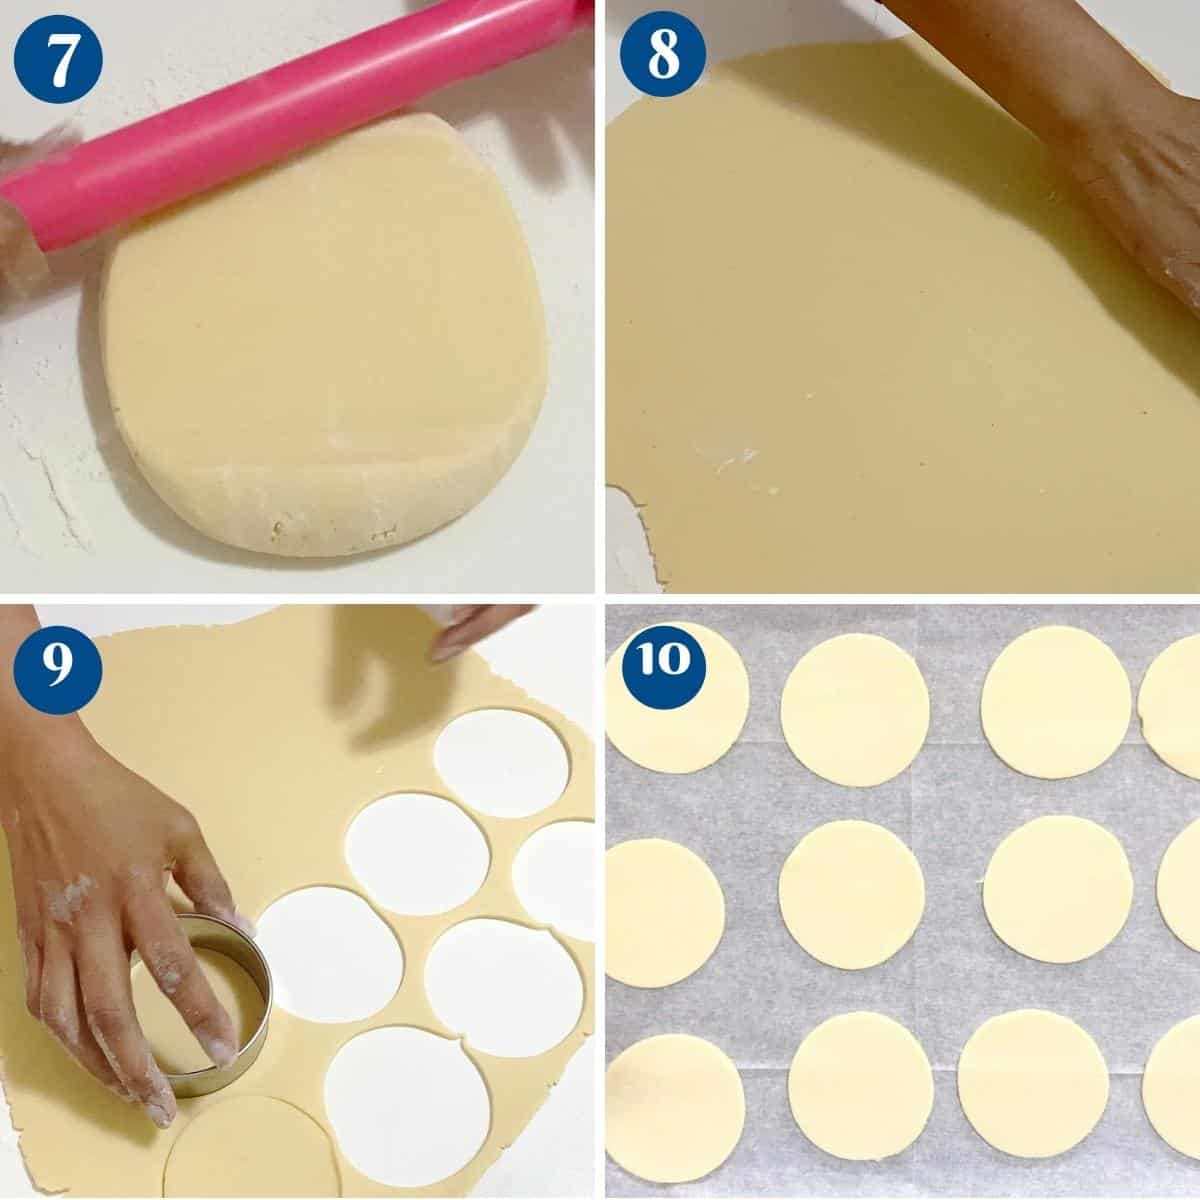
- Roll & Cut Dough: On a lightly floured surface, roll the dough out to about 1/8-inch thickness. Cut out circles using a round cutter (approximately 3–4 inches in diameter).
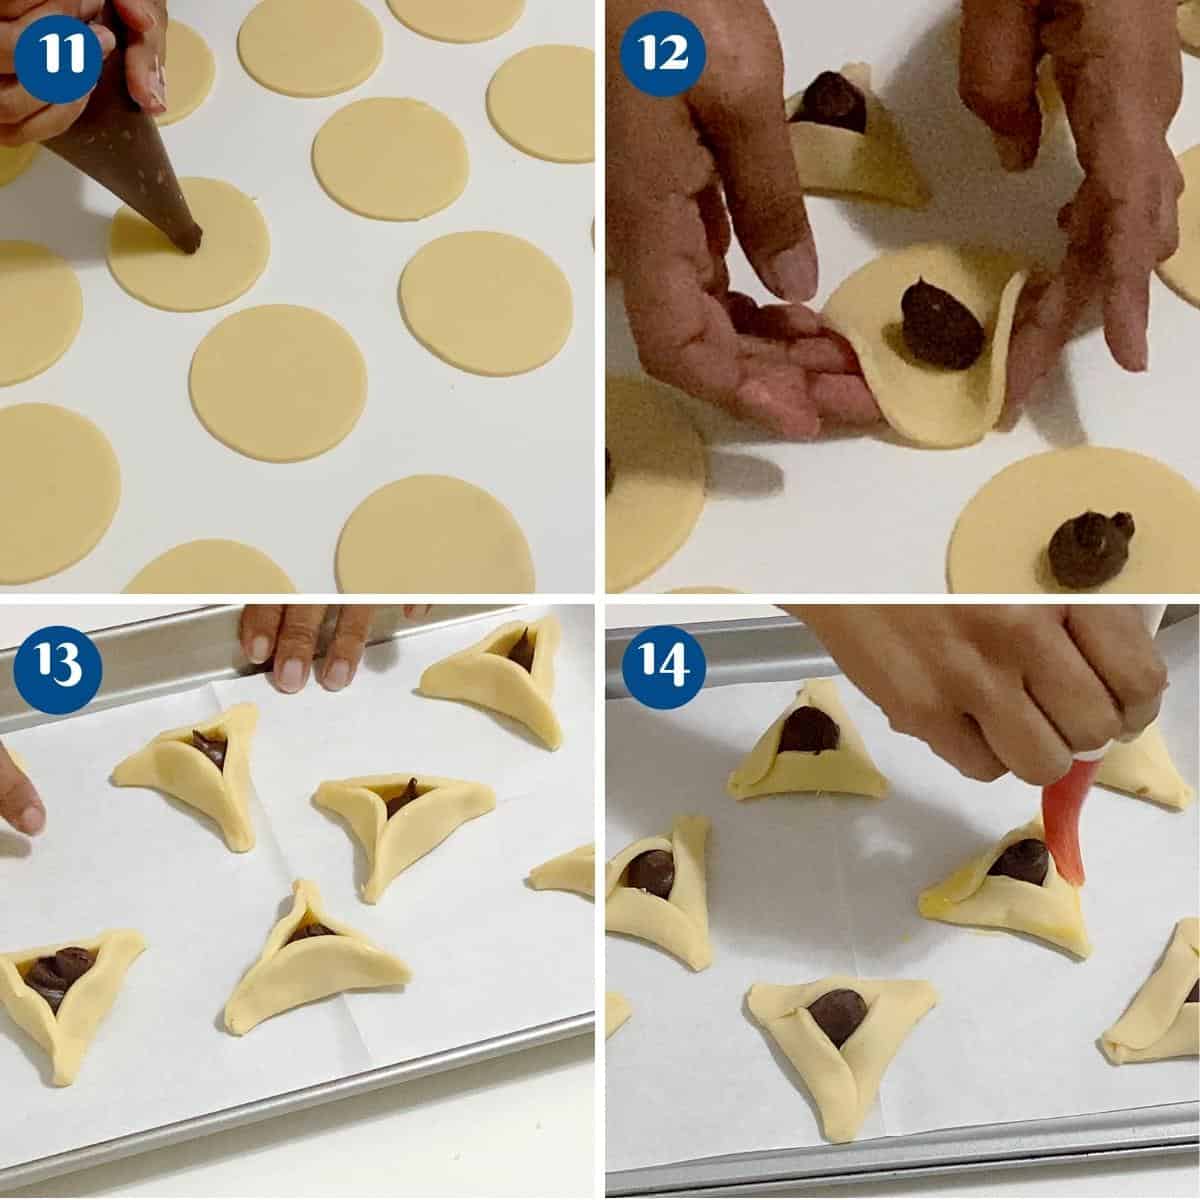
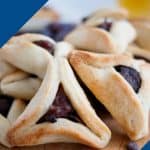
- Fill and Shape: Place about 1 teaspoon of the cooled filling in the center of each circle. Fold or pinch the edges up to form a triangle, gently pinching the corners together. (Leave the center exposed so the filling shows in the center.)
- Bake: Place the shaped cookies on the prepared baking sheet. Bake for 12–15 minutes or until the cookies are lightly golden around the edges. Remove from the oven and let the cookies cool on a wire rack.

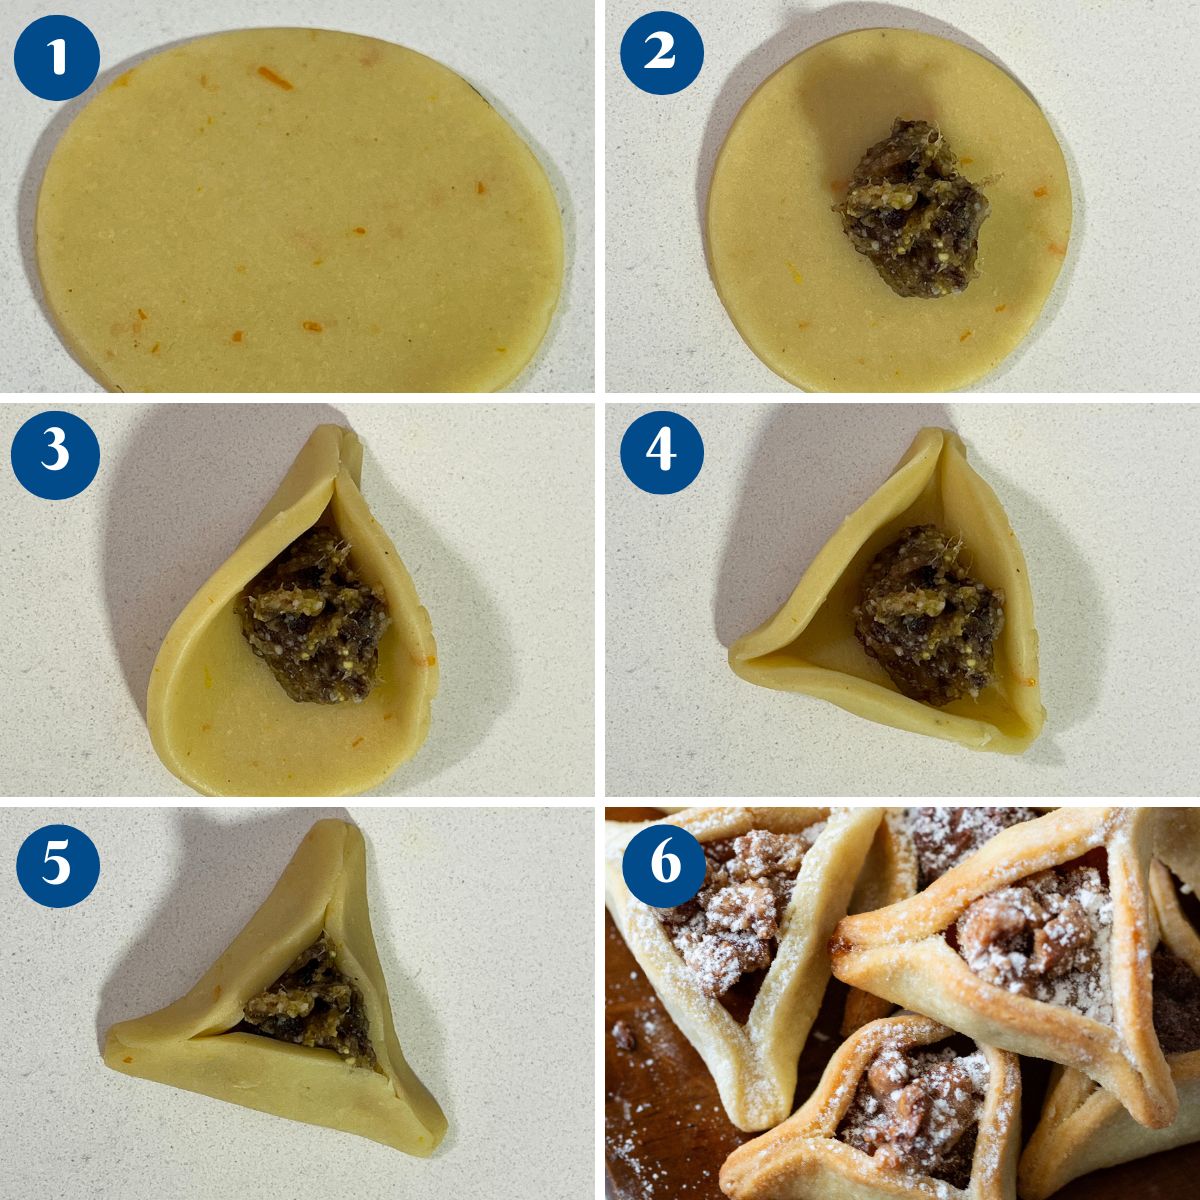
Method one – pinch method
- Brush the disc ever so slightly with water or egg whites. (I use water)
- The easiest way to find the middle with these triangles.
- Pinch two sides – bring the third side up to the middle (see 2 & 3 square in the collage below).
- Press the folds gently, do not pinch too much.
- Place all cookies on a baking tray.
- Note how my cookies are sealed, and yet still have that nice fluted edge (don’t press too hard).
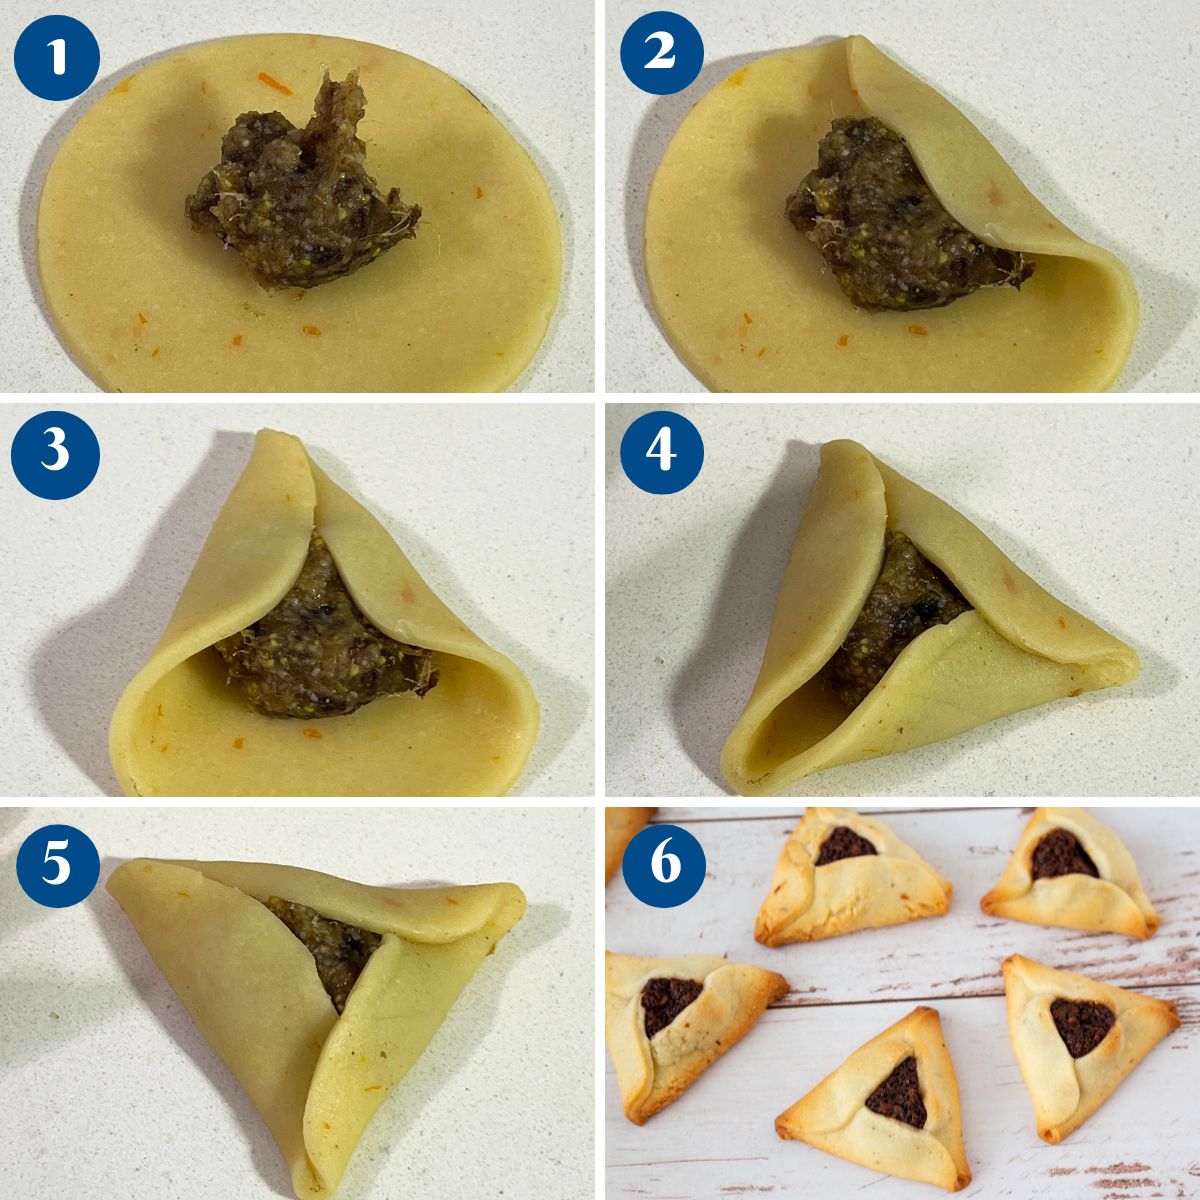
Method two – overlap method
- Basically, all you do is overlap the three corners.
- Start with the first, then the second overlap the first, and lastly, the third overlaps the first.
- It’s easier to understand with the images below.

Purim Cookies – Oznei Haman
These Purim cookies are a special treat during the Jewish Purim festival. A shortbread cookie dough with hundreds of choices for fillings, from traditional poppy seed and dates to modern chocolate, halva, apple pie, pecan pie, strawberry, dulce de leche, and more.
Video
Ingredients
- 6 oz (170 g) Butter unsalted, room temperature
- 1 cup (200 g) White sugar
- 3 ¼ cup (400 g) All-purpose flour
- 2 tbsp Cornstarch (cornflour)
- 1 tsp Baking powder
- ¼ tsp Salt
- 1 Egg large
- 1 Egg yolk
- 2 tsp Vanilla extract (or orange extract)
- 4 tbsp (60 ml) Orange juice
- ½ cup Poppy seeds
- ½ cup (120 ml) Milk
- 1 tbsp Butter
- 2 tbsp Honey or sugar
- 4 oz (113 g) Raisins or dried apples
- 4 oz (113 g) Prunes
- ½ cup (100 g) Sugar
- 4 oz (0.75 cups) Raisins
- 1 tbsp Lemon juice
- 1 tbsp Lemon zest
- 7 oz (200 g) Chocolate
- 2 tbsp Whipping cream
- 1 tbsp Butter unsalted
- Date filing
- Apple pie filing
- Pecan pie filling
- Halva filling
- Pistachio filling
- Nutella
- Halva
- Dulce de leche
- Strawberry jam (or any other jam)
Method
- Poppy seed filling – In a saucepan over medium heat, combine all filling ingredients – milk, poppy seeds, raisins, honey, and butter. Cook for 15 to 20 minutes. Cool before filling cookies.1/2 cup Poppy seeds, 1/2 cup Milk, 1 tbsp Butter, 2 tbsp Honey, 4 oz Raisins
- Prune filling – Add all ingredients to a food processor and blend until it's almost a paste.4 oz Prunes, 1/2 cup Sugar, 4 oz Raisins, 1 tbsp Lemon juice, 1 tbsp Lemon zest
- Chocolate filling – In a microwave-safe bowl, melt the chocolate, heavy cream, and butter until smooth. Chill until you have a peanut butter consistency before using it as filling.7 oz Chocolate, 2 tbsp Whipping cream, 1 tbsp Butter
- Dry ingredients – In a bowl, sift and combine together flour, cornstarch, baking powder, and salt.3 1/4 cup All-purpose flour, 2 tbsp Cornstarch, 1 tsp Baking powder, 1/4 tsp Salt
- Wet ingredients – In the stand mixer bowlK-mix with the paddle attachment, cream the butter and sugar until light and creamy. Add the egg and egg yolk one at a time. Followed by the vanilla extract and orange extract6 oz Butter , 1 cup White sugar, 1 Egg, 1 Egg yolk, 2 tsp Vanilla extract, 4 tbsp Orange juice
- Chill – Next, add the flour mixture and orange juice. Combine well into a soft dough. Divide the dough into two discs. Wrap well in plastic wrap and chill for at least 2 hours or until firm enough to roll.
- Preheat Oven: Set your oven to 350°F (175°C) and line a baking sheet with parchment paper.
- Roll & Cut Dough: On a lightly floured surface, roll the dough out to about 1/8-inch thickness. Cut out circles using a round cutter (approximately 3–4 inches in diameter).
- Fill and Shape: Place about 1 teaspoon of the cooled filling in the center of each circle. Fold or pinch the edges up to form a triangle, gently pinching the corners together. (Leave the center exposed so the filling shows in the center.)
- Bake: Place the shaped cookies on the prepared baking sheet. Bake for 12–15 minutes or until the cookies are lightly golden around the edges. Remove from the oven and let the cookies cool on a wire rack.
Notes
- Chill the dough as required. This will prevent the cookies from spreading too much.
- Roll the disc fairly thin so the cookies do not look bulky. However, if the cookies that are too thick tend to open up when baking.
- Use the proper method for the correct technique. The pinch method works with firm cookie dough. And yet, if you are unsure, use the overlap method.
Alternatively, test a few cookies with the pinch method before you do the whole batch. - Keep the filling thick so it won’t bleed out of the cookies.
- Do not overfill the center to prevent overflow. Make the discs no smaller than 3 inches because they tend to be smaller in size once folded unless you want mini hamantaschen cookies, which are very pretty, too.
- Bake until they start to get slightly brown on the sides. Don’t brown too much to prevent them from going hard.
Equipment you will need


Nutrition
Tried this recipe?
Mention @veenaazmanov_kitchen or tag #veenaazmanovkitchen!Easy cookies recipes
- Hamantaschen Cookies
- Custard Cookies
- Alfajores Cookies
- Thumbprint Cookies
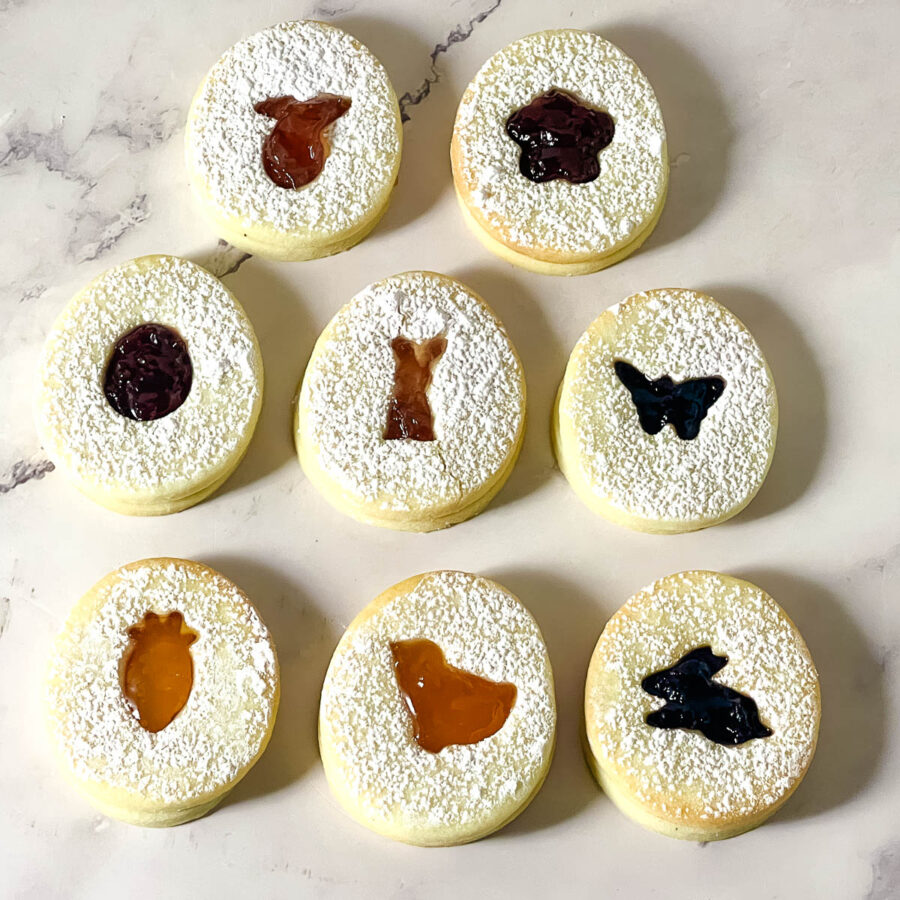
- Austrian Linzer Cookies
- Lemon Crinkle Cookies
Frequently asked questions
Room Temperature: They will typically keep well for up to 1 week when stored in a cool, dry place.
Refrigeration: If your environment is warm or if your fillings are particularly moist, refrigerating the cookies can extend their shelf life to about 2 weeks. Just note that refrigeration might slightly affect the texture.
Freezing: For longer storage, you can freeze the cookies for up to 3 months. When ready to enjoy, thaw them at room temperature and, if desired, dust with a little extra powdered sugar before serving.
These are triangular-shaped cookies made to celebrate the Jewish festival of Purim. And the cookie is named after Haman from the Purim story in the Bible and is shaped like the three corners of his hat. The festival is basically a Jewish carnival with everybody dressed in costumes and having costume parties and parades. It’s a fun time for kids and adults alike
The choices for filling these cookies are plenty, from traditional to modern. My kids’ favorite is Nutella, chocolate, halva, dulce de leche, strawberry jam (any other jam).
more cookies
- Condensed Milk Cookies
- Gingerbread Sandwich Cookies
- Raspberry Linzer Cookies
- Raspberry Linzer Cookies
- Ultimate Gingersnap Cookies


Don’t lose this recipe! Save it for Later!
📌 Save this Recipe for later on Pinterest so you can easily find it again.
⭐ Add Veena Azmanov Kitchen to your Google Preferred Sources.
It helps Google show you more of our recipes.
📧 Subscribe for new recipes delivered to your inbox.
🎥 Follow us for more recipes


Hi I was wondering if these cookies can be heat sealed?
Thank you!
Yes, you can warm them in a hot oven for a 3 to 5 minutes.
Ingredient list says white sugar, but recipe instructions says powdered sugar. Which is right?
Sorry, Beck. Yes, it is granulated sugar. Thanks
I had never heard of Purim cookies before I found your recipe but this is such a lovely dessert! Thank you for sharing!
You are welcome Liz. I hope you try them.
What a beautiful cookie! The video is great and super helpful in making these. Love all of the filling variations as well. Awesome post 🙂
Thank you, Angela.
I have never come across these cookies before but they look and sound delicious! I really like the story behind them too. I think I would have to go for chocolate when it comes to choosing filling 🙂 Chocolate girl through and through! Pinned! 🙂
Thank you, Jo
These look really lovely and easier than I would have thought!
Thanks Amy.