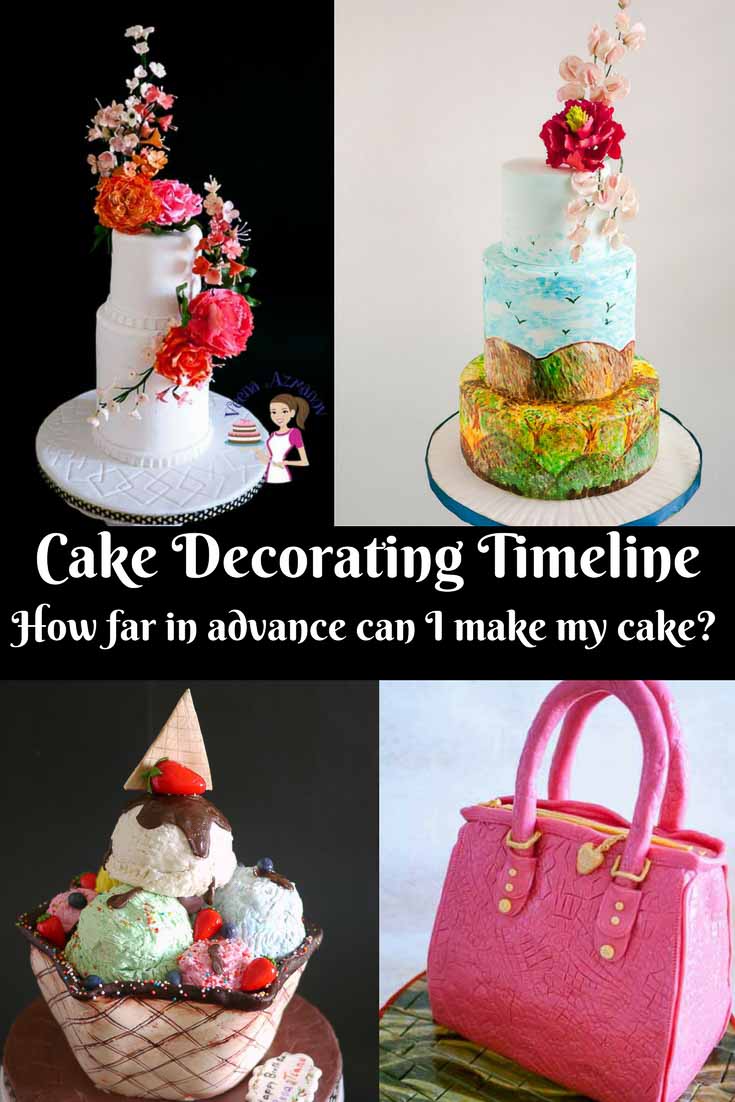
Cake Decorating Timeline (When Should I Decorate My Cake)


The most common questions that get asked when one has to decorate a cake are: when should I decorate my cake? How far in advance can you make a cake? When to ice a cake? Today I discuss the cake decorating timeline that I use to make sure I have a fresh cake, as well as enough time to decorate it.
Making dessert cakes is a lot different than making custom-decorated fondant cakes. I can decide in the morning that I want to serve a delicious chocolate cake for dinner today and that would be perfectly fine. I’d have to work hard, and a little fast but in general, I can produce a very impressive chocolate dessert cake in a very short time.
But I can’t do the same with my custom-decorated fondant cakes. Why not? If you are a new cake decorator, then you will find yourself asking – when should I start baking, frosting, and baking my cakes?
The timing for decorating a cake can vary depending on the specific type of cake, the decorations involved, and personal preferences. However, here are some general guidelines to consider:
- Baking and Cooling: First, make sure your cake is completely baked and cooled before you begin decorating. This is usually done a day in advance to allow ample time for the cake to cool down and set properly.
- Frosting: If you plan to frost your cake, it’s typically best to do it a day in advance. This allows the frosting to set and creates a smooth surface for any additional decorations.
- Complex Decorations: If your cake requires more complex or intricate decorations, such as fondant work, gum paste flowers, or elaborate piping designs, it’s advisable to start decorating the day before the event or occasion. These types of decorations often require more time and attention to detail, so allowing extra time ensures you won’t feel rushed.
- Fresh Ingredients: If your cake includes fresh fruit, whipped cream, or other perishable ingredients, it’s best to add them closer to the serving time. These ingredients may not hold up well for an extended period, so consider adding them a few hours before serving.
- Delicate Decorations: For delicate decorations like edible pearls, delicate sugar flowers, or fragile chocolate work, it’s generally recommended to add them as close to the serving time as possible. These decorations can be sensitive to moisture or temperature changes, so adding them at the last minute helps to maintain their quality and appearance.
Ultimately, it’s a good idea to plan ahead and give yourself ample time to decorate your cake. This allows for any unexpected challenges or adjustments, and ensures that you have a beautifully decorated cake ready for your intended occasion.
Custom decorated cakes
Technically, you can make a cake in less than 3 hours. Unfortunately, decorating the cake in such haste is very stressful and the outcome will not be very professional.
For example – I always decorate my cakes at least 6 hours after it has been baked. I believe it needs some resting time.
- After I crumb coat and cover it in buttercream, I give my cakes another couple of hours to rest (even 4 hours). This helps all the gasses inside the cake settle.
- Then when I put fondant I don’t have to deal with bumps or bulges.
- Also, I dowel my cakes at least 4 hours before delivery so that I have enough time just in case something goes wrong at the last minute.

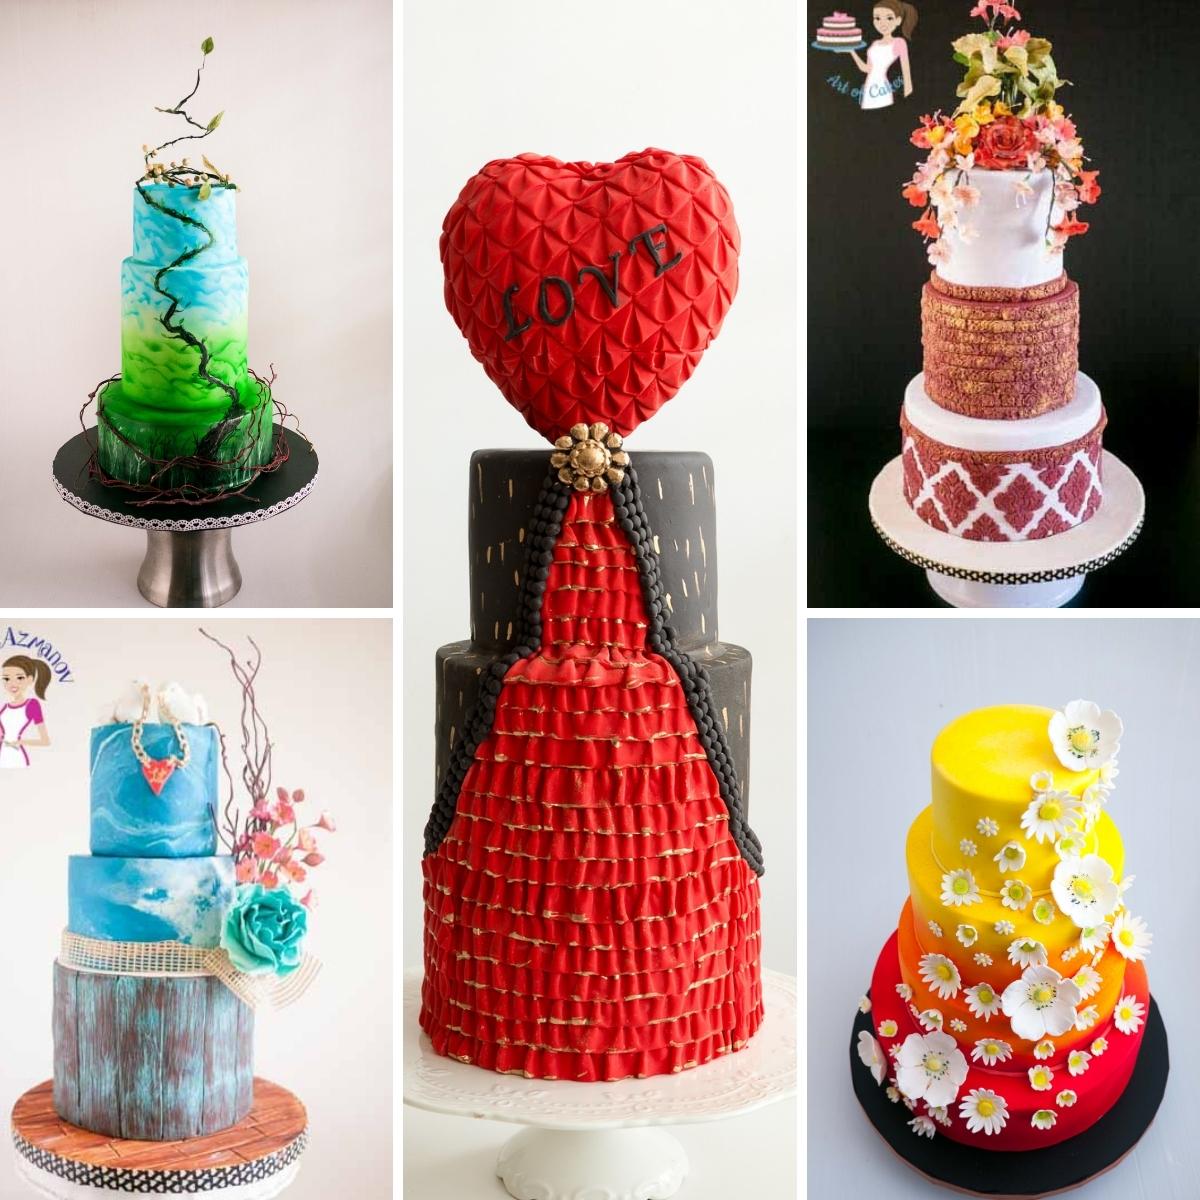
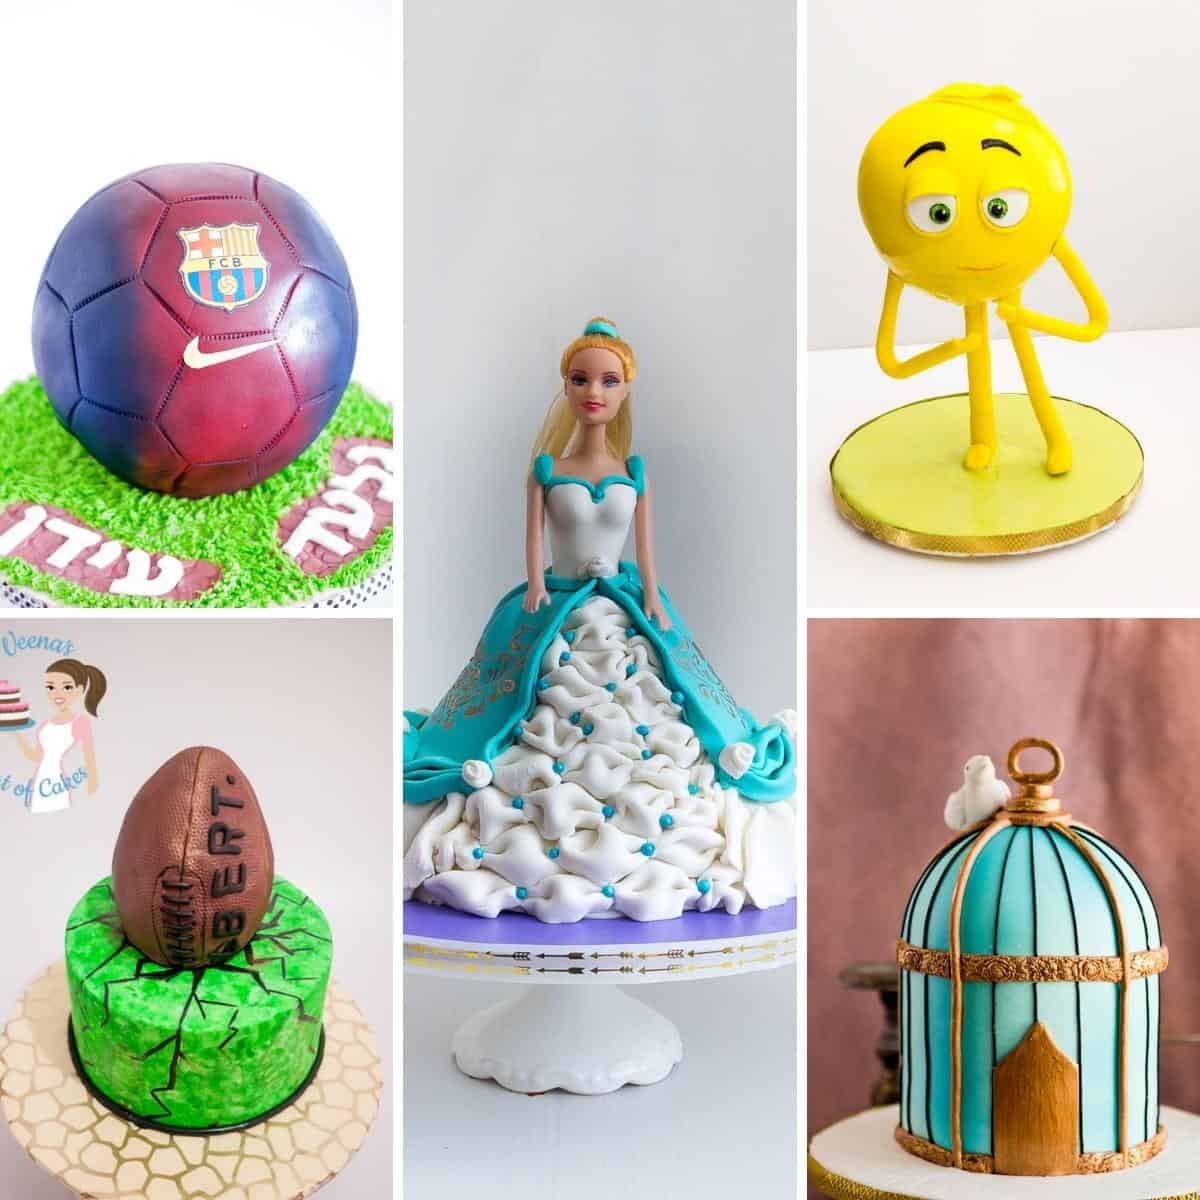
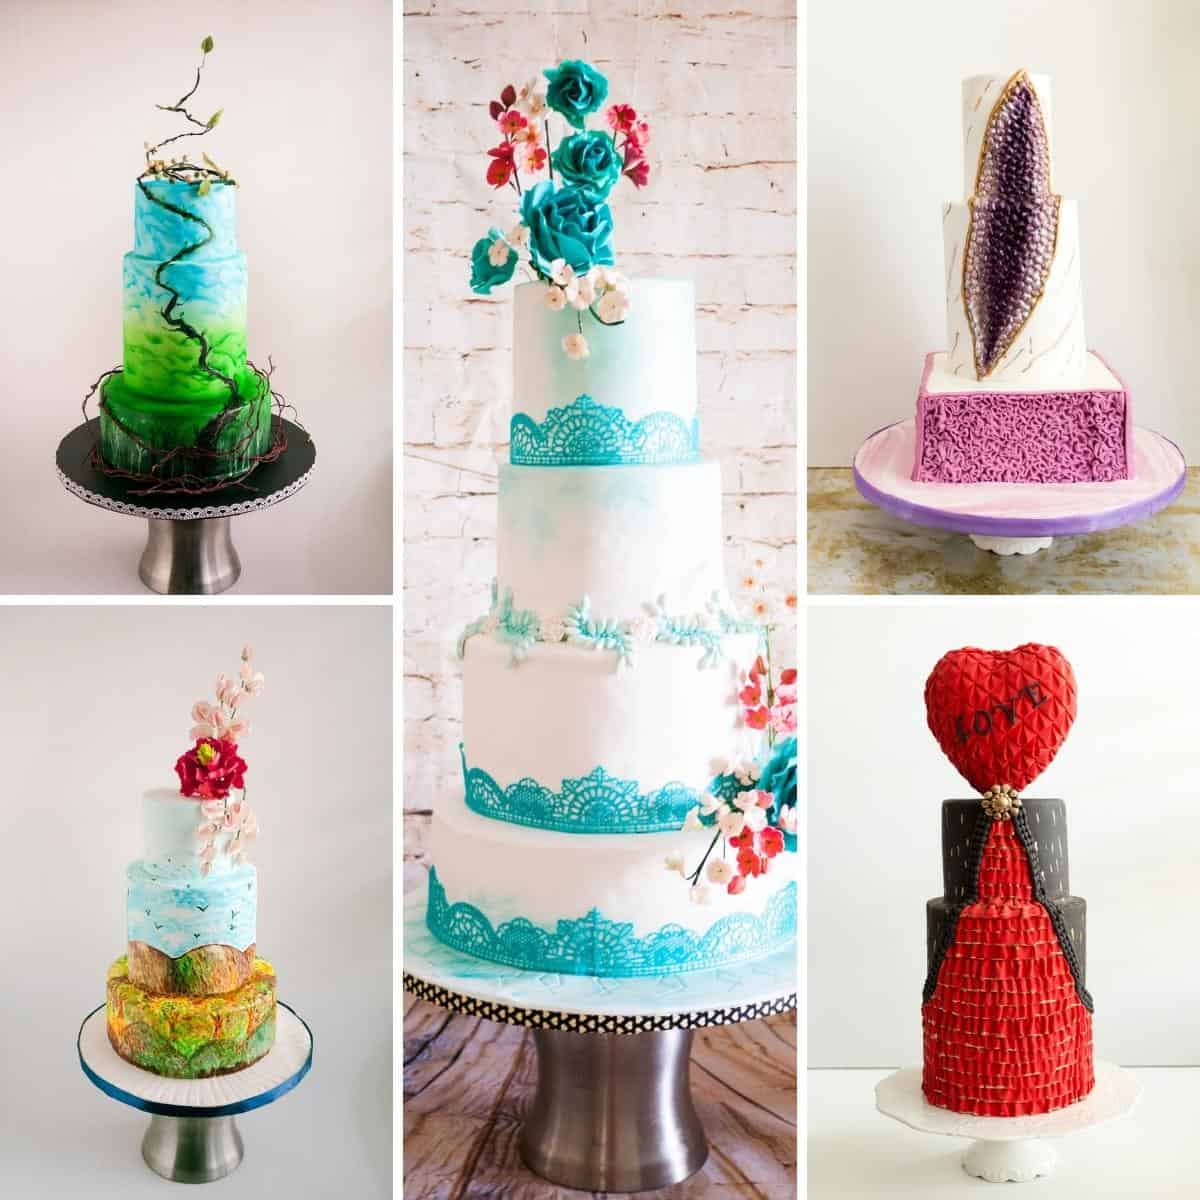
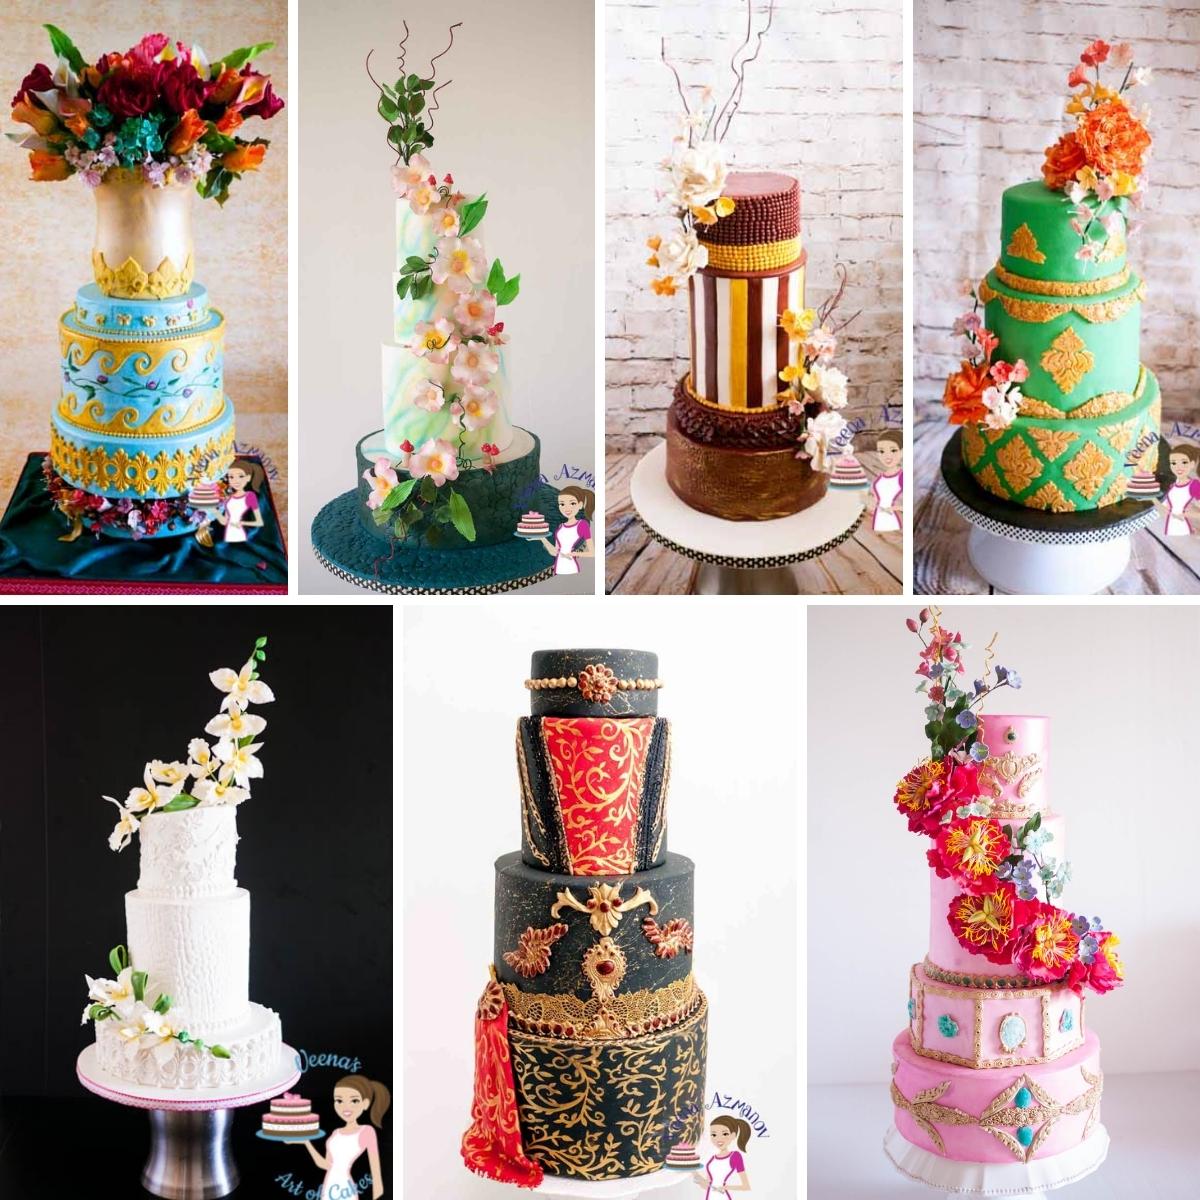
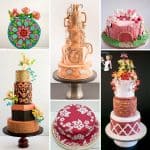
If you look at the cakes above in the collage, you will see that they are all similar (not the same) in size. Most of them are single-tier cakes. But each one requires a different timeline.
The bottom three buttercream cakes (see above image)
- The simple ruffles cake (tutorial) took me two hours from start to finish – because buttercream cakes don’t necessarily need a lot of settling time.
- The second princess cake is also a buttercream cake but the bottom tier does need a bit of resting time, and you need more work with stacking as well as piping. So while it is a buttercream cake it still needs more caution compared to the first ruffles cake.
- The third floral cake (tutorial) looks very simple but is actually easier than the second. Why? because the buttercream flowers can be made ahead of time. So you can make this cake from start to finish or in small parts.
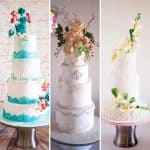
The top fondant cakes (see above image)
- The first is a simple small marbled fondant cake with a sugar flower that was made ahead of time. Because this cake is so small you can actually do a lot of it from start to finish without much resting time, unlike our tiered wedding cakes.
- The minion cake (tutorial)- is simple but has a lot of work on details that can be done ahead of or on the cake. This is a type of cake where often cake decorators tend to underprice themselves. Mostly because they do not calculate the amount of time that goes into creating these details. Read more about Pricing your cakes as well as underpricing your cakes.
- The last handbag with shoes is actually a very easy cake. The shoe has to be done in advance because there is no way you can make a Gumpaste Stiletto Shoe at the last minute
Those are very simple cakes. While the wedding cakes below take extra effort to plan and execute. As you can see each and every tier has a very different timeline – depending on how much can be done ahead of time as compared to how much work is involved in the cake decorating the stage. In this post, I don’t discuss these cakes in detail. And yet, if you look at Decorated Cakes – click on a cake and you will find useful information that I share regarding the process of making the cake.

Planning ahead – when should I decorate my cake?
Cake decorating can be divided into what you can do before you bake your cake, and what you need to do after the cake is baked. There are a lot of things you need to do before you actually bake the cake in an effort to save time later. For example:
- You can prepare your cake boards ahead of time. And this does not necessarily mean just wrapping them in decorating paper. I mean you can cover your cake board with fondant or add the extra elements that go on the board.
- Decorations and cake toppers – Sugar flowers and figures can be made as early as two weeks ahead of time. Standard-size cake boards and cake dummies work great to help with this. Use a dummy as a base for your figures until they are dry. Use a cake dummy to decide how many flowers you need. Or use a cake dummy to get the shape you need for your cake toppers.
- Check on your supplies to make the cake – if your cake order has lace make sure you have the lace mold. Do you need to order? How long will it take to arrive? Perhaps you need to get back to the client with any change of plans.
- Buy the necessary ingredients – sounds basic but when you make cakes often or not so often – your inventory can sometimes cause issues. Make sure you have the color or brand of your fondant.
- Download any templates or information you need – Always do this in advance just so you do not lose what you searched for when you planned the cake.
Cakes are tastier when made from scratch
Did you know that if you bake from scratch the cake becomes tastier in the next few days? Because it matures into something more delicious. Now I can’t prove that, but mom used to say it, so; it must be true. Right?
I always bake from scratch. Whether you are a cake decorator or a novice, I bet you will find my collection of Layer Cake Recipes, coffee cake recipes, bundt cakes, and sheet cakes useful.
When should I decorate my cake?
Often I get asked how far in advance can I make my cake. Over time, I have realized that the following schedule works best for me. Now there is no right or wrong here; with time you may develop your own schedule. For now, I’m happy to share with you my timeline so you can get started.
To better understand this timeline, let’s say that you need the cake to be ready for Saturday night.
- Day I – Wednesday night
- Make Filling, Frosting including Fondant if I’m using a homemade fondant recipe.
- Bake the cake. Cool completely. Wrap well in cling wrap and store in the fridge.
- Prepare your cake boards. Dress the cake board – if using Fondant or Royal Icing on the whole board.
- Day 2 – Thursday morning
- Bring cake, filling, and frosting to room temperature.
- Day 2 – Thursday afternoon
- Level, Tort, fill and crumb coat the cake.
- Let set in the fridge for 15 minutes, then cling wrap and let sit in the fridge for at least 4 hours. This helps settle the cake.
- Day 2 – Thursday night
- For Buttercream cakes (how to get sharp edges on buttercream cakes)
- Apply the second and third coats giving enough time to chill between coats
- Back to the fridge to rest.
- For Fondant/ Sugar paste cakes (how to get sharp edges on ganache cakes)
- Take the cake out of the fridge – let rest for a few minutes
- Novelty cake gets carved and shaped at this point.
- Cover with Fondant (Tips for working with Fondant)
- Leave at room temperature or fridge if using perishable fillings
- For Buttercream cakes (how to get sharp edges on buttercream cakes)
- Day 3 – Friday – The fun part
- Complete design and decorating details including doweling the cake and setting up the tiers.
- Decorating the cake board.
- Adding the additional details like sugar flowers and setting up the figures.
- All decorations are completed by night and the cake is left to rest overnight or (at least 4 hours just in case)
- Day 4 – Saturday
- Check cake for any last-minute hi-cups like bulges or burps.
- Photograph and pack the cake for delivery.
That’s my typical schedule. The exceptions to the rule would be if I have a novelty cake or a wedding cake that requires more decorating time. In that case, I would start a day early.
A few tips from me
Organization – How far in advance can I make my cake?
As a cake decorator who does almost everything from scratch at home, as well as taking care of two kids and managing the home, it is very important that I organize and plan my work correctly. For example; I prefer to bake twice a week, mainly Sundays and Wednesdays. I dedicate one day to making my fillings and frostings including buttercream
One day make my fondant if I’m using my homemade fondant recipe. That way I am not overwhelmed with too much to do for one cake.
For the working mom – When should I decorate my cake?
I know some of you are working mom who is not cake decorators but wants to make a celebration cake for the family or a birthday cake for your kids.
- You can bake your cake ahead of time, prepare your buttercream as well as your fondant and freeze these.
- Two days before you want to start decorating, thaw it in the fridge first then on the counter.
- It’s best to work with semi-frozen or chilled cakes. The torte and carve better too!
- Once you finish decorating you can keep it on the countertop in a cool place or in the fridge.

10 Tips to prevent your cakes from drying out.
I often get novice bakers who push decorating their cake close to the event as possible. The truth is you don’t have to. If you bake from scratch as I have explained above you can prepare your cakes a few days ahead and still have a delicious cake everyone will rave about. As for your cake drying out? well, take the following precautions and your cakes will never dry out.
- Do not over-bake the cake – keep an eye close to the baking time.
- After baking, cool the cake completely, then wrap the cake well in plastic and chill the cake in the fridge so it won’t dry out
- Brush the cake with simple syrup just before you layer it.
- Use a soft consistency icing between layers (not too stiff) if you live in high humidity make a damn around the edges and put soft consistency icing in between
- Wrap the cake in plastic and chill the cake after you stack the layers and crumb coat – this will prevent drying
- After crumb coat do not chill the cake for more than 30 minutes
- Frost the cake and chill between coats if necessary -once you have frosting on top and around the cake will not dry out.
- If you have buttercream frosting on the cake – wrap it with cling wrap once the buttercream gets firm – this will prevent the buttercream from drying out as well as prevent it from absorbing any other odor or smell of other foods in the fridge. wrapping the cake in cling wrap is not possible, place the cake in a cardboard box – this helps too.
- Thaw the cake for at least 2 hours before you serve. A soft room temperature cake is tastier than a hard stiff chilled cake.
- Once cut – cover the cut side of the cake with plastic to prevent the leftover of cake from drying
Don’t lose this recipe! Save it for Later!
📌 Save this Recipe for later on Pinterest so you can easily find it again.
⭐ Add Veena Azmanov Kitchen to your Google Preferred Sources.
It helps Google show you more of our recipes.
📧 Subscribe for new recipes delivered to your inbox.
🎥 Follow us for more recipes


DAY 5 DONE
Day 5 DONE
day 5 done
Day 5- done
Such fantastic information!
Margaret
Day 5 Done
Thanks.. Very detailed
Day 5 Done
You have so many beautiful cakes. I am self taught, and have made a few beautiful cakes. I would like to bake an Alice in Wonderland Cake, which is a 3 tier cake made from cups and saucers cakes. The only problem is, I am not sure on how to place them on top of one another. I could send you a photo of the cake, if you are interested in helping me. Thank you.
Thank you, Pat. To place the cakes one on top of the other you have to use dowels. See this post may help understand better – how stack tiered cakes
done day 5