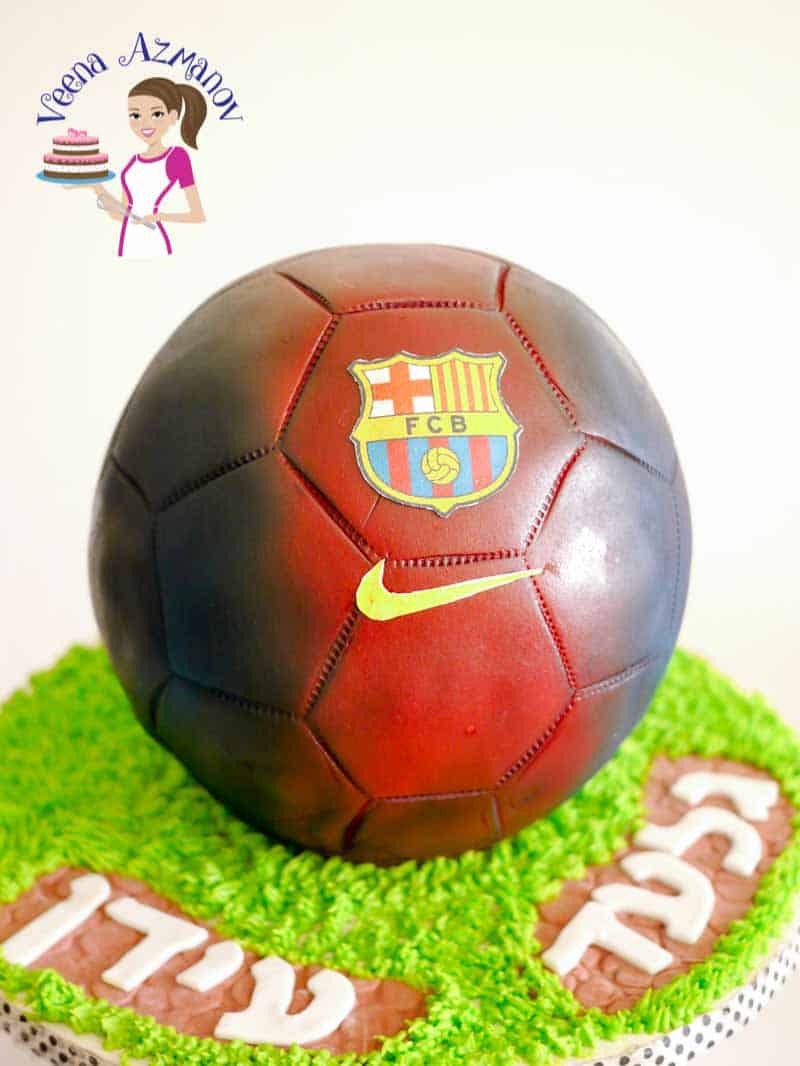
Barcelona Soccer Ball Cake


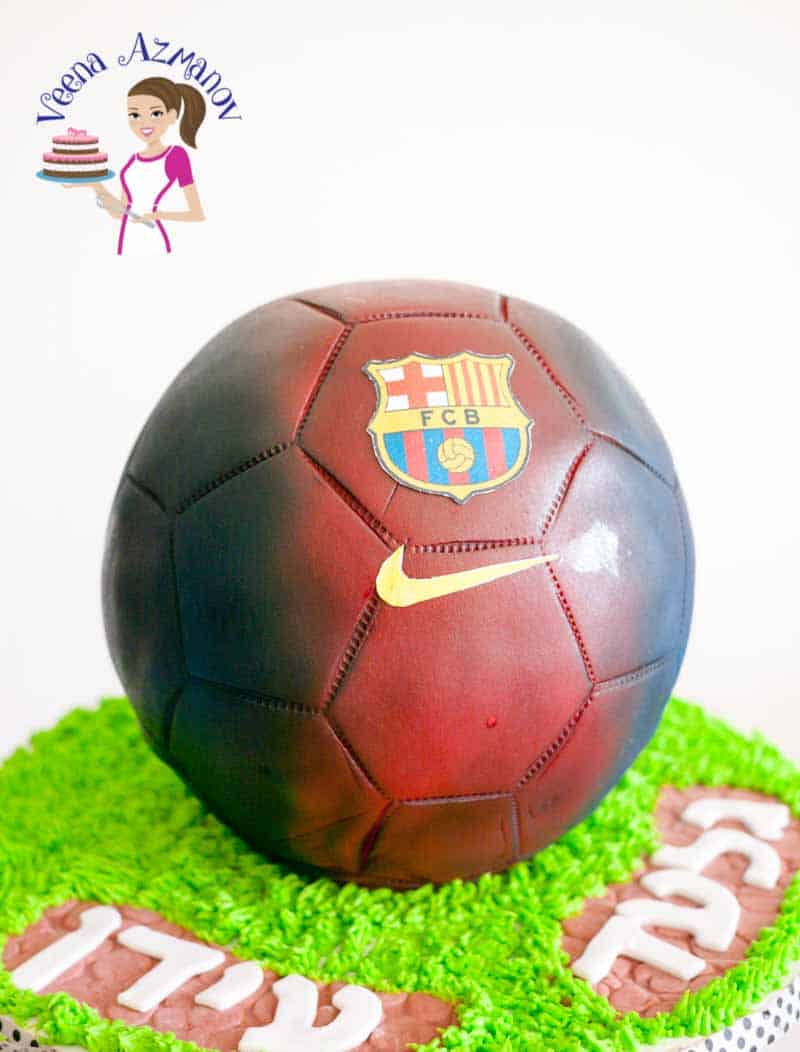
If you’re looking to wow a football fan, this Barcelona soccer ball cake is guaranteed to score big. With its bold red and blue airbrushed design and realistic 3D shape, it looks just like the real deal — but tastes way better. In this tutorial, I’ll show you step-by-step how I built this cake from scratch, including all the pro tips, tricks, and a little creative math along the way.
You’d think after making dozens of sculpted cakes — ball cakes included — this would be just another project. But nope. The Barcelona soccer ball is a different beast.
Unlike a classic black-and-white soccer ball where you can cut fondant pentagons and hexagons and piece them together like a puzzle, the Barça design demands more. You can’t fake those iconic red and blue streaks with cutouts. The only way to really nail the look is with an airbrush — and that’s where the magic (and pressure!) happens.
I’ll be honest, I had so much fun making this cake. It challenged me in just the right way — creatively, technically, and yes, mathematically too (thanks to my husband for those shape templates ?).
The best part? When I delivered the cake, the woman who ordered it for her son nearly screamed. Her exact words:
“It looks exactly like his real soccer ball — how did you even DO that?!”
Moments like that are exactly why I do what I do. It’s not just about the cake — it’s about bringing a smile, a memory, or in this case, a piece of a child’s passion, to life in edible form. And that’s when I know I’ve done my job right.
Step by step – Barca Soccer Ball Cake
Step 1: Make the two chocolate half-spheres
- Preheat oven to 160°C/320°F. Grease and line your ball pans.
- In a bowl, sift together flour, cocoa powder, baking powder, baking soda, and salt.
- Cream the butter and sugar until light and fluffy, then add the eggs and vanilla. Alternately, add the dry ingredients and buttermilk. Stir in the hot coffee last.
- Divide into the two pans and bake for 45–55 minutes or until a skewer comes out clean. Cool completely before handling.
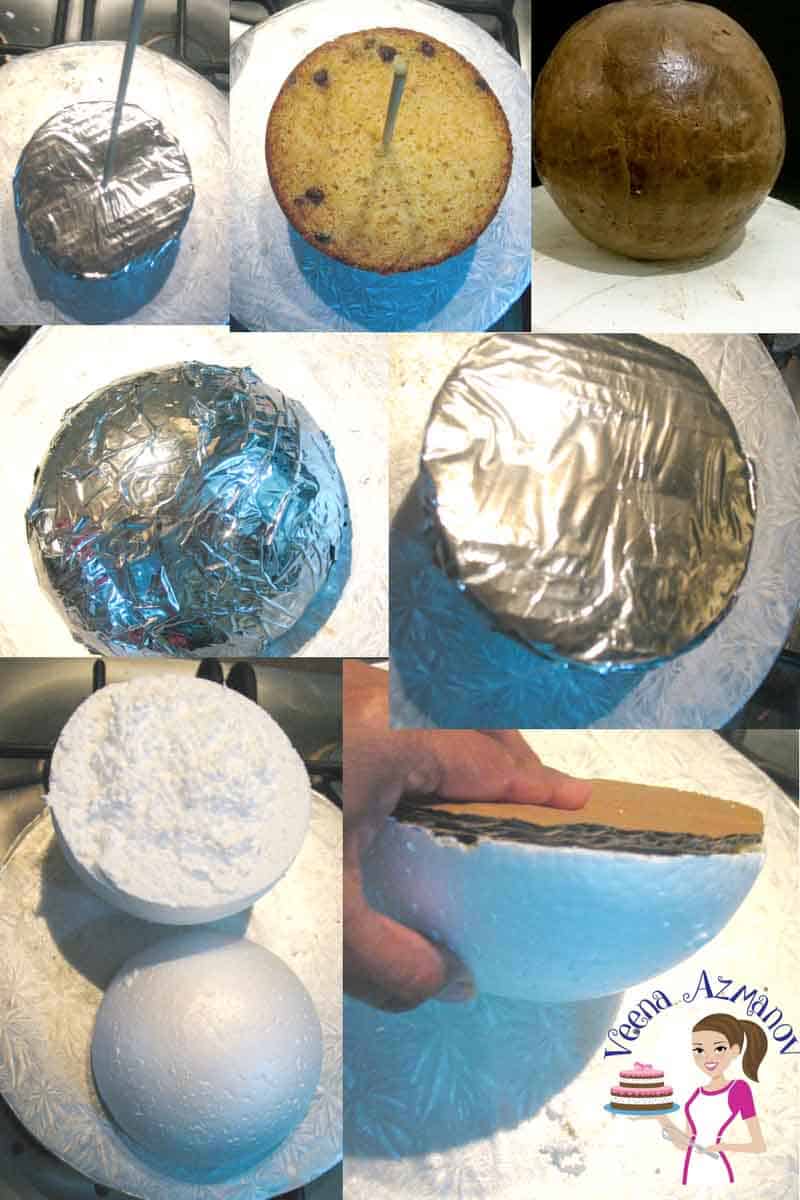
- Step 2: Support with Foam Core – Trim a third off the bottom cake (so the ball doesn’t roll away!). Replace that portion with your foil-wrapped foam core. This acts as a dummy so your cake won’t collapse under its own weight — trust me, I’ve been there.
- Step 3: Fill and Stack – Spread buttercream over the flat side of each cake half. Sandwich them together with the foam core underneath. Press gently to secure.
- Step 4: Make and Coat with Ganache – Microwave or heat on the stove until melted smooth and pourable but thick. Let cool completely to peanut butter consistency. Spread a smooth layer of ganache all over the cake — it locks in crumbs and gives your fondant a flawless surface. Chill until firm.
- Step 5: Fondant Time – Roll out your white fondant to about 3mm thick. Drape over your chilled cake. Smooth it down carefully — top to bottom — trimming excess as needed. You can use any fondant. Commercial or any of my homemade fondant recipe and Homemade Vegetarian Fondant too.
- Step 6: Add the Soccer Ball Pattern – Before airbrushing, create the classic soccer ball design using hexagon and pentagon shapes. I used a cardstock template to mark out shapes. Gently press the shapes onto the fondant-covered cake, spacing them out evenly — don’t worry about making it perfect; just suggest the look. I recommend starting from the top center and working your way down, like a globe pattern.
Pro tip – If you’re going full Barça, you can do the traditional black and white with fondant and skip the airbrushing completely. - Step 7: Paint the Passion—Once your fondant is dry, airbrush bold streaks of red and blue to represent FC Barcelona’s colors. Start from the top and bottom and then make your way towards the center.

How to Make a Foam Core Base for a Ball Cake
To keep your spherical cake from collapsing or turning into a chocolate landslide, you’ll want to create a sturdy foam base that mimics the bottom curve of the ball. Here’s how to do it:
- Start with a Foam Ball: Use a solid foam ball the same size as your cake — for example, an 8″ foam ball for an 8″ cake.
- Trim It Down: Cut off the bottom third of the foam ball. This flat edge will serve as your support base and help the cake sit securely without rolling around.
- Create a Matching Cake Board: Cut a round cake board (or foam board) to match the flat bottom of your trimmed foam piece. This will be the foundation your cake rests on.
- Assemble the Dummy Base: Glue the flat side of the foam ball to your cake board using hot glue. Let it set for a few minutes.
- Wrap It Up: Once the glue is dry, wrap the entire structure in aluminum foil to make it food-safe. You can also use plastic wrap and then foil for extra protection.
- Add a Central Dowel: Insert a wooden dowel through the center of the foam base. This will help anchor your cake layers and keep everything stable during stacking and decorating — especially if you’re transporting the cake.
- Ready to Build: Now you’re good to go! Stack your cake layers on top of the foam base, just as you would with any regular ball cake. Fill, frost, and cover — the base does the heavy lifting.
How to Measure the Pentagon and Hexagon Shapes for a Soccer Ball Cake
Okay, full disclosure: I know how to calculate the pentagon and hexagon sizes for a soccer ball cake… but I’m usually too lazy to do the math myself. So, I outsource it to my lovely husband — he whips it up for me in PowerPoint. Hey, teamwork makes the cake work, right? But if you want to DIY it, here’s the basic formula I use:
- Measure the Circumference of Your Ball Cake – Grab a measuring tape and go around the widest part of your fondant-covered cake. Let’s say it measures 20 inches.
- Do a Tiny Bit of Math – Multiply the circumference by 2, then divide by 30. Why 30? Because a classic soccer ball has a mix of 12 pentagons and 20 hexagons — so 30 shapes in total (ish).
- So in our example:
- 20 (circumference) × 2 = 40
- 40 ÷ 30 = 1.33 inches
- That 1.3 inches is the side length you’ll use to create your pentagon and hexagon templates.
- Create the Templates – I pop these measurements into PowerPoint to draw my pentagon and hexagon shapes to scale. Then I print them out and trace them onto card paper to use as stencils.
- Apply the Pattern to the Cake – Once your cake is covered in fondant and slightly firmed up (chill it for a few if needed), start marking out your pattern using the templates. I gently press around each shape and space them out evenly.
- Add Stitch Lines – For that realistic, stitched-soccer-ball effect, I use a stitching tool (or even a dull knife) to trace along the edges. Let the cake dry a bit before airbrushing so your shapes don’t get smudged.

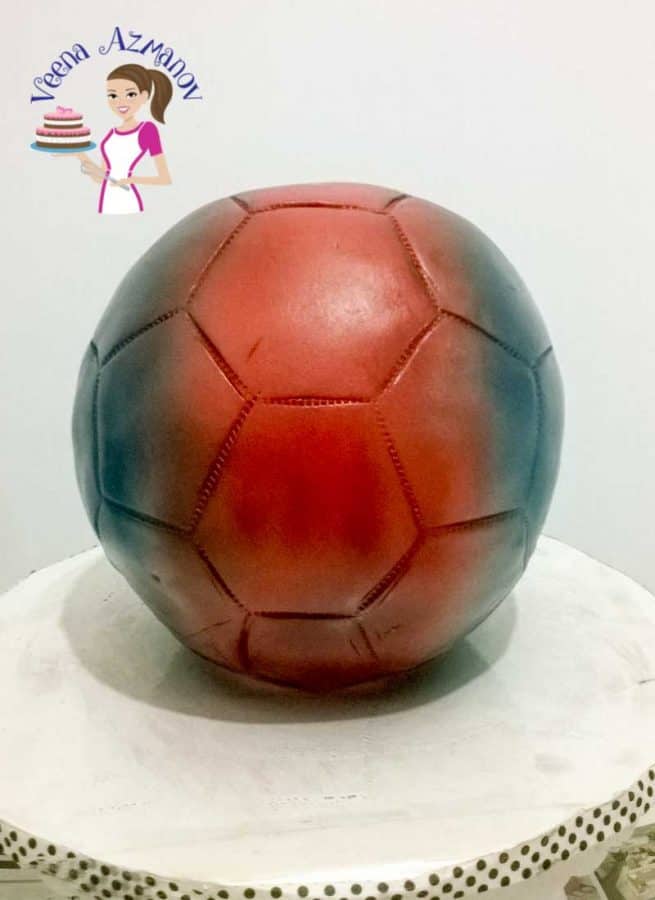
Airbrushing the Barça Colors
Now for the fun (and slightly nerve-wracking) part — airbrushing! I used red and blue airbrush colors to create that bold FC Barcelona look. These colors are intense, but they also tend to go blotchy if you rush it, especially on fondant. So here’s what worked best for me:
- Airbrush in Layers: I applied the color in two intervals instead of trying to go full coverage in one go.
- Dry Time is Key: After the first pass, I let the cake sit for about an hour. This gives the color a chance to dry and deepen naturally. You’ll start to see how intense it looks once dry, which helps you decide how much more to spray.
This layering method keeps the finish smooth and avoids that dreaded oversaturated, drippy look. Trust me — less panic, more control. And if you’re using gel colors diluted with vodka instead of airbrush paints, go even lighter with your first pass and build slowly.
I had to airbrush the cake in two long intervals. Just so the color won’t’ go blotchy. The blue and red are pretty dark. You have to use quite a bit to get that intense color in such cases it is best to airbrush and wait for an hour or so. The colors will dry and deepen which will give you a sense of how much more you need to airbrush. For this, I used airbrush colors – red and blue. For the Barcelona logo, I created an edible print out.

? How to Cut a Soccer Ball Cake (Without Causing a Cakequake)
- Step 1: Remove the Top Decorations (if any) – If you’ve added a fondant crest, candle, or other décor on top, gently remove it so you don’t slice through anything hard or awkward.
- Step 2: Anchor the Cake– Place the cake on a sturdy surface. If your cake is on a central dowel (like mine was), be aware of it so you don’t stab straight into it.
- Step 3: Cut a Top “Cap” Off – Using a sharp serrated knife, slice off about 1 to 1.5 inches from the very top to create a flat surface. This makes the next steps way easier and keeps the slices from toppling over.
- Step 4: Cut Horizontal Rings – Now, slice the ball horizontally into layers — like cutting a layer cake sideways. An 8-inch cake usually gives you 3–4 rings, depending on height.
- Step 5: Slice Each Ring into Servings – Take each ring and cut it into 1-inch slices. Think of it like slicing a small round cake — just repeat for each layer.
- Step 6: Watch the Cheers Roll In ? Serve with a grin, because you just sliced a ball-shaped cake like a pro. Optional: offer napkins and applause.

- Paw petrol cake with chase cake toppers – Video
- Spring Buttercream Basket of Flowers – Video
- Floral Buttercream with Russian piping tips – Video
- Fondant Tree Stump tutorial Pink Baby Shower Cake- Video
- How to make a pumpkin Cake
- Log cake tutorial


Frequently asked questions
Absolutely. Bake the cakes 1–2 days ahead and wrap them well in plastic wrap. You can also frost and cover the cake in fondant the day before — just store it in a cool room (not the fridge, or condensation may mess with your fondant).
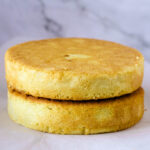
You can carve two dome shapes from regular round cakes. Bake in deep 6-inch or 8-inch pans and shape the tops using a serrated knife. A bit more effort, but still works!
Use gel food colors thinned with vodka or lemon extract and apply with a sponge, makeup brush, or soft food-safe paintbrush. Build up color in layers, just like airbrushing!
Place it on a non-slip mat inside a snug box. Use a central dowel if you’re traveling with it. Chill it before moving to firm up the ganache and fondant — it’ll travel better.

Barca Soccer Ball Cake Tutorial
If you've got a Barça fan in your life (or you are the fan), this is the cake to impress. A perfect chocolate soccer ball, decked out in red and blue glory. Here's how I built mine from the ground up — with tips to keep that spherical beauty standing tall (and not turning into a sad, saggy pancake).
Ingredients
- 2 ½ cups (310 g) All-purpose flour
- ¾ cup (65 g) Unsweetened cocoa powder
- 2 tsp Baking powder
- ½ tsp Baking soda
- ½ tsp Salt
- 1 cup (227 g) Butter
- 2 cups (400 g) Sugar
- 4 large Eggs
- 1 tbsp Vanilla extract
- 1 cups (240 ml) Buttermilk (or milk + 1 tbsp vinegar)
- 1 cup (240 ml) Hot coffee (or hot water for milder flavor)
- 1 cup (227 g) Unsalted butter softened
- 3 cups (360 g) Powdered sugar sifted
- 2 – 3 tbsp Heavy cream
- 1 tsp Vanilla extract
- ¼ tsp Pinch of salt
- 400 g Dark chocolate (bittersweet or semi-sweet) chopped
- 200 ml Heavy cream
- 900 grams White fondant (approx. for an 8-inch ball)
- Red and blue airbrush color (or gel color diluted with vodka)
- 8-inch ball Foam core cut to size wrapped in foil) for internal support
Method
- Preheat oven to 160°C/320°F. Grease and line your ball pans.
- In a bowl, sift together flour, cocoa powder, baking powder, baking soda, and salt.
- Cream the butter and sugar until light and fluffy, then add the eggs and vanilla. Alternately, add the dry ingredients and buttermilk. Stir in the hot coffee last.
- Divide into the two pans and bake for 45–55 minutes or until a skewer comes out clean. Cool completely before handling.
- Step 2: Support with Foam Core – Trim a third off the bottom cake (so the ball doesn’t roll away!). Replace that portion with your foil-wrapped foam core. This acts as a dummy so your cake won’t collapse under its own weight — trust me, I’ve been there.
- Step 3: Fill and Stack – Spread buttercream over the flat side of each cake half. Sandwich them together with the foam core underneath. Press gently to secure.
- Step 4: Make and Coat with Ganache – Microwave or heat on the stove until melted smooth and pourable but thick. Let cool completely to peanut butter consistency. Spread a smooth layer of ganache all over the cake — it locks in crumbs and gives your fondant a flawless surface. Chill until firm.
- Step 5: Fondant Time – Roll out your white fondant to about 3mm thick. Drape over your chilled cake. Smooth it down carefully — top to bottom — trimming excess as needed.
- Step 6: Add the Soccer Ball Pattern – Before airbrushing, create the classic soccer ball design using hexagon and pentagon shapes. I used a cardstock template to mark out shapes. Gently press the shapes onto the fondant-covered cake, spacing them out evenly — don’t worry about making it perfect; just suggest the look. I recommend starting from the top center and working your way down, like a globe pattern. Pro tip – If you’re going full Barça, you can do the traditional black and white with fondant and skip the airbrushing completely.
- Step 7: Paint the Passion—Once your fondant is dry, airbrush bold streaks of red and blue to represent FC Barcelona's colors. Start from the top and bottom and then make your way towards the center.
Notes
- Bake in Advance: Bake the cakes a day ahead so they’re fully cooled and firm. It makes carving, stacking, and frosting way easier.
- Chill Everything: Cold cakes are easier to handle. Chill after stacking, after ganaching, and even after fondant. Every step is smoother when the cake is firm.
- Don’t Skip the Dummy Base: That foam core bottom saves your sanity — it keeps the cake light, stable, and gives you that perfect ball shape without risking a cake collapse.
- Use Templates for Accuracy: Don’t try to freehand soccer ball patterns — they’ll haunt you. Make those hexagon and pentagon templates and reuse them all around the cake.
- Layer the Airbrush: Patience pays off here. Spray one light layer, let it dry, then go in again. Bold colors like red and blue need time to settle to avoid blotches.
- Work on a Turntable: You’ll save your wrists and your back. Plus, it’s so much easier to keep the pattern symmetrical and your airbrush strokes even.
- Let It Set Before Touching: Once you’re done decorating, step away. Let the fondant and color set before transporting or adding final details — it’ll keep everything crisp.
- And remember — perfection is overrated. If it looks like a soccer ball and makes a Barça fan happy, you nailed it.
Equipment you will need


Nutrition
Tried this recipe?
Mention @veenaazmanov_kitchen or tag #veenaazmanovkitchen!Don’t lose this recipe! Save it for Later!
📌 Save this Recipe for later on Pinterest so you can easily find it again.
⭐ Add Veena Azmanov Kitchen to your Google Preferred Sources.
It helps Google show you more of our recipes.
📧 Subscribe for new recipes delivered to your inbox.
🎥 Follow us for more recipes


Hi! I know this is an old post but if you see this, I am wondering: how do you get the ball from rolling away on the bottom cake display board (in this case how is the ball attached to the board painted green like grass)? I know the bottom is foam wrapped in foil, but what is making it balance and not simply roll? I haven’t tried the recipe yet but I feel confident about all the steps except for that one! Do I need to hot glue the foil wrapped foam to my base before stacking the cake? Thank you!
Hey Nan, the cake was made a long time ago but I am still a cake decorator so I do remember how to make my cakes.
In the progress pictures, you can see that the bottom of the cake is made of form, the top is cake, and if you look closely, there is a dowel (wooden stick) that goes through the center of the cake, form and the cake board on the bottom.
The dowel sits deep in the bottom board, so it does not move or roll over
The green grass is not painted – it is piped frosting
Have fun making your cake – and feel free to ask questions.
My son is obsessed with football and Barcelona is his team—I followed your instructions and the smile on his face was priceless. Thank you so much for sharing this!
Oh Sienna, that melts my heart. That’s exactly why I love cake decorating—those reactions are everything!
Do you recommend freezing the cake before carving? I always get nervous with softer layers.
Definitely, Kevin! I freeze mine for 30–60 minutes before carving—it helps a lot with control and clean lines.
I’ve been so scared to try a ball cake, but your step-by-step gave me confidence. Just finished one for a soccer-themed baby shower!
Yes, Meera!! That’s awesome! Once you do it once, you realize it’s not that scary—just a few good tricks. Congrats on your first one!
Quick question—how did you keep the sphere from flattening while stacking? Mine always ends up lopsided.
Quick question—how did you keep the sphere from flattening while stacking? Mine always ends up lopsided.
This was such a helpful tutorial! I made this for my nephew’s birthday and he flipped when he saw the Barcelona logo on the cake. Thank you!!
That’s amazing, Laura! I love hearing stories like that—makes all the airbrushing worth it! ?
For the life of my, I cannot get the fondant to sit smoothly on the spherical shape. It folds and bubbles. Could you do a tutorial about that?
Ah I will try to do that. I like to roll my fondant thicker so it has room to stretch and I don’t roll it too large so I can manage it better.
Thanks for the marvelous posting! Really love your blog.
Thank you, Sbobet.
OMG thank you so much for this detailed post. I really appreciate your tutorials and recipes. THanks
Thank you, Bassler. So happy you found this tutorial useful. Thanks for coming back to write this feedback. Have a lovely day.