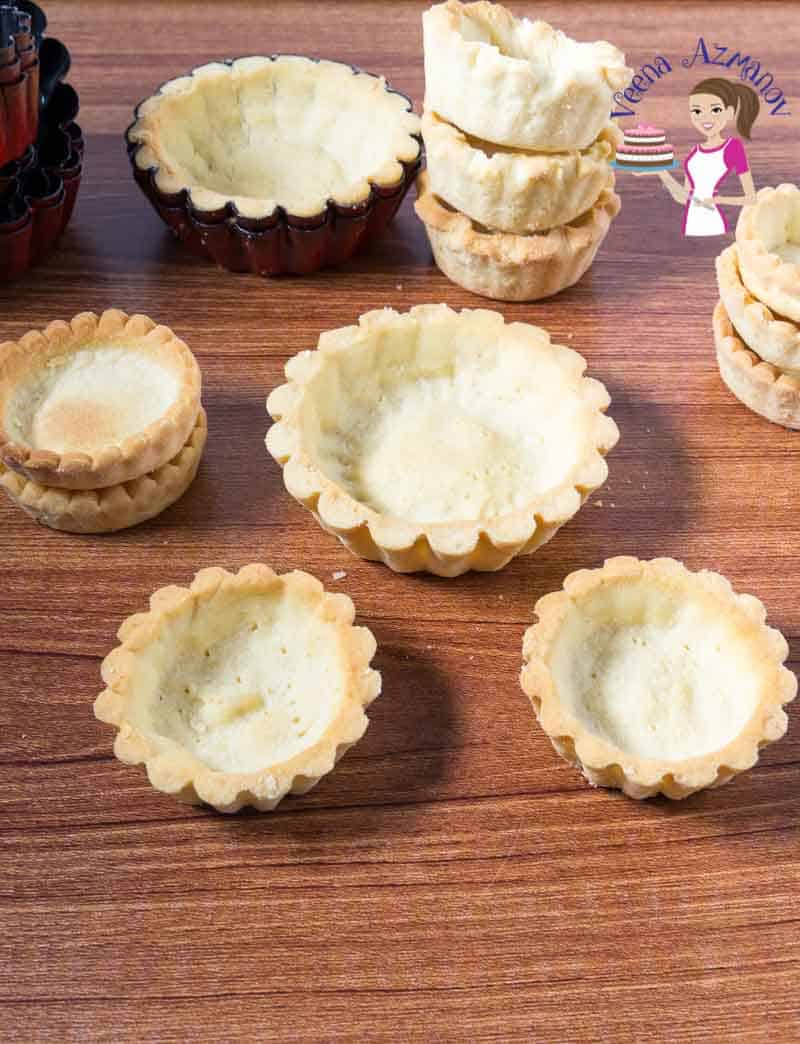
Mini Tart Shells
 Prep Time 10 minutes Cook Time 10 minutes Total Time 1 hour 5 minutes
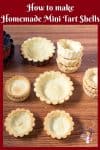
These bite-sized shortbread tarts make the most amazing and impressive desserts. The buttery shortcrust pastry that’s tender and crips. Today, I’m going to show my super simple and easy methods to make these mini tart shells. They are a perfect base for any filling, from sweet custard creams topped with fruits, mousses, or ganache. Homemade mini tarts will be your next new favorite homemade treat.
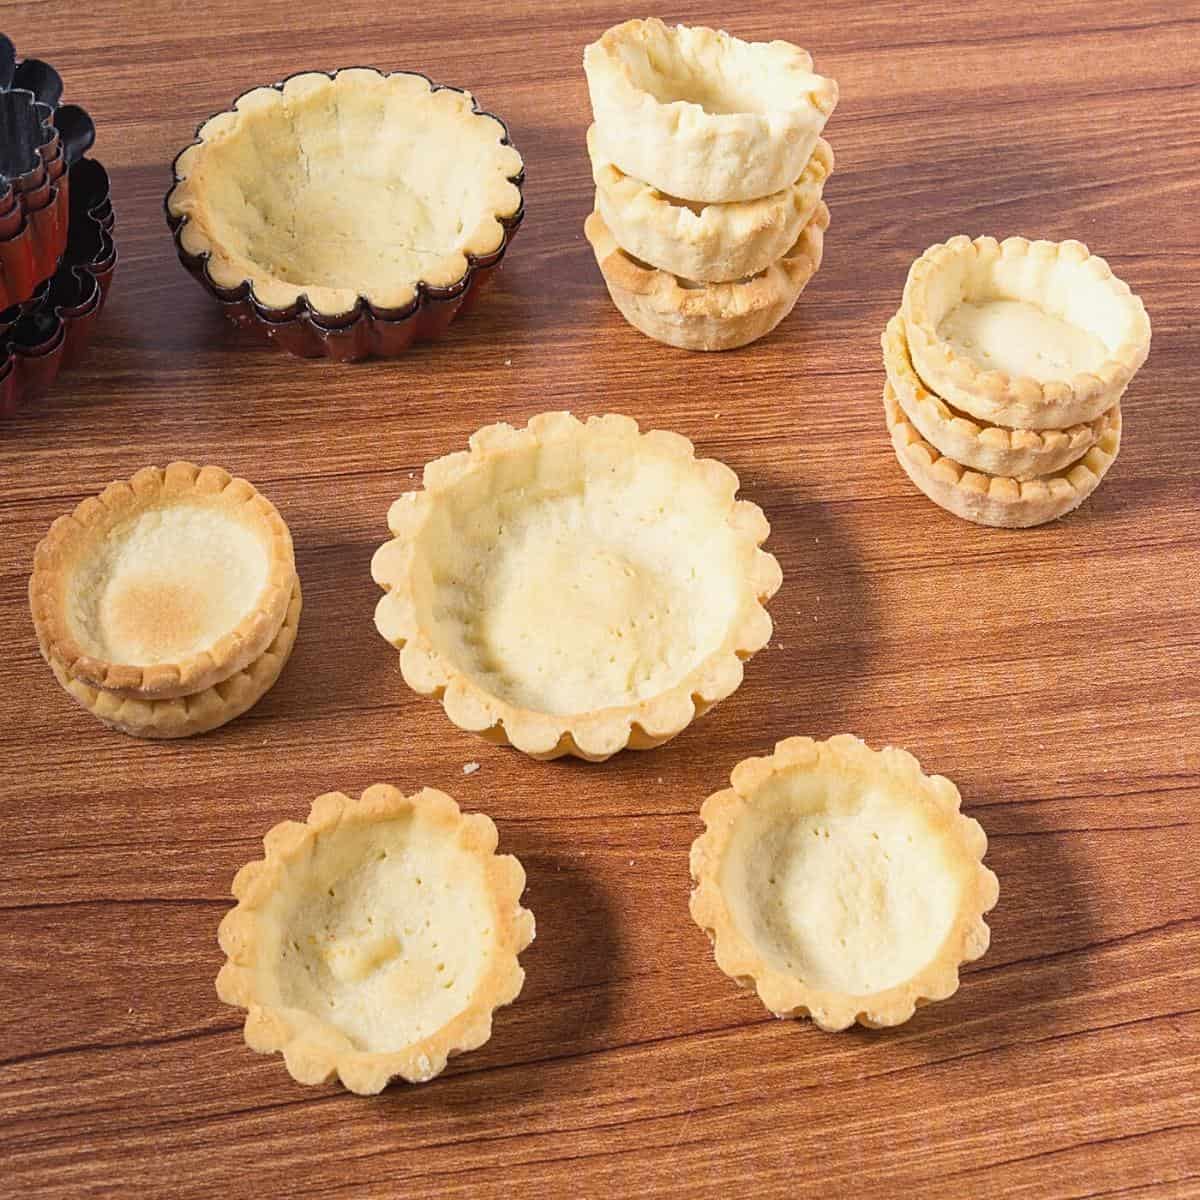
Mini tart shells are small pastry shells used as the base for making miniature tarts or tartlets.
Mini tart shells come in different shapes and sizes, including round, rectangular, or even bite-sized. They can be made using specialized tart pans or molds, or purchased pre-made from grocery stores or bakeries for convenience.
Why make these homemade tart shells?
- Customization: When you make tart shells at home, you have complete control over the ingredients and can customize them to suit your preferences. You can adjust the sweetness, thickness, and flavor of the crust to complement the filling.
- Quality Ingredients: You can choose high-quality ingredients when making tart shells at home, such as organic flour, free-range eggs, and real butter. This can result in a superior taste and texture compared to store-bought alternatives.
- Cost-Effective: While there is an initial investment in ingredients and time, making tart shells at home can be more cost-effective, especially if you plan to make them in bulk or regularly bake tarts.
- Creative Control: Homemade tart shells allow you to get creative with shapes, sizes, and flavors. You can experiment with different types of dough (such as shortcrust, puff pastry, or cookie dough) and explore various decorative techniques to make your tarts unique.

Ingredients and substitutes
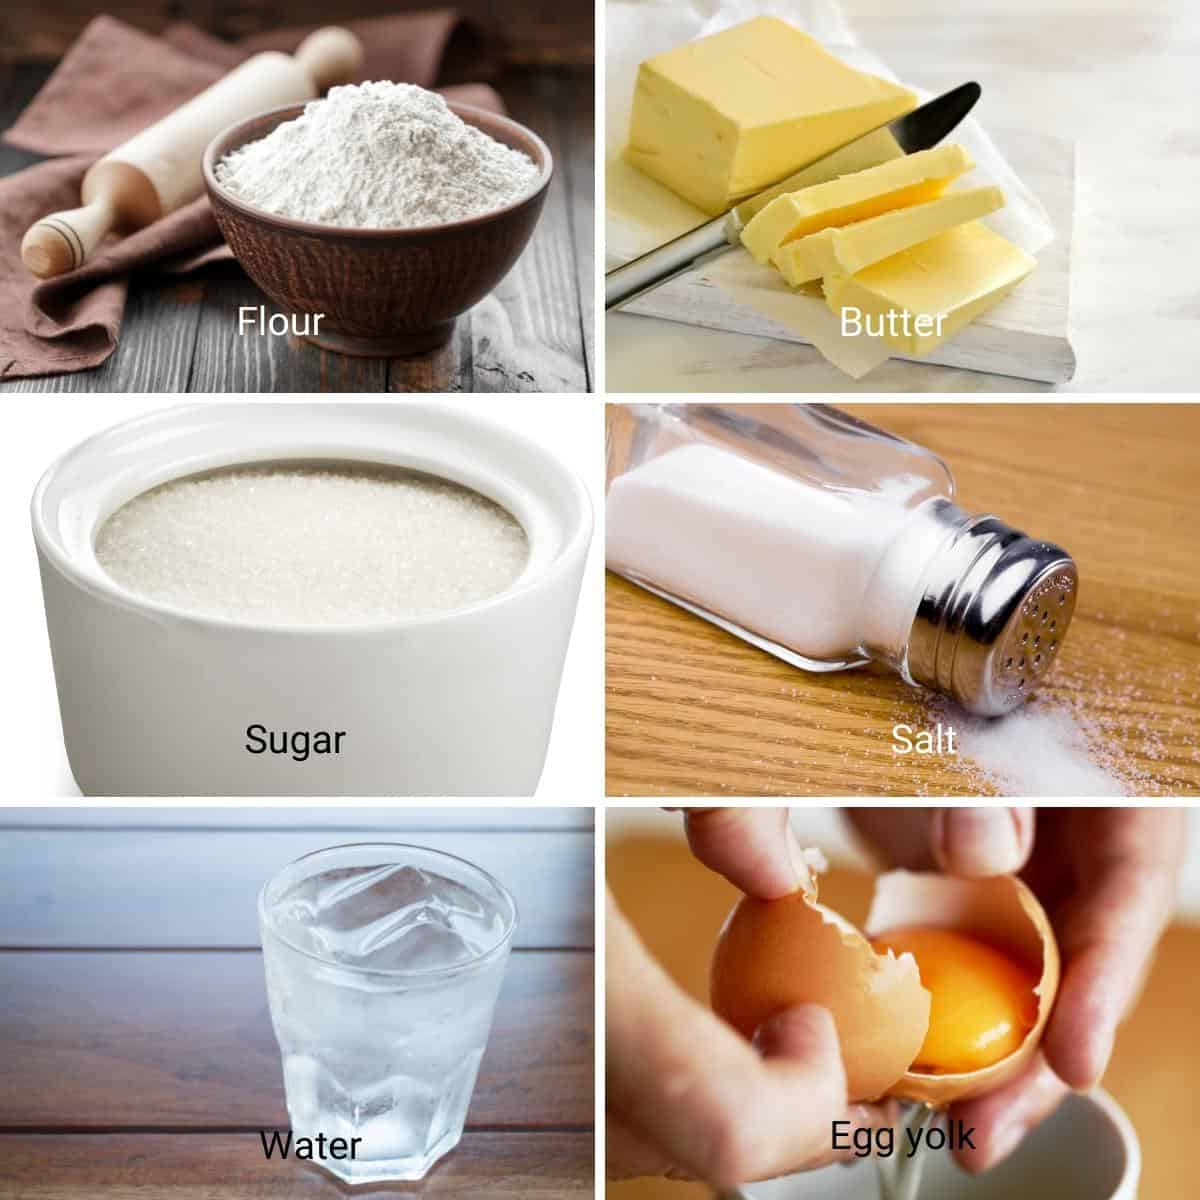
- All-Purpose Flour: Provides structure and texture to the tart shell. You can substitute pastry flour for all-purpose flour for a more delicate texture. Gluten-free flour blends can also be used as a gluten-free alternative.
- Unsalted Butter: Adds richness and flavor to the tart shell while creating a tender, flaky texture. If you prefer, you can use salted butter, but adjust the amount of added salt accordingly. Alternatively, you can use margarine or a vegan butter substitute for a dairy-free option.
- Granulated Sugar: Sweetens the tart shell if making sweet tarts. It also helps with browning and adds a subtle crunch. For savory tart shells, you can omit the sugar entirely or replace it with a pinch of salt for seasoning.
- Egg Yolk: Helps bind the ingredients together and adds richness to the dough. If you prefer an egg-free option, you can use a flaxseed or chia seed egg (1 tablespoon ground flaxseed or chia seeds mixed with three tablespoons of water) as a binding agent.
- Cold Water: Helps bring the dough together to the right consistency. You can use cold milk or cream for added richness if you prefer not to use water. Alternatively, some recipes use vodka instead of water, as it adds moisture without developing gluten in the dough.
- Salt: Enhances the flavor of the tart shell and balances the sweetness in sweet tart shells. You can use sea salt, kosher salt, or any other type of salt, depending on your preference. Adjust the amount based on your taste preferences.
Step-by-step: How to make mini tart shells
Pastry dough
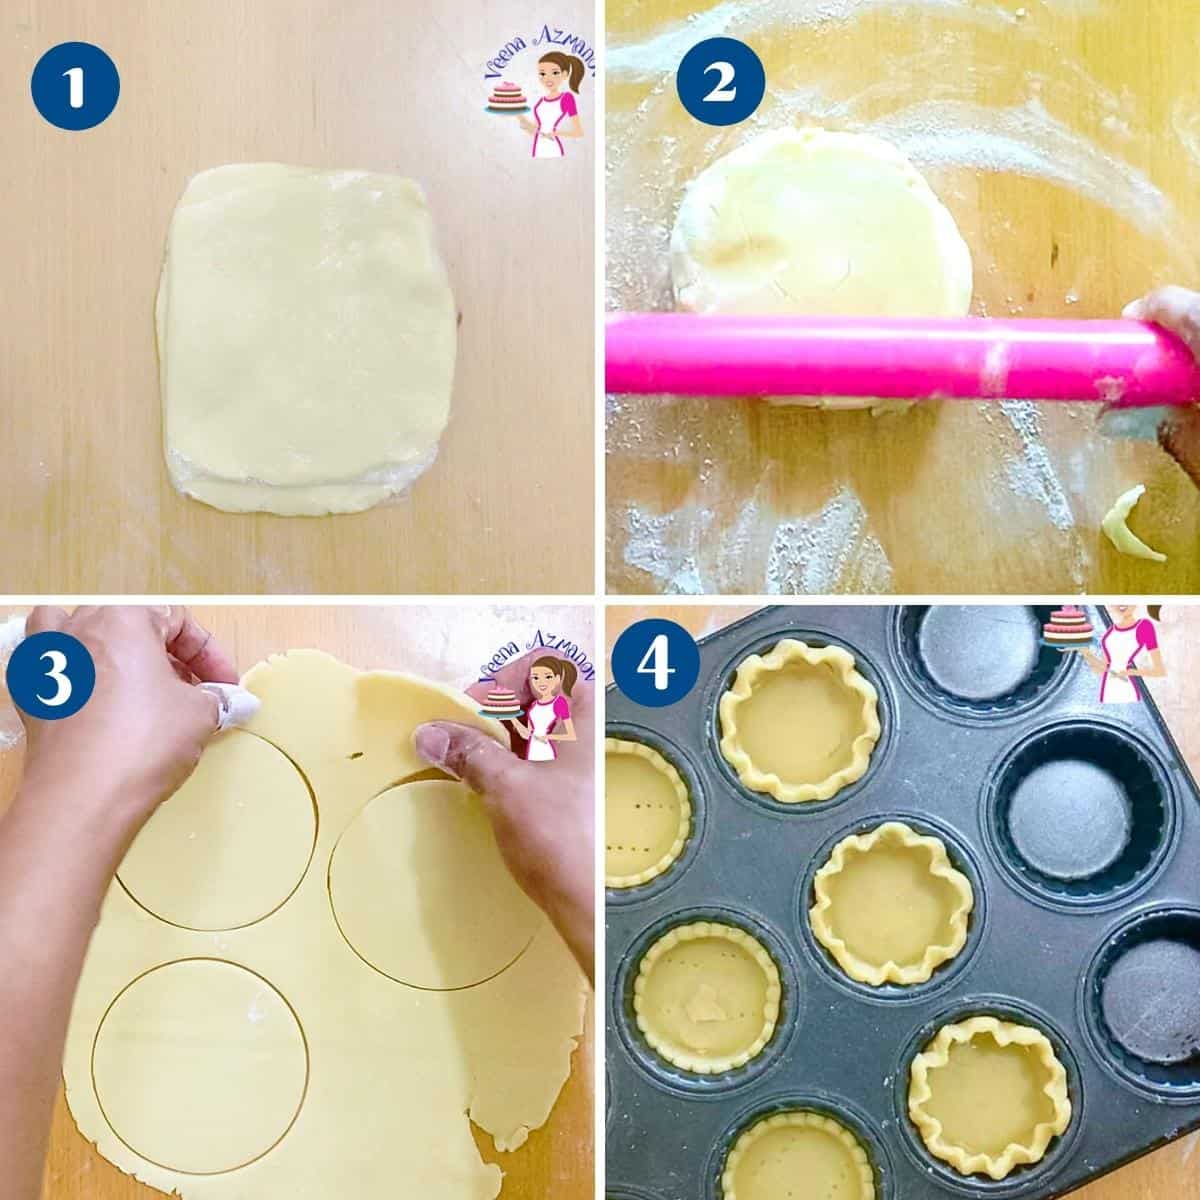
- Dough – Combine the flour, sugar (if making sweet tart shells), and cold butter in a food processor. Pulse until the mixture resembles coarse crumbs. Add the egg yolk and pulse until the dough starts to come together. If the dough seems too dry, add cold water, one tablespoon at a time, until the dough forms a ball.
- Chill – Turn the dough out onto a lightly floured surface and knead it gently until smooth. Shape it into a disk, wrap it in plastic wrap, and refrigerate for at least 30 minutes.

- Oven – Preheat your oven to 375°F (190°C). Lightly grease mini tart pans, depending on your desired size and shape of tart shells.
- Roll – Once the dough has chilled, roll it out on a lightly floured surface to about 1/8 inch thickness. If the dough becomes too soft, you can chill it again for a few minutes.
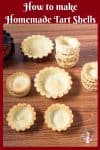
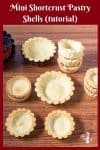
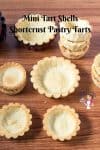
- Shells – Use a round cookie cutter or a glass slightly larger than the cavities in your tart pans to cut out circles of dough. Gently press each circle into the prepared tart pans, ensuring the dough conforms to the shape of the pan and comes up the sides.
- Dock – Prick the bottom of each tart shell with a fork to prevent it from puffing up during baking. This process is called docking.

- Bake – Place the tart shells in the oven and bake for about 10-12 minutes or until golden brown. Keep an eye on them to prevent over-browning. Alternatively, add filling and bake the tarts for 20 to 25 minutes or until light and golden.
- Cool – Once baked, remove the tart shells from the oven and allow them to cool completely in the pans before carefully removing them. Once cooled, fill the tart shells with your desired fillings, sweet or savory.
- Serve the mini tart shells immediately if filled with perishable fillings, or store them in an airtight container until ready to use.

Shallow tartlets using a Muffin Pan
- Prepare the Tart Dough: If using store-bought dough, let it come to room temperature according to the package instructions. If making homemade dough, prepare it according to your chosen recipe.
- Preheat the Oven: Preheat your oven to the temperature specified in your tart dough recipe.
- Prepare the Muffin Pan: Lightly grease the wells of the muffin pan to prevent the tart shells from sticking. Alternatively, you can use muffin liners, but the tart shells may not hold their shape as well.

- Shape the Tart Shells: Roll out the tart dough on a lightly floured surface to about 1/8 inch thickness. Use a round cookie cutter or a glass slightly larger than the wells of the muffin pan to cut out circles of dough.
- Place the Dough in the Muffin Pan: Gently press each circle of dough into the wells of the muffin pan, making sure to press the dough up the sides to form the tart shells. Trim any excess dough if necessary.
- Prick the Dough: Prick the bottom of each tart shell with a fork to prevent it from puffing up during baking. This step is crucial for ensuring that the tart shells bake evenly.
- Bake the Tart Shells: Place the muffin pan in the preheated oven and bake the tart shells according to the recipe instructions, usually until they are golden brown and cooked through. The exact baking time will depend on the dough you use.
- Cool and Remove from Pan: Once baked, remove the muffin pan from the oven and let the tart shells cool in the pan for a few minutes. Then, carefully remove them from the pan and transfer them to a wire rack to cool completely.
- Fill the Tart Shells: Once the tart shells are completely cooled, you can fill them with your desired fillings, whether sweet or savory.
- Serve: Serve the filled tart shells immediately or store them in an airtight container until ready to serve.

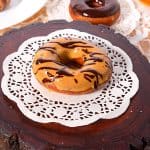
- Fruit fillings such as strawberry, raspberry, blackberry, and blueberry over the delicious pastry cream, and topped with whipped cream
- Condiments such as caramel sauce, butterscotch,
- Curds such as lemon curd and orange curd.
- Mousse such as strawberry, chocolate, and more.
- Baked with frangipani and fruits


Troubleshooting
- Tart Shells are Tough or Dense:
- Possible Causes: Overworking the dough can develop gluten, resulting in tough tart shells. Using too much flour or not enough fat in the dough.
- Troubleshooting: Handle the dough gently and avoid overmixing. Ensure the dough has the correct ratio of ingredients. If it’s too dry, add a bit more fat or liquid as needed.
- Tart Shells are Soggy:
- Possible Causes: Not baking the tart shells long enough before filling. Filling tart shells with overly moist fillings or filling them too far in advance.
- Troubleshooting: Blind bake the tart shells until they are fully cooked and golden brown before adding moist fillings. If using moist fillings, consider adding a thin layer of melted chocolate or a glaze to the bottom of the tart shells to create a barrier and prevent sogginess.
- Tart Shells Shrink During Baking:
- Possible Causes: Stretching the dough too much when pressing it into the tart pans. Not chilling the dough adequately before baking.
- Troubleshooting: Press the dough gently into the tart pans without stretching it. Chill the shaped tart shells in the refrigerator for at least 30 minutes before baking to help them maintain their shape.
- Uneven Baking or Browning:
- Possible Causes: Hot spots in the oven. Overcrowding the oven with too many tart pans at once.
- Troubleshooting: Rotate the tart pans halfway through baking to ensure even browning. Bake the tart shells in batches if necessary to avoid overcrowding the oven.
- Difficulty Removing Tart Shells from Pans:
- Possible Causes: Not greasing the tart pans adequately. Allow the tart shells to cool completely in the pans.
- Troubleshooting: Ensure the tart pans are well-greased before pressing in the dough. Allow the tart shells to cool in the pans for a few minutes after baking, then carefully remove them and transfer to a wire rack to cool completely.


Frequently asked questions
Store leftover tart shells in an airtight container at room temperature for up to 2 days, or freeze them for longer storage. Thaw frozen tart shells at room temperature before using.
To prevent tart shells from becoming soggy, ensure they are fully baked before filling. Dock the dough before baking to allow steam to escape, and avoid filling tart shells with overly moist fillings until just before serving.
If tart shells shrink during baking, you can gently press them back into shape while they are still warm. To prevent shrinking in the future, ensure the dough is chilled before baking, and avoid stretching it when pressing it into the pans.
If you don’t have pie weights, you can use dried beans, rice, or even sugar as makeshift weights. Simply line the tart shells with parchment paper or aluminum foil and fill them with the weights before baking.
Yes, you can make tart shells without eggs. Simply omit the egg yolk from the recipe and adjust the amount of liquid (such as water or milk) as needed to achieve the right dough consistency.
Often, people see light brown edges and presume the crust is done. No. The pastry is baked when the bottom is cooked, not when the edges are brown. Always make sure the bottom of the crust is cooked, or any filling will soak into the crust and make the tart soggy. If the edges are browning too quickly, tent the edges with foil or a pie crust shield.
Homemade Mini Tart Shells
These bite-sized shortbread tarts make the most amazing and impressive desserts. The buttery shortcrust pastry that's tender and crips. Today, I will show my super simple and easy methods to make these mini tart shells. They are a perfect base for any filling, from sweet custard creams topped with fruits, mousses, or ganache. Homemade mini tarts will be your next new favorite homemade treat.
Video
Ingredients
- 1 ½ cups (190 g) All-purpose flour
- ½ cup (113 g) Unsalted butter cold and cut into small pieces
- ¼ cup (50 g) Powdered sugar (omit to make savory shells)
- ¼ tsp Pinch of Salt
- 1 large Egg yolk
- 1-2 tbsp Cold water as needed
Method
- Dough – Combine the flour, sugar (if making sweet tart shells), and cold butter in a food processor. Pulse until the mixture resembles coarse crumbs. Add the egg yolk and pulse until the dough starts to come together. If the dough seems too dry, add cold water, one tablespoon at a time, until the dough forms a ball.1 ½ cups All-purpose flour, ½ cup Unsalted butter, ¼ cup Powdered sugar , ¼ tsp Pinch of Salt, 1 large Egg yolk, 1-2 tbsp Cold water
- Chill – Turn the dough out onto a lightly floured surface and knead it gently until smooth. Shape it into a disk, wrap it in plastic wrap, and refrigerate for at least 30 minutes.
- Oven – Preheat your oven to 375°F /190°C/ Gas Mark 5. Lightly grease mini tart pans or mini muffin tins, depending on the size and shape of tart shells you desire.
- Roll – Once the dough has chilled, roll it out on a lightly floured surface to about 1/8 inch thickness. If the dough becomes too soft, you can chill it again for a few minutes.
- Shells – Use a round cookie cutter or a glass slightly larger than the cavities in your tart pans to cut out circles of dough. Gently press each circle into the prepared tart pans, ensuring the dough conforms to the shape of the pan and comes up the sides.
- Dock – Prick the bottom of each tart shell with a fork to prevent it from puffing up during baking. This process is called docking.
- Bake – Place the tart shells in the oven and bake for about 10-12 minutes or until golden brown. Keep an eye on them to prevent over-browning. Alternatively, add filling and bake the tarts for 20 to 25 minutes or until light and golden.
- Cool – Once baked, remove the tart shells from the oven and allow them to cool completely in the pans before carefully removing them. Once cooled, fill the tart shells with your desired fillings, sweet or savory.
- Serve the mini tart shells immediately if filled with perishable fillings, or store them in an airtight container until ready to use.
Notes
- Keep Ingredients Cold: Ensure your ingredients, especially butter or shortening, are cold when making the dough. This helps create a flakier texture in the final tart shells.
- Don’t Overwork the Dough: Handle the dough gently and avoid overworking it. Overworking the dough can develop gluten, resulting in tough tart shells. Mix until just combined.
- Chill the Dough: After forming the tart shells in the pans, chill them in the refrigerator for at least 30 minutes before baking. This helps prevent shrinking during baking and maintains the shape of the shells.
- Dock the Dough: Prick the bottom of the tart shells with a fork before baking. This allows steam to escape and prevents the dough from puffing up excessively.
- Use Pie Weights: When blind baking tart shells (baking without filling), use pie weights or dried beans to weigh down the dough and prevent it from puffing up. Line the tart shells with parchment paper or aluminum foil before adding the weights.
- Preheat the Oven: Ensure your oven is fully preheated before baking the tart shells. A hot oven helps the dough set quickly, resulting in crispier shells.
- Watch the Baking Time: Keep a close eye on the tart shells while they’re baking, especially during the last few minutes. They can quickly go from golden brown to burnt.
- Rotate the Pan: If your oven has hot spots, rotate the muffin or tart pan halfway through baking to ensure even browning.
- Cool Completely Before Filling: Allow the tart shells to cool completely before removing them from the pan and filling them. Warm shells may become soggy when filled with moist fillings.
- Experiment with Flavors: Don’t be afraid to experiment with different types of dough (such as shortcrust pastry, puff pastry, or cookie dough) and fillings to create unique flavor combinations.
- Practice Makes Perfect: Making mini tart shells can take some practice to get just right. Don’t get discouraged if your first batch isn’t perfect. Each attempt will help you improve your technique.
Equipment you will need

Nutrition
Tried this recipe?
Mention @veenaazmanov_kitchen or tag #veenaazmanovkitchen!Don’t lose this recipe! Save it for Later!
📌 Save this Recipe for later on Pinterest so you can easily find it again.
⭐ Add Veena Azmanov Kitchen to your Google Preferred Sources.
It helps Google show you more of our recipes.
📧 Subscribe for new recipes delivered to your inbox.
🎥 Follow us for more recipes


Can I leave out sugar to make for savoury filling
Yes, you can leave out the sugar to make a savory pie crust.
Any feedback on using mini aluminum tartlet pans regarding method or baking time. They are a “traditional” pie tin shape with sloped sides.
I think they work the same as tart pans? No? unless I don’t understand which pans. If necessary use pie weights to bake them
If using 5 inch tart pans, what is the approximate yield?
Depending on the thickness you should have between 7 to 8 tarts.
Hi! I would like to use a mini muffin tin to bake these. How much time do you think they will take in the oven? Also, the filling that I am planning to add also require to be in the oven for oven (maple syrup pavan tartelettes). How should I adjust the cooking time to avoid over baking the dough?
Hey Julie, yes, you can use these to make maple pecan tartlets. A tart with filling should take about 18 minutes. Check the recipe to see the exact baking time. If you choose to prebake. Bake them for 8 minutes then the remaining time with filling.
Would this tart crust work for a Dutch apple pie tart? How long should I bake for using your recipe
Sierra. Yes, this is shortcrust dough. Follow these measurements and baking time for my Dutch apple pie for details.
This recipe made the perfect tartlet shells for my mini cream pies. I was worried the dough was too sandy to roll out, but it came together fine. I used mini muffin pans sprayed with cooking spray and the shells released easily. I used a biscuit cutter and the process was a lot quicker than I thought it would be. I made 48 tartlets in a little more than 10 minutes. After lining the tins I let rest in the fridge about 20 minutes. I didn’t’ have any problems with shrinkage or puffing too much and I didn’t use weights of any kind. As I didn’t want a very sweet dough I only used about 1/2 the sugar. I chose this recipe over pie dough because I thought it would less fragile – I wanted people to be able to just pick up a pie and eat it one or two bites. It came our just as I had hoped – sturdy enough to pick up, but flakey and tender when you bite into it. I’ll be making these again.
FYI – when scaling the recipe the stick quantity of butter does’t change.
Thank you, Elle. I am so happy you enjoyed worthing with this dough. It really is simple and easy. Thank you for the lovely and detailed feedback.
Hi there,
These tartlet shells are amazing! I’ve used this recipe several times recently for a wide variety of different tartlet fillings and all of my friends and family adores them! I love the buttery-ness and the sweetness is perfect for my fruit flavours.
I know you said that the baked shells freeze well, but do you have any idea whether or not the dough freezes well? I was thinking of pre-cutting the shell shapes, separating them with parchment paper, and freezing them so it would be easy to pull them out and quickly bake later.
Thanks so much,
Cora
Hey Cora, The dough freezes well. But, I don’t usually freeze them in the pans because I do not have so much space. I tend to freeze the dough and then use it chilled. But, I think it should not be an issue with freezing them at all.
how do i stop it from falling in on itself and puffing up in the oven?
Usually the small ones don’t fall. If you anchor the edges nicely with your fingers as you see me do in the video. That helps hold them in place.
Also, the sides are very shallow so they don’t usually fall. If you use a fork to poke holes they do not puff either.
Do your sides fall? Well, you can use small squares of parchment paper and baking beans.
Thanks
I followed the recipe very carefully, and they turned out great! I used my food processor and 4” tart pans. They popped right out, were a bit crunchy which was perfect with the lemon curd topped with fresh fruit. I can’t wait to make them for company. Thanks for a great recipe!
Thank you, Nancy. So happy you had great success with this recipe. Thanks for coming back to write this feedback
These mini tart shells are so cute. I actually never done any tart before. It’s very complicated to make – for me, at least that what I thought. Till now. Your step by step instructions are very helpful. Can’t wait to try make it!
Thanks, Natalie. It’s not complicated at all. You must try these.
You make these look so simple! I’ve never made mini tart shells before but always wondered how you get them out of the little forms!
Thank you, Glair. The come off the little forms very easily because they are butter based.
Love your step by step instructions and different methods! It makes the whole process to look so easy. Need to try this recipe sometime soon!)
Thank you, Veronika.
Thank you so much for sharing. I tried your recipe and they were the best I’ve made.
Just a quick question – I replaced the eggs with yogurt as suggested but, the minute I put my crispy, baked tart shells in the fridge they became soft. Could you please let me know where I went wrong?
Thank you once again!
Hey, Sharpi. Did you keep them in an airtight container? They should stay well in the fridge.
Perhaps it was the yogurt in the dough that attracts moisture in the fridge. Next time try less yogurt or just a tablespoon of water instead of yogurt.
Hi Veena,
Thank you for the suggestion. You were absolutely right. There was too much of water in the yogurt. I replaced yogurt with greek yogurt and ot turned out perfectly.
Thank you!
Sharpi
Ah.. that makes sense. Thanks for coming back to give me feedback Sharpi.