Food Photography & Cake Photography


Are you someone who loves to take pictures of food? With the rise of platforms like Instagram, food photography and cake photography have become a trend with many aspiring photographers taking on the challenge. Are you struggling to capture the perfect shot? Don’t worry—you’re not the only one!
Every day, photographers of all levels of experience are tweaking, troubleshooting and learning new tricks to capture perfect shots of their culinary creations. Whether you’re a food blogger, a professional restaurant photographer, or just an avid Instagrammer, the tips and tricks in this piece will help you take food photography to the next level. From mastering the basics to avoiding common pitfalls to exploring more advanced techniques, you’ll learn everything you need to know to create mouthwatering photographs. With handy tools and inspiring examples, you too can showcase your dishes in all their glory. So, stop fiddling with your settings and let’s explore the secrets to amazing food photography.
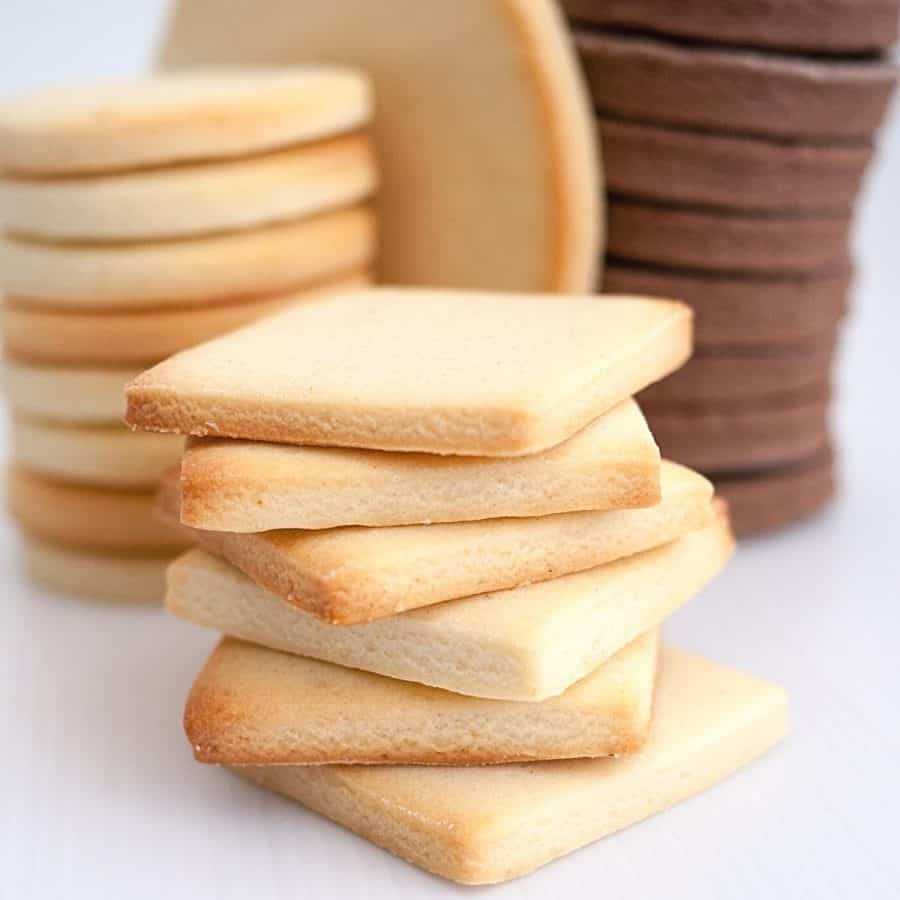
Taking pictures of food is not just about snapping a quick photo; it’s about capturing the flavors, textures, and visual appeal of the dish. It’s a way to elevate the dining experience and share the joy of food with others.
Many of us take pictures of our food and all of us have different reasons to do it.
- Documentation: Photographing your food allows you to document and remember the dishes you’ve prepared or enjoyed at restaurants. It’s a visual record of your culinary creations or memorable dining experiences that you can look back on in the future.
- Sharing and Social Media: Food photography is popular on social media platforms like Instagram, where people love to share their food experiences. Sharing your food photos can inspire others, spark conversations, and even help build a community of food enthusiasts. It’s a way to connect with others who have similar interests and share recommendations and recipes.
- Creativity and Artistic Expression: Food photography is a form of artistic expression. It allows you to showcase your creativity by styling and composing visually appealing images. You can experiment with different angles, lighting, and props to create stunning visuals that evoke emotions and capture the essence of the food.
- Promotion and Marketing: If you’re a food blogger, chef, or someone in the food industry, taking high-quality food photos can be crucial for promoting your brand or products. Eye-catching food images can attract potential customers, create a desire to try your food, and help build your reputation as a skilled chef or food expert.
- Recipe Sharing: Photographs can be an excellent visual aid when sharing recipes. By including step-by-step photos or final dish images, you make it easier for others to understand the process and visualize the end result. It enhances the overall recipe experience and increases the likelihood of others trying your recipes.
- Personal Satisfaction: Taking appealing food photos can be personally satisfying. It allows you to capture the beauty and artistry of food, celebrate your culinary achievements, and share them with others. It’s a way to express your passion for food and indulge in the creative process.

What makes a good food photograph?
A good food photograph is subjective to some extent, as different people may have different preferences and aesthetics. However, there are certain elements that can contribute to making a food photograph visually appealing and engaging. Here are some key factors:
- Lighting: Lighting plays a vital role in food photography. It should highlight the food’s textures, colors, and details. Soft, diffused lighting or natural light can often create a pleasing and inviting atmosphere. Properly lit images showcase the food in its best form, avoiding harsh shadows or overexposed areas.
- Composition: A well-composed food photograph captures the viewer’s attention and guides their eyes to the main subject. Consider elements like the rule of thirds, leading lines, and symmetry to create a balanced and visually pleasing composition. Pay attention to the placement of the food, props, and negative space within the frame.
- Styling and Props: Thoughtful styling and the use of appropriate props can enhance the visual appeal of a food photograph. Select props that complement the food, add interest to the composition, and help tell a story. Consider color coordination, textures, and the overall theme or mood you want to convey.
- Focus and Depth of Field: Use selective focus to draw attention to the main subject or a specific area of the dish. A shallow depth of field, achieved by using a wide aperture, can create a pleasing separation between the subject and the background, adding a sense of depth and highlighting details.
- Colors and Contrast: Vibrant, appetizing colors can make a food photograph more enticing. Pay attention to color harmony and contrast between the food and its surroundings. Adjusting the white balance and making minor color corrections during post-processing can also enhance the visual impact.
- Detail and Texture: Capturing the details and textures of the food can make the viewer feel more connected to the dish. Highlight the textures, patterns, and surface details by using appropriate lighting and close-up shots.
- Storytelling: A compelling food photograph tells a story or evokes emotions. Consider the context and narrative behind the dish. Use composition, props, and styling to convey the desired message or create a particular atmosphere.
- Cleanliness and Presentation: Ensure that the food is presented neatly and appealingly. Pay attention to cleanliness, proper plating techniques, and arranging ingredients or garnishes in an aesthetically pleasing way. Attention to details can significantly enhance the overall quality of the photograph.
Remember, these are general guidelines, and creativity and personal style play a crucial role in food photography. Experimentation and practice will help you develop your own unique approach and create visually captivating food photographs.

Basic tools you need for photography
When it comes to food photography, there are some basic tools that can help you capture appealing and professional-looking images. Here are a few essential photography tools for food photography:
- Camera: A camera is the primary tool you’ll need. It can be a DSLR, mirrorless camera, or even a high-quality smartphone with manual control options. Choose a camera that allows you to adjust settings like ISO, aperture, and shutter speed for maximum control over your images.
- Lenses: Different lenses can provide various perspectives and focal lengths for food photography. A few lens options to consider are:
- 50mm or 35mm prime lens: These lenses are great for capturing food with a natural perspective and depth of field. They are versatile and commonly used in food photography.
- Macro lens: A macro lens allows you to get extremely close and capture fine details and textures. It’s particularly useful for capturing close-up shots of ingredients, garnishes, or intricate designs on food.
- Wide-angle lens: A wide-angle lens can be handy for capturing larger scenes, table spreads, or restaurant interiors. It can provide a broader perspective and fit more elements into the frame.
- Tripod: Using a tripod helps stabilize your camera and eliminates potential blurring caused by shaky hands. It allows you to take longer exposures or shoot at lower ISOs without worrying about camera shake. Look for a sturdy tripod that suits your camera’s weight and offers adjustable height and stability.
- Reflector: A reflector is a useful tool for manipulating light and reducing shadows in your food photography. It’s typically a portable, collapsible disc with a reflective surface (white, silver, or gold). You can position it opposite a light source to bounce light onto the food and fill in shadows, creating a more balanced and evenly lit image.
- Diffuser: A diffuser is used to soften harsh light and create a more pleasing and diffused lighting setup. It can be a translucent panel or fabric that is placed between the light source and the food, reducing harsh shadows and creating a more gentle, even light.
- Props and Styling Tools: Props like plates, utensils, napkins, and ingredients can enhance the composition and visual appeal of your food photographs. Consider collecting various props that complement the style and theme of your dishes. Additionally, having tools like tweezers, brushes, and spray bottles can help you arrange and style the food precisely.
- Photo Editing Software: While not a physical tool, photo editing software like Adobe Lightroom or Photoshop can be incredibly valuable for fine-tuning and enhancing your food images. These tools allow you to adjust exposure, color balance, contrast, and other parameters to achieve the desired look.
Remember, while these tools can enhance your food photography, they are not the sole determinant of capturing great images. Your creativity, composition, lighting, and styling skills play a crucial role in creating visually appealing and enticing food photographs.

10 food photography tips
Here are some food photography tips to help you capture enticing and mouthwatering images:
- Lighting: Good lighting is essential in food photography. Natural light is usually the best option, so find a well-lit area near a window or shoot outdoors. Soft, diffused light works best to avoid harsh shadows and highlights. Consider using a reflector or white foam board to bounce light onto the food and reduce shadows.
- Composition: Pay attention to the composition of your photo. Use the rule of thirds to create a balanced and visually appealing image. Experiment with different angles, such as overhead shots, close-ups, or eye-level perspectives. Play with lines, shapes, and textures to create interest and guide the viewer’s eye.
- Props and styling: Choose props, utensils, and ingredients that complement the food and add visual interest. Consider using complementary colors, textures, and shapes to enhance the overall composition. Use minimalistic and clean backgrounds to make the food the focal point.
- Background and surfaces: Select a background and surfaces that complement the food and create a cohesive visual aesthetic. A simple, clean, and neutral backdrop works well to allow the food to stand out. Consider using wooden boards, marble slabs, or textured surfaces for added visual appeal.
- Focus and depth of field: Ensure the food is in sharp focus by using the autofocus feature on your camera or smartphone. Experiment with depth of field to create a pleasing blur in the background while keeping the main subject sharp. Use a wide aperture (low f-number) for a shallow depth of field or a smaller aperture (high f-number) for a larger depth of field.
- Styling and garnishing: Pay attention to the presentation and arrangement of the food. Arrange ingredients strategically, use garnishes, and create beautiful textures. Consider adding sauces, herbs, or colorful toppings to enhance the visual appeal. Use tweezers or small props to adjust individual elements.
- Shoot quickly: Food can change its appearance quickly, so work efficiently to capture the food at its best. Have everything prepared beforehand, and be ready to shoot as soon as the food is ready. Keep in mind that hot foods tend to look better than cold ones, as steam and natural textures are more prominent.
- Experiment with angles and perspectives: Try different angles and perspectives to capture unique shots. Shoot from above, at eye level, or from a low angle. Each angle can convey a different mood and showcase different elements of the dish.
- Edit with care: After capturing your photos, enhance them further using photo editing software or apps. Adjust the exposure, white balance, contrast, and saturation to enhance the colors and make the food pop. However, be careful not to over-edit and maintain a natural look.
- Practice and experiment: Food photography is a skill that improves with practice. Experiment with different techniques, props, and styles. Look for inspiration from professional food photographers or food blogs and try to develop your unique style.
Remember, food photography is all about making the food look delicious and enticing. With practice and creativity, you can capture stunning images that showcase the beauty of the cuisine you’re photographing.

Is food photography the same as cake photography?
Yes, very similar with a few differences to consider. Most foods on the table are often much smaller in size compared to cakes which in my case are often large wedding cakes.
12 cake photography tips
To take the best pictures of your cakes, follow these tips:
- Lighting: Good lighting is crucial for capturing beautiful cake photos. Natural light is generally the best option, so find a spot near a window or take your cakes outdoors. Avoid using direct overhead lighting, as it can create harsh shadows. Consider using a reflector or white foam board to bounce light onto the cake and reduce shadows.
- Background: Choose a clean and visually appealing background that complements your cake. A plain white or neutral-colored backdrop works well to make the cake the focal point. You can use a tablecloth, a large sheet of paper, or a cake stand as a base.
- Composition: Pay attention to the composition of your photo. Use the rule of thirds to create an aesthetically pleasing image. Experiment with different angles, such as overhead shots or close-ups, to capture the details and textures of the cake. Consider adding props like cake decorating tools or ingredients to add visual interest.
- Set the scene: Think about the overall atmosphere you want to create in your cake photo. Consider using complementary colors, table settings, or other elements to enhance the presentation. For example, you might include a cup of tea or a slice of cake on a plate next to the whole cake.
- Use props carefully – some times a prop can enhance a picture and sometime it can take attention away from the object.
- Angle – Choose the best angle for your picture based on the design of your cake. If your cake has many elements to it, then take various pictures so you can collage it. If your cake has one overall design choose the best angle to enhance that design element as a whole.
- It is best not to use flash when clicking food or cake. Instead, use lamps or spotlights to enhance the picture. The use of foil and white foam core boards is a great way to reflect light.
- Focus and depth of field: Ensure your cake is in sharp focus by using the autofocus feature on your camera or smartphone. If you have a DSLR or a smartphone with a portrait mode, experiment with a shallow depth of field to blur the background and make the cake stand out.
- Props and garnishes: Decorate your cake with complementary props and garnishes that enhance its appearance. Fresh fruits, flowers, powdered sugar, or a drizzle of syrup can add an extra touch of elegance. Just be mindful not to overwhelm the cake’s design.
- Clean presentation: Before taking pictures, ensure the cake is clean and free of any smudges or imperfections. Use a pastry brush to remove excess crumbs or dust off any powdered sugar or decorations.
- Experiment and take multiple shots: Take a variety of photos from different angles, distances, and compositions. Capture both the whole cake and close-up shots of specific details. Experiment with different settings and try out different perspectives until you find the ones that highlight your cake’s best features.
- Editing: After taking your photos, you can enhance them further with photo editing software or apps. Adjust the brightness, contrast, and saturation to make the colors pop. Crop the image if necessary and remove any imperfections. However, be cautious not to over-edit and maintain the natural look of the cake.
Remember to have fun and be creative while photographing your cakes. Practice makes perfect, so keep experimenting and refining your skills to capture the most appetizing and visually pleasing cake pictures.

ISO exposure and aperture
ISO, exposure, and aperture are fundamental concepts in photography that are closely related to each other. Understanding these three and how they interact, allows you to have more control over your camera settings and achieve the desired creative effects in your photographs. It takes practice to master these concepts, so don’t be afraid to experiment and learn from your results.
Here’s an explanation of each term:
- ISO: ISO refers to the sensitivity of your camera’s image sensor to light. It is represented by a numerical value, such as ISO 100, ISO 400, ISO 800, etc.
- A lower ISO number (e.g., ISO 100) indicates low sensitivity to light, resulting in less image noise and higher image quality.
- A higher ISO number (e.g., ISO 800) indicates higher sensitivity to light, allowing you to shoot in low-light situations, but it may introduce more image noise or grain.
When choosing the ISO setting, consider the available light and the level of noise you’re willing to accept. Use lower ISO values in well-lit environments and higher ISO values in darker conditions.
- Shutter Speed: Shutter speed determines the duration of time that the camera’s shutter remains open, exposing the image sensor to light. It is measured in seconds or fractions of a second (e.g., 1/200, 1/1000, 2 seconds, etc.).
- Faster shutter speeds (e.g., 1/1000) allow less light to enter the camera, resulting in freezing motion and sharp images. They are suitable for capturing fast-moving subjects.
- Slower shutter speeds (e.g., 2 seconds) allow more light to reach the sensor, resulting in longer exposure times. They are used for capturing motion blur or in low-light situations.
The choice of shutter speed depends on the desired effect. Use faster shutter speeds for action photography and slower shutter speeds for creative effects or capturing night scenes.
- Aperture: Aperture refers to the size of the lens opening that controls the amount of light reaching the camera’s sensor. It is measured in f-stops (e.g., f/2.8, f/4, f/8, etc.).
- A wide aperture (small f-number, e.g., f/2.8) creates a shallow depth of field, where the subject is in sharp focus while the background appears blurred. It’s useful for isolating a subject or creating a sense of depth.
- A narrow aperture (large f-number, e.g., f/16) creates a larger depth of field, where both the subject and the background are in focus. It’s suitable for landscape photography or when you want to capture more details in the scene.
The choice of aperture depends on your desired depth of field and the amount of light available. Consider using wider apertures for portraits and narrower apertures for landscapes or situations where you want everything in focus.

What are the best angles to photograph your food?
The best angle depends on the specific dish, its presentation, and the story you want to convey through your photograph. Experimenting with different angles and perspectives will help you discover what works best for each food item and create visually appealing images.
Here are some popular and effective angles to try:
- Overhead/Flat Lay: This angle provides a top-down view of the food. It works well for photographing plates, table spreads, or multiple dishes. It showcases the arrangement, colors, and textures of the food. It’s commonly used for capturing breakfast spreads, desserts, or organized ingredients.
- 45-Degree Angle: Shooting from a 45-degree angle to the food provides a slightly elevated and diagonal view. It offers depth and perspective to the image, making the food appear more three-dimensional. This angle is often used for capturing dishes with layered elements or when you want to showcase the height of the food.
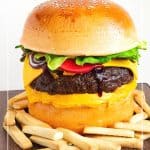
- Eye-Level/Horizontal: Capturing the food at eye level creates a natural and inviting perspective. It allows the viewer to connect with the food and see it from a similar perspective as if they were about to eat it. This angle is suitable for photographing burgers, sandwiches, or any dish where you want to highlight the details and textures.
- Close-up/Macro: Getting up close and capturing the intricate details and textures of the food can evoke a sense of indulgence and make the viewer crave the dish. This angle is excellent for highlighting the fine details of desserts, toppings, or capturing steam or melting cheese.
- Side Angle: Shooting from the side can emphasize the height and layers of the food. It works well for capturing stacked dishes, cakes, or food with visible layers. It allows you to showcase the cross-section and textures of the food effectively.
- Diagonal Angle: Shooting the food from a diagonal angle adds visual interest and creates a dynamic composition. It can help guide the viewer’s eye through the frame and create a sense of movement. This angle is suitable for capturing dishes with diagonal elements or when you want to add a creative touch to your composition.
Remember, when photographing food, there are various angles you can consider to capture appealing and enticing images.
Natural light vs artificial light in food photography
Both natural light and artificial light have their advantages and can be used effectively in food photography. Understanding the importance of each type of light can help you make informed decisions when setting up your food photography shoots. Here are the key considerations:
- Natural Light:
- Authentic Look: Natural light often produces a soft and pleasing aesthetic that can enhance the natural colors and textures of the food. It tends to create a more authentic and organic feel in photographs.
- Versatility: Natural light offers a wide range of lighting conditions throughout the day, from soft morning light to warm golden hour light. This versatility allows you to experiment with different moods and create diverse images.
- Cost and Accessibility: Natural light is readily available and doesn’t require additional equipment or setup. It can be an economical option, especially for those starting in food photography.
- Artificial Light:
- Control and Consistency: Artificial light sources, such as studio lights or continuous LED panels, offer precise control over the direction, intensity, and color temperature of the light. This control allows you to shape and manipulate the lighting to suit your creative vision consistently.
- Working in Low-Light Conditions: Artificial light is particularly useful in situations where natural light is insufficient or unavailable. It enables you to shoot in dimly lit environments and still achieve well-exposed images.
- Consistency in Any Location: When shooting in different locations or environments, artificial light ensures consistent lighting conditions regardless of the time of day or weather conditions.
In practice, many food photographers use a combination of natural and artificial light to achieve the desired results. For instance, they may utilize natural light for its softness and authenticity but supplement it with artificial light to fill in shadows or enhance specific aspects of the food.
Ultimately, the choice between natural and artificial light depends on the specific goals of your shoot, the style you wish to achieve, and the available resources. Experimenting with both types of light will help you understand their unique characteristics and how they can contribute to creating captivating food photographs.

Understanding light source in food photography
Understanding the direction of light is crucial in food photography as it can significantly impact the mood, texture, and overall appeal of your images. Here are some key considerations regarding the direction of light:
- Front Lighting: Front lighting refers to when the light source is positioned directly in front of the food, illuminating it from the front. This lighting setup is often used in commercial food photography and can result in evenly lit images with minimal shadows. It showcases the details and colors of the food, providing a clean and straightforward look. However, it may lack depth and can make the image appear flat.
- Side Lighting: Side lighting involves placing the light source to the side of the food, creating shadows and emphasizing textures and shapes. This lighting direction adds depth, dimension, and visual interest to the image. It can highlight the contours and details of the food, creating a more dramatic and dynamic composition.
- Backlighting: Backlighting occurs when the light source is positioned behind the food, illuminating it from the back. This setup can create a sense of warmth and glow around the edges of the food. It works particularly well for transparent or translucent elements like beverages or salads, as it can make them appear more vibrant and inviting. However, backlighting may require additional fill light or reflectors to balance the exposure and avoid underexposing the front of the food.
- Diffused Lighting: Diffused lighting is when the light is scattered or softened before reaching the food, reducing harsh shadows and creating a soft, even illumination. This can be achieved by using a softbox, or umbrella, or shooting near a large window with a sheer curtain. Diffused lighting helps to minimize reflections and provides a gentle, natural look that is well-suited for many food subjects.
When working with the direction of light, it’s important to consider the mood and style you want to convey. Experimenting with different lighting directions and their effects on the food will help you determine which setup best complements your subject and enhances its visual appeal.
Additionally, keep in mind that the quality and intensity of the light source can also impact the final outcome. Soft, natural light or diffused artificial light generally works well for food photography, as it helps avoid harsh shadows and provides a pleasing aesthetic.

What is a hero shot and how to capture one
Creating a hero shot, also known as a hero image or a show-stopping photograph, is all about capturing the essence and beauty of your subject in a visually striking and captivating way. In the context of food photography, a hero shot is typically the main image that represents the dish or recipe. To take a hero shot of your food in a photograph, follow these steps:
- Plan the Shot: Decide on the hero dish you want to capture and consider how you want to present it. Think about the composition, props, and styling that will make the dish stand out. Sketch out your ideas or create a mood board to visualize the shot.
- Set up the Scene: Choose a suitable background and surface that complements the dish. Consider using textures, colors, and props that enhance the overall composition. Ensure that the scene is clean and free of any distractions that may take away from the hero dish.
- Lighting: Choose the right lighting setup to showcase the dish. Natural light or diffused light from a window can create soft and appealing results. Alternatively, you can use artificial lights like studio strobes or continuous LED panels to have more control over the lighting. Position the light source to create the desired mood and emphasize the textures and colors of the dish.
- Styling and Plating: Pay attention to the plating and arrangement of the dish. Use techniques that highlight the key ingredients, textures, and shapes. Consider adding garnishes, sauces, or props that complement the dish and add visual interest. Make sure the presentation is neat and appealing.
- Select the Angle: Experiment with different angles to find the most flattering perspective for the hero dish. Popular angles include overhead (top-down view), 45-degree angle, or eye-level. Each angle offers a unique perspective and can emphasize different aspects of the dish. Choose the angle that best showcases the dish’s features and presentation.
- Focus and Depth of Field: Use selective focus to draw attention to the hero dish. Consider using a wide aperture (low f-stop number) to create a shallow depth of field, blurring the background and emphasizing the main subject. Ensure that the key elements of the dish are in sharp focus.
- Capture the Shot: Use a tripod or stabilize your camera to avoid camera shake. Take multiple shots from different angles and compositions to have options during the selection process. Experiment with different settings, exposure compensation, and white balance to achieve the desired look.
- Post-Processing: Once you have captured the hero shot, perform basic post-processing to enhance the image. Adjust the exposure, contrast, colors, and sharpness to bring out the details and make the dish visually appealing. Be mindful not to over-process and maintain a natural appearance.
- Presentation: Finally, consider how you want to present and share your hero shot. You can showcase it on social media platforms, blogs, or in a portfolio. Add captions, descriptions, or stories to enhance the viewer’s experience and create engagement.
Remember, practice, patience, and attention to detail are key in capturing a compelling hero shot. Continuously refine your techniques, experiment with different approaches, and let your creativity shine through to create stunning food photographs.

Do I need a tripod for food photographs? Can I do without one?
While using a tripod can be beneficial for food photography, it is not always necessary, and you can still achieve great results without one. Here are some considerations regarding the use of a tripod in food photography:
Benefits of Using a Tripod:
- Stability: A tripod provides stability and eliminates camera shake, especially when using slower shutter speeds or longer exposure times. This helps ensure sharp and clear images, particularly in low-light situations.
- Consistency: Using a tripod allows you to maintain a consistent composition and framing throughout your shoot. It can be particularly helpful when capturing multiple shots of the same dish or when shooting in a series.
- Precise Framing: With a tripod, you can precisely position and frame your shots, making it easier to fine-tune the composition and focus on the specific elements you want to highlight.
- Long Exposures: If you plan to incorporate motion blur or create long-exposure effects in your food photography, a tripod is essential for keeping the camera steady during the longer exposure times.
When You Might Not Need a Tripod:
- Sufficient Natural Light: If you’re shooting in well-lit environments or using fast shutter speeds, you can often handhold the camera without significant issues. This is especially true if you’re shooting with wider apertures and higher ISO settings.
- Higher ISO Capabilities: If your camera has good high ISO performance, you can increase the ISO setting to maintain a fast enough shutter speed and still capture sharp images without the need for a tripod.
- Stabilization Technologies: Some cameras or lenses come with built-in stabilization (e.g., image stabilization or vibration reduction). These features can help reduce camera shake and allow you to shoot handheld with improved stability.
- Flexibility and Mobility: Shooting without a tripod offers more freedom to move around and experiment with different angles and perspectives. It can be particularly useful when shooting in dynamic environments or situations where you need to be agile.
Ultimately, the decision to use a tripod in food photography depends on your shooting conditions, the desired outcome, and your personal preference. If you find that camera shake is affecting the sharpness of your images or you want to ensure precise composition and consistency, a tripod can be a valuable tool. However, if you’re comfortable shooting handheld and the shooting conditions allow for it, you can certainly capture great food photographs without a tripod.

The importance of negative space in food photography?
Negative space refers to the empty or unoccupied areas surrounding the main subject in an image. In food photography, negative space plays a crucial role in creating balance, highlighting the hero dish, and enhancing the overall visual impact. Here’s why negative space is important in food photography:
- Focus on the Main Subject: By incorporating negative space, you allow the main subject (the hero dish) to stand out and be the center of attention. The empty space around the food draws the viewer’s eye to the subject, emphasizing its details, textures, colors, and presentation.
- Composition and Balance: Negative space helps create a well-balanced composition. It provides breathing room for the main subject and allows for a visually pleasing arrangement within the frame. By carefully positioning the dish and utilizing negative space, you can achieve a sense of harmony and visual equilibrium.
- Simplicity and Minimalism: Negative space often contributes to a minimalist aesthetic, which can be quite appealing in food photography. It provides a clean, uncluttered background, allowing the hero dish to take center stage and creating a sense of elegance and simplicity.
- Enhancing the Story or Mood: Negative space can convey a particular mood or tell a story. It can evoke a sense of tranquility, serenity, or spaciousness. By leaving empty space around the dish, you can create a sense of openness or evoke a certain atmosphere that enhances the overall narrative or theme of your food photograph.
- Design and Graphic Elements: Negative space can serve as a design element, adding visual interest and creating a sense of structure within the composition. It can be used to create geometric shapes, leading lines, or patterns that enhance the visual appeal and add a sense of sophistication to the image.
- Text Placement and Copy Space: Negative space can also serve a practical purpose in food photography, allowing room for text placement or copy space. If you plan to use the image for branding, promotional materials, or recipes, having negative space ensures that there is enough room to overlay text without obstructing the main subject.
When working with negative space in food photography, keep in mind that the amount of negative space you include and its arrangement should complement the overall aesthetic and story you want to convey. Experiment with different compositions, angles, and perspectives to find the right balance between negative space and the hero dish, creating visually pleasing and engaging images.

What is dark food photography and how to take dark food pictures
Dark food photography is a style of food photography that emphasizes moody, dramatic, and low-light aesthetics. It involves capturing images with darker tones, deep shadows, and rich colors to create a sense of mystery and allure. Here are some tips to help you take dark food pictures:
- Lighting: Use controlled and diffused lighting to create soft shadows and highlights. Avoid harsh or direct lighting that can wash out the colors or create unwanted reflections. Experiment with side lighting or backlighting to add depth and dimension to the scene.
- Background and Props: Choose darker backgrounds, such as wooden surfaces, dark fabrics, or textured backgrounds, to complement the dark mood. Select props that enhance the atmosphere, such as dark-colored dishes, antique utensils, or rustic elements.
- Composition: Consider the placement and arrangement of the food within the frame. Utilize negative space strategically to create a balanced composition. Experiment with different angles, close-ups, and unique perspectives to add interest and evoke emotions.
- Styling: Pay attention to food styling by adding selective highlights to accentuate the textures and details of the dish. Use garnishes, sauces, or dustings of powdered sugar or cocoa to create contrast and visual interest. Consider adding elements like smoke, steam, or droplets of water to enhance the mood.
- Post-Processing: Use post-processing software to fine-tune the dark and moody look. Adjust the exposure, contrast, shadows, and highlights to achieve the desired effect. Enhance colors selectively to make them pop while maintaining the overall dark tones. Experiment with different editing techniques, such as adding vignettes or adjusting the tone curve, to enhance the atmosphere.
- Play with Props and Backgrounds: Dark food photography allows for creative freedom when it comes to choosing props and backgrounds. Experiment with textures, patterns, and materials that complement the mood you want to convey. Consider using rustic or vintage elements, dark-colored ceramics or cutlery, and natural textures like wood, stone, or fabric.
- Experiment with Light Painting: Light painting is a technique where you manually introduce light into the scene during a long exposure. This can be done by using a small flashlight or LED light to selectively illuminate specific areas of the dish or create artistic light streaks.
Remember, dark food photography is about creating an atmosphere and evoking emotions. It’s not about underexposing the image, but rather capturing the mood and enhancing the details in the darker tones. Practice, experiment, and develop your own style to achieve captivating and visually striking dark food photographs.

Troubleshooting
Food photography, like any other form of photography, can present challenges that may require troubleshooting. Here are some common issues that food photographers encounter and suggestions for troubleshooting them:
- Blurry Images: Blurriness can result from camera shake, insufficient light, or slow shutter speed. To address this issue, consider using a tripod to stabilize the camera, increasing the ISO setting to allow for a faster shutter speed, or using a faster lens with a wider aperture to allow more light into the camera.
- Unappetizing Colors: Colors that appear dull or unappetizing in your food photographs may be due to poor white balance or incorrect lighting. Ensure that your white balance setting matches the lighting conditions. If shooting in artificial light, consider using a color correction gel or adjusting the white balance in post-processing to achieve more accurate colors.
- Harsh Shadows: Harsh shadows can be caused by direct, harsh lighting or an improper placement of the light source. To soften shadows, try diffusing the light with a softbox, umbrella, or a sheer curtain. Adjust the position and angle of the light source to achieve a more pleasing and balanced lighting setup.
- Overexposed or Underexposed Images: Overexposure (bright, washed-out areas) or underexposure (dark, loss of detail) can occur if the camera’s exposure settings are not properly adjusted. Use the camera’s exposure compensation feature to adjust the exposure, or switch to manual mode and manually adjust the aperture, shutter speed, and ISO settings for better control over the exposure.
- Lack of Depth or Dimension: If your images lack depth or appear flat, it may be due to insufficient lighting or improper positioning of the light source. Consider adding additional light sources or reflectors to add dimension and create more depth in the image. Experiment with different angles and positions to capture the textures and layers of the food.
- Unfocused or Lack of Detail: If your images lack sharpness or fail to capture the details of the food, ensure that you have focused properly. Use manual focus or autofocus with a single focus point to ensure the desired area is sharp. Increase the depth of field by using a narrower aperture (higher f-stop number) to achieve greater overall sharpness.
- Cluttered Background or Distractions: If the background is cluttered or contains distracting elements, it can take away from the main subject. Consider using a simple and clean background or use negative space strategically to allow the hero dish to stand out. Arrange props and styling elements purposefully to create a visually pleasing composition.
- Styling Challenges: Styling food can be challenging, especially when dealing with melting or wilting ingredients. Work quickly, use props strategically to enhance the composition, and consider using food styling techniques such as misting produce, garnishing with fresh herbs, or using tweezers to arrange small elements precisely.
Remember that troubleshooting is a part of the learning process in photography. Analyze your images critically, identify the areas that need improvement, and make adjustments accordingly. With practice and experimentation, you’ll develop your skills and overcome the challenges to capture stunning food photographs.

Can I use my phone to take photographs of my food?
Yes, phone cameras have come a long way in recent years and are capable of taking excellent food photographs. With advancements in smartphone camera technology, including high-resolution sensors, advanced image processing algorithms, and multiple lenses, phone cameras can capture impressive detail, vibrant colors, and beautiful food images.
Here are some advantages of using a phone camera for food photography:
- Convenience: Phone cameras are compact and readily available, allowing you to capture food photos whenever inspiration strikes. You don’t have to carry additional equipment, making them ideal for spontaneous food photography.
- Accessibility: Most people carry their phones with them all the time, making it easy to document and share their food experiences instantly. You can quickly capture photos of dishes at restaurants, cafes, or even in your own kitchen.
- Quality: Modern phone cameras feature high-resolution sensors and advanced image processing capabilities. They can capture sharp, detailed images with accurate colors and dynamic range, especially in good lighting conditions.
- Editing and Sharing: Many smartphones have built-in editing features and a range of photo editing apps available, allowing you to enhance your food photos right on your phone. Additionally, you can quickly share your images on social media platforms or food-related communities to showcase your culinary creations.
While phone cameras have their advantages, there are a few limitations to keep in mind:
- Low-light Performance: Phone cameras generally struggle in low-light situations compared to larger dedicated cameras. They may produce more noise or have difficulty capturing details in challenging lighting conditions.
- Limited Control: Phone cameras often provide limited manual controls compared to dedicated cameras. You may have less control over settings such as aperture, shutter speed, and ISO, which can impact creative possibilities.
- Lens Limitations: Phone cameras typically have fixed lenses with a fixed focal length. While some newer models offer multiple lenses for different perspectives, they may not provide the flexibility and versatility of interchangeable lenses found in dedicated cameras.
Despite these limitations, phone cameras can still produce impressive food photographs. By understanding and working within their capabilities, utilizing good lighting, composition techniques, and post-processing tools, you can capture mouthwatering and visually appealing food images using your phone camera.


Moist, Fluffy Vanilla Bean Cake
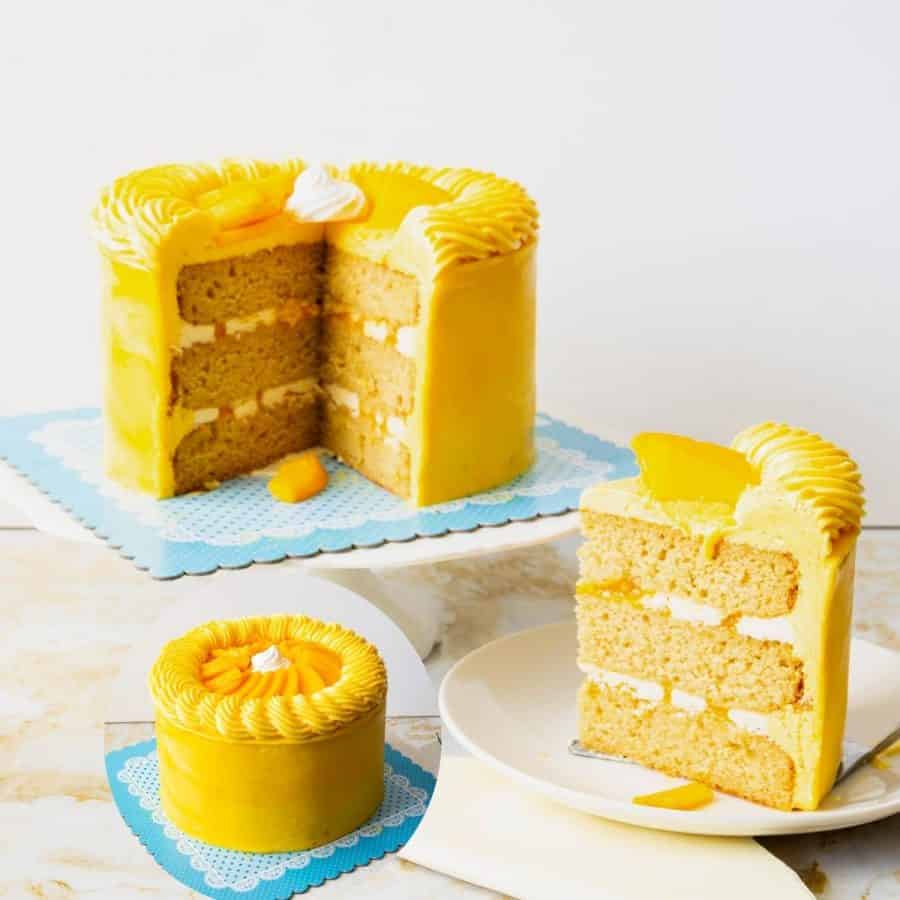
Moist Mango Cake
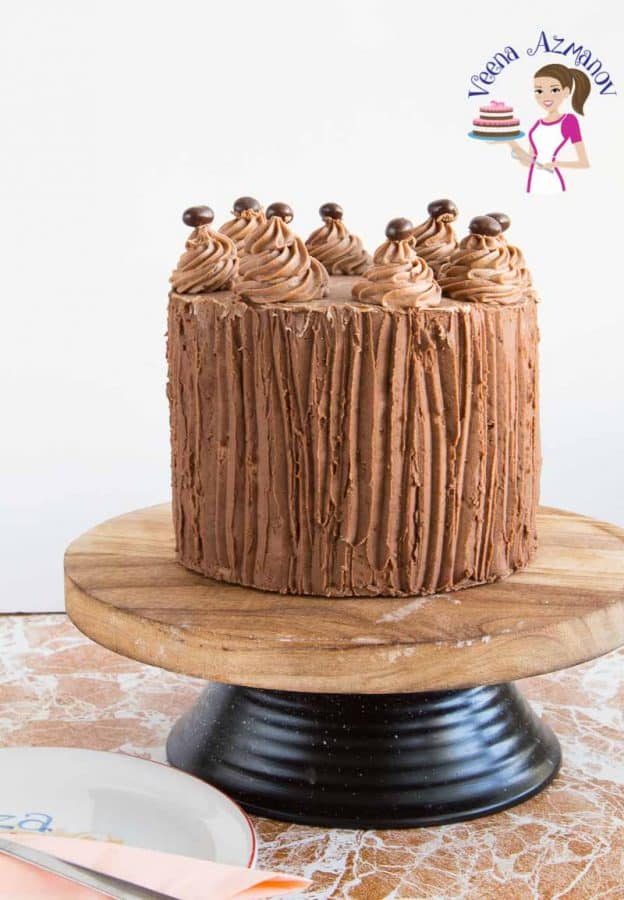
Chocolate Espresso Cake
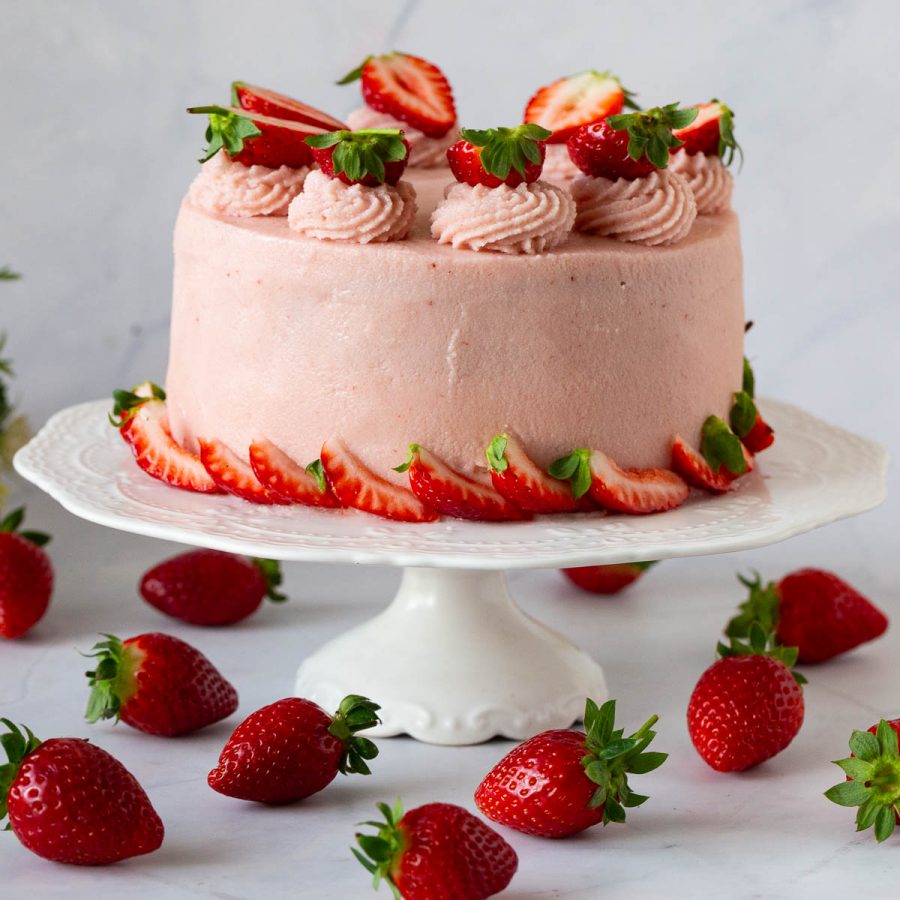
Fresh Strawberry Cake Recipe
Frequently asked questions
Food photography is a creative process, and there are no strict rules. It’s essential to find your own style, experiment, and continuously learn and improve your skills.
A camera (DSLR or mirrorless)
A lens (50mm or 35mm prime lens is commonly used)
Tripod
Lighting equipment (natural light or artificial lighting sources)
Reflectors or diffusers
Props and styling elements
Photo editing software
Natural light: Soft, diffused natural light is often preferred for its flattering and natural-looking results.
Artificial light: Continuous LED lights or studio strobes can provide more control over the lighting conditions and allow for consistent results.
ay attention to plating and food presentation.
Use props and styling elements that complement the dish.
Enhance colors and textures through lighting and post-processing.
Capture the food at its freshest and most visually appealing state.
Shoot in manual mode for greater control.
Use a wide aperture (low f-stop number) to create a shallow depth of field and blur the background.
Adjust the ISO to maintain a proper exposure.
Use a tripod to ensure stability, especially in low-light situations.
Consider the composition and arrangement of the dish.
Use complementary colors and textures.
Garnish the dish strategically to add visual interest.
Consider the overall mood or theme you want to convey.
Use photo editing software like Adobe Lightroom or Photoshop.
Adjust exposure, contrast, colors, and white balance.
Sharpen the image and remove any imperfections.
Maintain a natural and realistic appearance.
Practice regularly and experiment with different techniques.
Study and analyze the work of other food photographers.
Attend workshops or courses to learn new skills and techniques.
Seek feedback from peers or join online photography communities.
Develop your own style and unique perspective.
Experiment with different compositions, angles, and lighting setups.
Incorporate storytelling and convey a mood or emotion in your images.
Pay attention to details and strive for consistency in your work.
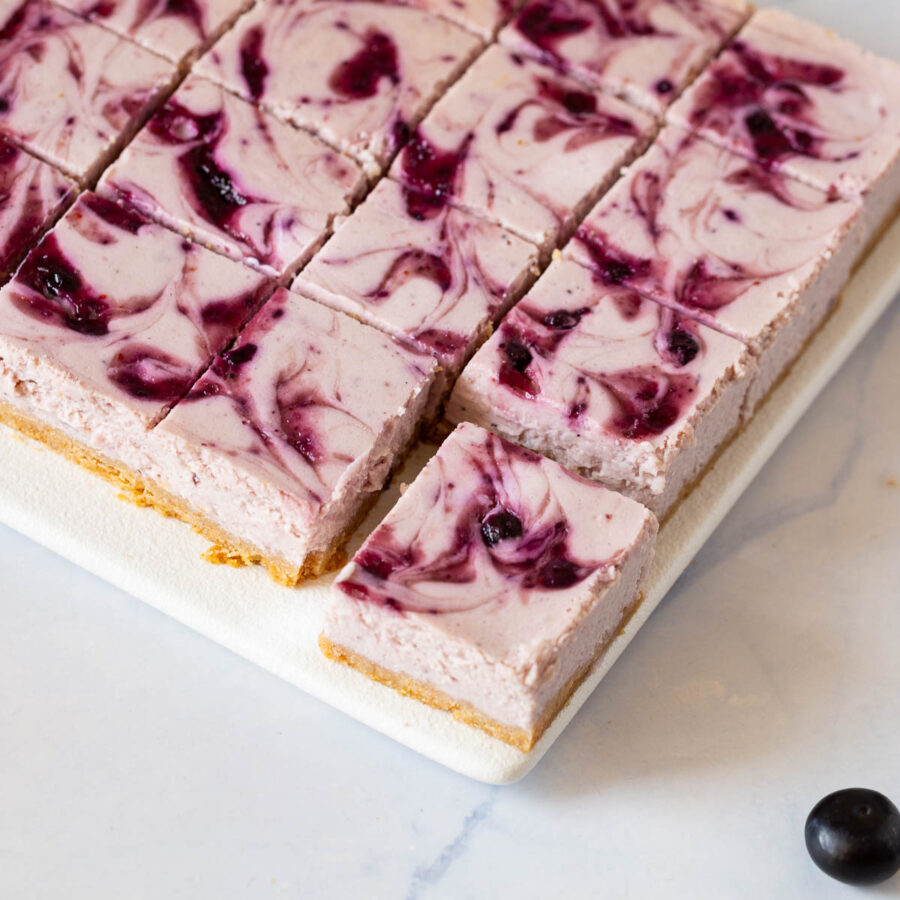
Baked Blueberry Cheesecake Bars
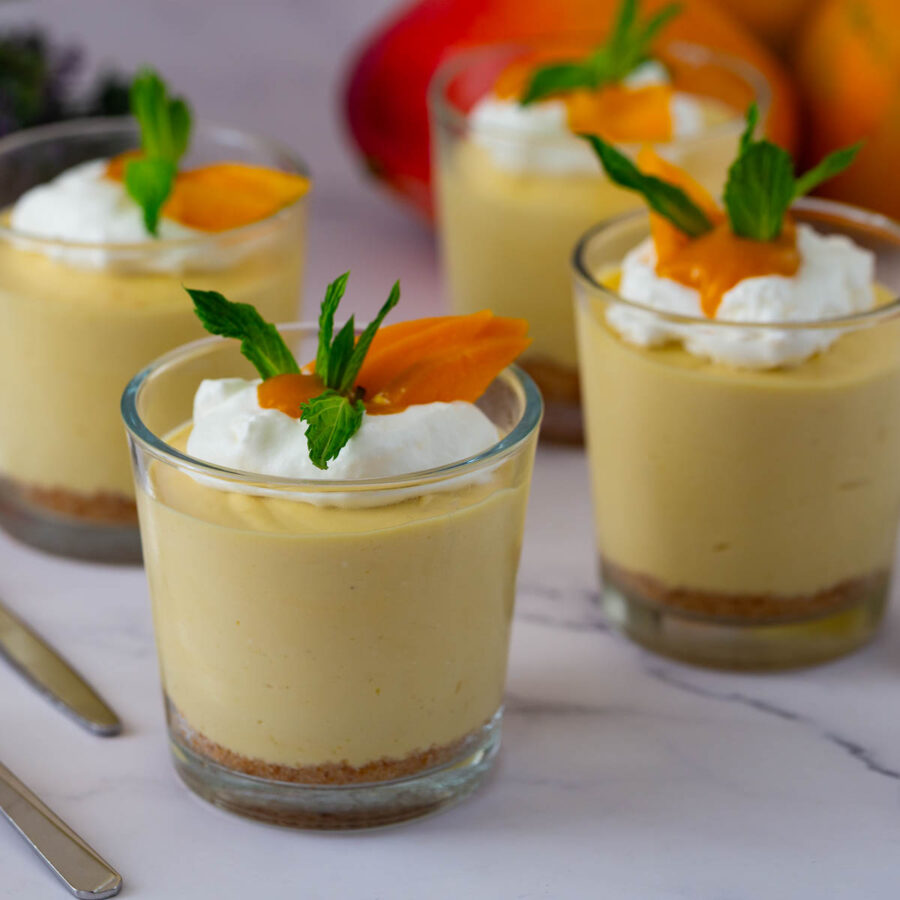
Mini No-Bake Mango Cheesecake Cups

Chocolate Cheesecake Tart
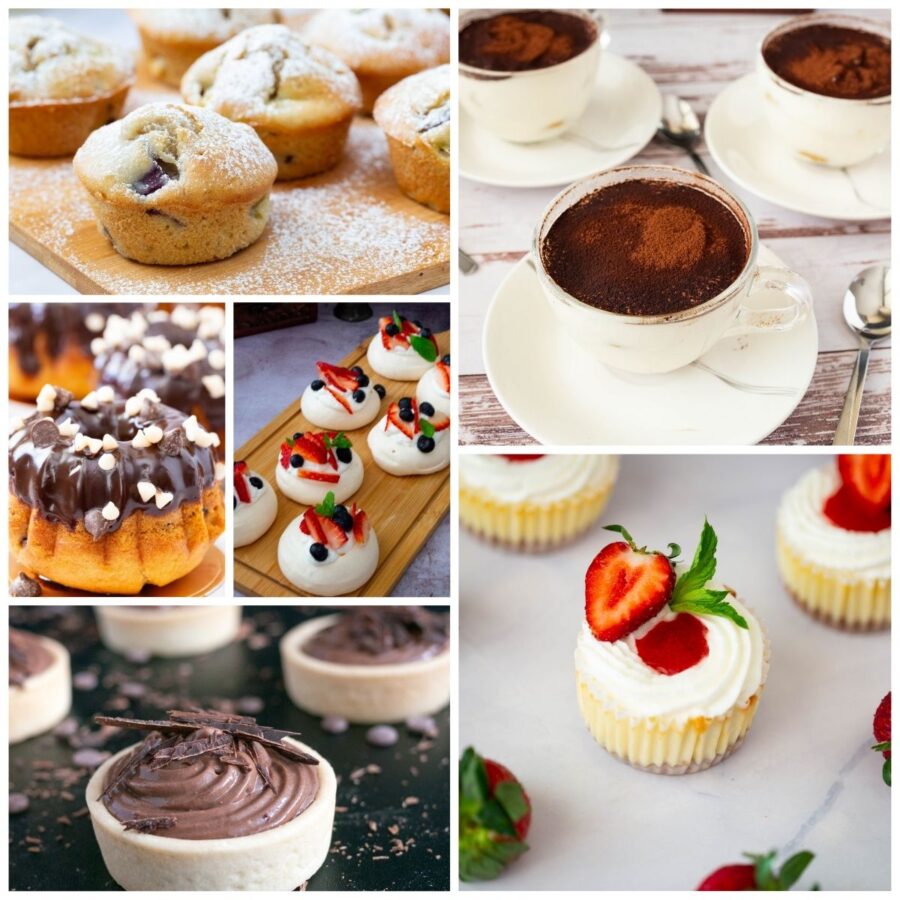
30+ Mini Valentine’s Day Treats – Bite-Size
Don’t lose this recipe! Save it for Later!
📌 Save this Recipe for later on Pinterest so you can easily find it again.
⭐ Add Veena Azmanov Kitchen to your Google Preferred Sources.
It helps Google show you more of our recipes.
📧 Subscribe for new recipes delivered to your inbox.
🎥 Follow us for more recipes

I am a food blogger, I strive every day to take better pictures so I can share them with recipes on my blog and encourage you to cook, bake, and decorate with confidence. I hope you found this article useful, please let me know in the comments below.