How to Transport Cupcakes (DIY Cupcake Carrier)
The easiest way to transport cupcakes is a cupcake box! But what if you do not have one? Here is a simple, easy and economical way to transport your cupcakes and not have them go splat by the end of your trip. Use this to take cupcakes to kids’ after-school activities, the park or even on a long bumpy ride across town. Transporting cupcakes has never been easier and simpler.
Are you looking for a quick, efficient, and easy way to transport cupcakes from one place to another without them going stale or becoming a jumbled mess? Whether you’re a baker looking for solutions to bring your delicious creations to a special event or you’re a cupcake lover eager to surprise a friend with a batch, you need to know the best strategies for transporting cupcakes.
In this article, we’ll provide you with a comprehensive guide on how to transport cupcakes safely and securely, from the perfect packing materials to the simplest methods of carrying a box of cupcakes. With our tips, you’ll be able to send cupcakes anywhere with utmost confidence; no more worrying about spilled frosting or smushed cupcakes!
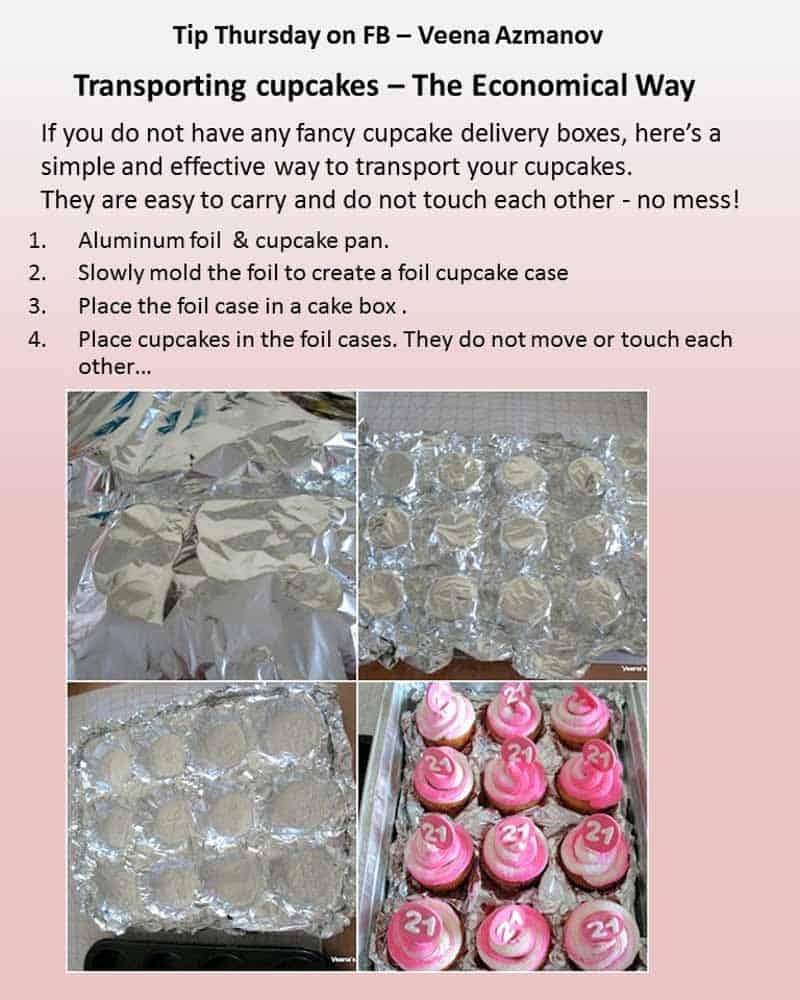
DIY cupcake carrier – 1
We are going to create a foil cupcake holder like this.
- Cut a big piece of aluminum foil about 1 1/2 times that of your baking pan.
- Flip your cupcake baking pan over.
- Place the aluminum foil on top of the baking pan
- Now slowly mold foil into the pan so the foil takes the sharp of the pan.
- Do it slowly making sure not to break the foil.
- Make sure you get into the depth of the curves so you get a good firm form.
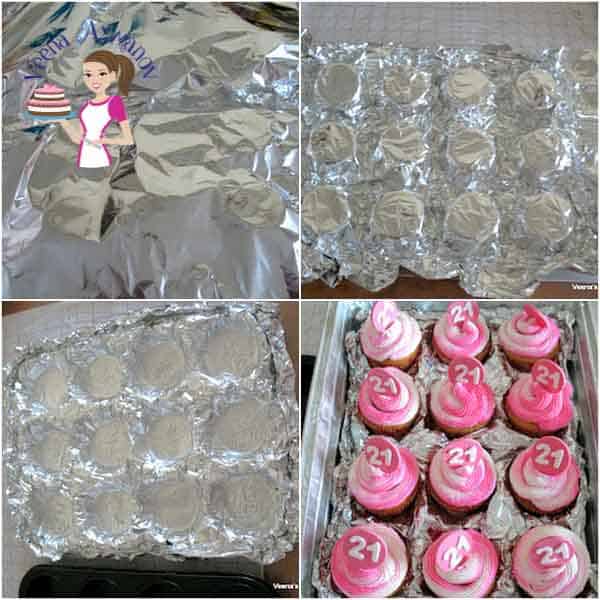
- Flip it over to the right side and neatly fold all the edges so it looks presentable.
- Then take off the baking pan from the foil.
- And Voila!! What you have is a cupcake holder for your cupcakes.
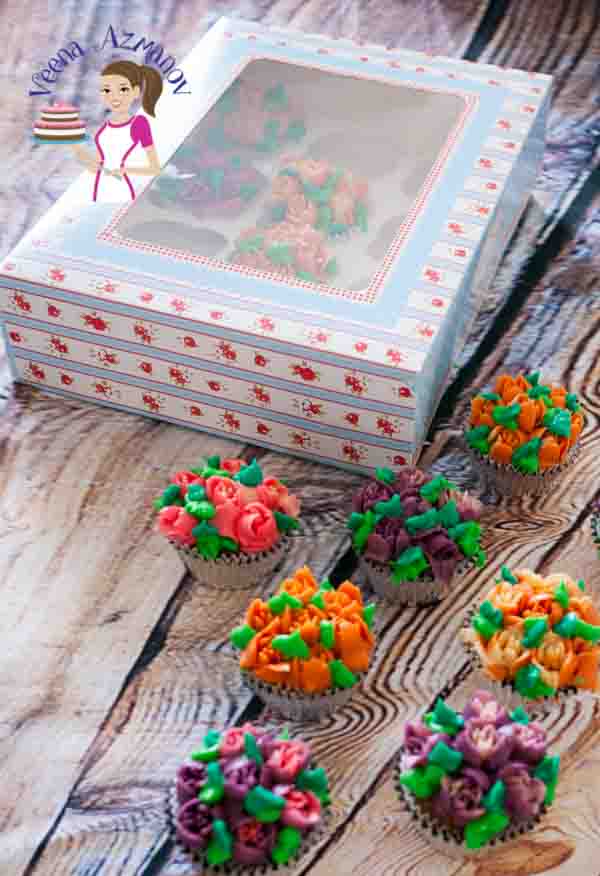
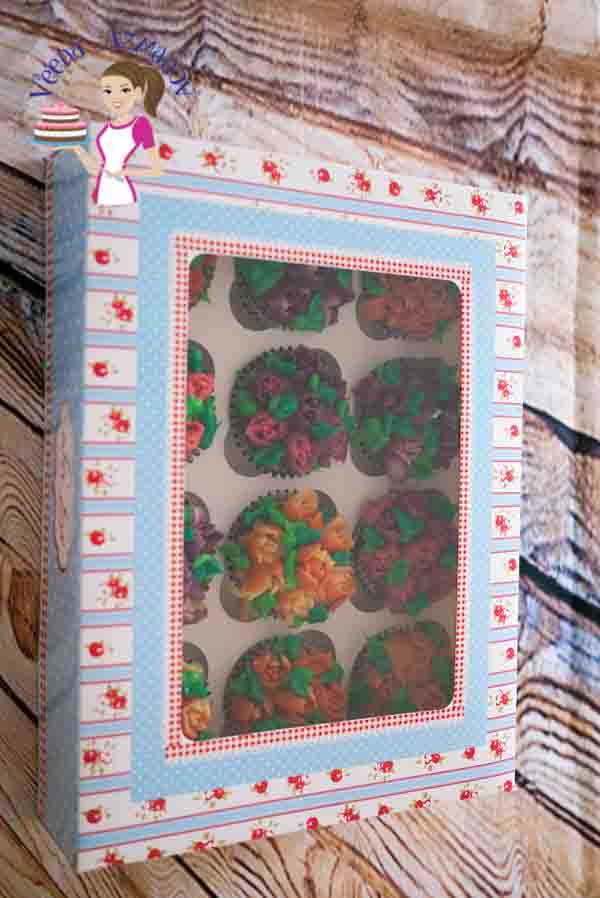
- You can place this in a box or a tray.
- It’s best to place it in a box that will create a snug fit around the foil.
- I use an aluminum tray.
- As you can see, the cupcakes do not touch each other or move. Therefore they travel well.
DIY Cupcake Carrier – 2
If you don’t have a cupcake carrier and want to transport cupcakes using materials you may already have at home, you can create a DIY cupcake carrier. Here’s a simple method using a regular cardboard box:
Materials you’ll need:
- Cardboard box
- Scissors or utility knife
- Ruler or measuring tape
- Pencil or marker
- Cupcake liners or parchment paper
- Tape or glue
- Tissue paper or crumpled parchment paper (optional)
Instructions:
- Measure and mark the size of the compartments: Determine the size of your cupcakes and mark the measurements on the inside of the box. Leave enough space between each compartment to prevent the cupcakes from touching or getting damaged.
- Cut out the compartments: Use the scissors or utility knife to carefully cut out the marked sections, creating individual compartments for each cupcake. Be sure to cut through both the top and bottom layers of the box.
- Line the compartments: Place cupcake liners or parchment paper inside each compartment to provide a clean surface for the cupcakes and prevent them from sticking to the cardboard.
- Secure the box: Fold the flaps of the box and secure them with tape or glue to ensure the box remains closed during transportation.
- Optional: Add padding: If you want to provide extra protection to the cupcakes, you can add a layer of tissue paper or crumpled parchment paper between the cupcakes and the lid of the box. This will help cushion any movement and keep the cupcakes in place.
- Place the cupcakes: Gently place each cupcake into its designated compartment, ensuring they fit securely without touching each other or the sides of the box.
- Close the box: Carefully close the lid of the box and secure it with tape or glue to keep it shut.
Remember to handle the box with care while transporting it to avoid any damage to the cupcakes. It’s also a good idea to keep the box level during transportation to prevent the cupcakes from shifting.
How to transport ice-cream Cone cupcakes
Ziv finally found a solution for me. He took a few paper cups. These are cheaper when you buy them in bulk, and they were easy to find.
- He cut an X at the bottom of each paper cup and placed them upside down in a large box.
- Place the ice cream cone cupcake in that gap, as you can see in the image below.
- When placed side by side, the cupcakes do not move or fall over. They traveled well! Make sure there is not too much negative space on the bottom of the box so the paper cups do not have space to move. If necessary, fill the gaps with paper.


Frequently asked questions
When preparing cupcakes for delivery, it’s essential to store them properly to maintain their freshness and appearance. Here’s a step-by-step guide on how to store cupcakes before delivery:
Cool the Cupcakes: Allow the cupcakes to cool completely after baking. Placing warm cupcakes in storage can create condensation, affecting their texture and causing the frosting to melt.
Choose an Airtight Container: Select a sturdy, airtight container that is large enough to hold all the cupcakes without crowding or touching. This helps preserve their shape and prevents them from drying out.
Layering and Separation: If you need to stack multiple layers of cupcakes, place a sheet of parchment paper or cardboard between each layer to create separation. This prevents the cupcakes from sticking to each other or getting squished.
Frosting and Toppings: If your cupcakes are frosted or have delicate toppings, take precautions to protect them. Ensure that the frosting is well set before storing and avoid stacking cupcakes directly on top of one another to prevent smudging or damage to the decorations.
Storage Conditions: Store the cupcakes in a cool, dry place. Avoid direct sunlight, heat sources, and areas with high humidity, as these can affect the texture and appearance of the cupcakes. If possible, refrigerate the cupcakes if the frosting or fillings are perishable or if it’s a particularly hot day.
Timing: If the cupcakes will be delivered within a few hours, they can be stored at room temperature. However, if the delivery will take longer or the weather is warm, it’s advisable to keep them refrigerated until just before delivery.
Transporting: During transportation, keep the cupcakes level and avoid any sudden movements or extreme temperature changes. If needed, you can place ice packs or chilled gel packs around the container to maintain a cooler temperature.
Just Before Delivery: Ideally, frost or decorate the cupcakes as close to the delivery time as possible. This ensures the cupcakes look their best when they reach their destination. If you’ve stored the cupcakes unfrosted, you can frost or decorate them at the delivery location if feasible.
By following these steps, you can help ensure that your cupcakes stay fresh and presentable before they are delivered to their intended recipients.
Transporting cupcakes on a hot day requires extra care to prevent them from melting, smudging, or losing their shape. Here are some tips to transport cupcakes on a hot day:
Chill the Cupcakes: Before transporting, refrigerate the cupcakes for a short period, especially if they have frosting or fillings that are prone to melting. This will help firm up the frosting and make the cupcakes more resilient to heat.
Use a Cooler or Insulated Bag: Insulated coolers or bags can help maintain a cooler temperature and protect the cupcakes from direct heat. Place the cupcakes inside the cooler or bag, and consider adding ice packs or frozen gel packs around them to provide additional cooling.
Avoid Direct Sunlight: Keep the cupcakes away from direct sunlight during transportation. Sunlight can increase the temperature and cause the frosting to melt or the cupcakes to become too soft. Place the cupcakes in the shade or in a cool spot inside your vehicle.
Optimal Timing: Try to transport the cupcakes during the cooler parts of the day, such as early morning or late evening, to minimize exposure to the heat.
Choose Sturdy Frosting: If possible, opt for sturdier frosting options that are less likely to melt in the heat. Cream cheese frosting, for example, is more prone to melting than buttercream or stabilized whipped cream frosting.
Protective Packaging: Use a cupcake carrier or a sturdy container with a tight-fitting lid to transport the cupcakes. These containers provide some insulation and prevent the cupcakes from moving or getting squished. Ensure the cupcakes are well spaced and not touching each other or the sides of the container.
Frosting Techniques: Consider using frosting techniques that are less likely to melt, such as using a crusting buttercream or piping a stiff buttercream swirl. These techniques can help the frosting hold its shape better in warm conditions.
Plan for Touch-ups: Bring along extra frosting, piping bags, and any decorations you used for the cupcakes. This way, if any cupcakes do get smudged or affected by the heat during transportation, you can touch them up before serving.
Remember to keep an eye on the cupcakes during transportation and make adjustments if necessary. With careful planning and these tips, you can help ensure that your cupcakes survive the heat and arrive at their destination in good condition.
Cupcakes can stay relatively fresh when stored in a box, but their freshness will depend on various factors such as the ingredients used, the storage conditions, and the duration of storage. Here are some considerations:
Moisture: Cupcakes stored in a box can retain their moisture better than if left exposed to the air. However, if the cupcakes are overly moist or contain perishable fillings or frostings, they may become soggy or spoil faster.
Storage Conditions: It’s important to store the cupcakes in a cool, dry place. Extreme temperatures or humidity can affect the texture and taste of the cupcakes. Avoid storing cupcakes in direct sunlight, as it can cause the frosting to melt or decorations to fade.
Airtight Container: To keep cupcakes fresh for longer, it’s advisable to store them in an airtight container or box. This helps prevent moisture loss and exposure to air, which can dry out the cupcakes.
Duration of Storage: Cupcakes are typically best enjoyed within a day or two of baking when they are at their freshest. While storing them in a box can help extend their freshness for a bit longer, it’s ideal to consume them as soon as possible for the best taste and texture.
Frosting and Toppings: Cupcakes with frosting or delicate toppings may require special care. If stored in a box, ensure that the frosting is well set before closing the box to prevent it from getting smudged. Consider storing cupcakes with fragile or perishable toppings separately and adding them just before serving.
It’s worth noting that the texture and taste of cupcakes can gradually change over time, even when stored in a box. To enjoy the cupcakes at their best, it’s recommended to consume them within a day or two of baking. If you need to store them for longer periods, you can consider freezing the cupcakes and thawing them before consumption for better freshness.
Yes, you can put cupcakes in a Ziploc bag for short-term storage or transportation. Here’s how:
Allow the Cupcakes to Cool: Make sure the cupcakes have completely cooled before placing them in a Ziploc bag. If the cupcakes are still warm, they can create condensation inside the bag, which may affect their texture and freshness.
Prepare the Ziploc Bag: Choose a Ziploc bag that is large enough to hold the cupcakes without squishing them. If you have larger cupcakes or ones with tall decorations, consider using gallon-sized bags. For standard-sized cupcakes, quart-sized bags should work well.
Place the Cupcakes in the Bag: Gently place the cupcakes inside the Ziploc bag, making sure they are arranged in a single layer. Avoid overcrowding the bag to prevent the cupcakes from getting smashed or losing their shape.
Seal the Bag: Close the Ziploc bag securely, removing as much air as possible. This helps maintain the freshness of the cupcakes and prevents them from drying out.
Optional: Extra Protection: If you’re concerned about the cupcakes shifting or getting smudged, you can place the Ziploc bag inside a sturdy container or box for added protection during transportation.
It’s important to note that using a Ziploc bag is best suited for short-term storage or transportation. If you need to store the cupcakes for an extended period, it’s advisable to use an airtight container to better maintain their freshness. Additionally, cupcakes with delicate decorations or perishable frostings may require more care during transportation to prevent damage or melting.
If you don’t have a container available to store cupcakes, there are still ways to help keep them fresh. Here are some alternative methods:
Wrap with Plastic Wrap: Individually wrap each cupcake tightly with plastic wrap, covering them completely. This helps retain moisture and prevent the cupcakes from drying out.
Use Aluminum Foil: Similarly, you can wrap each cupcake with aluminum foil, ensuring they are well covered. Aluminum foil provides some insulation and protects the cupcakes from exposure to air.
Use Cling Wrap and a Plate: Place the cupcakes on a plate and cover them with cling wrap, ensuring the wrap tightly seals around the plate and cupcakes. This method helps maintain some moisture and prevents the cupcakes from drying out.
Place in a Ziploc Bag: If you have Ziploc bags available, place each cupcake in an individual bag, squeezing out excess air before sealing. This helps create a microenvironment that retains moisture.
Store in a Cool Location: Find a cool spot in your home, away from direct sunlight or heat sources, to store the wrapped cupcakes. A cool pantry or cupboard can work well.
It’s important to note that these methods are suitable for short-term storage and are best used when you don’t have access to a proper container. While they can help maintain some freshness, it’s recommended to consume the cupcakes as soon as possible for the best taste and texture. If you need to store the cupcakes for a longer duration, consider using an airtight container to better preserve their freshness.
Don’t lose this recipe! Save it for Later!
📌 Save this Recipe for later on Pinterest so you can easily find it again.
⭐ Add Veena Azmanov Kitchen to your Google Preferred Sources.
It helps Google show you more of our recipes.
📧 Subscribe for new recipes delivered to your inbox.
🎥 Follow us for more recipes


Genius! I have been trying to find an economical way to transport cupcakes to the farmer’s market. I have a display case when there, but getting the cupcakes to the display has been challenging. Boxes are too expensive to use for this. This is perfect! Thank you so much for sharing!
I wanted to thank you for this advice for transporting cupcakes. You mentioned that after molding the aluminum foil you can place it inside a box. I’m interested to learn if you should know the dimensions of the box before hand so you can be sure the aluminum will fit in it.
Hey Taylor. Not sure I understood your question. I just mold the foil to the cupcake pan and do the best I can with the box. I never knew the dimensions of my boxes. You can measure your cupcake pan and make sure it’s the size of that cupcake pan. Thanks
Hi! Want to know if I’m transporting cupcakes by land/driving to another state, do cupcakes need to be in cooler with dry ice and AC on? Cupcakes are frosted with buttercream. Thanks!
Hey SweetC. It really depends on the weather. You will only need cooler or dry ice and AC in hot summer weather. For regular cool temperatures, you can place them in a box. I transport my cupcakes an hour away without anything at 24 degrees C and they are usually ok. Chill them well and keep them in a cool place in the car. But again I don’t know how hot the climate is where you are.
This tip on how to transport cupcakes is probably the best and most brilliant tip I have ever run across! Have to take 24 decorated cupcakes to our church’s Fall Festival tomorrow. My cupcakes usually arrive at their destination upside down, sideways, and with frosting all over the wrappers, I made the foil holders and my cupcakes are all snug in their little spaces. Thank you!
Thank you, Karen. So happy you found this useful. I know exactly what you mean. I use to have the same issue when traveling with cupcakes.
Thank you so much for this – I used this last week to take cupcakes for the family. You are right cupcake boxes can be expensive especially when you really just need to take them across to family and friends
Thank you, Kesi. Happy to hear you found this tutorial useful. Yes, it is cheaper to use this method when your with family and friends for sure.
OMG! Thank you so much! I’m doing a catering job that has a very tight budget. I was dreading spending “profit money” on boxes! You made a girl happy!
Thank you, Leslie. I’m so happy you found this useful.
Thankyou for this lovely idea
You are very welcome Sharmila
Hi veena pls share the recipe of tasty frosting that keep firm till eaten if i m preparing it in day and delivering it in night the same day at room temperature cupcakes made the day before. And plss share it as soon as possible. I m gonna use these boxes for delivering my cupcakes. How can i keep them till night ? In the boxes with plastic wrapp or refrigerate ? Then after refrigerate will it be kept for more 5 hours in the box ?? Recipeee please a perfect recipe for normal temperature above 60°
Fatima. I have lots of recipes for fillings and frosting on this blog. Please look under recipes. Each recipe will tell you how to use it and how long it will last. Most cupcakes and frosting recipes will last a night or two in the open without fridge.
love the idea for the cupcakes….this has always been a problem. thanks
Brilliant!
Absolutely brilliant! Thank you.