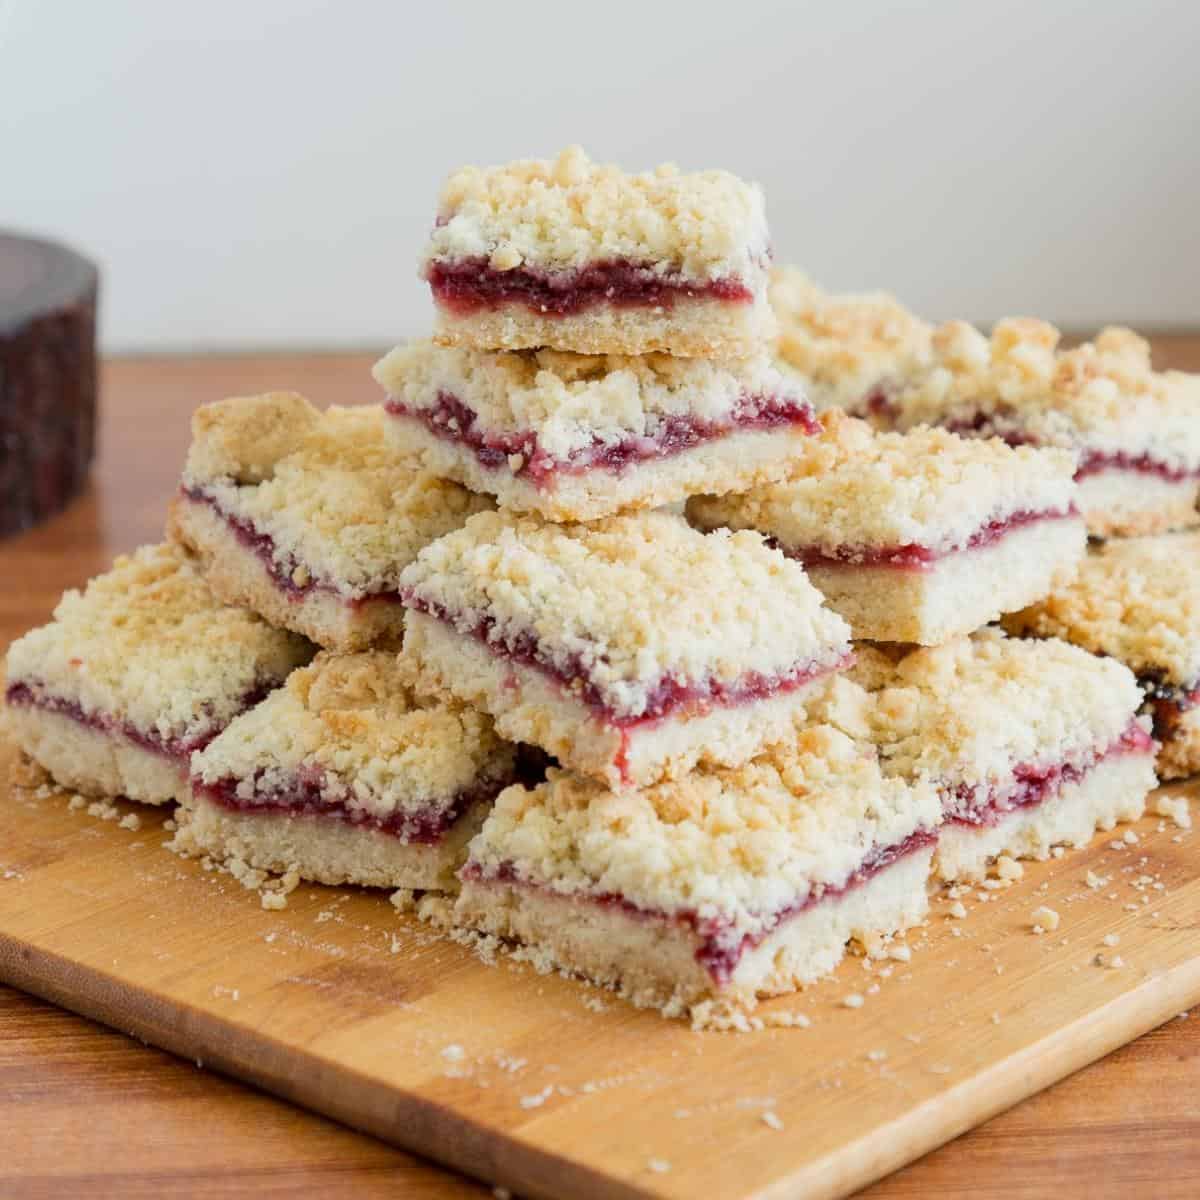
Delicious Cherry Bars

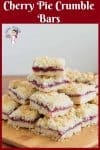
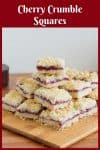
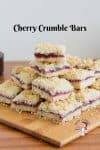
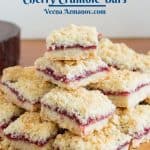

Give your classic cherry pie filling a crumble twist with these cherry bars. Sweet cherries between a rich, buttery base on the bottom and crumble on top. It’s a surprisingly easy recipe to make any time of the year.

Crumble bars are a delightful dessert that combines a buttery, crumbly topping with a luscious fruit filling. These bars typically feature a simple shortcrust base that provides a sturdy foundation for the juicy fruit layer.
Creating the best cherry crumble bars starts with a rich and flavorful cherry pie filling. By using fresh or frozen cherries, you can achieve a perfect balance of sweetness and tartness that elevates the entire dessert. These cherry crumble bars are not only easy to make but also a guaranteed crowd-pleaser, perfect for any occasion.
Why make these bars?
- Perfect Balance of Textures: The combination of a buttery shortcrust base and a crumbly topping provides a delightful contrast to the juicy, slightly tart cherry filling.
- Easy to Make: This recipe uses simple ingredients that are likely already in your pantry. Plus, the one-bowl method for the shortcrust minimizes cleanup.
- Versatile and Customizable: You can easily customize the recipe by using different fruits for the filling.
- Naturally Sweet and Tangy Filling: The cherry filling is naturally sweetened with a hint of tartness from the lemon juice, creating a perfect harmony of flavors.
Ingredients and substitutes
- Cherries – I am using fresh sweet cherries for the cherry filling, but you can also use frozen cherries any time of the year. If you choose to use sour cherries, I highly recommend adding 1/4 cup additional sugar to the cherry filling unless, of course, you prefer it less sweet.
- Sugar – I like my crumble topping to be a lighter color. So, I prefer to use white sugar. You can also substitute with light or brown sugar using the same quantity. Note that brown sugar contains molasses, so it will affect the taste and flavor.
- Butter – I always use unsalted butter because I like to control how much salt I add. If you use salted butter, that’s fine; just omit salt in the recipe.
- Spice mix – (optional) There are so many flavors that you can add to this, such as pumpkin spice, gingerbread spice, and simple vanilla, which works great on its own.

Step-by-step: Cherry Bars Recipe
- Preheat the oven: Preheat your oven to 350°F / 175°C / Gas mark 4. Grease an 8 x 8-inch baking dish or a 7 x 9″ rectangle pan and line it with parchment paper, leaving some overhang for easy removal.

- Dough – Combine the flour, powdered sugar, and salt in a large bowl. Next, add the cubed cold butter and mix with a pastry cutter or your fingers until the mixture resembles coarse crumbs. Then, add the egg yolk and mix until the dough starts to come together. Then, add cold water and combine well, but still be quite crumbly.
- Divide the Dough: Divide the dough into two portions, one slightly larger than the other. Then, press the larger portion into the prepared baking dish to form an even layer. Reserve the smaller portion for the crumble topping.
- Bake the Base: Bake the base layer in the preheated oven for about 15 minutes or until it turns golden. Then, remove it from the oven and let it cool slightly while you prepare the cherry filling.
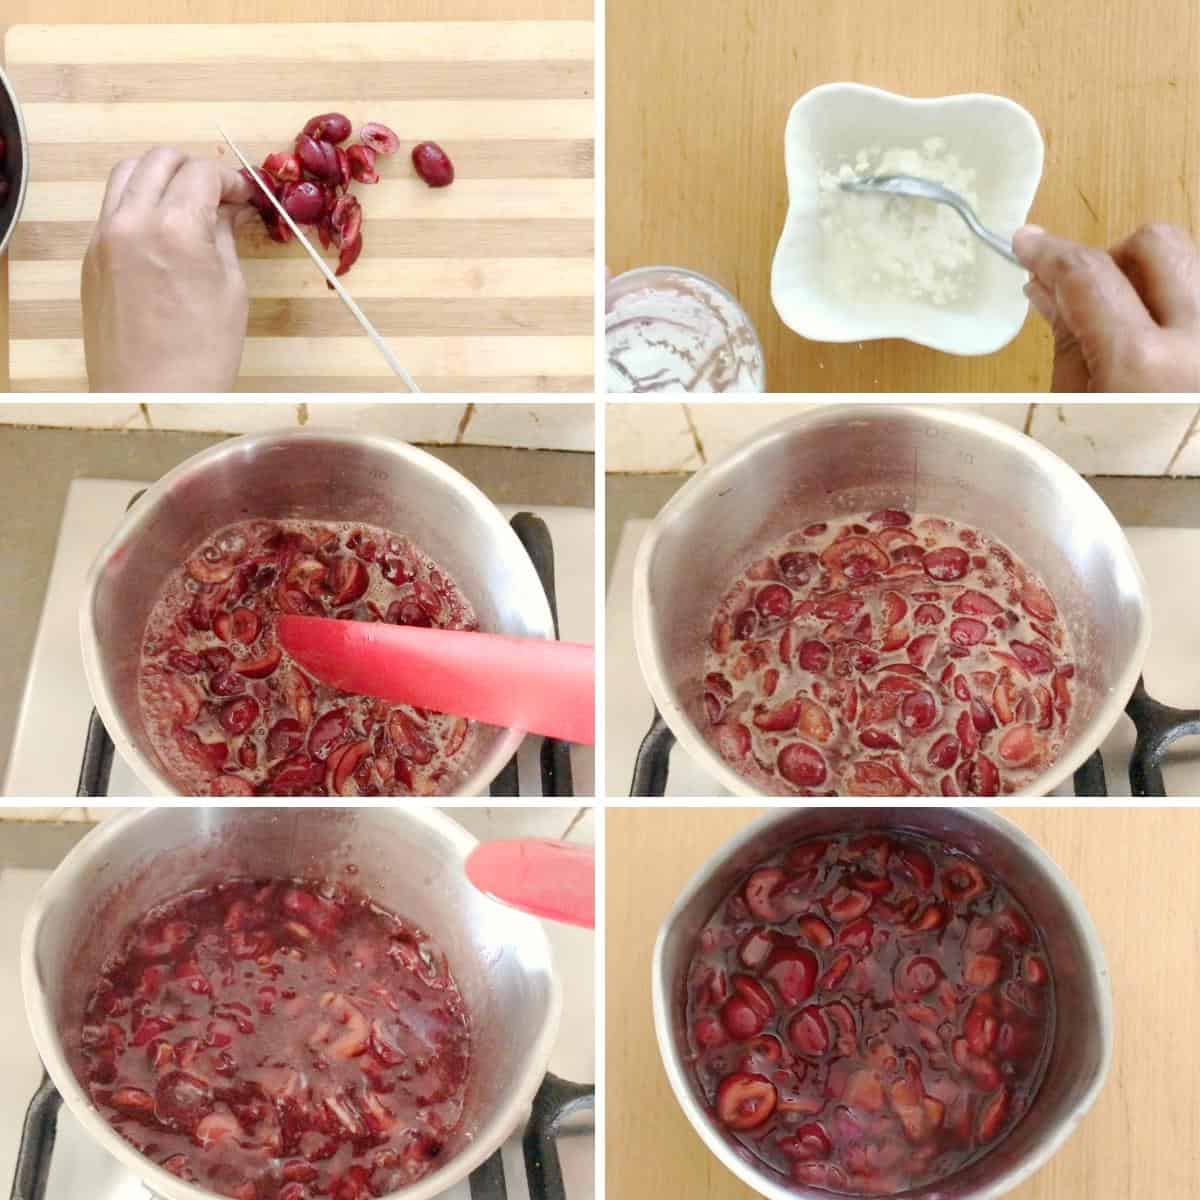
- Cherry filling: Place cherries in a saucepan with the sugar, lemon juice, and half the water. Heat on low to medium until sugar is dissolved. In a separate bowl, combine the remaining water with the cornstarch. Combine well so the cornstarch does not settle on the bottom. Add the cornstarch water to the cherries. Continue to cook on low – the mixture will thicken and look glossy. It’s ready when thick enough to coat the back of a wooden spoon or spatula. Cool completely. Cooling will thicken the filling some more. Set aside.

- Assemble: Pour the cherry filling over the base and spread evenly. Generously sprinkle the chilled crumble topping all over the filling.
- Bake the Bars: Return the baking dish to the oven and bake for an additional 30-35 minutes or until the crumble topping is golden brown and the cherry filling is bubbling.
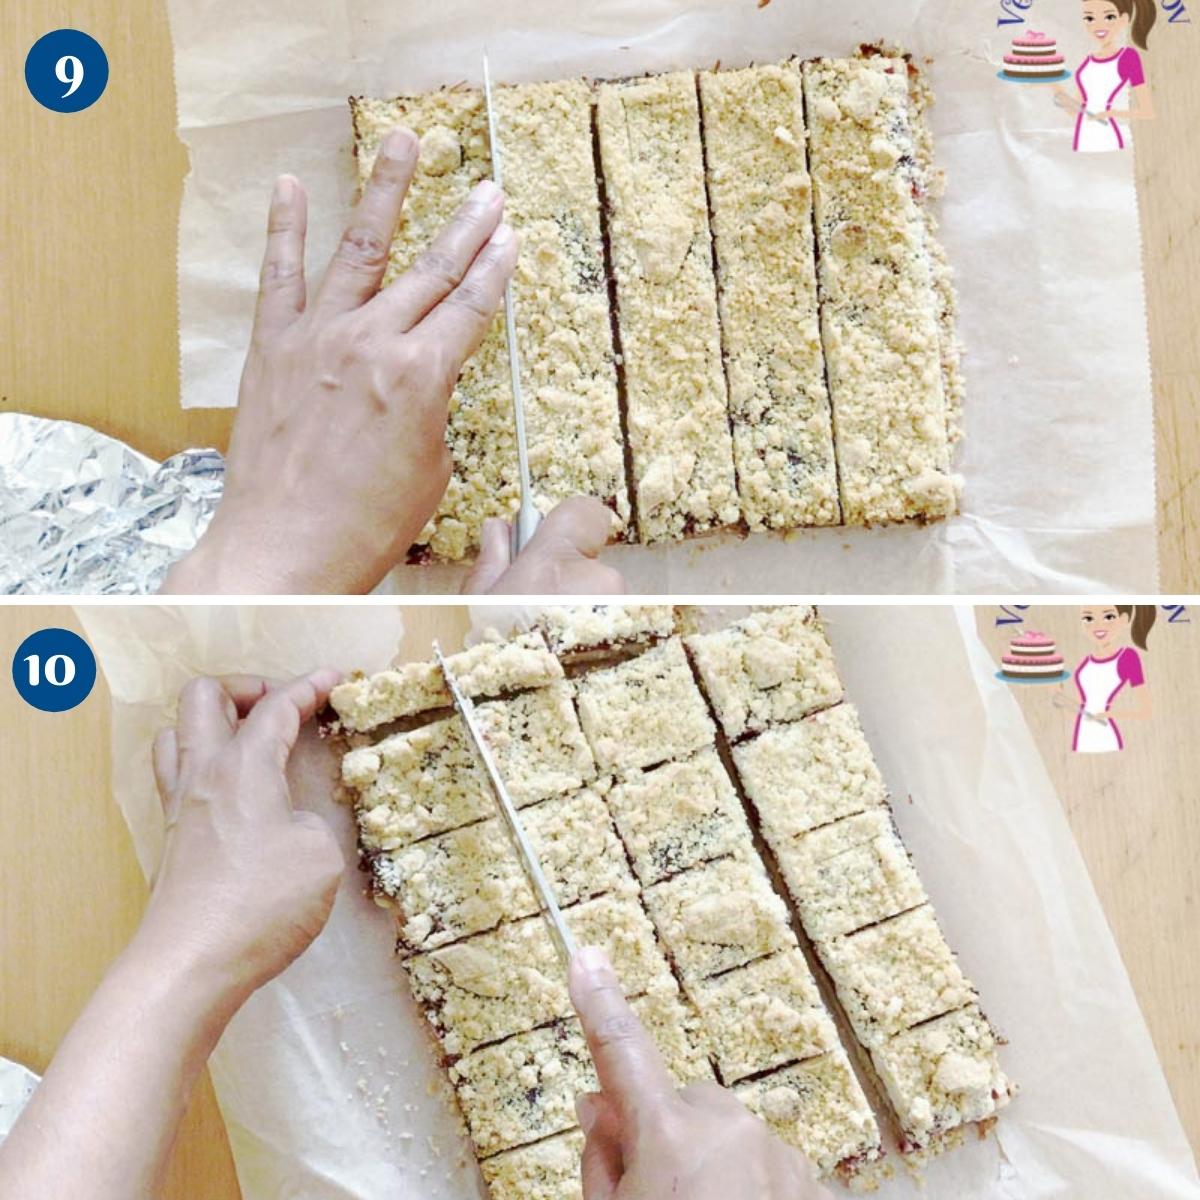
- Cool and Serve: Allow the bars to cool completely in the baking dish. Once cooled, use the parchment paper overhang to lift the bars out of the dish and cut into squares.
Cherry Bars
Give your classic cherry pie filling a crumble twist with these cherry bars. Sweet cherries between a rich, buttery base on the bottom and crumble on top. It's a surprisingly easy recipe to make any time of the year.
Video
Ingredients
- 2 cup (250 g) All-purpose flour
- ¾ cup (170 g) Butter (1 1/2 stick) unsalted, chilled
- ¾ cup (150 g) Sugar white
- 2 tbsp Milk
- 2 tsp Vanilla
- ¼ tsp Salt
- ½ tsp Spice powder optional
- 4 cups (600 g) Cherries, pitted
- ½ cup (100 g) Sugar
- 1 tbsp Lemon juice
- 2 tbsp Cornstarch
- ¼ cup (60 ml) Water
Method
- Preheat the oven: Preheat your oven to 350°F /175°C/ Gas mark 4. Grease an 8 x 8-inch baking dish or a 7 x 9-inch rectangle pan and line it with parchment paper, leaving some overhang for easy removal.
- Dough – Combine the flour, powdered sugar, and salt in a large bowl. Add the cubed cold butter and mix with a pastry cutter or your fingers until the mixture resembles coarse crumbs. Add the egg yolk and mix until the dough starts to come together. Add cold water and combine well, but still crumbly.2 cup All-purpose flour, 3/4 cup Butter, 3/4 cup Sugar, 2 tbsp Milk, 2 tsp Vanilla, 1/4 tsp Salt, 1/2 tsp Spice powder
- Divide the Dough: Divide the dough into two portions, one slightly larger than the other. Press the larger portion into the prepared baking dish to form an even layer. Reserve the smaller portion for the crumble topping.
- Bake the Base: Bake the base layer in the preheated oven for about 15 minutes or until it starts to turn golden. Remove from the oven and let it cool slightly while you prepare the cherry filling.
- Cherry filling: Place cherries in a saucepan with the sugar, lemon juice, and half the water. Heat on low to medium until sugar is dissolved. In a separate bowl, combine the remaining water with the cornstarch. Combine well so the cornstarch does not settle on the bottom. Add the cornstarch water to the cherries. Continue to cook on low – the mixture will thicken and look glossy. It's ready when thick enough to coat the back of a wooden spoon or spatula. Cool completely. Cooling will thicken the filling some more. Set aside.4 cups Cherries, pitted, ½ cup Sugar, 1 tbsp Lemon juice, 2 tbsp Cornstarch, ¼ cup Water
- Assemble: Pour the cherry filling over the base and spread evenly. Generously sprinkle the chilled crumble topping all over the filling.
- Bake the Bars: Return the baking dish to the oven and bake for an additional 30-35 minutes or until the crumble topping is golden brown and the cherry filling is bubbling.
- Cool and Serve: Allow the bars to cool completely in the baking dish. Once cooled, use the parchment paper overhang to lift the bars out of the dish and cut into squares.
Notes
-
- Use Cold Butter: Make sure your butter is very cold for the shortcrust pastry. This helps create a flaky and tender base. You can also freeze the butter and grate it into the flour for better distribution.
-
- Chill the Dough: After mixing the shortcrust dough, chill it for at least 30 minutes before pressing it into the baking dish, making it easier to handle and helping it bake more evenly.
-
- Cook the Cherry Filling Properly: Ensure the cherry filling thickens adequately before spreading it over the base. Cooking the filling until it thickens will prevent it from being too runny, which can lead to a soggy crust.
-
- Even Layering: Press the shortcrust base evenly into the baking dish to ensure it bakes uniformly. Spread the cherry filling evenly over the base and distribute the crumble topping uniformly for the best texture and presentation.
-
- Baking Time: Keep an eye on the bars while they bake. The crumble topping should be golden brown, and the cherry filling should be bubbling. Baking times can vary, so use visual cues to determine doneness.
-
- Cool Completely: Allow the bars to cool completely in the baking dish before cutting. This helps the filling set appropriately and makes the bars easier to slice.
-
- Use Parchment Paper: Line the baking dish with parchment paper, leaving an overhang on the sides. This makes it easier to lift the bars out of the dish for cutting and serving.
-
- Adjust Sweetness: Taste your cherries before cooking the filling. If they are particularly sweet, you might want to reduce the amount of sugar. If they are more tart, you can add a bit more sugar to balance the flavor.
-
- Experiment with Add-ins: Consider adding a touch of almond extract to the cherry filling for a complementary flavor. You can also sprinkle chopped nuts like almonds or pecans into the crumble topping for added texture.
-
- Storage: Store the cooled bars in an airtight container. They can be kept at room temperature for a couple of days or refrigerated for up to a week. They also freeze well for longer storage.
Equipment you will need


Nutrition
Tried this recipe?
Mention @veenaazmanov_kitchen or tag #veenaazmanovkitchen!more cherry recipes


Frequently asked questions
To reheat, place the bars in a preheated oven at 350°F (175°C) for 10-15 minutes until warmed through. This helps retain their crisp texture. You can also microwave individual bars for about 20-30 seconds.
Yes, frozen cherries work well in this recipe. Thaw the cherries first and drain any excess liquid to avoid a runny filling. You may need to adjust the cooking time to ensure the filling thickens properly.
Yes, you can make them gluten-free by using a gluten-free flour blend in place of the all-purpose flour. Ensure that the oats (if using) are also certified gluten-free.
Yes, adding nuts like almonds, pecans, or walnuts to the crumble topping can add a delightful crunch and enhance the flavor of the bars. Cherries pair well with almonds, pistachios, and macadamia.
Ensure the cherry filling is thickened properly before spreading it over the base. Additionally, baking the base for a few minutes before adding the filling can help maintain its crispness.
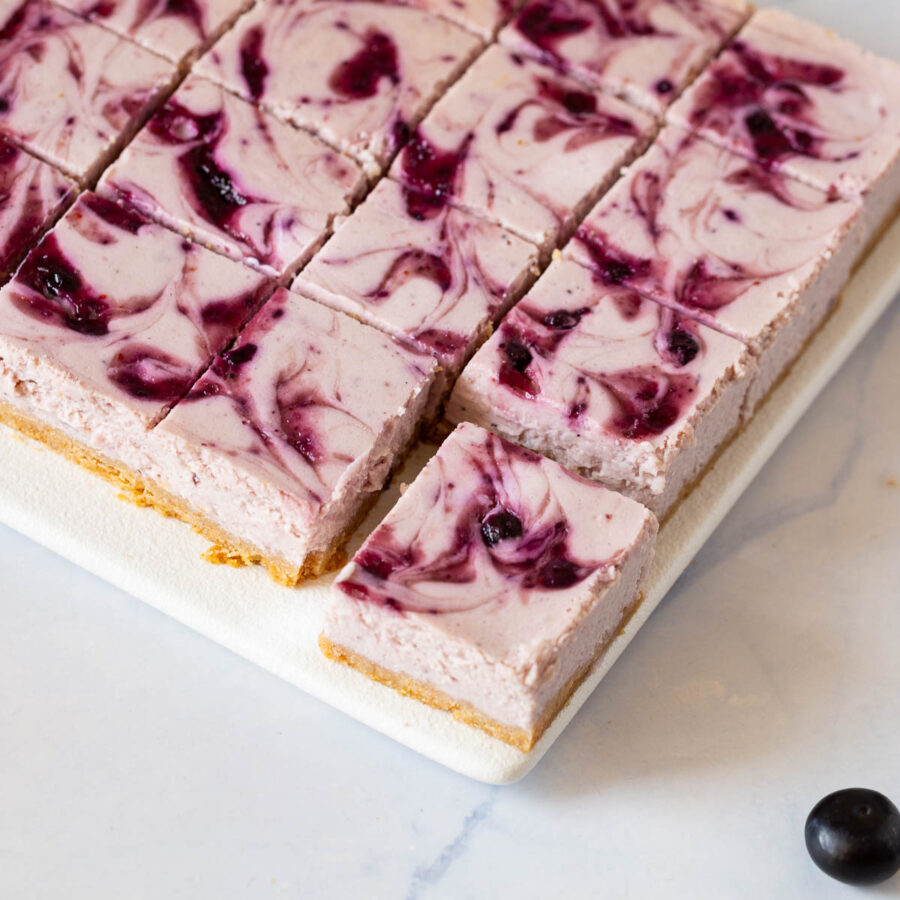
You can also use blueberries, plums, peaches, nectarines, and even strawberries. I highly recommend these:
Blueberry Cream Cheese Crumb Bars
Apricot Crumble Squares
more crumble bars you may like
- Easy Blueberry Bars Recipe
- Best Apricot Crumble Squares
- Apple Pie Bars with Crumble
- Easy Blueberry Crumble


Don’t lose this recipe! Save it for Later!
📌 Save this Recipe for later on Pinterest so you can easily find it again.
⭐ Add Veena Azmanov Kitchen to your Google Preferred Sources.
It helps Google show you more of our recipes.
📧 Subscribe for new recipes delivered to your inbox.
🎥 Follow us for more recipes


These cherry pie crumble bars look so delicious and I love how easy they are to make!
Thanks, Natalie.
This cherry pie crumble bars looks fantastic. The crumble on top is so perfect. A great dessert to make when cherries are in season. Pinning it to try later.
Thanks, Jo. Yes, they are so delish.
Your crumble bars look perfect, Veena! Oh how I wish I could reach in and grab one ^_^
Thanks, Tammy.
I made the most delicious cherry pie bars a few weeks ago and everyone raves about them! I was thinking about making them again, but I really prefer a crumble topping; it’s my favorite. Seeing as cherries are fresh in the grocery store right now, I think I’ll make your filling and share them at our next cookout.
Thanks, Jessica. yes, the crumble bars are definitely a hit.
I’ve never been a fan of any fruit or nut bars, but these look really good! I know if I ever want to attempt making bars from scratch, your recipe is the one I’d look up!
Thanks, Nicoletta. yes love nuts in the bars but have not added any to this one.
Cherry season is top in my list (together with artichoke) and can’t get enough. New ways to use them are always welcome! These bars look delicious. Thanks for the recipe!
Thanks Paula. I love artichokes too!
I love making crumble bars – they’re always a hit, and they taste so good with just about every fruit I’ve tried so far. But surprisingly, I haven’t made cherry- adding this to my list!
Me too Les. Love crumble bars with most fruits.
Those crumb bars look so good. It’s a good thing that cherries are in season now. We’ve got the grandsons coming over next Sunday so I have plenty of time to make the cherry filling and then make the crumb bars. They’ll be pleasantly surprised.
Thanks, Marisa. yes, cherries are in season now.