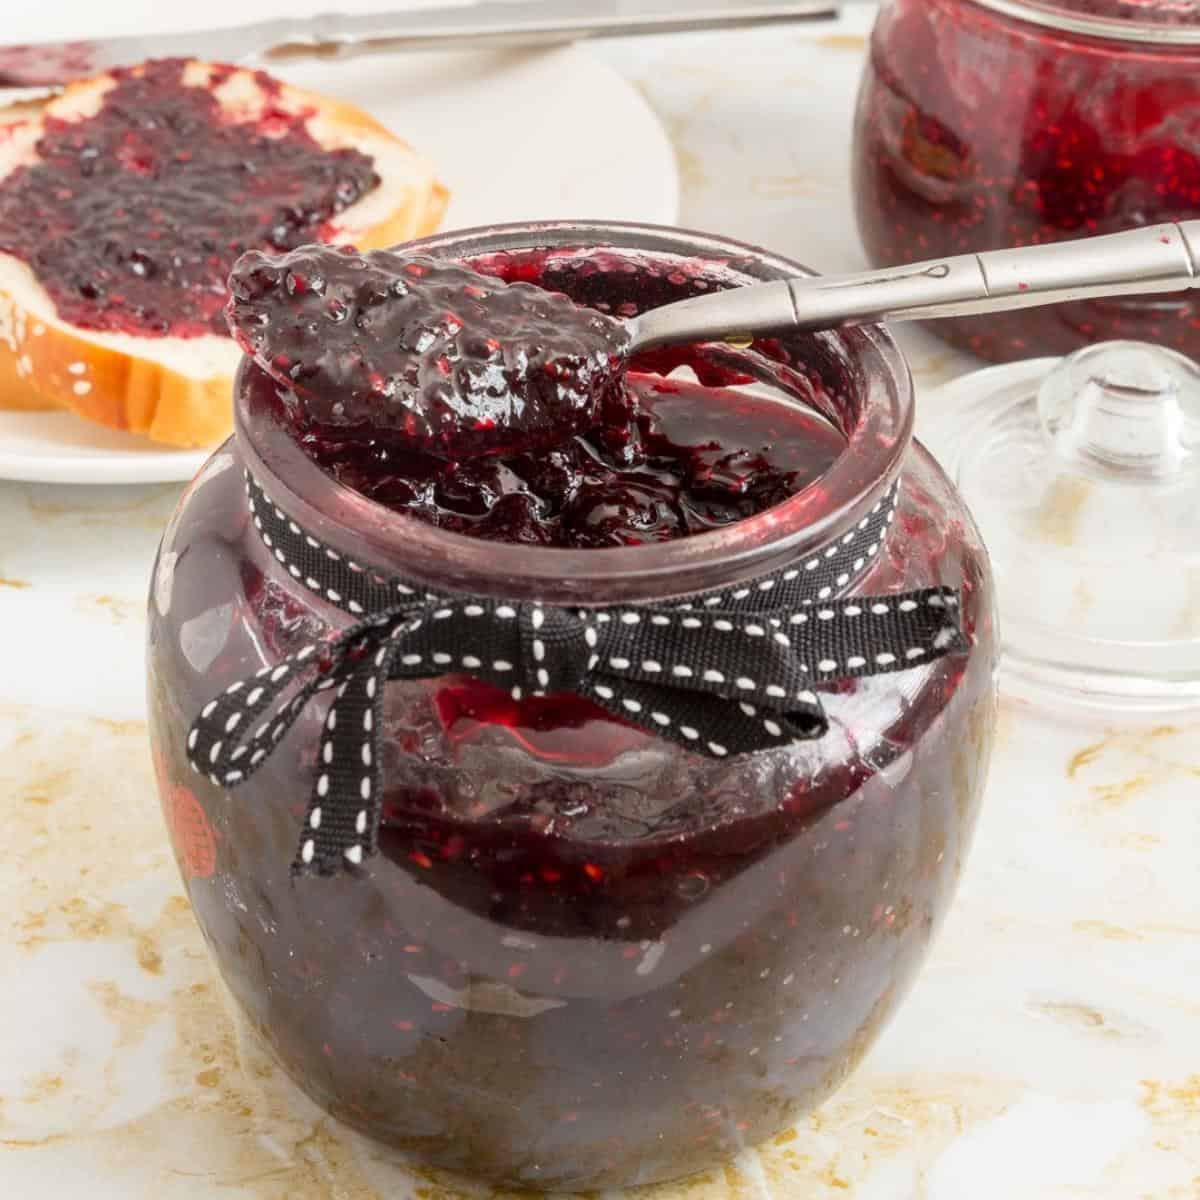
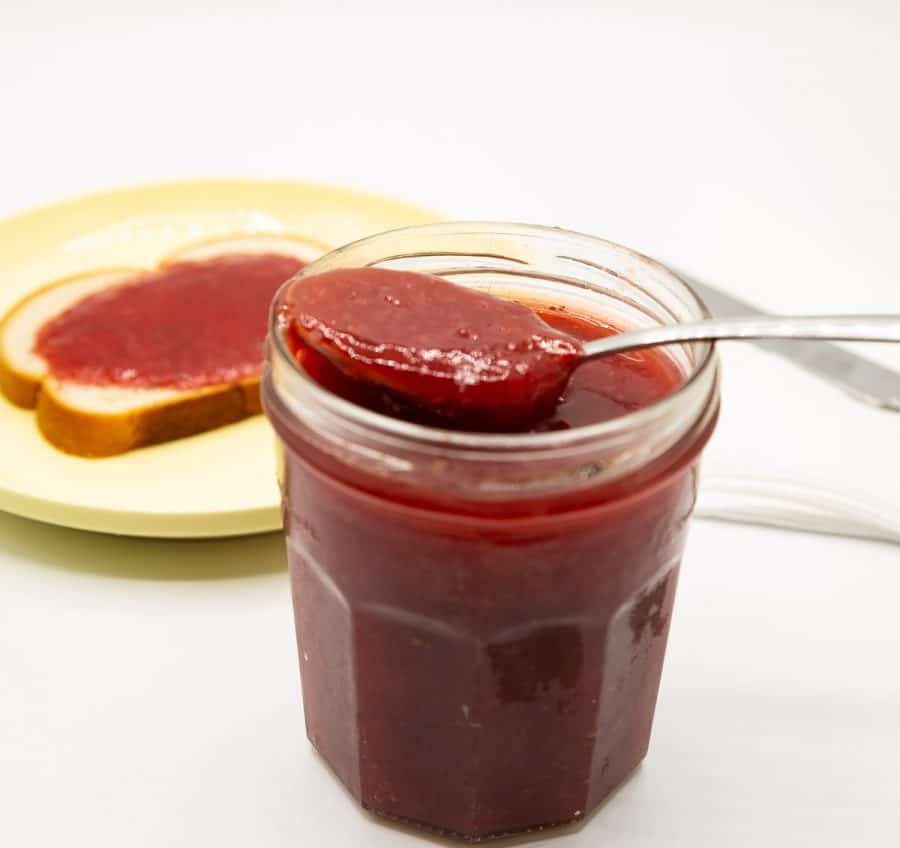
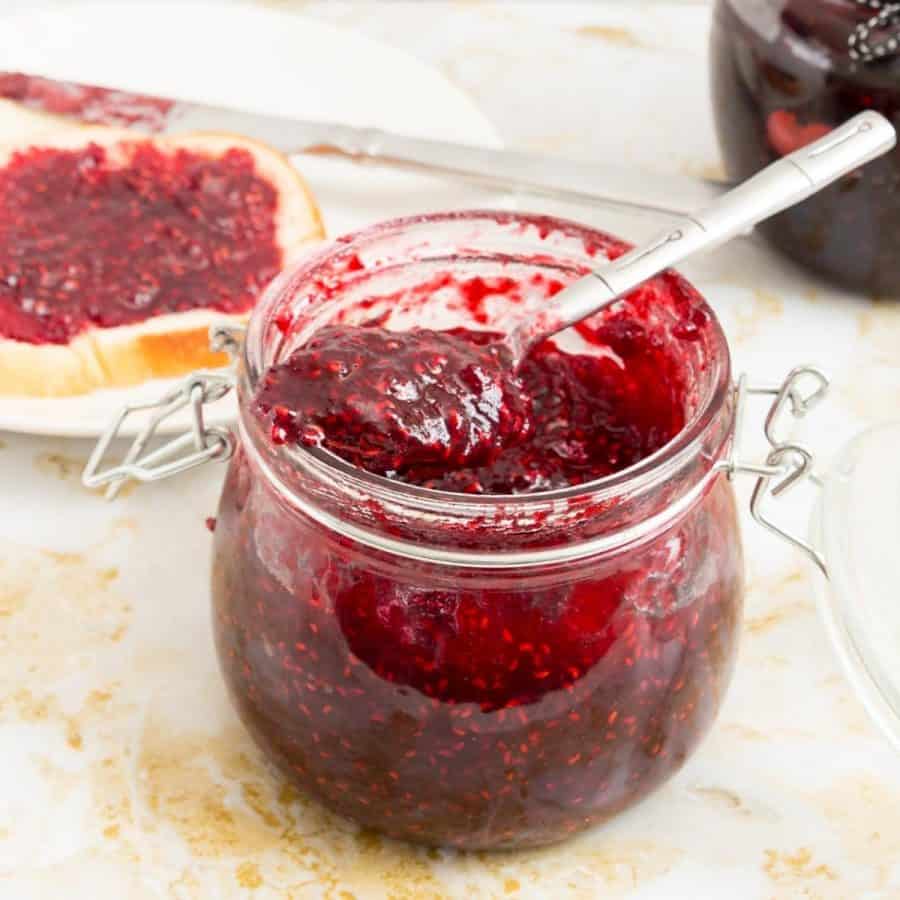
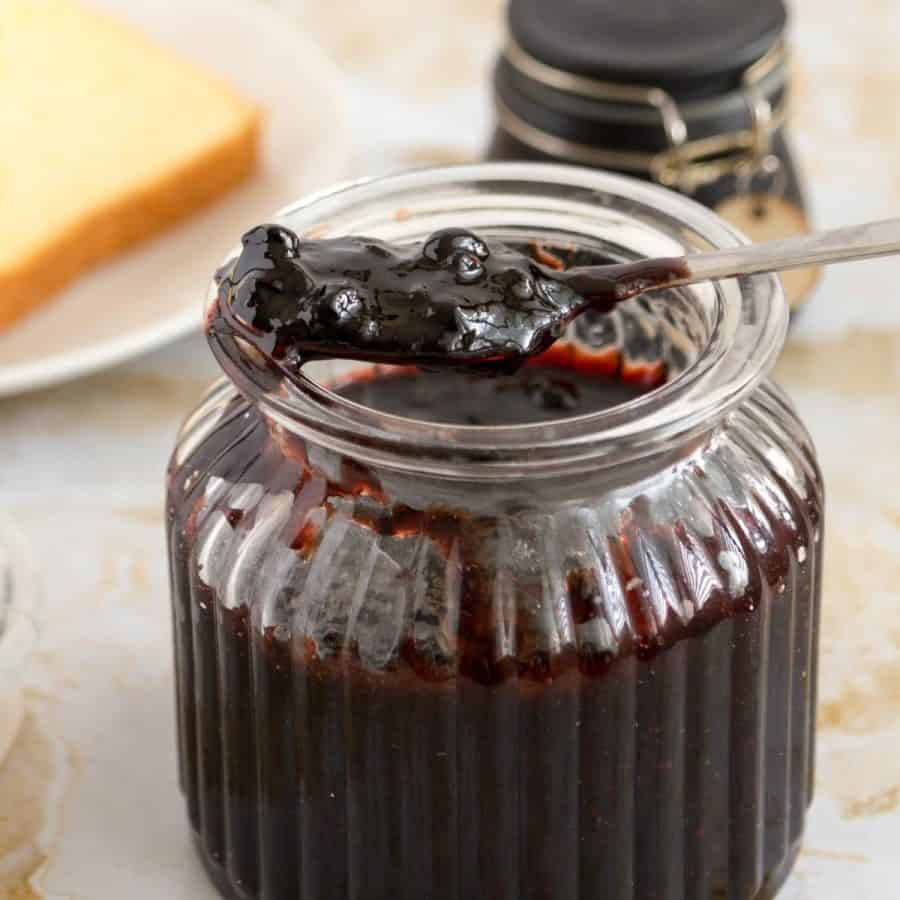
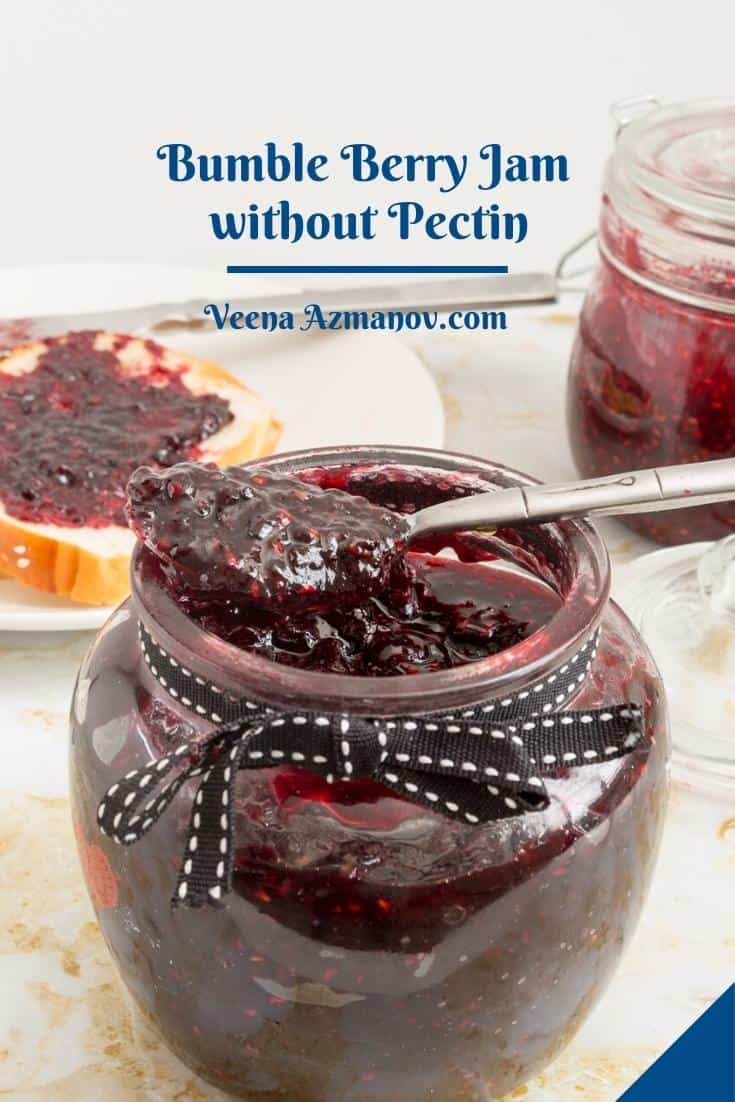
Old Fashion Mixed Berry Jam – Bumbleberry jam (No Pectin)

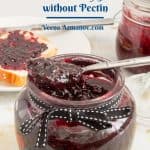
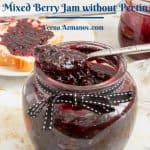
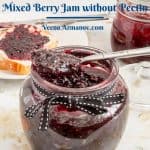
Summer is the best time to make a mixed berry jam when blueberries, raspberries, blackberries, and strawberries are in abundance. Low in sugar and made without any pectin or artificial flavoring, this jam takes only 30 minutes to make. It is also commonly known as bumbleberry jam. It’s a must-try jam if you love berries.
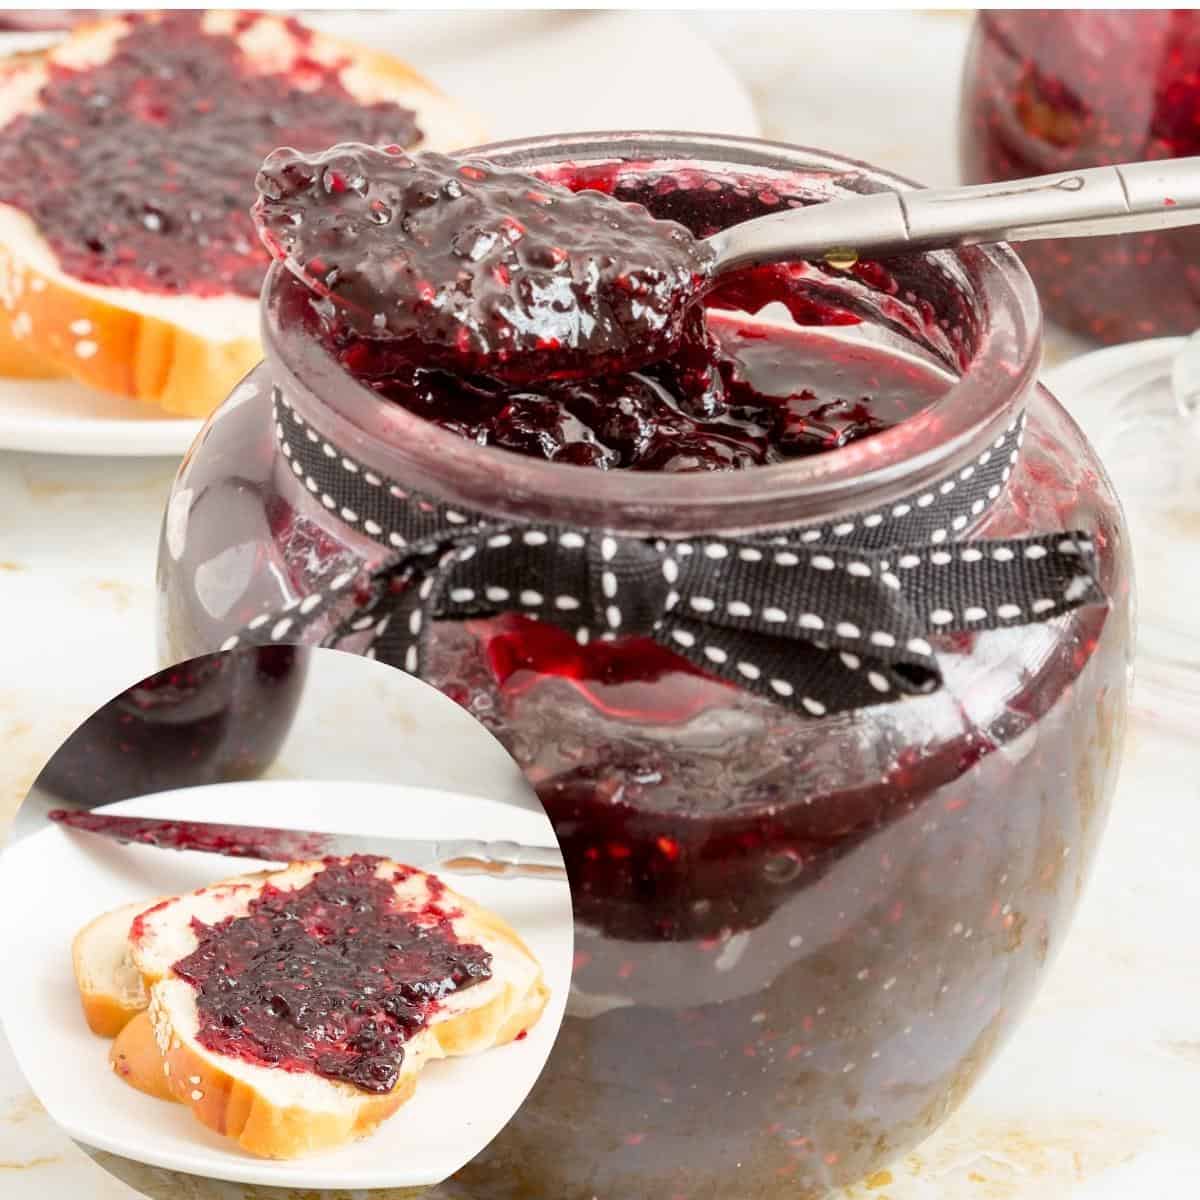
I grew up calling this jam a mixed berry jam because that’s what it is – a jam made with mixed berries. A few years ago, an American friend told me this is called a bumbleberry jam.
I always thought bumbleberry is a berry on its own. So, what is a bumbleberry? Actually, bumbleberry is a mixture of at least three different berries, mostly raspberries, blackberries, blueberries, and strawberries, because they are in season all at the same time.
Why have one berry when you can have them all? So, today, I’m using four berries.
Why make this jam?
- No-fail method – This recipe is simple and easy. And if you’ve never made homemade jam, you will definitely start now.
- No-canning – This homemade recipe is without the fuss of canning. Just pour the jam into sterilized jars and save them in the fridge or freezer. However, for those of you who want a big batch to can, I have also given you the detailed canning process.
- No pectin – Ideally, you can make jam with just two ingredients: berries and sugar. Because berries have natural acidity and pectin in abundance, adding lemon juice helps break down on the skin and prevents crystallization.
- Low-sugar – Fresh berries are naturally soft and sweet. Therefore, you don’t need to add a lot of sugar to this jam.
Ingredients and substitutes
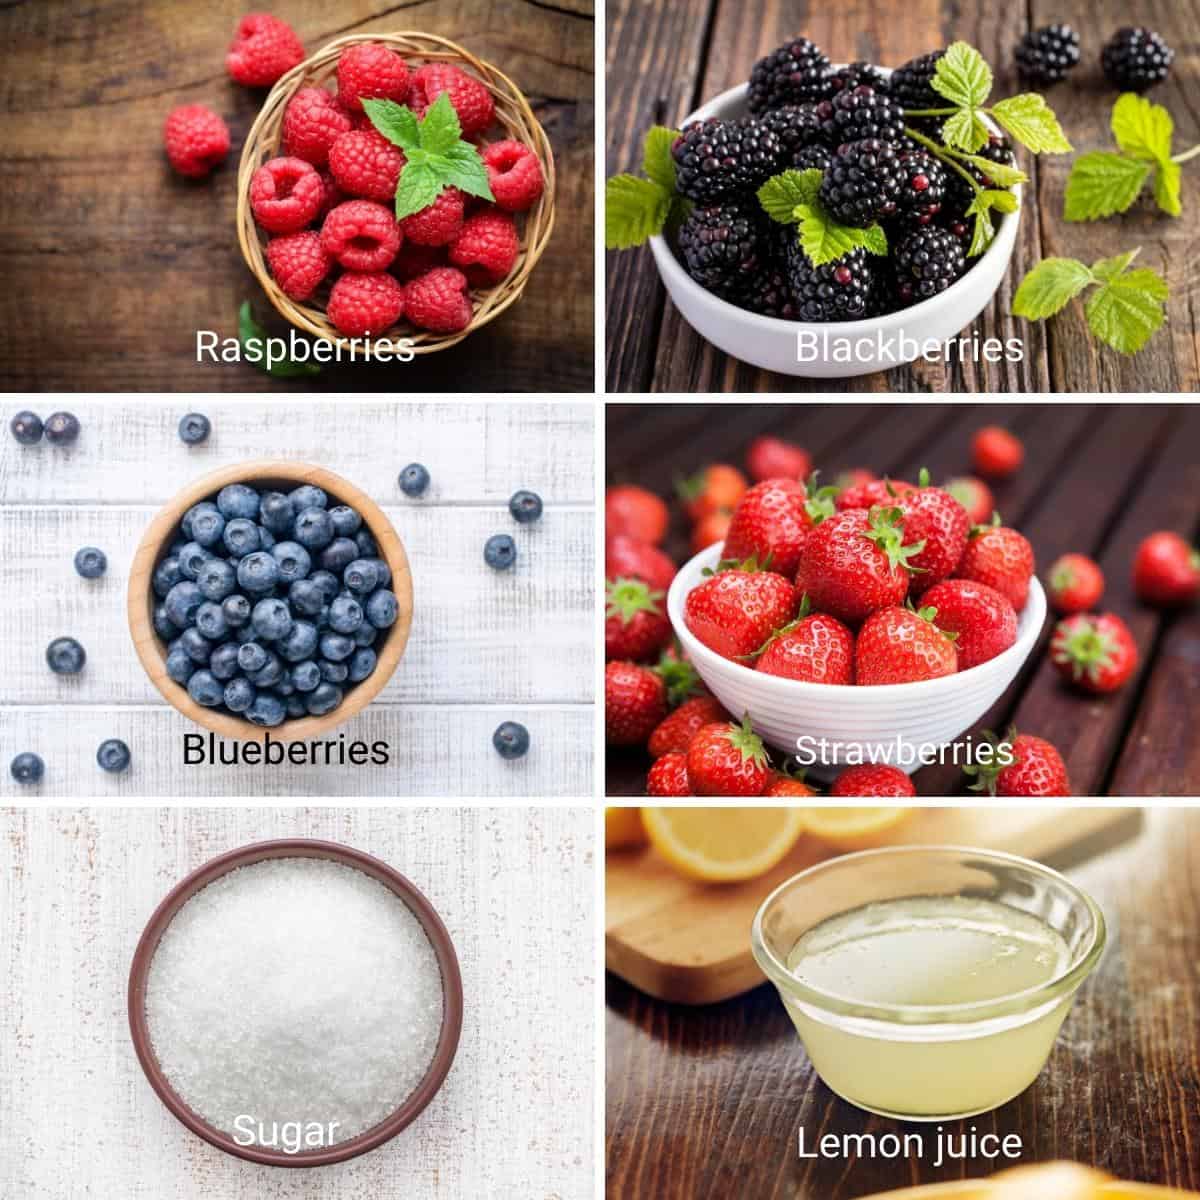
- Mixed berries – Use fresh, plump, sweet berries in season or frozen berries. Both work beautifully with this recipe. You can also use a variety of three, and yet I have used four: raspberries, blackberries, blueberries, and strawberries, and all in equal proportions.
You can use different proportions, and it will reflect in the taste and color of the jam. For example, more blueberries and blackberries will give a darker shade of blue and a little more tartness. In contrast, more raspberries or strawberries will give a lighter shade of blue and be a little sweeter. - Sugar – Unlike commercial jams, I like to use less sugar, which is usually half the quantity of fruit. For example, if I have 1 kg of fruit, I usually add 500 grams of sugar. So, my jam is more fruity rather than just sugary sweet. But if you like it sweet, you can add more. Most commercial jams are made with 3/4 of sugar, in this case 750 grams.
- Lemon Juice – Mixed berries are naturally sweet, so the lemon really helps bring out and enhance their sweetness. It also helps prevent crystallization. Lemons also have a lot of natural pectin.
Step-by-step: Mixed Berry Jam Recipe
- Place two small ceramic plates in the freezer so we can use them to test the jam later. Alternatively, you can use a candy thermometer to check the doneness of the jam.
- Check the berries and remove any bad, discolored, or bruised ones. Give them a quick wash and drain in a colander. Chop large berries like strawberries to make them similar in size.
Pro tip – Soft berries can be used, but discolored and bruised ones will ruin the jam. Also, don’t soak berries in water for too long, as they do soak up moisture. - In a heavy-bottomed pan, combine the berries, sugar, salt, and lemon juice.
Pro tip – If you are using frozen berries, let the berries macerate in sugar and lemon juice for a few hours before cooking. This softens the berry skin considerably. - Cook over medium heat until the sugar dissolves. Then, turn the heat up and let the mixture come to a boil. Let it boil for two minutes on medium-high.
Pro tip – Boiling the jam is important as it releases pectin from the skin and seeds in fruits. - Then, turn the heat to medium-low. The jam should still be simmering, but at a low simmer, not bubbling. Use a vegetable masher to mash the fruit for a smoother, jam-like consistency.
Pro tip – Mashing the fruit is optional, as the fruit will break down into smaller chunks, similar to a preserve as it cooks. However, mashing will give a smoother consistency, like jam. - Continue to simmer for about 20 to 30 minutes more, stirring often to prevent it from sticking to the bottom of the pan. The jam will continue to thicken and deepen in color as it cools.
Pro tip – The cooking time will depend on the quantity of jam and the heat applied to it. It’s okay to cook a little longer, but there must be a simmer for the fruit to release the pectin.

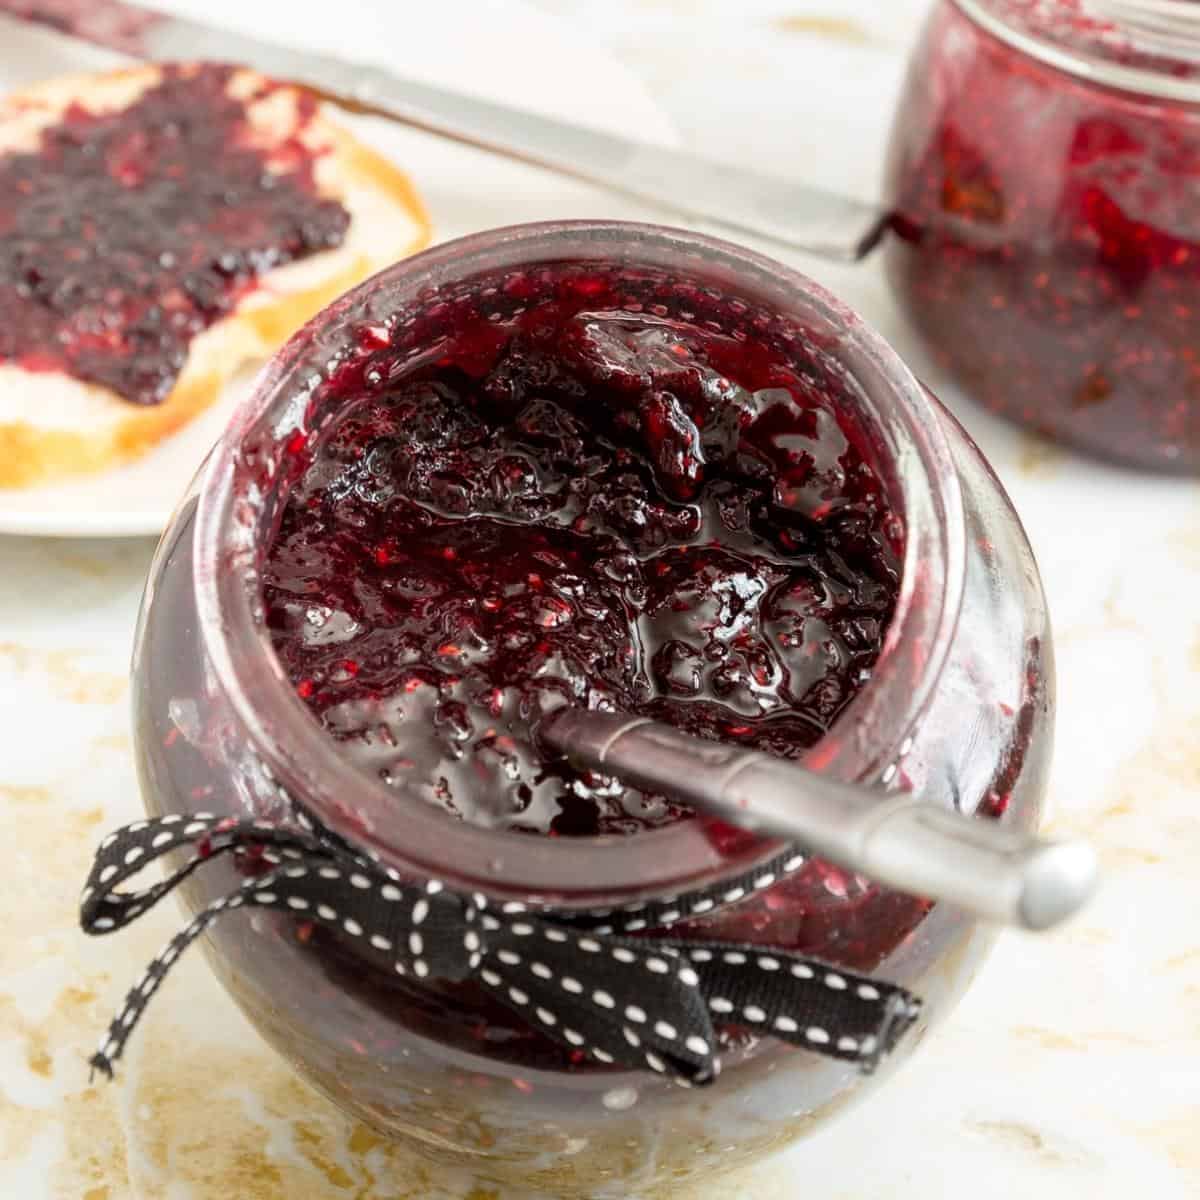
Testing the jam
- Remove one of the ceramic plates from the freezer. Place a teaspoon of jam on the cold plate.
Pro tip – The cold plate will help cool the jam almost instantly and give you a good indication if the jam is ready. - Set aside for 2 to 3 minutes. Then, test with your finger. Simply move/push the jam with your finger. If it wrinkles/crinkles, the jam is ready. And if not, let the jam cook a couple of minutes more and test again.
Pro tip – You may need to test the jam on a ceramic plate more than once or a couple of times, depending on how early you start checking. - Alternatively, you can use a candy thermometer – the jam should reach 105 °C / 221°F.
Pro tip – I find the thermometer to be the easiest and foolproof method to check for doneness. - Optional – Just when you are ready to take the jam off the heat, add a teaspoon of butter and stir well. Butter helps dissolve the foam that accumulates on top of the jam.
Pro tip – You don’t need more than one teaspoon of butter to help with the foam. It will also give you that glossy shine. - Pour the jam into warm, sterilized jars, leaving 1/4 inch space from the top. Use a clean, sterilized knife or spatula to move the jam a bit – this will remove any air pockets.
- Place a piece of wax paper on the top before you place the lid on tightly. Clean the rim of the jar with a clean paper towel. Top the lid.
Alternatively, use the lid with screw-on rings that come with the canning jars.

The canning process (if you plan to can the jam)
Sterilizing the jars
- Sterilize 4 x 8 oz (250 g) jars by washing them in hot, soapy water or cleaning them in the dishwasher with a gentle cycle. Then, place them in the oven for 20 minutes at a low 284°F / 140 °C
Pro tip – I find the dishwasher does a good job of cleaning, and the oven dries any excess moisture in the bottles. - Note – Leave them in the oven until you are ready to use them (you can turn the oven off). Don’t forget to wash and sterilize the bottle lids as well.
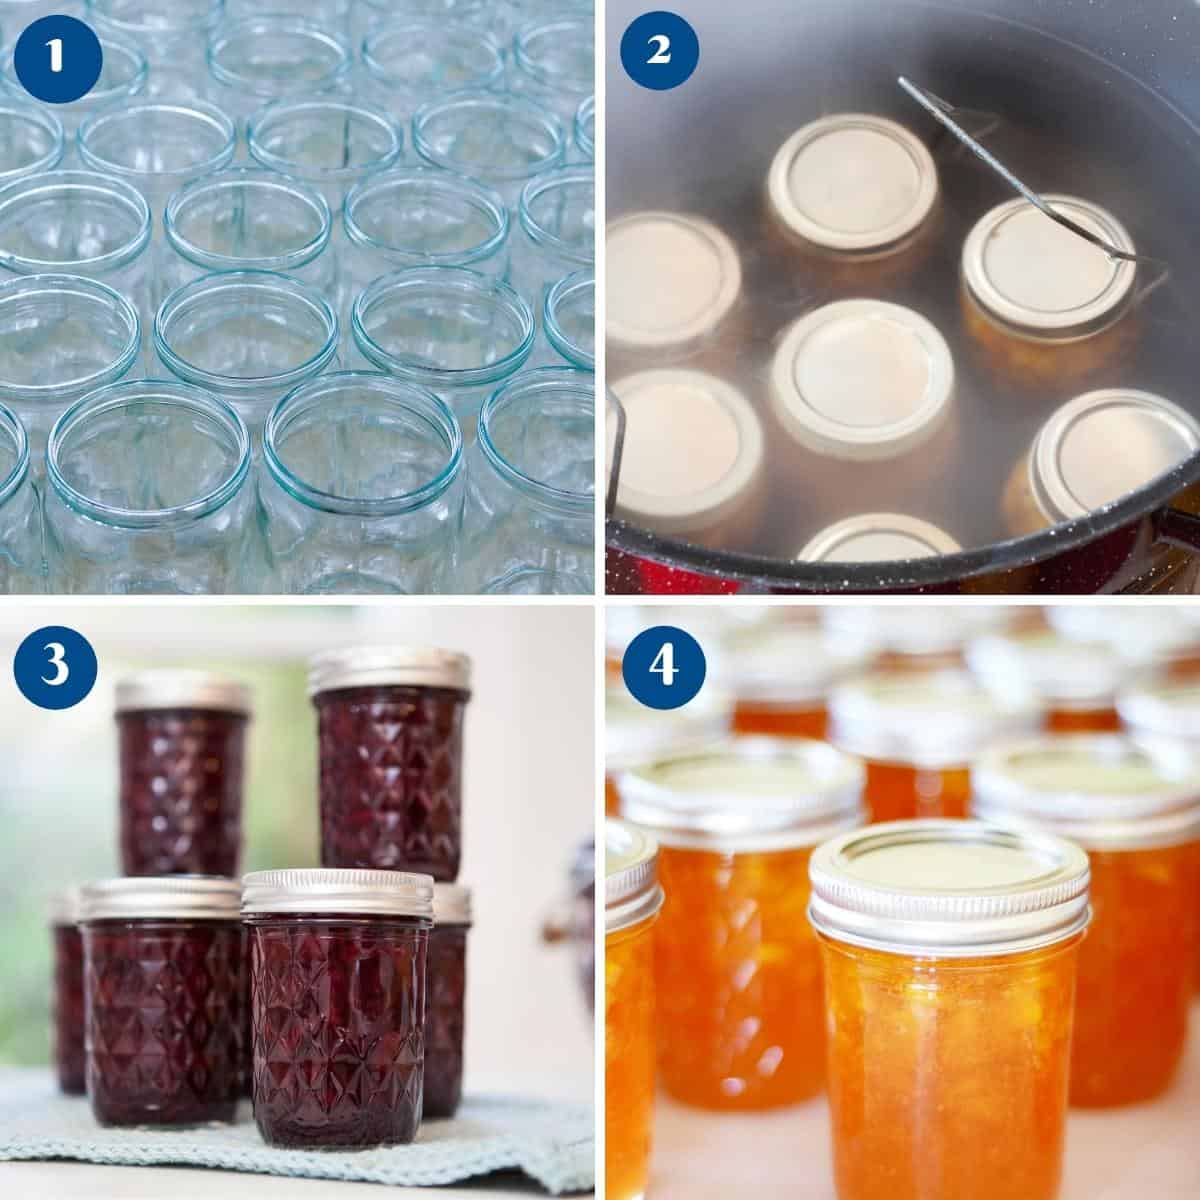
Canning
- Place a rack in the bottom of a large stockpot. Fill half the pot with water. Bring the water in the pot to a boil on high heat.
- Lower the jars over the rack, leaving enough space between the jars.
Pro tip – The water level should be at least an inch above the top of the jars. So, if necessary, pour more boiling water. - Bring the water to a boil again. Cover the pot and process/simmer for 15 minutes.
- Then, carefully remove the jars from the stockpot and place them on a kitchen towel to absorb any excess moisture. Cool completely.
Pro tip – The hot jars are very delicate, so make sure to use tongs when taking them out and place them on soft towels to prevent them from breaking. - Press the top of the lid to ensure the seal is tight – the lid should not move at all. Store in a cool, dry place.
Storage
- If canned, the jam will stay in a cool, dry place in the pantry for up to a year or longer.
- When not canned, the jam will stay at room temperature for a month or more in good weather.
- You can also keep the jam in the fridge for 3 to 6 months.
- Label the jar with the name and date so you know what is in it and when you made it.
Mixed-berry jam without sugar
Sugar helps create pectin, which makes our jam. But what if you can’t have sugar, or you don’t want to eat sugar? You can still make jam. Here’s how.
First, pick the naturally sweetest raspberries you can find at the market. Forget everything you read about pectin and buy a box of natural pectin. These are available in most supermarkets. If you don’t want to use pectin, you can use chia seeds. The difference is that jam with pectin has a longer shelf life than jam with chia seeds. Also, grab some fresh lemon juice, as it contains natural pectin. The formula is pretty simple, and it belongs to my mom.
- With Pectin
- 4 cups of fruits (one or a combination)
- 3 tbsp pectin
- 2 tbsp lemon juice
- 3/4 cup water
- 1/4 cup honey, maple syrup, or 2 tbsp Splenda
Bring everything to a boil and cook on low until it reaches a jam consistency.
- With chia seeds
- 4 cups fruit
- 2 tbsp lemon juice
- 1/4 cup water
- 1/4 cup honey, maple syrup, or 2 tbsp Splenda
Bring all to a boil and cook until thick, then add 2 tbsp of chia seeds.
If you ever find you need to add more sweetness, add a little agave syrup or honey to the jam just before you take it off the heat. This will sweeten it a bit. I used to make no-sugar jams for a friend of my mom long ago because she was diabetic. She really loved the jam, so she enjoyed it for breakfast every day.
- Strawberry Jam – No Pectin (3 ingredients)
- Apricot Jam – No Pectin (3 ingredients)
- Cherry Jam – No Pectin (3 ingredients)
- Apricot Peach Jam – No-Pectin (just 3 ingredients)


Frequently asked questions
Pectin is an essential ingredient for jams, jellies, and preserves. Without pectin, our jams and jellies will not set. Pectin is naturally found in many fruit seeds and skins, but can also be produced artificially.
Commercial pectin is usually made from the fruit rind. Using artificial pectin can reduce jam cooking time and give you a high yield, but it lacks the intense flavor produced by longer, slower cooking from the natural pectin in jam.
All fruits have pectin. Some fruits have more pectin than others, such as berries and apples. Especially in a berry jam, you don’t really need any more pectin.
Our grandmothers did not use any artificial pectin either. And yet, they’ve made us some amazing jams. Low-heat, slow cooking is the key to making a good jam because that’s when the pectin is naturally released.
An acid, like lemon juice, is necessary to keep the sugar from crystallizing, which is why all jam recipes have lemon juice. To fix crystallization, simply heat the jam in a microwave or clean saucepan over medium heat. Add lemon juice and cook until the sugar has melted again. This should fix it.
NO! You don’t. But if you do have a candy thermometer on hand, you can use it and take the guesswork out. I have always used the old-school jam-testing method, but trust me, the thermometer makes life so much easier.

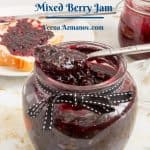
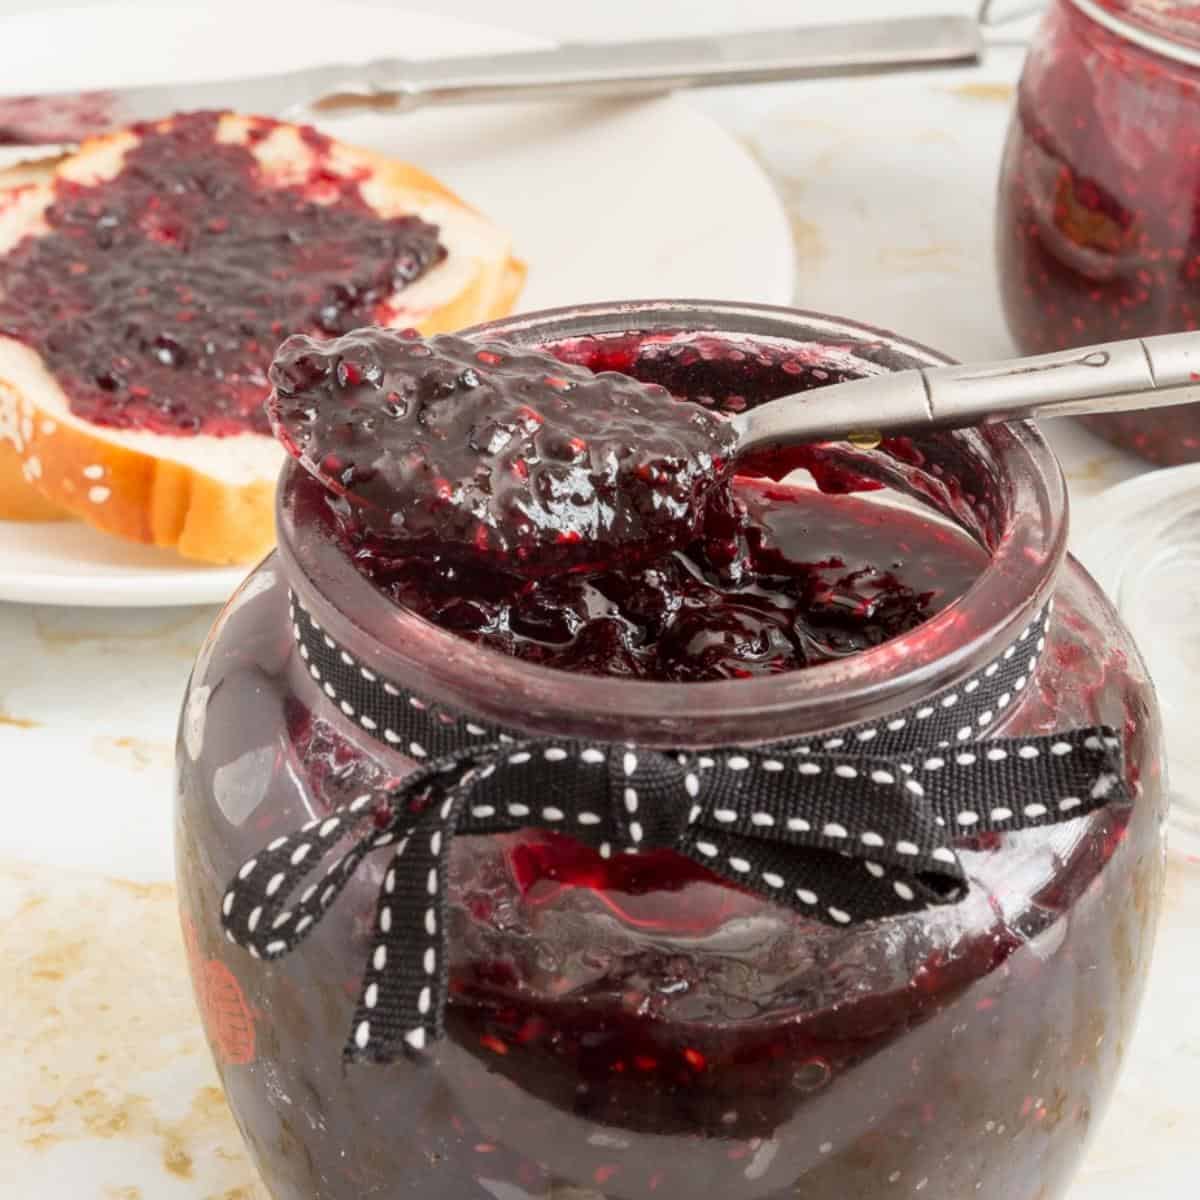
Mixed Berry Jam No Pectin (Low Sugar)
Summer is the best time to make a mixed berry jam when blueberries, raspberries, blackberries, and strawberries are abundant. This jam, which is also commonly known as bumbleberry jam, is low in sugar and made without pectin or artificial flavoring. It takes only 30 minutes to make and is a must-try if you love berries.
Video
Ingredients
- 2 lb (1 kg) Mixed berries raspberries, blackberries, blueberries, strawberries
- 1 lb (500 g) Sugar
- 4 tbsp (60 ml) Lemon juice
- ½ tsp Salt Optional
Method
- Place two small ceramic plates in the freezer so we can use them to test the jam later. Alternatively, you can use a candy thermometer to check the doneness of the jam.
- Check the berries and remove any bad, discolored, or bruised ones. Then, give them a quick wash and drain them in a colander. To make the berries similar in size, chop large berries like strawberries.
- In a heavy bottom pan, combine the berries, sugar, salt, and lemon juice.
- Cook on medium heat until the sugar is dissolved. Then, turn the heat up and let the mixture come to a boil. Let it boil for two minutes on medium-high.
- Then, turn the heat to medium-low. The jam should still be simmering, but at a low simmer, not bubbling. Use a vegetable masher to mash the fruit for a smoother, jam-like consistency.
- Continue to simmer for about 20 to 30 minutes more, stirring often so it does not stick to the bottom of the pan. The jam will continue to thicken and deepen in color as it cooks.
- Remove one of the ceramic plates from the freezer. Place a teaspoon of jam on the cold plate.
- Set aside for 2 to 3 minutes. Then, test with your finger. Simply move/push the jam with your finger. If it wrinkles/crinkles, it means the jam is ready. And if not, let the jam cook for a couple more minutes and test again.
- Alternatively, you can use a candy thermometer – the jam should reach 105°C / 221°F.
- Optional – Just when you are ready to take the jam off the heat, add a teaspoon of butter and stir well. Butter helps dissolve the foam that accumulates on top of the jam.
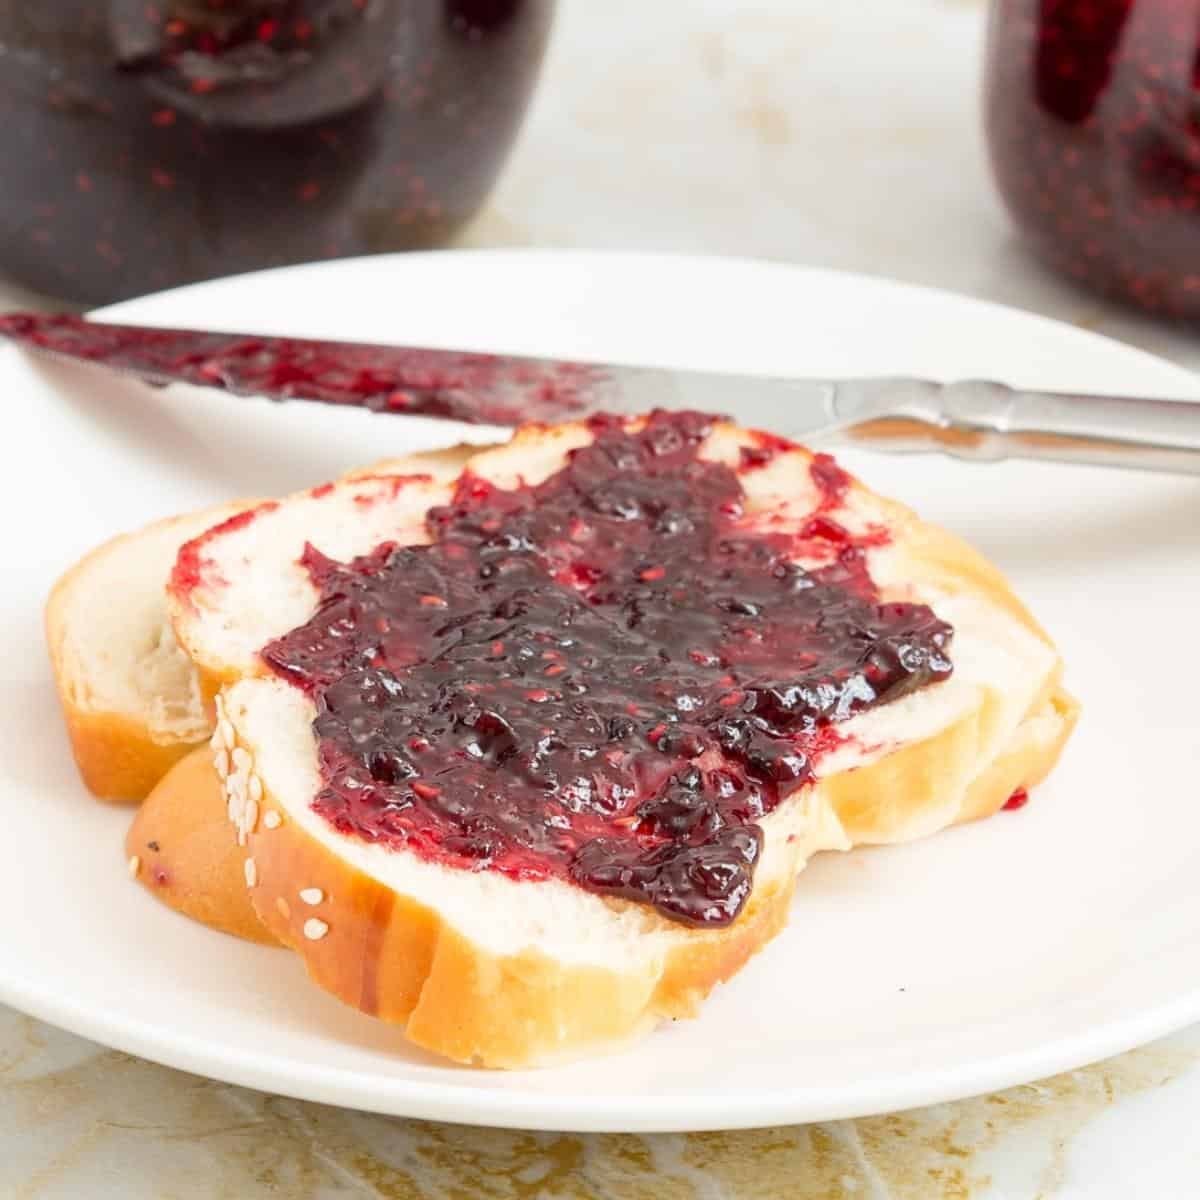
- Pour the jam into warm sterilized jars, leaving 1/4 inch space from the top. Use a clean, sterilized knife or spatula to move the jam a bit – this will remove any air pockets.
- Before you tighten the lid, place a piece of wax paper on top. Clean the rim of the jar with a clean paper towel. Then, top the lid.Alternatively, use the lid with screw-on rings that come with the canning jars.
- Sterilize 4 x 8 oz (250 g) jars by washing them in hot, soapy water or cleaning them in the dishwasher with a gentle cycle. Then, place them in the oven for 20 minutes at a low 284°F / 140 °C.
- Note – Leave them in the oven until you are ready to use them (you can turn the oven off). Don’t forget to wash and sterilize the bottle lids as well.
- Place a rack in the bottom of a large stockpot. Fill half the pot with water. Bring the water in the pot to a boil on high heat.
- Lower the jars over the rack, leaving enough space between the jars.
- Bring the water to a boil again. Cover the pot and process/simmer for 15 minutes.
- Then, carefully remove the jars from the stockpot and place them on a kitchen towel to absorb any excess moisture. Cool completely.
- Press the top of the lid to ensure the seal is tight – the lid should not move at all. Store in a cool, dry place.
Notes
-
- Shelf life – Homemade jams made with sugar and fresh fruit can have a long shelf life. If processed with the canning method and stored properly in a cool, dark place, a jam can last up to 2 years. Once opened, it can be kept in the refrigerator for up to 3 months.
-
- Do you need lemon juice? Almost all jams use lemon juice. Lemon is a great way to cut down on that sweetness with a citrus edge. It also prevents the sugar from crystallizing. Most importantly, lemons help prevent the growth of bacteria when canning jams.
-
- How long do you cook jam? We often say low-heat, slow cooking is what makes a good jam. This does not mean it takes a long time. Usually, a good 20 minutes is all it needs for about 1 kg / 2 lbs of fruit jam to reach a set point. You can start checking the jam after it has been cooking for 18 to 20 minutes.
-
- Jam not setting – Often, the reason jam does not set, after being reduced to half, is that it has not been boiled enough. The low-heat, slow cooking is what makes jam reach its setting point. If cooked too fast, the liquid is reduced, but without going through the natural process of setting. So, low-heat, slow cooking is the key to a perfect jam.
-
- Over-cooked jam – It is possible to overcook jam. It is better to undercook rather than overcook a jam. Because undercooked can be cooked again, but once overcooked, you have to add water to thin the jam. Note that once you add water, you reduce the shelf life of the jam as well. Best to get it right the first time.
Storage
- If canning, the canned jam will stay in a cool, dry place in the pantry for up to a year or even longer.
- When not canned, the jam will stay at room temperature for a month or more in good weather.
- You can also keep the jam in the fridge for 3 to 6 months.
- Label the jar with the name and date so you know what is in it and when you made it.
Equipment you will need


Nutrition
Tried this recipe?
Mention @veenaazmanov_kitchen or tag #veenaazmanovkitchen!
- Fresh Fig Jam – No Pectin (just 3 ingredients)
- Microwave Strawberry Jam – No Pectin
- Blueberry Jam – No Pectin (3 ingredients)
- See all jam recipes


Don’t lose this recipe! Save it for Later!
📌 Save this Recipe for later on Pinterest so you can easily find it again.
⭐ Add Veena Azmanov Kitchen to your Google Preferred Sources.
It helps Google show you more of our recipes.
📧 Subscribe for new recipes delivered to your inbox.
🎥 Follow us for more recipes


Beautiful jam!!! Not too sweet but packed with fruit flavour. Simple recipe and clear instructions. this is a firm favourite in my house. I have even made it with frozen berries from the supermarket during the winter months… a dash of Kirsch and a pretty little jar make lovely Christmas presents!!!
Thank you, Christiane, for the lovely feedback. Happy you enjoyed this jam. Yes, Kirsch is a perfect with berries and jams are always a great gift.
Cleaning out my freezer, I found some raspberries and strawberries and decided to try homemade jam for the first time. This recipe was a great, easy, yummy way to use them up and so much healthier than even most store bought natural jams!
Thanks, Rebekah. So happy you enjoyed this recipe. Thanks for coming back to write this feedback
I found this just in time for all the summer berries that are in season right now. I can’t wait to make this and spread it on literally everything I can.
Yes, lots of berries in season now. You must try Des.
What an amazingly detailed post for making jam!! So helpful – loving all your tips and expert advice in here! I have never heard of the name bumbleberry jam but so awesome that it is a mixture of 4 berries!
Thanks, Amanda. Glad you found my post useful.
I love making jams at home , there is something so authentic about it 🙂 My favorite is mixed berry like this one!
Thanks, Analida. Very true, nothing like homemade jam.
I’ve never heard of bumbleberry jam but the name is perfect. I completely agree why have one berry when you can have them all. This mixed berry jam will be perfect for canning now and eating all year.
Thanks, Kelly. I do love one berry jams too.
I think homemade jam is always the best! and you always can play around with different berries and flavors! Saving the recipe!
Absolutely Veronika. Homemade jam is the best.
Well, what do you know!! I never heard of bumbleberry and if I had I wouldn’t have known what it is. What a perfect time for you to post this recipe now that berries are in season. This is one jam I’d love to make ASAP! I love all of the uses you give for this jam. Very versatile. In fact, I believe I’ll make up a few pints and share with my kids.
Ha… Yeah, I learned that a few years ago too. You must try this jam. So good.
I would like to subscribe to your wonderful site! I didn’t find a link for that.
Val Kasnick
Thanks, Val. There are two opt-in for email on my blog. In fact, if you subscribe it will send you my Free Ebook which is very useful.
When I hover my mouse over the “subscribe” button, it highlights purple but when I click on it, nothing happens! Am I subscribed??
No, You have to click on the subscribe button for the email to register. It will send you a confirmation email as well.
Thanks
My neighbor just gave me a whole bunch of fresh berries and I was just wondering what to do with them. Now I know! I really appreciate all the tips and tricks and step by step instructions in this post. You make it foolproof! Thank you!
Thanks, Rebecca. I hope you try this one. So easy to make.