Mixed Berry Jam No Pectin (Low Sugar)
Diet : GF, NF, Eggless, Vegetarian
Calories: 6
Adjust Servings Here: 4 jars
Description
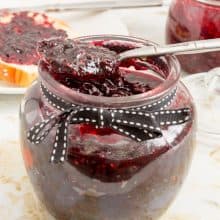
Summer is the best time to make a mixed berry jam when blueberries, raspberries, blackberries, and strawberries are abundant. This jam, which is also commonly known as bumbleberry jam, is low in sugar and made without pectin or artificial flavoring. It takes only 30 minutes to make and is a must-try if you love berries.
Ingredients
Make 4 x 250 g jars
- 2 lb (1 kg) Mixed berries raspberries, blackberries, blueberries, strawberries
- 1 lb (500 g) Sugar
- 4 tbsp (60 ml) Lemon juice
- ½ tsp Salt Optional
Instructions
- Place two small ceramic plates in the freezer so we can use them to test the jam later. Alternatively, you can use a candy thermometer to check the doneness of the jam.
- Check the berries and remove any bad, discolored, or bruised ones. Then, give them a quick wash and drain them in a colander. To make the berries similar in size, chop large berries like strawberries.
- In a heavy bottom pan, combine the berries, sugar, salt, and lemon juice.
- Cook on medium heat until the sugar is dissolved. Then, turn the heat up and let the mixture come to a boil. Let it boil for two minutes on medium-high.
- Then, turn the heat to medium-low. The jam should still be simmering, but at a low simmer, not bubbling. Use a vegetable masher to mash the fruit for a smoother, jam-like consistency.
- Continue to simmer for about 20 to 30 minutes more, stirring often so it does not stick to the bottom of the pan. The jam will continue to thicken and deepen in color as it cooks.
Testing the jam
- Remove one of the ceramic plates from the freezer. Place a teaspoon of jam on the cold plate.
- Set aside for 2 to 3 minutes. Then, test with your finger. Simply move/push the jam with your finger. If it wrinkles/crinkles, it means the jam is ready. And if not, let the jam cook for a couple more minutes and test again.
- Alternatively, you can use a candy thermometer - the jam should reach 105°C / 221°F.
- Optional - Just when you are ready to take the jam off the heat, add a teaspoon of butter and stir well. Butter helps dissolve the foam that accumulates on top of the jam.
- Pour the jam into warm sterilized jars, leaving 1/4 inch space from the top. Use a clean, sterilized knife or spatula to move the jam a bit – this will remove any air pockets.
- Before you tighten the lid, place a piece of wax paper on top. Clean the rim of the jar with a clean paper towel. Then, top the lid.Alternatively, use the lid with screw-on rings that come with the canning jars.
The canning process (if you plan to can the jam)
Sterilizing the jars
- Sterilize 4 x 8 oz (250 g) jars by washing them in hot, soapy water or cleaning them in the dishwasher with a gentle cycle. Then, place them in the oven for 20 minutes at a low 284°F / 140 °C.
- Note - Leave them in the oven until you are ready to use them (you can turn the oven off). Don’t forget to wash and sterilize the bottle lids as well.
Canning
- Place a rack in the bottom of a large stockpot. Fill half the pot with water. Bring the water in the pot to a boil on high heat.
- Lower the jars over the rack, leaving enough space between the jars.
- Bring the water to a boil again. Cover the pot and process/simmer for 15 minutes.
- Then, carefully remove the jars from the stockpot and place them on a kitchen towel to absorb any excess moisture. Cool completely.
- Press the top of the lid to ensure the seal is tight – the lid should not move at all. Store in a cool, dry place.
The nutrition information and metric conversion are calculated automatically. I cannot guarantee its accuracy. If this data is important to you please verify with your trusted nutrition calculator. Thank you
Did you make this recipe? Share it with me.Tag @veenaazmanov_kitchen on instagram or #hashtag it #veenaazmanovkitchen