Bundt Marble Cakes
 Prep Time 15 minutes Cook Time 55 minutes Total Time 1 hour 10 minutes
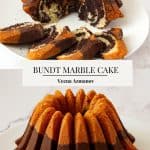
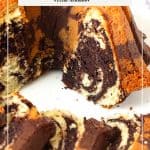
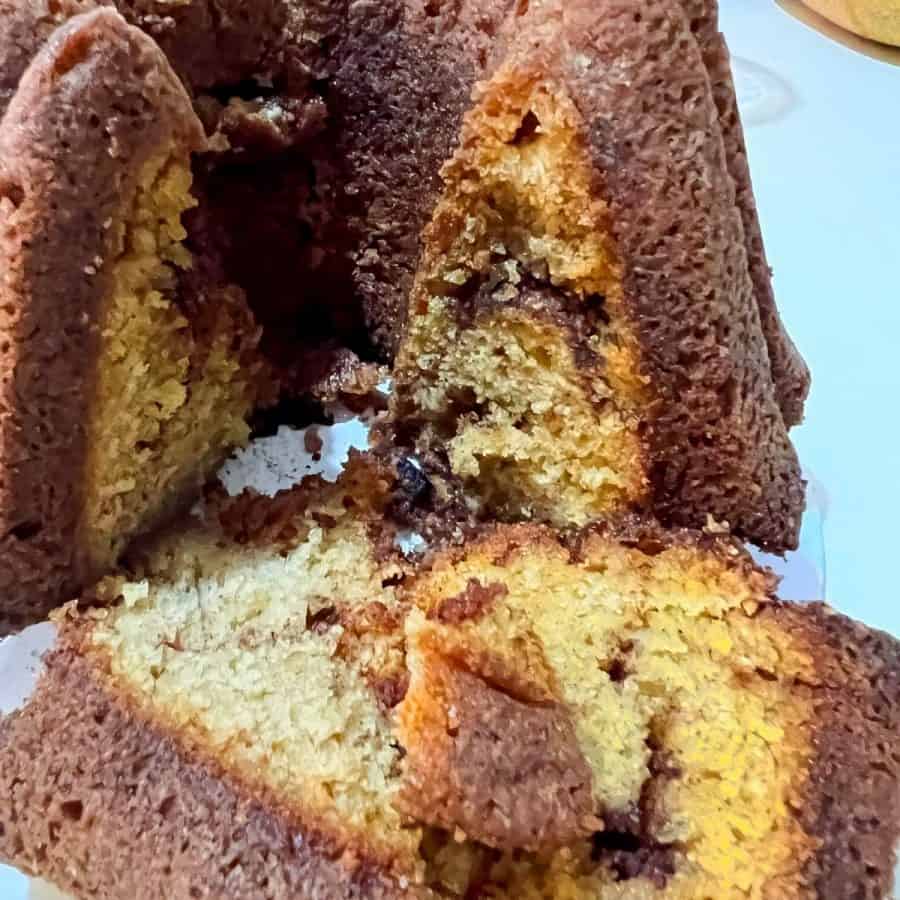
Imagine slicing into a bundt marble cake and being greeted with a mesmerizing burst of swirling colors. It’s an edible work of art that captures the imagination and leaves your guests in awe. But how exactly do professionals achieve those perfect swirls?

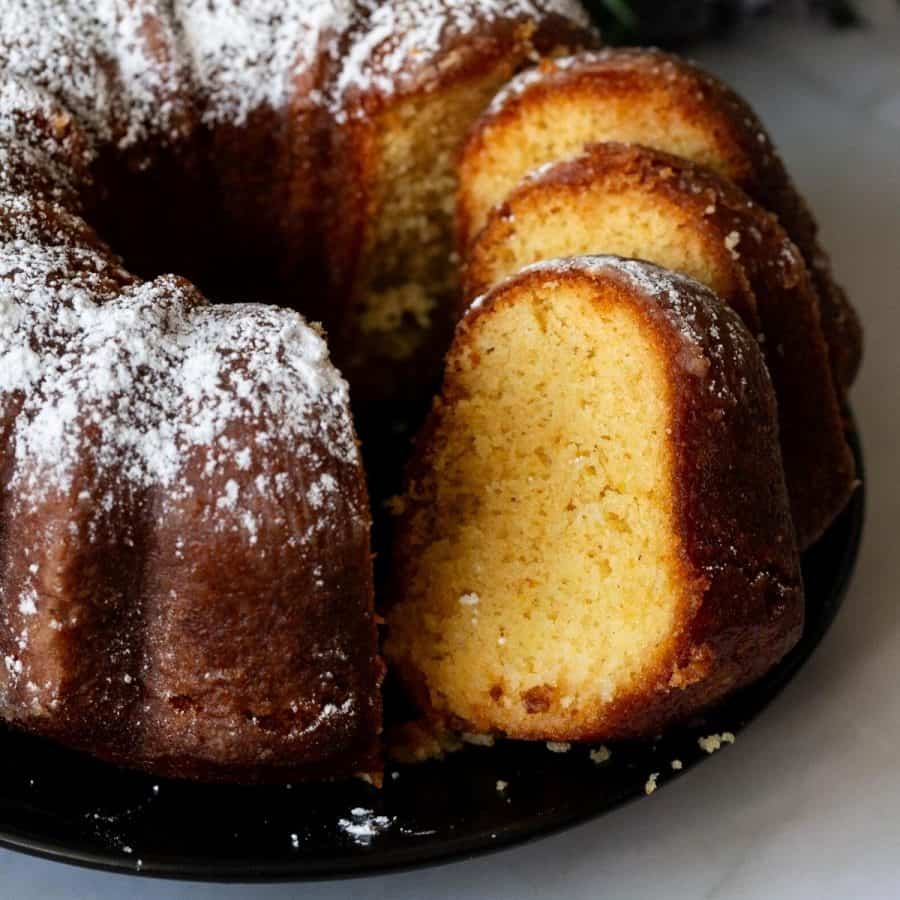
There’s something about a Marble Bundt Cake that makes it feel extra special. Maybe it’s the beautiful swirls of chocolate and vanilla, or the way the Bundt pan gives it that perfect shape—but one thing’s for sure, every time I make this cake, it never lasts long!
I’ve been making marble cakes for years, but I still get excited when I slice into one and see the perfectly swirled pattern inside. The best part? It’s not just pretty—it’s also soft, buttery, and full of flavor. The vanilla keeps it light and fragrant, while the chocolate adds just the right amount of richness.
I once brought this cake to a family gathering, thinking it would be a simple, crowd-pleasing dessert. But as soon as people saw it, they started calling dibs on slices before I even cut it! Someone even asked if I had any left at home—because they wanted to take another one for later.
Now, whenever I make this cake, I know to bake an extra one—because with its gorgeous swirls and rich flavor, one is never enough.
Why is this the best bundt cake?
- First and foremost, the visual appeal of a marble cake is hard to resist. The elegant swirl pattern, created by the skillful blending of chocolate and vanilla batters, adds a touch of sophistication to any occasion.
- But it’s not just about appearances. A well-made marble cake also delights the taste buds with its delicious combination of flavors.
- Furthermore, a marble cake offers a delightful surprise as you slice into it. Each piece reveals a unique swirl pattern, making every slice a miniature work of art.

Ingredients and substitutes
- First and foremost, let’s talk flour. All-purpose flour is typically used as the base in marble cake recipes, providing structure and stability.
- Next up, we have sugar. Granulated white sugar is the go-to choice for most recipes, as it blends easily and adds sweetness. However, if you want a deeper, more caramel-like flavor, you can experiment with brown sugar.
- Butter, the star of any good cake, is key to achieving a rich and moist texture. Unsalted butter is generally preferred, as it allows you to control the salt level in your recipe. However, if all you have on hand is salted butter, you can reduce or eliminate any additional salt called for in the recipe.
- Eggs are another essential ingredient in bundt marble cakes, providing structure and moisture. If you want to make your cake a little lighter, you can substitute some of the whole eggs with egg whites. Conversely, add an extra egg yolk or two for a richer, denser cake.
- To infuse your marble cake with flavors that complement the visual appeal, vanilla extract is a must. It adds depth and warmth to the overall taste profile. Feel free to experiment with other extracts like almond or a touch of citrus zest for a refreshing twist if you’re feeling adventurous.
- Lastly, don’t forget the cocoa paste. This is what gives the chocolate swirls their distinctive flavor and color. While most recipes call for unsweetened cocoa powder, you can use Dutch-processed cocoa for a smoother and more intense chocolate taste.

Step-by-step bundt marble cake
- Prep – Preheat your oven to 350°F / 175°C / Gas mark 4. Grease and flour an 8-inch Bundt cake pan thoroughly to prevent sticking.
- Cocoa paste – Mix the cocoa paste with cocoa powder and hot water in a small bowl. Stir until you have a smooth chocolate paste. Set it aside to cool while you prepare the batter.

- Dry ingredients – Whisk together the all-purpose flour, baking powder, and salt in a medium-sized mixing bowl. Set this dry mixture aside.
- Wet ingredients – In a large mixing bowl, using an electric mixer or a stand mixer, cream the softened butter and granulated white sugar until light and fluffy, which should take about 3-4 minutes. Add the eggs one at a time, mixing well after each addition. Be sure to scrape down the sides of the bowl to ensure even mixing. Mix in the vanilla extract.
- Dry to wet – Gradually add the dry mixture to the wet mixture in three parts, alternating with the buttermilk. Begin and end with the dry ingredients, mixing until just combined after each addition. Be careful not to overmix; mix until the ingredients are incorporated.
- Divide – Transfer half of the vanilla batter to another bowl. Gently fold the cocoa paste into this portion of the batter until it’s well combined. Now you should have two bowls, one with vanilla batter and the other with chocolate batter.

- Layer – Begin layering the batters in your prepared Bundt pan. Start by spooning a layer of vanilla batter into the bottom of the pan. Then, spoon the chocolate batter on top of the vanilla. Continue alternating between the two batters until all the batter is used up.
- Marble – Use a butter knife or a skewer to gently swirl the two batters together in the pan to create a marbled effect.
- Bake in the preheated oven for approximately 45-55 minutes, or until a toothpick inserted into the center of the cake comes out clean, with a few moist crumbs attached.
- Cool – Allow the cake to cool in the pan for about 10 minutes before transferring it to a wire rack to cool completely.
- Dust – Once the cake has cooled, dust it with powdered sugar or drizzle with a simple glaze if desired. Slice and enjoy your homemade 8-inch Bundt Marble Cake!


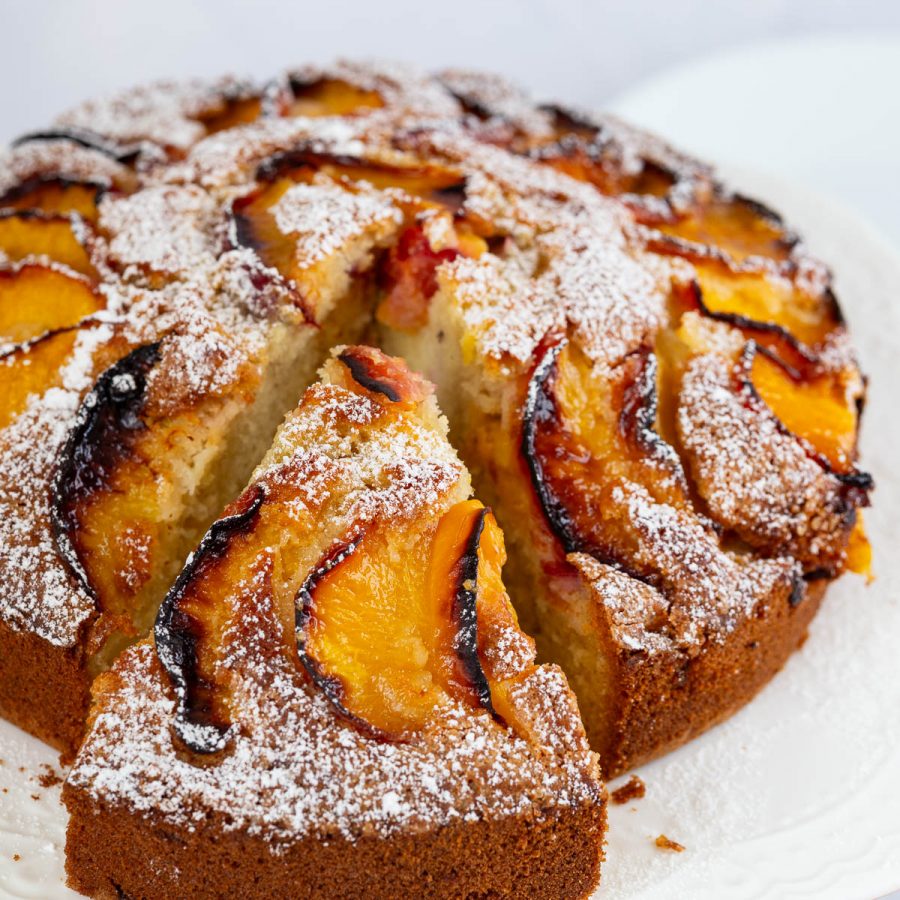
- Marbled Heart Cookies – Valentine Sugar Cookies
- Strawberry Ice Cream
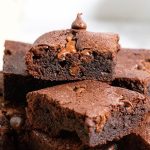
- Cream Cheese Brownies
- Cinnamon Coffee Cake
- Chocolate Bundt Cake with Chocolate Glaze
Frequently asked questions
The key to achieving a beautiful swirl pattern is to gently fold the two batters together, making sure not to overmix. Use a large spoon or spatula to scoop portions of each batter into the bundt pan, alternating between the two. Once all the batter is in the pan, take a butter knife or skewer and make a few figure-eight motions through the batter, creating a swirling effect.
Yes, you can freeze a marble cake! Once it has completely cooled, wrap it tightly in plastic wrap or aluminum foil and place it in a freezer-safe container. It can be stored in the freezer for up to three months. When you’re ready to enjoy it, thaw the cake in the refrigerator overnight or at room temperature for a few hours, and it will be as delicious as freshly baked.
Absolutely! While the traditional bundt shape is classic and beautiful, there are countless creative ways to serve marble cake. You can slice it into individual servings and decorate each piece with a dollop of whipped cream and some fresh fruit. Another idea is to transform your marble cake into a show-stopping trifle by cutting it into small cubes and layering it with whipped cream, fresh berries, and a drizzle of chocolate sauce in a glass trifle dish. The possibilities are endless, so let your creativity run wild.
Bundt Marble Cake
Imagine slicing into a bundt marble cake and being greeted with a mesmerizing burst of swirling colors. It’s an edible work of art that captures the imagination and leaves your guests in awe. But how exactly do professionals achieve those perfect swirls?
Video
Ingredients
- 2 ½ cups (310 g) All-purpose flour
- 1 ½ tsp Baking powder
- 1 tsp Baking soda
- ½ tsp Kosher salt
- 1 cup (227 g) Unsalted butter at room temperature
- 1 ¾ cups (350 g) Granulated white sugar
- 4 large (200 g) Eggs
- 1 cup (240 ml) Buttermilk
- 2 tsp Vanilla extract
- ⅓ cup (28 g) Unsweetened cocoa powder
- ¼ cup (60 ml) Hot water
Method
- Prep – Preheat your oven to 350°F /175°C/ Gas mark 4. Grease and flour an 8-inch Bundt cake pan thoroughly to prevent sticking.
- Cocoa paste – Mix the cocoa paste with cocoa powder and hot water in a small bowl. Stir until you have a smooth chocolate paste. Set it aside to cool while you prepare the batter.⅓ cup Unsweetened cocoa powder, ¼ cup Hot water
- Dry ingredients – Whisk together the all-purpose flour, baking powder, and salt in a medium-sized mixing bowl. Set this dry mixture aside.2 ½ cups All-purpose flour, 1 ½ tsp Baking powder, 1 tsp Baking soda , ½ tsp Kosher salt
- Wet ingredients – In a large mixing bowl, using an electric mixer or a stand mixer, cream the softened butter and granulated white sugar until light and fluffy, which should take about 3-4 minutes. Add the eggs one at a time, mixing well after each addition. Be sure to scrape down the sides of the bowl to ensure even mixing. Mix in the vanilla extract.1 cup Unsalted butter, 1 ¾ cups Granulated white sugar, 4 large Eggs, 1 cup Buttermilk, 2 tsp Vanilla extract
- Dry to wet – Gradually add the dry mixture to the wet mixture in three parts, alternating with the buttermilk. Begin and end with the dry ingredients, mixing until just combined after each addition. Be careful not to overmix; mix until the ingredients are incorporated.
- Divide – Transfer half of the vanilla batter to another bowl. Gently fold the cocoa paste into this portion of the batter until it's well combined. Now you should have two bowls, one with vanilla batter and the other with chocolate batter.
- Layer – Begin layering the batters in your prepared Bundt pan. Start by spooning a layer of vanilla batter into the bottom of the pan. Then, spoon the chocolate batter on top of the vanilla. Continue alternating between the two batters until all the batter is used up.
- Marble – Use a butter knife or a skewer to gently swirl the two batters together in the pan to create a marbled effect.
- Bake in the preheated oven for approximately 45-55 minutes, or until a toothpick inserted into the center of the cake comes out clean, with a few moist crumbs attached.
- Cool – Allow the cake to cool in the pan for about 10 minutes before transferring it to a wire rack to cool completely.
- Dust – Once the cake has cooled, dust it with powdered sugar or drizzle with a simple glaze if desired. Slice and enjoy your homemade 8-inch Bundt Marble Cake!
Notes
- First, make sure you have the right equipment. A good quality bundt pan with a non-stick coating is essential for achieving those beautiful swirls. It allows the batter to evenly distribute throughout the pan, creating an elegant marbled effect. Additionally, a sturdy mixing bowl and a reliable electric mixer will make your cake-making process much smoother.
- Next, take your time when layering the batter. Pouring the two contrasting batters slowly into the pan is key to achieving well-defined swirls. Start by pouring one batter in the center and then the other on top of it. As you continue layering, the batters will naturally merge and create beautiful patterns. Remember not to mix or stir the batters together, as this will result in a blended cake rather than distinct swirls.
- Another important tip is to ensure that both batters are at a similar consistency. If one batter is thicker or thinner than the other, it can affect the way they swirl together. Adjust the texture of each batter by adding a little extra liquid or flour as needed until they have the same pourable consistency. This will help the batters blend harmoniously and create a stunning marbling effect.
- Once your cake is in the oven, resist the temptation to open the door too frequently. Opening the oven door can cause fluctuations in temperature and disrupt the baking process, resulting in an unevenly cooked cake. Instead, rely on the suggested baking time and perform a quick toothpick test near the end to determine if the cake is fully baked. This will ensure a moist and tender crumb with a visually appealing swirl pattern.
Nutrition
Tried this recipe?
Mention @veenaazmanov_kitchen or tag #veenaazmanovkitchen!

Don’t lose this recipe! Save it for Later!
📌 Save this Recipe for later on Pinterest so you can easily find it again.
⭐ Add Veena Azmanov Kitchen to your Google Preferred Sources.
It helps Google show you more of our recipes.
📧 Subscribe for new recipes delivered to your inbox.
🎥 Follow us for more recipes


Such a delicious marble bundt cake! So tender and beautiful inside. It’s just like the one my grandma always makes!
I made this cake for brunch with friends this weekend. It was a hit. Super moist and beautiful.