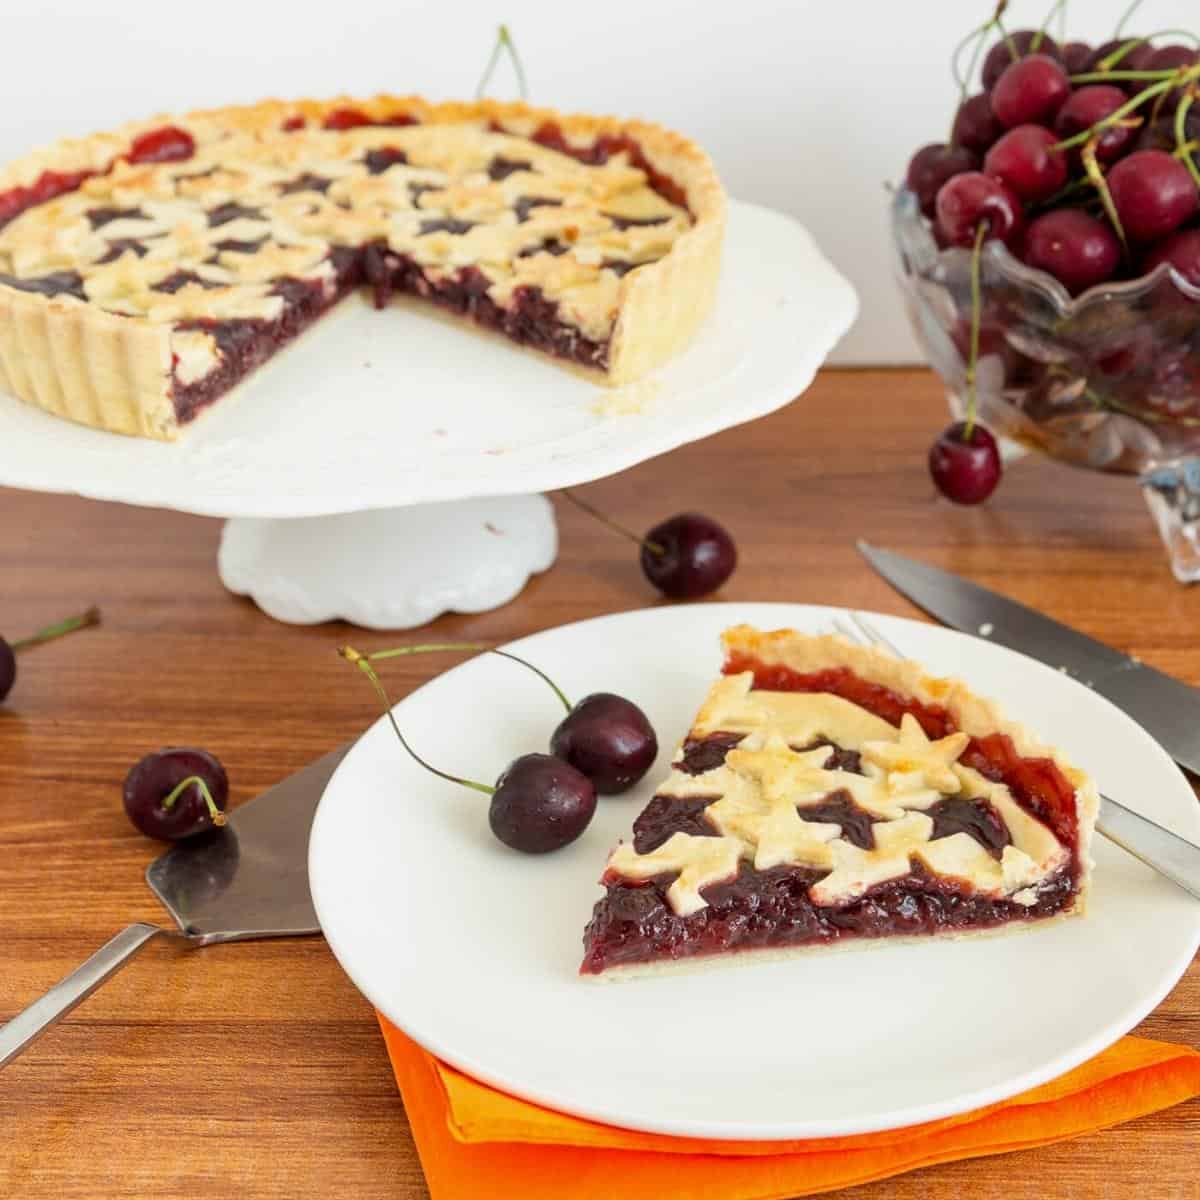
Fresh Cherry Pie Recipe
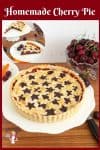
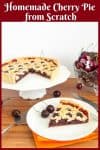
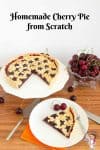


Cherry season is the best excuse to bake a classic, fresh cherry pie recipe from scratch! With a flaky homemade crust and sweet-tart cherry pie filling, this pie is an essential summer dessert. Whether you’re new to baking or a seasoned home baker, this easy cherry pie recipe will guide you to a gorgeous pie that slices beautifully and tastes even better.
As a mom of two, cherry season is one of my favorites because it’s the perfect excuse to get the kids in the kitchen. There’s something about pitting cherries together that turns into a giggly, messy bonding moment, and this cherry pie recipe is our go-to summer treat. It’s the same recipe I used to make for family picnics when I was just learning to bake, and it never fails to bring a taste of summer to the table.
Why you’ll love this pie?
- Uses fresh cherries or frozen for year-round baking.
- Buttery homemade crust that doesn’t get soggy.
- Sweet, thick cherry pie filling that slices beautifully.
- Easy-to-follow steps, even if you’re new to pies.
- Perfect for holidays, summer desserts, and weekend treats.
Ingredients and substitutes
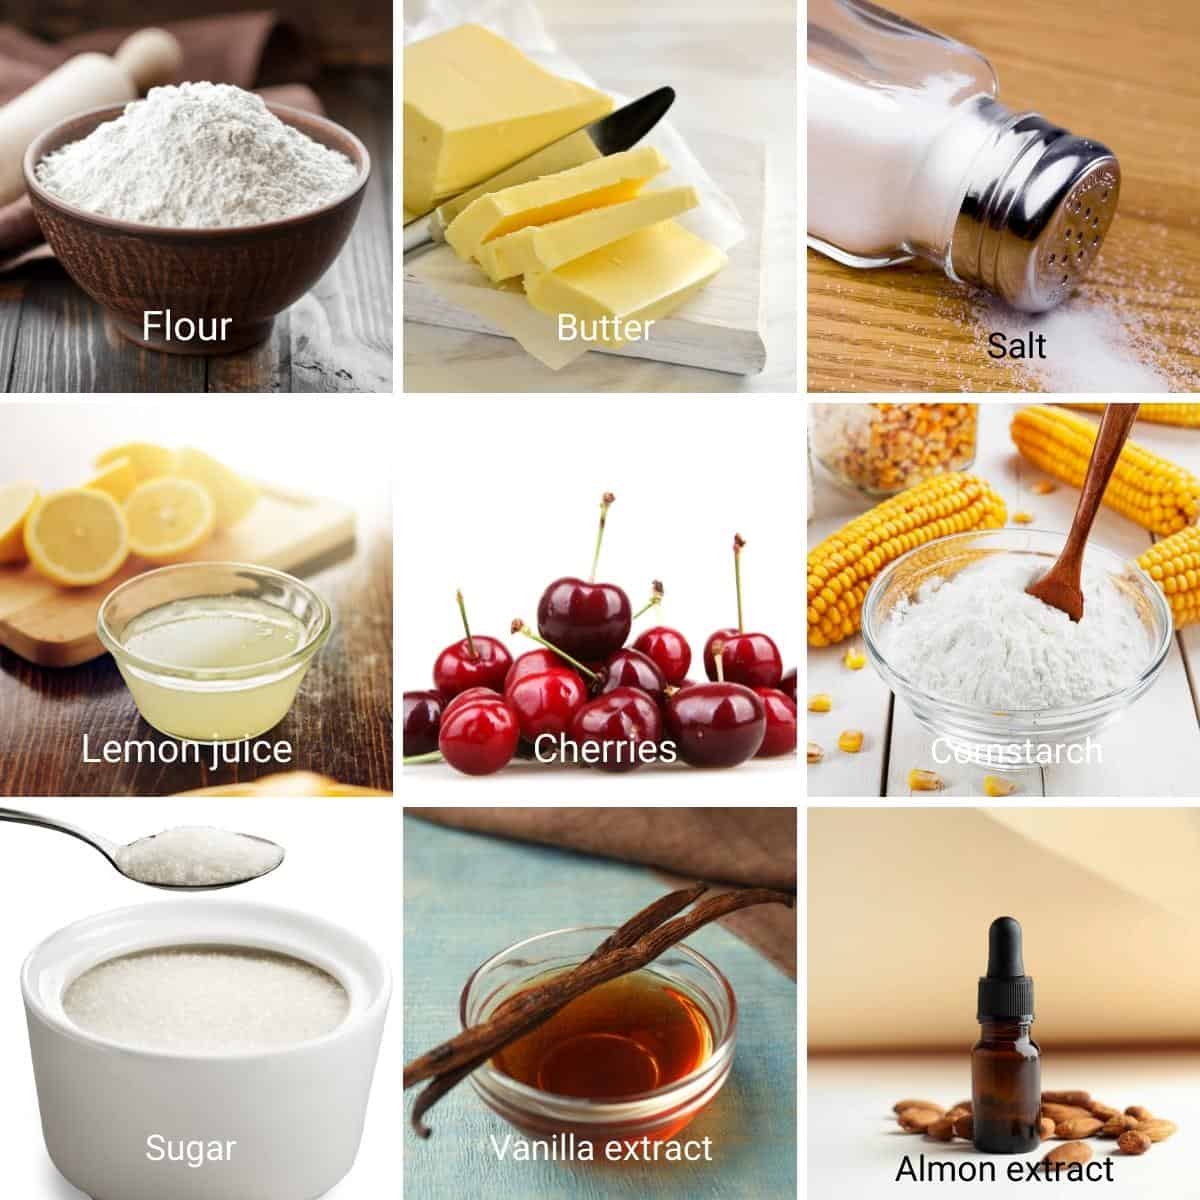
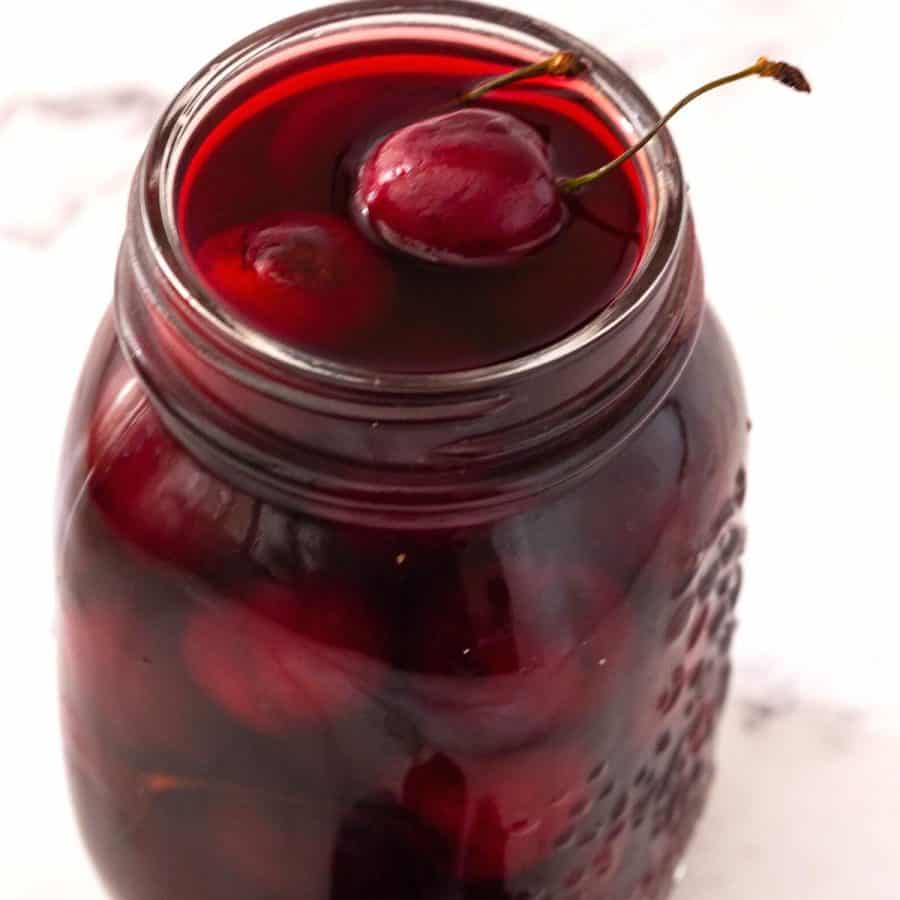
- Cherries: I use fresh sweet cherries for the best cherry pie flavor, but you can use frozen cherries without thawing first. If using sour cherries, taste and add 2 tablespoons more sugar if needed.
- Sugar: Essential for balancing the tartness of the cherries and adding a lovely syrup to your cherry pie filling. You can use brown sugar for a deeper flavor.
- Lemon Juice: Adds brightness and helps the cherry filling thicken and gel properly. You can swap with lime juice if that’s what you have.
- Cornstarch: Helps thicken the cherry pie filling so it doesn’t run when sliced. You can use tapioca flour, arrowroot, or rice flour as alternatives.
- Pie Crust: I use a homemade buttery pie crust for this cherry pie, but a store-bought pie crust works well if you need a shortcut.
Step-by-step: Easy cherry pie recipe
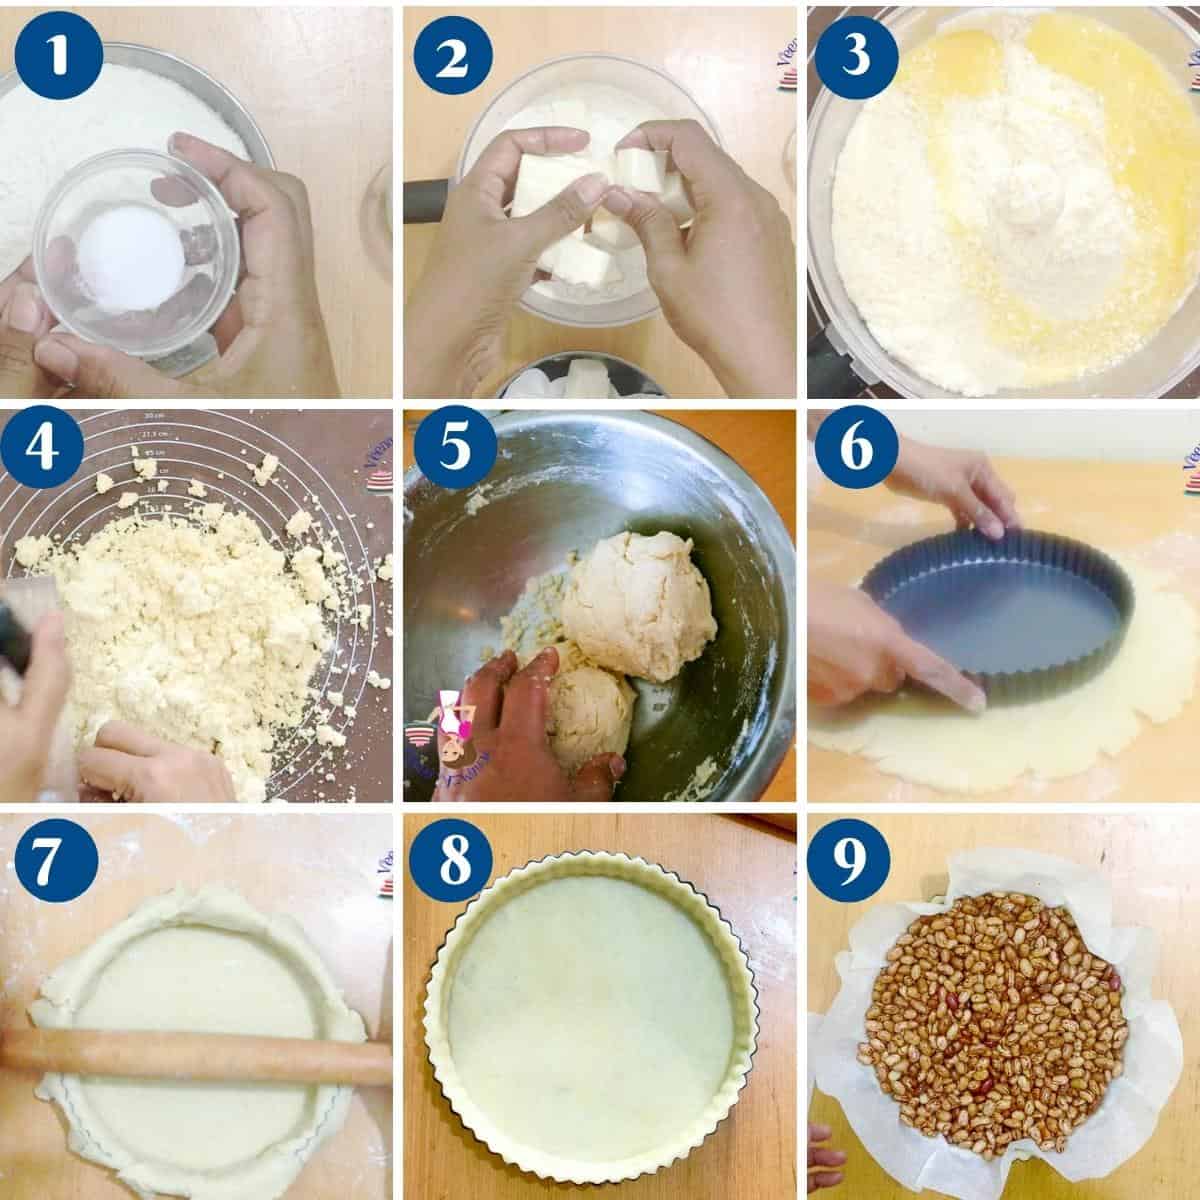
- Make the Double Pie Crust – In a food processor (or a bowl with a pastry cutter), pulse the cold butter, flour, and salt until the mixture resembles coarse breadcrumbs. Mix cold water and an egg, then add just enough to bring the dough together when pressed—don’t overwork it, or your pie crust won’t be flaky.
Pro tip – Chill your pie dough for at least 30 minutes so it rolls easily and doesn’t shrink while baking. Flatten it into two discs, one slightly larger for the bottom crust and one for the top.
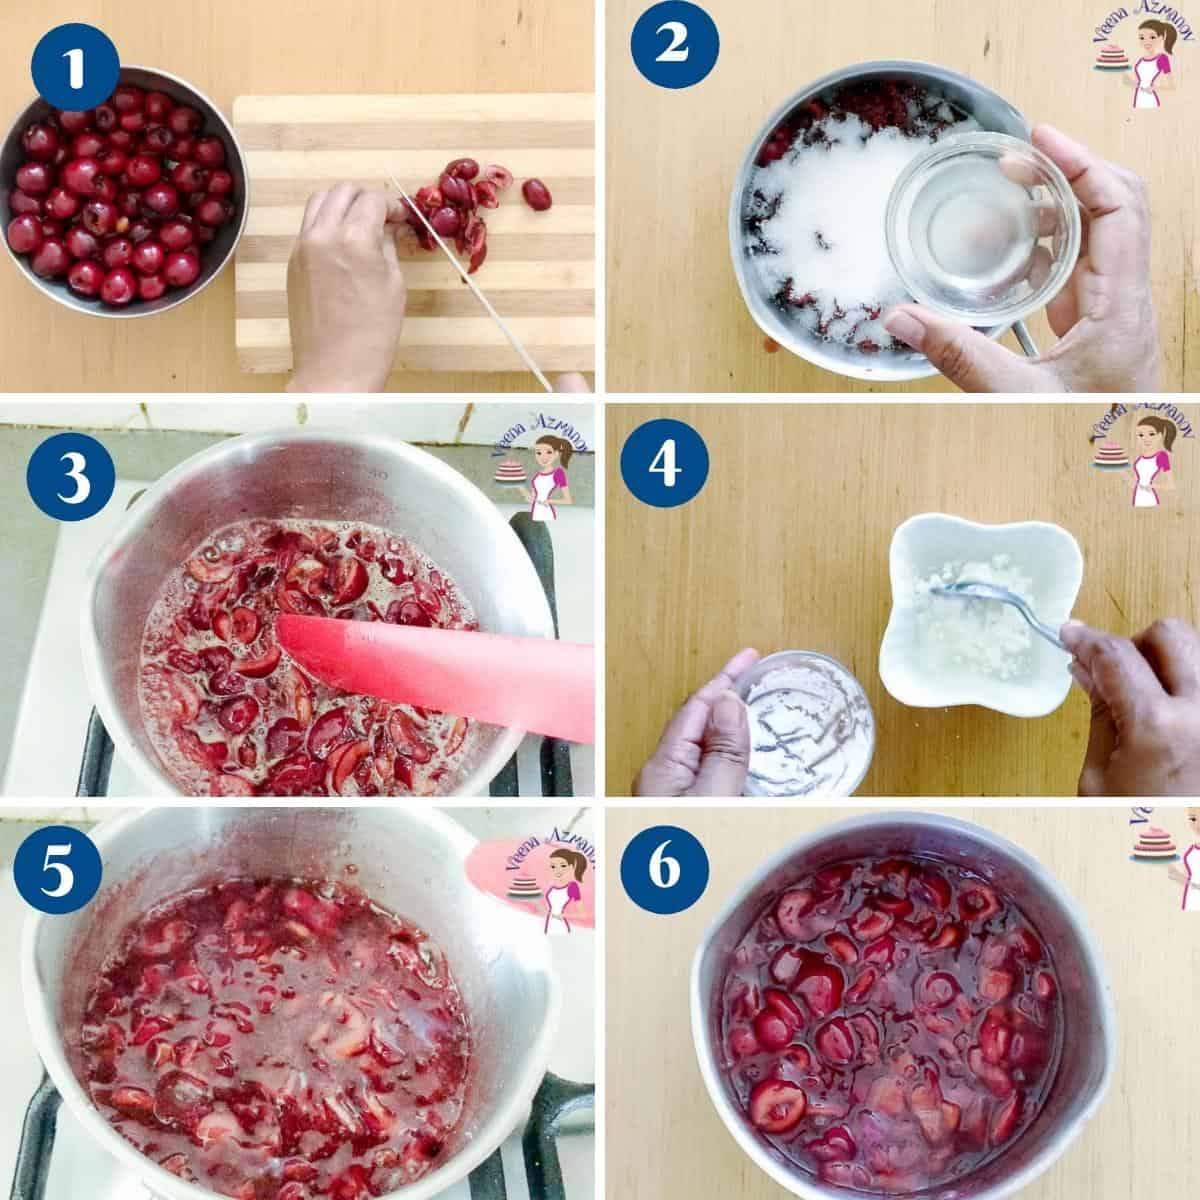
- Prepare the Cherry Pie Filling – While the dough chills, pit your fresh cherries (or use frozen cherries straight from the freezer).In a saucepan, combine cherries, sugar, lemon juice, and a splash of water. Cook on low until the sugar dissolves and the cherries start releasing their juices. Lightly mash some cherries for a thick, chunky filling. Mix cornstarch with water, add to the cherries, and cook until thick and glossy. Remove from heat and let it cool. The filling will thicken more as it cools, making it easier to slice the pie later.
- Roll and Blind Bake the Bottom Crust – Preheat your oven to 400°F (200°C). Roll the bottom pie crust on a floured surface and carefully fit it into your 9-inch pie pan or tart pan, letting the edges hang slightly over. Dock the base with a fork, line it with parchment, and fill with pie weights or beans. Blind bake for 15 minutes to prevent a soggy bottom, then remove the weights and let it cool slightly.
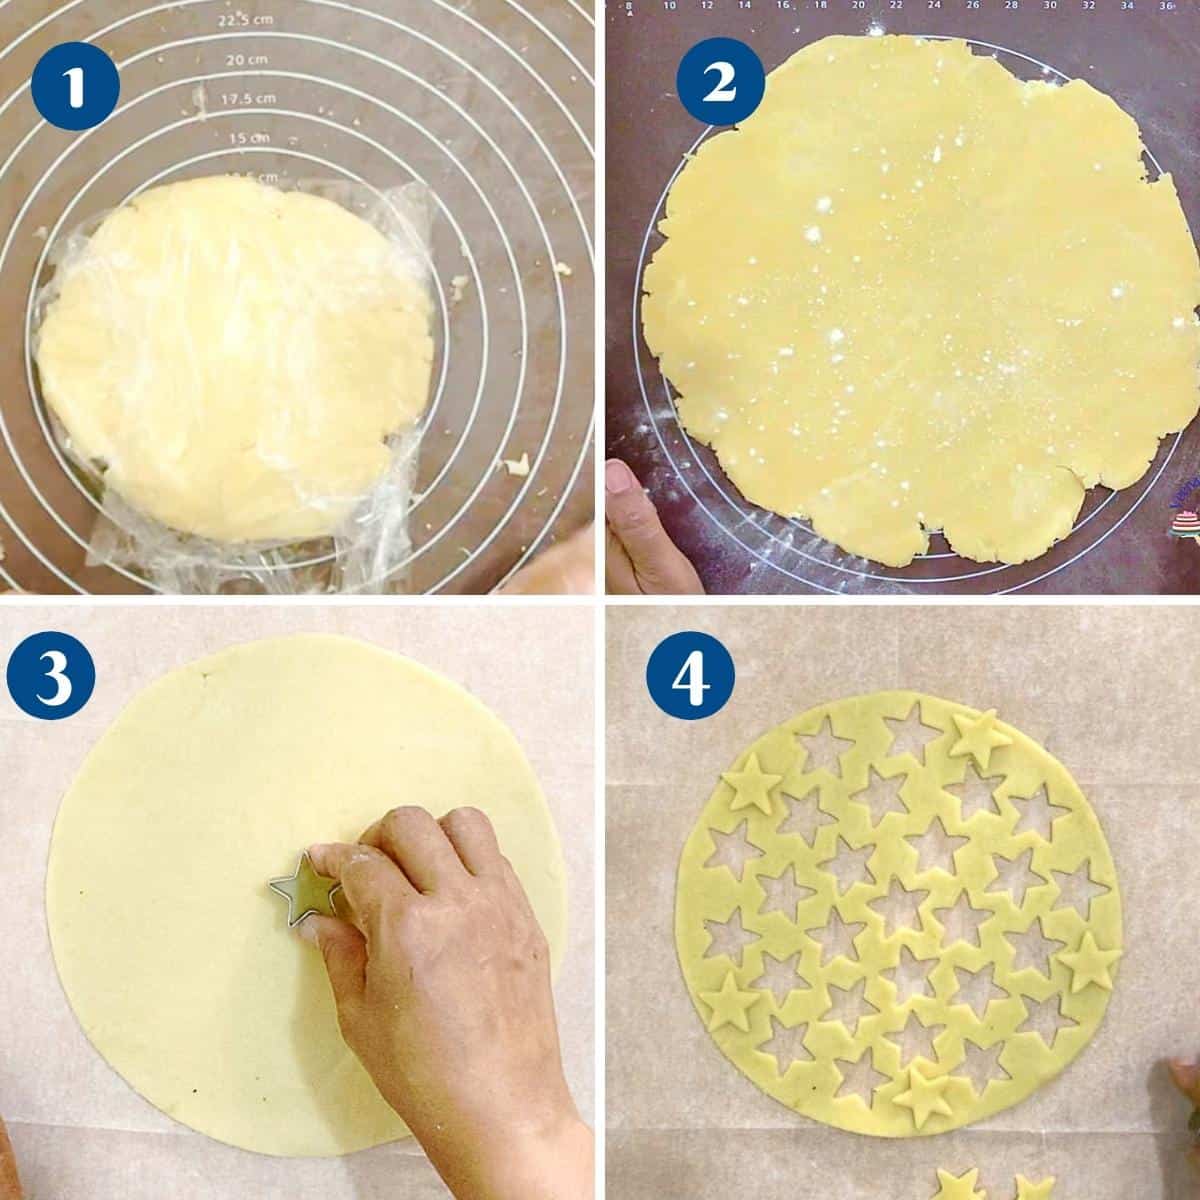
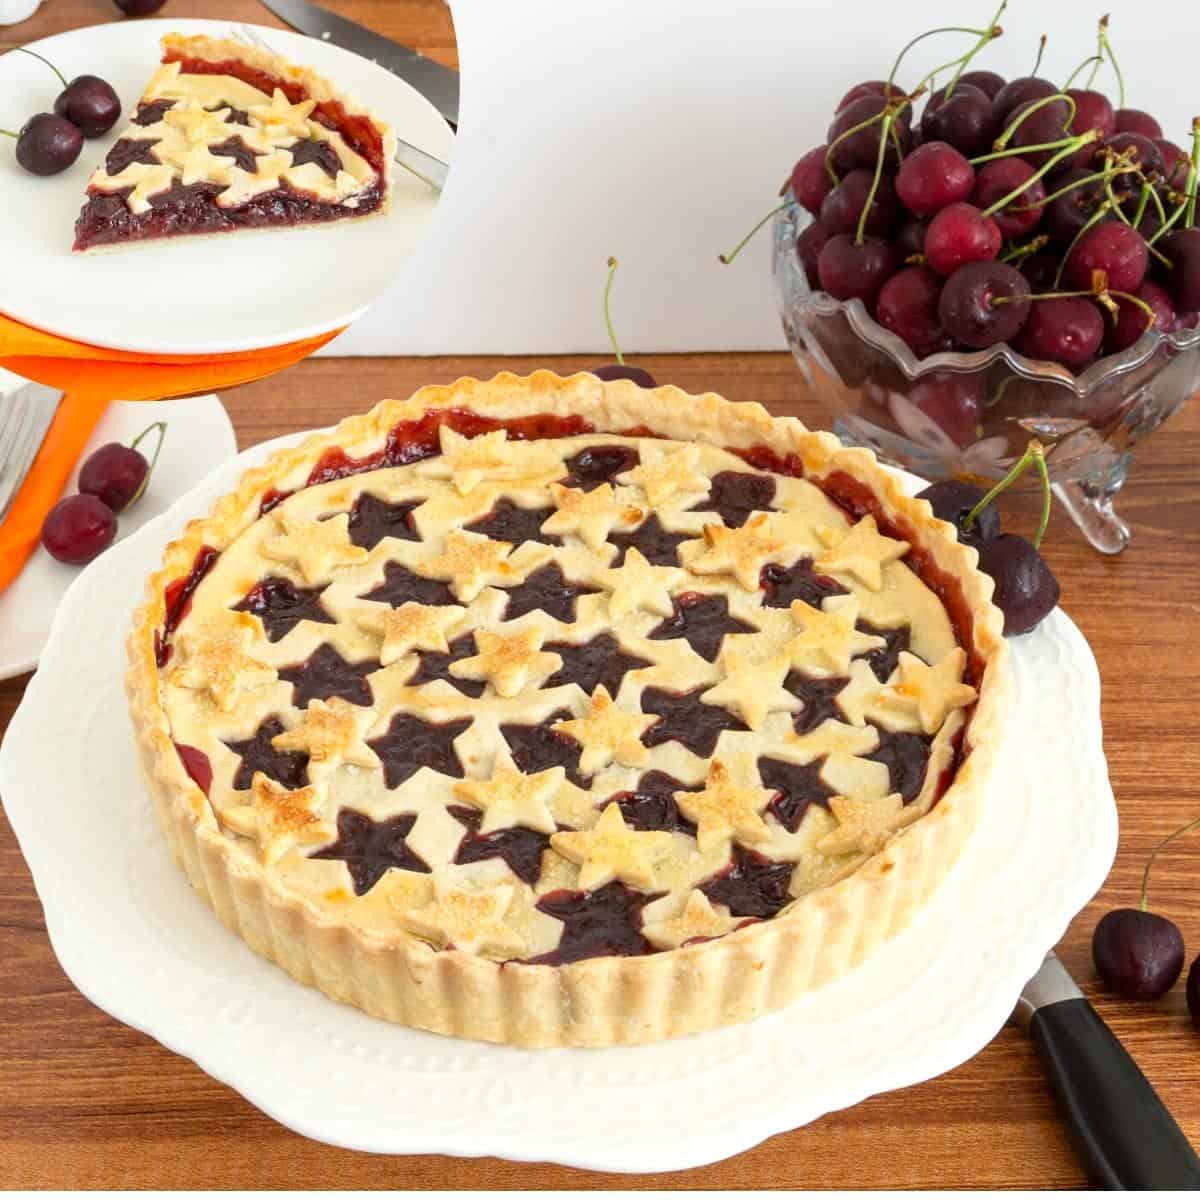
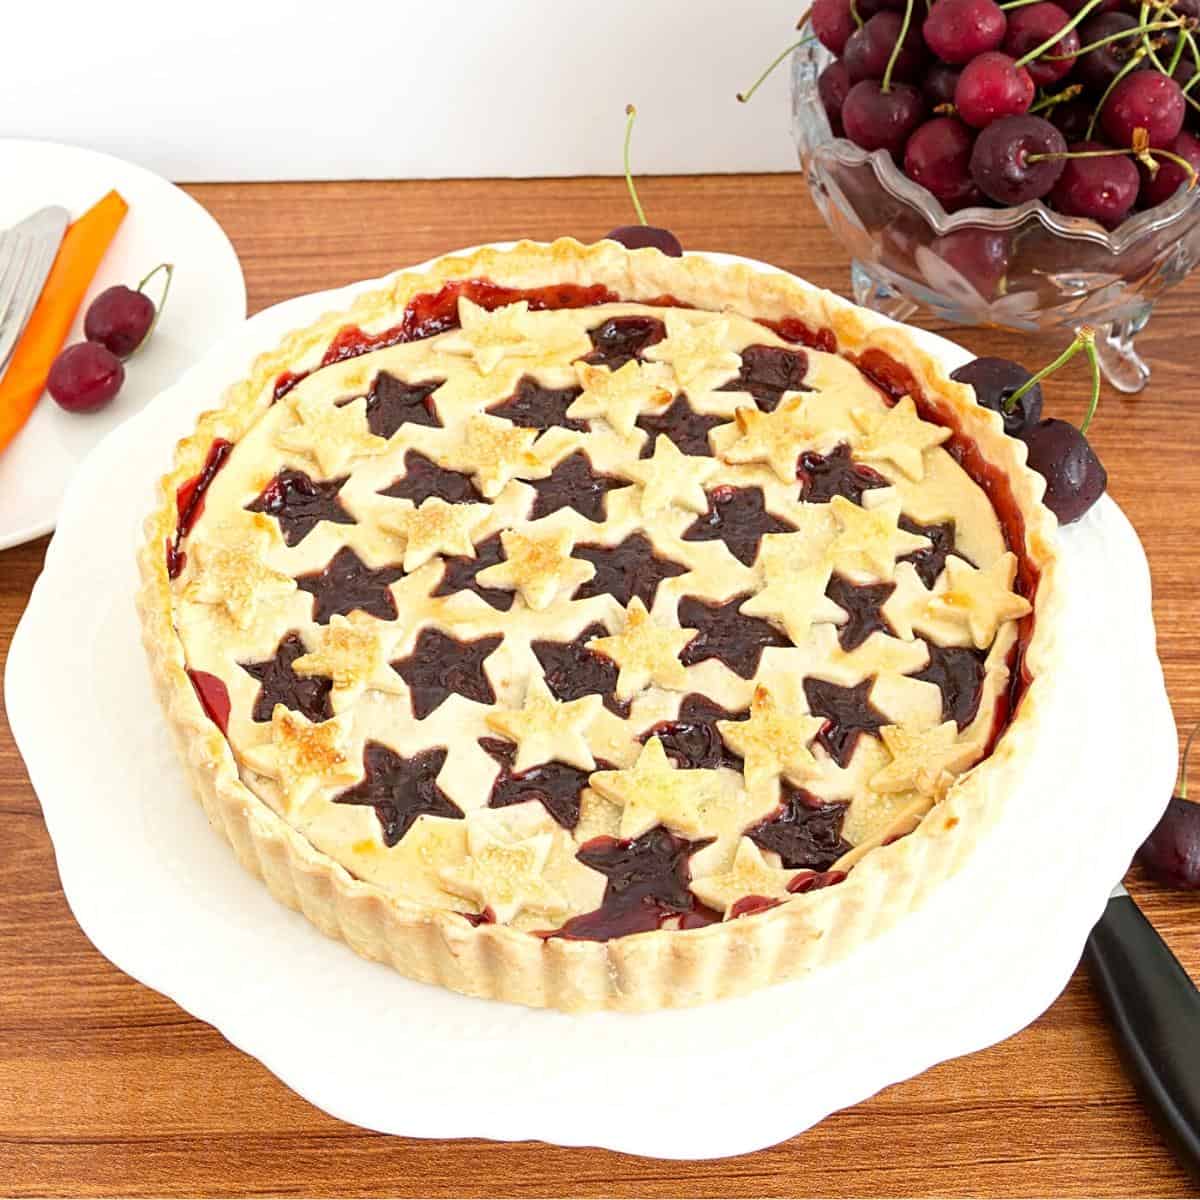
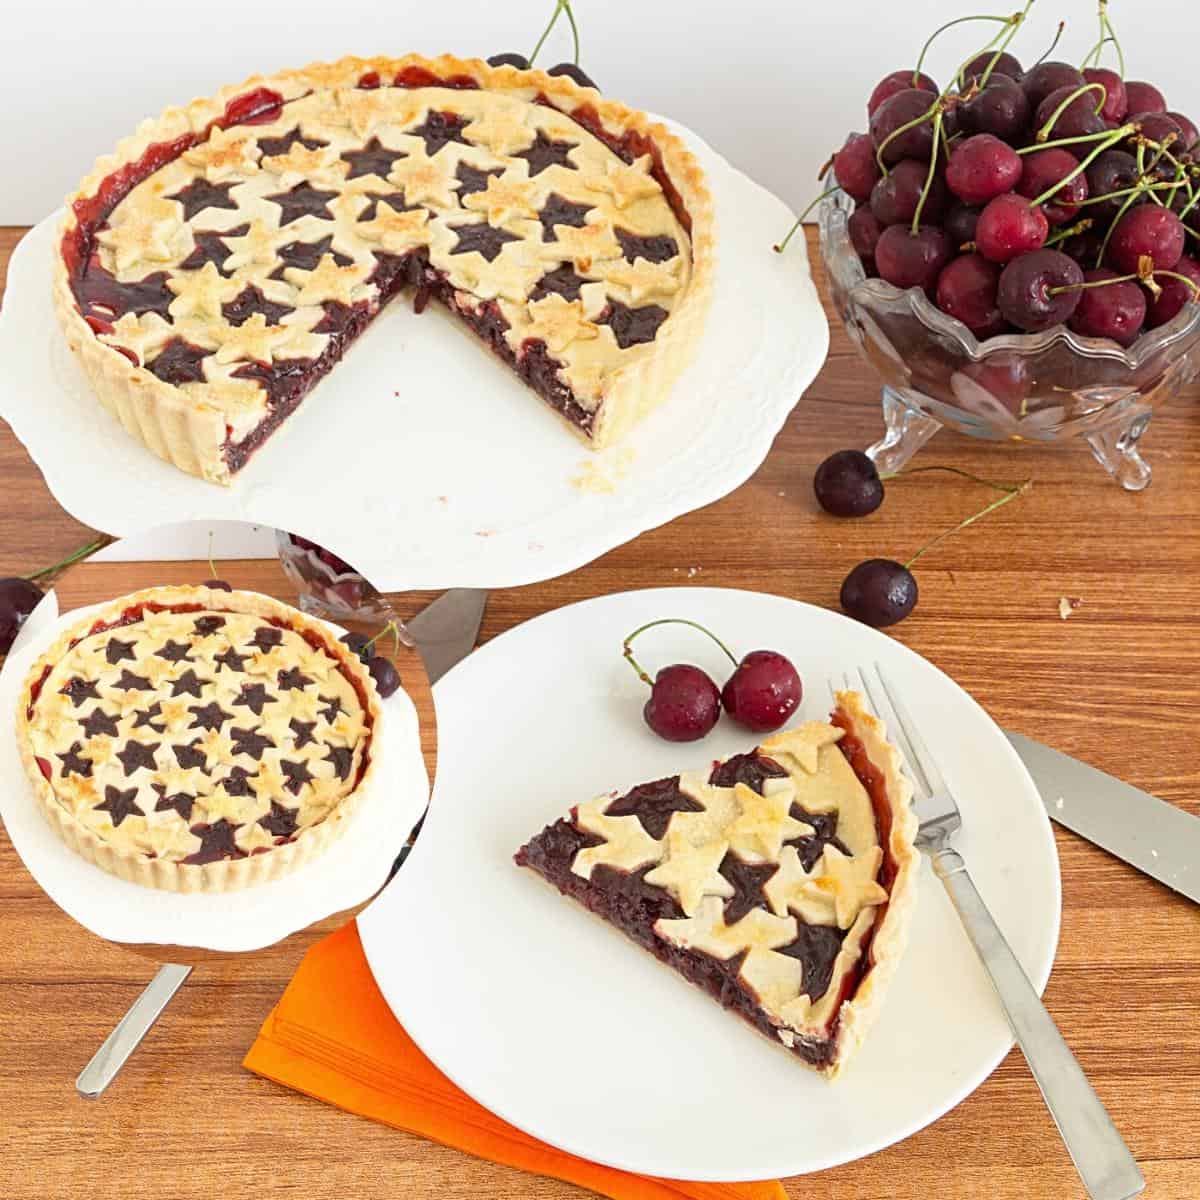
- Prepare the Star Top Crust – Roll out the second disc of dough slightly larger than your pie dish. Using a star cookie cutter, cut out star shapes across the dough. This creates a fun, festive topping while letting the cherry filling peek through.
Pro tip – Keep the dough cool while working for clean cuts.

- Assemble and Bake the Pie – Reduce the oven to 350°F (175°C). Fill the baked crust with the cooled cherry pie filling. Carefully place the star-cut top crust over the filling, adding a few extra stars for decoration if you like. Brush the crust with an egg wash (a mixture of egg yolk and cream) for a beautiful golden finish, and sprinkle with coarse sugar for added crunch. Bake for 35–45 minutes, or until the crust is golden brown and the filling is bubbling.
- Cool and Serve – Let the cherry pie cool completely for at least 3 hours, or overnight if you can wait. This helps the cherry filling set so you get clean slices without a runny mess. Serve your homemade cherry pie as is, or with a scoop of vanilla ice cream or whipped cream for the perfect summer dessert.
Tips for Success
- Taste cherries and adjust sugar based on sweetness.
- Chill the pie crust before rolling to prevent shrinkage.
- Let the pie cool fully to allow the filling to set.
- Use a baking sheet under the pie to catch drips.
- If edges brown too quickly, cover with foil.


Frequently asked questions
This cherry pie will keep in the fridge for 4 to 5 days. You can even freeze it for up to a month. Yes, you can bake the pie a day ahead or make the filling and dough in advance for easy assembly.
Bake for 35-50 minutes at 350°F until the crust is golden and the filling is bubbling.
Yes, thaw and drain them first, then proceed with the recipe.
Blind baking the crust and using a thick filling helps prevent soggy bottoms.
Cornstarch is reliable, but tapioca starch or arrowroot can be used as alternatives.
Yes. I am using a homemade double pie crust for the top and bottom.
But you can use a store-bought ready-to-roll pie crust that is easily available in any supermarket these days.
Follow my method below – roll and line the pastry tart. Bake it with pie weight for 10 to 15 minutes, then continue with the recipe below.
Absolutely, you can make about 8 x 5-inch mini cherry pies or 10 x 3-inch cherry pies with this recipe.
Best EVER Fresh Cherry Pie Recipe
Learn how to make a fresh cherry pie from scratch with buttery crust and homemade cherry pie filling. An easy cherry pie recipe perfect for summer desserts and holidays.
Video
Ingredients
- 315 g (2½ cups) All-purpose flour
- 226 g (1 cup) Butter chilled, cubed
- ½ tsp Salt
- 1 large Egg yolk or whole egg
- 60 – 90 ml (¼ cup) Water cold
- 900 g (6 cups) Cherries
- 150 grams (¾ cups) Sugar
- 2 tbsp Lemon juice
- 4 tbsp (¼ cups) Cornstarch
- 60 ml (¼ cup) Water
- ½ tsp Vanilla extract
- ¼ tsp Almond extract optional
- 1 Egg wash egg yolk with heavy cream
- Coarse sugar for sprinkling
Method
- Make the Double Pie Crust – In a food processor (or a bowl with a pastry cutter), pulse the cold butter, flour, and salt until the mixture resembles coarse breadcrumbs. Mix cold water and an egg, then add just enough to bring the dough together when pressed—don’t overwork it, or your pie crust won’t be flaky.Pro Tip: Chill your pie dough for at least 30 minutes so it rolls easily and doesn’t shrink while baking. Flatten it into two discs, one slightly larger for the bottom crust and one for the top.315 g All-purpose flour, 226 g Butter, ½ tsp Salt, 1 large Egg yolk , 60 – 90 ml Water
- Prepare the Cherry Pie Filling – While the dough chills, pit your fresh cherries (or use frozen cherries straight from the freezer).In a saucepan, combine cherries, sugar, lemon juice, and a splash of water. Cook on low until the sugar dissolves and the cherries start releasing their juices. Lightly mash some cherries for a thick, chunky filling.Mix cornstarch with water, add to the cherries, and cook until thick and glossy. Remove from heat and let it cool. The filling will thicken more as it cools, making it easier to slice the pie later.900 g Cherries, 150 grams Sugar, 2 tbsp Lemon juice, 4 tbsp Cornstarch, 60 ml Water, ½ tsp Vanilla extract, ¼ tsp Almond extract
- Roll and Blind Bake the Bottom Crust – Preheat your oven to 400°F (200°C). Roll the bottom pie crust on a floured surface and carefully fit it into your 9-inch pie pan, letting the edges hang slightly over.Dock the base with a fork, line it with parchment paper, and fill it with pie weights or dried beans. Blind bake for 15 minutes to prevent a soggy bottom, then remove the weights and let it cool slightly.
- Prepare the Star Top Crust – Roll out the second disc of dough slightly larger than your pie dish. Using a star cookie cutter, cut out star shapes across the dough. This creates a fun, festive topping while letting the cherry filling peek through.Tip: Keep the dough cool while working for clean cuts.
- Assemble and Bake the Pie – Reduce the oven to 350°F (175°C). Fill the baked crust with the cooled cherry pie filling. Carefully place the star-cut top crust over the filling, adding a few extra stars for decoration if you like. Brush the crust with an egg wash (a mixture of egg yolk and cream) for a beautiful golden finish, and sprinkle with coarse sugar for added crunch. Bake for 35–45 minutes, or until the crust is golden brown and the filling is bubbling.1 Egg wash, Coarse sugar
- Cool and Serve – Let the cherry pie cool completely for at least 3 hours, or overnight if you can wait. This helps the cherry filling set, so you get clean slices without a runny mess. Serve your homemade cherry pie as is, or with a scoop of vanilla ice cream or whipped cream for the perfect summer dessert.
Notes
Tips for Success:
- Taste cherries and adjust sugar based on sweetness.
- Chill the pie crust before rolling to prevent shrinkage.
- Let the pie cool fully to allow the filling to set.
- Use a baking sheet under the pie to catch drips.
- If edges brown too quickly, cover with foil.
Equipment you will need


Nutrition
Tried this recipe?
Mention @veenaazmanov_kitchen or tag #veenaazmanovkitchen!- Chocolate Cherry Cake with fresh whipped cream
- Rich Cherry Eggnog
- Pink Cherry Cupcakes with whipped cream Buttercream
- No-Churn Cherry Ice cream


Don’t lose this recipe! Save it for Later!
📌 Save this Recipe for later on Pinterest so you can easily find it again.
⭐ Add Veena Azmanov Kitchen to your Google Preferred Sources.
It helps Google show you more of our recipes.
📧 Subscribe for new recipes delivered to your inbox.
🎥 Follow us for more recipes


Oh, my! This looks extremely delicious! I love cherries, so I must try it out!
It is very delicious, Milica. You must try.
Cherry pie is so perfect this time of year! So great for the upcoming 4th of July celebration!
Thanks, Tisha. Absolutely
This is my favourite way to use fresh summer cherries. I am craving pie now.
Thanks, Dannii. Mine too. Love cherries.
I love cherries and this is just the season for fresh cherries! Can’t wait to try this pie – looks gorgeous!
Absolutely Natalie. Perfect for the season.
Wow! This Cherry Pie is not only GORGEOUS but it looks super easy to make. My sister in law is up this weekend and loves cherry pie. I’ll be making this for her for sure!
it is super simple and easy to make Aleta. Thanks
This looks delicious! Great tips on how to keep a crispy crust!
Thanks Beth.
Honestly cannot think of anything better than this on a cold winter night!
Absolutely, Nicolas.
You did such a nice job styling this!
Thanks Lizzy.
Whoa! You made the crust like a rockstar! It’s beautiful. Cherry pie is my husband’s favorite. I’m going to make this for him soon.
Thanks, Tynia. My Pie Crust recipe is fool proof.
My husband has been asking me to make a pie ALLLL summer. After reading this post and seeing your process shots with step by step instructions, I think I am ready!! Thanks for sharing such a great recipe – just saw some ripe cherries at the grocery store and I can’t wait to try this one!!
He will love this Kylie. You must make this for him. Thanks