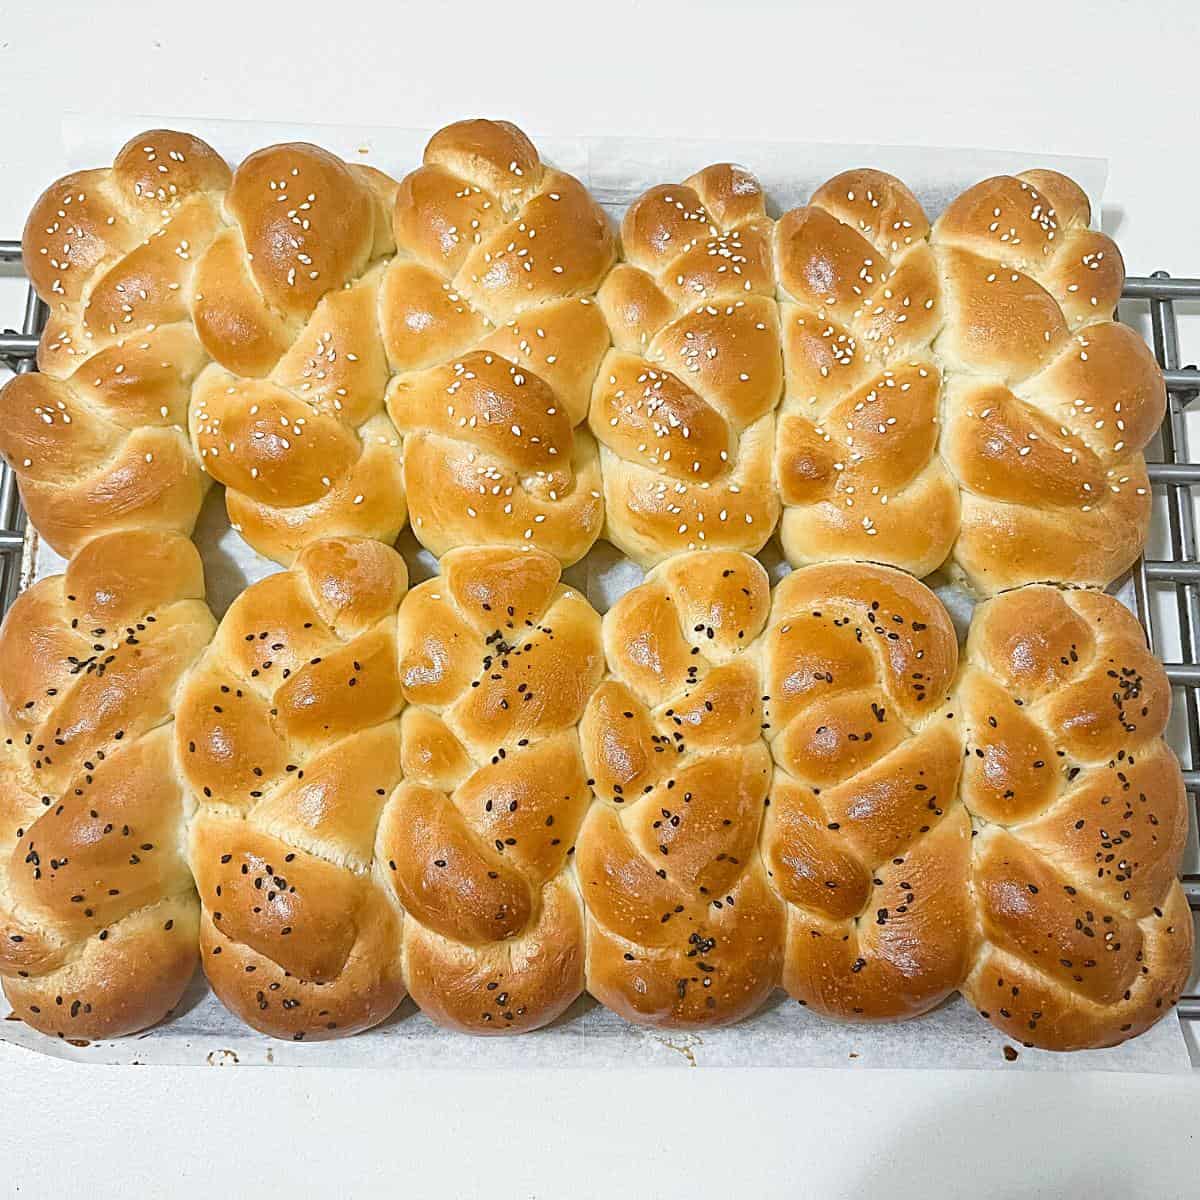
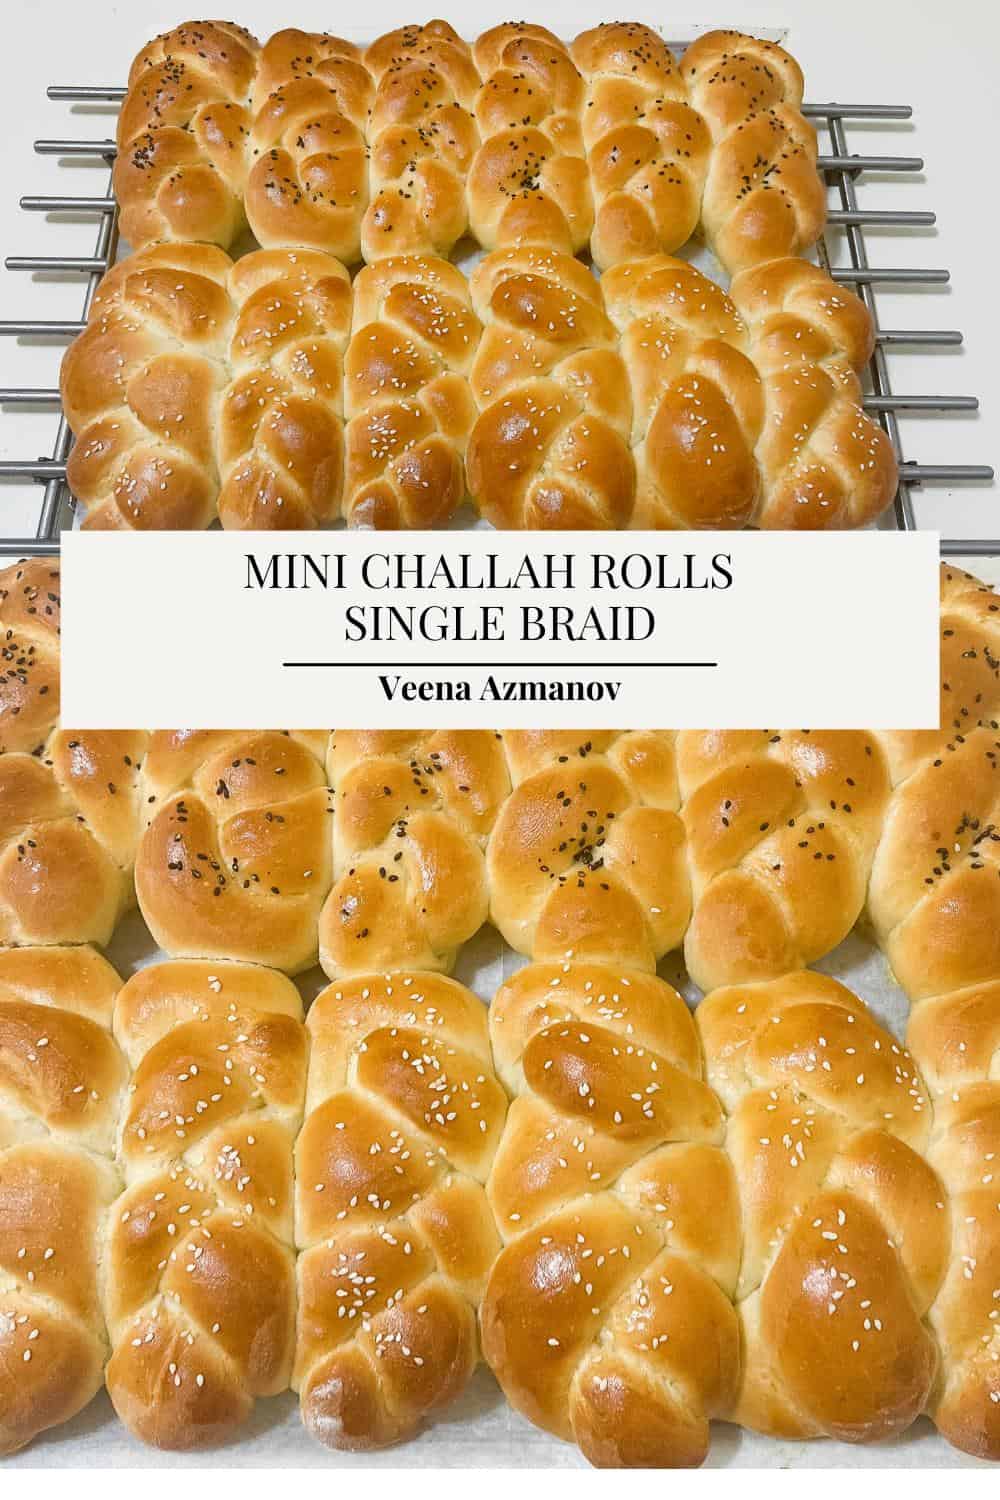
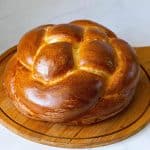
Delicious Mini Challah Rolls – Single Braid
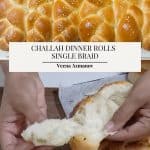
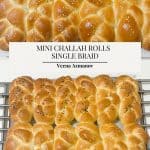

Warm, soft, and flavorful challah rolls are not just for Shabbat. They’re great for holiday dinners, parties, and weekday sandwiches. These single-braid challah buns are easy to make and very impressive to serve.
I didn’t grow up making challah, but once my kids came along, it became a staple in our home. When they were little, they took challah sandwiches to school every single day, which meant I was baking these rolls at least twice a week. Soft, slightly sweet, and perfect for little hands, they became more than just bread—they were a part of our daily routine, packed with love in every bite.
Baking challah wasn’t just about making food; it was therapy in its own way. The kneading, the braiding, the smell of fresh bread filling the house—it became my quiet moment amidst the chaos. A moment to reflect, to be present, to create something comforting, not just for my family, but for myself too.
Even now, when I bake these rolls, I think back to those mornings of packing lunches, those after-school moments when my kids would come home hungry and grab a challah roll straight from the kitchen. It’s amazing how food connects us to memories, how something as simple as bread can hold so much warmth and love.
Why make these mini challahs
- Braiding challah is easier than you think. And it doesn’t get easier than a single braid!
- As you can see in my video and step-by-step progress pictures, the process is simple and easy, just like making any other bread dough, just with braiding.
- The process is like any other dinner roll, except that it’s a braided loaf, which means it’s more impressive to serve.
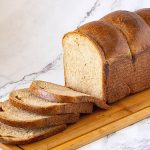
- These are perfect for sandwiches and baked French toast.
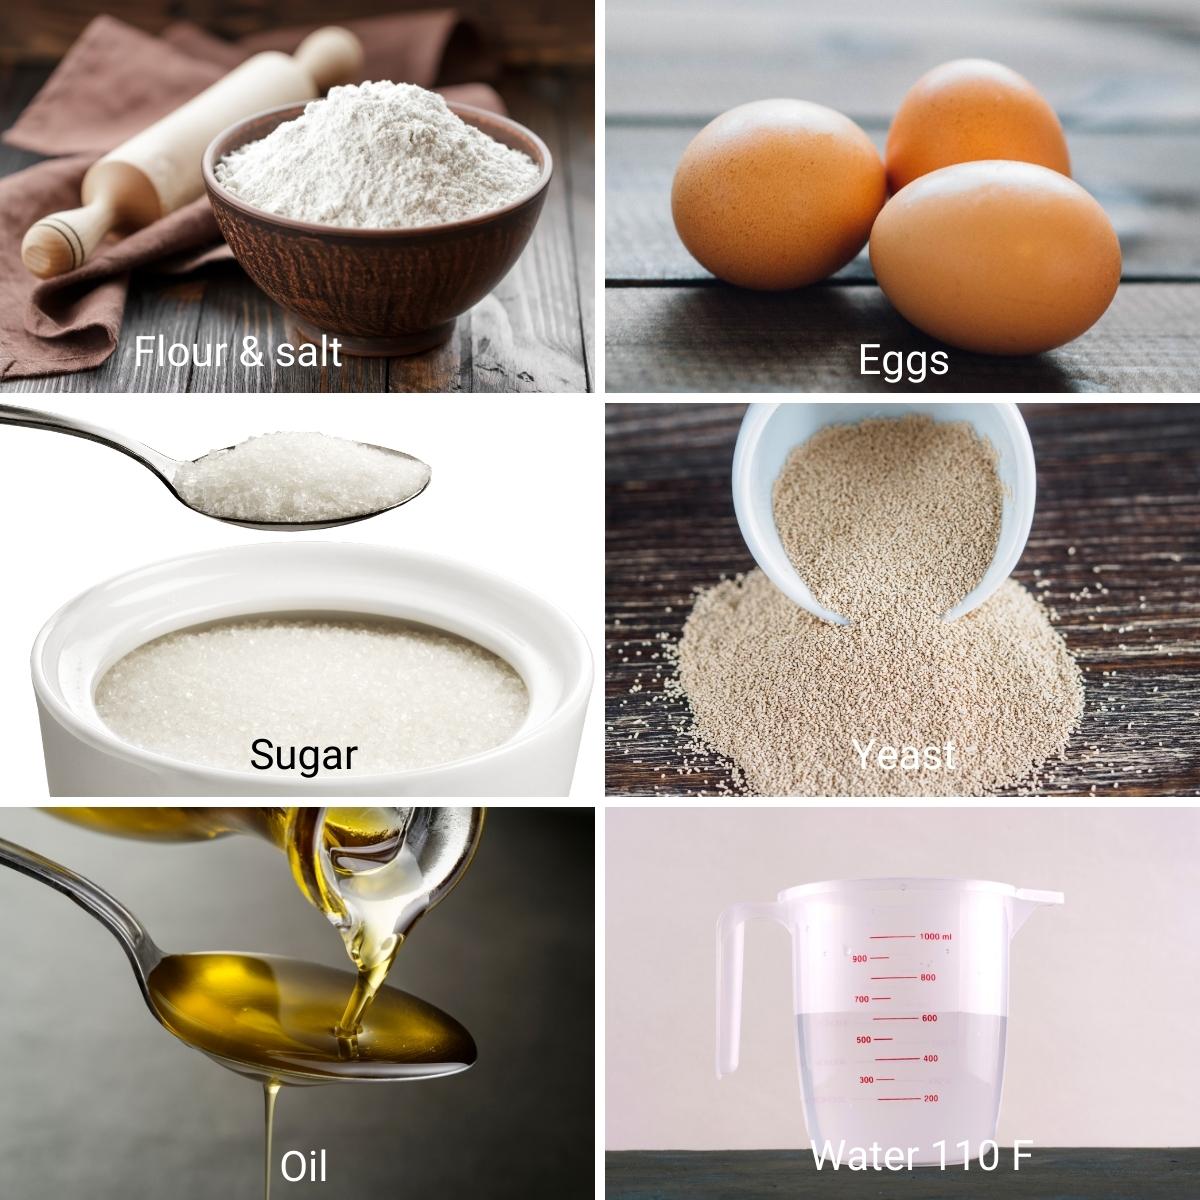
Ingredients and substitutes
- Flour – I like using bread flour for this challah. It gives a soft chew bread with a tender crust. But, for years, I have made this with all-purpose flour, and it also works wonderfully. So, use either bread or all-purpose flour.
- Water – As I said above, traditionally, challah is made with warm water, and yet the same amount of milk works just as well.
- Instant dry yeast – I like to use instant dry because I’ve always had great success with it. If you have to use active dry yeast, you will need 2 ¼ teaspoons or one packet. And if you use fresh yeast, you will need about 21 grams.
- Sugar –This is not necessarily very sweet because I will serve this with the dinner main course. But you can increase the sweetness more to make a sweeter challah. And if you prefer, you can also substitute sugar with honey.
- Butter – I like adding butter, not just to feed the yeast, but also to add flavor. You can substitute the butter for two tablespoons of vegetable oil in this recipe.
- Egg – Adds a lot of flavor to the bread, gives a tender crumb, and strengthens the texture. The egg is also a leavening agent that helps the bread rise.
Step-by-step: Mini challah rolls, single braid challah
- Yeast mixture – In a mixing bowl or measuring cup, combine warm water (110°F), yeast, honey, oil, and eggs. Stir and set aside to foam for 3 minutes.
- Dry mixture – Measure the flour and salt in a mixing bowl or stand mixer with the dough hook.
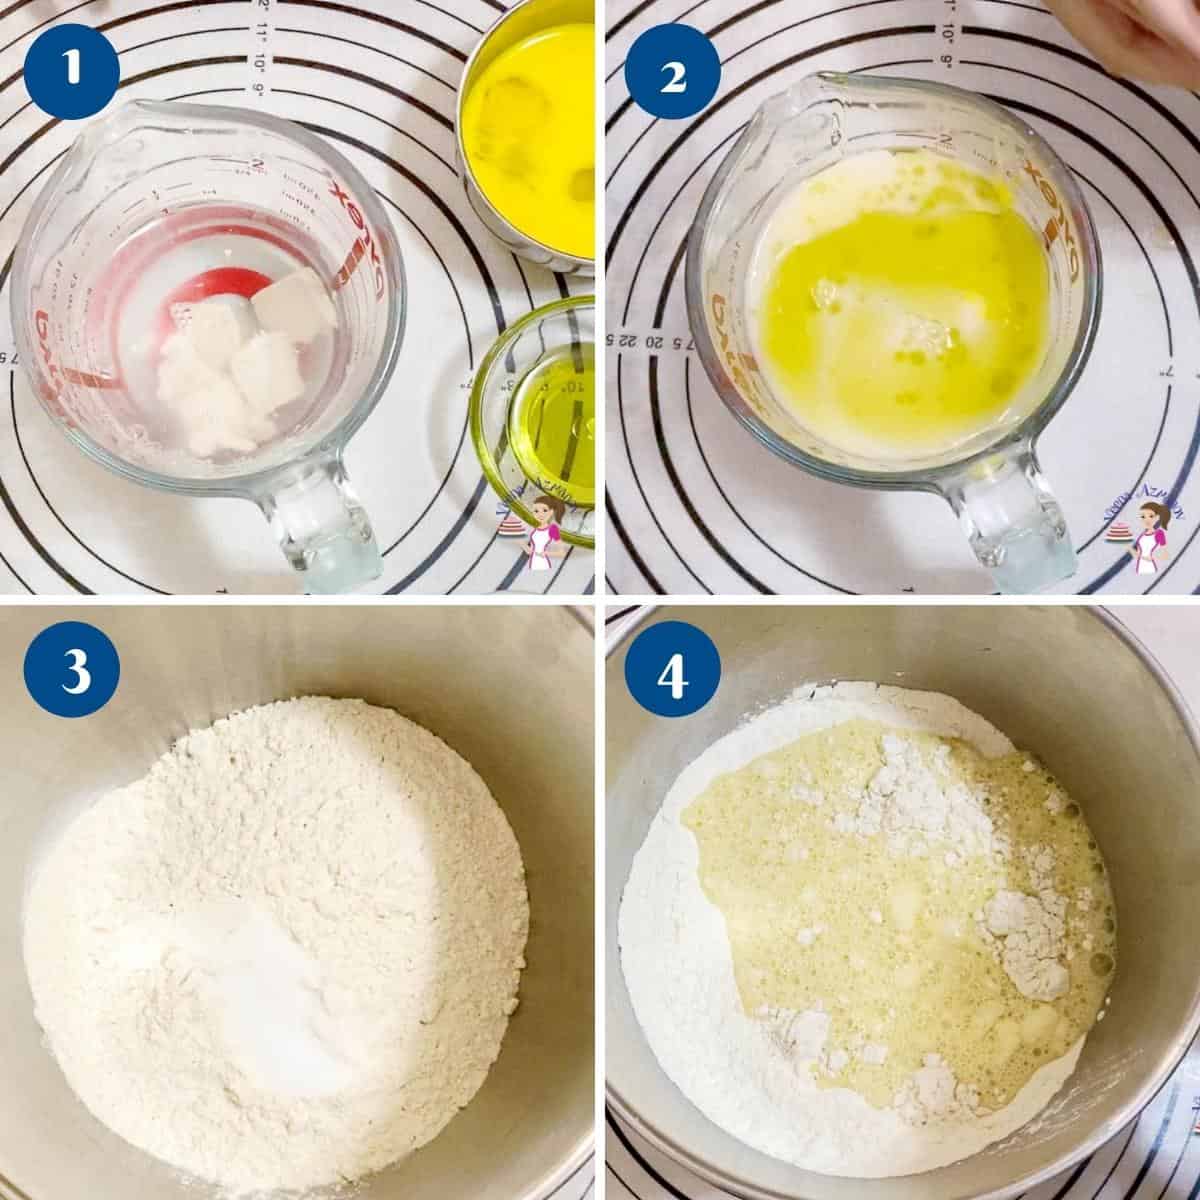
- Knead – Add the yeast mixture to the flour mixture and combine well at medium-low speed. Knead until smooth and elastic. This should take 18 to 20 minutes on medium-low in the stand mixer or 20 to 25 minutes by hand on a lightly dusted work surface.
- Bowl – When the dough is smooth, soft, and elastic, shape it into a ball. Place the dough in an oiled bowl, seam side down. Coat the surface with oil to prevent drying. Cover with a clean kitchen cloth or plastic wrap.

- Rise – Leave in a warm place. Let it rise for 60 to 90 minutes until it doubles in volume.
- Punch – When the dough is doubled in volume, transfer it to a well-dusted floured surface. Punch down and reshape into a ball. Then, roll it into a small log.
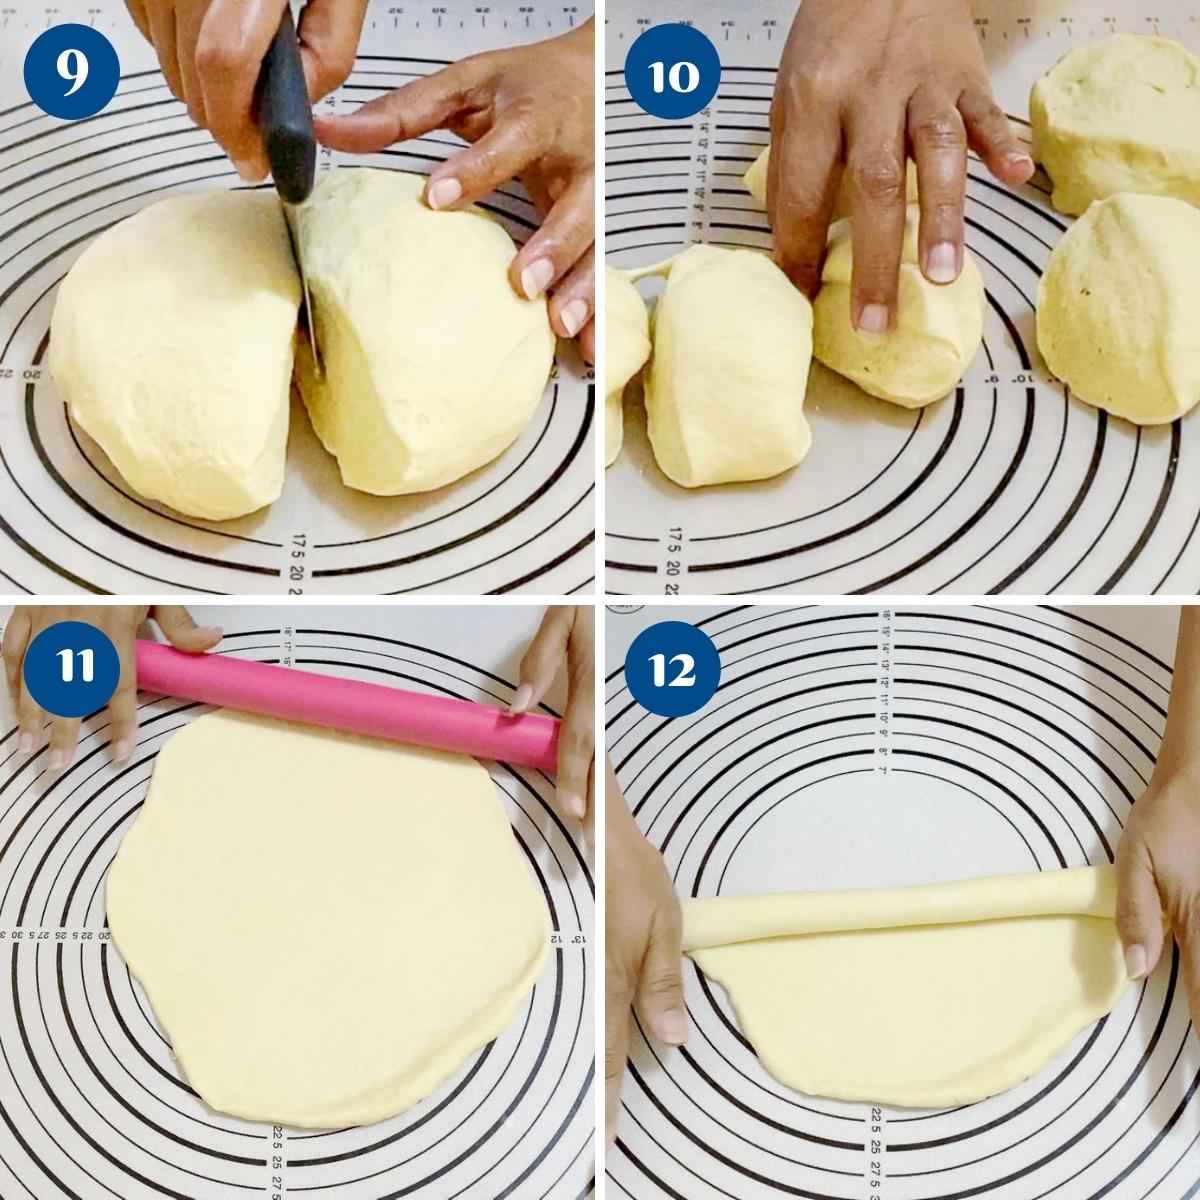
- Divide – Using a dough scraper, divide this log into four portions, and then divide each of those portions into three again. This should give you 12 dinner rolls.
Pro tip – These are 12 rolls, each 110 grams, but you can also make 16 smaller rolls, each 85 grams. - Ropes – Shape each into a ball. If necessary, let it rest for 5 to 10 minutes. Roll each ball with a rolling pin on an unfloured work surface. Then, roll like a jelly roll into a rope about 16 to 18 inches long (see video).

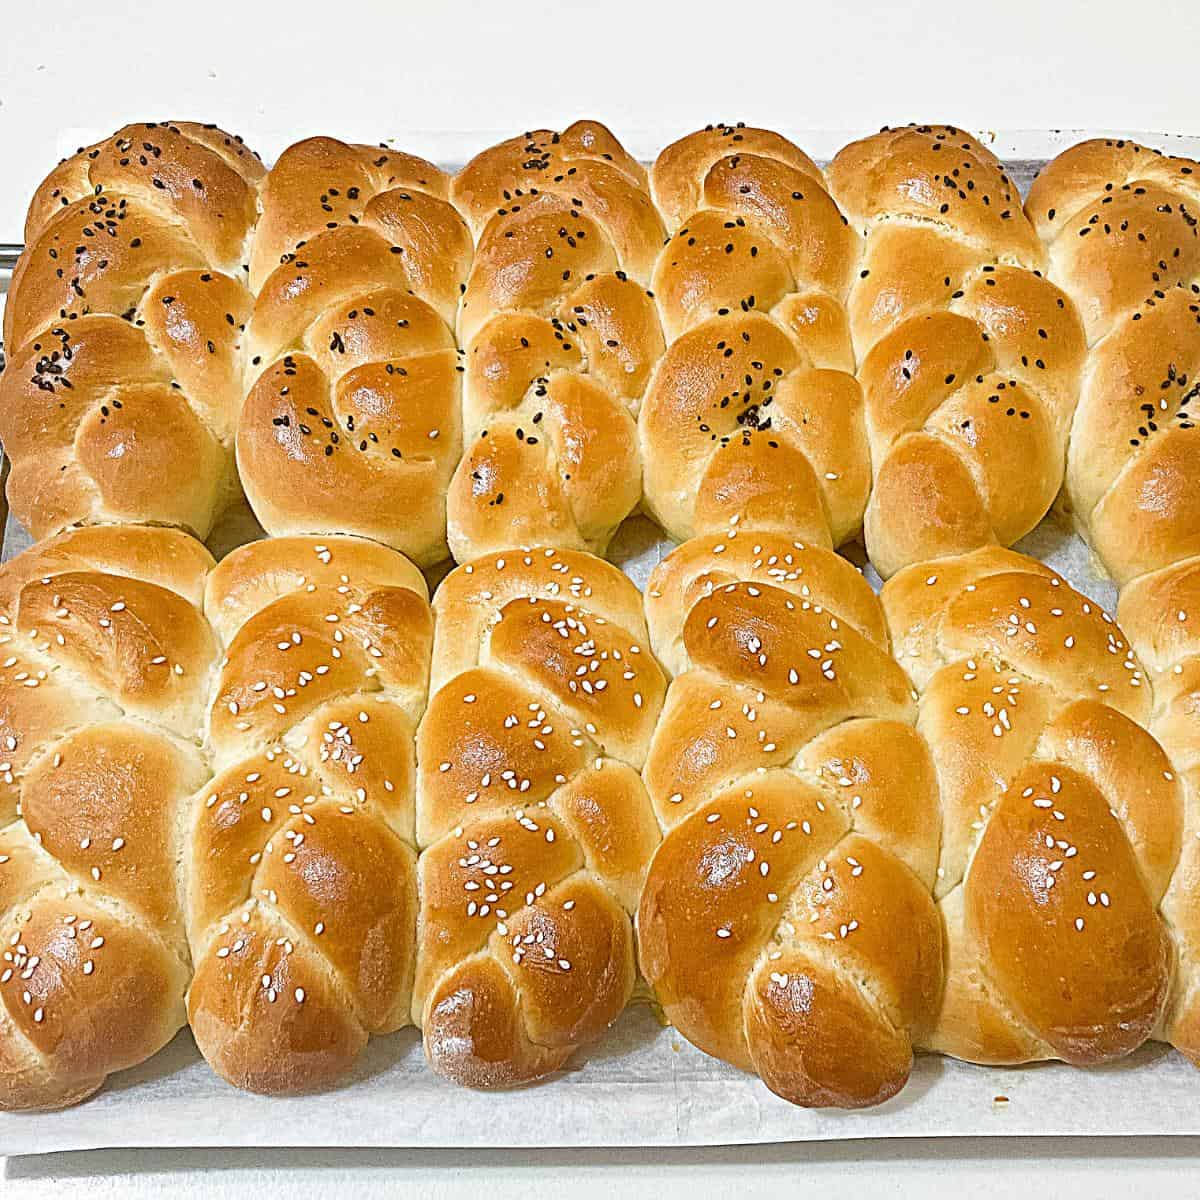
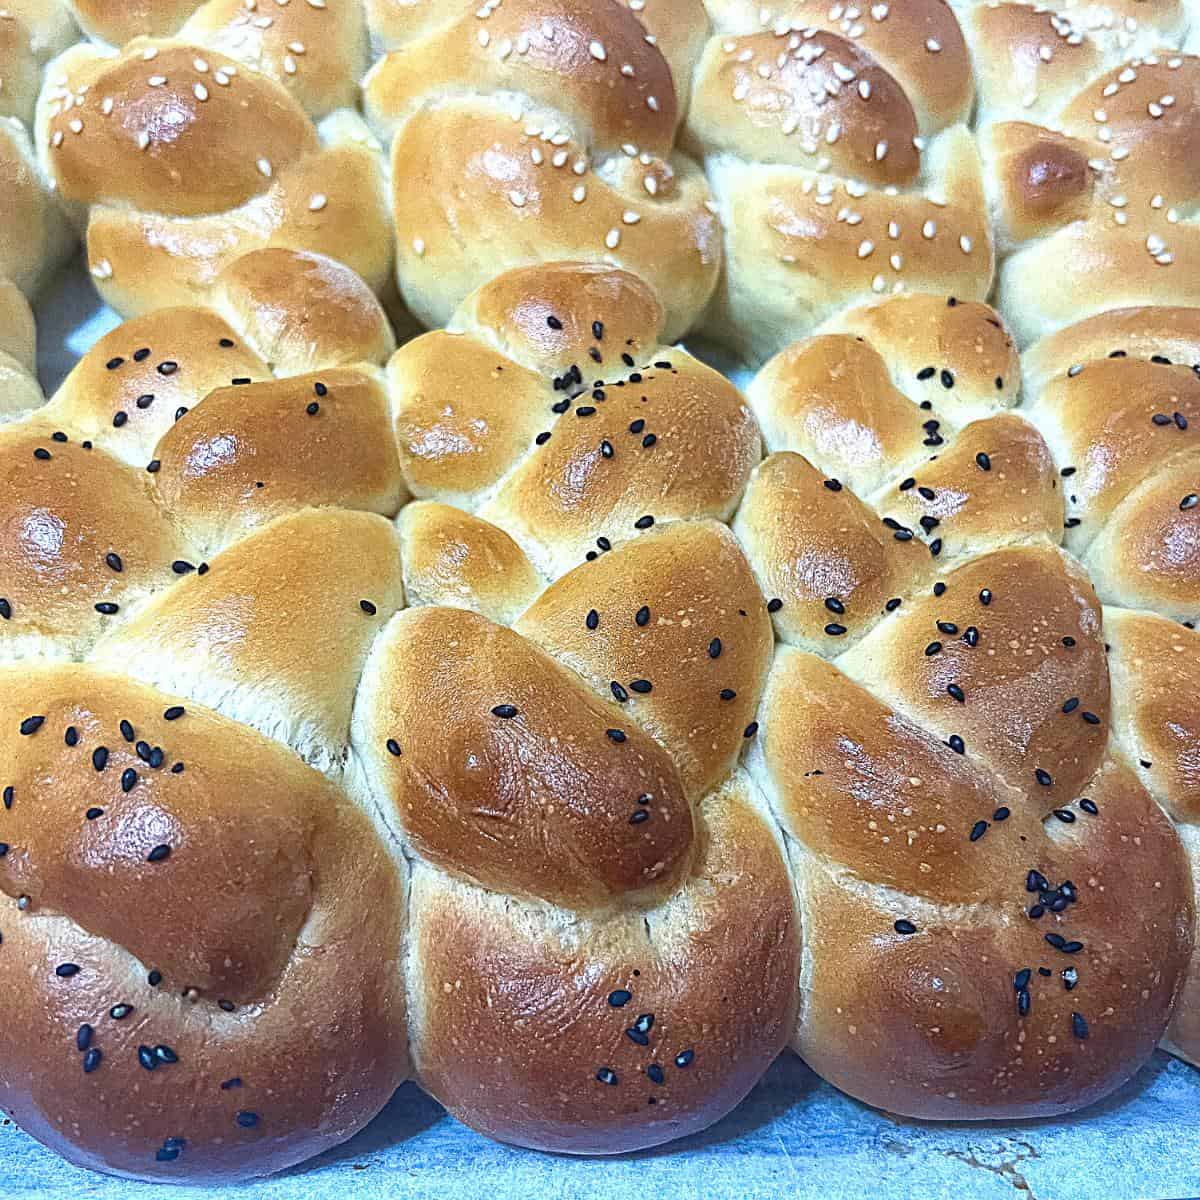
- Single braid challah – Braid the challah using a single rope. Start by shaping into a number six. Loop the top in a knot, twist the bottom, then anchor the top into the bottom. As shown in the progress pictures and video.
- Proof – Place the rolls on a baking sheet lined with parchment paper. Cover with plastic wrap or a clean kitchen cloth and let it proof for 45 to 60 minutes.
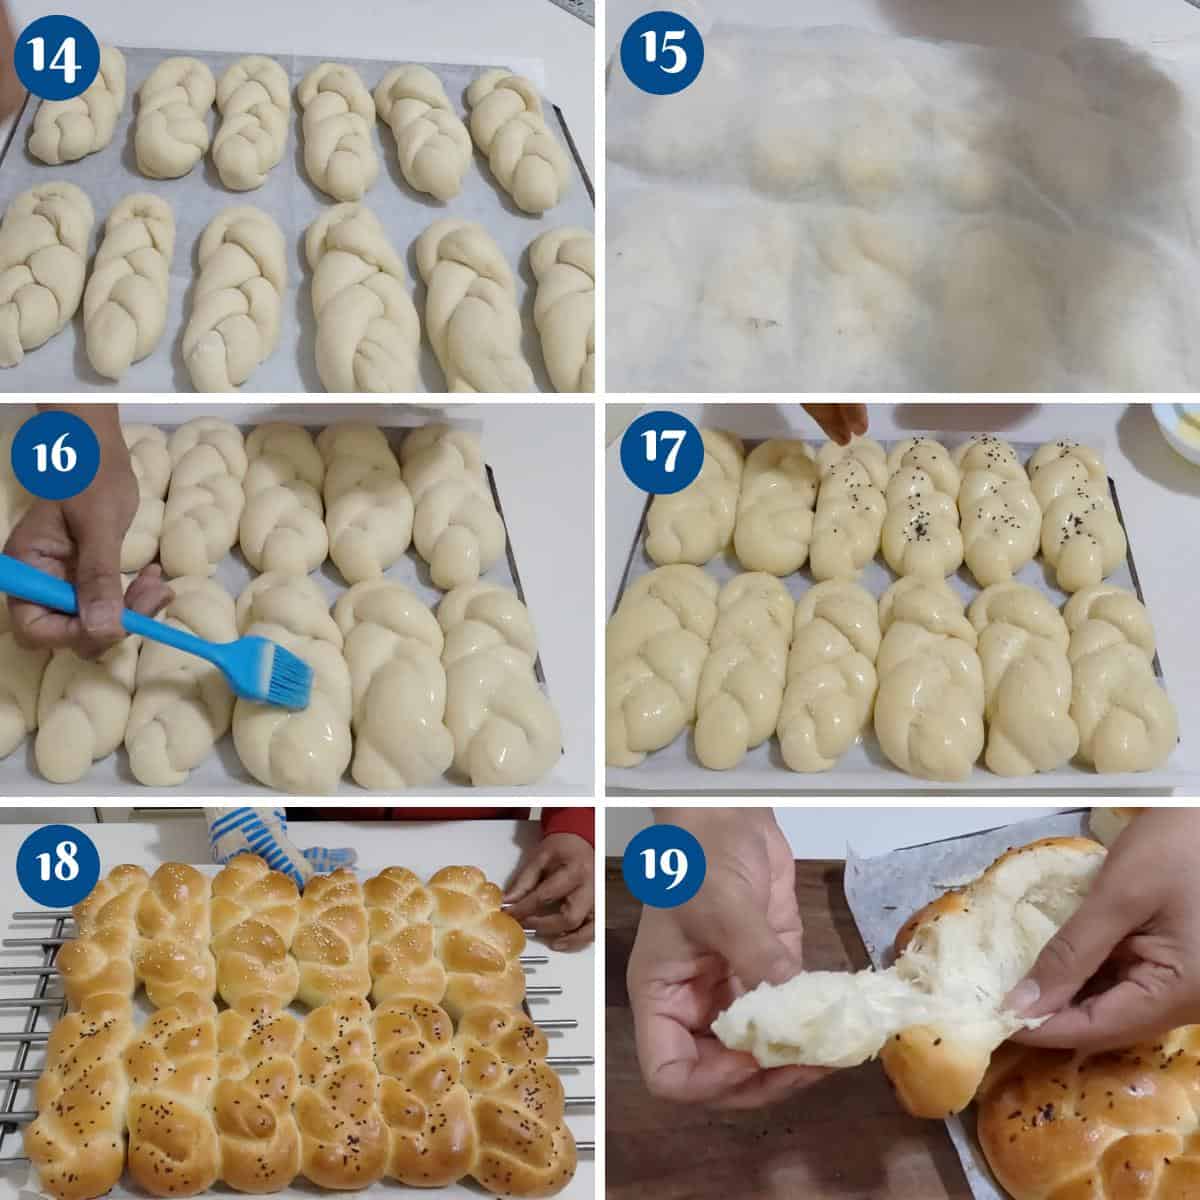
- Oven – About 20 minutes before baking, preheat the oven to 350°F /177°C / Gas Mark 4
- Bake – Brush the bread with egg wash. Sprinkle with sesame seeds. Then, bake each loaf on the center rack of the oven for 20 to 25 minutes.
- Cool – Remove from the oven and let cool on a wire rack for 5 minutes. Then, cover it with a clean kitchen cloth to keep it soft.


Frequently asked questions
These will keep at room temperature for 3 to 4 days. But you can also freeze them in the freezer for up to a month or more.
Well, challah is a type of bread. Challah is a popular Jewish bread made from white flour, water, and eggs. Jewish people do not eat meat and dairy together, so this bread does not use any milk or butter.
The question of whether challah bread (Jewish challah) is a healthy option comes up often. Considering that it is not loaded with butter, milk, or sugar, I’d say it is healthier than most bread.
Yes, I like to make my dough the previous evening and leave it to rise in the fridge overnight. The next day, thaw the dough an hour before you braid, proof, and bake. Fresh just in time for dinner.
Mini Challah Rolls- Single Braid
Warm, soft, and flavorful challah rolls are not just for Shabbat. They're great for holiday dinners, parties, and weekday sandwiches. These single-braid challah buns are easy to make and very impressive to serve.
Video
Ingredients
- 375 ml (1½ cups) Water warm 110F
- 10 g (3¼ tsp) Instant dry yeast
- 30 g (2 tbsp) Sugar
- 40 g (2 tbsp) Oil cooking or olive
- 150 g (3 large) Eggs
- 750 g (6 cups) Bread flour or 50% bread and 50% all-purpose flour
- 12 g (1¾ tsp) Kosher salt
Method
- Yeast mixture – In a mixing bowl or measuring cup, combine warm water (110°F), yeast, honey, oil, and eggs. Stir and set aside to foam for 3 minutes.375 ml Water, 10 g Instant dry yeast, 30 g Sugar, 40 g Oil, 150 g Eggs
- Dry mixture – Measure the flour and salt in a mixing bowl or stand mixer with the dough hook.750 g Bread flour, 12 g Kosher salt
- Knead – Add the yeast mixture to the flour mixture and combine well at medium-low speed. Knead until smooth and elastic. This should take about 18 to 20 minutes on medium-low in the stand mixer or about 20 to 25 minutes by hand on a lightly dusted work surface.
- Bowl – When the dough is smooth, soft, and elastic, shape it into a ball. Then, place the dough in an oiled bowl, seam side down. Coat the surface with oil to prevent drying. Cover with a clean kitchen cloth or plastic wrap.
- Rise – Leave in a warm place. Let rise for 60 to 90 minutes until it doubles in volume.
- Punch – When the dough is doubled in volume, transfer it to a well-dusted floured surface. Punch down and reshape into a ball. Then, roll it into a small log.
- Divide – Using a dough scraper, divide this log into four portions, and then divide each of those portions into three again. This should give you 12 dinner rolls.
- Ropes – Shape each into a ball. If necessary, let rest for 5 to 10 minutes. Roll each ball with a rolling pin on an unfloured work surface. Then, roll like a jelly roll into a rope about 16 to 18 inches long (see video).
- Single braid challah – Braid the challah using a single rope. Start by shaping into a number six. Loop the top in a knot, twist the bottom, then anchor the top into the bottom. As shown in the progress pictures and video.
- Proof – Place the rolls on a baking sheet lined with parchment paper. Cover with plastic wrap or clean kitchen cloth and let proof for 45 to 60 minutes.
- Oven – About 20 minutes before baking, preheat the oven to 350°F /177°C / Gas Mark 4
- Bake – Brush the bread with egg wash. Sprinkle with sesame seeds. Then, bake each loaf on the center rack of the oven for 20 to 25 minutes.
- Cool – Remove from the oven and let cool on a wire rack for 5 minutes. Then, cover with a clean kitchen cloth to keep it soft.
- Enjoy!
Notes
- Measure all ingredients beforehand, so you don’t forget anything at the last minute.
- For accuracy, use a scale for the ingredients because every cup of flour can weigh differently depending on how you fill it.
- The liquid (milk or water) must be warm (not hot) – about 110°F. If the liquid is too hot, it will kill the yeast. Similarly, if the liquid is too cold, it will not activate the yeast.
- Most yeasts have a long shelf life, but they can get ruined. Always check the expiry date on the yeast. If unsure, combine the yeast with water/milk, sugar/honey, and oil/butter from the recipe and let stand for 5 minutes. If it gets foamy, the yeast is good to go. If not, it’s best to buy fresh yeast or check the temperature of the milk.
- Keep salt away from yeast as it can kill the yeast. I like to combine the salt with the flour and then add the yeast mixture.
- A soft, loose, well-hydrated dough is not necessarily a bad thing. Often, it will give you soft, puffy bread. So, don’t be tempted to add more flour than mentioned in the recipe.
- Kneading is key to making good bread. While kneading by hand can be therapeutic, using a stand mixer is easier and quicker.
- Leave the dough at room temperature to rise until it doubles in volume. While not recommended, when in haste, you can place it in a warm (30 C / 75 F- not hotter) oven, which will expedite the rise.
- Bread does not have to be time-consuming. You can leave the dough in the fridge to rise for a few hours (even overnight) while you go about your chores. A slow rise will give more flavor to the bread.
- Always preheat the oven for at least 10 minutes before you place bread in, or the low temperature will spread the dough too much.
Equipment you will need


Nutrition
Tried this recipe?
Mention @veenaazmanov_kitchen or tag #veenaazmanovkitchen!Don’t lose this recipe! Save it for Later!
📌 Save this Recipe for later on Pinterest so you can easily find it again.
⭐ Add Veena Azmanov Kitchen to your Google Preferred Sources.
It helps Google show you more of our recipes.
📧 Subscribe for new recipes delivered to your inbox.
🎥 Follow us for more recipes

This is amazing!! I love a good bread recipe, and I think I have found a new favourite. Thank you so much for sharing this recipe 🙂
I love these individual rolls! They were just as good as the bakery breads and made great sandwiches! Thanks for the easy instructions.
I made this recipe for my last brunch. It was a huge hit, and easier than I thought. I left the dough to rise overnight in the fridge, which worked perfectly.
Thank you, Helene
Braided bread is always so pretty! This reminds me of a braided bread my grandma used to make! Excited to give your recipe a try!
I made this bread with dinner last night and it was delicious! Your instructions were so clear and easy to understand!
Thank you, Tayler.
Oh, my deliciousness! These mini-Challahs look perfect and delicious! I am looking forward to making these for my family.
These are so adorable! They turned out awesome—so soft and chewy and perfect 🙂
I’ve always been intimidated by these types of breads! Your recipe made it so easy for me to follow and even better making it was a success for me! Thank you!
Thank you, Ned
This is such a beautiful braid. Making it made me looks like a pro.
THANK YOU FOR THE RECIPE. WHAT DO YOU MEAN BY SAYING SINGLE BREAD?
It just means that you make a braid with a single stand!!