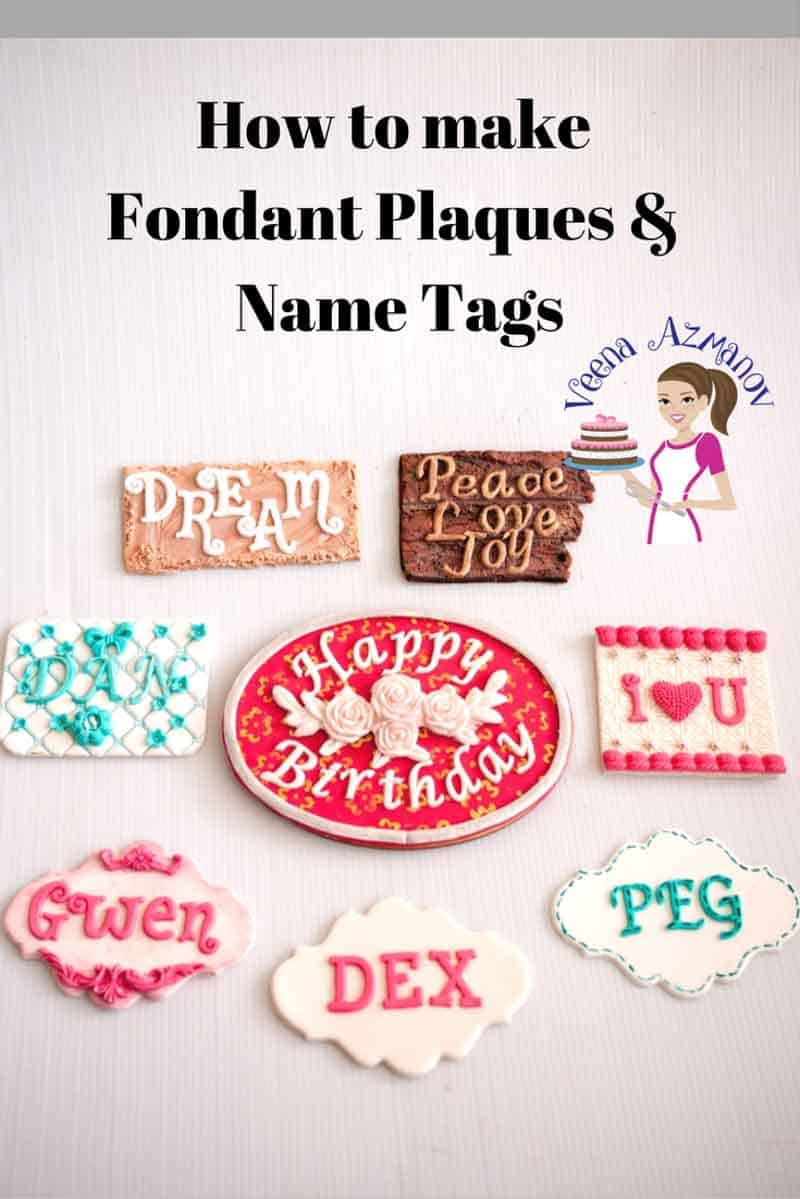
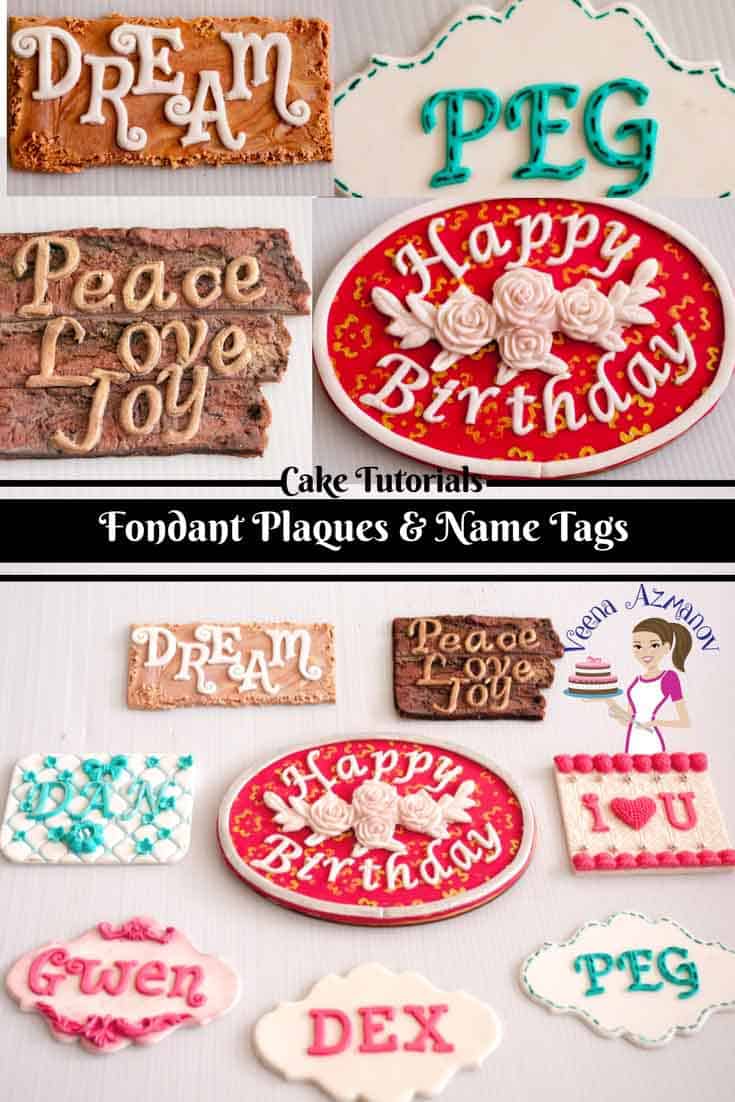
7 Fondant Plaques and Name Tags for Cakes – Tutorial
A great way to add a little more pizzazz to your cakes is to create unique and beautiful fondant plaques and name tags. In this video, I show you seven designs from vintage to stenciled so you can be more creative with your next cake.
A few weeks ago, I received these beautiful alphabet molds. Now I have had a love-hate relationship with alphabet cutters. No matter how easy they claim to be – with me…!! Duh…..!! And, of course, new toys really excite me, so as soon as I got them, I made a bunch of alphabet. Lots of them.
What was I supposed to do with all those alphabet I made? Not to mention, I had all these ideas for plaques and name tags flowing through my head. You guessed it. I created a few ideas that have been lingering in my head for these plaques and name tags, and made a video showing you creative ways to use these alphabet molds.
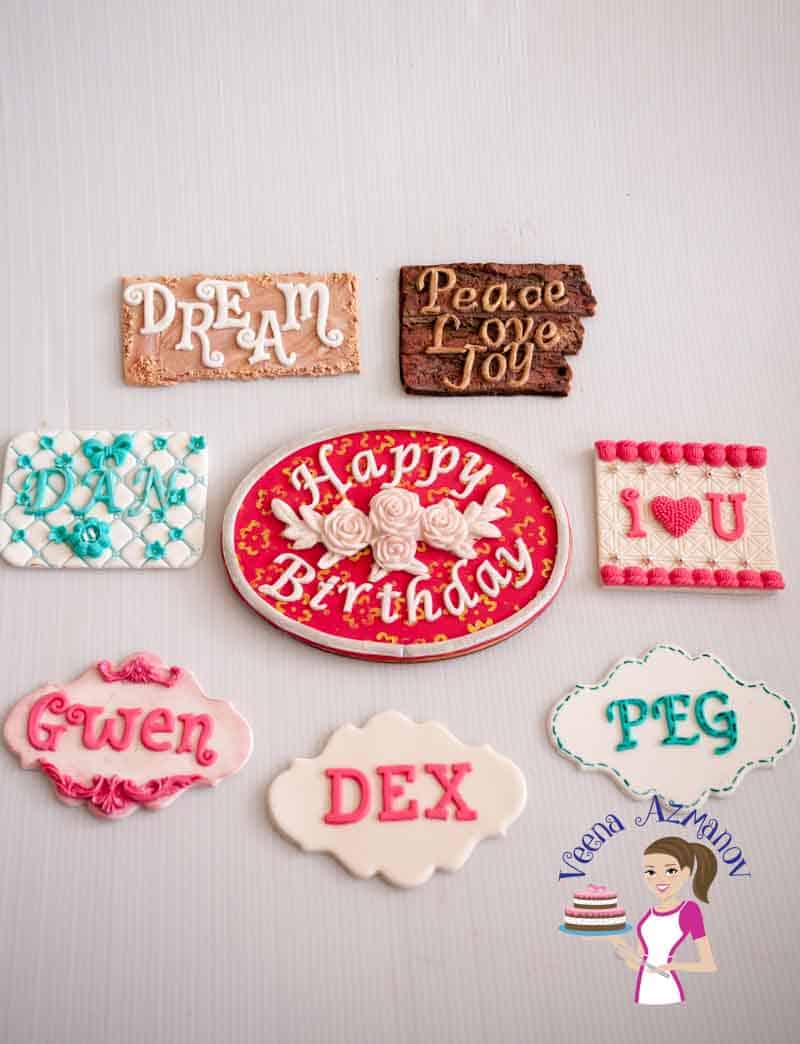
Individual fondant plaques and name tags I made
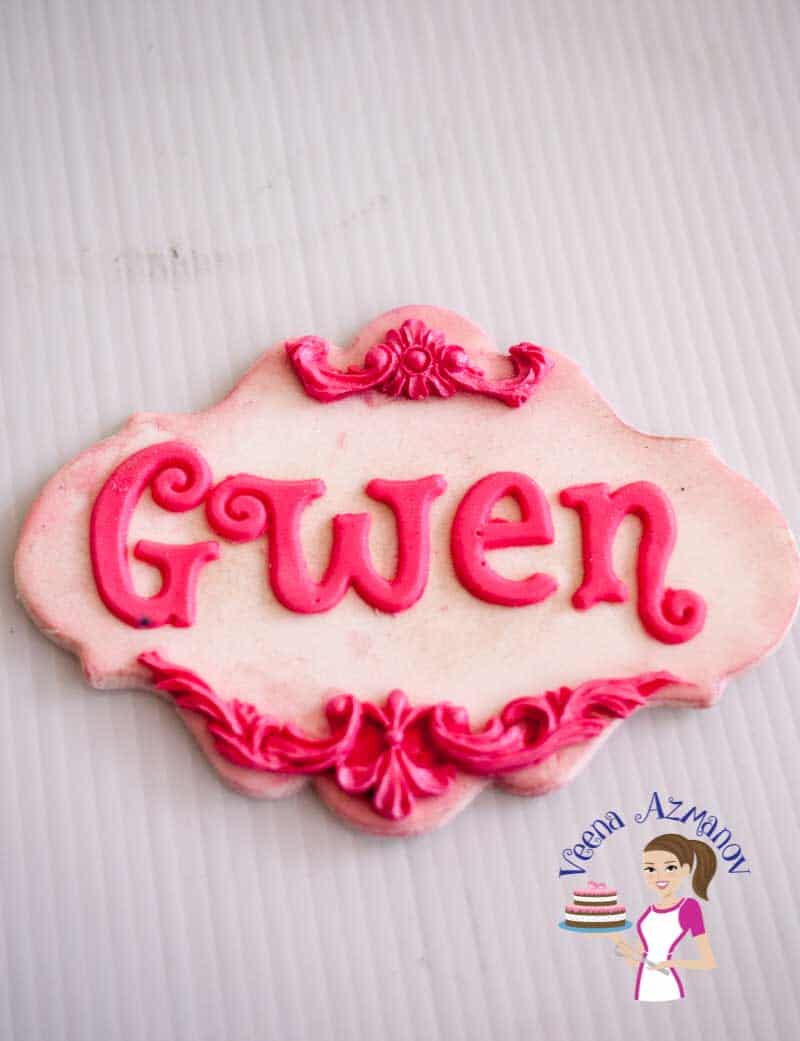
1. Vintage pink name tag
- Fondant Plaque cutter.
- Blush Pink Petal Dust from Magic Colours.
- And, calligraphy Uppercase and lowercase for the alphabets.
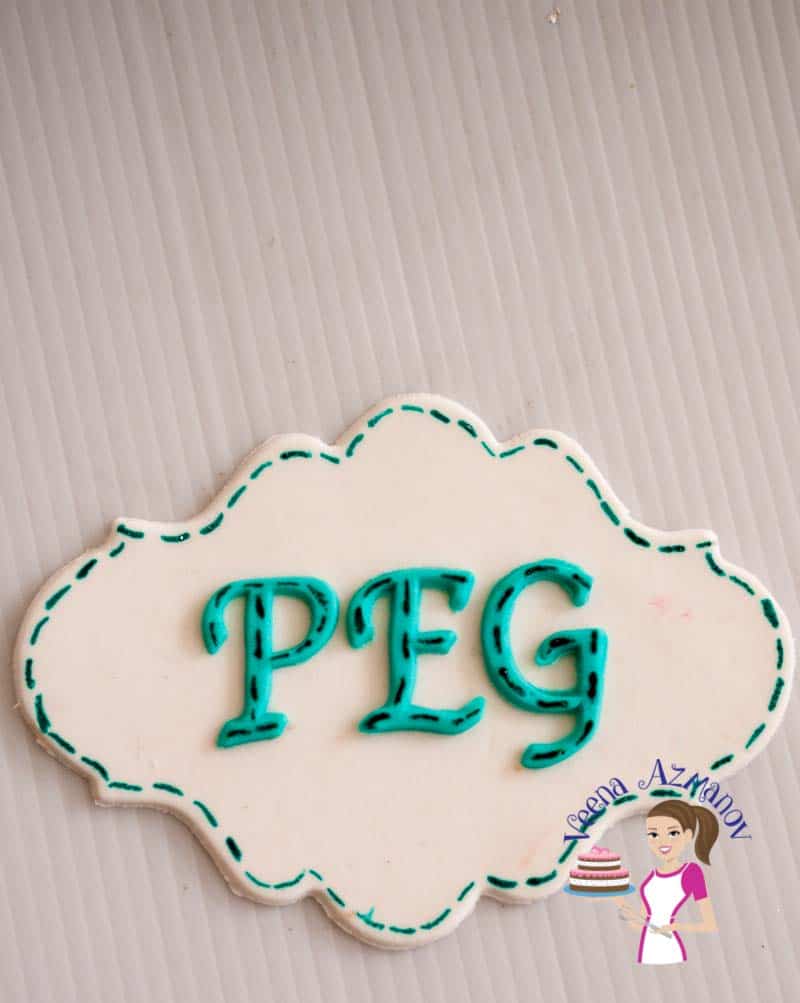
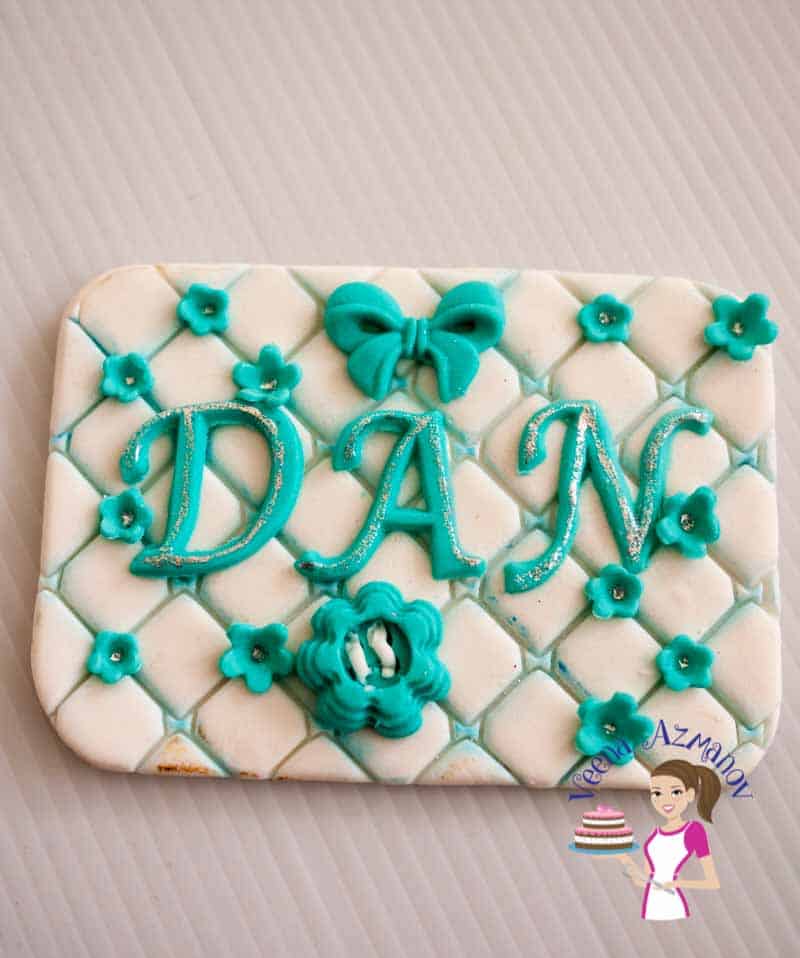
2. Stitch effect name tag
- Fondant plaque cutter.
- Magic Colors Turquoise Gel Color.
- Thin paint brush.
- Calligraphy Uppercase Flexabet molds.
3. Baby pillow turquoise fondant name tag
- Fondant double diamond cutter.
- JEM plaque cutter set.
- Typewrite Uppercase Flexabet Molds.
4. Shabby Sheek wood finish – The most important toll I used here is
- The fondant needle tool to rough out the fondant and the alphabets. Be careful when picking on the alphabets – I found just scraping worked better than picking as I did on the fondant.
- As you can see in the video – I didn’t use any cutter for the plaque but you could use any of the ones I used above.
- The alphabets are Swirly Uppercase Flexabet molds.

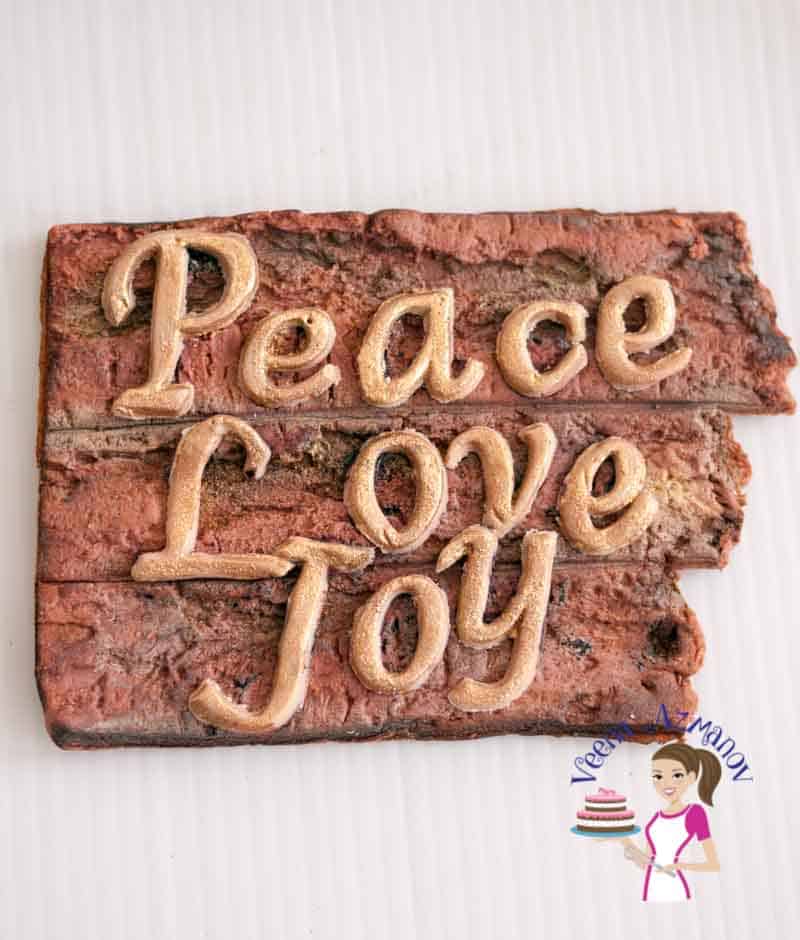
5. Tree trunk plaque
- Tree bark / Tree trunk silicon mold.
- Magic Colors – Petal Dust Brown, Ivory and Gold.
- The metallic is a mix of Magic Colors copper and gold luster dust.
- The Alphabets are – Typewriter Uppercase and lowercase Flexabet Cutters.
6. ‘I Heart You’ plaque
- Fondant Diamond Embossed cutter.
- Square cookie cutter.
- Silver Dragees.
- Marvelous Molds Grand Tassel Border Mold from the swag collection .
- Swirly Lowercase Flexabet Molds.

7. Happy birthday plaque (stenciled)
For this you will need
- A large oval cookie cutter or template.
- Edible flower stencils (couldn’t find the exact one).
- Gold luster dust (I used Magic Colours).
- Fondant rose spray Silicon molds (similar).
- Flexabet Typewrite Happy Birthday Plaque.
- Fondant extruder.

And finally here is my video on YouTube
- Castle Cake Tutorial
- SpongeBob Cake
- Wine Bottle and Crate Cake Tutorial
- How to Make a Fire Truck Cake
- Baby Booties Baby Shoes Cake Toppers


Don’t lose this recipe! Save it for Later!
📌 Save this Recipe for later on Pinterest so you can easily find it again.
⭐ Add Veena Azmanov Kitchen to your Google Preferred Sources.
It helps Google show you more of our recipes.
📧 Subscribe for new recipes delivered to your inbox.
🎥 Follow us for more recipes


These are so pretty – I cannot wait to try these
Thank you, Naiss
This is so amazing Veena – So unique. Not all cake decorators would take the trouble to spend so much time on a simple plaque but it sure is worth the effort.
Thank you so much, Ark. Appreciate the kind words and support.
These are so cute. What wonderful ideas!
Thank you so much Brandi
These look beautiful! What a fun and personal way to spruce up a cake!
Yeah – isn’t it? Thanks Luci
I cook a lot, but when someone asks me to make a cake– it always looks so sad! I have no talent in this department! These are beautiful ideas.
Thank you so much Michelle.. Yeah I know what you mean..caking can take a little practice –
What a fabulous idea!
Thanks for sharing
Julie
Thermo Kitchen
You are very welcome Julie. Thank you !
These are seriously so amazing! I’m heading over to marvelous molds right now to check their products out. I had no idea these types of fondant plaques were even possible and I love them!
Thanks Emily. Oh you will go crazy – Marvelous Molds has such a huge range