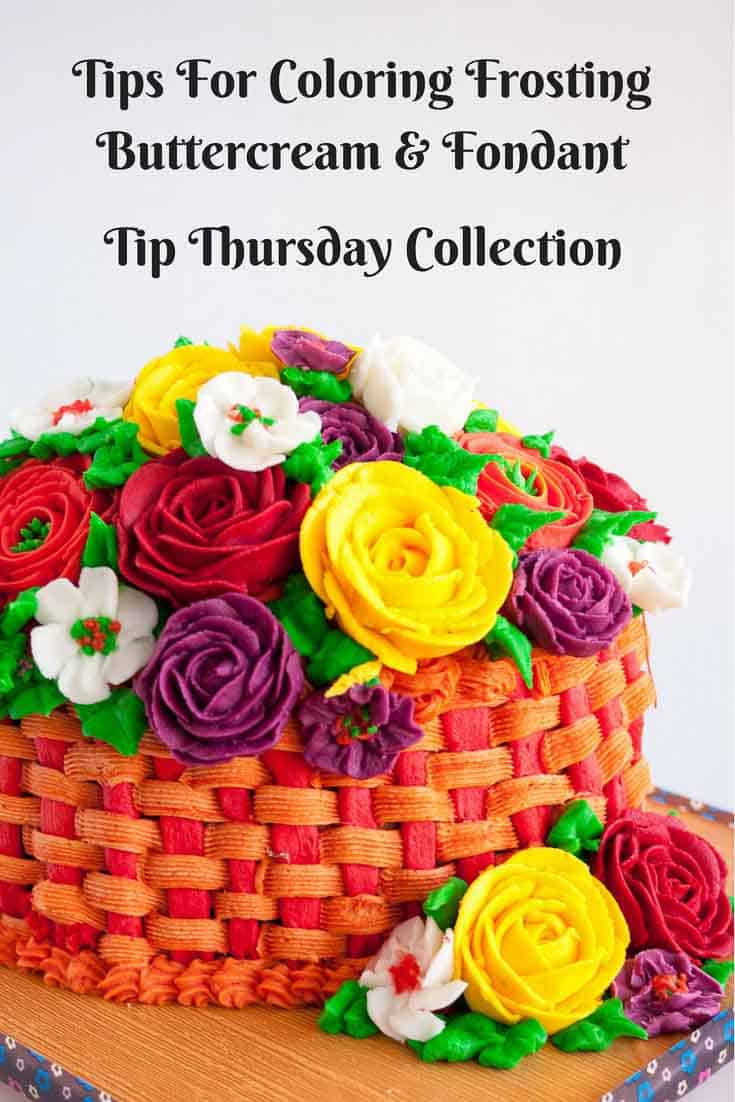
Tips for Coloring Icing: A Comprehensive Guide
Tips for coloring icing is a valuable resource for any cake decorator. This comprehensive color chart of mixing colors to create new ones is priceless. And, it comes in very handy when working with buttercream or fondant. A simple and easy way to make many unique buttercreams or fondant icing for your next cake.
Frosting is like the ultimate accessory for your baked goods, adding both flavor and flair. But when it comes to making a statement, colored frosting is where it’s at! Whether you’re aiming for a subtle pastel palette or a bold, vibrant hue, colored frosting can transform your treats into edible works of art. Imagine a simple cupcake elevated with a swirl of soft pink frosting, or a classic sugar cookie adorned with a burst of rainbow colors. With colored frosting, the possibilities are endless, and your edible creations are sure to dazzle and delight!
Why color your own frosting?
- Customization: Making your own colored frosting allows you to create custom shades that perfectly match your vision or theme, giving your treats a unique and personal touch.
- Quality Ingredients: When you make your own frosting, you have control over the quality of the ingredients. You can choose to use organic, natural, or high-quality ingredients, ensuring a better overall taste and texture.
- Freshness: Homemade frosting is always fresher than store-bought options, which may have been sitting on shelves for an extended period. Fresh frosting tends to have a smoother texture and more vibrant color.
- Cost-Effective: Making your own colored frosting can be more cost-effective, especially if you already have basic ingredients like butter, powdered sugar, and food coloring on hand. It can also be more economical when making large batches or multiple colors.
- Custom Consistency: Homemade frosting allows you to control the consistency, whether you prefer a thick, pipeable frosting for decorating or a thinner glaze for spreading. You can adjust the consistency by adding more liquid or powdered sugar as needed.
- Fun and Creative: Making your own colored frosting can be a fun and creative activity, especially for kids. You can experiment with different colors, techniques, and designs, making the baking process even more enjoyable and rewarding.

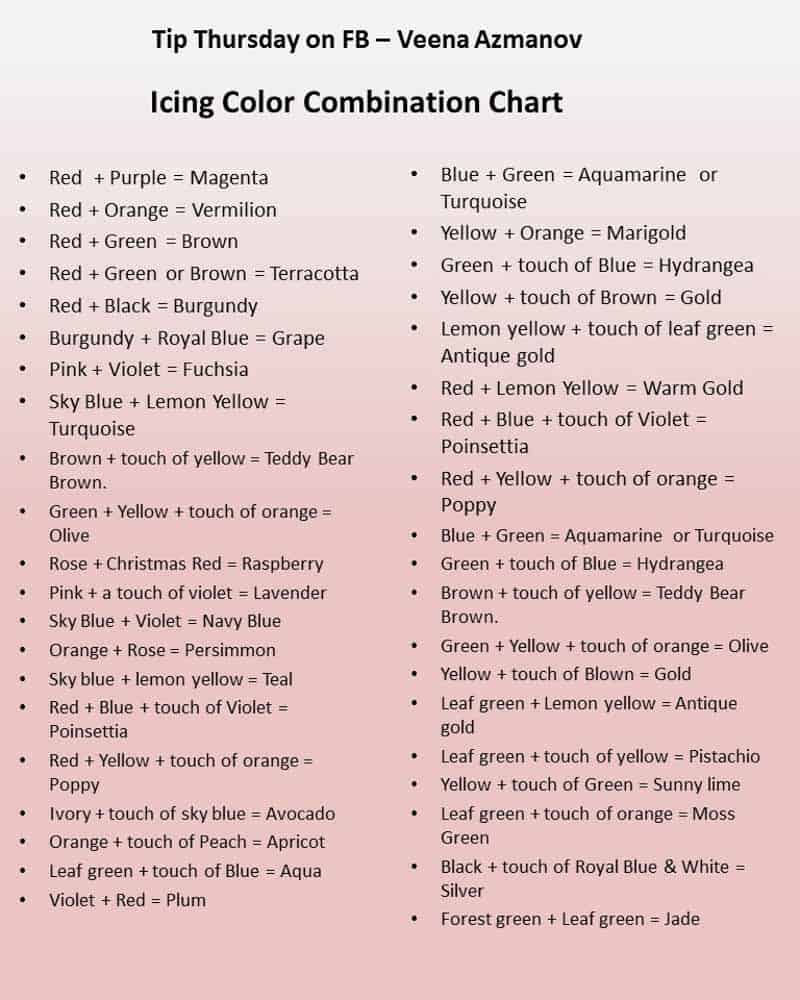
Icing color combinations
- Red + Purple = Magenta
- or Red + Orange = Vermilion
- and Red + Green = Brown
- also Red + Green or Brown = Terracotta
- Red + Black = Burgundy
- Burgundy + Royal Blue = Grape
- Pink + Violet = Fuchsia
- Sky Blue + Lemon Yellow = Turquoise
- Brown + touch of yellow = Teddy Bear Brown.
- Green + Yellow + touch of orange = Olive
- Rose + Christmas Red = Raspberry
- Pink + a touch of violet = Lavender
- Sky Blue + Violet = Navy Blue
- Orange + Rose = Persimmon
- Sky blue + lemon yellow = Teal
- Red + Blue + touch of Violet = Poinsettia
- or Red + Yellow + touch of orange = Poppy
- Ivory + touch of sky blue = Avocado
- Orange + touch of Peach = Apricot
- Leaf green + touch of Blue = Aqua
- Violet + Red = Plum
- Blue + Green = Aquamarine or Turquoise
- Yellow + Orange = Marigold
- Green + touch of Blue = Hydrangea
- Yellow + touch of Brown = Gold
- Lemon yellow + touch of leaf green = Antique gold
- Red + Lemon Yellow = Warm Gold
- or Red + Blue + touch of Violet = Poinsettia
- Red + Yellow + touch of orange = Poppy
- Blue + Green = Aquamarine or Turquoise
- Green + touch of Blue = Hydrangea
- Brown + touch of yellow = Teddy Bear Brown.
- Green + Yellow + touch of orange = Olive
- Yellow + touch of Blown = Gold
- Leaf green + Lemon yellow = Antique gold
- or Leaf green + touch of yellow = Pistachio
- Yellow + touch of Green = Sunny Lime
- Leaf green + touch of orange = Moss Green
- Black + touch of Royal Blue & White = Silver
- Forest green + Leaf green = Jade
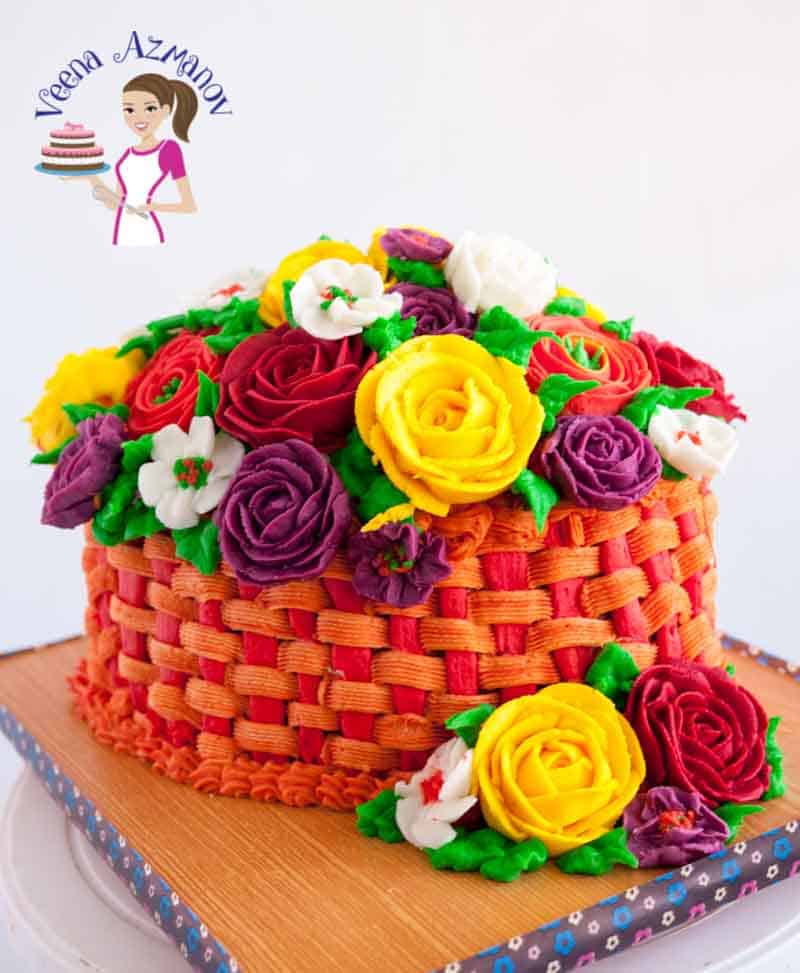
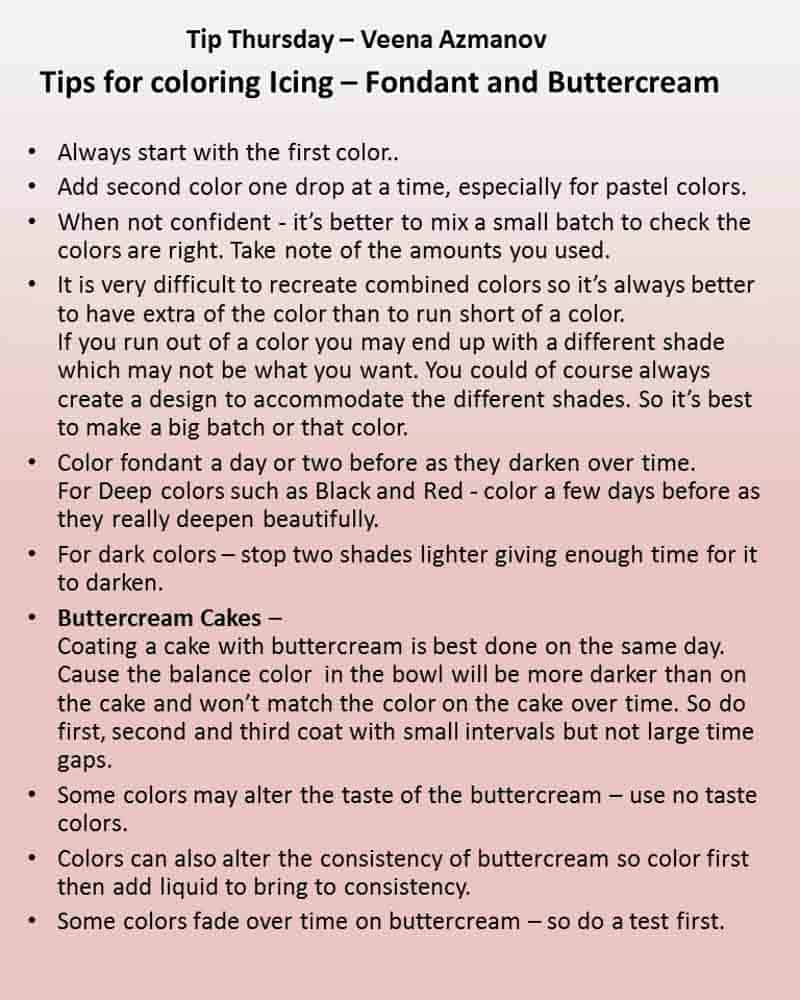
Tips for coloring buttercream frosting
Coloring buttercream frosting can be a fun and creative process. Here are some tips to help you achieve the perfect colored frosting:
- Start with White: Begin with a batch of white buttercream frosting. This will give you a blank canvas to work with and ensure that the colors you add are true to the desired shade.
- Use Gel Food Coloring: Gel food coloring is more concentrated than liquid food coloring, so you’ll need less to achieve vibrant colors. It also won’t thin out your frosting as much as liquid food coloring.
- Add Color Gradually: Start by adding a small amount of food coloring to your frosting and mix well. You can always add more if you want a deeper color, but you can’t take it away once it’s mixed in.
- Mix Colors Carefully: If you’re mixing colors to create a custom shade, add a little of each color at a time and mix well between additions. This will help you achieve the exact color you’re looking for without overmixing the frosting.
- Use a Toothpick: If you’re using gel food coloring, dip a toothpick into the coloring and then into the frosting to add small amounts at a time. This will help you control the amount of color you’re adding.
- Let Colors Develop: Colors may deepen or develop over time, so let your colored frosting sit for a few minutes after mixing to see the final shade before adding more color.
- Store Extra Frosting: If you have leftover colored frosting, store it in an airtight container in the refrigerator. Bring it to room temperature and re-mix before using to ensure a smooth consistency and even color.
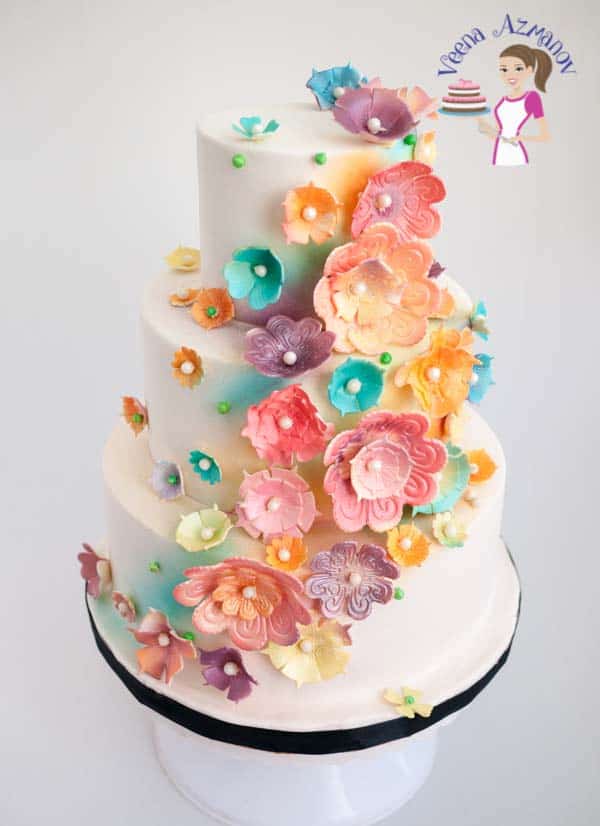
Tips for coloring fondant
Coloring fondant, also known as sugar paste, can be a great way to add vibrant colors to your cake decorating projects. Here are some tips to help you achieve the best results:
- Use Gel or Paste Food Coloring: Gel or paste food coloring is preferred over liquid food coloring when coloring fondant. Gel and paste colors are more concentrated, which means you need less to achieve the desired color, and they won’t affect the consistency of the fondant as much.
- Knead Well: To ensure that the color is evenly distributed throughout the fondant, knead it well after adding the food coloring. This will help you achieve a uniform color.
- Start with a Small Amount: It’s easier to add more color to achieve a darker shade than it is to lighten the color if you add too much. Start with a small amount of food coloring and gradually add more until you reach the desired shade.
- Use Gloves: Food coloring can stain your hands, so it’s a good idea to wear gloves when kneading the fondant with the food coloring.
- Let the Color Develop: Colors can deepen or change slightly as the fondant sits, so let the colored fondant rest for a bit before using it to cover your cake or create decorations.
- Store Unused Fondant Properly: If you have leftover colored fondant, wrap it tightly in plastic wrap and store it in an airtight container to prevent it from drying out. Stored properly, fondant can last for several weeks.
- Mix Colors Carefully: If you need to create a custom color, start by mixing small amounts of different colored fondant together. Knead the fondant well to blend the colors, and add more as needed to achieve the desired shade.
Today’s Tip Thursday on Facebook Page. You can save more of my Tip Thursdays here on Pinterest


What do you mean when you write a touch of a color?
Connie. A touch would be less than 1/8 teaspoon. I know that sounds too little but it is often the best to start. If necessary you can add more as needed. Hope this helps.
How to get perfect red colour in whipped cream icing?can you help me Veena
Personally, I prefer to airbrush the red rather than add it to the whipped cream. I avoid dark colors with whipping cream.
Thank you so much for this. Such a helpful chart.
Thank you, Kassandra. So happy to hear you found this post useful. Thanks for coming back to write this feedback. Have a lovely day.
Pls how do I get champagne gold. Tnks
Well it depends on the shade of Champagne- you will need to play with the ratio until you get what you looking for. I’d start with Ivory, a touch of brown, a little peach will bring a nice glow too.
Hi Veena, pls what is the best way to keep fondant stuck to my cake without it melting
Jummy sounds like you live in a place with high humidity? I do have high humidity here too and I keep it at room temperature. If I put it in the fridge it does have condensation when you take it out but that will dry out in a few hours. Just don’t touch it. IF your cake does not need fridge then just leave it in a cool room. If possible with the AC on.
I enjoy the colour combinations ,thanks
Thank you
Thanks..
Sorry please, are there any colours I can combine to get mint green?
Ah… I’d say add a tiny tiny leaf green and star with that. You will need to see the shades of green you have – every green is different and mint needs just a dash.
Is their any problem using with liquid color in buttercream. ….I’m not getting bright color wen I’m using liquid color
Liquid colors are usually diluted. So you need a lot more.. Unfortunately it also thins your buttercream and makes the consistency very soft.
Hi Veena, how will I achieve the deep red color for my fondant.
Thank you very much
Use red and add a dab of brown until you get a deep red color –
Thanks Veena. This is very helpful.