Cupcakes Tips and Troubleshooting
Don’t just make cupcakes, make amazing cupcakes! Whether you’re a complete beginner or a seasoned cupcake baker, this article will provide you with all the tips, tricks, and troubleshooting advice you need to create show-stopping cupcakes every time. From the basics of baking to the art of decoration, this article will arm you with the confidence to bake beautiful cupcakes that are almost too good to eat.
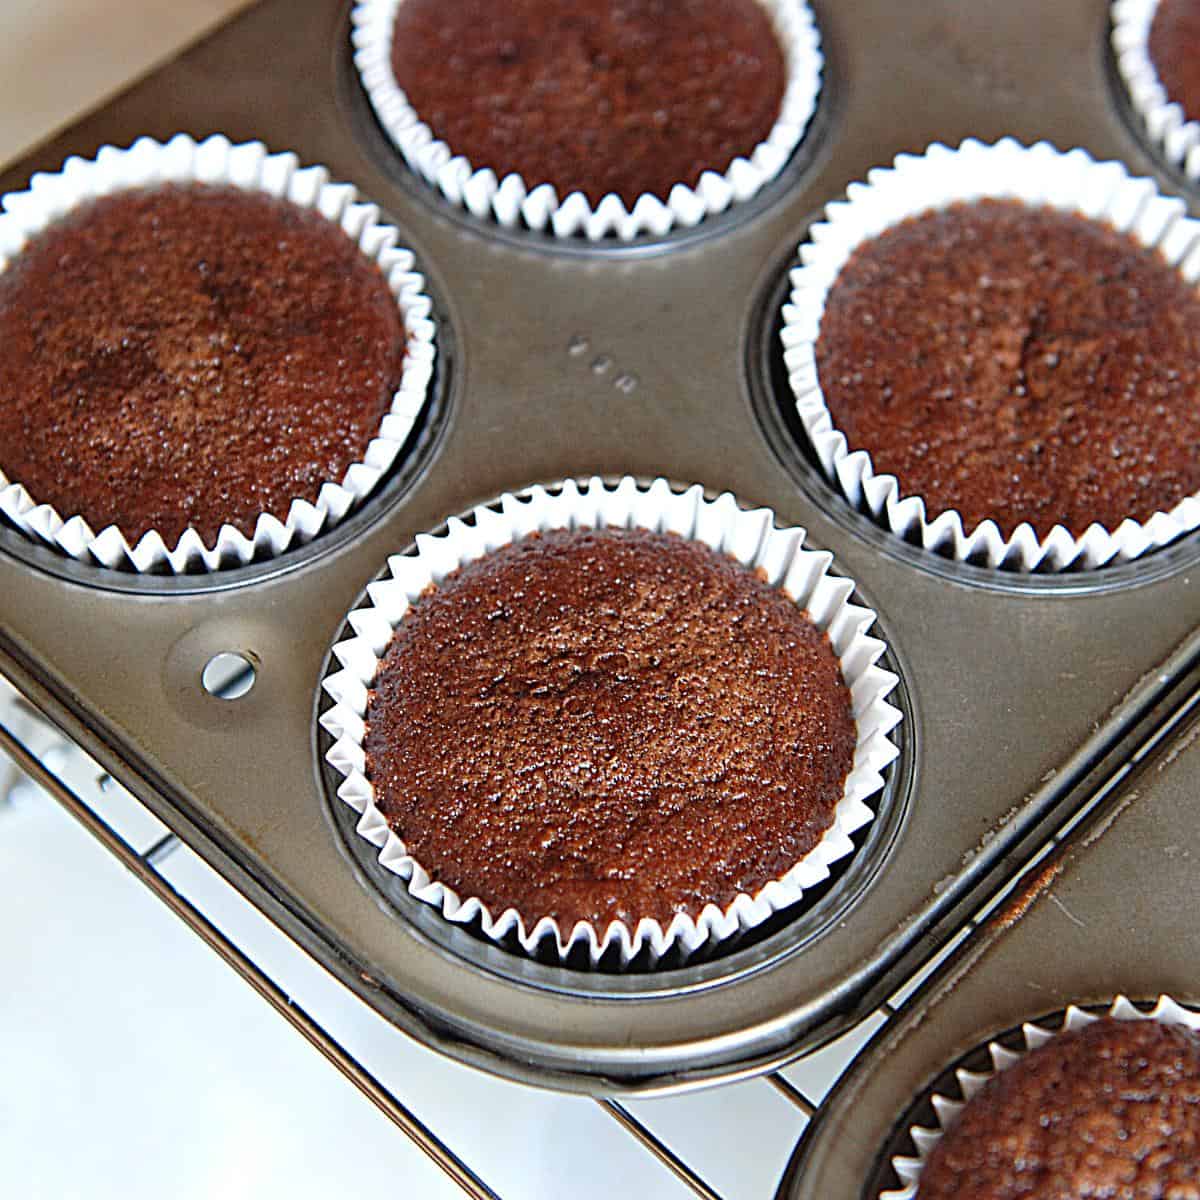
Have you baked cupcakes only to take them out of the oven all lopsided, wonky or unevenly baked cupcakes? That’s usually how we call them isn’t is? Lopsided/wonky or uneven baked cupcakes? Well, those are usually the words people use when they message me.
Now I don’t really have pictures of unevenly baked cupcakes; just because it never occurred to me to take pictures. But trust me I’ve had my fair share of these when I just started baking cupcakes. Of course, if you going to decorate them with buttercream or fondant then it’s not an issue right? No one knows under the frosting what really happened.
Tips for baking perfect cupcakes
Here are some tips to help you bake perfect cupcakes:
- Follow the recipe accurately: Carefully measure all the ingredients as per the recipe instructions. Baking is a science, and precise measurements are crucial for consistent results.
- Use room temperature ingredients: Bring eggs, butter, and other dairy ingredients to room temperature before using them. Room temperature ingredients blend more easily and result in better texture.
- Preheat the oven: Make sure to preheat your oven before placing the cupcakes inside. This ensures that the cupcakes bake evenly and rise properly.
- Use quality ingredients: Choose high-quality ingredients for the best flavor and texture. Fresh eggs, good-quality flour, and pure vanilla extract can make a significant difference.
- Mix the batter correctly: Follow the mixing instructions provided in the recipe. Overmixing can lead to dense cupcakes, while undermixing can result in uneven texture. Mix until the ingredients are just combined.
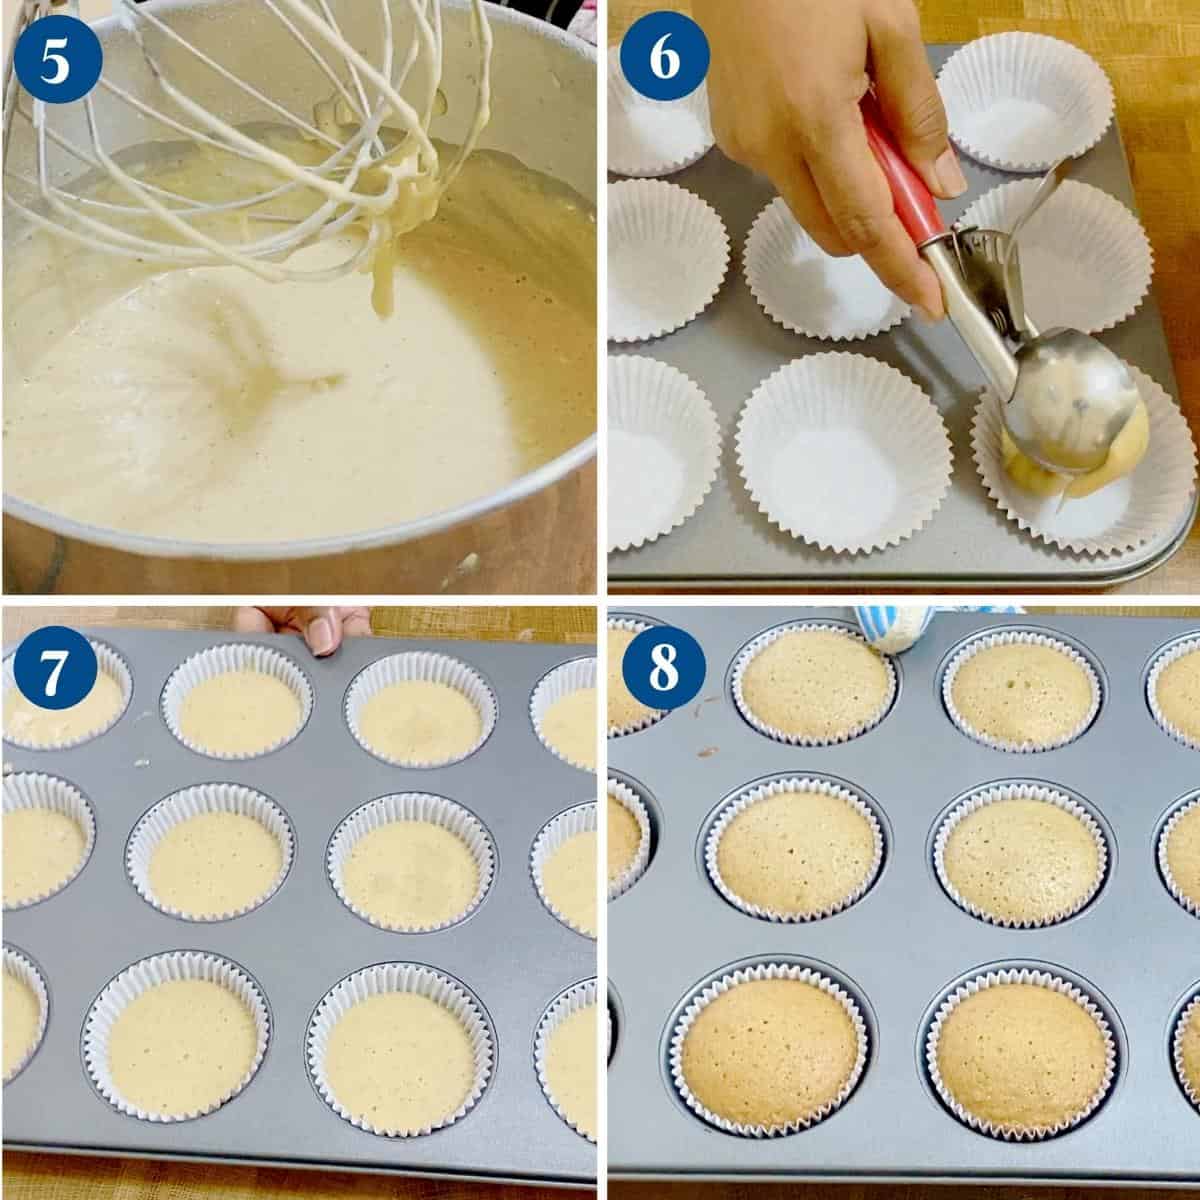
- Fill the cupcake liners correctly: Fill each cupcake liner about two-thirds full to allow room for the cupcakes to rise. Using an ice cream scoop or a spoon can help ensure consistent measurements.
- Don’t open the oven too often: Avoid opening the oven door frequently while the cupcakes are baking. Sudden temperature changes can affect the baking process.
- Rotate the cupcake pan: If you notice uneven baking in your oven, halfway through baking, rotate the cupcake pan 180 degrees to ensure even heat distribution.
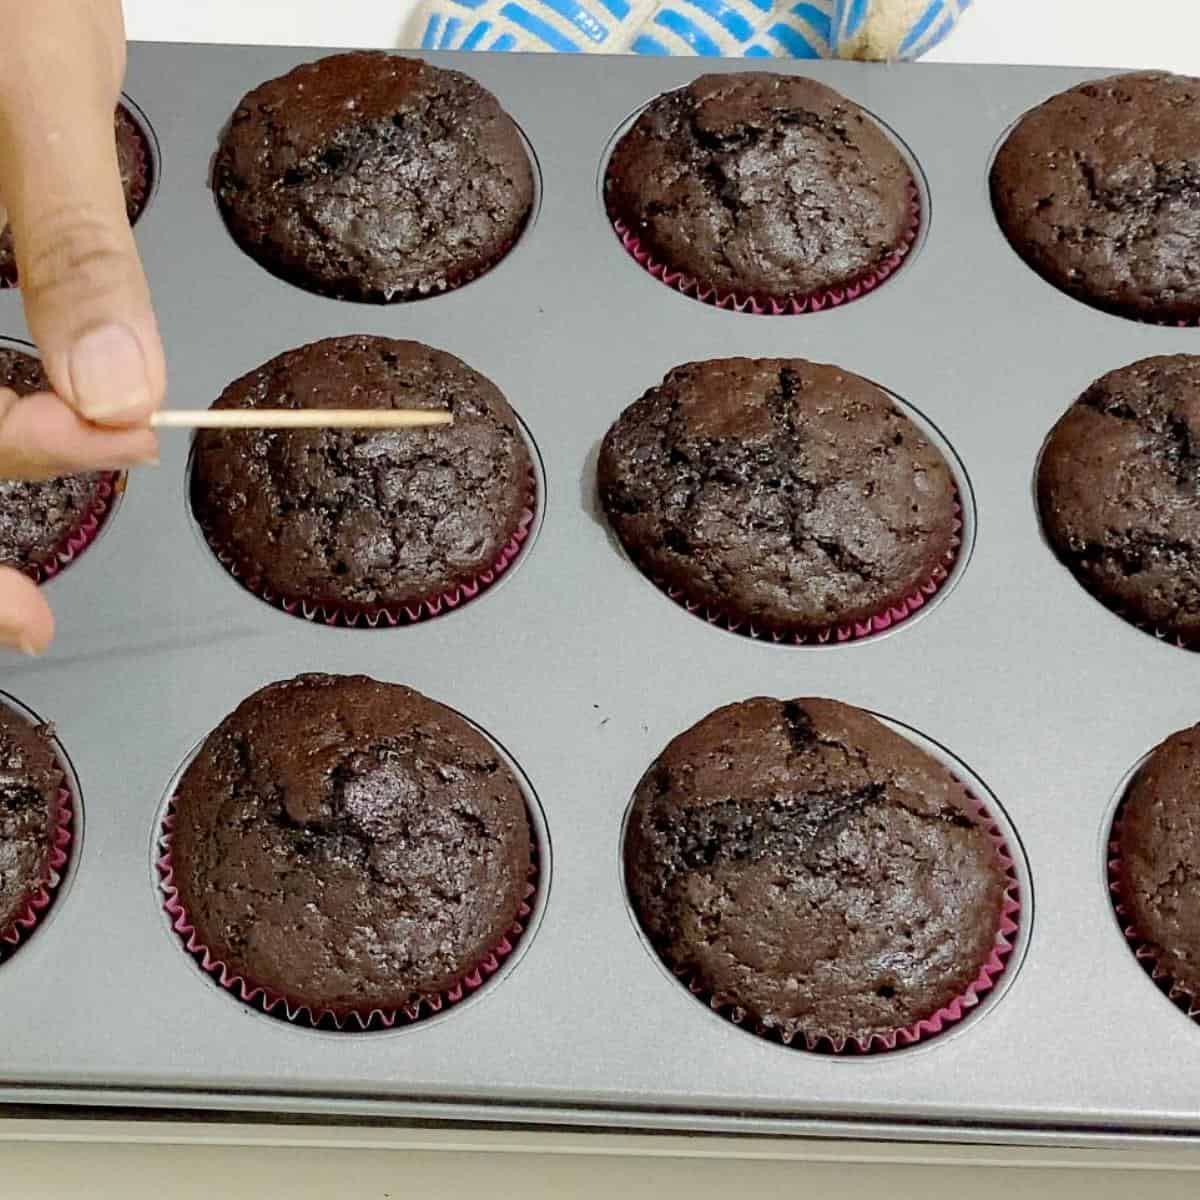
- Check for doneness: Test the cupcakes for doneness by inserting a toothpick or cake tester into the center. If it comes out clean or with a few crumbs, they’re done. Avoid overbaking, as it can result in dry cupcakes.
- Cool properly: Allow the cupcakes to cool in the pan for a few minutes, then transfer them to a wire rack to cool completely. This prevents them from becoming soggy due to trapped steam.
- Frosting and decorating: Once the cupcakes are completely cooled, you can frost and decorate them as desired. Ensure the cupcakes are cooled to room temperature to prevent the frosting from melting.
Remember, practice makes perfect, so don’t be discouraged if your first attempts aren’t flawless. With time and experience, you’ll improve your cupcake-baking skills. Enjoy the process and have fun experimenting with flavors and decorations!
What is the secret to moist cupcakes?
The secret to moist cupcakes lies in a few key factors. Here are some tips to achieve moist cupcakes:
- Proper measurement of ingredients: Accurate measurement of ingredients is crucial for the texture and moisture of your cupcakes. Use measuring cups and spoons to ensure you add the right amount of flour, sugar, liquids, and fats as specified in the recipe.
- Don’t overmix the batter: Overmixing can lead to gluten development, resulting in dense and dry cupcakes. Mix the batter just until the ingredients are combined. Overmixing can also cause too much air to be incorporated into the batter, which can lead to a drier texture.
- Use quality fats: Fats like butter or vegetable oil contribute to the moisture and tenderness of cupcakes. Ensure you use good-quality butter or oil that is at room temperature. Cream the butter properly before adding other ingredients to incorporate air and create a lighter texture.
- Include moistening ingredients: Adding ingredients that retain moisture can enhance the moistness of your cupcakes. These can include ingredients like sour cream, yogurt, buttermilk, applesauce, mashed bananas, or pureed fruits. These ingredients not only add moisture but also provide flavor and tenderness to the cupcakes.
- Do not overbake: Be careful not to overbake your cupcakes, as this can lead to dryness. Follow the recommended baking time in the recipe and keep a close eye on them towards the end of baking. Use a toothpick or cake tester to check for doneness. If it comes out with a few moist crumbs attached, the cupcakes are done.
- Proper cooling and storage: After baking, allow the cupcakes to cool completely before storing them. This helps the cupcakes retain their moisture. Store the cupcakes in an airtight container to prevent them from drying out. If desired, you can also place a slice of bread in the container to help retain moisture.
- Consider syrups or fillings: To add extra moisture and flavor, you can brush the cupcakes with a simple syrup or add a filling. Syrups can be made by heating equal parts of water and sugar until the sugar dissolves. Brushing the cupcakes with the syrup while they’re still warm helps retain moisture. Fillings such as fruit preserves or ganache can also add moisture to the center of the cupcakes.
By following these tips, you can create moist and delicious cupcakes that will impress your taste buds. Remember to choose a reliable recipe and make adjustments based on your preferences and baking conditions.


Troubleshooting – baked cupcakes
Here are some common cupcake-baking issues and their troubleshooting tips:
- Cupcakes sinking in the middle:
- Possible causes: Overmixing the batter, underbaking, or opening the oven door too soon.
- Solutions: Mix the batter just until the ingredients are combined. Ensure the cupcakes are baked for the recommended time and test for doneness with a toothpick. Avoid opening the oven door until the cupcakes have set.
- Cupcakes not rising:
- Possible causes: Outdated baking powder or baking soda, improper measurement of leavening agents, or oven temperature too low.
- Solutions: Check the expiration dates of your baking powder and baking soda. Use fresh leavening agents and measure them accurately. Ensure the oven is preheated to the correct temperature as specified in the recipe.
- Cupcakes are dry:
- Possible causes: Overbaking, too much flour, or too little fat or liquid in the recipe.
- Solutions: Bake the cupcakes for the recommended time and check for doneness using a toothpick. Ensure that you are measuring the flour accurately and not packing it too tightly. Double-check the fat and liquid quantities to ensure they are sufficient for moisture.
- Cupcakes are dense and heavy:
- Possible causes: Overmixing the batter, too much flour, or not enough leavening agents.
- Solutions: Mix the batter just until the ingredients are combined to avoid overmixing. Measure the flour accurately and avoid packing it too tightly. Check the recipe for the correct amount of leavening agents and ensure they are fresh.
- Cupcakes are burnt on the bottom:
- Possible causes: Oven temperature too high or cupcakes placed too close to the bottom heating element.
- Solutions: Use an oven thermometer to ensure your oven is at the correct temperature. Adjust the oven rack to the center position to prevent the cupcakes from being too close to the heating element.
- Cupcakes are unevenly baked:
- Possible causes: Uneven oven temperature, improper filling of cupcake liners, or overcrowding the oven.
- Solutions: Use an oven thermometer to verify the temperature and make sure it’s accurate. Fill the cupcake liners evenly, about two-thirds full. Avoid overcrowding the oven by baking in multiple batches if necessary.
- Cupcakes sticking to the liners:
- Possible causes: Low-quality or non-stick liners, overbaking, or not allowing the cupcakes to cool adequately.
- Solutions: Use high-quality cupcake liners or consider using silicone baking cups. Bake the cupcakes for the recommended time, and avoid overbaking. Allow the cupcakes to cool in the pan for a few minutes before transferring them to a wire rack to cool completely.
Some of these issues need a little more attention so let’s explore them further. Shall we?
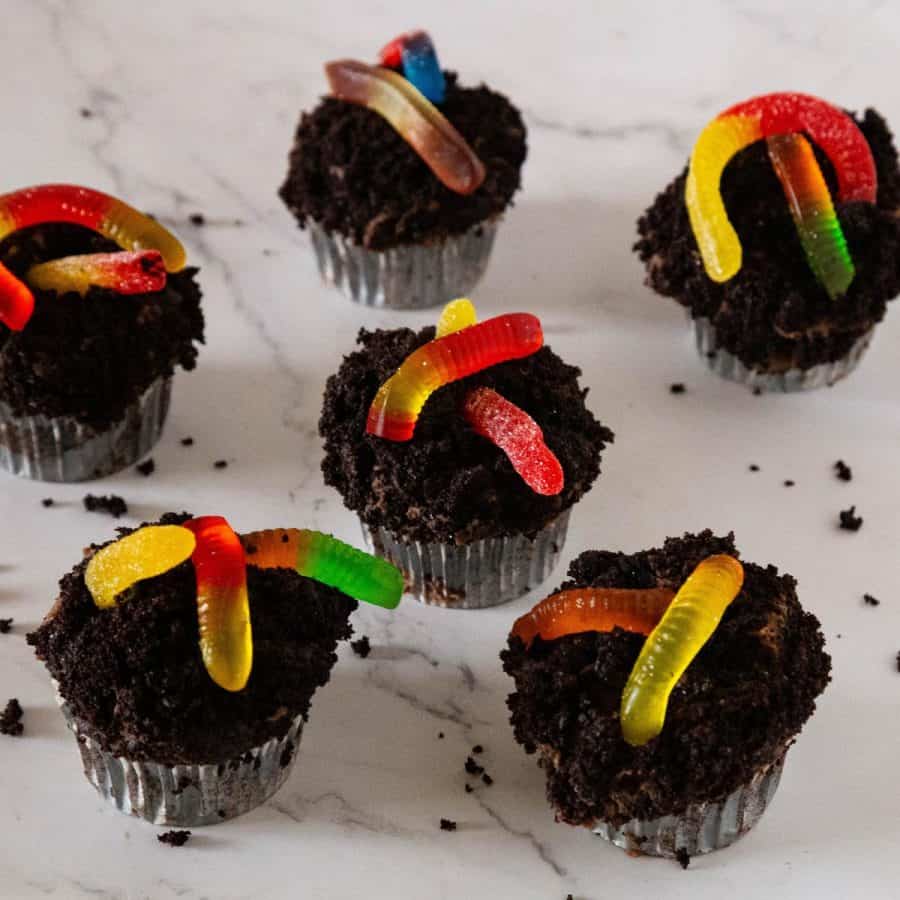
One of the problems with cupcake baking can be unevenly baked cupcakes or as we say lopsided, wonky cupcakes. These can be very frustrating. Here are 8 tips to make cupcakes rise evenly, help troubleshoot and figure out what could be the possible cause. These are also tips that can help make sure you bake a perfect cupcake every single time.
Why do cupcakes bake unevenly or lopsided?
Uneven baking of cupcakes can occur due to several factors. Here are some possible reasons:
- Uneven oven temperature: An inaccurate oven temperature can lead to uneven baking. It’s important to preheat your oven properly and use an oven thermometer to ensure the temperature is accurate. Hot spots or cold spots within the oven can also cause uneven baking, so rotating the cupcakes halfway through baking can help.
- Improperly filled cupcake liners: If you overfill or underfill the cupcake liners, it can result in uneven baking. Fill each liner about two-thirds full to allow room for the cupcakes to rise evenly during baking.
- Uneven batter distribution: If you don’t distribute the cupcake batter evenly among the liners, some cupcakes may end up with more batter than others. Use a scoop or spoon to ensure consistent amounts of batter in each liner.
- Incorrect oven rack position: Placing the cupcake pan on an incorrect oven rack can affect baking. The ideal position is usually in the center of the oven, where the heat is evenly distributed.
- Different cupcake sizes: If you have cupcakes of different sizes in the same batch, they may bake at different rates. Try to ensure uniformity in size to promote even baking.
- Baking pan material: Different baking pans conduct heat differently. Dark-colored pans tend to absorb more heat and can result in uneven baking. Consider using light-colored aluminum pans or silicone baking cups, which promote even heat distribution.
- Opening the oven door too frequently: Frequently opening the oven door during baking can cause fluctuations in temperature, leading to uneven baking. Try to resist the temptation to check on the cupcakes too often.
- Altitude and humidity: Environmental factors like altitude and humidity can affect baking. High altitudes and humid climates may require adjustments to the recipe, such as altering the oven temperature or baking time.
By addressing these factors, you can increase the chances of achieving more even baking results for your cupcakes.
Troubleshooting unevenly / lopsided cupcakes
So, while this is a very frustrating issue most often the problem lies with the oven temperature, not the recipe. The best way to learn from this is to experiment with the solutions below.
- Cupcakes rise too fast – High oven temperature – reduce temperature slightly.
- or cupcakes have cracks on the top – again means they are rising much too fast – the oven is too high. Lower temperature slightly.
- Cupcakes bak quicker then the time stated (in 15 minutes as compared to the stated 20 minutes )–usually because the oven is too high. Reduce temperature.
- Then there are cupcakes baked but raised on one side – uneven heating – means your oven fan needs to be switched off or oven temperature lowered by 25%.
- Cupcakes baked raised on one side and cracked – Using fan assisted oven and the oven temperature is too high – cupcakes will bake faster and dry out. Lower temperature significantly.
- All cakes are baked towards one side in your oven –the oven tray or oven is not leveled.
- Fill cupcakes only 2/3 full so they have space to rise.
- Bake one cupcake tray at a time. If you have to bake two – have the oven fan on so it will distribute heat evenly but at a lower setting.
- Rotate the pan in between cooking this will help them rise evenly too.
- It’s better to have a cupcake take longer to bake than to have a wonky lopsided cupcake. Right?
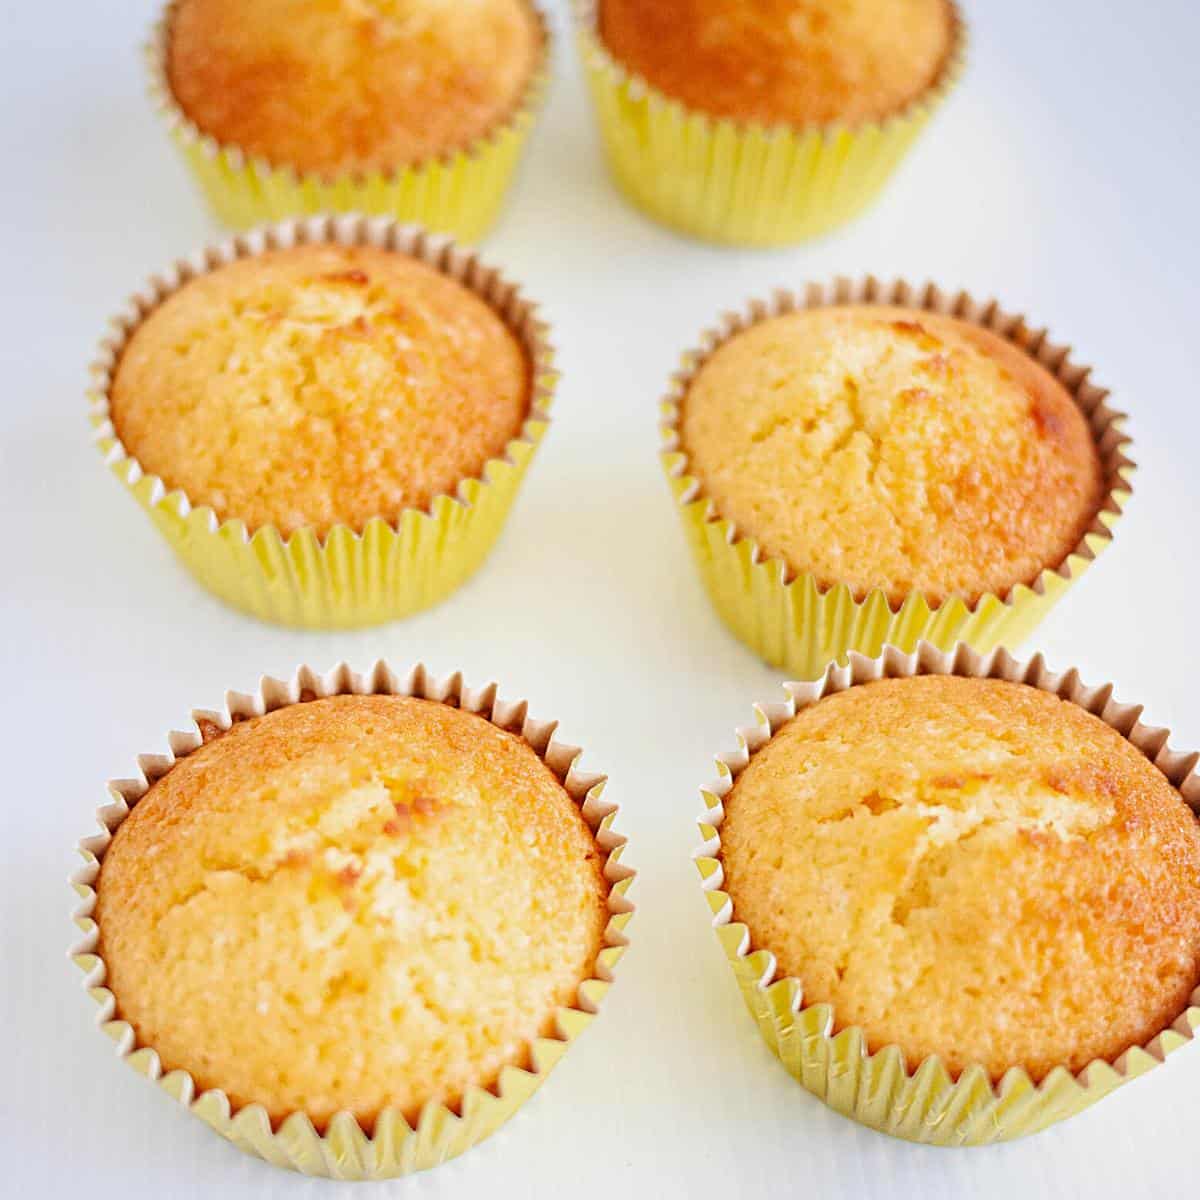


How to bake same size cupcakes?
Baking cupcakes of the same size requires consistency in both the amount of batter and the baking process. Here’s how you can achieve that:
- Use a scoop or measuring cup: To ensure that each cupcake receives the same amount of batter, use a scoop or measuring cup. This will help you portion out the batter evenly into each cupcake liner.
- Fill the liners uniformly: Fill each cupcake liner about two-thirds full. This will allow the cupcakes to rise evenly during baking. Using an ice cream scoop or a measuring cup with a spout can help you pour the batter consistently.
- Tap the pan: After filling the liners, tap the cupcake pan gently on the counter a few times. This helps to eliminate air bubbles and ensures that the batter settles uniformly in each liner.
- Rotate the pan: If you’re baking multiple cupcake pans at once, make sure to rotate the pans halfway through baking. This helps to ensure even heat distribution, as ovens can have hot spots. If you’re baking a single pan, rotating is not necessary.
- Maintain consistent oven temperature: Check your oven temperature with an oven thermometer to ensure it’s accurate. Fluctuating temperatures can result in uneven baking. Avoid opening the oven door frequently during baking, as it can cause temperature fluctuations.
- Bake one pan at a time: If you’re baking multiple pans, it’s best to bake one pan at a time in the center of the oven. This allows for proper airflow and even baking.
- Check for doneness: Use a toothpick or cake tester to check for doneness. Insert it into the center of a cupcake, and if it comes out clean or with a few crumbs, the cupcakes are ready.
- Cool the cupcakes properly: After removing the cupcakes from the oven, allow them to cool in the pan for a few minutes. Then transfer them to a wire rack to cool completely. Cooling the cupcakes properly helps them retain their shape and texture.
To achieve uniform cupcakes that are baked to the same size, remember to practice and make adjustments as needed based on your specific oven and recipe.
How to avoid cupcake liners peeling during baking?
While most often we presume the problem might be with the liners, sometimes the problem actually can be with the procedures we use. Of course that does not mean the liners are always perfect. To prevent cupcake liners from peeling during baking, you can try the following tips:
- Use high-quality liners: Choose liners made of sturdy material and of good quality. Thin or low-quality liners are more likely to peel or stick to the cupcakes. Often I find the supermarket brand’s liner works best because they are made with regular not fancy baking paper. So I’m not talking about price I’m talking about quality. Sometimes test the new liners with leftover batter.
- Greased liners: Never spray your pan or liners with grease – the liners are already prepared for baking.
- Adjust the baking temperature: High temperatures can cause the cupcake liners to peel. Lowering the oven temperature slightly can help mitigate this issue. Follow the recommended baking temperature in the recipe, but if you consistently experience peeling liners, consider reducing the temperature by about 25 degrees Fahrenheit (14 degrees Celsius).
- Fill the liners correctly: Fill the cupcake liners about two-thirds full with batter, leaving some room for the cupcakes to rise. Overfilling can cause the batter to spill over the edges and stick to the liners.
- Underbaking – Underbaking your cupcakes can cause your cake to shrink when cooling causing the liners to pull away. Bake until done.
- Allow the cupcakes to cool properly: After baking, let the cupcakes cool in the pan for a few minutes before transferring them to a wire rack to cool completely. This gradual cooling process helps the cupcakes contract slightly, reducing the likelihood of liners peeling.
- Use silicone baking cups: Consider using reusable silicone baking cups instead of paper liners. Silicone liners have a non-stick surface, and cupcakes tend to release more easily from them.
- Experiment with different brands or types of liners: Different cupcake liner brands or materials may yield different results. You can try different options to find liners that work well for you and don’t peel during baking.
Remember to also handle the cupcakes gently when removing the liners to maintain their appearance.
Why do cupcakes become sticky on the top?
Cupcakes can become sticky on top for a few reasons:
- Moisture condensation: If the cupcakes are stored in a container while they are still warm or hot, moisture can condense on the top surface, creating a sticky texture. It’s important to allow the cupcakes to cool completely before storing them to prevent this condensation.
- Humidity: High humidity in the environment can also cause cupcakes to become sticky on top. Moisture from the air can be absorbed by the cupcakes, leading to a sticky surface. Consider storing cupcakes in an airtight container to minimize exposure to humid air.
- Excessive frosting or toppings: If you’ve applied a generous amount of frosting, glaze, or other toppings to the cupcakes, they may become sticky on top. This is especially true if the frosting contains high amounts of sugar or if it hasn’t fully set or dried.
- Syrups or fillings: If you’ve added syrups, fillings, or fruit preserves to the cupcakes, they can contribute to stickiness on top. These additions can introduce extra moisture to the surface, resulting in stickiness.
To prevent cupcakes from becoming sticky on top:
- Ensure the cupcakes are completely cooled before storing them.
- Store cupcakes in a cool, dry place with low humidity.
- Use a moderate amount of frosting or toppings, avoiding excessive amounts that may not fully set or dry.
- If using syrups or fillings, apply them sparingly and ensure they are well-absorbed or set before storing the cupcakes.
By paying attention to storage conditions and the amount of moisture introduced to the cupcakes, you can help prevent them from becoming sticky on top.

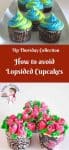
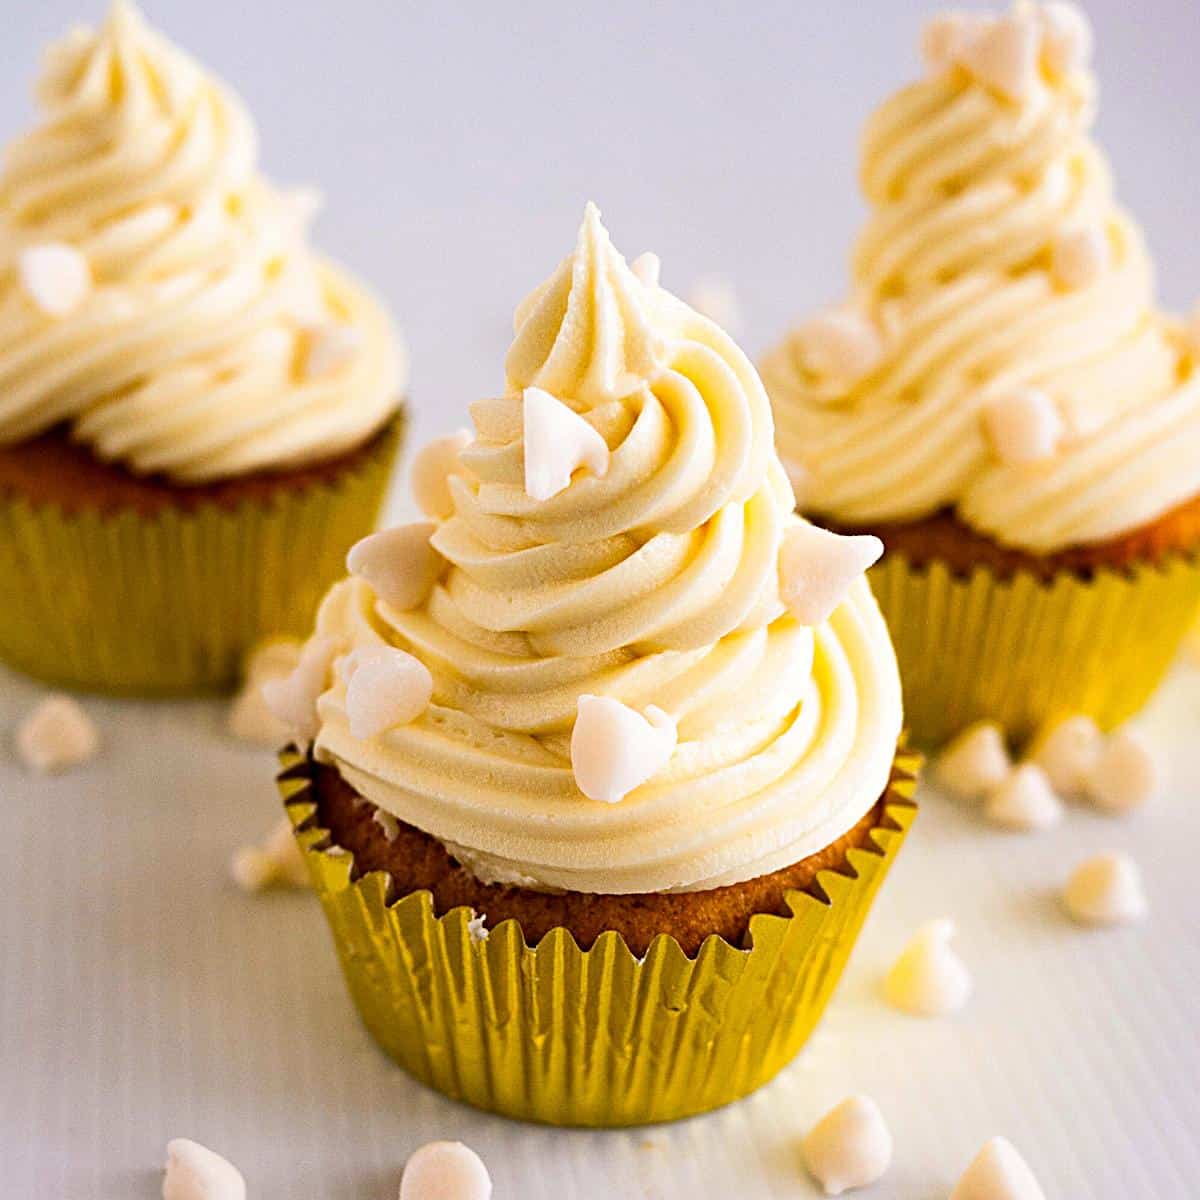
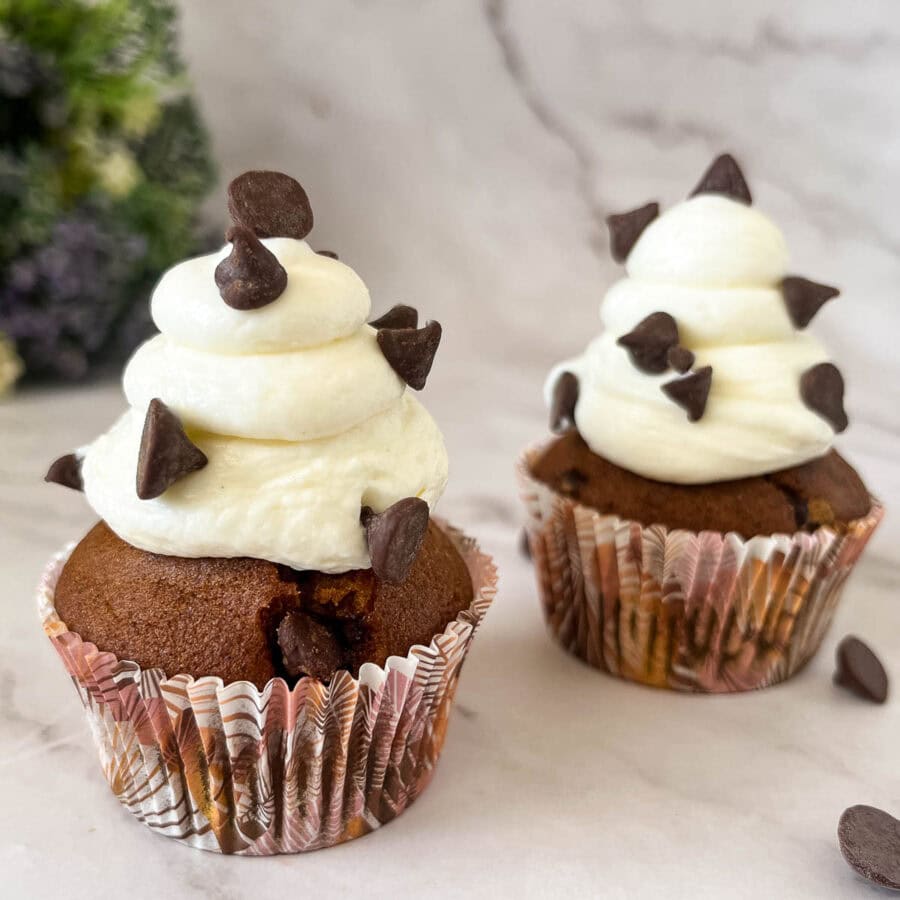
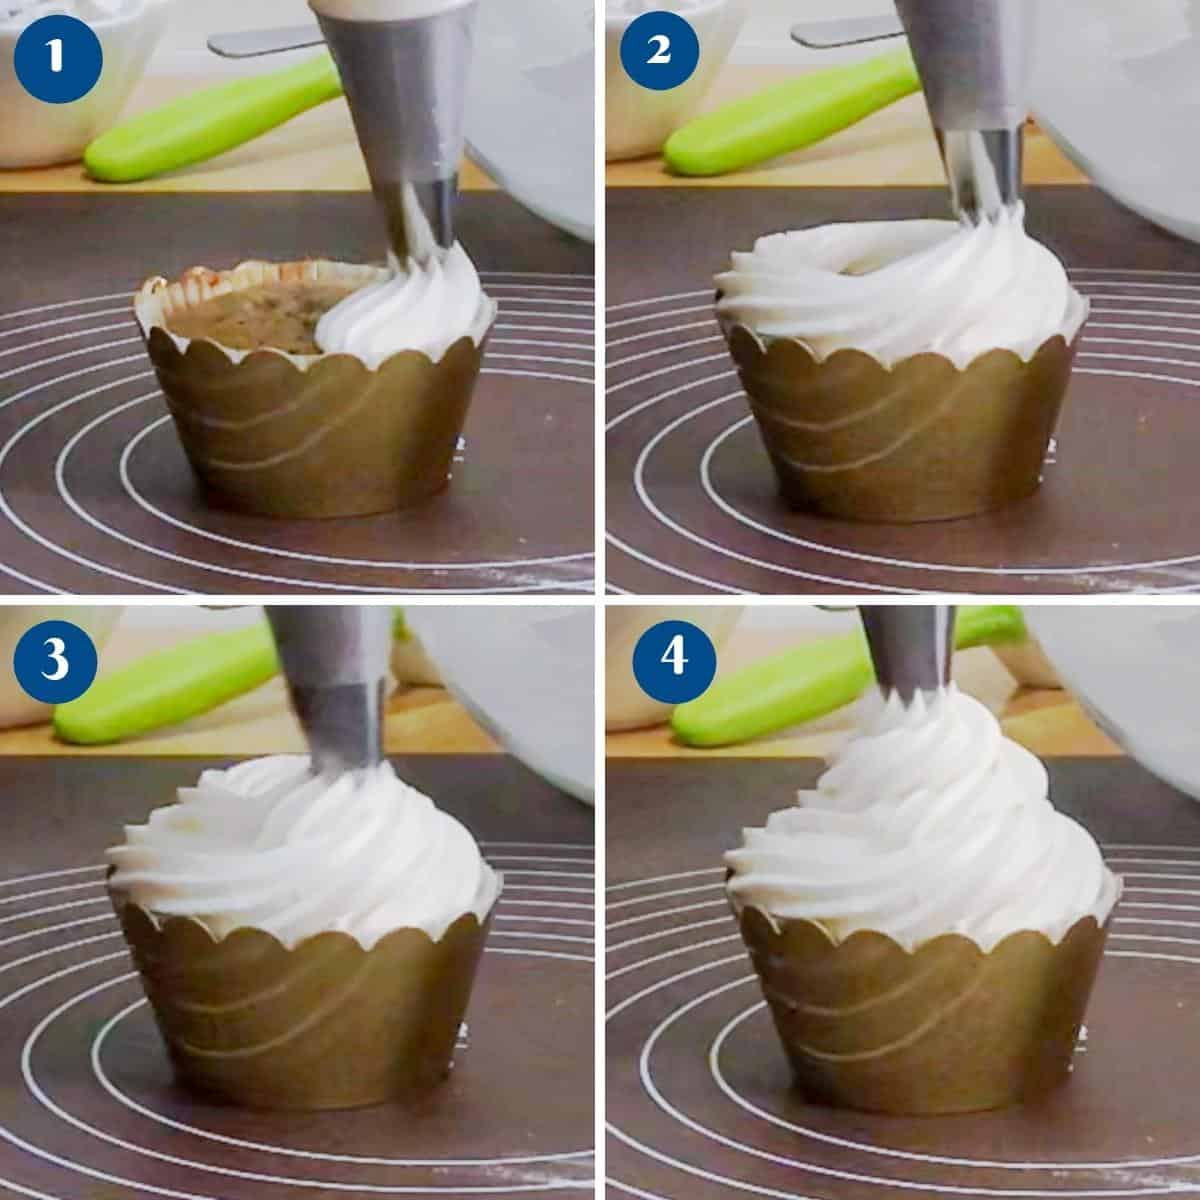
How to pipe the perfect cupcake swirl?
Piping a perfect cupcake swirl takes practice, but with the right technique and some tips, you can achieve beautiful results. Here’s how to pipe the perfect cupcake swirl:
- Prepare your piping bag and tip: Fit a piping bag with a large open-star tip (such as Wilton 1M or 2D) for a classic swirl. Alternatively, you can use a round tip for a smooth swirl. Make sure the tip is securely attached and the bag is filled with frosting.
- Hold the piping bag correctly: Hold the piping bag with one hand, gripping it firmly near the top where the frosting is, and using your other hand to guide and control the bag’s movement.
- Position the piping tip: Hold the piping bag directly above the center of the cupcake, with the piping tip just slightly above the surface.
- Start in the center: Begin piping by applying steady pressure to the bag while maintaining a consistent speed. Start in the center of the cupcake, applying a small amount of pressure to create a solid base.
- Create a swirl motion: Once the base is formed, start moving the piping bag in a circular motion from the center, working outward in a spiral pattern. As you move the bag, gradually increase the pressure to create a taller and wider swirl.
- Maintain consistent pressure: Keep an even pressure on the piping bag as you swirl to maintain a consistent flow of frosting. This helps create a uniform and smooth appearance.
- End with a flick or release: Once you’ve reached the desired height and width, stop applying pressure and give a slight flick or release of pressure to create a clean edge at the top of the swirl.
- Practice and experiment: Piping techniques improve with practice, so don’t be discouraged if your first attempts aren’t perfect. Experiment with different nozzle sizes, pressure levels, and piping speeds to find the technique that works best for you.
Additional tips:
- Work with chilled or slightly firm frosting for better control and definition in your swirls.
- Avoid overfilling the piping bag, as it can lead to messy piping and inconsistent results. Fill the bag about two-thirds full to maintain control.
- If the frosting becomes too soft or warm while piping, you can refrigerate the cupcakes briefly to firm up the frosting before continuing.
Remember, piping the perfect cupcake swirl takes time and practice. Don’t be afraid to experiment, have fun, and develop your own unique piping style. Enjoy the process and the delicious cupcakes you create!
How to properly fill cupcakes?
Filling cupcakes with a delicious filling can add a delightful surprise and extra flavor. Here’s a step-by-step guide on how to properly fill cupcakes:
- Prepare the cupcakes: Bake your cupcakes as usual, following your preferred recipe. Allow them to cool completely before proceeding with the filling.
- Choose the filling: Select a filling that complements the flavor of your cupcakes. Popular options include fruit preserves, chocolate ganache, caramel, pastry cream, or whipped cream. Ensure that the filling has a smooth consistency and is not too runny.
- Prepare the filling and piping bag: If necessary, prepare the filling according to the recipe instructions. Transfer the filling to a piping bag fitted with a narrow round or filling tip. If you don’t have a piping bag, you can use a zip-top bag with the corner snipped off.
- Create a filling hole: Use a cupcake corer or a small sharp knife to create a hole in the center of each cupcake. Insert the corer or knife at an angle and gently twist or carve out a small portion of the cupcake, making sure not to cut through the bottom. Set aside the removed cake pieces.
- Fill the cupcakes: Insert the piping tip into the hole you created and gently squeeze the piping bag to fill the cavity with the filling. Start with a small amount of filling and gradually increase it as needed. Be careful not to overfill, as it may cause the cupcake to burst or become unstable.
- Replace the cake piece: Trim off a portion of the cake piece that was removed earlier to fit the hole. Place the trimmed piece back on top of the filling, gently pressing it down to cover the hole. The cake piece should sit flush with the cupcake’s surface.
- Repeat for all cupcakes: Repeat the filling process for each cupcake until they are all filled.
- Frost or decorate the cupcakes: Once the cupcakes are filled, you can proceed to frost or decorate them as desired. The filling will add an extra layer of flavor and surprise to the cupcakes.
It’s important to note that filled cupcakes are best consumed within a day or two, as the filling can potentially soften the cupcake over time. When storing filled cupcakes, keep them refrigerated to maintain the freshness of the filling.

How to store cupcakes properly?
Proper storage is essential to maintain the freshness and quality of your cupcakes. Here’s how you can store them correctly:
- Allow the cupcakes to cool completely: Before storing the cupcakes, ensure they are cooled to room temperature. Placing warm cupcakes in storage can create condensation, leading to a loss of texture and sogginess.
- Choose an airtight container: Place the cooled cupcakes in an airtight container. This helps to prevent them from drying out and keeps them fresh for longer. You can use plastic or glass containers with tight-fitting lids, or even dedicated cupcake carriers.
- Layer the cupcakes: If you need to stack the cupcakes, place a layer of parchment paper or cupcake liners between each layer to prevent them from sticking together or getting squished.
- Store at room temperature: Cupcakes are generally best stored at room temperature, away from direct sunlight or sources of heat. They can last for 2-3 days this way, maintaining their flavor and texture. If your kitchen is particularly warm or humid, you can store them in a cool area, such as a pantry.
- Avoid the refrigerator (in most cases): Unless your cupcakes have perishable fillings or frostings that require refrigeration (like cream cheese frosting), it’s best to avoid refrigerating them. The cold temperature can dry out the cupcakes. However, if you live in a very hot and humid climate, refrigeration can be an option to help extend their shelf life. Just make sure to bring them to room temperature before serving.
- Freeze for long-term storage: If you want to store cupcakes for an extended period, they can be frozen. Wrap each cupcake tightly in plastic wrap or place them in individual airtight freezer bags. Then, place them in a freezer-safe container or freezer bag. Cupcakes can generally be frozen for up to 2-3 months. Thaw the frozen cupcakes in the refrigerator overnight or at room temperature for a few hours before serving.
- Frosting considerations: If your cupcakes are frosted, be cautious when stacking them in the container to avoid damaging the frosting. If possible, cover the container loosely with plastic wrap to prevent the frosting from sticking to the lid.
Remember, cupcakes are at their best when freshly baked, so it’s ideal to consume them within a day or two. Proper storage techniques will help preserve their quality for as long as possible.
By addressing these common issues, you can troubleshoot and improve your cupcake baking results. Remember to follow the recipe carefully and make adjustments as needed based on your specific baking conditions. Happy baking!


Frequently asked questions
Cupcakes can crack on top for several reasons. Here are some common causes.
High oven temperature: If the oven temperature is too high, the cupcakes can rise too quickly, causing the tops to crack. Make sure to preheat your oven to the correct temperature as specified in the recipe, and consider using an oven thermometer to ensure accuracy.
Uneven oven temperature: An uneven oven temperature can cause uneven baking and cracking. Ensure that your oven is properly calibrated and that heat is evenly distributed. Consider rotating the cupcake pans halfway through baking if you notice unevenness.
Rapid temperature changes: Drastic temperature changes during baking can lead to cracks. Avoid opening the oven door too frequently or too early in the baking process, as this can cause sudden changes in temperature.
Lack of moisture: Insufficient moisture in the cupcake batter can result in dryness and cracking. Double-check that you’ve included the correct amount of liquid ingredients specified in the recipe.
Pan placement in the oven: Placing the cupcake pans too close to the oven’s heating element can cause excessive heat on the tops of the cupcakes, leading to cracking. Ensure that the pans are positioned in the center of the oven for even heat distribution.
If your cupcake liners have peeled or are too dirty during baking, you can use an additional cupcake liner below the previous one. Just make it look good.
Don’t throw them out. Instead, to add extra moisture and flavor, you can brush the cupcakes with a simple syrup or add a filling. Syrups can be made by heating equal parts of water and sugar until the sugar dissolves. Brushing the cupcakes with the syrup while they’re still warm helps retain moisture. Fillings such as fruit jams and preserves or ganache can also add moisture to the center of the cupcakes.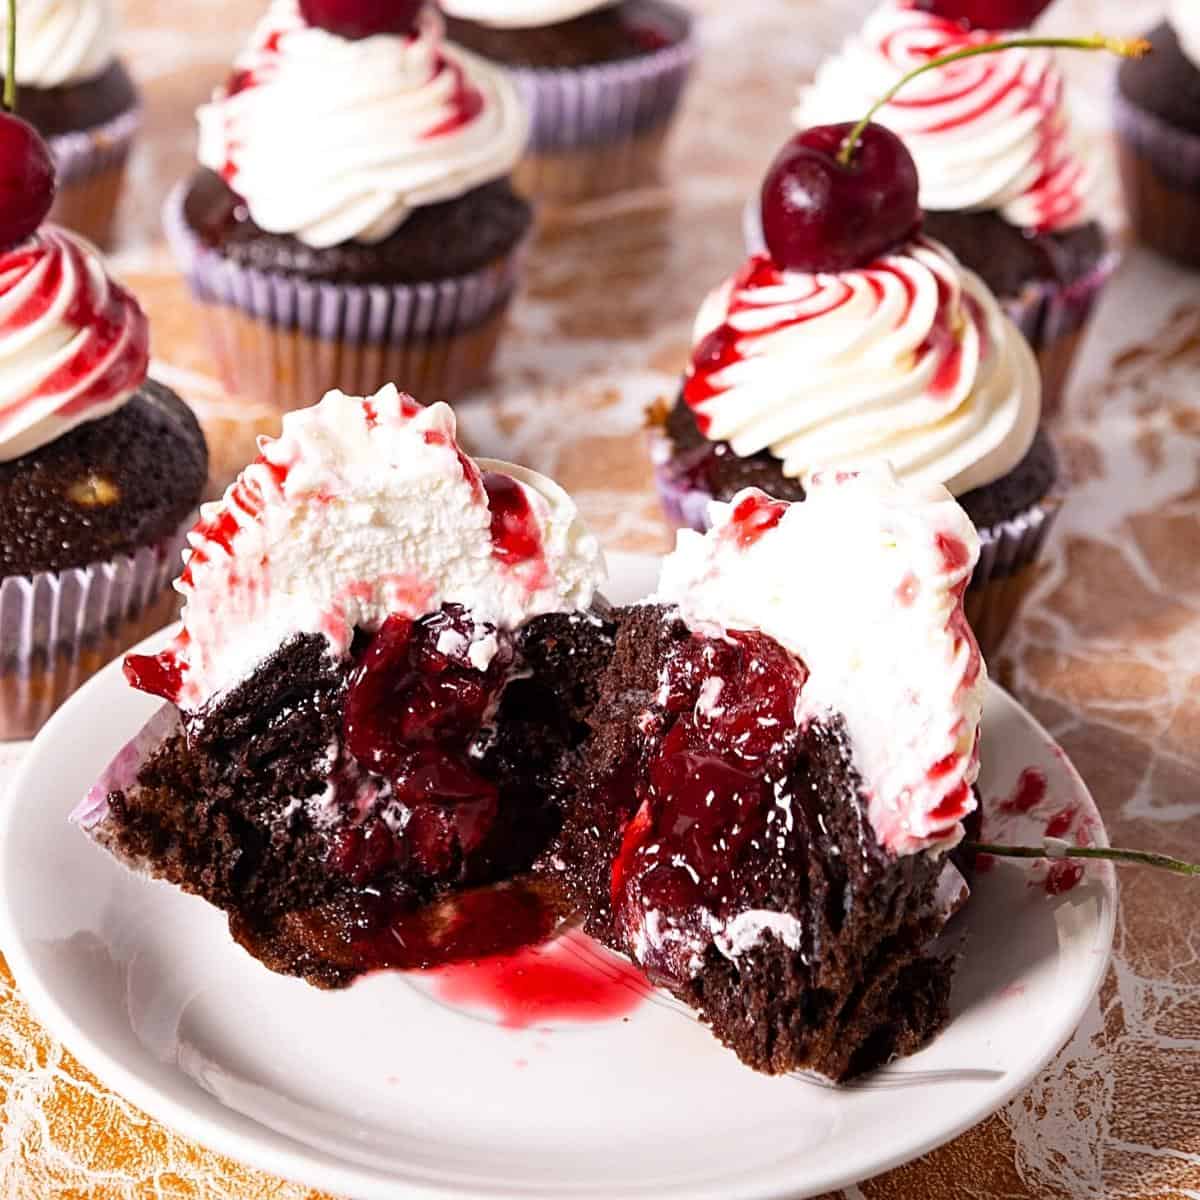
Use a light and airy cupcake batter. Simple! To make a light and airy cupcake batter whip the egg whites in the recipe separately and fold them into the batter. This will create volume and bake light and fluffy cupcakes.
When baking cupcakes, it’s helpful to be aware of common mistakes to avoid. Here are some mistakes to watch out for:
Overmixing the batter: Overmixing the batter can lead to dense and tough cupcakes. Mix the ingredients just until they are combined, and avoid overworking the batter.
Incorrect oven temperature: An oven that is too hot or too cold can affect the baking process. Use an oven thermometer to ensure the oven is at the correct temperature as specified in the recipe.
Opening the oven door too frequently: Opening the oven door during baking can cause temperature fluctuations, affecting the cupcakes’ rise and texture. Avoid opening the oven door too often or too early in the baking process.
Overfilling the cupcake liners: Fill the cupcake liners about two-thirds full to allow room for the cupcakes to rise. Overfilling can cause the batter to overflow and result in unevenly shaped cupcakes.
Using expired leavening agents: Baking powder and baking soda lose their effectiveness over time. Check the expiration dates and make sure your leavening agents are fresh to ensure proper rise in the cupcakes.
Overbaking the cupcakes: Overbaking can lead to dry and crumbly cupcakes. Follow the recommended baking time in the recipe and check for doneness using a toothpick or cake tester. If it comes out with a few moist crumbs attached, the cupcakes are done.
Not properly greasing or lining the cupcake pan: To prevent sticking, use cupcake liners or grease the cupcake pan with cooking spray or butter. This ensures the cupcakes can be easily removed from the pan without breaking.
Frosting warm cupcakes: Allow the cupcakes to cool completely before frosting them. Frosting warm cupcakes can cause the frosting to melt and slide off.
Not allowing enough time for cooling: Proper cooling is essential for texture and flavor development. Allow the cupcakes to cool in the pan for a few minutes before transferring them to a wire rack to cool completely.
Neglecting to read the recipe thoroughly: Read the recipe carefully before you begin. This helps you understand the steps and requirements, ensuring you have all the necessary ingredients and equipment.
By avoiding these common mistakes, you can increase your chances of baking delicious and well-formed cupcakes. Remember to practice, learn from experience, and have fun with your baking adventures!
Don’t lose this recipe! Save it for Later!
📌 Save this Recipe for later on Pinterest so you can easily find it again.
⭐ Add Veena Azmanov Kitchen to your Google Preferred Sources.
It helps Google show you more of our recipes.
📧 Subscribe for new recipes delivered to your inbox.
🎥 Follow us for more recipes
Cupcakes are a delicious treat and a delightful way to showcase your creative baking skills. But, with all the ingredients and methods involved, it’s easy to make mistakes or feel overwhelmed when baking cupcakes. I hope this article has provided you with everything you need to know to make perfect cupcakes every time: from the most helpful tools and ingredients, to troubleshooting common problems, and top-notch tips and tricks. Whether you’re a cupcake novice or a seasoned baker, I hope you’ll learn something new that will enhance your baking experience. So, let’s get started! Please do leave a feedback.


Day 7 done
Hi Verna.
Hope you are enjoying your day.
I am very new to baking, and although my cupcakes taste really good they are always lopsided.
Having read your top tips including reducing the temperature by 25%, I am keen give them a try.
As a guide, if I reduce the temperature by 25% should I increase the cooking time by 25%
From 160c for 20mins to 120c for 25mins?
Thanks.
Chris.
Chris, 160C is usually a good temperature to bake cakes and cupcakes unless you are using a fan-assisted oven or your oven needs calibration. 120C in a regular oven is actually very low for cupcakes.
I suggest you do a trial with a few cupcakes at 140C and don’t reduce the cooking time. One other issue with lopsided cupcakes can be undertaking and overmixing too!
I suggest trying a one-bowl cupcake and not over-mix it.
Bake half at 140C at the directed time. Then make adjustments to the next batch accordingly.
All the best
Thank you for all your Tip Thursday. They are priceless. I have learned so much from these.
Thank you, Keanan. So happy you find my blog and all these tips useful. Thank you so much for coming back to leave this feedback. Have a wonderful day.
I just had wonky cupcakes for the first time in my life, and I’m old. I checked my oven and the temp is correct, and it’s convection and the fan is working. I did, however, use HOT water in the recipe. I saw some advice on the internet…I think that is why my chocolate cupcakes came out bad.
Sorry to hear that Sandy… thanks for the hot water tip. Lol these things have nothing to do with young and old… happens to the best of us. I’m sure your cupcakes still tasted divine.
My oven doesn’t have two rods option every option is having a fan, except one option which has only lower rod. On which mode should I bake cupcakes,cakes and brownies?
Here we use top and bottom rod for baking cakes, cupcakes, and brownies. But, I know that some of the Indian girls bake these with only the bottom rod because the ovens are quite small
Hi, Thanks for the tip thursday. As u have said my cupcake had a crack on top. I tried reducing the temp from 180c to 160 C and it was the same thing with the next batch as well. what could be the reason. ?