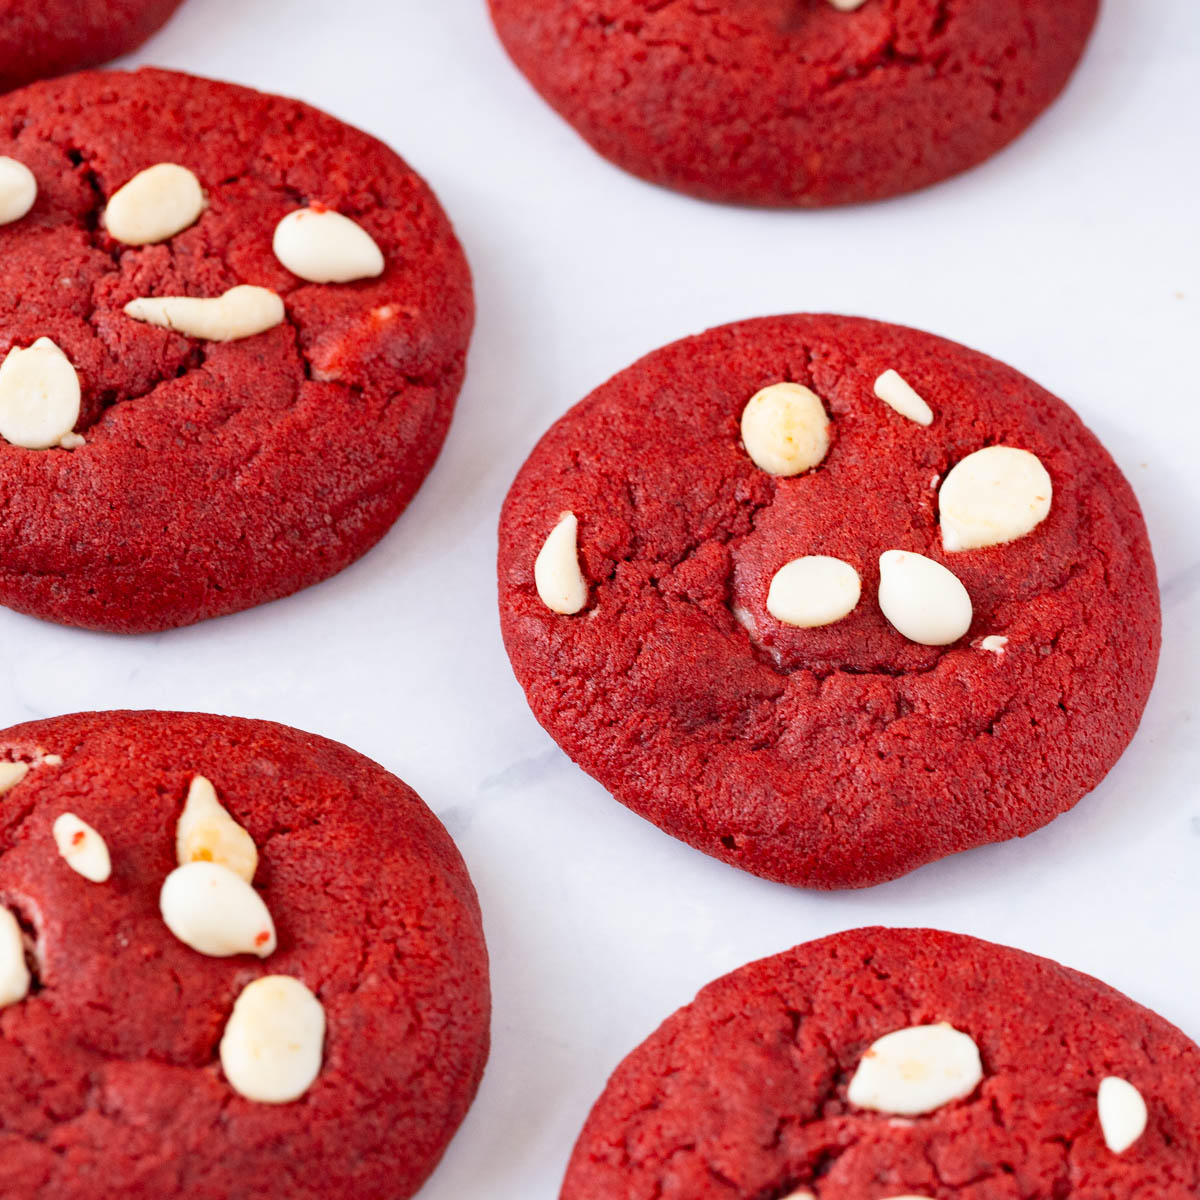
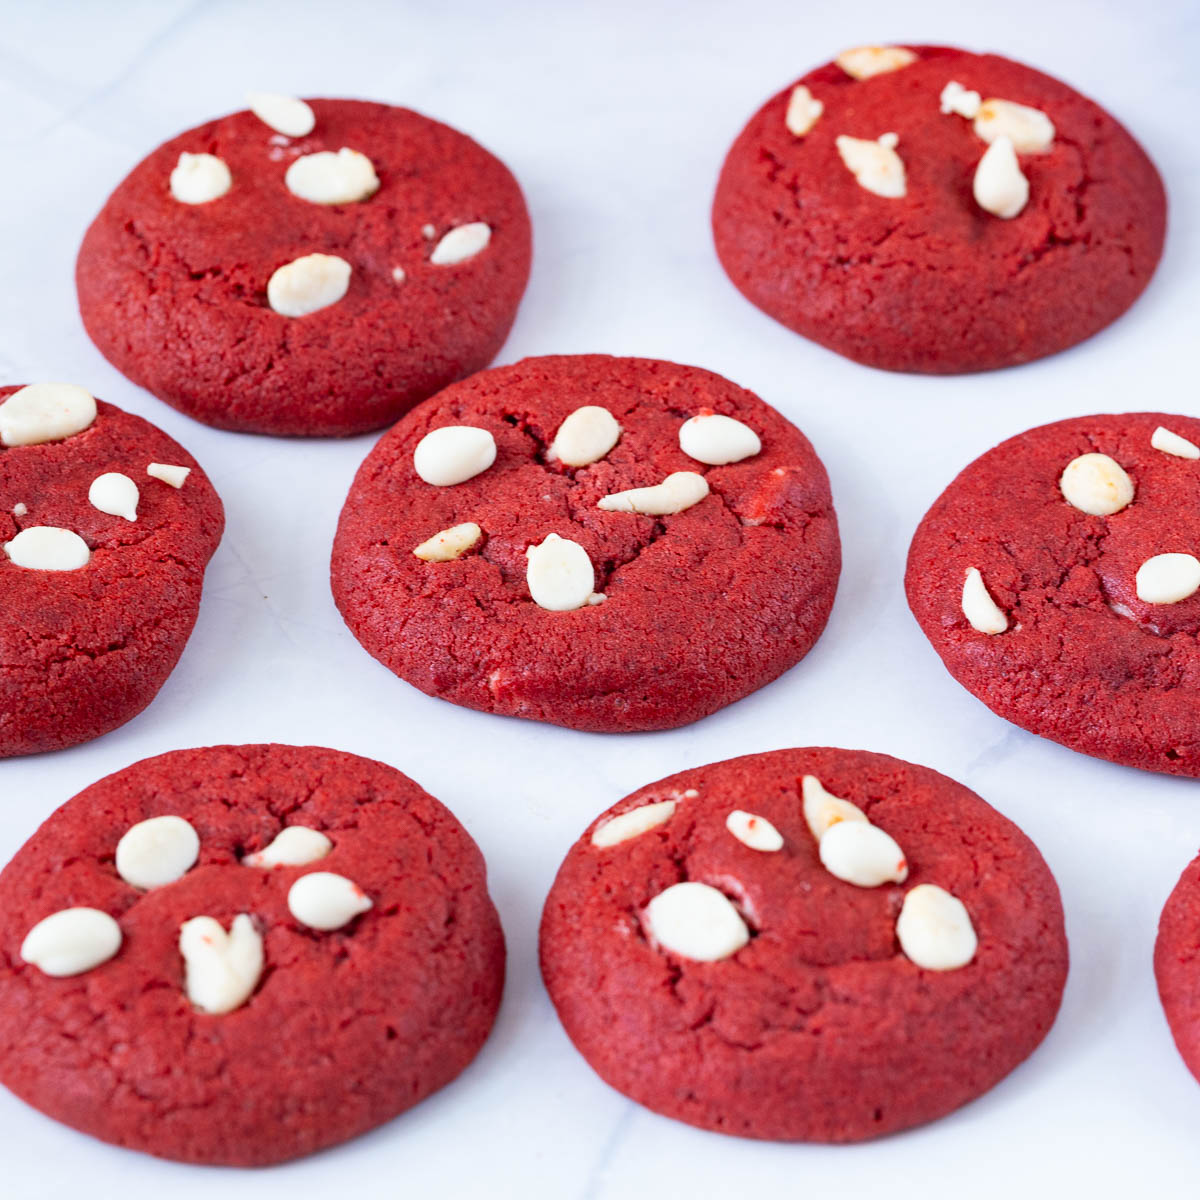
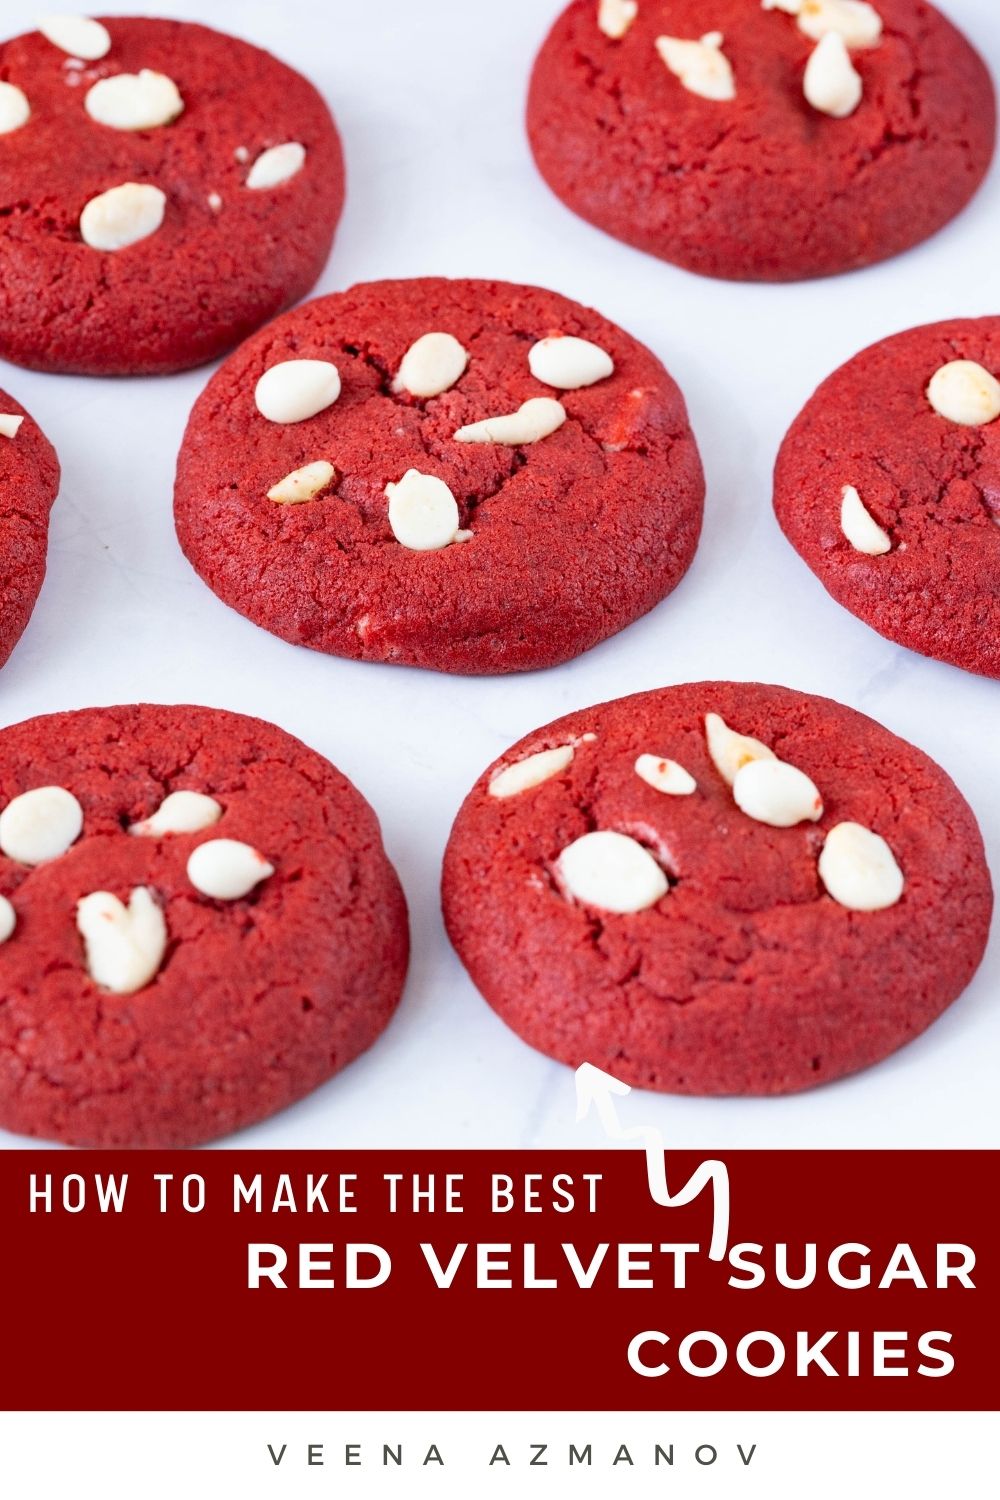
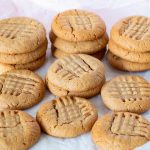
Red Velvet Sugar Cookies


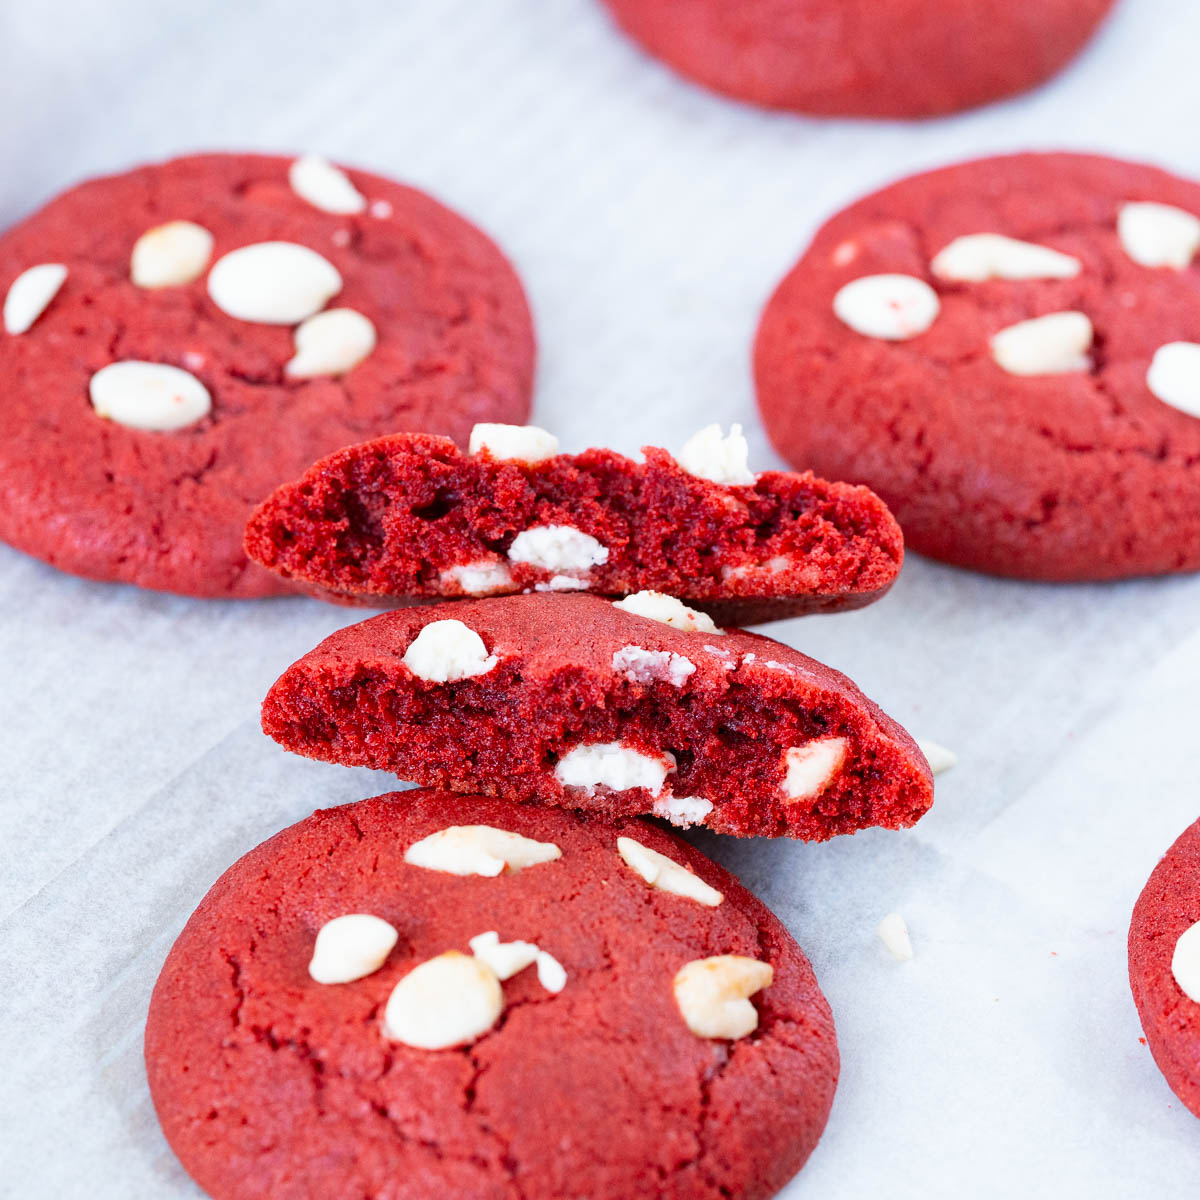
These red velvet sugar cookies are soft and chewy, with the perfect balance of subtle cocoa flavor with a hint of tang. Their vibrant red color and white chocolate chip topping make them as beautiful as they are delicious. These cookies are a fun and festive treat, perfect for holidays or any special occasion.
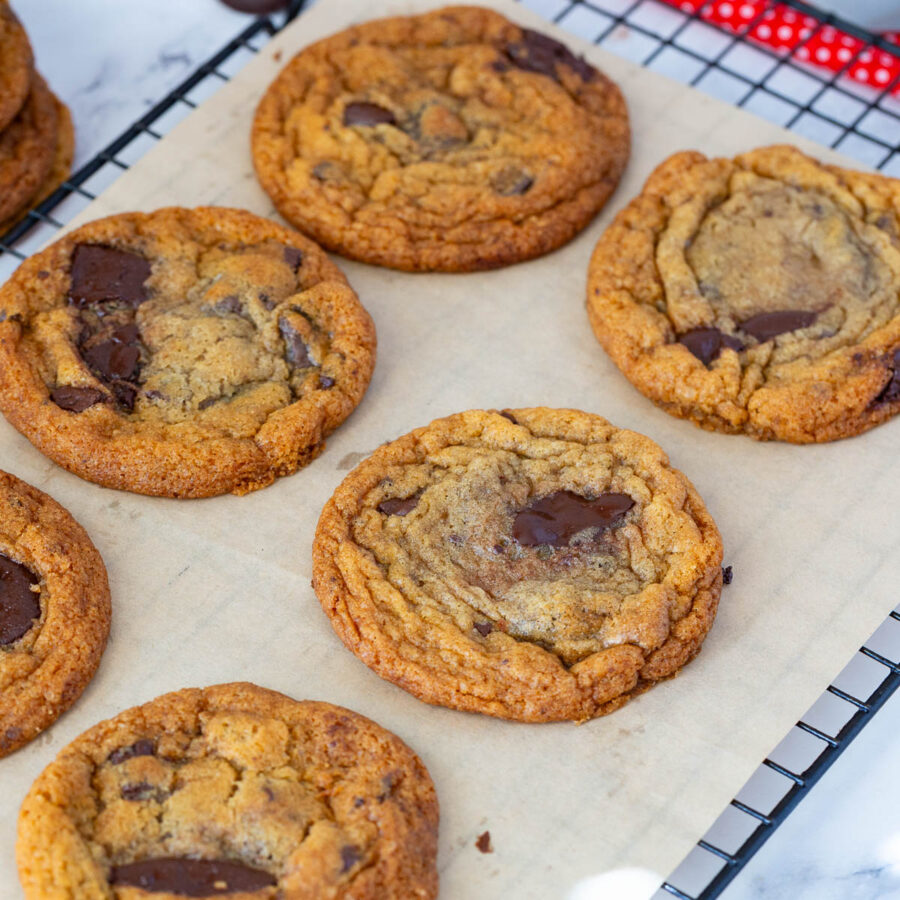
Sugar cookies are a timeless classic, known for their soft texture, delicate sweetness, and melt-in-your-mouth goodness. Made from a simple combination of butter, sugar, flour, and eggs, they are incredibly versatile and can be shaped, decorated, or flavored to suit any occasion. Whether enjoyed plain, dusted with sugar, or topped with colorful icing, sugar cookies are a favorite treat for holidays, birthdays, or casual snacking. The dough is easy to work with, making sugar cookies perfect for baking with kids or as a fun family activity. Their buttery richness and subtle sweetness make them a delightful canvas for endless creativity, allowing bakers to add sprinkles, flavors, or even a tangy citrus twist. Sugar cookies’ charm lies in their simplicity, making them a staple in every baker’s repertoire.
For a fun and vibrant twist, turning traditional sugar cookies into Red Velvet Sugar Cookies is easy and delicious. By adding red food coloring, a hint of cocoa powder, and a splash of vinegar or lemon juice, you can transform the classic sugar cookie into a red velvet variation. The rich, deep red hue combined with the subtle cocoa flavor creates a cookie that’s both visually stunning and irresistibly tasty. This red velvet twist is perfect for special occasions like Valentine’s Day or Christmas or whenever you want to add a pop of color and flavor to your cookie platter.
Why are these the best cookies?
- Perfect Balance of Flavors – The combination of cocoa powder and a hint of vanilla creates the signature red velvet flavor—mild chocolate with a delicate sweetness—while the vinegar or lemon juice adds a slight tang, enhancing the red velvet experience without overpowering the taste.
- Soft and Chewy Texture – Chilling the dough ensures the cookies hold their shape, and the combination of white and brown sugar guarantees a soft and chewy texture. The result is cookies that are tender on the inside with slightly crisp edges.
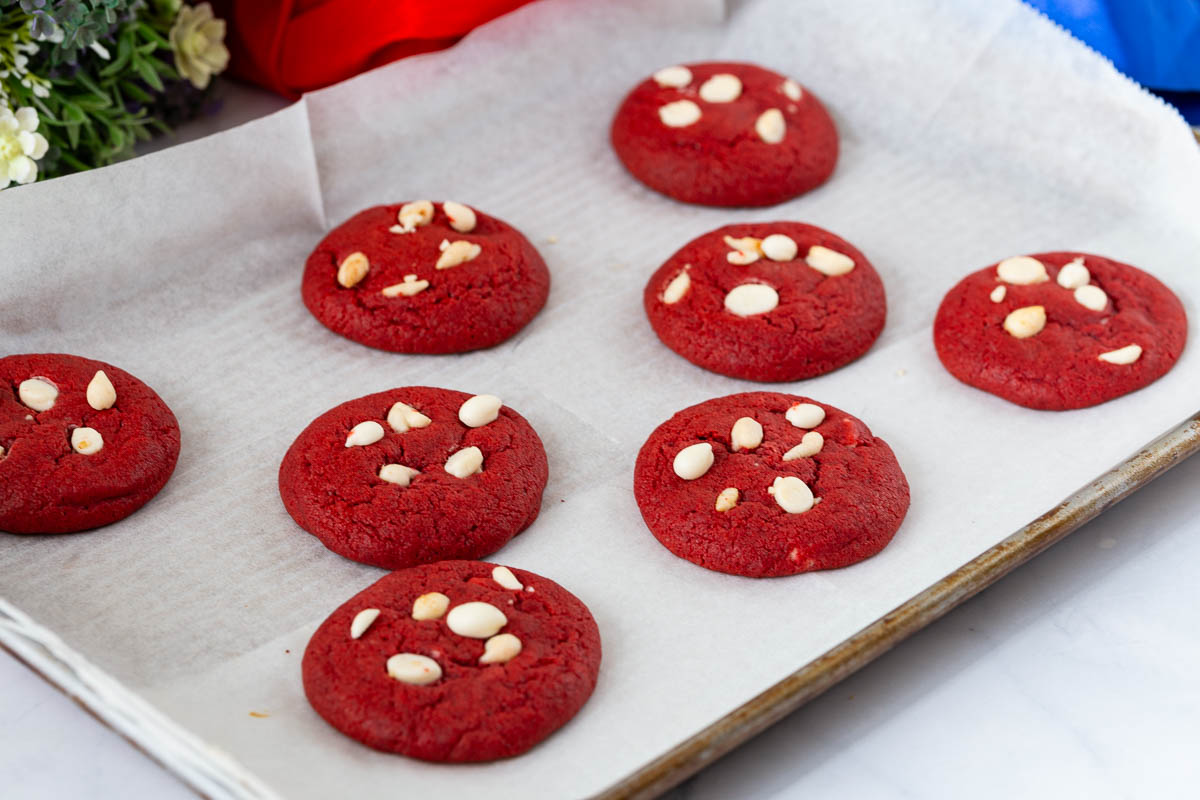
- Vibrant Color and Appearance – The red food coloring gives the cookies a striking red velvet color that contrasts beautifully with the white chocolate chips on top. These cookies look as good as they taste, making them perfect for special occasions or holidays.
- Easy to Make and Versatile – The recipe is straightforward, using basic ingredients, and the dough comes together quickly. You can easily adapt this recipe by swapping out the white chocolate chips for dark or milk chocolate, adding nuts, or shaping them differently for added creativity.
Ingredients and substitutes
- All-purpose flour provides structure to the cookies. If needed, you can substitute with a 1:1 gluten-free flour blend.
- Cocoa powder adds a subtle chocolate flavor to the cookies. For a richer flavor, use Dutch-processed cocoa powder or reduce the cocoa slightly for a milder taste.
- Butter (unsalted) provides richness and a soft texture. For a dairy-free version, substitute with margarine or a plant-based butter.
- White sugar and brown sugar create sweetness and balance moisture. Replace white sugar with coconut or light brown sugar for a deeper flavor if needed.
- The egg binds the dough and adds moisture. For a vegan option, you can replace it with a flax egg (one tablespoon of ground flaxseed mixed with three tablespoons of water).
- Red food coloring provides the iconic red velvet color. Beet juice or a natural food coloring can be used as a substitute.
- Vinegar or lemon juice enhances the red velvet flavor and reacts with the baking soda for leavening. Substitute with apple cider vinegar or lime juice.
- White chocolate chips add sweetness and texture to the cookies. Dark or milk chocolate chips, or even cream cheese chunks, can be used instead.

Step-by-step: Red Velvet Sugar Cookies
- Prepare the dry ingredients: In a medium bowl, whisk together the flour, cocoa powder, baking soda, and salt until well combined. Set aside.
- Cream the butter and sugars: In a large mixing bowl, using an electric mixer or stand mixer, cream the softened butter with the white sugar and brown sugar on medium speed until light and fluffy, about 2-3 minutes.
- Add the wet ingredients: Beat in the egg until fully incorporated. Add the vanilla extract, red food coloring, and vinegar (or lemon juice). Mix until everything is evenly combined and the mixture turns a vibrant red color.
- Combine wet and dry ingredients: Gradually add the dry ingredients to the wet ingredients. Mix on low speed until just combined. Do not overmix the dough. The dough will be soft and sticky.
- Chill the dough: Cover the dough with plastic wrap and chill in the refrigerator for at least 1 hour. Chilling is crucial to prevent the cookies from spreading too much during baking.
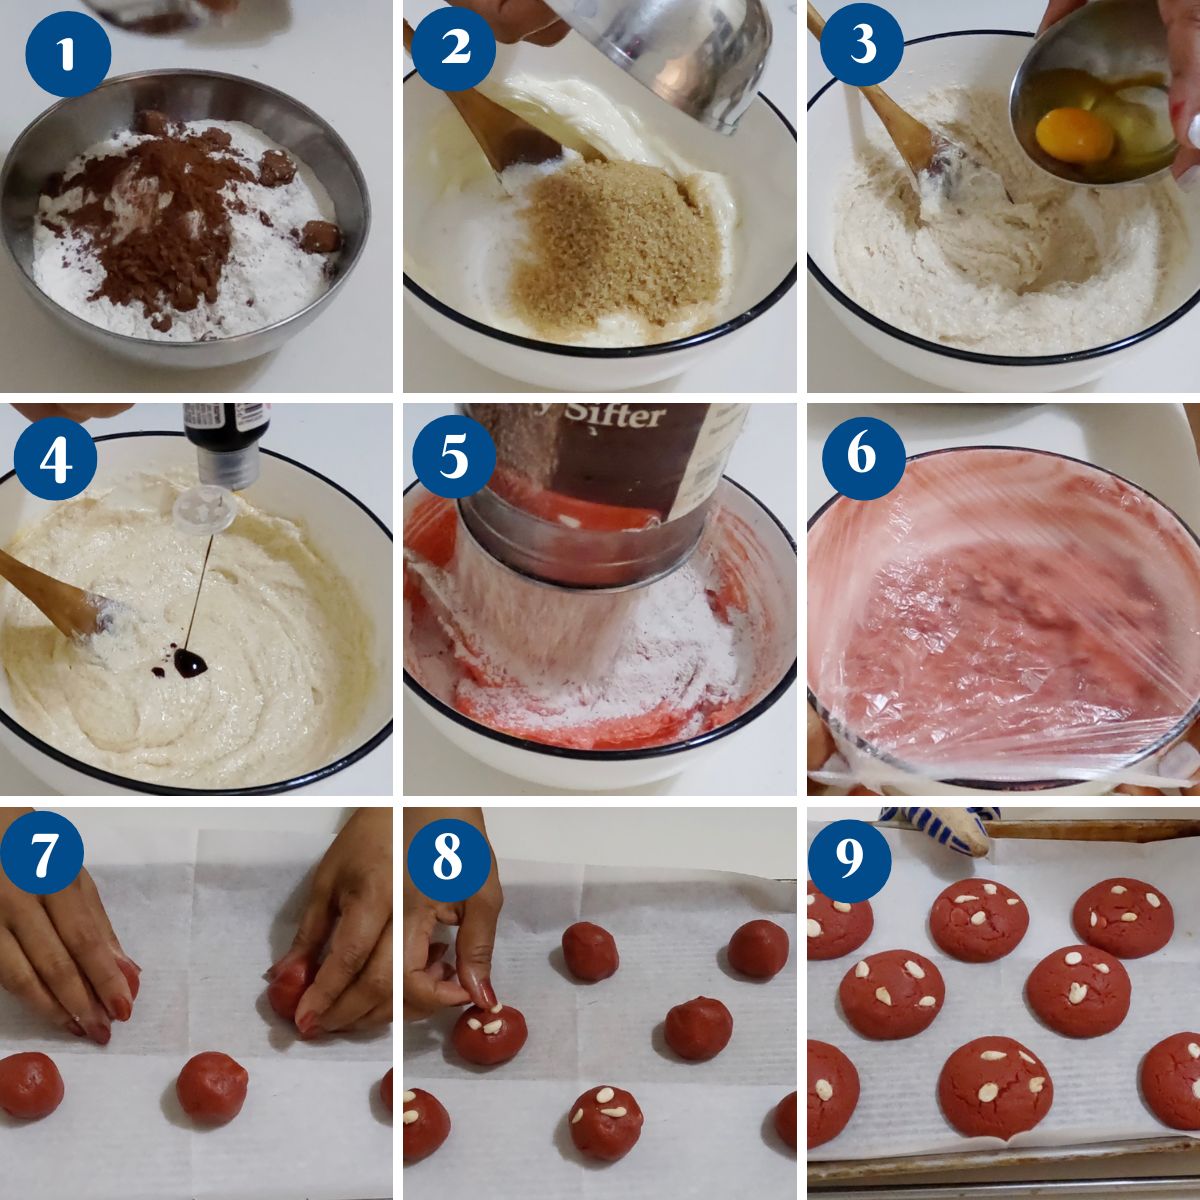
- Preheat the oven: Preheat your oven to 350°F (175°C) and line a baking sheet with parchment paper.
- Shape the cookies: Once the dough has chilled, scoop about 1 ½ tablespoons of dough (or use a small cookie scoop) and roll it into balls. Place them about 2 inches apart on the prepared baking sheet.
- Add white chocolate chips: Press a few on top of each dough ball for a festive red velvet appearance.
- Bake the cookies: Bake in the oven for 10-12 minutes or until the edges are set and the centers still appear slightly soft. They will continue to firm up as they cool.
- Cool the cookies: Allow them to cool on the baking sheet for 5 minutes before transferring them to a wire rack to cool completely.
Tips for Success
- Chill the dough: Don’t skip chilling the dough. This helps prevent the cookies from spreading too much during baking and enhances the texture, giving you that perfect soft and chewy bite.
- Use gel food coloring: For a more vibrant red color, use gel food coloring instead of liquid. Gel coloring is more concentrated, so you need less of it, which avoids altering the dough’s consistency.
- Measure flour correctly: Too much flour can dry and crumble the cookies and ensure. Use the spoon-and-level method to avoid overpacking the flour into your measuring cup, ensuring the correct texture.
- Don’t overbake: These cookies are meant to be soft, so bake until the edges are just set, even if the center looks slightly underbaked. They will firm up as they cool, staying soft and chewy on the inside.
Frequently asked questions
Yes, you can! The dough can be made and stored in the refrigerator for up to two days before baking. You can also freeze the dough balls and bake them directly from frozen, adding a couple of minutes to the baking time.
Absolutely. You can skip the red food coloring for a more natural, cocoa-flavored sugar cookie. The taste will remain the same, but they won’t have the signature red velvet look.
Vinegar or lemon juice enhances the tangy flavor of red velvet. It also reacts with the baking soda to help the cookies rise and become soft and fluffy.
Store the cookies in an airtight container at room temperature for up to 5 days. You can also freeze them for up to 3 months. Thaw at room temperature before serving.
Red Velvet Sugar Cookies
These red Velvet Sugar Cookies are soft and chewy and have the perfect balance of subtle cocoa flavor with a hint of tang. Their vibrant red color and white chocolate chip topping make them as beautiful as they are delicious. These cookies are a fun and festive treat, perfect for holidays or any special occasion.
Video
Ingredients
- 1 ¾ cups (220 g) All-purpose flour
- 1 ½ tbsp (7 g) Cocoa powder
- ½ tsp Baking soda
- ¼ tsp Salt
- ½ cup (113 g) Unsalted butter softened
- ½ cup (100 g) Granulated white sugar
- ¼ cup (55 g) Brown sugar packed
- 1 large Egg
- 1 tsp vanilla extract
- 1 tbsp Red food coloring
- 1 tsp Vinegar or lemon juice
- ½ cup (90 g) White chocolate chips for topping as desired
Method
- Prepare the dry ingredients: In a medium bowl, whisk together the flour, cocoa powder, baking soda, and salt until well combined. Set aside.1 ¾ cups All-purpose flour, 1 ½ tbsp Cocoa powder, ½ tsp Baking soda, ¼ tsp Salt
- Cream the butter and sugars: In a large mixing bowl, using an electric mixer or stand mixer, cream the softened butter with the white sugar and brown sugar on medium speed until light and fluffy, about 2-3 minutes.½ cup Unsalted butter, ½ cup Granulated white sugar, ¼ cup Brown sugar
- Add the wet ingredients: Beat in the egg until fully incorporated. Add the vanilla extract, red food coloring, and vinegar (or lemon juice). Mix until everything is evenly combined and the mixture turns a vibrant red color.1 large Egg, 1 tsp vanilla extract, 1 tbsp Red food coloring, 1 tsp Vinegar or lemon juice
- Combine wet and dry ingredients: Gradually add the dry ingredients to the wet ingredients. Mix on low speed until just combined. Do not overmix the dough. The dough will be soft and sticky.
- Chill the dough: Cover the dough with plastic wrap and chill in the refrigerator for at least 1 hour. Chilling is crucial to prevent the cookies from spreading too much during baking.
- Preheat the oven: Preheat your oven to 350°F (175°C) and line a baking sheet with parchment paper.
- Shape the cookies: Once the dough has chilled, scoop about 1 ½ tablespoons of dough (or use a small cookie scoop) and roll it into balls. Place them about 2 inches apart on the prepared baking sheet.
- Add white chocolate chips: Press a few on top of each dough ball for a festive red velvet appearance.½ cup White chocolate chips for topping
- Bake the cookies: Bake in the oven for 10-12 minutes or until the edges are set and the centers still appear slightly soft. They will continue to firm up as they cool.
- Cool the cookies: Allow them to cool on the baking sheet for 5 minutes before transferring them to a wire rack to cool completely.
Notes
- Chill the Dough: Don’t skip chilling the dough. This helps prevent the cookies from spreading too much during baking and enhances the texture, giving you that perfect soft and chewy bite.
- Use Gel Food Coloring: For a more vibrant red color, use gel food coloring instead of liquid. Gel coloring is more concentrated, so you need less of it, which avoids altering the dough’s consistency.
- Measure Flour Correctly: Too much flour can make the cookies dry and crumbly. Use the spoon-and-level method to avoid overpacking the flour into your measuring cup, ensuring the correct texture.
- Don’t Overbake: These cookies are meant to be soft, so bake until the edges are just set, even if the center looks slightly underbaked. They will firm up as they cool, staying soft and chewy on the inside.
Nutrition
Tried this recipe?
Mention @veenaazmanov_kitchen or tag #veenaazmanovkitchen!Don’t lose this recipe! Save it for Later!
📌 Save this Recipe for later on Pinterest so you can easily find it again.
⭐ Add Veena Azmanov Kitchen to your Google Preferred Sources.
It helps Google show you more of our recipes.
📧 Subscribe for new recipes delivered to your inbox.
🎥 Follow us for more recipes


Great recipe